
Difference between revisions of "XV Broken/Benimaru Nikaido"
Jump to navigation
Jump to search
Coliflowerz (talk | contribs) (→Throws) |
(More hits actually usually means more scaling, as scaled damage is rounded down on individual hits.) |
||
| Line 236: | Line 236: | ||
|name=Catch and Shoot | |name=Catch and Shoot | ||
|input=(close) 4/6C | |input=(close) 4/6C | ||
|description=* Sends the opponent flying a fair distance. | |description=* Sends the opponent flying a fair distance. Hard knockdown like all normal throws. Benimaru can follow up with a dash and hyper hop for a safejump. | ||
}} | }} | ||
| Line 244: | Line 244: | ||
|name=Front Suplex | |name=Front Suplex | ||
|input=(close) 4/6D | |input=(close) 4/6D | ||
|description=* Decent back throw which gives Benimaru a hard knockdown and | |description=* Decent back throw which gives Benimaru a hard knockdown. However, the throw has significant recovery and does not allow for any safejump setups. | ||
}} | }} | ||
| Line 266: | Line 266: | ||
===Flying Drill=== | ===Flying Drill=== | ||
{{FrameDataCargo-KOFXV | {{FrameDataCargo-KOFXV | ||
|moveId= | |moveId=benimaru_j2d | ||
|name=Flying Drill | |name=Flying Drill | ||
|input=j. | |input=j.2D | ||
|description=* Decent way to stall your air momentum and pressure safely if spaced correctly. Deals two hits if done from a hop and three if done from a jump. New to this game is that this move is an overhead, so it's an easy way to mix up your pressure. This will also result in a juggle on an air hit. You can cancel your backdash into this but all that does is make it shorter and its recovery worse. | |description=* Decent way to stall your air momentum and pressure safely if spaced correctly. Deals two hits if done from a hop and three if done from a jump. New to this game is that this move is an overhead, so it's an easy way to mix up your pressure. This will also result in a juggle on an air hit. You can cancel your backdash into this but all that does is make it shorter and its recovery worse. | ||
}} | }} | ||
| Line 280: | Line 280: | ||
|input=236B/D/BD | |input=236B/D/BD | ||
|description2=* Mainly combo glue. On its own it is a short-ranged poke with decent priority, and has an odd property of causing a ground slide on hit when used as an anti-air. However, you barely use it for this purpose because it's so short. This move is perfect for 2B combos as it is fast, safe on block on its own and you don't always have to commit to the followup. Super cancellable. | |description2=* Mainly combo glue. On its own it is a short-ranged poke with decent priority, and has an odd property of causing a ground slide on hit when used as an anti-air. However, you barely use it for this purpose because it's so short. This move is perfect for 2B combos as it is fast, safe on block on its own and you don't always have to commit to the followup. Super cancellable. | ||
|description3=* The EX version does more damage and results in the followup being EX too. This is also extremely fast at 3f startup, allowing it to punish things that most other characters can't. | |description3=* The EX version does more damage, has slightly longer range and results in the followup being EX too. This is also extremely fast at 3f startup, allowing it to punish things that most other characters can't. | ||
}} | }} | ||
| Line 288: | Line 288: | ||
|name=Inazuma Sandan-Geri | |name=Inazuma Sandan-Geri | ||
|input=236B/D/BD~28B/D | |input=236B/D/BD~28B/D | ||
|description2=* A combo ender which deals the most meterless damage out of anything Benimaru has, but results in a soft knockdown. The first hit of this followup is super cancellable but the timing is tricky, so if you're aiming for consistency and are not confident in your execution then it's best to super cancel Iai Geri instead. | |description2=* A combo ender which deals the most meterless damage out of anything Benimaru has, but results in a soft knockdown. The first hit of this followup is super cancellable but the timing is tricky, so if you're aiming for consistency and are not confident in your execution then it's best to super cancel Iai Geri instead. The second hit of normal versions is also an anywhere juggle. | ||
|description3=* Not super cancellable at any point, given it's an EX move. | |description3=* Not super cancellable at any point, given it's an EX move. | ||
}} | }} | ||
| Line 306: | Line 306: | ||
|name=Raikinken | |name=Raikinken | ||
|input=236A/C/AC | |input=236A/C/AC | ||
|description=* Safe special to use in pressure, as it's fast, has decent priority and is safe on block. Best used when spaced properly so you don't have to deal with throw punishes. In neutral this can be used to kill fireballs and build meter for yourself, while also defending your ground as it can stop the opponent's approach when timed correctly. In the corner you can use this as a harassment tool, and the optimal spacing for it is also ideal for checking rolls. Super cancellable. | |description=* Safe special to use in pressure, as it's fast, has decent priority and is safe on block. Best used when spaced properly so you don't have to deal with throw punishes. In neutral this can be used to kill fireballs and build meter for yourself, while also defending your ground as it can stop the opponent's approach when timed correctly. In the corner you can use this as a harassment tool, and the optimal spacing for it is also ideal for checking rolls. Super cancellable on first hit only. | ||
|description2=* Benimaru aims his fist upward for an attack which can be used as a far anti-air, but usually isn't too dependable for this purpose given its speed. This move whiffs on crouchers. Super cancellable. | |description2=* Benimaru aims his fist upward for an attack which can be used as a far anti-air, but usually isn't too dependable for this purpose given its speed. This move whiffs on crouchers. Super cancellable. Does more damage than 214C in corner crumple combos. | ||
|description3=* Results in a crumple on hit, making it essential for Benimaru's big punishes from close heavies. He can't combo into this from a low, however. This move is also safe on block, so all you really lose for not getting the hit confirm is half a stock. | |description3=* Results in a crumple on hit, making it essential for Benimaru's big punishes from close heavies. He can't combo into this from a low, however. This move is also safe on block, so all you really lose for not getting the hit confirm is half a stock. | ||
}} | }} | ||
| Line 316: | Line 316: | ||
|name=Air • Raijinken | |name=Air • Raijinken | ||
|input=j.236A/C/AC | |input=j.236A/C/AC | ||
|description2=* Another way to stall Benimaru's air momentum while also allowing him to control space. Benimaru will halt his air momentum, fire a Raijinken, then fall forward or backward depending on whether you used the light or heavy version, respectively. The air Raijinken stays out for a decent amount of time, making it good as a zoning tool and sometimes for pressure. | |description2=* Another way to stall Benimaru's air momentum while also allowing him to control space. Benimaru will halt his air momentum, fire a Raijinken, then fall forward or backward depending on whether you used the light or heavy version, respectively. The air Raijinken stays out for a decent amount of time, making it good as a zoning tool and sometimes for pressure. Can be input via a "tiger knee" motion (i.e. 2369+A/C), improving its recovery significantly and making it plus on block. | ||
|description3=* Benimaru fires a Raijinken which lasts for longer then falls forward. Only really useful in some combos. | |description3=* Benimaru fires a Raijinken which lasts for longer then falls forward. Only really useful in some combos. Has massive hitstun and can be followed up with many ground moves in the corner, most notably c.C or c.D or even CD. Can also be input via a "tiger knee" motion (i.e. 2369+AC). | ||
}} | }} | ||
| Line 345: | Line 345: | ||
|input=236236A/C/AC | |input=236236A/C/AC | ||
|description2=* Combo ender. The light version has lower body invincibility and aims straight, while the heavy version has upper body invincibility, aims upward and whiffs on crouchers. Either can be used in combos with no change to the damage. This super deals more damage than Benimaru Rising Shot, but launches the opponent far away as opposed to keeping them close. However, given all supers in this game result in a hard knockdown, you have more than enough time after recovering to run up and continue your pressure. The last hit is cancellable into SDMs and Climax. | |description2=* Combo ender. The light version has lower body invincibility and aims straight, while the heavy version has upper body invincibility, aims upward and whiffs on crouchers. Either can be used in combos with no change to the damage. This super deals more damage than Benimaru Rising Shot, but launches the opponent far away as opposed to keeping them close. However, given all supers in this game result in a hard knockdown, you have more than enough time after recovering to run up and continue your pressure. The last hit is cancellable into SDMs and Climax. | ||
|description3=* This super deals more hits, more damage and covers a much greater radius. It is also fully invincible, but you already have | |description3=* This super deals more hits, more damage and covers a much greater radius. It is also fully invincible, but you already have 623+K for that so it's irrelevant in neutral. The last hit is Climax cancellable. | ||
}} | }} | ||
| Line 363: | Line 363: | ||
|name=Raiha Jin-Ou Ken | |name=Raiha Jin-Ou Ken | ||
|input=2141236CD | |input=2141236CD | ||
|description=* A very fast punish tool which covers the entire distance in front of Benimaru. The damage is spread over nine hits | |description=* A very fast punish tool which covers the entire distance in front of Benimaru. The damage is spread over nine hits. | ||
}} | }} | ||
Revision as of 02:27, 14 April 2022

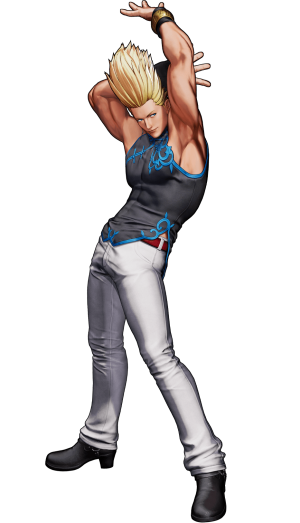
Born into a rich family and raised by his Japanese father and American mother, this shooting star takes fighting to a whole other level. His slender frame provides an excellent medium which enhances his electrostatics, and combining that with his chiseled legs (no doubt from years of shoot boxing experience), his kicks hit like bolts of lightning.
However for this tournament, his friend and rival, Kyo Kusanagi, all but forced him into this position where he has to watch over both Shun'ei and Meitenkun.
However for this tournament, his friend and rival, Kyo Kusanagi, all but forced him into this position where he has to watch over both Shun'ei and Meitenkun.
Movelist
(*) = EX OK
(!) = MAX OK
(Midair Only) = Can only be done in the air.
Throws
Catch and Shoot - (close) ![]() /
/ ![]() +
+ ![]()
Front Suplex - (close) ![]() /
/ ![]() +
+ ![]()
Spinning Knee Drop - (close) ![]() /
/ ![]() +
+ ![]() (Midair Only)
(Midair Only)
Command Normals
Jackknife Kick - ![]() +
+ ![]()
Flying Drill - ![]() +
+ ![]()
Special Moves
Iai-Geri - ![]() +
+ ![]() /
/ ![]() (*)
(*)
- ┗ Inazuma Sandan-Geri -

 +
+  /
/ 
Raimeitou - ![]() +
+ ![]() /
/ ![]() (*)
(*)
Raikinken - ![]() +
+ ![]() /
/ ![]() (*)
(*)
Air • Raijinken - ![]() +
+ ![]() /
/ ![]() (Midair Only) (*)
(Midair Only) (*)
Benimaru Collider - (close) ![]()
![]() +
+ ![]() /
/ ![]() (*)
(*)
Super Jinrai Kick - ![]() +
+ ![]() /
/ ![]() (*)
(*)
Super Special Moves
Rai-Kou Ken - ![]()
![]() +
+ ![]() /
/ ![]() (!)
(!)
Benimaru Rising Shot - ![]()
![]() +
+ ![]() /
/ ![]() (!)
(!)
Climax Super Special Moves
Raiha Jin-Ou Ken - ![]()
![]()
![]() +
+ ![]()
![]()
Quick Combo Reference
| 0 Meter |
Placeholder |
( = dmg |
| 1 Meter |
Placeholder |
( = dmg |
| 2 Meters |
Placeholder |
( = dmg |
Gameplay Overview
| Benimaru Nikaido is an honest test of one's KOF fundamentals. Sporting decent pokes, safe pressure, various mixup options and now his reversal from older games, Benimaru excels in key areas of KOF which allow him to control the match and to shift gears easily. His poor defense and lack of gimmicks force him to play honest at all times, although with his toolkit he is up to the task. Benimaru is effective on point and mid, as he conserves meter well while only spending half a stock for EX Raijinken combos which deal good damage. | |
| Pros | Cons |
|
|
Normals
Far Standing Normals
Far A
| far A
5A
5A  |
|---|
Far B
| far B
5B
5B   |
|---|
Far C
| far C
5C
5C   |
|---|
Far D
| far D
5D
5D   |
|---|
Close Standing Normals
Close A
| close A
cl.A
cl.A   |
|---|
Close B
| close B
cl.B
cl.B   |
|---|
Close C
| close C
cl.C
cl.C   |
|---|
Close D
| close D
cl.D
cl.D   |
|---|
Crouch Normals
Crouch A
| crouch A
2A
2A   |
|---|
Crouch B
| crouch B
2B
2B   |
|---|
Crouch C
| crouch C
2C
2C    |
|---|
Crouch D
| crouch D
2D
2D   |
|---|
Jump Normals
Jump A
| jump A
j.A
j.A   |
|---|
Jump B
| jump B
j.B
j.B    |
|---|
Jump C
| jump C
j.C
j.C    |
|---|
Jump D
| jump D
j.D
j.D    |
|---|
Blowback
Blowback
| Blowback
CD
CD   |
|---|
ShatterStrike
| Shatterstrike
236CD
236CD    |
|---|
jump CD
| jump CD
j.CD
j.CD   |
|---|
Throws
Catch and Shoot
| Catch and Shoot
(close) 4/6C
(close) 4/6C   |
|---|
Front Suplex
| Front Suplex
(close) 4/6D
(close) 4/6D   |
|---|
Spinning Knee Drop
| Spinning Knee Drop
(close) j.4/6C
(close) j.4/6C   |
|---|
Command Moves
Jackknife Kick
| Jackknife Kick
6B
6B    |
|---|
Flying Drill
| Flying Drill
j.2D
j.2D   |
|---|
Special Moves
Iai-Geri
| Iai-Geri
236B/D/BD
236B/D/BD     |
|---|
Inazuma Sandan-Geri
| Inazuma Sandan-Geri
236B/D/BD~28B/D
236B/D/BD~28B/D        |
|---|
Raimeitou
| Raimeitou
214A/C/AC
214A/C/AC      |
|---|
Raijinken
| Raikinken
236A/C/AC
236A/C/AC      |
|---|
Air • Raijinken
| Air • Raijinken
j.236A/C/AC
j.236A/C/AC    |
|---|
Benimaru Collider
| Benimaru Collider
632146A/C/AC
632146A/C/AC     |
|---|
Super Jinrai Kick
| Super Jinrai Kick
623B/D/BD
623B/D/BD         |
|---|
Super Special Moves
Rai-Kou Ken
| Rai-Kou Ken
236236A/C/AC
236236A/C/AC         |
|---|
Benimaru Rising Shot
| Benimaru Rising Shot
236236B/D/BD
236236B/D/BD      |
|---|
Climax Super Special Moves
Raiha Jin-Ou Ken
| Raiha Jin-Ou Ken
2141236CD
2141236CD   |
|---|


