|
|
| Line 850: |
Line 850: |
| |image2=RBFF2_Chonshu_632146c2.jpg | | |image2=RBFF2_Chonshu_632146c2.jpg |
| |image3=RBFF2_Chonshu_632146c3.jpg | | |image3=RBFF2_Chonshu_632146c3.jpg |
| | |image4=RBFF2_Chonshu_632146c4.jpg |
| |caption3=4f invincible | | |caption3=4f invincible |
| |input=632146C | | |input=632146C |
Revision as of 06:02, 20 November 2020
Gameplay Overview
Tiny shoto child #2, and one of Real Bout 2's infamous top tiers. He's impossible to keep out and impossible to block. He has a projectile S-Power that can be used in the air and heals him, the ability to vortex off of any knockdown, plus frames for days, and a bunch of teleports for some reason. His scant weaknesses are mostly that he's stuck with lame small normals and a poor midrange game. This is further exacerbated by his ground movement not being quite quick enough to let him force his way in at that awkward spacing. But that's a very minor set of weaknesses when one touch can guarantee his offense and likely win him the round.
| Pros |
Cons
|
- Zippy ground movement
- Unreactable left/right vortex that's plus on block
- Smothering up-close offense
- P-Power enables huge damage combos
- Incredibly quick DP that hits behind him and enables his vortex
|
- Mediocre Breakshots
- Susceptible to getting bullied by long range footsies
- Feint is completely unviable for Feint Cancelling
|
Normals
Standing
| 5A
|
| Damage
|
Stun
|
Startup
|
Active
|
Recovery
|
Hit Advantage
|
Block Advantage
|
Guard
|
Cancel
|
BS
|
Juggle
|
| 3x2
|
3/5x2
|
4
|
1,1
|
10
|
5
|
1
|
HL
|
N
|
-
|
-
|
Quick two-hitting jab. The existence of your 6A overhead limits your ability to walk and pressure with this. It **can** go into further combos, but Chonshu is a bit too stubby for this to reliably allow such.
If they get pushed out too far for the second hit to connect, you're +4 on hit and even on block.
|
|
| 5B
|
| Damage
|
Stun
|
Startup
|
Active
|
Recovery
|
Hit Advantage
|
Block Advantage
|
Guard
|
Cancel
|
BS
|
Juggle
|
| 5x2
|
3/5x2
|
5
|
2,1
|
12
|
-3
|
-1
|
HL
|
N
|
-
|
-
|
Weird-looking two-hitting kick move. This is what you walk and pester with. The startup and recovery aren't quite as good as your 5A, but it has a better hitbox for the job and there's no 6B to get in your way. Like 5A, it's not likely to start any meaningful combos for you.
If they get pushed too far out for the second hit to connect, you're +1 on hit and -3 on block.
|
|
| 5C
|
| Damage
|
Stun
|
Startup
|
Active
|
Recovery
|
Hit Advantage
|
Block Advantage
|
Guard
|
Cancel
|
BS
|
Juggle
|
| 11x2
|
3/9x2
|
7
|
3,3
|
20
|
3
|
-3
|
HL
|
N
|
-
|
-
|
Advancing two-hitter axe kick. This goes over some low attacks and lets you press your offense. There's no cancel window on it, though, so what you see here is what you get.
|
|
n.5A
(within 48px of opponent)
|
| Damage
|
Stun
|
Startup
|
Active
|
Recovery
|
Hit Advantage
|
Block Advantage
|
Guard
|
Cancel
|
BS
|
Juggle
|
| 4x2
|
2/5x2
|
4
|
1,1
|
10
|
5
|
1
|
HL
|
N
|
-
|
-
|
5A but close. At this distance you'll be able to get a proper combo chain going, so be ready to confirm the hit. The existence of 6A continues to be the bane of this move's usefulness in pressure.
|
|
n.5B
(within 42px of opponent)
|
| Damage
|
Stun
|
Startup
|
Active
|
Recovery
|
Hit Advantage
|
Block Advantage
|
Guard
|
Cancel
|
BS
|
Juggle
|
| 4x2
|
2/5x2
|
5
|
2,1
|
12
|
3
|
-1
|
HL
|
N
|
-
|
-
|
It's your 5B but close. Quick scramble combo starter and mash button that can be confirmed, like you'd expect.
|
|
n.5C
(within 54px of opponent)
|
| Damage
|
Stun
|
Startup
|
Active
|
Recovery
|
Hit Advantage
|
Block Advantage
|
Guard
|
Cancel
|
BS
|
Juggle
|
| 11x2
|
3/9x2
|
7
|
3,3
|
20
|
3
|
-3
|
HL
|
Y
|
-
|
-
|
The moneymaker. Hitting with this button lets you start the carnage. It's the beginner of Chonshu's vortex as well as a wicked fast punish, with lots of ways to keep the initiative even if blocked. It can only be cancelled or chained out of on the first hit, but the second hit is safe on block outside of Breakshots anyways. A funny side effect of this move reaching upwards is it can sometimes tag people trying to neutral jump, but that's a fringe case. If it happens, it happens.
|
|
Crouching
| 2A
|
| Damage
|
Stun
|
Startup
|
Active
|
Recovery
|
Hit Advantage
|
Block Advantage
|
Guard
|
Cancel
|
BS
|
Juggle
|
| 3x2
|
3/5x2
|
4
|
1,1
|
10
|
5
|
1
|
HL
|
N
|
-
|
-
|
It's like 5A but crouching, with almost identical properties. This one has slightly more use, as it goes into Chonshu's 2A2C string. More on that later.
|
|
| 2B
|
| Damage
|
Stun
|
Startup
|
Active
|
Recovery
|
Hit Advantage
|
Block Advantage
|
Guard
|
Cancel
|
BS
|
Juggle
|
| 5x2
|
3/5x2
|
5
|
2,1
|
12
|
-3
|
-1
|
L
|
N
|
-
|
-
|
This move is to 2A what 5B is to 5A. That's really it.
|
|
| 2C
|
| Damage
|
Stun
|
Startup
|
Active
|
Recovery
|
Hit Advantage
|
Block Advantage
|
Guard
|
Cancel
|
BS
|
Juggle
|
| 21
|
6/24
|
7
|
6
|
20
|
KD
|
-3
|
L
|
Y
|
-
|
-
|
Chonshu's sweep. It's probably your longest reaching normal, and safe on block. Note that Chonshu's hurtbox actually stays a bit higher up than his sprite makes it appear, so it isn't good as a low-profile anti-air.
Like any shoto sweep worth its salt, it possesses a cancel window -- try thinking a little more creatively than just cancelling it into fireball.
|
|
Command
Falling Slap
6A
|
| Damage
|
Stun
|
Startup
|
Active
|
Recovery
|
Hit Advantage
|
Block Advantage
|
Guard
|
Cancel
|
BS
|
Juggle
|
| 16
|
3/9
|
15
|
5
|
22
|
-1
|
-7
|
H
|
N
|
-
|
-
|
Your overhead. It's very fast and has similar reach to 2C, so it can net you a cheap bit of damage if your opponent is turtling in the corner. Thanks to your fast jabs, you might trade and keep your turn even if they mash their fastest button out afterwards.
|
|
High Avoid Attack
5AB
|
| Damage
|
Stun
|
Startup
|
Active
|
Recovery
|
Hit Advantage
|
Block Advantage
|
Guard
|
Cancel
|
BS
|
Juggle
|
| 14
|
5/15
|
6
|
7
|
20
|
-11
|
-15
|
HL
|
Y
|
-
|
-
|
It's quick, but the range is notably lacking. Overall has the same universal applications as other high avoids, with low-profiling incoming attacks and jumpins.
|
|
Jumping
| j.A
|
| Version
|
Damage
|
Stun
|
Startup
|
Active
|
Recovery
|
Hit Advantage
|
Block Advantage
|
Guard
|
Cancel
|
BS
|
Juggle
|
| Hop
|
6
|
3/9
|
4
|
...
|
6
|
9
|
5
|
HL
|
-
|
-
|
-
|
| Jump
|
6
|
3/9
|
4
|
10
|
6
|
9
|
5
|
HL
|
-
|
-
|
-
|
An upwards angled air to air with good priority and speed.
|
|
| j.B
|
| Version
|
Damage
|
Stun
|
Startup
|
Active
|
Recovery
|
Hit Advantage
|
Block Advantage
|
Guard
|
Cancel
|
BS
|
Juggle
|
| Neutral Jump/Hop
|
8
|
3/9
|
5
|
6
|
6
|
9
|
5
|
H
|
-
|
-
|
-
|
| Diagonal Jump
|
8
|
3/9
|
5
|
6
|
6
|
9
|
5
|
H
|
-
|
-
|
-
|
| Diagonal Hop
|
8
|
3/9
|
5
|
8
|
6
|
9
|
5
|
H
|
-
|
-
|
-
|
A downwards angled j.A, with a hitbox behind his head. It's actually pretty hard to cross up with this.
|
|
| j.C
|
| Version
|
Damage
|
Stun
|
Startup
|
Active
|
Recovery
|
Hit Advantage
|
Block Advantage
|
Guard
|
Cancel
|
BS
|
Juggle
|
| Neutral/Diagonal Hop, Neutral Jump
|
21
|
6/18
|
7
|
8
|
8
|
18
|
12
|
H
|
-
|
-
|
-
|
| Diagonal Jump
|
21
|
6/18
|
7
|
6
|
8
|
18
|
12
|
H
|
-
|
-
|
-
|
A pretty nutty button. It can cross up, will stomp airborne opponents below you with ease, and lock the opponent down long enough on block to pressure and on hit to combo. If they're unwilling or unable to anti-air you, you use this. A lot.
|
|
Oversway Actions
5D
(opponent in oversway)
|
| Damage
|
Stun
|
Startup
|
Active
|
Recovery
|
Hit Advantage
|
Block Advantage
|
Guard
|
Cancel
|
BS
|
Juggle
|
| 18
|
4/15
|
5
|
3+3
|
14
|
4/6
|
1/0
|
H
|
Y
|
-
|
-
|
Be sure to combo this into 66A if you connect with it.
|
|
2D
(opponent in oversway)
|
| Damage
|
Stun
|
Startup
|
Active
|
Recovery
|
Hit Advantage
|
Block Advantage
|
Guard
|
Cancel
|
BS
|
Juggle
|
| 18
|
4/15
|
8
|
3+4
|
15
|
KD/7
|
15/-2
|
L
|
N
|
-
|
-
|
|
A
(from oversway)
|
| Damage
|
Stun
|
Startup
|
Active
|
Recovery
|
Hit Advantage
|
Block Advantage
|
Guard
|
Cancel
|
BS
|
Juggle
|
| 8
|
2/9
|
26
|
1
|
12
|
3
|
-1
|
H
|
N
|
-
|
-
|
|
B
(from oversway)
|
| Damage
|
Stun
|
Startup
|
Active
|
Recovery
|
Hit Advantage
|
Block Advantage
|
Guard
|
Cancel
|
BS
|
Juggle
|
| 8
|
2/11
|
24
|
3
|
13
|
1
|
-1
|
L
|
N
|
-
|
-
|
|
C
(from oversway)
|
| Damage
|
Stun
|
Startup
|
Active
|
Recovery
|
Hit Advantage
|
Block Advantage
|
Guard
|
Cancel
|
BS
|
Juggle
|
| 18
|
6/18
|
23
|
4
|
10
|
13
|
-3
|
HL
|
N
|
-
|
-
|
If you're farther away when hitting with this, you can combo straight into 66A for the hard knockdown and oki (though this can still drop at max range). If you're close enough, confirm into the full n.5C string for more damage and somewhat worse oki.
|
|
Throw
Blast Away
4/6C
|
| Damage
|
Stun
|
Startup
|
Active
|
Recovery
|
Hit Advantage
|
Block Advantage
|
Guard
|
Cancel
|
BS
|
Juggle
|
| 26
|
-
|
-
|
-
|
-
|
-
|
-
|
-
|
-
|
-
|
-
|
Standard throw. A hard knockdown for Chonshu is a bad time for the opponent. Note that this does not side switch.
|
|
Feints
Leviathan's Strain Feint
2BC
|
| Damage
|
Stun
|
Startup
|
Active
|
Recovery
|
Hit Advantage
|
Block Advantage
|
Guard
|
Cancel
|
BS
|
Juggle
|
| -
|
-
|
-
|
-
|
58
|
-
|
-
|
-
|
-
|
-
|
-
|
Chonshu fakes his P-Power and settles back down. Terrible feint. It goes over lows, but cannot be cancelled and as such is way too slow to be used for any practical purpose. You deserve whatever big punish the opponent has in store if you use this.
|
|
Special Moves
Sight of Heaven
236A/C
|
| Version
|
Damage
|
Stun
|
Startup
|
Active
|
Recovery
|
Hit Advantage
|
Block Advantage
|
Guard
|
Cancel
|
BS
|
Juggle
|
| A
|
16
|
5
|
19/26
|
-
|
25
|
2
|
0
|
HL
|
-
|
Y
|
Y
|
| C
|
16
|
5
|
19/26
|
-
|
28
|
2
|
0
|
HL
|
-
|
Y
|
Y
|
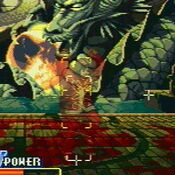
Pretty mediocre fireball. You're never minus even if it's blocked, but the slow startup and recovery make this difficult to use effectively sometimes. It's decent to throw out at fullscreen and maybe get some slight advantage -- it's also a combo/frametrap off of n.5C at point blank. The main issue is there isn't usually anything stopping your opponent from just leaping over it and handing you a combo punish. This doubles as Chonshu's safest Breakshot.
|
|
Empire Heaven Smash
623A/C
6f invuln
|
| Version
|
Damage
|
Stun
|
Startup
|
Active
|
Recovery
|
Hit Advantage
|
Block Advantage
|
Guard
|
Cancel
|
BS
|
Juggle
|
| A
|
8,12x2
|
2x3
|
3
|
4,20
|
39
|
KD
|
-35
|
HL
|
-
|
Y
|
Y
|
| Version
|
Damage
|
Stun
|
Startup
|
Active
|
Recovery
|
Hit Advantage
|
Block Advantage
|
Guard
|
Cancel
|
BS
|
Juggle
|
| C
|
8,9x4
|
2, 1x4
|
4
|
6,23
|
47
|
KD
|
-45
|
HL
|
-
|
Y
|
Y
|
A very fast DP with a wide hitbox that will snipe opponents behind Chonshu as well as in front. The startup is fast and the invincibility fully covers the startup, but it's still very possible to trade with this if you use it too early. Outside of its uses as a reversal and anti-air, it's a great tool to juggle after certain combo strings for high damage, and Chonshu gets to start running his oki train after landing it. A very useful DP, and his fastest Breakshot to boot.
|
|
Emperor God Bop
66A
We return to the land of plus frames.
|
| Damage
|
Stun
|
Startup
|
Active
|
Recovery
|
Hit Advantage
|
Block Advantage
|
Guard
|
Cancel
|
BS
|
Juggle
|
| 2, 28
|
0.5
|
6
|
10
|
20
|
KD
|
6
|
HL
|
-
|
N
|
Y
|
Rushing elbow hitgrab. Not only is this an asinine +6 on block, it inflicts a true hard knockdown on the opponent, meaning they cannot tech roll and have far fewer options to deal with your oki. Its main downside is that it has limited range and as such can be difficult to combo into reliably, but when used closer up it can combo off of his jab chains.
When juggled into, the opponent is dealt minute damage and sent into a long tumbling knockdown. On trade, this has a lot of hitstun so you might be able to snag a quick conversion as well.
|
|
Emperor's God Eye
63214A/B/C
35f invincible
|
| Version
|
Damage
|
Stun
|
Startup
|
Active
|
Recovery
|
Hit Advantage
|
Block Advantage
|
Guard
|
Cancel
|
BS
|
Juggle
|
| A/C
|
-
|
-
|
-
|
-
|
47
|
-
|
-
|
-
|
-
|
Y
|
-
|
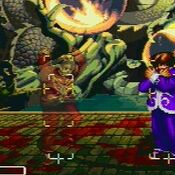
Teleport. 63214A teleports Chonshu in place like a glorified sidestep, 63214C teleports Chonshu behind the opponent. There's a decent amount of invincibility to these, and Chonshu has some low avoidance properties all the way through the recovery, but it's easy to punish if used poorly. As a Breakshot, the silhouettes follow Chonshu's path, making it less of a mixup and more a tool to bait whiffs and hopefully get a punish.
|
| Version
|
Damage
|
Stun
|
Startup
|
Active
|
Recovery
|
Hit Advantage
|
Block Advantage
|
Guard
|
Cancel
|
BS
|
Juggle
|
| B
|
-
|
-
|
-
|
-
|
47
|
-
|
-
|
-
|
-
|
Y
|
-
|
Chonshu teleports in the air behind the opponent. This move by itself is not very good, but it has a followup that is designed specifically to sneak in a quick low-damage mixup. More on that below.
|
|
Rolling Dive
A/B/C during B Emperor's God Eye
|
| Damage
|
Stun
|
Startup
|
Active
|
Recovery
|
Hit Advantage
|
Block Advantage
|
Guard
|
Cancel
|
BS
|
Juggle
|
| 19
|
5
|
3
|
-
|
25
|
-
|
-
|
HL
|
-
|
N
|
N
|
Falling roll attack. Chonshu's direction can be steered left and right to make this an annoying left/right, though it's a large risk for a small bit of damage, with the heavy recovery afterwards.
|
|
Imperial Exterminator
j.214B
50f invincibility
|
| Damage
|
Stun
|
Startup
|
Active
|
Recovery
|
Hit Advantage
|
Block Advantage
|
Guard
|
Cancel
|
BS
|
Juggle
|
| -
|
-
|
-
|
-
|
43
|
-
|
-
|
-
|
-
|
N
|
-
|
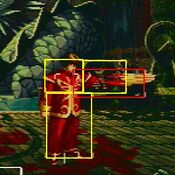
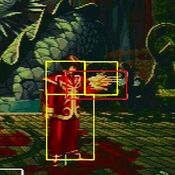
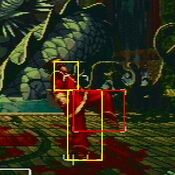
The good air teleport. It's overall quicker than grounded teleports, and Chonshu can choose any attack he wishes on the way down. The invincibility gained from this teleport is actually longer than the teleport itself, so he maintains about 7 frames of invincibility post-recovery before he can be hit. You probably guessed it: teleport in and press j.C.
|
|
Dragon's Light
236B
|
| Damage
|
Stun
|
Startup
|
Active
|
Recovery
|
Hit Advantage
|
Block Advantage
|
Guard
|
Cancel
|
BS
|
Juggle
|
| 15
|
0
|
14
|
3
|
31
|
KD
|
-13
|
HL
|
-
|
N
|
N
|
Short ranged move that seems largely outclassed, but has use in punishes when cancelled into its followup.
|
|
Teleport Attack
63214B during Dragon's Light
|
| Damage
|
Stun
|
Startup
|
Active
|
Recovery
|
Hit Advantage
|
Block Advantage
|
Guard
|
Cancel
|
BS
|
Juggle
|
| 31 (+27)
|
0
|
-
|
-
|
-
|
KD
|
-
|
-
|
-
|
-
|
-
|
Chonshu unleashes a sick teleporting autocombo on his opponent. You have a brief period afterwards where you can walk over your knocked down opponent to reposition for, you guessed it, oki. Comboing into this off of n.5C (your only reliable way to combo into this) will do slightly more damage than the full string into 623C juggle, so keep that in mind.
|
|
Desperation Moves
Emperor Drain
632146BC
Heals 38 damage on hit
|
| Damage
|
Stun
|
Startup
|
Active
|
Recovery
|
Hit Advantage
|
Block Advantage
|
Guard
|
Cancel
|
BS
|
Juggle
|
| 76
|
?
|
30
|
-
|
55
|
KD
|
20
|
HL
|
-
|
N(?)
|
N
|
Slow fireball that eats other projectiles and heals half of the damage it deals if it connects. You recover instantly if this is blocked, so the risk is if they jump over it and punish you for throwing it. Don't expect to land this much outside of maybe punishing reckless DPs, but every successful connect is 38 more damage your opponent has to deal to take you out. You can even heal out of red health this this and lose access to your P-Power, so do be mindful.
|
|
Air Emperor Drain
j.2146BC
Heals 38 damage on hit
|
| Damage
|
Stun
|
Startup
|
Active
|
Recovery
|
Hit Advantage
|
Block Advantage
|
Guard
|
Cancel
|
BS
|
Juggle
|
| 76
|
0
|
30
|
-
|
55
|
KD
|
-
|
HL/L
|
N
|
N
|
N
|
Emperor Drain but, of course, in the air. It has that special air fireball property SNK loved to put in their games where if it hits your feet, it's a low. Whiffing this is death, but it's much safer (not always completely safe) on block. Playing into this, your recovery on landing is actually shorter than normal jump recovery, at only 4 frames.
|
|
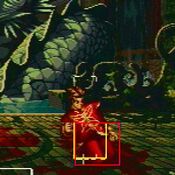
Leviathan's Strain
632146C
4f invincible
|
| Damage
|
Stun
|
Startup
|
Active
|
Recovery
|
Hit Advantage
|
Block Advantage
|
Guard
|
Cancel
|
BS
|
Juggle
|
| 14x8 (86)
|
0
|
1+11
|
-
|
???
|
KD
|
-36
|
HL/L
|
N
|
N
|
Y
|
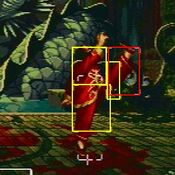
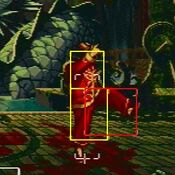
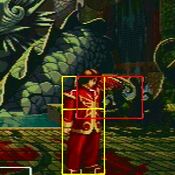
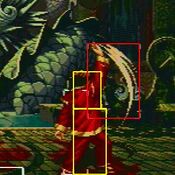
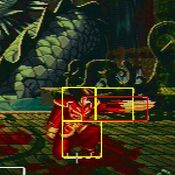
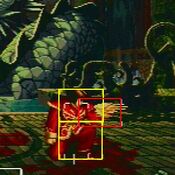
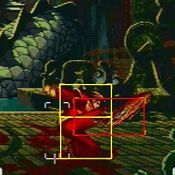
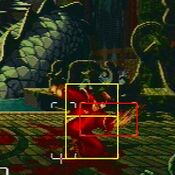
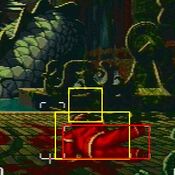
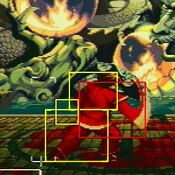
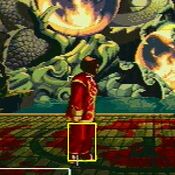
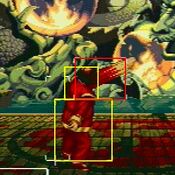
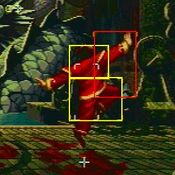
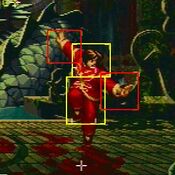
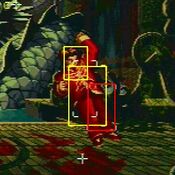
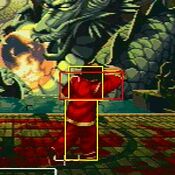
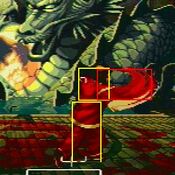
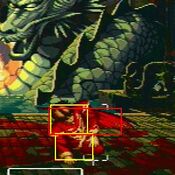
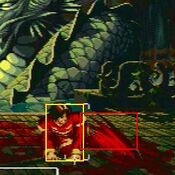
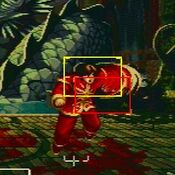
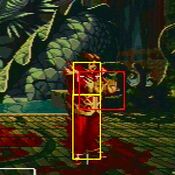
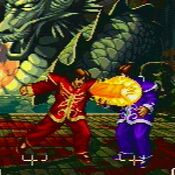
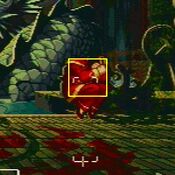
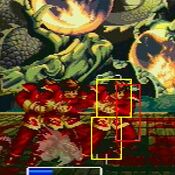
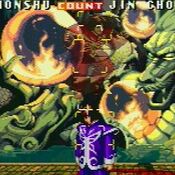
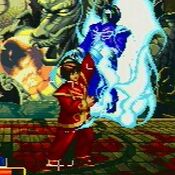
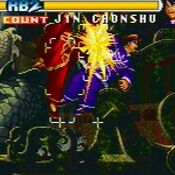
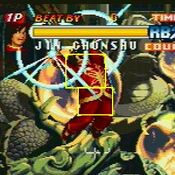
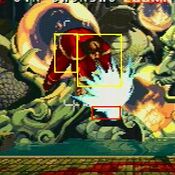
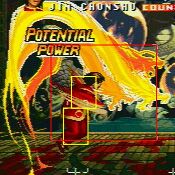
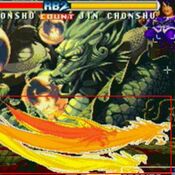
Big dick damage cashout P-Power. This move gives Chonshu ridiculous damage off of his most reliable combo tools and his vortex. It's safe to say Chonshu at red health, with the combined threat of Emperor Drain and Leviathan's Strain, becomes ridiculously threatening. The only problem is that this can be finicky to land in juggles. It's almost impossible to juggle into if you're all the way into the corner, and if used too early the opponent won't fall into every hit and will come out relatively unscathed. But don't be fooled, Chonshu has countless opportunities to land this and erase lifebars.
|
|
