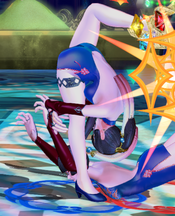
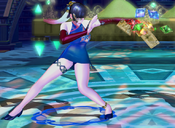
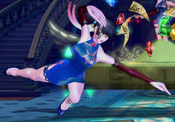
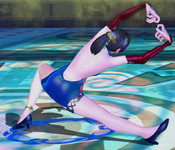
Difference between revisions of "SNK Heroines: Tag Team Frenzy/Mian"
Jump to navigation
Jump to search
(Change filename to avoid conflict with potential future Mian costumes) |
(→Videos) |
||
| (37 intermediate revisions by the same user not shown) | |||
| Line 1: | Line 1: | ||
[[File: | {{TOClimit|2}} | ||
[[File:SNKH Mian Profile.png|right]] | |||
== | ==Profile== | ||
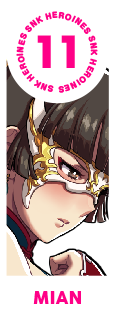
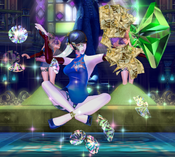
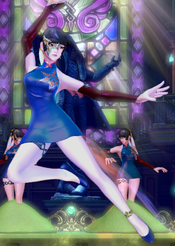
A female fighter who uses her skills as a Sichuanese opera performer as part of her fighting style. While she is generally unfriendly and shy, she will act more girly around those she considers her friends. | |||
==Gameplan== | |||
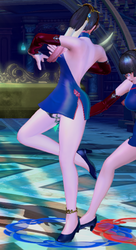
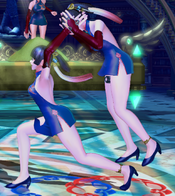
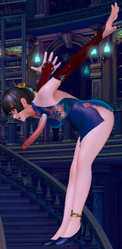
Notable normals: Far H, cl. H - These two normals are notable for Mian because they’re a bit unconventional. Far H will take Mian over low based moves and make her avoid throws. Despite this, you can combo into her ground-based special moves like normal when you hit it. Close Heavy is an odd one, on the other hand, because it will groundbounce an opponent you hit with it that’s grounded, but will pop up an opponent that you hit with it otherwise. Good to keep in mind. | Notable normals: Far H, cl. H - These two normals are notable for Mian because they’re a bit unconventional. Far H will take Mian over low based moves and make her avoid throws. Despite this, you can combo into her ground-based special moves like normal when you hit it. Close Heavy is an odd one, on the other hand, because it will groundbounce an opponent you hit with it that’s grounded, but will pop up an opponent that you hit with it otherwise. Good to keep in mind. | ||
===Recommended Partners=== | |||
*'''Mui Mui''' - Allows her to easily set up a full combo by swapping with Mian mid-rekka. | |||
* | |||
'' | |||
== | ==Normal Moves== | ||
====== <font style="visibility:hidden" size="0">c.L</font> ====== | |||
{{MoveData | |||
|image=SNHK_Mian_cL.png | |||
|caption= | |||
|image2=SNHK_Mian_cLL.png | |||
|caption2= | |||
|image3=SNHK_Mian_cLLL.png | |||
|caption3= | |||
|name=c.L | |||
|input= | |||
|data= | |||
{{AttackData-SNKH | |||
|version=5L | |||
|damage=30 | |||
|startup=4 | |||
|active= | |||
|recovery= | |||
|hitAdv=0 | |||
|blockAdv=-2 | |||
|HTC=13 | |||
|BTC=11 | |||
|spirit= | |||
|description= | |||
}} | |||
{{AttackData-SNKH | |||
|header=no | |||
|version=5LL | |||
|damage=27 | |||
|startup= | |||
|active= | |||
|recovery= | |||
|hitAdv=-1 | |||
|blockAdv=-3 | |||
|HTC=19 | |||
|BTC=17 | |||
|spirit= | |||
|description= | |||
}} | |||
{{AttackData-SNKH | |||
|header=no | |||
|version=5LLL | |||
|damage=28 | |||
|startup= | |||
|active= | |||
|recovery= | |||
|hitAdv=-5 | |||
|blockAdv=-7 | |||
|HTC=19 | |||
|BTC=17 | |||
|spirit= | |||
|description= | |||
}} | |||
}} | |||
====== <font style="visibility:hidden" size="0">c.H</font> ====== | |||
{{MoveData | |||
|image=SNHK_Mian_cH.png | |||
|caption= | |||
|name=c.H | |||
|input= | |||
|data= | |||
{{AttackData-SNKH | |||
|damage=70 | |||
|startup=8 | |||
|active= | |||
|recovery= | |||
|hitAdv=SKD | |||
|blockAdv=17 | |||
|HTC=SKD | |||
|BTC=17 | |||
|spirit= | |||
|description=Can be jump canceled on guard. | |||
}} | |||
}} | |||
====== <font style="visibility:hidden" size="0">f.L</font> ====== | |||
{{MoveData | |||
|image=SNHK_Mian_fL.png | |||
|caption= | |||
|name=f.L | |||
|input= | |||
|data= | |||
{{AttackData-SNKH | |||
|damage=30 | |||
|startup=5 | |||
|active= | |||
|recovery= | |||
|hitAdv=3 | |||
|blockAdv=1 | |||
|HTC=13 | |||
|BTC=11 | |||
|spirit= | |||
|description= | |||
}} | |||
}} | |||
====== <font style="visibility:hidden" size="0">f.H</font> ====== | |||
{{MoveData | |||
|image=SNHK_Mian_fH.png | |||
|caption= | |||
|name=f.H | |||
|input= | |||
|data= | |||
{{AttackData-SNKH | |||
|damage=70 | |||
|startup=16 | |||
|active= | |||
|recovery= | |||
|hitAdv=1 | |||
|blockAdv=-1 | |||
|HTC=19 | |||
|BTC=17 | |||
|spirit= | |||
|description= | |||
}} | |||
}} | |||
====== <font style="visibility:hidden" size="0">j.L</font> ====== | |||
{{MoveData | |||
|image=SNHK_Mian_jL.png | |||
|caption= | |||
|name=j.L | |||
|input= | |||
|data= | |||
{{AttackData-SNKH | |||
|damage=30 | |||
|startup=6 | |||
|active= | |||
|recovery= | |||
|hitAdv= | |||
|blockAdv= | |||
|HTC= | |||
|BTC= | |||
|spirit= | |||
|description= | |||
}} | |||
}} | |||
====== <font style="visibility:hidden" size="0">j.H</font> ====== | |||
{{MoveData | |||
|image=SNHK_Mian_jH.png | |||
|caption= | |||
|name=j.H | |||
|input= | |||
|data= | |||
{{AttackData-SNKH | |||
|damage=50 | |||
|startup=8 | |||
|active= | |||
|recovery= | |||
|hitAdv= | |||
|blockAdv= | |||
|HTC= | |||
|BTC= | |||
|spirit= | |||
|description= | |||
}} | |||
}} | |||
====== <font style="visibility:hidden" size="0">66H</font> ====== | |||
{{MoveData | |||
|image=SNHK_Mian_66H.png | |||
|caption= | |||
|name=66H | |||
|input= | |||
|data= | |||
{{AttackData-SNKH | |||
|damage=80 | |||
|startup=18 | |||
|active= | |||
|recovery= | |||
|hitAdv=SKD/HKD | |||
|blockAdv=-9 | |||
|HTC=SKD | |||
|BTC=19 | |||
|spirit= | |||
|description=Wall-bounces. This move is also the ender of a c.L > c.H gatling. | |||
}} | |||
}} | |||
==Universal Mechanics== | |||
====== <font style="visibility:hidden" size="0">Forward Throw</font> ====== | |||
{{MoveData | |||
|image=SNHK_Mian_FT.png | |||
|caption= | |||
|name=Forward Throw | |||
|input=6L+G | |||
|data= | |||
{{AttackData-SNKH | |||
|damage=50, 50 | |||
|startup=4 | |||
|active= | |||
|recovery= | |||
|hitAdv=HKD | |||
|blockAdv=Unblockable | |||
|HTC=SKD | |||
|BTC=19 | |||
|spirit= | |||
|description=Throw, multi-hit. Causes soft knockdown. | |||
}} | |||
}} | |||
====== <font style="visibility:hidden" size="0">Back Throw</font> ====== | |||
{{MoveData | |||
|image=SNHK_Mian_BT.png | |||
|caption= | |||
|name=Back Throw | |||
|input=4L+G | |||
|data= | |||
{{AttackData-SNKH | |||
|damage=100 | |||
|startup=4 | |||
|active= | |||
|recovery= | |||
|hitAdv=HKD | |||
|blockAdv=Unblockable | |||
|HTC=SKD | |||
|BTC=19 | |||
|spirit= | |||
|description=Throw. Causes soft knockdown. | |||
}} | |||
}} | |||
====== <font style="visibility:hidden" size="0">Air Throw</font> ====== | |||
{{MoveData | |||
|image=SNHK_Mian_AT.png | |||
|caption= | |||
|name=Air Throw | |||
|input=j.5L+G | |||
|data= | |||
{{AttackData-SNKH | |||
|damage=100 | |||
|startup=4 | |||
|active= | |||
|recovery= | |||
|hitAdv=HKD | |||
|blockAdv=Unblockable | |||
|HTC=SKD | |||
|BTC=19 | |||
|spirit= | |||
|description=Throws opponent behind. Causes soft knockdown. | |||
}} | |||
}} | |||
== | ====== <font style="visibility:hidden" size="0">Assist</font> ====== | ||
{{MoveData | |||
|image=SNHK_Mian_SP.png | |||
|caption= | |||
|name=Assist | |||
|input=5I | |||
|data= | |||
{{AttackData-SNKH | |||
|damage= | |||
|startup=16 | |||
|active= | |||
|recovery= | |||
|hitAdv= | |||
|blockAdv= | |||
|HTC= | |||
|BTC= | |||
|spirit= | |||
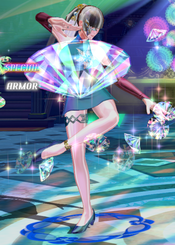
|description=Requires SP Item. Grants you 5 seconds of armor. It protects from normals and supers as well, but is vulnerable to throws. | |||
}} | |||
}} | |||
==Special Moves== | ==Special Moves== | ||
====== <font style="visibility:hidden" size="0">5S</font> ====== | |||
{{MoveData | |||
|image=SNHK_Mian_5S.png | |||
|caption= | |||
|image2=SNHK_Mian_5SEX.png | |||
|caption2= | |||
|name=Karin | |||
|input=5S | |||
|data= | |||
{{AttackData-SNKH | |||
|version=Normal | |||
|damage=100 | |||
|startup=17 | |||
|active= | |||
|recovery= | |||
|hitAdv=SKD/-17 | |||
|blockAdv=-15/-24 | |||
|HTC=19 | |||
|BTC=17 | |||
|spirit=1 | |||
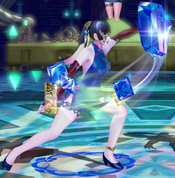
|description=Mian delivers a series of 6 hits that launches an opponent upward. If they’re standing when this hits, all 6 hits will connect, popping them up high. If they’re airborne or already being juggled, you won’t get all the hits and they won’t be popped up as high. Like other moves, you can hit this one twice before the game says you can’t do it anymore. | |||
}} | |||
{{AttackData-SNKH | |||
|header=no | |||
|version=EX | |||
|damage=110 | |||
|startup=17 | |||
|active= | |||
|recovery= | |||
|hitAdv=SKD | |||
|blockAdv=-6 | |||
|HTC=19 | |||
|BTC=17 | |||
|spirit=0 | |||
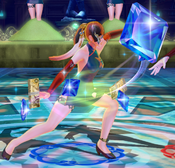
|description=On activation, EX version moves you forward a longer distance and is 9 hits instead of 6 on a standing opponent. Recovery is a little quicker, so like the original you can follow up on it. Damage wise though, it's not a huge increase compared to the regular version. | |||
}} | |||
}} | |||
====== <font style="visibility:hidden" size="0">2S</font> ====== | |||
{{MoveData | |||
|image=SNHK_Mian_2S.png | |||
|caption= | |||
|image2=SNHK_Mian_2SEX.png | |||
|caption2= | |||
|name=Rasen | |||
|input=2S | |||
|data= | |||
{{AttackData-SNKH | |||
|version=Normal | |||
|damage=90 | |||
|startup=10 | |||
|active= | |||
|recovery= | |||
|hitAdv=SKD/-41 | |||
|blockAdv=-33/-42 | |||
|HTC=SKD | |||
|BTC=17 | |||
|spirit=1 | |||
|description=Mian slides in with a low kick, then comes up with a rising kick that pops the opponent upward. The recovery's not great, so you can't follow up on it under normal circumstances, but it does give her some slight mid and head level invul on startup. | |||
}} | |||
{{AttackData-SNKH | |||
|header=no | |||
|version=EX | |||
|damage=100 | |||
|startup=10 | |||
|active= | |||
|recovery= | |||
|hitAdv=SKD | |||
|blockAdv=-18 | |||
|HTC=SKD | |||
|BTC=17 | |||
|spirit=0 | |||
|description=The EX version of Rasen is three hits as opposed to two, and pops the opponent up a bit higher. You also recover from this version faster. If you’re in the corner, you can follow up with cl.H. It also has invulnerability, so you can use it to bypass some supers. | |||
}} | |||
}} | |||
====== <font style="visibility:hidden" size="0">4S</font> ====== | |||
{{MoveData | |||
|image=SNHK_Mian_4S.png | |||
|caption= | |||
|image2=SNHK_Mian_4SEX.png | |||
|caption2= | |||
|name=Hiyoushou | |||
|input=4S | |||
|data= | |||
{{AttackData-SNKH | |||
|version=Normal | |||
|damage=90 | |||
|startup=31 | |||
|active= | |||
|recovery= | |||
|hitAdv=SKD/-10 | |||
|blockAdv=0/-11 | |||
|HTC= | |||
|BTC= | |||
|spirit=1 | |||
|description=Mian spins forward with a palm strike. If it connects, the opponent gets wallbounced, allowing for follow-ups. This has armor during the latter end, as it's about to become active. The armor only protects her from the front; so if you're behind her, you can hit her. | |||
}} | |||
{{AttackData-SNKH | |||
|header=no | |||
|version=EX | |||
|damage=100 | |||
|startup=26 | |||
|active= | |||
|recovery= | |||
|hitAdv=SKD | |||
|blockAdv=-4 | |||
|HTC= | |||
|BTC= | |||
|spirit=0 | |||
|description=The EX version of Mian's palm strike makes her stay in place as she jumps and spins. The attack happens faster and still wallbounces, and has some startup invul too, with the trade off of not having much horizontal range compared to the regular version. It's pretty safe if it's blocked as well. | |||
}} | |||
}} | |||
====== <font style="visibility:hidden" size="0">6S</font> ====== | |||
{{MoveData | |||
|image=SNHK_Mian_6S.png | |||
|caption=Bienkyu - Forward (Ground) | |||
|image2=SNHK_Mian_6S1.png | |||
|caption2=Attack 1 | |||
|image3=SNHK_Mian_6S2.png | |||
|caption3=Attack 2 | |||
|image4=SNHK_Mian_6S3.png | |||
|caption4=Attack 3 | |||
|image5=SNHK_Mian_6S4.png | |||
|caption5=Attack 4 | |||
|name=Bienkyu - Forward | |||
|input=6S | |||
|data= | |||
{{AttackData-SNKH | |||
|version=Normal | |||
|damage= | |||
|startup=13 | |||
|active= | |||
|recovery= | |||
|hitAdv= | |||
|blockAdv= | |||
|HTC= | |||
|BTC= | |||
|spirit=0.5 | |||
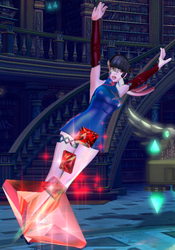
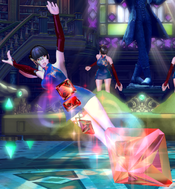
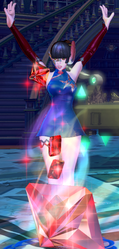
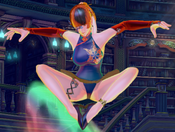
|description=Mian floats up and forward at an angle. From here, she can do one of four angled dive kicks. Each of these dive kicks hits once, and you can do Bienkyu - Forward or Backward into other dive kicks if one of these hits. Recovery wise, they’re pretty bad. Following up on them naturally is therefore difficult. 70 damage regardless of which dive kick connects. EX Bienkyu functions exactly like the standard Bienkyu, save for having invul on startup, so you can use it to escape some situations. | |||
}} | |||
{{AttackData-SNKH | |||
|header=no | |||
|version=Attack 1 | |||
|damage=70 | |||
|startup=9 | |||
|active= | |||
|recovery= | |||
|hitAdv= | |||
|blockAdv= | |||
|HTC= | |||
|BTC= | |||
|spirit=0.5 | |||
|description=Mian dive kicks backward, away from where she's facing. | |||
}} | |||
{{AttackData-SNKH | |||
|header=no | |||
|version=Attack 2 | |||
|damage=70 | |||
|startup=9 | |||
|active= | |||
|recovery= | |||
|hitAdv= | |||
|blockAdv= | |||
|HTC= | |||
|BTC= | |||
|spirit=0.5 | |||
|description=Mian dive kicks down and forward. | |||
}} | |||
{{AttackData-SNKH | |||
|header=no | |||
|version=Attack 3 | |||
|damage=70 | |||
|startup=9 | |||
|active= | |||
|recovery= | |||
|hitAdv= | |||
|blockAdv= | |||
|HTC= | |||
|BTC= | |||
|spirit=0.5 | |||
|description=Mian dive kicks down and forward at a more acute angle. If during this move's trajectory Mian touches a wall without hitting the opponent, this followup becomes Attack 4. | |||
}} | |||
{{AttackData-SNKH | |||
|header=no | |||
|version=Attack 4 | |||
|damage=70 | |||
|startup=9 | |||
|active= | |||
|recovery= | |||
|hitAdv= | |||
|blockAdv= | |||
|HTC= | |||
|BTC= | |||
|spirit=0.5 | |||
|description=Mian dive kicks straight down. | |||
}} | |||
{{AttackData-SNKH | |||
|header=no | |||
|version=EX | |||
|damage=80 | |||
|startup=9 | |||
|active= | |||
|recovery= | |||
|hitAdv=SKD | |||
|blockAdv= | |||
|HTC= | |||
|BTC= | |||
|spirit=0 | |||
|description=Each of the EX dive kicks goes in the same angles as their normal counterparts. However, the EX versions will do more damage, cause knockdown, and have less recovery. | |||
}} | |||
}} | |||
====== <font style="visibility:hidden" size="0">j.4/6S</font> ====== | |||
{{MoveData | |||
|image=SNHK_Mian_j4S.png | |||
|caption=Bienkyu - Backwards (Air) | |||
EX | |image2=SNHK_Mian_6SEX.png | ||
|caption2=Bienkyu EX | |||
|name=Air Bienkyu - Backward/Forward | |||
|input=j.4/6S | |||
|data= | |||
{{AttackData-SNKH | |||
|version=Normal | |||
|damage= | |||
|startup=13 | |||
|active= | |||
|recovery= | |||
|hitAdv= | |||
|blockAdv= | |||
|HTC= | |||
|BTC= | |||
|spirit=0.5 | |||
|description=The backward variant of the Bienkyu sends Mian up and away from her opponent, with the dive kicks working exactly the same way. You can follow up into this from ground Bienkyu at no extra Spirit Gauge cost. | |||
}} | |||
{{AttackData-SNKH | |||
|header=no | |||
|version=Attack 1 | |||
|damage=70 | |||
|startup=9 | |||
|active= | |||
|recovery= | |||
|hitAdv= | |||
|blockAdv= | |||
|HTC= | |||
|BTC= | |||
|spirit=0.5 | |||
|description=Mian dive kicks backward, away from where she's facing. | |||
}} | |||
{{AttackData-SNKH | |||
|header=no | |||
|version=Attack 2 | |||
|damage=70 | |||
|startup=9 | |||
|active= | |||
|recovery= | |||
|hitAdv= | |||
|blockAdv= | |||
|HTC= | |||
|BTC= | |||
|spirit=0.5 | |||
|description=Mian dive kicks down and forward. | |||
}} | |||
{{AttackData-SNKH | |||
|header=no | |||
|version=Attack 3 | |||
|damage=70 | |||
|startup=9 | |||
|active= | |||
|recovery= | |||
|hitAdv= | |||
|blockAdv= | |||
|HTC= | |||
|BTC= | |||
|spirit=0.5 | |||
|description=Mian dive kicks down and forward at a much lower angle. If during this move's trajectory Mian touches a wall without hitting the opponent, this followup becomes Attack 4. | |||
}} | |||
{{AttackData-SNKH | |||
|header=no | |||
|version=Attack 3 | |||
|damage=70 | |||
|startup=9 | |||
|active= | |||
|recovery= | |||
|hitAdv= | |||
|blockAdv= | |||
|HTC= | |||
|BTC= | |||
|spirit=0.5 | |||
|description=Mian dive kicks straight down. | |||
}} | |||
{{AttackData-SNKH | |||
|header=no | |||
|version=EX | |||
|damage=80 | |||
|startup=9 | |||
|active= | |||
|recovery= | |||
|hitAdv=SKD | |||
|blockAdv= | |||
|HTC= | |||
|BTC= | |||
|spirit=0 | |||
|description=Like on EX Bienkyu forward, you have invul on the start of this. Other than that, it shares all the same functionality as its Forward counterpart, including dive kicks. | |||
}} | |||
}} | |||
==Dream Finish== | ==Dream Finish== | ||
====== <font style="visibility:hidden" size="0">5D</font> ====== | |||
{{MoveData | |||
|image=SNHK_Mian_5D1.png | |||
|caption= | |||
|image2=SNHK_Mian_5D2.png | |||
|caption2= | |||
|name=Rangurenbu | |||
|input=5D | |||
|data= | |||
{{AttackData-SNKH | |||
|damage=350 | |||
|startup=18 | |||
|active= | |||
|recovery= | |||
|hitAdv=HKD | |||
|blockAdv=20 | |||
|HTC= | |||
|BTC= | |||
|spirit=4 | |||
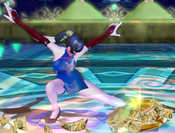
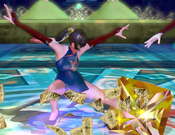
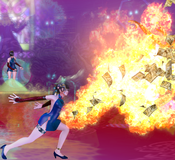
|description=Mian hits the opponent with her fan, which goes into a ranbu series of strikes. The usual applies, where you should only do it if you know you can hit it. If it connects, you’re invulnerable against any ongoing items flying around. | |||
}} | |||
}} | |||
====== <font style="visibility:hidden" size="0">2D</font> ====== | |||
{{MoveData | |||
|image=SNHK_Mian_2D1.png | |||
|caption= | |||
|image2=SNHK_Mian_2D2.png | |||
|caption2= | |||
|name=Hiren Enbu | |||
|input=2D | |||
|data= | |||
{{AttackData-SNKH | |||
|damage=350 | |||
|startup=11 | |||
|active= | |||
|recovery= | |||
|hitAdv=HKD | |||
|blockAdv=-11 | |||
|HTC= | |||
|BTC= | |||
|spirit=4 | |||
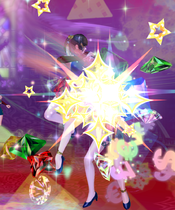
|description=Mian floats in the air, spinning rapidly. This move gets some invulnerability on startup, but if you miss, you’re wide open. | |||
}} | |||
}} | |||
==Combos== | ==Combos== | ||
''For information on combo notation, please refer to [[SNK_Heroines:_Tag_Team_Frenzy/Controls#Notation|this page]].'' | |||
===Mid-screen=== | |||
====1000 health==== | |||
* j.H, L,L,L~5S, far.H~6S~H, cl.H, jc, IAD.H, 66H, IAD.L, 66H, 2D '''(474 damage)''' | |||
* j.H, L,L,L~5S, far.H~4S, cl.H, jc, IAD.H, 66H, IAD.L, 66H, 2D '''(479 damage)''' | |||
* j.H, L,L,H, far.H~4S, IAD.H, 66H, cl.H~4S, IAD.L, 66H, 2D '''(493 damage)''' | |||
====500 health==== | |||
* j.H, L,L,L~5S, far.H~6S~H, cl.H, jc, IAD.H, 66H, IAD.L, 66H, 2S xx 2D '''(482 damage)''' | |||
* j.H, L,L,H, 66H, IAD.H, 66H, cl.H~4S, IAD.L, 66H, 2S xx 2D '''(487 damage)''' | |||
* j.H, L,L,L~5S, far.H~4S, IAD.H, 66H, cl.H~4S, IAD.L, 66H, 2S xx 2D '''(505 damage)''' | |||
===Corner=== | |||
====1000 health==== | |||
* j.H, L,L,L~5S, cl.H, 66H, IAD.H, 66H, 2S xx 2D '''(455 damage)''' | |||
* j.H, L,L,L~5S, 66H, cl.H~4S, IAD.H, 66H, 2D '''(460 damage)''' | |||
''' | ====500 health==== | ||
* j.H, L,L,L~5S, cl.H~6S~S, 66H, 2S xx 2D '''(445 damage)''' | |||
* j.H, L,L,L~5S, cl.H~4S, backdash, far.H~4S, IAD.H, 66H, 2S xx 2D '''(490 damage)''' | |||
===Corner-carry=== | |||
====1000 health==== | |||
* L,L,L~5S, far.H~4S, dash, IAD.L, 66H, cl.H, 2D '''(431 damage)''' | |||
* L,L,H, 66H, dash, IAD.L, 66H, IAD.H, 66H, cl.H~4S, 2D '''(453 damage)''' | |||
====500 health==== | |||
* L,L,L~5S, far.H~4S, walk(6), IAD.L, 66H, cl.H~4S, IAD.H, 66H, 5S xx 2D '''(455 damage)''' | |||
* L,L,L~5S, 66H, IAD.L, 66H, far.H~4S, IAD.H, 66H, 5S xx 5D '''(462 damage)''' | |||
==Videos== | ==Videos== | ||
{{#ev:youtube|s6xPYNKkvsQ}} | {{#ev:youtube|s6xPYNKkvsQ|||'''SNK Heroines - Mian combos''' by [https://twitter.com/AriaMikado Mikadok]|frame}} | ||
{{#ev:youtube|deG8sdww7eg|||'''SNK Heroines Mian Combo Exhibition (NO ITEMS)''' by [https://twitter.com/Combonauts COMBONAUTS]|frame}} | |||
==Costumes== | ==Costumes== | ||
{{Costumes-SNKH|Character= | {{Costumes-SNKH|Character=SNKH Mian}} | ||
==External Links== | ==External Links== | ||
*[https://docs.google.com/spreadsheets/d/1ymluKechf6RzEm0hVAnpuE-F4l47IBilWh3ePCT4oxg/edit#gid=547263134 SNKH Mian Frame Data] | |||
{{Navbox SNKH}} | {{Navbox SNKH}} | ||
[[Category:SNK Heroines Tag Team Frenzy]] | [[Category:SNK Heroines: Tag Team Frenzy]] | ||
[[Category:Mian]] | [[Category:Mian]] | ||
Latest revision as of 02:09, 25 May 2020
Profile
A female fighter who uses her skills as a Sichuanese opera performer as part of her fighting style. While she is generally unfriendly and shy, she will act more girly around those she considers her friends.
Gameplan
Notable normals: Far H, cl. H - These two normals are notable for Mian because they’re a bit unconventional. Far H will take Mian over low based moves and make her avoid throws. Despite this, you can combo into her ground-based special moves like normal when you hit it. Close Heavy is an odd one, on the other hand, because it will groundbounce an opponent you hit with it that’s grounded, but will pop up an opponent that you hit with it otherwise. Good to keep in mind.
Recommended Partners
- Mui Mui - Allows her to easily set up a full combo by swapping with Mian mid-rekka.
Normal Moves
c.L
| c.L |
|---|
c.H
| c.H |
|---|
f.L
| f.L |
|---|
f.H
| f.H |
|---|
j.L
| j.L |
|---|
j.H
| j.H |
|---|
66H
| 66H |
|---|
Universal Mechanics
Forward Throw
| Forward Throw 6L+G |
|---|
Back Throw
| Back Throw 4L+G |
|---|
Air Throw
| Air Throw j.5L+G |
|---|
Assist
| Assist 5I |
|---|
Special Moves
5S
| Karin 5S |
|---|
2S
| Rasen 2S |
|---|
4S
| Hiyoushou 4S |
|---|
6S
| Bienkyu - Forward 6S Bienkyu - Forward (Ground) Attack 1 Attack 2 Attack 3 Attack 4 |
|---|
j.4/6S
| Air Bienkyu - Backward/Forward j.4/6S Bienkyu - Backwards (Air) Bienkyu EX |
|---|
Dream Finish
5D
| Rangurenbu 5D |
|---|
2D
| Hiren Enbu 2D |
|---|
Combos
For information on combo notation, please refer to this page.
Mid-screen
1000 health
- j.H, L,L,L~5S, far.H~6S~H, cl.H, jc, IAD.H, 66H, IAD.L, 66H, 2D (474 damage)
- j.H, L,L,L~5S, far.H~4S, cl.H, jc, IAD.H, 66H, IAD.L, 66H, 2D (479 damage)
- j.H, L,L,H, far.H~4S, IAD.H, 66H, cl.H~4S, IAD.L, 66H, 2D (493 damage)
500 health
- j.H, L,L,L~5S, far.H~6S~H, cl.H, jc, IAD.H, 66H, IAD.L, 66H, 2S xx 2D (482 damage)
- j.H, L,L,H, 66H, IAD.H, 66H, cl.H~4S, IAD.L, 66H, 2S xx 2D (487 damage)
- j.H, L,L,L~5S, far.H~4S, IAD.H, 66H, cl.H~4S, IAD.L, 66H, 2S xx 2D (505 damage)
Corner
1000 health
- j.H, L,L,L~5S, cl.H, 66H, IAD.H, 66H, 2S xx 2D (455 damage)
- j.H, L,L,L~5S, 66H, cl.H~4S, IAD.H, 66H, 2D (460 damage)
500 health
- j.H, L,L,L~5S, cl.H~6S~S, 66H, 2S xx 2D (445 damage)
- j.H, L,L,L~5S, cl.H~4S, backdash, far.H~4S, IAD.H, 66H, 2S xx 2D (490 damage)
Corner-carry
1000 health
- L,L,L~5S, far.H~4S, dash, IAD.L, 66H, cl.H, 2D (431 damage)
- L,L,H, 66H, dash, IAD.L, 66H, IAD.H, 66H, cl.H~4S, 2D (453 damage)
500 health
- L,L,L~5S, far.H~4S, walk(6), IAD.L, 66H, cl.H~4S, IAD.H, 66H, 5S xx 2D (455 damage)
- L,L,L~5S, 66H, IAD.L, 66H, far.H~4S, IAD.H, 66H, 5S xx 5D (462 damage)
Videos
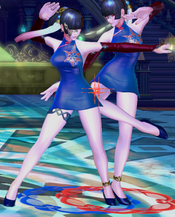
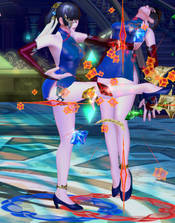
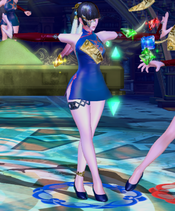
Costumes
