The King of Fighters XIII/Mai Shiranui
Gameplay Overview
SNK Technical Reference
(http://www.youtube.com/watch?v=OI1dRG_okQs)
Gameplay Notes
Less combo friendly, losing her anti-air from her repertoire, and having one of lowest damage outputs to her MaxCancel combos (due to damage scaling from her DM) makes even the most diehard Mai fans cringe when they first tryout XIII Mai. It's easy almost to chalk her off as fan-service for the "No Mai, No buy" XII-complainers.
Mai XIII however, really belongs to this growing list of revamped (and refreshing) characters such as Ralf, Chin, and even Kensou. Once mastered, she's really a deadly weapon and some have reported that she's a lot more interesting to play than her former formulaic iterations.
Pokes, Priority, Speed, and everything in between. Mai has amazing pokes; all of her ground pokes near and far are good. Close/Far C is fast and kind of acts as a pseudo anti air (the close version is cancelable). Far D is meaty, has good range, and has a nice upward slant. Close/Far B has good range and is quick. Far A/Close A is fast and cancelable. Next, one will realized about her awesome priority. Sick. Her priority is pretty disgusting and it was probably designed that way to compensate for a lack of a real anti-air. If timed correctly, Mai's j.B and j.C will even beat Kyo's wake up Oniyaki (dp+P). She has excellent air normals, in particular her j.CD is real fast (and a huge hitbox to boot) and her crossups are great and reliable (j.C and j.B). Her air throw is extremely threatening when you factor in her sheer speed hence, it is always a good habit to hold any direction (but up) plus C when you jump, to throw your opponent if they try to attack you air to air. Her dash speed is definitely one of the fastest in the game which work hand-in-hand with her pokes excellently. Everything combined, makes her have good offensive pressure and helps make her the perfect battery character.
Mai's pitfall is that she struggles to do great damage mid-screen. Mai's d.B, d.A/s.A, hcf+D (Hisstatsu Shinobi Baichi) combo is hard to hit confirm as well (remember she has no command attacks anymore) and she'll get punished easily if the opponent blocks your hcf+K. Her air.qcb+P (Musasabi No Mai)is not safe either; the Ex version is only safe if you aim it at their feet.
During a wake up block string, d.A, d.C works wonders and it will catch your opponent off guard the first couple of times. Do not risk throwing out too many blocked Ryuenbu to a savvy opponent as they are easily GCAB rolled --> punish. The only decent block string for pressure is j.CD, s.CD, qcf+C. If the opponent tries jump after the s.CD, more that likely they will get hit by the C Kachosen since the s.CD puts them in a longer hit stun.
Her only mid screen combo that's decent is a jump attack of choice, d.B, d.A/s.A, Ex Ryuenbu (qcb+P), hcf+D which is pretty handy considering you don't need to blow a drive cancel. If you do d.C --> C Ryuenbu spaced even slightly apart, it will not combo. Alternatively, you can do d.B, d.A/s.A, Ex hcf K, far D even though it does slightly less damage.
On the subject of spacing, Mai's jump arcs needs time adjusting to because of her speed, making you miss the opponent when you go for jump-ins if you are not used to them yet. Poke away or j.CD your opponents and overall just zone them until they are in the corner. Even when you get them in the corner, her Ex Ryuenbu > C Ryuenbu > C Ryuenbu > air throw is so picky on timing that it's best off skipping the last C Ryuenbu and going for the air throw. Much like Hwa Jai, she doesn't have much mid-screen options but turns in to a monster in the corner (especially in HD).
A special mention to her Ex Kachosen (qcf+P), it is extremely fast and will catches people off guard. Even her C Kachosen is fast again. If you connect her Kachosen, you can quickly link that to her NeoMax even from full screen away. Also, her j.B, j.D, and j.CD have a special property which allows them to wall jump AFTER they have put the opponent in block stun, in the corner, from above.
In hindsight, SNK did a good job taking an cookie-cutter character (jump attack > stand attack > command attack > special attack) and made her gameplay more interesting. All in all, despite her shortcomings, her pros compensates and she belongs in the solid mid-tier section.
Pros
-Great Pokes
-Good normals
-Awesome priority
-Fast
-Good keep away
-Great battery character
-High jump arcs enable to her to control air-air battles along with throw option
Cons
-Damaging combos do not really emerge until she corners the opponent
-Lacks real safe block strings
-Harder to hit confirm without command attacks
-High jump arcs makes her sometimes easier to anti-air against
-NeoMax scales poorly when Max Canceled
-Somewhat one-dimenional
Normals
Standing Far
st. A -
- Chain/Cancelable
- Hit Detection: High
- Damage: 25
st. B -
- Hit Detection: High
- Damage: 30
st. C -
- Hit Detection: High
- Damage: 80
st. D -
- Hit Detection: High
- Damage: 80
Standing Close
cl. A -
- Chain/Cancelable
- Hit Detection: High
- Damage: 25
cl. C -
- Cancelable
- Hit Detection: High
- Damage: 70
cl. D -
- Cancelable
- Hit Detection: High
- Damage: 70
Crouching
cr. A -
- Chain/Cancelable
- Hit Detection: High
- Damage: 25
cr. B -
- Chainable
- Hit Detection: Low
- Damage: 30
cr. C -
- Cancelable
- Hit Detection: High
- Damage: 70
cr. D -
- Cancelable
- Hit Detection: Low
- Damage: 80
Jumping
j. A -
- Hit Detection: Mid
- Damage: 45(40)
j. B -
- Cancelable
- Hit Detection: Mid
- Damage: 45(40)
j. C -
- Cancelable
- Hit Detection: Mid
- Damage: 72(70)
j. D -
- Cancelable
- Hit Detection: Mid
- Damage: 70(68)
Blowback Attack
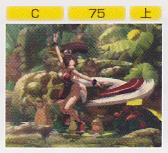
CD -
- Whiff/Cancel-able
- Hit Detection: High
- Damage: 75
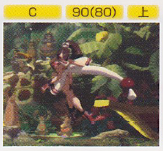
j. CD -
- Cancelable
- Hit Detection: High
- Damage: 90(80)
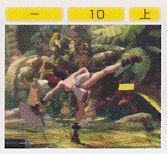
GCCD: Guard Cancel Blowback Attack
- Hit Detection: High
- Damage: 10
Throw
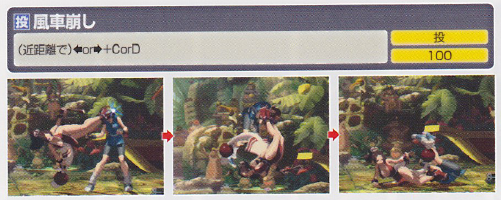
Fuusha Kuzushi = (b/f+C/D) close -
- Can be broken
- Hit Detection: Close
- Damage: 100
Yura = (b/d/f+C) close in air -
- Can't be broken
- Hit Detection: Close
- Damage: 125
Command Moves
Filler Picture
"There's no picture of the wall jump in the mook, just read the description below!"
Wall Jump = (press uf when near the wall in the air, ub on the 2P side) -
- Area Detection: 1P Wall (uf) / 2P Wall (ub)
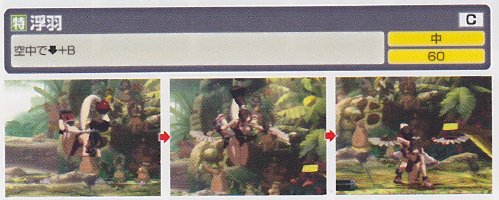
Ukihane = (d+B) in air -
- Cancelable
- Hit Detection: Mid
- Damage: 60
Special Moves
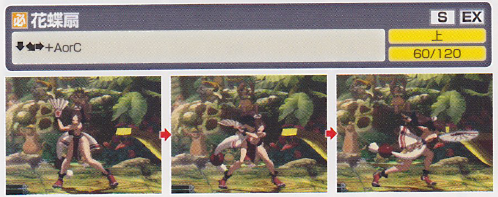
Kachousen = (qcf+P) -
(EX) = qcf+AC -
- Super Cancelable
- Hit Detection: High
- Damage: 60/120
Ryuuenbu = (qcb+P) -
(EX) = qcb+AC -
- Drive/Super Cancelable
- Hit Detection: High
- Damage: 65/40+65/50+80
Hissatsu Shinobi Baichi = (hcf+K) -
(EX) = hcf+BD -
- Drive/Super Cancelable
- Hit Detection: High
- Damage:45x3/50x2+45+50/32x6
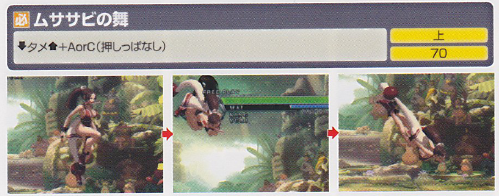
Musasabi No Mai = (d~u+P) -
- Hit Detection: High
- Damage: 70
Musasabi No Mai (Air) = (qcb+P) in air -
(EX) = qcb+AC in air -
- Drive/Super Cancelable
- Hit Detection: High
- Damage: 70/48xN+48
Desperation Moves
Chou Hissatsu Shinobi Baichi = (qcb hcf+K) also in air -
(EX) = qcb hcf+K
- Max Cancelable
- Hit Detection: High
- Damage: 30+25x8(25x8)/45+25x11
Neomax
Kunoichi no Mai = (qcf hcb+AC) also in air -
- Hit Detection: High
- Damage: 0+450
Combos
Combos (Starters are: d.B, d.A/s.A; s.C/s.D and are interechangeable)
Misc.
- j.D, j.d.B [128]
1 stock/No Drives
- s.C, Ex hcf K, Far D [260] - s.C, Ex qcb P, hcd D [267] - (Corner) s.C, Ex hcf K, qcb C, s.C [316] - (Corner) s.C, qcb+AC, qcb+C, qcb+C, air throw [431]
2 stocks/No Drives
- s.C, Ex qcb P, qcb~hcf+K DM [315] - (Corner) s.C, Ex qcb~hcf+K, air throw [408]
0 stocks/1 Drive
- (Corner) s.C, hcf+K (2hits), [DC] air.qcb+C, qcb+C, air throw [383]
1 stock/1 Drive
- (Corner) s.C, Ex qcb P, qcb C, qcb C [1hit], [DC] qcf+P, qcb C, qcb C, s.C [497] - (Corner) s.C, Ex qcb P, qcb C, hcf D [2hits[, [DC] qcb C, qcb C, qcb C, air throw [514]
2 stocks/1 Drive
- (Corner) s.C, Ex hcf K, qcb C [1hit], [DC] Ex qcb P, qcb A, qcb C x2, s.C [455] - (Corner) s.C, Ex qcb P, qcb C, qcb C [1hit], [DC] Ex qcb P, qcb A, qcb C, air throw [543] - (Corner) s.C, Ex qcb P, qcb C, qcb C [1hit], [DC] Ex qcb P, qcb A, qcb C x2, s.C [554]
3 stocks/ 1 Drive
- (Corner) d.B, s.A, Ex qcb P, qcb P, hcf D [2hits], [DC] qcb C x2, Ex qcb~hcf+K [580]
HD Combos
No stocks
(Corner)
- j.C, s.C, [HD] s.D, hcf D, [HDC] air.qcb C, hcf D [2hits], [HDC] qcb C, hcf D [1hit], [HDC] qcb A, hcf D [2hits], [HDC] qcb C, qcb C, air throw [640]
- j.C, s.C, [HD] s.D, hcf D, [HDC] air.qcb C, hcf D [2hits], [HDC] qcb C, hcf B [1hit], [HDC] qcb C, (hcf D [2hits], [HDC] qcb C) x2, qcb C, air throw [659]
2 stocks
(Corner)
- j.C, s.C, [HD] s.C, qcb C [1hit], [HDC] Ex qcb P, (qcb C, qcb C [1hit], [HDC] qcf A) x2, qcb C [1hit], [HDC] Ex qcb P, qcb A, qcb C, qcb C, s.C [655]
- j.C, s.C, [HD] s.C, hcf D [2hits], [HDC] air.qcb P, hcd D [2hits], [HDC] qcb C, qcb C, qcb C [1hit], [HDC] Ex qcb P, qcb A, qcb C, qcb C [1hit], [HDC] Ex qcb P, qcb A, qcb C x2, air throw [711]
- j.C, s.C, [HD] s.D, hcf D [2hits], [HDC] air.qcb C, hcf D [2hits], [HDC] qcb C, hcf B [1hit], [HDC] qcb A, (hcf D [2hits], [HDC] qcb C) x2, qcb C, Ex qcb~hcf+ K [769]
(Corner to corner combo 2 stocks HD)
- j.C, s.C, HD, dash D, (hcf D [1hit], [HDC] qcb C [1hit], [HDC] Ex qcb P) x2, hcf D [1hit], [HDC] qcb A, hcf D [2hits], [HDC] qcb C, qcb C, air throw [619]
3 stocks
(Corner)
- s.C, [HD], s.C, hcf B [2hits], [HDC] air.qcb P, hcf D [2hits], [HDC] qcb C, hcf D [2hits], [HDC] qcb C, qcb C, qcb C [1hit], [HDC] qcf A, [MC] qcf~hcb +AC NM [776]
- j.C, s.C, [HD] s.D, hcf D, [HDC] air.qcb C, hcf D [2hits], [HDC] qcb C, hcf D [2hits], [HDC] qcb C, hcf D [2hits], [HDC] qcf A, [MC] NM [799]
- j.C, s.C, [HD], s.C, hcf D [2hits], [HDC] air.qcb P, (hcf D [2hits],[HDC] qcb C) x2, hcf D [2hits], [HDC] qcf P, qcf~hcb+AC NM[/url]. (Approx. 790dmg) (http://www.youtube.com/watch?v=LvJsHUl1qX8#t=0m14)
4 stocks
(Corner)
- j.C, s.C, [HD] s.D, hcf D [2hits], [HDC] air.qcb P, hcf D [2hits], [HDC] qcb C, qcb C, qcb C [1hit], [HDC] Ex qcb P, qcb A, qcb C, qcb C [1hit], [HDC] Ex qcb P, qcb A, qcb C, Ex qcb~hcf +K DM [808]
5 stocks
(Corner)
- j.C, s.C, [HD] s.D, hcf D [2hits], [HDC] air.qcb P, hcf D [2hits], [HDC] qcb C, hcf B [1hit], [HDC] qcb C, qcb C, Ex qcb~hcf +K DM, [MC] qcf~hcb +AC NM [908]
Miscellaneous
Character Sprite
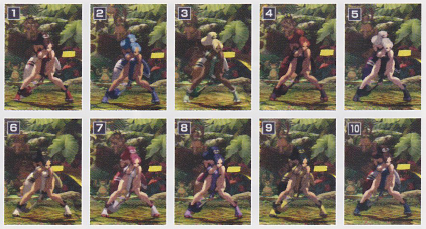
Colors
Other
Taunt
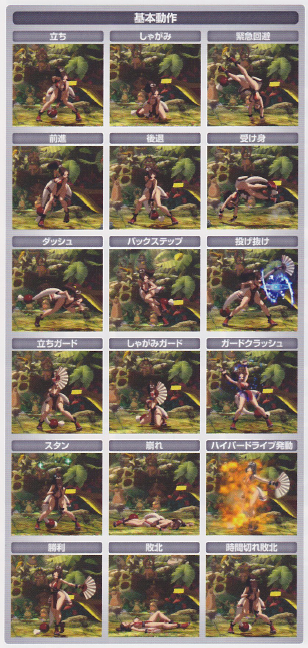
First Row: Standing/Crouching/Evasive Roll
Second Row: Walking (forward/Walking (Backward)/Safe Roll
Third Row: Running/Back Step/Throw Break
Fourth Row: Standing Guard/Crouching Guard/Guard Crush
Fifth Row: Dizzy/Downed/Hyper Drive Activation
Last Row: Win Pose/Knock Out/Time Up Pose
Links & References
Technical Reference
http://www.youtube.com/watch?v=OI1dRG_okQs
Discussion Threads
Discuss at Dream Cancel


