-Happy New Year 2025!
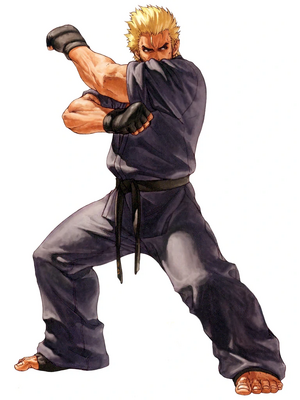
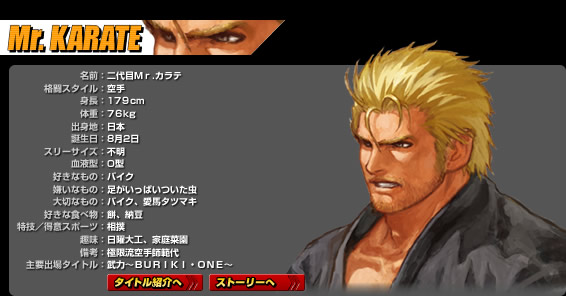
NeoGeo Battle Coliseum/Mr. Karate

(NOTE: Mr. Karate is Ryo Sakazaki, and will be referred to as Ryo for convenience.)
Normals
Close
- cl.A/B/C/D are cancel-able.
- cl.A comes out really fast, and chains to itself twice.
- cl.B is fast also, and chains to itself twice.
- cl.D does not hit low despite the animation and doing so in most of Ryo's other games; hits mid.
Standing
- st.A is cancel-able/whiff cancel-able.
- st.B is Ryo's furthest reaching poke, surpassing even sweep's range.
- st.C isn't cancelable and barely outranges st.A. Is near-even on hit and on block like st.B, but being faster than st.B gives it some edge in scrambles.
- st.D can sometimes be used as a preemptive anti-air if dp+p or cr.C won't connect.
Crouching
- cr.A/C/D are all cancelable on hit.
- cr.A/B are whiff cancel-able.
- cr.A/B are chainable into themselves, but not each other.
- cr.C is a one of the best anti-air normals Ryo has. It also is used in a bread-n-butter combo (see combos).
- cr.D looks like it has range, but has a smaller hit box than some of the other characters' trip moves, so take caution when using this move. It can be canceled into another move, thus making it a somewhat safe option.
Jumping
- All of Ryo's jump normals have different animations between diagonal and neutral jump.
- j.A has enough hitstun to consistently combo into cr.A where all other diagonal jump normals require waiting to be deeper into the jump.
- nj.A and D are the best Ryo has for lasting air-to-airs if he does a neutral jump.
- nj.A has the most active hitbox and comes out faster, but being an elbow attack means subpar range.
- nj.D is similarly active and has more range, but has more start-up, requiring preemptiveness.
- nj.B had to wait for KOF XIV to get away from being restricted to neutral jump. Though with this game having full jumps only, it may actually serve decently as a jump-in for an opponent to run into with its active frames.
- j.B hits higher than j.D, giving Ryo an option to air-to-air reactively if he jumps 2nd to an opponent's own.
- nj.C is a risky middle ground/trade-off anti-air between A and D; briefest active window, but does have the damage and range of D and comes out fast like A.
- j.C is your standard committal jump-in; faster than 'jack-of-all-trades' j.D, more damage than j.A. You can cross-up with this move, aiming to hit with Ryo's back leg, assuming you want to have a harder time when j.D is more reliable at that.
- j.D makes for a fair air-to-air, jump-in, and is the best at crossing up. Aim to hit the opponent with Ryo's bent knee.
Guard Cancel Tag Attack
- Pressing the E button while blocking will allow Ryo to do a standing punch that looks like hcb+p and he will then tag out.
Throw
Katate Nage: b/f+CD
- Can be broken. Regular knockdown. This distance made allows for zoning tactics to get put back into play. This move is great for throwing opponents in the corner from midscreen because Ryo sends them across an entire screen.
Command Moves
Hyouchuu Wari: f+A
- Ryo's overhead chop. This move combos from close heavies but f+A itself even losing its overhead property is not special- or super-cancelable.
- Can frametrap by canceling a light normal into this move.
Joudan Uke: f+B
- Ryo's high/mid parry. This move can stop both attacks and projectiles of any kind, including supers. Can stop some higher-hitting lows like Hanzo's sweep. Neither this or the low parry can stop grabs, of course. Both parries are special and super cancelable, along with being cancelable into either parry again to deal with multihits.
Gedan Uke: df+B
- Low parry.
Special Moves
Ko'oh Ken: qcf+A/C
- Ryo throws a projectile that disperses almost as soon as its released from his palm. A has Ryo stay in place while C moves him forward. Reliable tool to throw out on block, or to bully in the corner with proper spacing.
Kohou: dp+A/C
- Kyokugenryuu's DP. Button strength determines the height Ryo travels. A can beat out air approaches on reaction, C has more invuln.
Zanretsuzen: f,b,f+A/C
- Ryo briefly guards himself, to a punching vacuum. On hit, A does a straight and C does a standing uppercut, though both lead to HKD and roughly the same oki. On whiff, C stays active longer than A.
Kohou Shippuuken: hcb+A/C
- Ryo does a thrust attack with his fist. Both versions can be super-canceled, and do a considerable amount of guard damage. It is best to use the A version, as it can easily be canceled and combos from heavy normals the most reliably. C has some start-up invuln and has a 2nd hit that will SKD. Can lead to some usually corner-only combos being available midscreen if done from a parry.
Mouko Raijin Setsu: dp+B/D
- Ryo does a jumping version of his overhead chop. Button strength determines the distance of the move. If either version of this move hits air-to-air, it can be followed with another dp+B for a quick OTG combo.
Hien Shippuukyaku: hcb OR db,f+B/D
- hcb uses Takuma's version of the flying kicks in '02 -- while db,f uses Ryo's KOF version since '96. Button strength for both types determines the distance traveled. db,f+k can be canceled into after hcb+p; the same button strength needs to be used.
Desperation Moves
Tenchi no Joge Kamaee: qcf,hcb+B/D
- Ryo goes from his default stance to that of KOF '96-XI's. During the animation, his full body autoguards all attacks, but is throw vulnerable.
- Buryoko Ranbu: after Tenchi no Joge Kamaee, f, uf, f, f, df, uf, uf
- If at close range (e.g. a single heavy normal or from successful parry), Ryo can combo/punish by doing qcf,hcb+k and quickly starting the combo chain as the super flash ends.
- This super is available for free starting with the first forward input if Ryo gets two consecutive parries.
- Unlike Gai Tendo's Rush in KOF XI, this Buriki One super does not involve any directly up or down inputs, making it much more consistent to finish (with a more even timing between each input, also unlike Gai's deaccelerating tempo). Can stop after the 3rd input to combo into cr.C, then canceling that into whatever route is desired.
- Stopping at the 3rd hit to use cr.C into a combo is recommended if you don't plan to use the 1 bar ender below. There's no knockdown at the end of Buryoko Ranbu without it, and you and the standing opponent will be even.
- Suburuou Shou Kabushi: after Buryoko Ranbu, f
- Additional 1 bar ender (technically the only bar spent if doing Buryoku Ranbu after two parries). Leaves an opponent at about half their max health assuming you didn't do this entire chain and then this ender on block -- in which case you are very negative and likely very dead soon.
- Suburuou Shou Kabushi: after Buryoko Ranbu, f
Tenchi Haoh Ken: qcfx2+A/C
- No stun effect is attached to this singular straight punch. Doesn't combo from lights like some KOFs either. A is faster than the C version. Neither have invuln. Best used and is most consistent in the corner as a 1 bar combo ender after hcb+A.
Ryuuko Ranbu: qcf,hcb+A/C
- Uses 2 bar. A version is the super of choice when choosing one for combo enders. Both versions have start-up invuln, while C is invincible throughout Ryo's dash as well, helpful for ignoring projectiles and punishing if they have high recovery.
Haohshoukoken: f,hcf+A/C
- Ryo's projectile super does a good amount of damage, and can stop or pierce other projectiles. Button strength determines the speed.
General Strategy
- Ryo is a very versatile character, in that he can be played both defensively and offensively. Mixing up blocked strings with counters to bait out moves can allow him to get free hits or full blown combos in. Depending on the range, Ryo can go from a parry to hcb+A.db,f+B. Crouching B, crouching C to qcf + A can be used as both a great blocked string, and as a BnB combo. Try to force the opponent to block low, so that the options open up more.
- If Ryo throws the opponent in the corner, dp+B/D is guaranteed, and cannot be tech rolled out of.
- Block strings:
- cr.B, cr.C, qcf+A
- cr.B, cr.A, st.B
- Cancelable heavy normal, f+A
Mr. Karate NGBC Primer I(by Dark Geese)
- Bnb is cr.B xx Cr.C xx A or C fireball/Deadly Assault. - You can vary this via cr.Bxxcr.C to ranbu super (qcfhcb+p super) Another bnb of his. - Do not waste time with his Buriki One (qcfhcb+k) super unless you are an expert in it. I can hit this stuff later on. - He has two types of command flying kicks: one that is hcb+k (b button is sae ala 2k2) and the db, f, k one that flies across the screen. So he has his old ones plus Takumas from 2k2. - Yes Dp+A is a good Anti Air but so is Cr.C. It's pretty good and SAFER. - In the corner off a Throw you can link Dp+D overhead as an OTG. - Haohshokoken is good from afar and still used to punish stuff.
Combos
- cl.Bx2, st.B
- cr.B, cr.C, qcf+A
- (in the corner) throw, dp+B/D
- dp+D (air-to-air), dp+B
- cr.B, cr.A, db,f+B/D
- cl./cr.C, hcb+A.db,f+B
- jump-in, cl./cr.C, hcb+D
- jump-in, cr.A(x2), qcf+A
- (in the corner) cl./cr.C, hcb+A, qcfx2+p/qcf,hcb+p
Color Palettes
- Note: The "S" button is the start button.
