Gameplay Overview
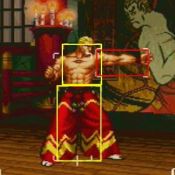
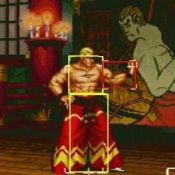
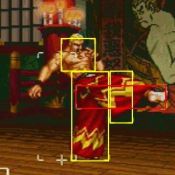
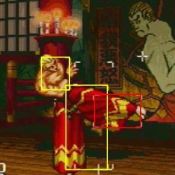
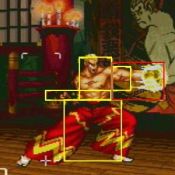
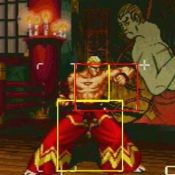
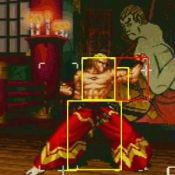
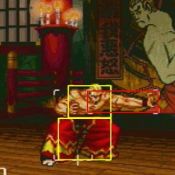
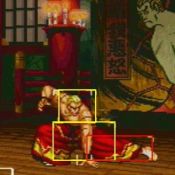
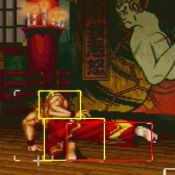
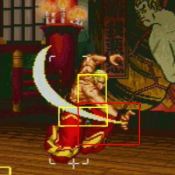
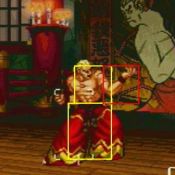
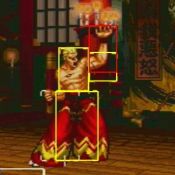
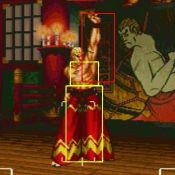
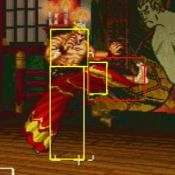
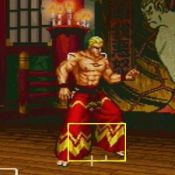
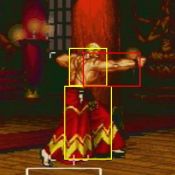
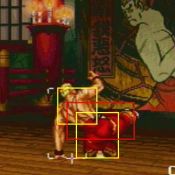
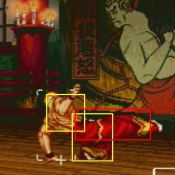
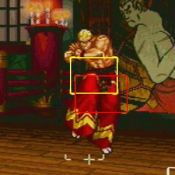
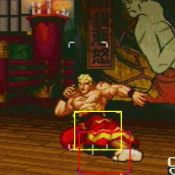
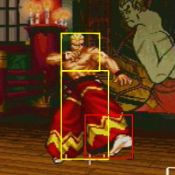
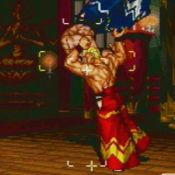
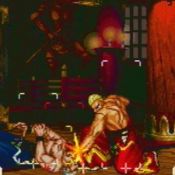
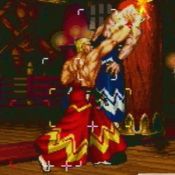
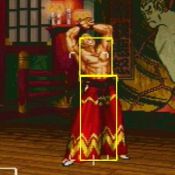
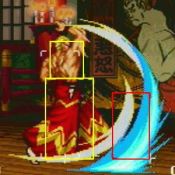
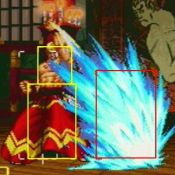
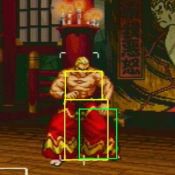
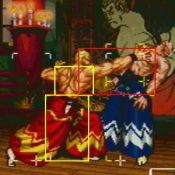
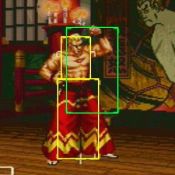
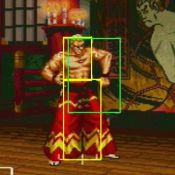
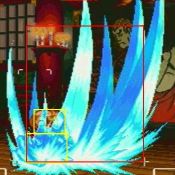
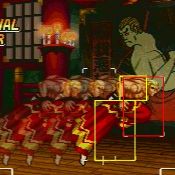
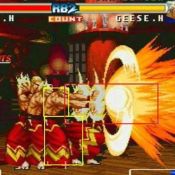
Geese Howard is a man who needs no introduction. His normally sizable movelist has been slimmed down compared to previous entries; his combos are generally short and he also has far fewer special moves than most other characters in Real Bout 2, but that's not stopping him from being one of the best characters in the game. Command grabs are incredibly powerful and Geese gets to command grab you from basically halfscreen. That alone would put him close to top tier, but he also has great damage off of small openings thanks to his powerful Pursuit attack that can be set up off of various knockdowns. Geese either outright ignores the rules of the game or enforces them on the opponent to an insane degree. He's the perfect pick for people who can handle having a specialized toolkit in exchange for dominating neutral and offensive prowess.
| Pros |
Cons
|
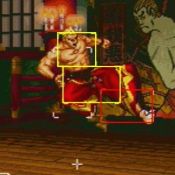
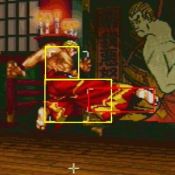
- Lightning Spin Kick is an advancing normal that's plus on block, has a huge kara cancel window, and leads to a combo if it hits.
- The best command grabs in the entire roster, with two incredibly reliable options in Vacuum Throw and Rashomon
- Frame 1 catch counters that immediately reverse the game's momentum and set up Geese's offense very well
- Strong, utilitarian normals
- Divine Punishment is the most damaging Pursuit in the game, and is an extremely consistent combo tool
|
- Limited toolkit; not much variety in special moves or combo chains
- Defensive options require a hard guess or meter to work
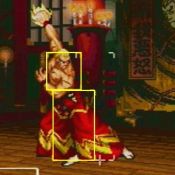
- No invincible attacks outside of Breakshot Reppuken
|
Normals
Standing
| 5A
|
| Damage
|
Stun
|
Startup
|
Active
|
Recovery
|
Hit Advantage
|
Block Advantage
|
Guard
|
Cancel
|
BS
|
Juggle
|
| 9
|
3/12
|
5
|
2
|
10
|
+4
|
0
|
Mid
|
Y
|
N
|
N
|
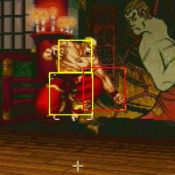
Basic far range jab check. Noticeably less committal than 5B, and unlike you're able to use it while holding back to walk or block high. Its main downside is the hitbox is up high enough that most characters can just crouch and low profile right under it. As such finding uses for this can be difficult depending on the matchup.
|
|
n.5A
(within 48px of opponent)
|
| Damage
|
Stun
|
Startup
|
Active
|
Recovery
|
Hit Advantage
|
Block Advantage
|
Guard
|
Cancel
|
BS
|
Juggle
|
| 9
|
3/12
|
5
|
5
|
7
|
+4
|
0
|
Mid
|
Y
|
N
|
N
|
The fact that this normal can be crouched under even at point blank combined with mediocre combo potential compared to 2A and 2B immediately erases its usefulness.
|
|
| 5B
|
| Damage
|
Stun
|
Startup
|
Active
|
Recovery
|
Hit Advantage
|
Block Advantage
|
Guard
|
Cancel
|
BS
|
Juggle
|
| 11
|
3/12
|
7
|
4
|
12
|
0
|
-4
|
Mid
|
Y
|
N
|
N
|
Your primary poke. Its range is good and the recovery isn't terrible, but its damage is low. You have useful cancels off of this, primarily being either Reppuken or Feint Reppuken. Cancelling into Feint Reppuken is difficult to see coming, and frequently gives you enough time to go in with a 4B kara throw. Reppuken will not combo, instead serving as a frame trap that punishes opponents for trying to poke you out of a Feint tick grab.
|
|
n.5B
(within 43px of opponent)
|
| Damage
|
Stun
|
Startup
|
Active
|
Recovery
|
Hit Advantage
|
Block Advantage
|
Guard
|
Cancel
|
BS
|
Juggle
|
| 11
|
3/12
|
7
|
7
|
9
|
0
|
-4
|
Mid
|
Y
|
N
|
N
|
Very niche normal used in point blank max damage corner combos. Don't expect to get much use out of it otherwise, as it's weirdly slow and Lightning Spin Kick will take priority if you press B while holding backwards.
|
|
| 5C
|
| Damage
|
Stun
|
Startup
|
Active
|
Recovery
|
Hit Advantage
|
Block Advantage
|
Guard
|
Cancel
|
BS
|
Juggle
|
| 9*3
|
3/8*3
|
12
|
22
|
16
|
0
|
-6
|
Mid
|
N
|
N
|
N
|
Slow and really lame multi-hitting palm strike. The priority is alright but this move stays out for way too long and doesn't fill any niche that your other normals don't already do better.
|
|
n.5C
(within 70px of opponent)
|
| Damage
|
Stun
|
Startup
|
Active
|
Recovery
|
Hit Advantage
|
Block Advantage
|
Guard
|
Cancel
|
BS
|
Juggle
|
| 12*2
|
4/12*2
|
8
|
3, 10
|
15
|
0 (+6)
|
-6 (0)
|
Mid
|
Y
|
N
|
N
|
Another max damage combo tool. 2A and 2B being easier to use and leading to similar if not possibly even higher damage depending on meter and positioning makes this about as difficult to use as the rest of his close normals.
|
|
Crouching
| 2A
|
| Damage
|
Stun
|
Startup
|
Active
|
Recovery
|
Hit Advantage
|
Block Advantage
|
Guard
|
Cancel
|
BS
|
Juggle
|
| 9
|
3/12
|
5
|
4
|
7
|
+3
|
-1
|
Mid
|
Y
|
N
|
N
|
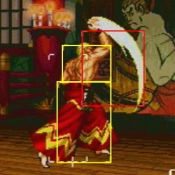
Decent low jab with chain combo and cancel options. There's fairly good priority on Geese's arm.
|
|
| 2B
|
| Damage
|
Stun
|
Startup
|
Active
|
Recovery
|
Hit Advantage
|
Block Advantage
|
Guard
|
Cancel
|
BS
|
Juggle
|
| 11
|
3/12
|
6
|
6
|
10
|
0
|
-4
|
Low
|
Y
|
N
|
N
|
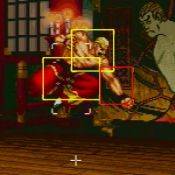
Super useful low kick. It opens up huge damage with its 2BBC chain combo, lowers Geese's hurtbox, and generally is just very scary to deal with. You're minus on block, but Geese has ways to make challenging there scary.
|
|
| 2C
|
| Damage
|
Stun
|
Startup
|
Active
|
Recovery
|
Hit Advantage
|
Block Advantage
|
Guard
|
Cancel
|
BS
|
Juggle
|
| 24
|
6/27
|
8
|
3
|
27
|
KD
|
-10 (0)
|
Low
|
Y
|
N
|
N
|
Long range cancellable sweep -- probably the best sweep in the game. The recovery on whiff is terrible, so you shouldn't just throw it out, but it's even on block when cancelled into Feint Raging Storm -- this also perfectly sets you up to kara 4B into Divine Punishment when it connects. Expect this to punish a surprising amount of otherwise seemingly safe stuff.
|
|
Command
Buzzsaw
6A
9f Upper body invuln
|
| Damage
|
Stun
|
Startup
|
Active
|
Recovery
|
Hit Advantage
|
Block Advantage
|
Guard
|
Cancel
|
BS
|
Juggle
|
| 16
|
0
|
30
|
5
|
22
|
-1
|
-7
|
H
|
N
|
N
|
N
|
Horribly slow forward moving overhead. The canned follow-up chain combo into 5C 360A does very nice damage, but pretty much anyone can react and block this or just jab you out of it if used raw. This mostly is useful because the later active frames actually hit low enough that it triggers a bug rendering it unblockable. There are setups to hit consistently with this as a meaty, mostly off of 2C and other similar knockdowns. Overall still not that useful.
|
|
Rising Palm
3A
|
| Damage
|
Stun
|
Startup
|
Active
|
Recovery
|
Hit Advantage
|
Block Advantage
|
Guard
|
Cancel
|
BS
|
Juggle
|
| 10*2
|
0
|
8
|
3,2,4
|
13
|
+4/+7
|
-2/+1
|
HL
|
Y
|
N
|
N
|
An anti-air attack that is mostly too slow and too lacking in priority to get the job done unless used very preemptively. It has a chain combo followup with 5C 2C that can be further followed up with Divine Punishment, but the sequence is unsafe on block and just outclassed in damage output.
|
|
Lightning Spin Kick
4B
|
| Damage
|
Stun
|
Startup
|
Active
|
Recovery
|
Hit Advantage
|
Block Advantage
|
Guard
|
Cancel
|
BS
|
Juggle
|
| 19
|
6/27
|
22
|
3
|
10
|
+11
|
+7
|
HL
|
N
|
N
|
N
|
This move is undeservingly good. It travels a great distance, is plus on block, leads to a braindead confirm on hit, and the kara cancel window is enormous. This kara cancel opens up Geese's pressure and neutral, and other assorted tricks. The basic use for this is to kara cancel (cancel during the forward movement -- before the kick itself comes out) into Vacuum Throw or Rashomon. Once they start playing around this tactic, you can still maintain the upper hand by cancelling into the appropriate counter to stuff their checks, or if they jump over it you will frequently go underneath them and recover in time to punish their recovery. Become very acquainted with the ins and outs of this move -- if you can't use it effectively, just pick another character.
|
|
Divine Punishment
2C when opponent is knocked down
Pursuit; within 53px
|
| Damage
|
Stun
|
Startup
|
Active
|
Recovery
|
Hit Advantage
|
Block Advantage
|
Guard
|
Cancel
|
BS
|
Juggle
|
| 24
|
7
|
0
|
N/A
|
N/A
|
KD
|
N/A
|
N/A
|
N
|
N
|
N
|
See that 24 damage? Highest damaging pursuit in the game. This move is genuinely crazy good. It sports great range for a pursuit further compounded by the ability to cancel Lightning Spin Kick into it to pick up combos from nearly any knockdown. Unlike every other pursuit (and unlike in previous Real Bout games, oddly enough) there is no whiff animation for this, so a missed kara pursuit usually won't put you in much danger. But like Yamazaki's Todome pursuit, this will throw the opponent behind you on success. This means sometimes you might want to sacrifice some extra damage to keep the pressure going -- so don't always autopilot every knockdown into this. Just most of them.
|
|
Slash Uppercut
5AB
High Avoid Attack
|
| Damage
|
Stun
|
Startup
|
Active
|
Recovery
|
Hit Advantage
|
Block Advantage
|
Guard
|
Cancel
|
BS
|
Juggle
|
| 14
|
5/19
|
8
|
3
|
20
|
+3 (+6)
|
-3 (0)
|
HL
|
Y
|
N
|
N
|
Your most useful anti-air normal, though even with its solid priority it can still trade at inopportune times. Despite its flaky nature, you still want to maximize use of this both as an anti-air and as a counterpoke in close-up abare situations. Feint cancelling will give you better advantage on hit and safety on block, and resetting an airborne opponent will usually leave them in range to threaten with a kara Vacuum Throw if their first instinct after the reset is to turtle.
|
|
Jumping
| j.A
Normal Jump/Hop, Diagonal Hop Diagonal Jump
|
| Version
|
Damage
|
Stun
|
Startup
|
Active
|
Recovery
|
Hit Advantage
|
Block Advantage
|
Guard
|
Cancel
|
BS
|
Juggle
|
| Neutral Hop
|
9
|
3/12
|
5
|
N/A
|
6
|
-
|
-
|
H
|
-
|
-
|
-
|
| Diagonal Hop
|
9
|
3/12
|
5
|
N/A
|
6
|
-
|
-
|
H
|
-
|
-
|
-
|
| Neutral Jump
|
9
|
3/12
|
5
|
6
|
6
|
-
|
-
|
H
|
-
|
-
|
-
|
| Diagonal Jump
|
9
|
3/12
|
5
|
10
|
6
|
-
|
-
|
H
|
-
|
-
|
-
|
|
| j.B
|
| Version
|
Damage
|
Stun
|
Startup
|
Active
|
Recovery
|
Hit Advantage
|
Block Advantage
|
Guard
|
Cancel
|
BS
|
Juggle
|
| Neutral Hop
|
11
|
3/12
|
6
|
N/A
|
6
|
-
|
-
|
H
|
-
|
-
|
-
|
| Diagonal Hop
|
11
|
3/12
|
6
|
N/A
|
6
|
-
|
-
|
H
|
-
|
-
|
-
|
| Neutral Jump
|
11
|
3/12
|
6
|
6
|
6
|
-
|
-
|
H
|
-
|
-
|
-
|
| Diagonal Jump
|
11
|
3/12
|
6
|
8
|
6
|
-
|
-
|
H
|
-
|
-
|
-
|
|
| j.C
Jump C Hop C
|
| Version
|
Damage
|
Stun
|
Startup
|
Active
|
Recovery
|
Hit Advantage
|
Block Advantage
|
Guard
|
Cancel
|
BS
|
Juggle
|
| Neutral Hop
|
20
|
6/23
|
8
|
8
|
8
|
-
|
-
|
H
|
-
|
-
|
-
|
| Diagonal Hop
|
23
|
6/23
|
8
|
8
|
8
|
-
|
-
|
H
|
-
|
-
|
-
|
| Neutral Jump
|
8*3
|
3/8*3
|
8
|
N/A
|
8
|
-
|
-
|
H
|
-
|
-
|
-
|
| Diagonal Jump
|
8*3
|
3/8*3
|
8
|
N/A
|
8
|
-
|
-
|
H
|
-
|
-
|
-
|
|
Oversway Actions
5D
(opponent in oversway)
|
| Damage
|
Stun
|
Startup
|
Active
|
Recovery
|
Hit Advantage
|
Block Advantage
|
Guard
|
Cancel
|
BS
|
Juggle
|
| -
|
-
|
-
|
-
|
-
|
-
|
-
|
H
|
-
|
-
|
-
|
|
2D
(opponent in oversway)
|
| Damage
|
Stun
|
Startup
|
Active
|
Recovery
|
Hit Advantage
|
Block Advantage
|
Guard
|
Cancel
|
BS
|
Juggle
|
| -
|
-
|
-
|
-
|
-
|
-
|
-
|
L
|
-
|
-
|
-
|
|
A
(from oversway)
|
| Damage
|
Stun
|
Startup
|
Active
|
Recovery
|
Hit Advantage
|
Block Advantage
|
Guard
|
Cancel
|
BS
|
Juggle
|
| -
|
-
|
-
|
-
|
-
|
-
|
-
|
H
|
-
|
-
|
-
|
|
B
(from oversway)
|
| Damage
|
Stun
|
Startup
|
Active
|
Recovery
|
Hit Advantage
|
Block Advantage
|
Guard
|
Cancel
|
BS
|
Juggle
|
| -
|
-
|
-
|
-
|
-
|
-
|
-
|
L
|
-
|
-
|
-
|
|
C
(from oversway)
|
| Damage
|
Stun
|
Startup
|
Active
|
Recovery
|
Hit Advantage
|
Block Advantage
|
Guard
|
Cancel
|
BS
|
Juggle
|
| -
|
-
|
-
|
-
|
-
|
-
|
-
|
L
|
-
|
-
|
-
|
|
Throw
Clamp of the Tiger
4/6C
|
| Damage
|
Stun
|
Startup
|
Active
|
Recovery
|
Hit Advantage
|
Block Advantage
|
Guard
|
Cancel
|
BS
|
Juggle
|
| 26
|
-
|
-
|
-
|
-
|
-
|
-
|
-
|
-
|
-
|
-
|
Pretty normal throw that side switches and leaves the opponent just shy of Geese's feet. If he throws them into the corner, he can land a Divine Punishment afterwards.
|
|
Fatal Blow Bopper
632C during Clamp of the Tiger
|
| Damage
|
Stun
|
Startup
|
Active
|
Recovery
|
Hit Advantage
|
Block Advantage
|
Guard
|
Cancel
|
BS
|
Juggle
|
| 32
|
-
|
-
|
-
|
-
|
-
|
-
|
-
|
-
|
-
|
-
|
An alternate version of his standard throw, where Geese repeatedly palm strikes the opponent's face while they're on the ground. It does more damage, but Geese jumps away afterwards instead of remaining close. You're better off going for something else most of the time.
|
|
Mauling Tiger Crunch
3C
|
| Damage
|
Stun
|
Startup
|
Active
|
Recovery
|
Hit Advantage
|
Block Advantage
|
Guard
|
Cancel
|
BS
|
Juggle
|
| 8x5 (40)
|
-
|
-
|
-
|
-
|
-
|
-
|
-
|
-
|
-
|
-
|
Chokehold throw that deals the most damage of any of Geese's throws outside of Rashomon. It leaves the opponent on the same side, thus making this the throw to use if you want to keep your opponent's back to the wall. You can tack on even more damage with a well-timed Lightning Spin Kick kara cancel Divine Punishment afterwards -- this is much easier in the corner.
|
|
Feints
Feint Reppuken
2AC
|
| Damage
|
Stun
|
Startup
|
Active
|
Recovery
|
Hit Advantage
|
Block Advantage
|
Guard
|
Cancel
|
BS
|
Juggle
|
| -
|
-
|
-
|
-
|
22f total
|
-
|
-
|
-
|
-
|
-
|
-
|
Basic fireball fakeout. Despite the longer duration this can fake people out during pressure or neutral.
|
|
Feint Raging Storm
2BC
|
| Damage
|
Stun
|
Startup
|
Active
|
Recovery
|
Hit Advantage
|
Block Advantage
|
Guard
|
Cancel
|
BS
|
Juggle
|
| -
|
-
|
-
|
-
|
19f total
|
-
|
-
|
-
|
-
|
-
|
-
|
Expect to use this one a lot. Quick feint that makes a lot of attacks much better on block and opens up tick throws and a few combos.
|
|
Special Moves
Reppuken
214A
|
| Damage
|
Stun
|
Startup
|
Active
|
Recovery
|
Hit Advantage
|
Block Advantage
|
Guard
|
Cancel
|
BS
|
Juggle
|
| 16
|
5
|
17
|
-
|
49
|
-4
|
-6
|
Mid
|
N
|
Y (23f invuln)
|
N
|
Ground travelling fireball. It's deceptively easy to jump over, and the recovery is somewhat hefty, but it has a decent travelling speed that lets Geese pester from afar. If your chain doesn't end with a knockdown and you aren't up close, you'll be cancelling into this most of the time. Also functions well as a Breakshot, as it gains invincibility in that circumstance.
|
|
Double Reppuken
214C
|
| Damage
|
Stun
|
Startup
|
Active
|
Recovery
|
Hit Advantage
|
Block Advantage
|
Guard
|
Cancel
|
BS
|
Juggle
|
| 16+16 (30)/28
|
5+5/3
|
20, 40
|
-
|
40
|
-4
|
-6
|
Mid
|
N
|
Y (41f invuln)
|
N
|
Geese winds up his Reppuken before sending out a much bigger one that deals increased damage, eats opposing projectiles, and has a much taller hitbox. This one has some interesting properties. The initial windup period has a projectile hitbox that can nullify opposing projectiles before sending out a smaller one akin to 214A. Its long startup period makes it somewhat difficult to use in a traditional fireball sense, but it can make opposing zoners' lives a bit more difficult. Like its smaller counterpart, this gains invincibility as a Breakshot, but for a much longer period.
|
|
Palm Blast
41236A
|
| Damage
|
Stun
|
Startup
|
Active
|
Recovery
|
Hit Advantage
|
Block Advantage
|
Guard
|
Cancel
|
BS
|
Juggle
|
| 28
|
7
|
1
|
14
|
21
|
KD
|
N/A
|
N/A
|
N
|
N
|
N/A
|
Counter that catches all low-hitting attacks, including specials. Geese parries the incoming attack and palm slams the opponent in the face, sending them away. This can be ground teched unlike Dragon Throw, but does not switch sides. It's hard to use this properly unless you have a hard read on your opponent's pattern, but this is necessary to keep your opponent from brainlessly meatying you with lows all day.
|
|
Dragon Throw
41236B
|
| Damage
|
Stun
|
Startup
|
Active
|
Recovery
|
Hit Advantage
|
Block Advantage
|
Guard
|
Cancel
|
BS
|
Juggle
|
| 28
|
7
|
1
|
14
|
20
|
KD
|
N/A
|
N/A
|
N
|
N
|
N/A
|
Counter that catches all high-hitting attacks, grounded or airborne, and specials that do not hit low. Geese catches the incoming attack and slams them on the ground behind him for a long untechable knockdown. Your premier anti-air threat against aggressive opponents. On hit, this is a free Divine Punishment every time, which adds a not-insignificant chunk of extra damage on top.
|
|
Push of the Tiger
41236C
|
| Damage
|
Stun
|
Startup
|
Active
|
Recovery
|
Hit Advantage
|
Block Advantage
|
Guard
|
Cancel
|
BS
|
Juggle
|
| N/A
|
N/A
|
1
|
14
|
20
|
+18
|
N/A
|
N/A
|
N
|
N
|
N
|
Counter that catches any mid-hitting grounded normal. Geese grabs the opponent and shoves them behind him for a combo opportunity ala Scum Gale. This counter can be difficult to properly land a knockdown off of depending on the spacing, but the threat is huge if you can confirm it into Deadly Rave. Very useful counter that will beat a lot of offensive patterns clean if used properly.
|
|
Vacuum Throw
360A
53px range
|
| Damage
|
Stun
|
Startup
|
Active
|
Recovery
|
Hit Advantage
|
Block Advantage
|
Guard
|
Cancel
|
BS
|
Juggle
|
| 35
|
5
|
0
|
1
|
N/A
|
KD
|
N/A
|
Throw
|
N
|
N
|
N
|
Possibly one of Geese's most infamous moves in Real Bout 2. By itself, this is just a command grab, which is already pretty good. Like other command grabs, there is no associated whiff with this attack, thus leaving it essentially risk-free if buffered properly. On successful connect, it throws the opponent clear to the other side of the screen, which sounds bad. But Geese has very little trouble getting in thanks to the ability to cancel this off of Lightning Spin Kick's startup, giving him a much larger effective range in which he can land this. If the opponent jumps, the spin kick comes out unhindered, frequently still leaving Geese in a good position to punish their jump on landing or make some space. On top of that, if Geese throws the opponent into the corner with this, he can usually get in and still nail them with a Divine Punishment pursuit for more damage!
|
|
S-Power
Raging Storm
641236BC
|
| Damage
|
Stun
|
Startup
|
Active
|
Recovery
|
Hit Advantage
|
Block Advantage
|
Guard
|
Cancel
|
BS
|
Juggle
|
| 76
|
N
|
32
|
32
|
31
|
KD
|
-27
|
Mid
|
N
|
N
|
N
|
Occasional YOLO anti-air and chip tool. It starts up slow, but punishing can be tough for characters without quick forward movement due to how far this pushes back on block. It additionally hits the sway plane, though this is more for show than any genuine utility. Note this attack loses all hitboxes after chipping five times on block.
|
|
P-Power
Rashomon
360C
58px range
|
| Damage
|
Stun
|
Startup
|
Active
|
Recovery
|
Hit Advantage
|
Block Advantage
|
Guard
|
Cancel
|
BS
|
Juggle
|
| 0+110 (96)
|
0
|
0
|
1
|
N/A
|
KD
|
KD
|
Throw
|
N
|
N
|
N
|
The undisputed best command grab in the game. If you take Vacuum Throw and give it monstrous damage and a hair more range, you get this. It's largely identical in application to Vacuum Throw -- just be warned that depending on screen positioning your opponent might be able to act before you after this connects.
|
|
Deadly Rave
632146A ~ AABBBCCC 214C
|
| Damage
|
Stun
|
Startup
|
Active
|
Recovery
|
Hit Advantage
|
Block Advantage
|
Guard
|
Cancel
|
BS
|
Juggle
|
| 2+6+8+10*6+37
|
0
|
1+3
|
27
|
4
|
KD
|
-6
|
Mid
|
N
|
Y
|
N
|
|
Chain Attacks
Punch Starters
- 5A, 5B, 5C
- 5A, 5B, 2C, 2BC, 4B (Kara) 2C
NOTE: This combo uses Kara divine punishment, which is possible because of Geese's cancellable sweep, cancel into raging storm feint and then 4B and before the kick comes out press 2C when near to get the divine punishment.
NOTE: As soon as Geese lands press 2C for Divine Punishment followup
NOTE: When Geese hits the ground do the half circle back motion, and if the single hit followup comes out press 8A for a vaccum throw!
NOTE: Can add extra 2A but usually won't get both hits of 5C, still will combo but if you want both hits of 5C tighten up your timing or omit a 2A, if doing two 2As into 5C it has to be point blank in order for it to connect. 2C after 2A does more damage.
Kick Starters
- 2B, 2B, 2C/3C, 2BC 4B (Kara) 2C
NOTE: After the feint raging storm, immediately input 4B, before the kick comes out and you are close to the opponent tap 2C for divine punishment
One of Geese's strongest hitconfirm into deadly rave
NOTE: Like the 2B starter combo this uses kara cancelling a 4B into divine punishment after a raging storm feint
Strong Starters
None
Combos
Meterless
NOTE: This combo is only possible in the corner, and you have to TAP 2C not hold down, otherwise you will get sweep, does a ton of damage.
Metered
Here is a combo video of some of Geese's BnBs
http://www.youtube.com/watch?v=SaNSsMlyeKo
Strategy

