Introduction
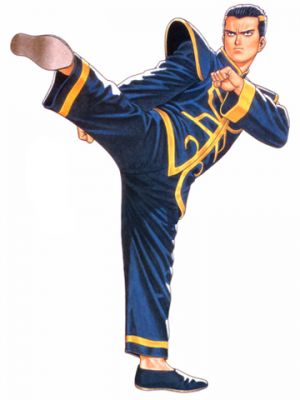
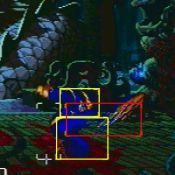
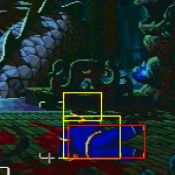
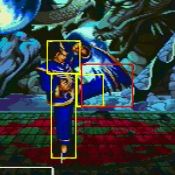
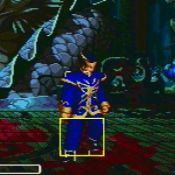
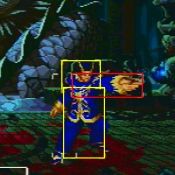
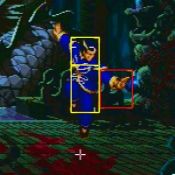
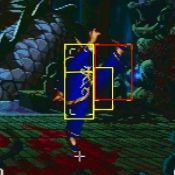
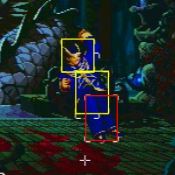
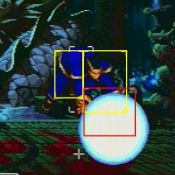
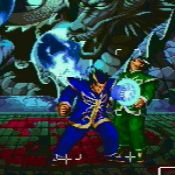
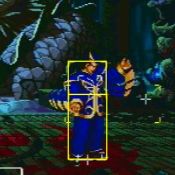
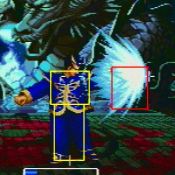
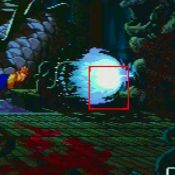
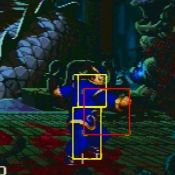
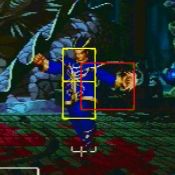
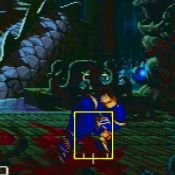
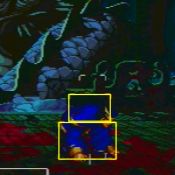
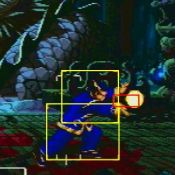
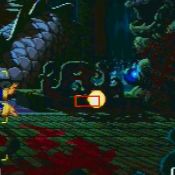
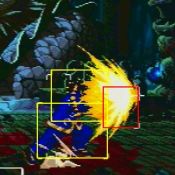
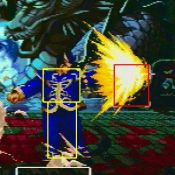
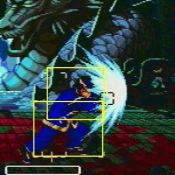
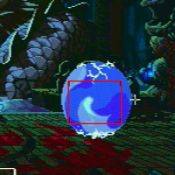
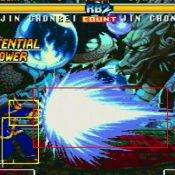
Tiny shoto child #1. Chonrei sports good fireballs, zippy movement, reliable combos, good anti-airs, a supremely dumb jumping normal in his j.C and the ability to low profile all sorts of stuff. You've probably guessed that Chonrei mostly wants to chuck fireballs and anti-air people for trying to jump over them, and you'd be right. He can also just roll right under them and get a guaranteed punish courtesy of his Transcendent Dragon rolls. These rolls amazingly enable him to get around some higher-hitting Breakshots and generally annoy people for trying to hit him. But none of this makes up for his lack of any sort of real overhead threat. He can tick throw better than most people, but if he doesn't have the life lead or his opponent can contest his zoning, he starts to struggle. But his overall toolkit is solid, so he's still great for shoto players looking for a slightly different flavor to their usual archetype.
| Pros |
Cons
|
- Some of the quickest ground movement in the game
- Great basic shoto tools
- S-Power lets him cut off huge swathes of screen space
- Transcendent Dragon rolls enable low profile punishes and tick throws
- j.C is a great crossup
|
- Can't combo into any of his supers
- Lame buttons outside of j.C
- Low burst damage combined with lacking high/low mixup renders comebacks difficult
- Slow and hard to use P-Power
|
Normals
Standing
| 5A
|
| Damage
|
Stun
|
Startup
|
Active
|
Recovery
|
Hit Advantage
|
Block Advantage
|
Guard
|
Cancel
|
BS
|
Juggle
|
| 8
|
-
|
5
|
2
|
10
|
4
|
0
|
HL
|
Y
|
-
|
-
|
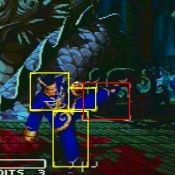
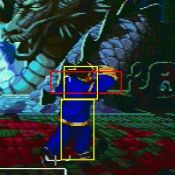
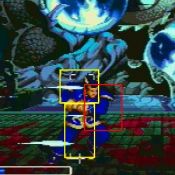
Standard mid-height jab. You can pretty reliably press this while dashing forward.
|
|
n.5A
(within 48 px of opponent)
|
| Damage
|
Stun
|
Startup
|
Active
|
Recovery
|
Hit Advantage
|
Block Advantage
|
Guard
|
Cancel
|
BS
|
Juggle
|
| 8
|
-
|
5
|
2
|
10
|
4
|
0
|
HL
|
Y
|
-
|
-
|
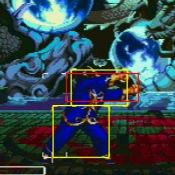
Close range mash jab. An effective bullying tool when used right.
|
|
| 5B
|
| Damage
|
Stun
|
Startup
|
Active
|
Recovery
|
Hit Advantage
|
Block Advantage
|
Guard
|
Cancel
|
BS
|
Juggle
|
| 10
|
-
|
6
|
3
|
12
|
1
|
-3
|
HL
|
Y
|
-
|
-
|
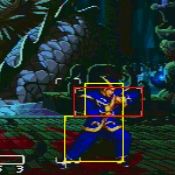
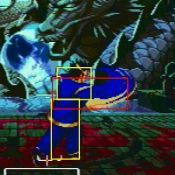
This starts Chonrei's highest damaging chain combo sequence, so get used to pressing this for punishes.
|
|
n.5B
(within 42 px of opponent)
|
| Damage
|
Stun
|
Startup
|
Active
|
Recovery
|
Hit Advantage
|
Block Advantage
|
Guard
|
Cancel
|
BS
|
Juggle
|
| 10
|
-
|
6
|
3
|
12
|
1
|
-3
|
HL
|
Y
|
-
|
-
|
|
|
|
| 5C
|
| Damage
|
Stun
|
Startup
|
Active
|
Recovery
|
Hit Advantage
|
Block Advantage
|
Guard
|
Cancel
|
BS
|
Juggle
|
| 23
|
-
|
8
|
6
|
20
|
0
|
-6
|
HL
|
N
|
-
|
-
|
The weak priority means it won't see much neutral use but if you don't think you can dash in for a 5B chain combo punish, this also works.
|
|
n.5C
(within 61 px of opponent)
|
| Damage
|
Stun
|
Startup
|
Active
|
Recovery
|
Hit Advantage
|
Block Advantage
|
Guard
|
Cancel
|
BS
|
Juggle
|
| 23
|
-
|
8
|
6
|
20
|
0
|
-6
|
HL
|
Y
|
-
|
-
|
|
Crouching
| 2A
|
| Damage
|
Stun
|
Startup
|
Active
|
Recovery
|
Hit Advantage
|
Block Advantage
|
Guard
|
Cancel
|
BS
|
Juggle
|
| 8
|
-
|
5
|
2
|
10
|
4
|
0
|
HL
|
Y
|
-
|
-
|
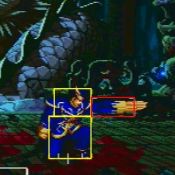
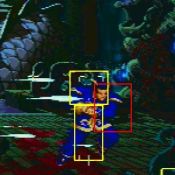
Strangely disjointed crouching jab. A good counterpoke with chain combo options.
|
|
| 2B
|
| Damage
|
Stun
|
Startup
|
Active
|
Recovery
|
Hit Advantage
|
Block Advantage
|
Guard
|
Cancel
|
BS
|
Juggle
|
| 10
|
-
|
6
|
3
|
12
|
1
|
-3
|
L
|
Y
|
-
|
-
|
A low risk option to try and force the opponent to block low and turtle.
|
|
| 2C
|
| Damage
|
Stun
|
Startup
|
Active
|
Recovery
|
Hit Advantage
|
Block Advantage
|
Guard
|
Cancel
|
BS
|
Juggle
|
| 23
|
-
|
8
|
3
|
20
|
KD
|
-3
|
L
|
Y
|
-
|
-
|
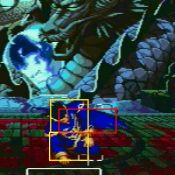
Despite Chonrei getting pretty low on the ground this move's low profile is essentially nonexistent. It's still a quick cancellable sweeping option and safe on block so it still has uses.
|
|
Command
Axe Kick
6B
|
| Damage
|
Stun
|
Startup
|
Active
|
Recovery
|
Hit Advantage
|
Block Advantage
|
Guard
|
Cancel
|
BS
|
Juggle
|
| 16
|
-
|
25
|
3
|
19
|
4
|
-2
|
H
|
N
|
-
|
-
|
Extremely slow overhead. The kara cancel window potentially enables Transcendent Dragon fakeouts but this move overall loses hard to mash and active defense.
|
|
Quick Punch
5AB
High Avoid Attack
|
| Damage
|
Stun
|
Startup
|
Active
|
Recovery
|
Hit Advantage
|
Block Advantage
|
Guard
|
Cancel
|
BS
|
Juggle
|
| 14
|
-
|
8
|
4
|
20
|
-8
|
-8
|
HL
|
Y
|
-
|
-
|
Like Chonshu's this is an underwhelming High Avoid. It tends to lose out or simply trade rather than beat stuff.
|
|
Jumping
| j.A
|
| Version
|
Damage
|
Stun
|
Startup
|
Active
|
Recovery
|
Hit Advantage
|
Block Advantage
|
Guard
|
Cancel
|
BS
|
Juggle
|
| Neutral Hop
|
8
|
-
|
5
|
9
|
6
|
+8
|
+4
|
H
|
N
|
-
|
-
|
| Diagonal Hop
|
8
|
-
|
5
|
9
|
6
|
+8
|
+4
|
H
|
N
|
-
|
-
|
| Neutral Jump
|
8
|
-
|
5
|
8
|
6
|
+8
|
+4
|
H
|
N
|
-
|
-
|
| Diagonal Jump
|
8
|
-
|
5
|
10
|
6
|
+8
|
+4
|
H
|
N
|
-
|
-
|
|
| j.B
|
| Version
|
Damage
|
Stun
|
Startup
|
Active
|
Recovery
|
Hit Advantage
|
Block Advantage
|
Guard
|
Cancel
|
BS
|
Juggle
|
| Neutral Hop
|
10
|
-
|
6
|
8
|
6
|
+8
|
+4
|
H
|
N
|
-
|
-
|
| Diagonal Hop
|
10
|
-
|
6
|
8
|
6
|
+8
|
+4
|
H
|
N
|
-
|
-
|
| Neutral Jump
|
10
|
-
|
6
|
6
|
6
|
+8
|
+4
|
H
|
N
|
-
|
-
|
| Diagonal Jump
|
10
|
-
|
6
|
8
|
6
|
+8
|
+4
|
H
|
N
|
-
|
-
|
|
| j.C
Normal Hop/Jump Diagonal Hop/Jump
|
| Version
|
Damage
|
Stun
|
Startup
|
Active
|
Recovery
|
Hit Advantage
|
Block Advantage
|
Guard
|
Cancel
|
BS
|
Juggle
|
| Neutral Hop
|
19
|
-
|
8
|
8
|
8
|
+15
|
+4
|
H
|
N
|
-
|
-
|
| Diagonal Hop
|
19
|
-
|
9
|
4
|
8
|
+15
|
+4
|
H
|
N
|
-
|
-
|
| Neutral Jump
|
19
|
-
|
8
|
6
|
8
|
+15
|
+4
|
H
|
N
|
-
|
-
|
A pretty good move to press to stomp people trying to go underneath you.
|
| Diagonal Jump
|
19
|
-
|
9
|
4
|
8
|
+15
|
+4
|
H
|
N
|
-
|
-
|
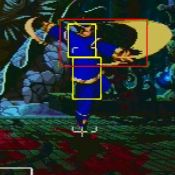
Genuinely insane button with great crossup potential. Combine this with air turnaround for some truly ambiguous crossups.
|
|
Oversway Actions
5D
(opponent in oversway)
|
| Damage
|
Stun
|
Startup
|
Active
|
Recovery
|
Hit Advantage
|
Block Advantage
|
Guard
|
Cancel
|
BS
|
Juggle
|
| 19
|
-
|
8
|
3,4
|
15
|
4
|
-2
|
H
|
Y
|
-
|
-
|
|
2D
(opponent in oversway)
|
| Damage
|
Stun
|
Startup
|
Active
|
Recovery
|
Hit Advantage
|
Block Advantage
|
Guard
|
Cancel
|
BS
|
Juggle
|
| 19
|
-
|
8
|
3,4
|
15
|
7
|
1
|
L
|
-
|
-
|
-
|
|
A
(from oversway)
|
| Damage
|
Stun
|
Startup
|
Active
|
Recovery
|
Hit Advantage
|
Block Advantage
|
Guard
|
Cancel
|
BS
|
Juggle
|
| 10
|
-
|
23
|
3
|
12
|
3
|
-1
|
H
|
N
|
-
|
-
|
|
B
(from oversway)
|
| Damage
|
Stun
|
Startup
|
Active
|
Recovery
|
Hit Advantage
|
Block Advantage
|
Guard
|
Cancel
|
BS
|
Juggle
|
| 10
|
-
|
21
|
3
|
12
|
1
|
-1
|
L
|
N
|
-
|
-
|
|
C
(from oversway)
|
| Damage
|
Stun
|
Startup
|
Active
|
Recovery
|
Hit Advantage
|
Block Advantage
|
Guard
|
Cancel
|
BS
|
Juggle
|
| 19
|
-
|
23
|
4
|
11
|
12
|
-3
|
HL
|
N
|
-
|
-
|
|
Throw
Blast Away
4/6C
|
| Damage
|
Stun
|
Startup
|
Active
|
Recovery
|
Hit Advantage
|
Block Advantage
|
Guard
|
Cancel
|
BS
|
Juggle
|
| 26
|
-
|
-
|
-
|
-
|
-
|
-
|
-
|
-
|
-
|
-
|
Standard throw that keeps the opponent in front of you. Sends them far enough away that you can either chase them into the corner or set up your fireball game again.
|
|
Feints
Feint Empire Destiny
2BC
|
| Damage
|
Stun
|
Startup
|
Active
|
Recovery
|
Hit Advantage
|
Block Advantage
|
Guard
|
Cancel
|
BS
|
Juggle
|
| -
|
-
|
-
|
-
|
27
|
-
|
-
|
-
|
-
|
-
|
-
|
Takes a bit long to be a pressure feint. It instead can fake the opponent into jumping to get around your S-Power.
|
|
Special Moves
Emperor's Eye
236A/C
|
| Version
|
Damage
|
Stun
|
Startup
|
Active
|
Recovery
|
Hit Advantage
|
Block Advantage
|
Guard
|
Cancel
|
BS
|
Juggle
|
| A
|
16
|
-
|
12
|
-
|
53 total
|
-5
|
-6
|
HL
|
-
|
Y
|
Y
|
| C
|
16
|
-
|
16
|
-
|
56 total
|
-4
|
-6
|
-
|
HL
|
Y
|
Y
|
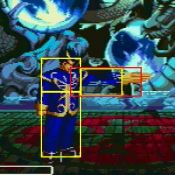
Really really nice and quick fireball with two very useful travel speeds. This combined with a lot of dashing forms the crux of your neutral. It's a half-decent Breakshot too.
|
|
Emperor Crunch
623A/C
4f invuln
|
| Version
|
Damage
|
Stun
|
Startup
|
Active
|
Recovery
|
Hit Advantage
|
Block Advantage
|
Guard
|
Cancel
|
BS
|
Juggle
|
| A
|
28
|
-
|
4
|
3(2)15
|
33
|
KD
|
-25
|
HL
|
-
|
Y
|
Y
|
| Version
|
Damage
|
Stun
|
Startup
|
Active
|
Recovery
|
Hit Advantage
|
Block Advantage
|
Guard
|
Cancel
|
BS
|
Juggle
|
| C
|
28
|
-
|
4
|
3(2)15
|
45
|
KD
|
-42
|
HL
|
-
|
Y
|
Y
|
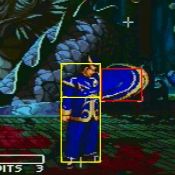
Standard DP that anti-airs and ends soome combos. The invincibility isn't all that great and if used early it has a nasty tendency to trade. But the quick startup lets you reliably use this as a deep anti-air to shut down jumpers.
|
|
Trascendent Dragon
236B/214B (Hold ok)
|
| Damage
|
Stun
|
Startup
|
Active
|
Recovery
|
Hit Advantage
|
Block Advantage
|
Guard
|
Cancel
|
BS
|
Juggle
|
| -
|
-
|
-
|
-
|
20-56 total
|
-
|
-
|
-
|
-
|
-
|
-
|
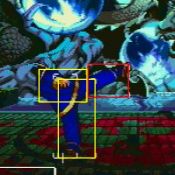
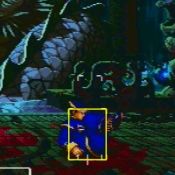
Annoying low profile roll; hold B to roll farther. You can go under all sorts of stuff from jumps to Breakshots or even just stuff during neutral and punish them, either with a throw or a full combo. Learn to love this move.
|
|
Emperor God Bop
66A
|
| Damage
|
Stun
|
Startup
|
Active
|
Recovery
|
Hit Advantage
|
Block Advantage
|
Guard
|
Cancel
|
BS
|
Juggle
|
| 28
|
-
|
7
|
9
|
28
|
-1
|
-7
|
HL
|
-
|
-
|
-
|
Short ranged elbow strike with annoyingly long recovery on whiff. Outclassed by 666A.
|
|
Extended Emperor God Bop
666A
|
| Damage
|
Stun
|
Startup
|
Active
|
Recovery
|
Hit Advantage
|
Block Advantage
|
Guard
|
Cancel
|
BS
|
Juggle
|
| 28
|
-
|
7
|
18
|
8
|
-1
|
-7
|
HL
|
-
|
-
|
-
|
The main differece here is that Chonrei goes way farther forward and has significantly shorter recovery. Sadly no matter which version you use your pressure is limited by being left at minus frames on hit. It's still a good tool to represent at midrange and try to bully your opponent out of your space. Or just to move around and get under their jump.
|
|
Emperor Blast
2146C
|
| Damage
|
Stun
|
Startup
|
Active
|
Recovery
|
Hit Advantage
|
Block Advantage
|
Guard
|
Cancel
|
BS
|
Juggle
|
| 28
|
-
|
33
|
-
|
65-120
|
KD
|
22
|
HL
|
-
|
Y
|
-
|
Restores 14 health points on hit
Mini Chonshu S-Power. The healing and damage aren't good enough to warrant risking the huge recovery this has on whiff.
|
|
S-Power
Empire Destiny Blow
641236BC-C-C-C
|
| Damage
|
Stun
|
Startup
|
Active
|
Recovery
|
Hit Advantage
|
Block Advantage
|
Guard
|
Cancel
|
BS
|
Juggle
|
| 20,20,20,20(67)
|
-
|
31
|
-
|
85 total
|
-19
|
-21
|
HL
|
-
|
-
|
-
|
Can absorb up to 4 projectiles
Despite being an S-Power, you need at red health to use this effectively, because each shot after the first one costs a chunk of meter, and the initial shot will completely drain your meter if your health is too high. With that out of the way, this is a good way to fill the screen with projectiles, and you can delay each shot for an incredibly long time to fake the opponent into thinking they can approach.
|
|
Empire Destiny Slash
641236BC (hold ok)
|
| Damage
|
Stun
|
Startup
|
Active
|
Recovery
|
Hit Advantage
|
Block Advantage
|
Guard
|
Cancel
|
BS
|
Juggle
|
| 13*5(61)
|
-
|
35-41
|
-
|
85 total
|
7
|
4
|
HL
|
-
|
N
|
-
|
Holding down BC will cause the projectile to travel forward with no hitbox, releasing BC will make it expand into a stationary multi-hitting projectile. This is a fantastic way to prevent the opponent from approaching you on the ground, allowing you to punish Oversway movement or careless jumps appropriately. It's also a threatening chip option at low life.
|
|
P-Power
Emperor Roar Destroyer
641236C
|
| Damage
|
Stun
|
Startup
|
Active
|
Recovery
|
Hit Advantage
|
Block Advantage
|
Guard
|
Cancel
|
BS
|
Juggle
|
| 96
|
-
|
1+25
|
12
|
21
|
+9
|
-6
|
HL
|
-
|
N
|
-
|
The slow startup prevents this from being useful for any real purpose other than hard read midrange anti-airs. And it's not even very good at that.
|
|
Chain Attacks
Combos
Meterless
Metered
Strategy
