Introduction
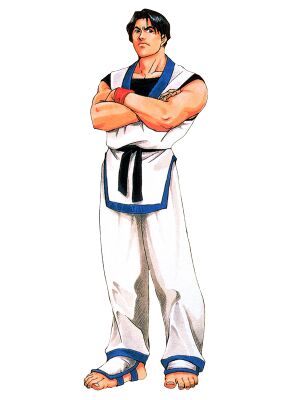
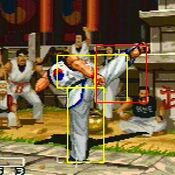
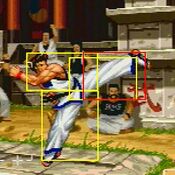
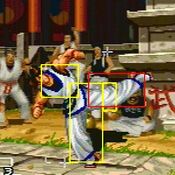
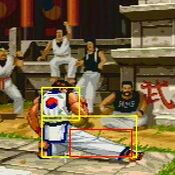
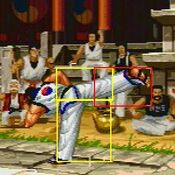
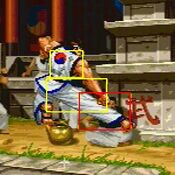
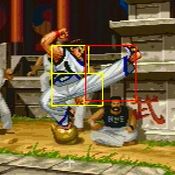
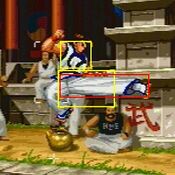
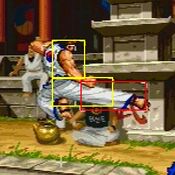
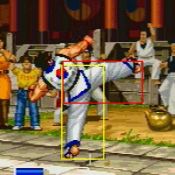
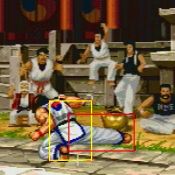
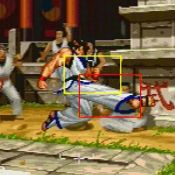
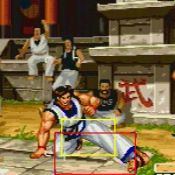
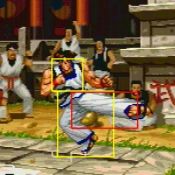
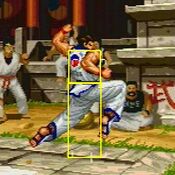
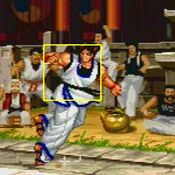
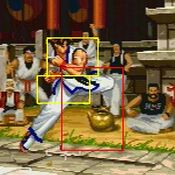
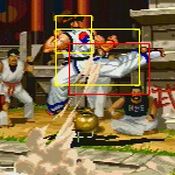
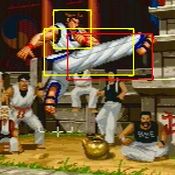
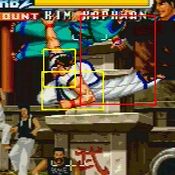
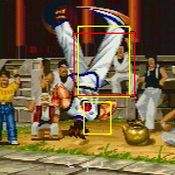
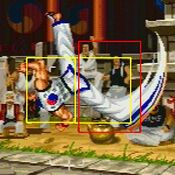
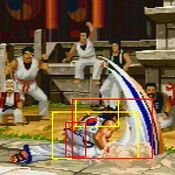
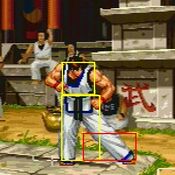
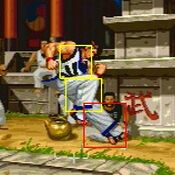
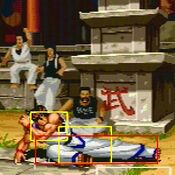
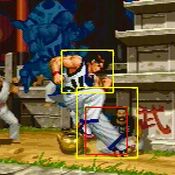
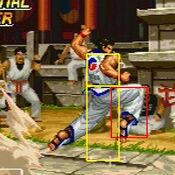
Kim Kaphwan is generally a phenomenal character in most games he's in and RB2 Kim is no exception. Kim functions as a defensive footsies focused character who has excellent recovery on his normals, many of which have good range and speed and can combo into his incredibly useful P-Power Hou'ou Kyaku. Add in a plethora of defensive tools to deter any approach and you have a character who thrives in neutral and can punish mistakes on a dime. While he shines on defense however, he lacks somewhat in the offensive department; zoning can really stifle Kim's gameplan as he has no real way to counter projectiles. He can also be out-poked by certain characters with little effort. Lastly, his high-low mixup is exceedingly poor, owing to telegraphed and easily punished overhead options. This forces him to rely on other means to get a hit in, primarily staggers and baiting Breakshots. Ideally, Kim wants to control the pace of the match and force the opponent to make a mistake before capitalizing appropriately. If you like a control-type playstyle that benefits off good defense, Kim is your man.
| Pros |
Cons
|
- Strong footsies
- Probably the best combo super in the game
- Great at abusing sway plane mechanics
- Endless easy hitconfirm opportunities
- Great defensive tools including a flash kick
- Can steal an entire round off of one clean conversion
|
- Can't do much if the opponent is blocking
- Overheads are slow and have bad data on hit/block
- Fireballs and invincible anti-airs give him trouble
- Some moves become unsafe or don't combo properly at poor spacing
|
Normals
Standing
| 5A
|
| Damage
|
Stun
|
Startup
|
Active
|
Recovery
|
Hit Advantage
|
Block Advantage
|
Guard
|
Cancel
|
BS
|
Juggle
|
| 7
|
3/11
|
5
|
2
|
10
|
4
|
0
|
HL
|
Yes
|
-
|
No
|
A short kick that confirms into two of Kim's chains; 5A>A>B>C and 5A>B>C with the latter working up to tip range. Can easily confirm into specials or super with 5A>B.
Note: You can get a version of 5A that slightly glides forward by inputting 2A during a dash, but this version doesn't go into chains and if you're too close will give you n.5A instead. Not much use, but it's good to know of.
|
|
| n.5A
|
| Damage
|
Stun
|
Startup
|
Active
|
Recovery
|
Hit Advantage
|
Block Advantage
|
Guard
|
Cancel
|
BS
|
Juggle
|
| 7
|
3/11
|
5
|
2
|
10
|
4
|
0
|
HL
|
Yes
|
-
|
No
|
For all intents and purposes it's the same button as 5A. It can whiff on smaller characters crouching however, so be cautious.
|
|
| 5B
|
| Damage
|
Stun
|
Startup
|
Active
|
Recovery
|
Hit Advantage
|
Block Advantage
|
Guard
|
Cancel
|
BS
|
Juggle
|
| 11
|
3/11
|
6
|
3
|
15
|
-2
|
-6
|
HL
|
Yes
|
-
|
No
|
Get very acquainted with this move. It's Kim's best standing poke, and a cancellable one at that. Unfortunately it's a bit more difficult to hit confirm as it does not chain into anything, but its range makes it an invaluable tool in Kim's footsies game.
|
|
| n.5B
|
| Damage
|
Stun
|
Startup
|
Active
|
Recovery
|
Hit Advantage
|
Block Advantage
|
Guard
|
Cancel
|
BS
|
Juggle
|
| 11
|
3/11
|
6
|
3
|
12
|
1
|
-3
|
HL
|
Yes
|
-
|
No
|
It's cancellable but it doesn't chain into anything so there's no real reason to use this over n.5A. It works pretty well as an anti air in a pinch due to a nice vertical hitbox, but with [2]8B in your pocket you shouldn't need to rely on it.
|
|
| 5C
Don't.
|
| Damage
|
Stun
|
Startup
|
Active
|
Recovery
|
Hit Advantage
|
Block Advantage
|
Guard
|
Cancel
|
BS
|
Juggle
|
| 23/23
|
4/22*2
|
7
|
8
|
32
|
-10
|
-16
|
HL
|
No
|
-
|
No
|
Hits twice for decent damage, but not consistently as the first hit has shorter range than the second. It's -10 on hit though it does push back. It's a lightning rod for punishment. More often than not, you're going to hit this by accident off a poorly spaced n.5C attempt and feel bad as a result. Best to just avoid this one.
|
|
| n.5C
|
| Damage
|
Stun
|
Startup
|
Active
|
Recovery
|
Hit Advantage
|
Block Advantage
|
Guard
|
Cancel
|
BS
|
Juggle
|
| 10/10
|
4/11*2
|
8
|
3
|
20
|
3
|
-3
|
HL
|
Yes
|
-
|
No
|
Kim's most damaging combo starter. Hits twice with both hits being cancellable. Not only is it the start to Kim's n.5C>A>B>C chain which follows easily into [2]8A~2A for just under half your opponent's health bar, it can also lead to some scary stagger pressure as a feint cancel leaves either hit neutral on block or +6 on hit for an easy link so long as you're close enough, though cancelling on the first hit is more consistent. Since the n.5C>A chain is cancellable it functions as an easy confirm into P-Power however at tip range the second hit can whiff, leaving Kim quite vulnerable.
|
|
Crouching
| 2A
|
| Damage
|
Stun
|
Startup
|
Active
|
Recovery
|
Hit Advantage
|
Block Advantage
|
Guard
|
Cancel
|
BS
|
Juggle
|
| 7
|
3/11
|
5
|
5
|
7
|
4
|
0
|
L
|
Yes
|
-
|
No
|
A fast low that can link into itself. Kim's best low starter as it chains directly into 5A and n.5A. As such, you can consider this an alternate starter to his chains.
|
|
| 2B
|
| Damage
|
Stun
|
Startup
|
Active
|
Recovery
|
Hit Advantage
|
Block Advantage
|
Guard
|
Cancel
|
BS
|
Juggle
|
| 11
|
3/11
|
6
|
3
|
14
|
-1
|
-5
|
L
|
Yes
|
-
|
No
|
Another one to familiarize yourself with. If 5B is Kim's best standing poke then 2B is his best low poke. It's effectively the same move as his far 5B but lowers his hurtbox and recovers faster.
|
|
| 2C
|
| Damage
|
Stun
|
Startup
|
Active
|
Recovery
|
Hit Advantage
|
Block Advantage
|
Guard
|
Cancel
|
BS
|
Juggle
|
| 23
|
6/26
|
8
|
6
|
20
|
-
|
-6
|
L
|
Yes
|
-
|
No
|
A cancellable sweep. It's fine but with 2B's range and utility you don't really need to throw this out unless you need a quick knockdown.
|
|
Command
| 6B
|
| Damage
|
Stun
|
Startup
|
Active
|
Recovery
|
Hit Advantage
|
Block Advantage
|
Guard
|
Cancel
|
BS
|
Juggle
|
| 16
|
4/22
|
18
|
5
|
22
|
-3
|
-9
|
H
|
No
|
-
|
No
|
An easily telegraphed overhead that can beat lows. You can cancel into it from any cancellable normal or chain attack. Sadly Kim's only real way to get the opponent to stand block outside of jumps or hops. It has its purpose but don't get attached to this one.
|
|
Gut Kick
5AB
High Avoid Attack
|
| Damage
|
Stun
|
Startup
|
Active
|
Recovery
|
Hit Advantage
|
Block Advantage
|
Guard
|
Cancel
|
BS
|
Juggle
|
| 14
|
5/18
|
8
|
6
|
19
|
-9
|
-9
|
HL
|
Yes
|
-
|
No
|
Kim's evade move. Shrinks his hurtbox to just his leading foot before the kick comes out but the evasion window is so small you're more likely to trade at best. An FC on hit or block increases the frame advantage to -4, making it safe should you choose not to cancel. Honestly it's pretty weak for an evade move.
|
|
Jumping
| j.A
|
| Version
|
Damage
|
Stun
|
Startup
|
Active
|
Recovery
|
Hit Advantage
|
Block Advantage
|
Guard
|
Cancel
|
BS
|
Juggle
|
| Neutral Hop
|
7
|
-
|
5
|
till landing
|
6
|
+8
|
+4
|
H
|
N
|
-
|
-
|
- An easy crossup that stays active until landing.
|
| Diagonal Hop
|
7
|
-
|
5
|
till landing
|
6
|
+8
|
+4
|
H
|
N
|
-
|
-
|
- An easy crossup that stays active until landing.
|
| Neutral Jump
|
7
|
-
|
4
|
10
|
6
|
+8
|
+4
|
H
|
Y
|
-
|
-
|
- Cancellable jump in. Allows Kim a unique air chain with j.8A>B, though it doesn't work on smaller characters.
|
| Diagonal Jump
|
7
|
-
|
5
|
8
|
6
|
+8
|
+4
|
H
|
Y
|
-
|
-
|
- Cancellable jump in that crosses up fairly easily. Allows Kim a unique air chain with j.7/9A>B, which will consistently work on the entire cast.
|
|
| j.B
Neutral Hop/Jump Diagonal Hop/Jump
|
| Version
|
Damage
|
Stun
|
Startup
|
Active
|
Recovery
|
Hit Advantage
|
Block Advantage
|
Guard
|
Cancel
|
BS
|
Juggle
|
| Neutral Hop
|
11
|
-
|
6
|
till landing
|
6
|
+8
|
+4
|
H
|
N
|
-
|
-
|
- It stays active until landing so it works pretty well at stuffing jumps and hops.
|
| Diagonal Hop
|
11
|
-
|
5
|
till landing
|
6
|
+8
|
+4
|
H
|
N
|
-
|
-
|
- Stays active until landing. More or less functions as an aerial poke. The range on it is exceptional.
|
| Neutral Jump
|
11
|
-
|
6
|
6
|
6
|
+8
|
+4
|
H
|
Y
|
-
|
-
|
- Cancellable with a decently vertical hitbox making it somewhat practical for certain air-to-air situations.
|
| Diagonal Jump
|
11
|
-
|
5
|
9
|
6
|
+8
|
+4
|
H
|
Y
|
-
|
-
|
- Cancellable with an decently horizontal hitbox making it somewhat practical for certain air-to-air situations.
|
|
| j.C
|
| Version
|
Damage
|
Stun
|
Startup
|
Active
|
Recovery
|
Hit Advantage
|
Block Advantage
|
Guard
|
Cancel
|
BS
|
Juggle
|
| Neutral Hop
|
19
|
-
|
7
|
7
|
8
|
+15
|
+9
|
H
|
N
|
-
|
-
|
- Not much different than j.C outside of not being cancellable.
|
| Diagonal Hop
|
19
|
-
|
7
|
7
|
8
|
+15
|
+9
|
H
|
N
|
-
|
-
|
- Not much different than j.C outside of not being cancellable.
|
| Neutral Jump
|
19
|
-
|
7
|
7
|
8
|
+15
|
+9
|
H
|
Y
|
-
|
-
|
- Cancellable with a downward hitbox and good damage; due to its hitstun it makes confirms very easy.
|
| Diagonal Jump
|
19
|
-
|
7
|
7
|
8
|
+15
|
+9
|
H
|
Y
|
-
|
-
|
- Cancellable with a downward hitbox and good damage; due to its hitstun it makes confirms very easy.
|
|
Oversway Actions
5D
(opponent in oversway)
|
| Damage
|
Stun
|
Startup
|
Active
|
Recovery
|
Hit Advantage
|
Block Advantage
|
Guard
|
Cancel
|
BS
|
Juggle
|
| 19
|
-
|
10
|
4
|
10
|
11
|
8
|
H
|
Y
|
-
|
-
|
|
2D
(opponent in oversway)
|
| Damage
|
Stun
|
Startup
|
Active
|
Recovery
|
Hit Advantage
|
Block Advantage
|
Guard
|
Cancel
|
BS
|
Juggle
|
| 19
|
-
|
7
|
3
|
10
|
KD
|
8
|
L
|
Y
|
-
|
-
|
|
A
(from oversway)
|
| Damage
|
Stun
|
Startup
|
Active
|
Recovery
|
Hit Advantage
|
Block Advantage
|
Guard
|
Cancel
|
BS
|
Juggle
|
| 10
|
-
|
21
|
4
|
12
|
+3
|
+1
|
H
|
-
|
-
|
-
|
|
B
(from oversway)
|
| Damage
|
Stun
|
Startup
|
Active
|
Recovery
|
Hit Advantage
|
Block Advantage
|
Guard
|
Cancel
|
BS
|
Juggle
|
| 10
|
-
|
24
|
4
|
12
|
+1
|
-1
|
L
|
-
|
-
|
-
|
|
C
(from oversway)
|
| Damage
|
Stun
|
Startup
|
Active
|
Recovery
|
Hit Advantage
|
Block Advantage
|
Guard
|
Cancel
|
BS
|
Juggle
|
| 19
|
-
|
24
|
6
|
11
|
+10
|
-4
|
HL
|
-
|
-
|
-
|
|
Throws
| 4/6C
Body Toss
|
| Damage
|
Stun
|
Startup
|
Active
|
Recovery
|
Hit Advantage
|
Block Advantage
|
Guard
|
Cancel
|
BS
|
Juggle
|
| 26
|
-
|
-
|
-
|
-
|
-
|
-
|
Unblockable
|
No
|
-
|
No
|
Standard throw. Will always switch sides, no matter which direction you hold.
|
|
Feints
Hou'ou Kyaku Feint
2BC
|
| Damage
|
Stun
|
Startup
|
Active
|
Recovery
|
Hit Advantage
|
Block Advantage
|
Guard
|
Cancel
|
BS
|
Juggle
|
| -
|
-
|
-
|
-
|
19
|
-
|
-
|
-
|
-
|
-
|
-
|
A feint of Kim's P-Power and in tandem with his normals and chains, one of the best in the game. This is a big part of Kim's gameplan on both offense and defense. It's basically a swiss army knife; you can use it for frame traps, safety, pressure and so on. It shaves enough frames off n.5C to leave it neutral on block and +6 on hit which enables a confirm into any 5A starter chains. You can also abuse it at the end of Kim's 5A>B>C chain to either reduce recovery on block or make his line shift game truly terrifying on hit, which we'll cover below in the strategies section.
|
|
Special Moves
Ku Sa Jin
[2]8A
Lower body invuln
|
| Damage
|
Stun
|
Startup
|
Active
|
Recovery
|
Hit Advantage
|
Block Advantage
|
Guard
|
Cancel
|
BS
|
Juggle
|
| 12*3(31)
|
1*3
|
4
|
2,2,7
|
49
|
KD
|
Death
|
HL
|
No
|
No
|
Yes
|
Kim's best combo ender, which juggles easily. It looks like an anti-air, and it has a decent angle, but it is nowhere near as good as [2]8B so don't use it outside of combos. Seriously, the block recovery is extremely variable but it is always punishable and the last hit can whiff easily on those crouch blocking, setting you up for disaster. That being said it can launch on any hit and is decently active so it's possible to catch mistakes with its low crush properties, but you have much safer tools for punishment.
|
|
Ku Sa Jin Finish
[2]8A~2A
|
| Damage
|
Stun
|
Startup
|
Active
|
Recovery
|
Hit Advantage
|
Block Advantage
|
Guard
|
Cancel
|
BS
|
Juggle
|
| 13(9)
|
-
|
8
|
3
|
39
|
KD
|
-
|
-
|
No
|
No
|
Yes
|
A follow up to [2]8A that is only accessible on hit. There's no reason not to tack this on for the extra damage.
|
|
Hangetsuzan
214B/C
Light Hangetsuzan Heavy Hangetsuzan
|
| Version
|
Damage
|
Stun
|
Startup
|
Active
|
Recovery
|
Hit Advantage
|
Block Advantage
|
Guard
|
Cancel
|
BS
|
Juggle
|
| B
|
8*2+16(29)
|
1*3
|
9
|
2,2,3
|
25
|
0
|
-6
|
HL
|
No
|
Yes
|
Yes
|
Light Hangetsuzan. Hits up to three times, beats lows and resets neutral on hit. One of Kim's most consistent enders. You'll go into this in cases where you don't have a charge and need a quick confirm which happens quite often. A great Break Shot as well. The main issue with this move is that depending on how it hits, the last hit can whiff and leave you at negative frames.
|
| C
|
16+19(32)
|
7
|
18
|
2,3
|
29
|
KD
|
-10
|
HL
|
No
|
Yes
|
Yes
|
Heavy Hangetsuzan. This one knocks down and travels significantly farther, but is much harder to confirm into as it has twice the startup and much easier to punish at -10. Like 214B it's a Break Shot, but due to its startup it's best to stick to 214B.
|
|
Hienzan
[2]7/8/9B
|
| Damage
|
Stun
|
Startup
|
Active
|
Recovery
|
Hit Advantage
|
Block Advantage
|
Guard
|
Cancel
|
BS
|
Juggle
|
| 35
|
5
|
6
|
11
|
44
|
KD
|
-32
|
HL
|
No
|
Yes
|
No
|
One of the best reversals in the game. Hienzan comes out quick, has great startup invulnerability, and above average damage. It can be angled either straight up, slightly forward, or decently forward depending on which direction you held up towards. As if it needed anything more, it's also one of the best Break Shots due to its speed. Despite all these positives it has a much more vertical than horizontal hitbox, and like any reversal not named Sky of Fire the recovery is terrible so try to make sure this lands.
|
|
Hakikyaku
22B
|
| Damage
|
Stun
|
Startup
|
Active
|
Recovery
|
Hit Advantage
|
Block Advantage
|
Guard
|
Cancel
|
BS
|
Juggle
|
| 15
|
5
|
15
|
5
|
9
|
14
|
8
|
L
|
No
|
Yes
|
No
|
A staggering low that gives heavy plus frames. It's Kim's best Break Shot as well if you're in P-Power. In neutral, considering Kim's opponents have little reason to respect his overheads, it's +8 on block allowing you to maintain your pressure. Assuming you do land a hit up close for a +14 advantage you can link with 5A>B at close range or 214B which is more consistent, but will still whiff at the farthest range. This is also true for Break Shot usage. That being said, with P-Power a hit from 22B at any range can easily link straight into Hou'ou Kyaku essentially giving you a P-Power Break Shot. And hey, you can just throw this out to build meter. Crazy. Keep this one in your pocket.
|
|
Hi Sho Kyaku
j.2B
|
| Damage
|
Stun
|
Startup
|
Active
|
Recovery
|
Hit Advantage
|
Block Advantage
|
Guard
|
Cancel
|
BS
|
Juggle
|
| 9*4(28)
|
1*4
|
8
|
1,1,1,1
|
22
|
-
|
-
|
HL
|
No
|
No
|
No
|
Kim's divekick. Can hit up to 4 times and will do so until it lands so be wary of Break Shots. You can cancel into it off any of Kim's jumping air normals. The best use for this move is that it will completely crush opposing AB anti-airs. It's actually not an overhead so it can be crouch blocked, though it's relatively safe if blocked, but keep in mind it has landing recovery and can still be punished depending on how it hits.
|
|
Judgment Kick
j.2B~3b
|
| Damage
|
Stun
|
Startup
|
Active
|
Recovery
|
Hit Advantage
|
Block Advantage
|
Guard
|
Cancel
|
BS
|
Juggle
|
| 14(+10)
|
1
|
6
|
25
|
12
|
KD
|
-15
|
L
|
No
|
No
|
No
|
A follow up to Kim's divekick that causes a KD and must be blocked low. You can use it on hit or block but not whiff. It's heavily punishable on block so it's best to confirm into this. On a blocked j.2B however it is possible to frame trap opponents trying to mash after with this so pay attention to what they do in response. You can even mess with the timing as you have a huge window to go into it.
|
|
S-Power
Hou'ou Tenbu Kyaku
j.41236BC
|
| Damage
|
Stun
|
Startup
|
Active
|
Recovery
|
Hit Advantage
|
Block Advantage
|
Guard
|
Cancel
|
BS
|
Juggle
|
| 70
|
-
|
14
|
~
|
16
|
KD
|
~
|
HL
|
N
|
N
|
N
|
A divekick super that can actually be tiger knee'd or confirmed off a j.C. Stays active until it lands or is blocked and is relatively safe on block as well. Despite being a jump super it does not hit overhead.
|
|
P-Power
Hou'ou Kyaku
21416C
|
| Damage
|
Stun
|
Startup
|
Active
|
Recovery
|
Hit Advantage
|
Block Advantage
|
Guard
|
Cancel
|
BS
|
Juggle
|
| 90
|
-
|
1+2
|
24
|
5
|
KD
|
-6
|
HL
|
N
|
N
|
N
|
Legitimately one of the best P-Powers in the game. Crazy easy to confirm, comes out insanely fast, does a ton of damage, is only BARELY unsafe and travels 3/4ths of the screen. This move is so good opponents just have to play differently when you are in P-Power. The fact that you can Break Shot 22B into it means as long as you're in P-Power they can't even pressure you on block without fear of this coming out. Quite literally a game changer.
|
|
Chains
5A>B>C / 2A>5A>B>C
5A>A>B>C / 2A>5A>A>B>C
5A>A>C
n.5C>A>B>C
Strategy
There are three basic gameplans to playing Kim. They are as follows: defense, offense, and plane shift abuse. The last two sound like they go hand in hand, but they'll each require their own section, so bear with me here.
Defense
This is the most fundamental aspect of Kim. He can shut a lot of characters down by just poking proactively with 2B. 2B will do basically everything it needs to, and thanks to needing to be blocked low it will prevent your opponent from simply walking out of your range. Poke with this a few times, and watch for them to jump in. Because you've been using 2B, you already have your charge ready for Hienzan. So anti-air them with that if they're in range. If they get up close, your light attacks are great for making space and letting you shift momentum to your favor. Just be warned of your n.5A whiffing over some crouchers.
Be sure to know your Breakshot options. Hienzan is by far the easiest and one of the most threatening, but its poor horizontal range means there are ways for the opponent to bait it out. Hangetsuzan is your second most useful. The B version has still relatively short range, but it's fast enough to hit a lot of stuff, while the C version goes a long distance and can possibly punish fireballs used just outside of poke range or other long recovery attacks. Hakikyaku is the most interesting one, but probably the least universally useful one. It's not nearly as easy to do as your other Breakshots but it can convert to a combo if your opponent is pressuring you point-blank.
If you've been thinking about your other options, like your Abare normals, you'll realize that all of Kim's light attacks can easily string into his ABC chain. This brings us to:
Offense
We've already told you why Kim's high/low mixup is bad. But that's not the point. Kim's 5ABC chain, n.5CABC chain, feint cancels, and Hakikyaku are all built with the sole purpose of staggering, frame trapping, and baiting Breakshots. There will be one part dedicated to each of these three options. Keep in mind that if you confirm a hit with ANY of these options and you have P-Power loaded, that's an opportunity to combo into Hou'ou Kyaku.
5ABC is the most basic. The idea here is that feint cancelling the final hit leaves you at neutral on block, but at such a range where your opponent will likely get outpoked by 2B if they try to mash. You might try the 5ABC feint cancel chain again, but that won't accomplish a whole lot other than lock the other guy in blockstun until they decide to Breakshot you. But you can feint cancel the earlier hits, or just stop after the first hit. You also have a very long window between the hits to delay and still get the next hit of the chain or cancel into Hakikyaku as a frame trap. That's all fine and dandy, but this chain by itself is pretty lame unless they get hit or you manage to frame trap them.
n.5CABC chain is the next step of this idea. The first attack hits twice, and the second normal can still be cancelled. You're left at plus frames pretty reliably for feint cancelling on hit, and are otherwise just left plain safe and at perfect Kim poking distance. It's also very easy to hitconfirm into the full string and get some pretty nuts damage for your trouble. But you can also combo into Hakikyaku with this, assuming you're in range. If that little light in your head went off telling you that this sounds like yet another Hou'ou Kyaku opportunity, you really are a Kim player.
Hakikyaku is where this gets REALLY fun. The main problem with the previous strings is that they're all mids in a game with pretty generous absolute guard, so there's little risk to just mashing Breakshots if they keep going. So this handy little stomp puts a quick stop to that. There are essentially no breakshots that end with a low-block input, so this move's different timing compared to his chain combos and options combined with hitting low means it's great at baiting breakshot attemps and hitting them. It's incredibly advantaged on block as well, so it's not like guessing the wrong timing on their Breakshot is the end of the world. This becomes, as usual, far more threatening when you're in P-Power and can confirm a good stomp into Hou'ou Kyaku. I know I keep talking about confirming hits into that, but that's how it is when you have a move this good.
Judiciously combine, mix, and match various ways to keep the opponent unable to sit there blocking. Feint cancel to stop your pressure short and start again, Hakikyaku to keep your turn, and stagger the hell out of them. Confirm every hit you can into Hou'ou Kyaku. And don't forget to bait and punish their AB attacks with a low-hitting option or even a Hishou Kyaku. This is all just a start.
You're probably wondering what happens if you just let the 5ABC chain rock on hit, and as such you're ready for:
Plane Shift Abuse
This is where Kim stops playing the game and becomes outright unfair. There is so much to possibly talk about here, so I won't bore you with the details. The basic idea here is that Kim's anti-plane tools in 5D and 2D are among the most absurd ones in the entire game. He gets access to a looping mixup ala Franco, but with the added benefit of a bunch of opportunities to combo into Hou'ou Kyaku and even an Option Select or two.
Keep in mind your best opportunity to get any of this started is off of a feint cancelled 5ABC chain. Without the feint, you aren't nearly advantaged enough to force a response. Here are a few basic ideas to get you started.
- Kim's 2D by itself will start up and recover faster than pretty much any back plane 5A. What this means is you can 2D, recover, and if your opponent 5A's over it, you get to 5D them for it.
- 5D will let you link into your 5ABC chain on hit at most ranges. This naturally lets you shove them right back there and force them to guess again.
- If your opponent backdashes in the back plane and you 5ABC'd them from close enough, you get to chase them down and punish their recovery with another 5ABC chain.
- You can jump over their back plane attack and Hishou Kyaku them for a healthy helping of damage and a knockdown.
