Gameplay Overview
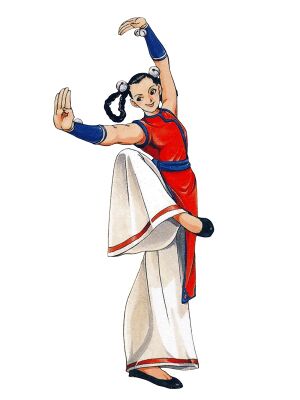
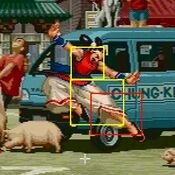
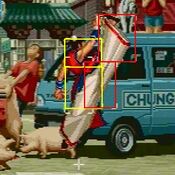
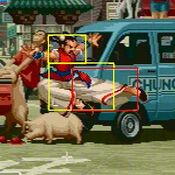
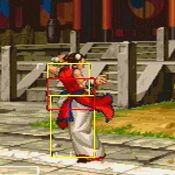
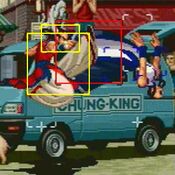
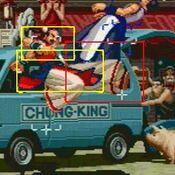
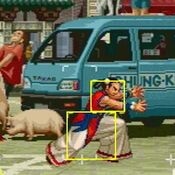
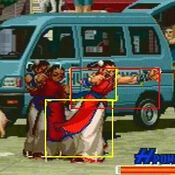
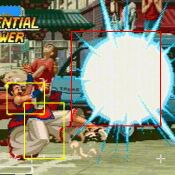
Xiangfei is a mobile, versatile character who does best when she's frustrating the opponent to death at mid to close range. Her frame data and mixups aren't quite solid enough to be played like some of the suffocating rushdown characters that she may superficially resemble, but her plethora of solid defensive options and surprising poke range supports a skittish but effective neutral-focused playstyle with a nice bag of gimmicks. The big downsides are her practically nonexistent high/low and awkwardly weak damage outside of close range. Still, a solid mid-high tier character overall.
| Pros |
Cons
|
- speedy ground movement
- good pokes
- fully invincible backdash
- unique set of counters can shut out predictable offense
- solid suite of breakshots
- builds meter quickly
- great corner pressure and massive corner carry with elbow
- can just delete you if she has super
|
- relatively weak damage-wise, even at close range her punishes aren't amazing without S- or P-power
- grounded anti-airs are either unreliable or extremely comittal
- no mix
|
Normals
Standing
| 5A
|
| Damage
|
Stun
|
Startup
|
Active
|
Recovery
|
Hit Advantage
|
Block Advantage
|
Guard
|
Cancel
|
BS
|
Juggle
|
| 6
|
3/11
|
5
|
2
|
10
|
4
|
0
|
HL
|
Y
|
-
|
-
|
|
|
|
| 5B
|
| Damage
|
Stun
|
Startup
|
Active
|
Recovery
|
Hit Advantage
|
Block Advantage
|
Guard
|
Cancel
|
BS
|
Juggle
|
| 8
|
3/11
|
6
|
3
|
18
|
-5
|
-9
|
HL
|
Y
|
-
|
-
|
Her longest reaching standing poke, confirm into 5BB3C juggle or 5B2B elbow on close to medium range hit and light puffball on farther hits.
|
|
| 5C
|
| Damage
|
Stun
|
Startup
|
Active
|
Recovery
|
Hit Advantage
|
Block Advantage
|
Guard
|
Cancel
|
BS
|
Juggle
|
| 21
|
6/22
|
14
|
4
|
20
|
2(3)
|
-4(-3)
|
HL
|
Y
|
-
|
-
|
Slow double palm strike. A decent punisher with a forgiving hitbox. This version of the attack will not give you the Chou Pailong followups, you need to land the close version.
|
|
n.5C
(within 83px of opponent)
|
| Damage
|
Stun
|
Startup
|
Active
|
Recovery
|
Hit Advantage
|
Block Advantage
|
Guard
|
Cancel
|
BS
|
Juggle
|
| 21
|
6/11
|
9
|
5
|
20
|
1(3)
|
-5(-3)
|
HL
|
Y
|
-
|
-
|
Somewhat faster double palm strike. The better startup helps, but it's still prone to getting stuffed if you just throw it out at close range. Decent meaty though, and the reward for landing it is massive if you have access to S-power.
|
|
Crouching
| 2A
|
| Damage
|
Stun
|
Startup
|
Active
|
Recovery
|
Hit Advantage
|
Block Advantage
|
Guard
|
Cancel
|
BS
|
Juggle
|
| 6
|
3/11
|
5
|
2
|
10
|
4
|
0
|
HL
|
Y
|
-
|
-
|
Standard jab from crouch. Almost entirely interchangable with 5a.
|
|
| 2B
|
| Damage
|
Stun
|
Startup
|
Active
|
Recovery
|
Hit Advantage
|
Block Advantage
|
Guard
|
Cancel
|
BS
|
Juggle
|
| 8
|
3/11
|
5
|
8
|
9
|
-1
|
-5
|
L
|
Y
|
-
|
-
|
Go-to low poke. Middling range but extremely quick (beating her jabs by a frame!) with safe chain options, if you're close enough to use this you probably want to.
|
|
| 2C
|
| Damage
|
Stun
|
Startup
|
Active
|
Recovery
|
Hit Advantage
|
Block Advantage
|
Guard
|
Cancel
|
BS
|
Juggle
|
| 21
|
6/26
|
9
|
8
|
28
|
KD
|
-14(-3)
|
L
|
Y
|
-
|
-
|
Sweep. Useful at footsie ranges where 5B and 2B would whiff or fail to confirm. Frame data is quite good if you feint cancel it or frame trap with a special, please don't let this whiff or go un-canceled.
|
|
Command
Ri mon Chou Chu
6A
|
| Damage
|
Stun
|
Startup
|
Active
|
Recovery
|
Hit Advantage
|
Block Advantage
|
Guard
|
Cancel
|
BS
|
Juggle
|
| 6
|
?
|
12
|
3
|
13
|
0
|
0
|
HL
|
Y
|
-
|
-
|
Like 5A with twice the startup and some forward movement. Pretty useless on its own, it can start chains into 5B3C juggle more consistently than B normals in certain punish situations, which is good when you want her corner combo. The most applicable use of this move is kara canceling into chains and specials, her 360C command grab gains a much needed (though still piddling) boost in range when kara cancelled from this move.
|
|
Kousentai
4B
|
| Damage
|
Stun
|
Startup
|
Active
|
Recovery
|
Hit Advantage
|
Block Advantage
|
Guard
|
Cancel
|
BS
|
Juggle
|
| 20
|
?
|
20
|
6
|
21
|
1(3)
|
-5(-3)
|
L
|
Y
|
-
|
-
|
Really gimmicky, same animation and range as 2C but takes twice as long to come out while leaving them standing with heavy hitstun for a confirm. Generally worse than sweep, but it has an interesting kara cancel window I guess.
|
|
Drunken Backhand
5AB
High Avoid Attack
|
| Damage
|
Stun
|
Startup
|
Active
|
Recovery
|
Hit Advantage
|
Block Advantage
|
Guard
|
Cancel
|
BS
|
Juggle
|
| 14
|
5/18
|
7
|
4
|
28
|
-6(3)
|
-12(-3)
|
HL
|
Y
|
-
|
-
|
It's her high avoid attack, does what it says on the tin. Not actually a very good anti-air at most angles, this thing's purpose is to poke/counter-poke and it's good at it. Don't whiff this one either if you can help it.
|
|
Jumping
| j.A
|
| Damage
|
Stun
|
Startup
|
Active
|
Recovery
|
Hit Advantage
|
Block Advantage
|
Guard
|
Cancel
|
BS
|
Juggle
|
| 6
|
3/11
|
5
|
8
|
5
|
9
|
5
|
HL
|
-
|
-
|
-
|
|
| j.B
Neutral Jump/Hop Diagonal Jump/Hop
|
| Version
|
Damage
|
Stun
|
Startup
|
Active
|
Recovery
|
Hit Advantage
|
Block Advantage
|
Guard
|
Cancel
|
BS
|
Juggle
|
| Neutral Jump/Hop
|
8
|
3/11
|
5
|
8
|
5
|
9
|
5
|
H
|
-
|
-
|
-
|
| Diagonal Jump
|
8
|
3/11
|
5
|
20
|
5
|
9
|
5
|
H
|
-
|
-
|
-
|
| Diagonal Hop
|
8
|
3/11
|
5
|
14
|
5
|
9
|
5
|
H
|
-
|
-
|
-
|
|
| j.C
Neutral Jump/Hop Diagonal Jump/Hop
|
| Version
|
Damage
|
Stun
|
Startup
|
Active
|
Recovery
|
Hit Advantage
|
Block Advantage
|
Guard
|
Cancel
|
BS
|
Juggle
|
| Neutral Jump
|
16
|
6/22
|
8
|
3
|
8
|
18
|
12
|
H
|
-
|
-
|
-
|
| Neutral Hop
|
16
|
6/22
|
8
|
6
|
5
|
18
|
12
|
H
|
-
|
-
|
-
|
| Diagonal Jump
|
16
|
6/22
|
13
|
9
|
8
|
15
|
9
|
H
|
-
|
-
|
-
|
| Diagonal Jump
|
16
|
6/22
|
13
|
10
|
5
|
18
|
12
|
H
|
-
|
-
|
-
|
|
Oversway Actions
5D
(opponent in oversway)
|
| Damage
|
Stun
|
Startup
|
Active
|
Recovery
|
Hit Advantage
|
Block Advantage
|
Guard
|
Cancel
|
BS
|
Juggle
|
| 18
|
4/18
|
7
|
3+3
|
18
|
2(3)
|
-4(-3)
|
H
|
Y
|
-
|
-
|
|
2D
(opponent in oversway)
|
| Damage
|
Stun
|
Startup
|
Active
|
Recovery
|
Hit Advantage
|
Block Advantage
|
Guard
|
Cancel
|
BS
|
Juggle
|
| 18
|
4/18
|
6
|
4+4
|
19
|
3
|
-3
|
L
|
N
|
-
|
-
|
|
A
(from oversway)
|
| Damage
|
Stun
|
Startup
|
Active
|
Recovery
|
Hit Advantage
|
Block Advantage
|
Guard
|
Cancel
|
BS
|
Juggle
|
| 8
|
2/11
|
24
|
2
|
12
|
2
|
0
|
H
|
N
|
-
|
-
|
|
B
(from oversway)
|
| Damage
|
Stun
|
Startup
|
Active
|
Recovery
|
Hit Advantage
|
Block Advantage
|
Guard
|
Cancel
|
BS
|
Juggle
|
| 8
|
2/11
|
24
|
4
|
12
|
1
|
-1
|
L
|
N
|
-
|
-
|
|
C
(from oversway)
|
| Damage
|
Stun
|
Startup
|
Active
|
Recovery
|
Hit Advantage
|
Block Advantage
|
Guard
|
Cancel
|
BS
|
Juggle
|
| 18
|
6/22
|
26
|
2
|
11
|
13
|
7
|
HL
|
N
|
-
|
-
|
|
Throw
Ryukuchi Kou'en
4/6C
|
| Damage
|
Stun
|
Startup
|
Active
|
Recovery
|
Hit Advantage
|
Block Advantage
|
Guard
|
Cancel
|
BS
|
Juggle
|
| 26
|
-
|
-
|
-
|
-
|
-
|
-
|
-
|
-
|
-
|
-
|
|
|
|
Feints
Tenpouzan Feint
4AC
|
| Damage
|
Stun
|
Startup
|
Active
|
Recovery
|
Hit Advantage
|
Block Advantage
|
Guard
|
Cancel
|
BS
|
Juggle
|
| -
|
-
|
-
|
-
|
22
|
-
|
-
|
-
|
-
|
-
|
-
|
Your go-to feint cancel, though far too slow to enable fancy combos. The upper body invulnerability this move confers is pretty useful, it can make counter-pokes and even breakshots whiff if timed right.
|
|
Daitetsujin Feint
2BC
|
| Damage
|
Stun
|
Startup
|
Active
|
Recovery
|
Hit Advantage
|
Block Advantage
|
Guard
|
Cancel
|
BS
|
Juggle
|
| -
|
-
|
-
|
-
|
24
|
-
|
-
|
-
|
-
|
-
|
-
|
Slower than 4AC and no change to your hitbox. Can psych out the opponent when you're in red life and random Daitetsujin is a real threat.
|
|
Special Moves
Nanpa
236A/C
Light Nanpa Heavy Nanpa
|
| Version
|
Damage
|
Stun
|
Startup
|
Active
|
Recovery
|
Hit Advantage
|
Block Advantage
|
Guard
|
Cancel
|
BS
|
Juggle
|
| A
|
28
|
5
|
14
|
4
|
29
|
-4
|
-6
|
HL
|
-
|
Y
|
Y
|
Light puffball. Great move to confirm, harass, and frame trap with though limited by its minus frames on hit/block. At close ranges and in the corner especially this move will immediately end your turn or even get you punished so don't autopilot into it. Varying the timing of this move can eat certain breakshots. Both versions delete projectiles.
|
| C
|
38
|
7
|
26
|
8
|
17
|
KD
|
2
|
HL
|
-
|
Y
|
Y
|
Heavy puffball. Xiangfei takes a step forward before loosing this, extending the total range to about halfscreen. Leaves you plus on block but extremely vulnerable to breakshots if they have meter. I think it kicks ass as a meaty if you know they won't breakshot or invincible reversal, +10 is hard to argue with and it can be timed to catch tech.
|
|
Tenpouzan
623B
9f invuln
|
| Damage
|
Stun
|
Startup
|
Active
|
Recovery
|
Hit Advantage
|
Block Advantage
|
Guard
|
Cancel
|
BS
|
Juggle
|
| 12+18(27)
|
2+4
|
4
|
5, 20
|
43
|
KD
|
lol
|
HL
|
-
|
Y
|
Y
|
Xiangfei's DP. Great invuln and priority, though the damage is somewhat low when only the 2nd hit connects. Horizontal range is bad, keep that in mind if you breakshot with this.
|
|
Senri Chuu'ou
236B
|
| Damage
|
Stun
|
Startup
|
Active
|
Recovery
|
Hit Advantage
|
Block Advantage
|
Guard
|
Cancel
|
BS
|
Juggle
|
| 24
|
5
|
21
|
22
|
25
|
KD
|
-5
|
HL
|
-
|
N
|
N
|
Elbow hitgrab you can combo into. Xiangfei dives towards the opponent and sends them flying to the corner of the screen if the grab connects. Always go for the followup.
|
|
Senri Chuu'ou: Kankuu
236B while landing Senri Chuu'ou
|
| Damage
|
Stun
|
Startup
|
Active
|
Recovery
|
Hit Advantage
|
Block Advantage
|
Guard
|
Cancel
|
BS
|
Juggle
|
| 11+11(17)
|
2+2
|
18
|
7, 10
|
20
|
KD
|
N/A
|
N/A
|
-
|
N
|
Y
|
Canned followup to Senri. One of the hits whiffs on Billy midscreen, halving the damage. Still, always do this.
|
|
Senri Chuu'ou: Shinsaiha
214B during Senri startup
|
| Damage
|
Stun
|
Startup
|
Active
|
Recovery
|
Hit Advantage
|
Block Advantage
|
Guard
|
Cancel
|
BS
|
Juggle
|
| 0+35(30†)
|
7
|
26
|
6
|
24
|
KD
|
N/A
|
THR
|
-
|
N
|
N
|
Alternate true command throw version of Senri, as such you can't combo into it. Use sparingly to break downbacking.
|
|
Esaka
A~6/2/8
Mid counter, 20f invuln Low counter, 20f invuln Anti-air counter, 9f invuln Drunken fist recovery
|
| Version
|
Damage
|
Stun
|
Startup
|
Active
|
Recovery
|
Hit Advantage
|
Block Advantage
|
Guard
|
Cancel
|
BS
|
Juggle
|
| Mid
|
20
|
0
|
13
|
7
|
61
|
KD
|
-46
|
HL
|
-
|
Y
|
N
|
Mid counter. Bizarre input (tap the stick direction immediately AFTER hitting the button), can be kara cancelled from 5a startup or hidden in non-actionable frames. If inputted correctly, any mid-hitting normals intersecting her hurtbox within a few frames will immediately trigger the counter.
|
| Version
|
Damage
|
Stun
|
Startup
|
Active
|
Recovery
|
Hit Advantage
|
Block Advantage
|
Guard
|
Cancel
|
BS
|
Juggle
|
| low
|
20
|
0
|
13
|
7
|
61
|
KD
|
-46
|
L
|
-
|
Y
|
N
|
Low counter. Similar to the above in all ways, but catches lows instead of mids.
|
| Version
|
Damage
|
Stun
|
Startup
|
Active
|
Recovery
|
Hit Advantage
|
Block Advantage
|
Guard
|
Cancel
|
BS
|
Juggle
|
| Anti-Air
|
20
|
0
|
10
|
4
|
37
|
KD
|
-19
|
HL
|
-
|
Y
|
N
|
Anti-air counter, by far the most useful of the three. Can turn any straightforward jump-in into a generous juggle. A bit annoying to do consistently but whiffing a 5A is more generous than, say, getting your ateminage empty jumped. However, it can be forced to whiff, notably by deep turnaround jumpins.
|
|
S-Power
Daitetsujin
64123BC
|
| Damage
|
Stun
|
Startup
|
Active
|
Recovery
|
Hit Advantage
|
Block Advantage
|
Guard
|
Cancel
|
BS
|
Juggle
|
| 76
|
?
|
23
|
18
|
25
|
KD
|
-4
|
HL
|
-
|
Y
|
Y
|
The shoulder check of a lifetime. Decently fast startup and has some limited use in combos. Can be an anti-air or just used randomly to fraud out huge damage from a stray poke/jump/dash. Generally only punishable by throws, and depending on the opponent's character and available resources getting thrown may or may not be worth risking. Geese, Yamazaki, Bob, Krauser, Duck (S-power), and Xiangfei (P-power) are especially dangerous here.
|
|
Chou Pailong
(after n.C), 616AB, 616AB
First Strike Second Strike
|
| Version
|
Damage
|
Stun
|
Startup
|
Active
|
Recovery
|
Hit Advantage
|
Block Advantage
|
Guard
|
Cancel
|
BS
|
Juggle
|
| First Strike
|
21
|
0
|
3
|
1
|
29
|
KD
|
-4
|
HL
|
Y
|
N
|
Y
|
616AB during the startup of or after hitting n.5c. When you have access to it, try and confirm this, it'll open up a lot of damage. There's some elder_tech associated with this move, as stated earlier you can actually do this during the STARTUP of n.5c if your execution is good enough (it's much harder than it sounds). gitr recommends 616C~AB~616AB, see article. This theoretically makes it an extremely fast and rewarding punisher and allows you to juggle into it in corner combos, but this may not be match-practical.
|
| Version
|
Damage
|
Stun
|
Startup
|
Active
|
Recovery
|
Hit Advantage
|
Block Advantage
|
Guard
|
Cancel
|
BS
|
Juggle
|
| Second Strike
|
49
|
0
|
6
|
2
|
62
|
KD
|
N/A
|
HL
|
N
|
N
|
Y
|
616AB again after landing the first Chou Pailong followup. Massive damage, always do it if you can. Only thing to watch out for is that it'll take them out of the corner if you use it there.
|
|
P-Power
Majinga
360C
Throw, 53pc range Strike
|
| Version
|
Damage
|
Stun
|
Startup
|
Active
|
Recovery
|
Hit Advantage
|
Block Advantage
|
Guard
|
Cancel
|
BS
|
Juggle
|
| Throw
|
96
|
-
|
0
|
1
|
N/A
|
KD
|
N/A
|
THR
|
-
|
N
|
N
|
This is the good stuff. A brutal 0f command throw with brutally awful range and the dubious honor of being the only command grab DM/SDM with a whiff animation in the entire game, the massive damage and fear factor more than make up for the downsides. Can be kara'd as 6A3214789C or buffered from dash, 5C66A, or the 4B5C to mitigate the awful range.
|
| Version
|
Damage
|
Stun
|
Startup
|
Active
|
Recovery
|
Hit Advantage
|
Block Advantage
|
Guard
|
Cancel
|
BS
|
Juggle
|
| Strike
|
54
|
-
|
25
|
4
|
61
|
KD
|
-37
|
HL
|
-
|
N
|
Y
|
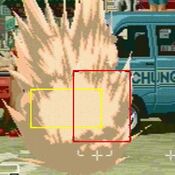
The version of Majinga you get if they can't be thrown on the activation frame (i.e. a glorified whiff). Xiangfei pops a large explosion projectile in front of her, dealing a little over half the damage of the command grab. You don't really want this, it'll only ever hit anyone if they're neutral jumping as you use it, which can happen from time to time when you go for command throw Majinga in corner pressure. Can also juggle off of anti-air Esaka but just use Daitetsujin instead please. Getting this blocked sucks ass, you'll eat their biggest jumpin punish while Xiangfei fixes her hair.
|
|
Chain Attacks
Punch Starters
A (*)  -------->  A (*)      ----->  A (*)     ----->  A       ----->  f + A (E)
d + A (*) |       d + A (*)          d + A (*)         d + A
f + A (*) |                          C (*, E)          B (*, E)
          |                                     C (E)
          |
          ----->  ;B (*)      ----->  C (O, E)
          |       d + B (*, _)        D + C (_, E)
          |                           fd + C (*, A, E)
          |                           D (<, E)
          |
          ----->  C (*)      ----->   A (*)     ----->  C (E)
                                      B (*, E)          A + B (T, E)
                                                        D (T, E)
A in air (O)--->  B (1, H, O, E)
                  C (1, H, O, E)
Kick Starters
B (*)  -------->  B(*)    -----> C (0, E)
d + B (*, _)      d + B (*, _)   d + C (_, E)
                                df + C (*, A, E)
                                D (<, E)
b + B (*, _)---> D (E)
B in air (O)---> C (F, H, 0, E)
Strong Starters
C (*) --------> f, f + A (1, >, E)
Combos
Meterless
- B5B doesn't have enough hitstun to land Senri
- 2B2B xx 236B 236B
- AAC xx 236B 236B
- A/B5B3C 236A
- j.C AB xx 236B 236B
- A useful confirm into Senri at jumpin spacings where 2B2B will whiff
Corner Only
- 236C 623B
- BB3C 236A 623B
- A~8 236A(x2-3) 623B
- Getting 3 Nanpas in the juggle requires the first one to hit late in its active frames, very difficult
- A~8(Trade) (5A5B)3C 236A(x2) 623B
Metered
- (j.B/j.C) 5C xx 616AB xx 616AB
- A5C 64123BC
- Extremely finicky to input
- A~8 64123BC 623B
- A~8 64123BC 616(C)~AB xx 616AB
- Linking Daitetsujin off of high Esaka can be extremely difficult or impossible depending on the height of the counter. It's free off of a trade.
Metered, Corner Only
- 2B2B 64123BC
- BB3C 236A 616(C)~AB xx 616AB
- A~8 236A(x1-3) 616(C)~AB xx 616AB
