|
|
| (103 intermediate revisions by 7 users not shown) |
| Line 1: |
Line 1: |
| {| style="margin-right:1em;" align="right" | | {{CharNavbox XIII}} |
| | __TOC__
| | {| class="wikitable" style="float:right; margin-left:10px;" |
| |}
| | |- |
| [[Image:Kyoxiii.jpg]] [[Image:Spacer.gif]] [[Image:Kyo.gif]] | | |[[File:XIII_Kyo_Profile.png|350px]] |
| | <center><font size="4"><b>Kyo Kusanagi</b></font></center> |
| | |- |
| | |- |
| | | [[File:XIII_Kyo.gif]] |
| | |} |
| | {{TOClimit|3}} |
|
| |
|
|
| |
|
| | ==Movelist== |
| '''Throws''' | | '''Throws''' |
|
| |
|
| ''Issetsu Seoi Nage'': [[image:bk.gif]]/[[image:fd.gif]] + [[image:c.gif]]/[[image:d.gif]] close
| | Issetsu Seoi Nage: [[File:bk.gif]]/[[File:fd.gif]] + [[File:c.gif]]/[[File:d.gif]] close |
|
| |
|
|
| |
|
| '''Command Moves''' | | '''Command Moves''' |
|
| |
|
| ''Goufu You'': [[image:fd.gif]] + [[image:b.gif]]
| | Goufu You: [[File:fd.gif]] + [[File:b.gif]] |
|
| |
|
| ''88 Shiki'': [[image:df.gif]] + [[image:d.gif]]
| | 88 Shiki: [[File:df.gif]] + [[File:d.gif]] |
|
| |
|
| ''Naraku Otoshi'': [[image:db.gif]]/ [[image:dn.gif]]/ [[image:df.gif]] + [[image:c.gif]] in the air
| | Naraku Otoshi: [[File:db.gif]]/ [[File:dn.gif]]/ [[File:df.gif]] + [[File:c.gif]] in the air |
|
| |
|
|
| |
|
| '''Special Moves''' | | '''Special Moves''' |
|
| |
|
| ''Yamibarai'': [[image:qcf.gif]] + [[image:a.gif]]/[[image:c.gif]] *
| | Yamibarai: [[File:qcf.gif]] + [[File:a.gif]]/[[File:c.gif]] * |
|
| |
|
| ''Oniyaki'': [[image:dp.gif]] + [[image:a.gif]]/[[image:c.gif]] *
| | Oniyaki: [[File:dp.gif]] + [[File:a.gif]]/[[File:c.gif]] * |
|
| |
|
| ''Kotokskio '': [[image:hcb.gif]] + [[image:b.gif]]/[[image:d.gif]] *
| | Kotokskio: [[File:hcb.gif]] + [[File:b.gif]]/[[File:d.gif]] * |
|
| |
|
| ''Oborogurma'': [[image:rdp.gif]] + [[image:b.gif]]/[[image:d.gif]] *
| | Oborogurma: [[File:rdp.gif]] + [[File:b.gif]]/[[File:d.gif]] * |
|
| |
|
| ''75 Shiki'': [[image:qcf.gif]] + [[image:b.gif]]/[[image:d.gif]] *
| | 75 Shiki: [[File:qcf.gif]] + [[File:b.gif]]/[[File:d.gif]] * |
|
| |
|
|
| |
|
| '''Desperation Moves''' | | '''Desperation Moves''' |
|
| |
|
| ''Orochinagi'': [[image:qcb.gif]][[image:hcf.gif]] + [[image:a.gif]]/[[image:c.gif]] *
| | Orochinagi: [[File:qcb.gif]][[File:hcf.gif]] + [[File:a.gif]]/[[File:c.gif]] * |
|
| |
|
| ''Air Orochinagi'': [[image:qcb.gif]][[image:hcf.gif]] + [[image:a.gif]]/[[image:c.gif]] *
| |
|
| |
|
| | Air Orochinagi: [[File:qcb.gif]][[File:hcf.gif]] + [[File:a.gif]]/[[File:c.gif]] * |
|
| |
|
| '''NeoMax'''
| |
|
| |
|
| ''Ama no Murakumo'': [[image:qcf.gif]][[image:qcf.gif]] + [[image:a.gif]]+[[image:c.gif]] | | '''Neomax''' |
|
| |
|
| {*) = EX version possible
| | Ama no Murakumo: [[File:qcf.gif]][[File:qcf.gif]] + [[File:a.gif]]+[[File:c.gif]] |
| | |
| | * = EX version possible |
|
| |
|
| :[http://www.youtube.com/watch?v=gFGRHodcFYM Kyo Kusanagi's Move List VIdeo] | | :[http://www.youtube.com/watch?v=gFGRHodcFYM Kyo Kusanagi's Move List VIdeo] |
| | |
|
| |
|
| {| border="1" align="center" style="font-size:90%" | | {| border="1" align="center" style="font-size:90%" |
| Line 57: |
Line 66: |
| Anywhere<br/> | | Anywhere<br/> |
| | | | | |
| cr.B, cr.A, df+D (1), qcf+D, hcb+K = 245 dmg<br/>
| | 2B, 2A, 3D(1), 236D, 214K = 245 dmg<br/> |
| j.C, cl.C, df+D (1), qcf+D, hcb+K = 330 dmg<br/> | | j.C, cl.C, 3D(1), 236D,214K = 330 dmg<br/> |
| |- | | |- |
|
| |
|
| Line 66: |
Line 75: |
| Corner<br/> | | Corner<br/> |
| | | | | |
| j.C, cl.C, df+D (1), qcf+D, rdp+B, rdp+BD = 363 dmg<br/> | | j.C, cl.C, 3D(1), 236D, 421B, 421BD = 363 dmg<br/> |
| cl.C, df+D (1), qcf+D, rdp+B, qcf+B, rdp+B, dp+AC = 364 dmg<br/> | | cl.C, 3D(1), 236D, 421B, 236B, 421B, 623AC = 364 dmg<br/> |
| |- | | |- |
| | '''1 Stock, 1+ Drive Gauge''' | | | '''1 Stock, 1+ Drive Gauge''' |
| Line 73: |
Line 82: |
| Corner<br/> | | Corner<br/> |
| | | | | |
| j.C, cl.C, df+D (1), qcf+D, rdp+B, (SC) air qcb~hcf+P, qcf+A, hcb+K = 510 dmg<br/> | | j.C, cl.C, 3D(1), 236D, 421B, (SC) air 2141236P, 236A, 63214K = 510 dmg<br/> |
| |- | | |- |
| | '''2 Stock, No Drive Gauge''' | | | '''2 Stock, No Drive Gauge''' |
| Line 79: |
Line 88: |
| Low<br/> | | Low<br/> |
| | | | | |
| cr.Bx2, s.B, qcf+B, qcb~hcf+AC = 412 dmg<br/>
| | 2Bx2, 5B, 236B, 2141236AC = 412 dmg<br/> |
| |- | | |- |
| |} | | |} |
|
| |
|
| | ==Console Changes== |
|
| |
|
| | - 88 Shiki (3D) moves forward more. As a result, 5C, 3D, 236K now does the full four hits. |
|
| |
|
| =Console Changes=
| | - Kototsuki You (63214K) has more lag on block |
|
| |
|
| - 88 Shiki (df+D) moves forward more. As a result, stand C, df+D, QCF+K now does the full four hits.
| | - B version of 75 Shiki Kai (236K) can now be followed up with other attacks. On the ground you can only follow up with an uppercut, but on a mid-air hit you can do more interesting things. |
| | |
| - Kototsuki You (HCB+K) has more lag on block
| |
| | |
| - B version of 75 Shiki Kai (QCF+K) can now be followed up with other attacks. On the ground you can only follow up with an uppercut, but on a mid-air hit you can do more interesting things. | |
|
| |
|
| - Added an EX version for his mid-air Orochinagi. It does 3 hits and 300 damage. Unlike the ground version it has no invincibility but is very fast, so you can use it in combos or in air-to-air battles. | | - Added an EX version for his mid-air Orochinagi. It does 3 hits and 300 damage. Unlike the ground version it has no invincibility but is very fast, so you can use it in combos or in air-to-air battles. |
|
| |
|
| - far D has less lag. | | - f.D has less lag. |
|
| |
|
| Yamamoto – ''"The air Orochinagi which he learned in KOF Sky Stage (laughs) and now the EX version on top of that has made him a master of the move. It’s now possible to do high damage combos off of a hit confirm with his df.D > qcf+D combo. Please try him out now that he has so many more attack options." | | Yamamoto – ''"The air Orochinagi which he learned in KOF Sky Stage (laughs) and now the EX version on top of that has made him a master of the move. It’s now possible to do high damage combos off of a hit confirm with his 3D > 236D combo. Please try him out now that he has so many more attack options." |
| '' | | '' |
|
| |
|
| =Gameplay Overview= | | ==Gameplay Overview== |
|
| |
|
| Kyo is a very noteworthy character with many powerful options to exploit during game play. He is a versatile character who has the tools to zone the opponent and/or rush the opponent down. He can also punish jump-ins very well with his Oniyaki (dp+P), EX Oborogurma (rdp+BD) but can also carry his opponent across the screen with moves such as 75 Shiki (qcf+K) and Oborogurma (rdp+K). His HD combos involve him using most of his moveset to get the most damaging combo out possible whether it's midscreen or in the corner. His play-style tends to be favored by people looking for someone who is flashy but at the same time isn't too difficult to learn. | | Kyo is a very noteworthy character with many powerful options to exploit during game play. He is a versatile character who has the tools to zone the opponent and/or rush the opponent down. He can also punish jump-ins very well with his Oniyaki (623P), EX Oborogurma (421BD) but can also carry his opponent across the screen with moves such as 75 Shiki (236K) and Oborogurma (421K). His HD combos involve him using most of his moveset to get the most damaging combo out possible whether it's midscreen or in the corner. His play-style tends to be favored by people looking for someone who is flashy but at the same time isn't too difficult to learn. |
|
| |
|
| Compared to alternate version NESTS Kyo, this version of Kyo is a bit more reliant on scoring easy hard knockdowns to set up either a safe jump option, a high/low okizeme mix-up or using his j.2C for some annoying cross-ups. He has stronger long range options using is qcf+P for zoning, and his NeoMax which can punish opponents at full screen. His HD combos are a bit more flashier and juggle-heavy which may require a fair amount of execution to pull off consistently but they are very damaging. His mid-range game both offensively and defensively are somewhat lacking in proper tools and options compared to NESTS Kyo, but long-range and close range potential can still make him a highly valid threat. | | Compared to alternate version NESTS Kyo, this version of Kyo is a bit more reliant on scoring easy hard knockdowns to set up either a safe jump option, a high/low okizeme mix-up or using his j.2C for some annoying cross-ups. He has stronger long range options using is 236P for zoning, and his NeoMax which can punish opponents at full screen. His HD combos are a bit more flashier and juggle-heavy which may require a fair amount of execution to pull off consistently but they are very damaging. His mid-range game both offensively and defensively are somewhat lacking in proper tools and options compared to NESTS Kyo, but long-range and close range potential can still make him a highly valid threat. |
|
| |
|
| =XIII Kyo vs NESTS Kyo Differences= | | ===XIII Kyo vs NESTS Kyo Differences=== |
|
| |
|
| * XIII Kyo does not combo from s.C to f.B, while NESTS Kyo does. | | * XIII Kyo does not combo from 5C to 6B, while NESTS Kyo does. |
| * The XIII Kyo's st.A whiffs completely on crouching opponents. However, NESTS Kyo's st.A will actually hit crouching opponents. | | * The XIII Kyo's 5A whiffs completely on crouching opponents. However, NESTS Kyo's 5A will actually hit crouching opponents. |
| * The XIII Kyo's EX Orochinagi DM has a quicker start up than NESTS Kyo's EX Orochinagi DM. | | * The XIII Kyo's EX Orochinagi DM has a quicker start up than NESTS Kyo's EX Orochinagi DM. |
| * NESTS Kyo is not capable of using Orochinagi in mid-air | | * NESTS Kyo is not capable of using Orochinagi in mid-air |
| * XIII Kyo's Oniyaki DP+A hits twice and DP+C hits three times. NESTS Kyo's DP+A hits once and the C version hits twice with autoguard properties. | | * XIII Kyo's Oniyaki 623A hits twice and 623C hits three times. NESTS Kyo's 623A hits once and the C version hits twice with autoguard properties. |
| * XIII Kyo's EX DP has him traveling straight up in a spiral. NESTS Kyo is stationary in mid-air during his EX DP. | | * XIII Kyo's EX DP has him traveling straight up in a spiral. NESTS Kyo is stationary in mid-air during his EX DP. |
| * XIII Kyo has more long range and zoning options than NESTS Kyo does. | | * XIII Kyo has more long range and zoning options than NESTS Kyo does. |
| * XIII Kyo's QCF+K up-kicks are automatic. NESTS Kyo will require the player to input an K to finish the move. | | * XIII Kyo's 236K up-kicks are automatic. NESTS Kyo will require the player to input an K to finish the move. |
| * NESTS Kyo’s df.D is not cancellable. | | * NESTS Kyo’s 3D is not cancellable. |
| * NESTS Kyo's HCB+K requires him to "catch" the opponent and then cause an explosion, while the EX version works as another damaging reversal option. NESTS Kyo will still go through the same animation sequence making the move unsafe. The XIII Kyo's version of this move automatically works after the first successful hit and the animations stops with Kyo's elbow in front of him. The EX version of the move works as a 4 frame command throw. | | * NESTS Kyo's 63214K requires him to "catch" the opponent and then cause an explosion, while the EX version works as another damaging reversal option. NESTS Kyo will still go through the same animation sequence making the move unsafe. The XIII Kyo's version of this move automatically works after the first successful hit and the animations stops with Kyo's elbow in front of him. The EX version of the move works as a 4 frame command throw. |
| * XIII Kyo lacks any safe special move reversals while NESTS Kyo has somewhat safer reversal options. | | * XIII Kyo lacks any safe special move reversals while NESTS Kyo has somewhat safer reversal options. |
|
| |
|
| Line 136: |
Line 143: |
|
| |
|
| ==Normals== | | ==Normals== |
| ===Standing=== | | |
| ===== <span class="invisible-header"></span> ===== | | ===Far Standing Normals=== |
| <font style="visibility:hidden" size="0"></font>
| | ==== ==== |
| {{MoveData
| | {{FrameDataCargo-KOFXIII |
| |image=
| | |moveId=kyo_sta |
| |caption=
| | |display= 100px |
| |name=s.A
| | |description= |
| |data=
| | Cancellable. Standard punch attack. Fast and stops a lot of short hops. It's okay from time to time in mid-range to throw this out to stop hops in advance if your opponent is really hop twitchy, especially if they are cornered. Disadvantages for this jab is that it lacks horizonal range and that it whiffs completely on crouching opponents. |
| {{AttackData-KOFXIII | |
| |Damage=25 | |
| |Guard=Mid | |
| |Startup= | |
| |Active=
| |
| |Recovery=
| |
| |Adv. Hit=
| |
| |On Block=+3
| |
| |Invulnerability=
| |
| |description=Cancellable. Standard punch attack. Fast and stops a lot of short hops. It's okay from time to time in mid-range to throw this out to stop hops in advance if your opponent is really hop twitchy, especially if they are cornered. Disadvantages for this jab is that it lacks horizonal range and that it whiffs completely on crouching opponents.
| |
| }}
| |
| }} | | }} |
|
| |
|
| ===== <span class="invisible-header"></span> ===== | | ==== ==== |
| <font style="visibility:hidden" size="0"></font>
| | {{FrameDataCargo-KOFXIII |
| {{MoveData | | |moveId=kyo_stb |
| |image=
| | |display= 140px |
| |caption=
| | |description= |
| |name=s.B
| | Special cancellable. A quick standing, low kick. Unlike previous years, Kyo had the ability to cancel this kick into his other normals, like his df+D for example. Now that ability has been removed, it is a little less useful. You can now only cancel this kick into his specials, like qcf+K for example (more importantly the B version of that move). |
| |data=
| | |
| {{AttackData-KOFXIII
| |
| |Damage=30 | |
| |Guard=Low | |
| |Startup= | |
| |Active=
| |
| |Recovery=
| |
| |Adv. Hit=
| |
| |On Block=-1
| |
| |Invulnerability=
| |
| |description=Special cancellable. A quick standing, low kick. Unlike previous years, Kyo had the ability to cancel this kick into his other normals, like his df+D for example. Now that ability has been removed, it is a little less useful. You can now only cancel this kick into his specials, like qcf+K for example (more importantly the B version of that move).
| |
| }}
| |
| }} | | }} |
|
| |
|
| ===== <span class="invisible-header"></span> ===== | | ==== ==== |
| <font style="visibility:hidden" size="0"></font>
| | {{FrameDataCargo-KOFXIII |
| {{MoveData
| | |moveId=kyo_stC |
| |image=
| | |display= 160px |
| |caption=
| | |description= |
| |name=s.C
| | Whiff cancellable and cancellable by itself. Strong punch that's aimed slightly upward. It has good range but it is very risky to use as an anti-air, because it's start-up is really slow and it's whiff recovery is really bad. |
| |data=
| |
| {{AttackData-KOFXIII | |
| |Damage=70 | |
| |Guard=Mid | |
| |Startup=3 | |
| |Active=
| |
| |Recovery=
| |
| |Adv. Hit=
| |
| |On Block=+0
| |
| |Invulnerability=
| |
| |description=Cancellable. Up close strong punch. Due to its speed, it is a bnb/combo starter of choice. Defensively it is best to use this move if your opponent is trying jump over your head, because of it's vertical height, or as a quick punish because of its fast start-up.
| |
| }}
| |
| }} | | }} |
|
| |
|
| ===== <span class="invisible-header"></span> ===== | | ==== ==== |
| <font style="visibility:hidden" size="0"></font>
| | {{FrameDataCargo-KOFXIII |
| {{MoveData
| | |moveId=kyo_std |
| |image=
| | |display= 170px |
| |caption=
| | |description= |
| |name=Far C
| | Not cancellable. Jumping turn kick. It has great reach and can be used to avoid some attacks that are aimed low as well, but it's a little slow. Kyo is minus on block during this kick, but he does get pushed back a small amount from the opponent. You can try to use this to bait mashing or jumping if the opponent is trying to get out of the corner. Overall, it is a decent poke but it can be beaten out by incoming hop attacks. |
| |data=
| |
| {{AttackData-KOFXIII | |
| |Damage=80 | |
| |Guard=Mid | |
| |Startup= | |
| |Active=
| |
| |Recovery=
| |
| |Adv. Hit=
| |
| |On Block=-9
| |
| |Invulnerability=
| |
| |description=Whiff cancellable and cancellable by itself. Strong punch that's aimed slightly upward. It has good range but it is very risky to use as an anti-air, because it's start-up is really slow and it's whiff recovery is really bad.
| |
| }}
| |
| }} | | }} |
|
| |
|
| ===== <span class="invisible-header"></span> ===== | | ===Close Standing Normals=== |
| <font style="visibility:hidden" size="0"></font>
| | ==== ==== |
| {{MoveData
| | {{FrameDataCargo-KOFXIII |
| |image=
| | |moveId=kyo_clc |
| |caption=
| | |display= 120px |
| |name=s.D
| | |description= |
| |data=
| | Cancellable. Up close strong punch. Due to its speed, it is a bnb/combo starter of choice. Defensively it is best to use this move if your opponent is trying jump over your head, because of it's vertical height, or as a quick punish because of its fast start-up. |
| {{AttackData-KOFXIII | |
| |Damage=80 | |
| |Guard=Mid | |
| |Startup= | |
| |Active=
| |
| |Recovery=
| |
| |Adv. Hit=
| |
| |On Block=-3
| |
| |Invulnerability=
| |
| |description=Not cancellable. Jumping turn kick. It has great reach and can be used to avoid some attacks that are aimed low as well, but it's a little slow. Kyo is minus on block during this kick, but he does get pushed back a small amount from the opponent. You can try to use this to bait mashing or jumping if the opponent is trying to get out of the corner. Overall, it is a decent poke but it can be beaten out by incoming hop attacks.
| |
| }}
| |
| }} | | }} |
|
| |
|
| ===Crouching=== | | ===Crouching Normals=== |
| ===== <span class="invisible-header"></span> ===== | | ==== ==== |
| <font style="visibility:hidden" size="0"></font>
| | {{FrameDataCargo-KOFXIII |
| {{MoveData
| | |moveId=kyo_crA |
| |image=
| | |display= 160px |
| |caption=
| |
| |name=cr.A
| |
| |data=
| |
| {{AttackData-KOFXIII | |
| |Damage=25 | |
| |Guard=Mid
| |
| |Startup=
| |
| |Active=
| |
| |Recovery=
| |
| |Adv. Hit=
| |
| |On Block=+1
| |
| |Invulnerability= | |
| |description=Cancellable. Crouching punch attack. A very quick poke, preferred to be chained to his df+D. The range is a bit shorter compared to his cr.B, but it reaches a bit farther than his s.A. | | |description=Cancellable. Crouching punch attack. A very quick poke, preferred to be chained to his df+D. The range is a bit shorter compared to his cr.B, but it reaches a bit farther than his s.A. |
| }}
| |
| }} | | }} |
|
| |
|
| ===== <span class="invisible-header"></span> ===== | | ==== ==== |
| <font style="visibility:hidden" size="0"></font>
| | {{FrameDataCargo-KOFXIII |
| {{MoveData
| | |moveId=kyo_crB |
| |image=
| | |display= 180px |
| |caption=
| | |description= |
| |name=cr.B
| | Cancellable. A quick crouching kick. It's a great poke that's good for chaining into combos, has excellent range and can be chained. It is neutral on block, so you can use this kick to try to read if your opponent will mash or try to move around if they are itching to get out of the corner. |
| |data=
| |
| {{AttackData-KOFXIII | |
| |Damage=30 | |
| |Guard=Low | |
| |Startup= | |
| |Active=
| |
| |Recovery=
| |
| |Adv. Hit=
| |
| |On Block=+1
| |
| |Invulnerability=
| |
| |description=Cancellable. A quick crouching kick. It's a great poke that's good for chaining into combos, has excellent range and can be chained. It is neutral on block, so you can use this kick to try to read if your opponent will mash or try to move around if they are itching to get out of the corner.
| |
| }}
| |
| }} | | }} |
|
| |
|
| ===== <span class="invisible-header"></span> ===== | | ==== ==== |
| <font style="visibility:hidden" size="0"></font>
| | {{FrameDataCargo-KOFXIII |
| {{MoveData | | |moveId=kyo_crC |
| |image=
| | |display= 80px |
| |caption=
| |
| |name=cr.C
| |
| |data=
| |
| {{AttackData-KOFXIII
| |
| |Damage=70 | |
| |Guard=Mid
| |
| |Startup=
| |
| |Active=
| |
| |Recovery=
| |
| |Adv. Hit=
| |
| |On Block=-8 | |
| |Invulnerability=
| |
| |description=Cancellable. Crouch uppercut attack, good reach, great priority, very fast, and good as a ground anti-air. Try not to use this against hop attacks or else it will get beaten out or they will trade. | | |description=Cancellable. Crouch uppercut attack, good reach, great priority, very fast, and good as a ground anti-air. Try not to use this against hop attacks or else it will get beaten out or they will trade. |
| }}
| |
| }} | | }} |
|
| |
|
| ===== <span class="invisible-header"></span> ===== | | ==== ==== |
| <font style="visibility:hidden" size="0"></font>
| | {{FrameDataCargo-KOFXIII |
| {{MoveData | | |moveId=kyo_crD |
| |image=
| | |display= 200px |
| |caption=
| |
| |name=cr.D
| |
| |data=
| |
| {{AttackData-KOFXIII
| |
| |Damage=80 | |
| |Guard=Low
| |
| |Startup=
| |
| |Active=
| |
| |Recovery=
| |
| |Adv. Hit=KD
| |
| |On Block=-8
| |
| |Invulnerability= | |
| |description=Whiff and hit cancellable. A crouch sweep attack. It knocks standing opponents down when hits and has good reach but it's rather slow. You can try to cancel it into another move if blocked or whiffed. | | |description=Whiff and hit cancellable. A crouch sweep attack. It knocks standing opponents down when hits and has good reach but it's rather slow. You can try to cancel it into another move if blocked or whiffed. |
| }}
| |
| }} | | }} |
|
| |
|
| ===Jumping=== | | ===Jump Normals=== |
| ===== <span class="invisible-header"></span> ===== | | ==== ==== |
| <font style="visibility:hidden" size="0"></font>
| | {{FrameDataCargo-KOFXIII |
| {{MoveData
| | |moveId=kyo_jA |
| |image=
| | |display= 150px |
| |caption=
| |
| |name=j.A
| |
| |data=
| |
| {{AttackData-KOFXIII | |
| |Damage=40 (45) | |
| |Guard=Overhead
| |
| |Startup=6
| |
| |Active=
| |
| |Recovery=
| |
| |Adv. Hit=
| |
| |On Block=
| |
| |Invulnerability= | |
| |description=Cancellable. Jumping elbow attack. It comes out fast but the range is mediocre. You can use this as an air-to-air too but it might get beaten out by longer jump attacks. This attack might whiff if used incorrectly against crouching opponents. | | |description=Cancellable. Jumping elbow attack. It comes out fast but the range is mediocre. You can use this as an air-to-air too but it might get beaten out by longer jump attacks. This attack might whiff if used incorrectly against crouching opponents. |
| }}
| |
| }} | | }} |
|
| |
|
| ===== <span class="invisible-header"></span> ===== | | ==== ==== |
| <font style="visibility:hidden" size="0"></font>
| | {{FrameDataCargo-KOFXIII |
| {{MoveData
| | |moveId=kyo_jb,kyo_hb |
| |image=
| | |display= 110px |
| |caption=
| | |description2=Jumping knee attack. It has good priority, stays out for a bit and crosses-up. Even though the range is short, it doesn't have the susceptibility of being anti-aired with crouching B's like his j.2C or j.D. |
| |name=j.B
| |
| |data=
| |
| {{AttackData-KOFXIII | |
| |Damage=40 (45) | |
| |Guard=Overhead
| |
| |Startup=5
| |
| |Active= | |
| |Recovery= | |
| |Adv. Hit=
| |
| |On Block=
| |
| |Invulnerability=
| |
| |description=Jumping knee attack. It has good priority, stays out for a bit and crosses-up. Even though the range is short, it doesn't have the susceptibility of being anti-aired with crouching B's like his j.2C or j.D.
| |
| }}
| |
| }} | | }} |
|
| |
|
| ===== <span class="invisible-header"></span> ===== | | ==== ==== |
| <font style="visibility:hidden" size="0"></font>
| | {{FrameDataCargo-KOFXIII |
| {{MoveData
| | |moveId=kyo_jC |
| |image=
| | |display= 160px |
| |caption=
| |
| |name=j.C
| |
| |data=
| |
| {{AttackData-KOFXIII | |
| |Damage=70 (72) | |
| |Guard=Overhead
| |
| |Startup=6
| |
| |Active=
| |
| |Recovery=
| |
| |Adv. Hit=
| |
| |On Block=
| |
| |Invulnerability= | |
| |description=Jumping punch attack. A great jump-in move that does good damage. It points down at a 60 degree angle which good for jumping in with. If you use it as an air-to-air it may get beaten out by jump attacks that have a more horizontal hitbox. Defensively you can use it while you are jumping away against opponents trying to advance on you in mid-range, either by them jumping at you, or running towards you. You can also use it to jump away after blocking a j.CD if the opponent likes to hop at you afterwards to continue pressure. | | |description=Jumping punch attack. A great jump-in move that does good damage. It points down at a 60 degree angle which good for jumping in with. If you use it as an air-to-air it may get beaten out by jump attacks that have a more horizontal hitbox. Defensively you can use it while you are jumping away against opponents trying to advance on you in mid-range, either by them jumping at you, or running towards you. You can also use it to jump away after blocking a j.CD if the opponent likes to hop at you afterwards to continue pressure. |
| }}
| |
| }} | | }} |
|
| |
|
| ===== <span class="invisible-header"></span> ===== | | ==== ==== |
| <font style="visibility:hidden" size="0"></font>
| | {{FrameDataCargo-KOFXIII |
| {{MoveData
| | |moveId=kyo_jD |
| |image=
| | |display= 170px |
| |caption=
| |
| |name=j.D
| |
| |data=
| |
| {{AttackData-KOFXIII | |
| |Damage=70 (68) | |
| |Guard=Overhead
| |
| |Startup=8
| |
| |Active=
| |
| |Recovery=
| |
| |Adv. Hit=
| |
| |On Block=
| |
| |Invulnerability= | |
| |description=A very useful air-to-air kick that should be used earlier than later because of it's range. A great move to be used defensively to keep advancing opponents out. The only risk with this kick is that it completely whiffs on crouching opponents, so be very careful using this offensively. Your opponent can just duck under it and punish you with a low attack. | | |description=A very useful air-to-air kick that should be used earlier than later because of it's range. A great move to be used defensively to keep advancing opponents out. The only risk with this kick is that it completely whiffs on crouching opponents, so be very careful using this offensively. Your opponent can just duck under it and punish you with a low attack. |
| }}
| |
| }} | | }} |
|
| |
|
| ===Blowback Attack=== | | ===Blowback Normals=== |
| ===== <span class="invisible-header"></span> ===== | | ==== ==== |
| <font style="visibility:hidden" size="0"></font>
| | {{FrameDataCargo-KOFXIII |
| {{MoveData | | |moveId=kyo_stcd |
| |image=
| | |display= 140px |
| |caption=
| |
| |name=CD
| |
| |data=
| |
| {{AttackData-KOFXIII
| |
| |Damage=75 | |
| |Guard=
| |
| |Startup=
| |
| |Active=
| |
| |Recovery=
| |
| |Adv. Hit=
| |
| |On Block=-1 | |
| |Invulnerability=
| |
| |description=Whiff and hit cancellable. A very fast shoulder tackle. You can whiff cancel this to add a bit more range to some of your special moves or to use it as a fake out to catch players trying to advance on your thinking your just whiffing this for no reason (ex. CD -> hcb+K). | | |description=Whiff and hit cancellable. A very fast shoulder tackle. You can whiff cancel this to add a bit more range to some of your special moves or to use it as a fake out to catch players trying to advance on your thinking your just whiffing this for no reason (ex. CD -> hcb+K). |
| }}
| |
| }} | | }} |
|
| |
|
| ===== <span class="invisible-header"></span> ===== | | ==== ==== |
| <font style="visibility:hidden" size="0"></font>
| | {{FrameDataCargo-KOFXIII |
| {{MoveData
| | |moveId=kyo_jcd |
| |image=
| | |display= 130px |
| |caption=
| |
| |name=j.CD
| |
| |data=
| |
| {{AttackData-KOFXIII | |
| |Damage=90 (80) | |
| |Guard=Mid
| |
| |Startup=13
| |
| |Active=
| |
| |Recovery=
| |
| |Adv. Hit=
| |
| |On Block=
| |
| |Invulnerability= | |
| |description=Cancellable. Air shoulder tackle. It comes out pretty quick and delivers a chunk of hit-stun like many other CD attacks. It has a pretty massive hit box, though the range is pretty short. After the opponent blocks this, you can either continue your pressure to go low (cr.B, etc.) or hit them with an overhead (f+B, or j.B, etc). | | |description=Cancellable. Air shoulder tackle. It comes out pretty quick and delivers a chunk of hit-stun like many other CD attacks. It has a pretty massive hit box, though the range is pretty short. After the opponent blocks this, you can either continue your pressure to go low (cr.B, etc.) or hit them with an overhead (f+B, or j.B, etc). |
| }}
| |
| }}
| |
|
| |
| ===== <span class="invisible-header"></span> =====
| |
| <font style="visibility:hidden" size="0"></font>
| |
| {{MoveData
| |
| |image=
| |
| |caption=
| |
| |name=GCCD
| |
| |data=
| |
| {{AttackData-KOFXIII
| |
| |Damage=10
| |
| |Guard=Mid
| |
| |Startup=
| |
| |Active=
| |
| |Recovery=
| |
| |Adv. Hit=
| |
| |On Block=
| |
| |Invulnerability=
| |
| |description=Guard Cancel Blowback Attack.
| |
| }}
| |
| }} | | }} |
|
| |
|
| ==Throws== | | ==Throws== |
| ===== <span class="invisible-header"></span> =====
| | {{FrameDataCargo-KOFXIII |
| <font style="visibility:hidden" size="0"></font>
| | |moveId=kyo_throw |
| {{MoveData | | |display= 130px |
| |image=
| |
| |caption=
| |
| |name=Issetsu Seoi Nage (b/f + C/D)
| |
| |data=
| |
| {{AttackData-KOFXIII
| |
| |Damage=65 + 38 | |
| |Guard=
| |
| |Startup=
| |
| |Active=
| |
| |Recovery=
| |
| |Adv. Hit=
| |
| |On Block=
| |
| |Invulnerability= | |
| |description=A slam to elbow drop that cannot be tech rolled. The opponent is placed a good position away from Kyo for a perfect cross-up with j.2C or j.B after a brief run, superjump j.2C for a safejump setup, empty jump to a low, or another throw if they try to roll on wake-up, bait a reversal, etc. Try your best to time your jumps correctly for which ever specific setup you are going for after landing the throw, or you may eat a reversal. | | |description=A slam to elbow drop that cannot be tech rolled. The opponent is placed a good position away from Kyo for a perfect cross-up with j.2C or j.B after a brief run, superjump j.2C for a safejump setup, empty jump to a low, or another throw if they try to roll on wake-up, bait a reversal, etc. Try your best to time your jumps correctly for which ever specific setup you are going for after landing the throw, or you may eat a reversal. |
| }}
| |
| }} | | }} |
|
| |
|
| ==Command Moves== | | ==Command Normals== |
| ===== <span class="invisible-header"></span> =====
| | |
| <font style="visibility:hidden" size="0"></font>
| | {{FrameDataCargo-KOFXIII |
| {{MoveData | | |moveId=kyo_rawf+B,kyo_cancelf+b |
| |image= | | |display= 200px |
| |caption=
| | |description2=* Only cancellable from a canceled normal. |
| |name=Goufu You (f+B)
| |
| |data=
| |
| {{AttackData-KOFXIII
| |
| |Damage=75 (60)
| |
| |Guard=Overhead
| |
| |Startup=
| |
| |Active=
| |
| |Recovery=
| |
| |Adv. Hit=
| |
| |On Block=
| |
| |Invulnerability= | |
| |description=* Only cancellable from a canceled normal. | |
| * Kyo's axe kick that hits crouching opponents but has limited cancel properties. Unlike KOF02's Kusanagi, Kyo's overhead isn't ridiculous at all in this game and is somewhat subpar in this game. On block it is around -2 frames, while he receives a fair amount of pushback from the opponent, which makes it hard to punish. | | * Kyo's axe kick that hits crouching opponents but has limited cancel properties. Unlike KOF02's Kusanagi, Kyo's overhead isn't ridiculous at all in this game and is somewhat subpar in this game. On block it is around -2 frames, while he receives a fair amount of pushback from the opponent, which makes it hard to punish. |
| * Unfortunately you cannot combo into this move from any of Kyo's normals, but it seems to have cancel properties on block when canceled from a normal like cl.C, f+B, hcb+B, which the hcb+B will connect into. There really isn't a point to doing that, especially if the normal cannot combo into it. | | * Unfortunately you cannot combo into this move from any of Kyo's normals, but it seems to have cancel properties on block when canceled from a normal like cl.C, f+B, hcb+B, which the hcb+B will connect into. There really isn't a point to doing that, especially if the normal cannot combo into it. |
| * It is possible to HD activate from this overhead by itself into a combo which is pretty good. Even if the opponent is blocking, you can raw activate into HD, then go low immediately (cr.B or df+D) to catch them off guard when the were still busy from blocking the overhead, into a damaging HD combo. | | * It is possible to HD activate from this overhead by itself into a combo which is pretty good. Even if the opponent is blocking, you can raw activate into HD, then go low immediately (cr.B or df+D) to catch them off guard when the were still busy from blocking the overhead, into a damaging HD combo. |
| }}
| |
| }} | | }} |
|
| |
|
| ===== <span class="invisible-header"></span> =====
| | |
| <font style="visibility:hidden" size="0"></font>
| | {{FrameDataCargo-KOFXIII |
| {{MoveData | | |moveId=kyo_df+D |
| |image=
| | |display= 200px |
| |caption=
| |
| |name=88 Shiki (df+D)
| |
| |data=
| |
| {{AttackData-KOFXIII
| |
| |Damage=30 + 45 | |
| |Guard=Low
| |
| |Startup=
| |
| |Active=
| |
| |Recovery=
| |
| |Adv. Hit=
| |
| |On Block=
| |
| |Invulnerability= | |
| |description=* Free cancel-able on 1st hit, hits low twice. | | |description=* Free cancel-able on 1st hit, hits low twice. |
| * It has good range, connects after crouch normals and his st. C fairly well. You can also free cancel this move into his special moves incase you need a quick low aiming punish if his cr.B is out of range. This move is not safe on block at all, even if performed at a end of a blockstring (ex. cr.B, cr.A, df+D). If a character has a fast special move (or DM) that can reach him while he's recovering, he can get punished rather hard. You MAY get away with it if a certain character lacks a move that can punish him or if the player doesn't realize that isn't safe, but still use this move on block sparingly. | | * It has good range, connects after crouch normals and his st. C fairly well. You can also free cancel this move into his special moves incase you need a quick low aiming punish if his cr.B is out of range. This move is not safe on block at all, even if performed at a end of a blockstring (ex. cr.B, cr.A, df+D). If a character has a fast special move (or DM) that can reach him while he's recovering, he can get punished rather hard. You MAY get away with it if a certain character lacks a move that can punish him or if the player doesn't realize that isn't safe, but still use this move on block sparingly. |
| }}
| |
| }} | | }} |
|
| |
|
| ===== <span class="invisible-header"></span> =====
| | |
| <font style="visibility:hidden" size="0"></font>
| | {{FrameDataCargo-KOFXIII |
| {{MoveData | | |moveId=kyo_jd+C |
| |image= | | |display= 120px |
| |caption=
| |
| |name=Naraku Otoshi (db/d/df+C aka j.2C in air)
| |
| |data=
| |
| {{AttackData-KOFXIII
| |
| |Damage=50
| |
| |Guard=Overhead
| |
| |Startup=
| |
| |Active=
| |
| |Recovery=
| |
| |Adv. Hit=
| |
| |On Block=
| |
| |Invulnerability= | |
| |description=* Two-handed downward haymaker attack. | | |description=* Two-handed downward haymaker attack. |
| * If successfully used as an air-to-air it slams the opponent to the ground for a hard knockdown. It has a lot of hit stun so it can be used to jump-in and start a combo. When used during a backdash it makes him hop backward further and quicker. It can also be used as a cross-up too. This move isn't fool proof though. Your opponent can cr.B anti-air this move by carefully placing a cr.B to shrink their hitbox if the j.2C was performed early. It is also not a good idea to use this move as an air-to-air attack, j.D is much suitable for that. | | * If successfully used as an air-to-air it slams the opponent to the ground for a hard knockdown. It has a lot of hit stun so it can be used to jump-in and start a combo. When used during a backdash it makes him hop backward further and quicker. It can also be used as a cross-up too. This move isn't fool proof though. Your opponent can cr.B anti-air this move by carefully placing a cr.B to shrink their hitbox if the j.2C was performed early. It is also not a good idea to use this move as an air-to-air attack, j.D is much suitable for that. |
| * You can combo 2 j.2C's in a row on a standing opponent by hitting the first one really low around the waist area of the character's sprite, the IMMEDIATELY hyper hopping performing the second hit as early as possible. The two hits give 97 damage. | | * You can combo 2 j.2C's in a row on a standing opponent by hitting the first one really low around the waist area of the character's sprite, the IMMEDIATELY hyper hopping performing the second hit as early as possible. The two hits give 97 damage. |
| ::[http://www.youtube.com/watch?v=KfJ29Hr7nDs Kyo Crossup Tutorial] | | ::[http://www.youtube.com/watch?v=KfJ29Hr7nDs Kyo Crossup Tutorial] |
| }}
| |
| }} | | }} |
|
| |
|
| ==Special Moves== | | ==Special Moves== |
| ===== <span class="invisible-header"></span> =====
| |
| <font style="visibility:hidden" size="0"></font>
| |
| {{MoveData
| |
| |image=
| |
| |caption=
| |
| |name=[http://2.bp.blogspot.com/-iXzHWjB569A/U9-ksnCFiVI/AAAAAAAACS8/fNyN718Ty8o/s1600/Kyo.png Yamibarai (qcf+P)]
| |
| |data=
| |
| {{AttackData-KOFXIII
| |
| |Damage=60
| |
| |Guard=Mid
| |
| |Startup=
| |
| |Active=
| |
| |Recovery=
| |
| |Adv. Hit=
| |
| |On Block=
| |
| |Invulnerability=
| |
| |description=A flame projectile that goes across the ground towards the other side of the screen. A version moves slowly and the C version goes much faster. Good for zoning or ending blockstrings to add space (which can be Guard Rolled by the defending opponent to punish you). Opponents can hop over the projectile or perform a normal attack that is slighty invincible to low attacks (ex. Elisabeth's st.D, Kim's st.D etc.).
| |
| }}
| |
| }}
| |
|
| |
|
| ===== <span class="invisible-header"></span> =====
| | {{FrameDataCargo-KOFXIII |
| <font style="visibility:hidden" size="0"></font>
| | |moveId=kyo_qcf+A,kyo_qcf+C,kyo_qcf+AC |
| {{MoveData | | |display= 200px |
| |image= | | |input=qcf+A/C/AC |
| |caption= | | |input2=236A/C/AC |
| |name=[http://1.bp.blogspot.com/-jLFk4PGZhdg/U9-kr5eMpjI/AAAAAAAACS0/_MaMeDpPXjw/s1600/Kyo+ex.png EX Yamibarai (qcf+AC)] | | |description= A flame projectile that goes across the ground towards the other side of the screen. A version moves slowly |
| |data= | | |description2= C version goes much faster. Good for zoning or ending blockstrings to add space (which can be Guard Rolled by the defending opponent to punish you). Opponents can hop over the projectile or perform a normal attack that is slighty invincible to low attacks (ex. Elisabeth's st.D, Kim's st.D etc.). |
| {{AttackData-KOFXIII
| | |description3=EX Comes out very quickly making it very easy to combo into and knocks opponent down. It can beat out all regular fireballs and projectiles, but trades with EX projectiles, and gets beaten out by super projectiles (like Ryo's f~hcf+P for example). Super Cancelable, need to be close. |
| |Damage=100 | |
| |Guard=Mid
| |
| |Startup=
| |
| |Active=
| |
| |Recovery=
| |
| |Adv. Hit=
| |
| |On Block= | |
| |Invulnerability=
| |
| |description=Comes out very quickly making it very easy to combo into and knocks opponent down. It can beat out all regular fireballs and projectiles, but trades with EX projectiles, and gets beaten out by super projectiles (like Ryo's f~hcf+P for example). Super Cancelable, need to be close.
| |
| }}
| |
| }} | | }} |
|
| |
|
| ===== <span class="invisible-header"></span> =====
| |
| <font style="visibility:hidden" size="0"></font>
| |
| {{MoveData
| |
| |image=
| |
| |caption=
| |
| |name=Oniyaki (dp+P)
| |
| |data=
| |
| {{AttackData-KOFXIII
| |
| |Damage=55+23/80+25x2
| |
| |Guard=Mid
| |
| |Startup=
| |
| |Active=
| |
| |Recovery=
| |
| |Adv. Hit=
| |
| |On Block=
| |
| |Invulnerability=
| |
| |description=An uppercut imbued with flames. It has a wide hitbox so it punishes a lot of jump-ins, and some pokes, easily. The A version (light punch) does one hit while the C version (strong punch) does 3 hits and has a slight amount of invincibility at the start. Both versions can be drive/super canceled on the first hit. If you whiff this move (or have it blocked), you can be punished extremely hard.
| |
| }}
| |
| }}
| |
|
| |
|
| ===== <span class="invisible-header"></span> =====
| | {{FrameDataCargo-KOFXIII |
| <font style="visibility:hidden" size="0"></font>
| | |moveId=kyo_dp+A,kyo_dp+C,kyo_dp+AC |
| {{MoveData | | |display= 200px |
| |image=
| | |input=dp+A/C/AC |
| |caption=
| | |input2=623A/C/AC |
| |name=EX Oniyaki (dp+AC)
| | |description= An uppercut imbued with flames. It has a wide hitbox so it punishes a lot of jump-ins, and some pokes, easily. The A version (light punch) does one hit |
| |data=
| | |description2= C version (strong punch) does 3 hits and has a slight amount of invincibility at the start. Both versions can be drive/super canceled on the first hit. If you whiff this move (or have it blocked), you can be punished extremely hard. |
| {{AttackData-KOFXIII
| | |description3=EX rises into the air vertically instead of diagonally and has a vacuum effect on hit pulling them into the uppercut. EX version has more invincibility/auto-guard and does 10 hits. Drive/Super Cancellable. |
| |Damage=70+19+18+17+16+15+14+13+12+11 | |
| |Guard=Mid | |
| |Startup= | |
| |Active= | |
| |Recovery= | |
| |Adv. Hit=
| |
| |On Block= | |
| |Invulnerability= | |
| |description=Rises into the air vertically instead of diagonally and has a vacuum effect on hit pulling them into the uppercut. EX version has more invincibility/auto-guard and does 10 hits. Drive/Super Cancellable.
| |
| }}
| |
| }} | | }} |
|
| |
|
| ===== <span class="invisible-header"></span> =====
| |
| <font style="visibility:hidden" size="0"></font>
| |
| {{MoveData
| |
| |image=
| |
| |caption=
| |
| |name=Kotokskio (hcb+K)
| |
| |data=
| |
| {{AttackData-KOFXIII
| |
| |Damage=30+128
| |
| |Guard=Mid/Close
| |
| |Startup=
| |
| |Active=
| |
| |Recovery=
| |
| |Adv. Hit=
| |
| |On Block=
| |
| |Invulnerability=
| |
| |description=* Rushing elbow to grab attack. It's very quick and has lower body invincibility at start-up. It works well after most normals and juggle attacks. B version goes about 75% of the screen and D version goes full-screen. Both are unsafe on block.
| |
| * What should be noted is that Kyo recovers very quickly on whiff and that he travels forward much faster than he would while running. This move can be used as an alternate dash if the opponent is knocked down to add pressure. When Kyo gets close enough while the opponent is on knocked down, he will stop abruptly - he can guard badly timed reversals or go for an offensive mix up. Use this move cautiously because it is impossible to stop Kyo from traveling during this move and it is still unsafe on block.
| |
| }}
| |
| }}
| |
|
| |
|
| ===== <span class="invisible-header"></span> =====
| | {{FrameDataCargo-KOFXIII |
| <font style="visibility:hidden" size="0"></font>
| | |moveId=kyo_hcb+B,kyo_hcb+D,kyo_hcb+BD |
| {{MoveData | | |display= 200px |
| |image= | | |input=hcb+B/D/BD |
| |caption= | | |input2=63214B/D/BD |
| |name=EX Kotokskio (hcb+BD) | | |description= Rushing elbow to grab attack. It's very quick and has lower body invincibility at start-up. It works well after most normals and juggle attacks. B version goes about 75% of the screen. |
| |data= | | |description2= D version goes full-screen. Both are unsafe on block. |
| {{AttackData-KOFXIII
| | What should be noted is that Kyo recovers very quickly on whiff and that he travels forward much faster than he would while running. This move can be used as an alternate dash if the opponent is knocked down to add pressure. When Kyo gets close enough while the opponent is on knocked down, he will stop abruptly - he can guard badly timed reversals or go for an offensive mix up. Use this move cautiously because it is impossible to stop Kyo from traveling during this move and it is still unsafe on block. |
| |Damage=180
| | |description3= Changes the properties to a command grab. It can catch a lot of people by surprise if you empty jump into it, or if you're close enough to punish a move that has bad recovery. Drive/Super Cancelable on first hit. |
| |Guard=Mid/Close
| |
| |Startup=4 | |
| |Active= | |
| |Recovery=
| |
| |Adv. Hit=
| |
| |On Block=
| |
| |Invulnerability=
| |
| |description=Changes the properties to a command grab. It can catch a lot of people by surprise if you empty jump into it, or if you're close enough to punish a move that has bad recovery. Drive/Super Cancelable on first hit. | |
| }}
| |
| }} | | }} |
|
| |
|
| ===== <span class="invisible-header"></span> =====
| |
| <font style="visibility:hidden" size="0"></font>
| |
| {{MoveData
| |
| |image=
| |
| |caption=
| |
| |name=Oborogurma (rdp+K)
| |
| |data=
| |
| {{AttackData-KOFXIII
| |
| |Damage=40/40+38+63
| |
| |Guard=Mid
| |
| |Startup=
| |
| |Active=
| |
| |Recovery=
| |
| |Adv. Hit=
| |
| |On Block=
| |
| |Invulnerability=
| |
| |description=Quick jump kick(s). B version does one hit and juggles the opponent if hit high enough; D version does three hits slamming the opponent down on the third hit. Both versions are unsafe when whiffed. These kicks are best used in combos and are very unreliable anti-airs. B version can be drive/super canceled on the first hit while the D and EX versions can be super canceled on the second hit.
| |
| }}
| |
| }}
| |
|
| |
|
| ===== <span class="invisible-header"></span> =====
| | {{FrameDataCargo-KOFXIII |
| <font style="visibility:hidden" size="0"></font>
| | |moveId=kyo_rdp+B,kyo_rdp+D,kyo_rdp+BD |
| {{MoveData | | |display= 190px |
| |image=
| | |input=rdp+B/D/BD |
| |caption=
| | |input2=421B/D/BD |
| |name=EX Oborogurma (rdp+BD)
| | |description= Quick jump kick(s). B version does one hit and juggles the opponent if hit high enough |
| |data=
| | |description2= D version does three hits slamming the opponent down on the third hit. Both versions are unsafe when whiffed. These kicks are best used in combos and are very unreliable anti-airs. B version can be drive/super canceled on the first hit while the D and EX versions can be super canceled on the second hit. |
| {{AttackData-KOFXIII
| | |description3= Mimics the strong version except with more invincibility at start-up, faster start up, and massive hitbox. Excellent move for anti air at certain angles where dp+P misses. Best used in combos that call for it, or as a risky wake up reversal attack. Super Cancel-able on the first/second hit. |
| |Damage=60+57+90 | |
| |Guard=Mid | |
| |Startup= | |
| |Active= | |
| |Recovery= | |
| |Adv. Hit=
| |
| |On Block= | |
| |Invulnerability=
| |
| |description=Mimics the strong version except with more invincibility at start-up, faster start up, and massive hitbox. Excellent move for anti air at certain angles where dp+P misses. Best used in combos that call for it, or as a risky wake up reversal attack. Super Cancel-able on the first/second hit. | |
| }}
| |
| }} | | }} |
|
| |
|
| ===== <span class="invisible-header"></span> =====
| |
| <font style="visibility:hidden" size="0"></font>
| |
| {{MoveData
| |
| |image=
| |
| |caption=
| |
| |name=75 Shiki Kai (qcf+K)
| |
| |data=
| |
| {{AttackData-KOFXIII
| |
| |Damage=35+33/30+28
| |
| |Guard=Mid
| |
| |Startup=
| |
| |Active=
| |
| |Recovery=
| |
| |Adv. Hit=
| |
| |On Block=
| |
| |Invulnerability=
| |
| |description=2 jumping kick attacks. B version simply knocks the opponent down but it's pretty safe: D version launches the opponent higher into the air for a possible follow-up and can be super canceled upon second hit. The B version is more useful within his combos in the corner, and can also combo into his EX Orochinagi (qcb~hcf+AC) midscreen. Defensively, the opponent can mash a reversal attack in between his first and second kick. If the second kick is blocked, Kyo is pretty safe at -2 frames, and can even possibly frame trap them with a move with fast start-up. Compared to EX Kyo, both of the kicks release with one button instead of two, and it seems that EX Kyo's launches the opponent up a bit higher.
| |
| }}
| |
| }}
| |
|
| |
|
| ===== <span class="invisible-header"></span> =====
| | {{FrameDataCargo-KOFXIII |
| <font style="visibility:hidden" size="0"></font>
| | |moveId=kyo_qcf+B,kyo_qcf+D,kyo_qcf+BD |
| {{MoveData | | |display= 190px |
| |image= | | |input=qcf+B/D/BD |
| |caption= | | |input2=236B/D/BD |
| |name=EX 75 Shiki Kai (qcf+BD) | | |description= 2 jumping kick attacks. B version simply knocks the opponent down but it's pretty safe |
| |data= | | |description2= D version launches the opponent higher into the air for a possible follow-up and can be super canceled upon second hit. The B version is more useful within his combos in the corner, and can also combo into his EX Orochinagi (qcb~hcf+AC) midscreen. Defensively, the opponent can mash a reversal attack in between his first and second kick. If the second kick is blocked, Kyo is pretty safe at -2 frames, and can even possibly frame trap them with a move with fast start-up. Compared to EX Kyo, both of the kicks release with one button instead of two, and it seems that EX Kyo's launches the opponent up a bit higher. |
| {{AttackData-KOFXIII
| | |description3= Same amount of start-up as the heavy kick version (18f), has a longer attacking range, very short amount of upper body (above his waist) invincibility during its start, safe on block, with no gaps in between the first and second hit and launches the opponent higher. The disadvantages this move has is that the damage is quite low, along with is slow start-up makes its a very unreliable anti-air, especially against hops. It's upper body invincibility can be useful for phasing through mid-air waist to shoulder height projectiles (ex. Andy, Robert, Ash, Takuma, King) but not ground skimming ones (Terry's Power Wave). Super Cancel-able. |
| |Damage=40+38 | |
| |Guard=Mid | |
| |Startup=
| |
| |Active=
| |
| |Recovery=
| |
| |Adv. Hit=
| |
| |On Block= | |
| |Invulnerability=
| |
| |description=Same amount of start-up as the heavy kick version (18f), has a longer attacking range, very short amount of upper body (above his waist) invincibility during its start, safe on block, with no gaps in between the first and second hit and launches the opponent higher. The disadvantages this move has is that the damage is quite low, along with is slow start-up makes its a very unreliable anti-air, especially against hops. It's upper body invincibility can be useful for phasing through mid-air waist to shoulder height projectiles (ex. Andy, Robert, Ash, Takuma, King) but not ground skimming ones (Terry's Power Wave). Super Cancel-able.
| |
| }}
| |
| }} | | }} |
|
| |
|
| ==Desperation Moves== | | ==Super Special Moves== |
| ===== <span class="invisible-header"></span> =====
| |
| <font style="visibility:hidden" size="0"></font>
| |
| {{MoveData
| |
| |image=
| |
| |caption=
| |
| |name=Orochinagi (qcb~hcf+P)
| |
| |data=
| |
| {{AttackData-KOFXIII
| |
| |Damage=
| |
| |Guard=Mid
| |
| |Startup=
| |
| |Active=
| |
| |Recovery=
| |
| |Adv. Hit=
| |
| |On Block=
| |
| |Invulnerability=
| |
| |description=Flaming wave attack. Holding either punch button, delays the attack. It does a nice amount of chip damage. You can use it as a preemptive anti-air against opponents jumping towards you, but beyond that, it's use is rather limited. Both ground and EX versions can be Max Canceled on hit.
| |
| }}
| |
| }}
| |
|
| |
|
| ===== <span class="invisible-header"></span> =====
| | {{FrameDataCargo-KOFXIII |
| <font style="visibility:hidden" size="0"></font>
| | |moveId=kyo_qcbhcf+p,kyo_qcbhcf+ac,kyo_j_qcbhcf+p |
| {{MoveData | | |display= 200px |
| |image= | | |input=qcb,hcb+A/C/AC (AIR OK) |
| |caption= | | |input2=2141236A/C/AC (AIR OK) |
| |name=Air Orochinagi (qcb~hcf+P in air) | | |description= Flaming wave attack. Holding either punch button, delays the attack. It does a nice amount of chip damage. You can use it as a preemptive anti-air against opponents jumping towards you, but beyond that, it's use is rather limited. Both ground and EX versions can be Max Canceled on hit. |
| |data= | | |description2= 2 frame start-up if held briefly, causes more damage and does three hits instead of one. It's fast startup and range makes it great to use as a preemptive anti-air midscreen, or to catch opponents trying to jump out of the corner. The air version has faster startup and is very useful for extending many of Kyo’s corner combos. If you're feeling lucky, you can use this as an air-to-air, or to attempt to snuff out someones anti-air against you. Max Cancel-able on ground, on hit. |
| {{AttackData-KOFXIII
| | |description2= 2 frame start-up if held briefly, causes more damage and does three hits instead of one. It's fast startup and range makes it great to use as a preemptive anti-air midscreen, or to catch opponents trying to jump out of the corner. The air version has faster startup and is very useful for extending many of Kyo’s corner combos. If you're feeling lucky, you can use this as an air-to-air, or to attempt to snuff out someones anti-air against you. Max Cancel-able on ground, on hit. |
| |Damage= | | |description3= Air flaming wave attack. It mimics the ground version except done in the air now and pushes Kyo back slightly after activation. You will most likely be using this more in Kyo's drive cancels or HD combos. It's start up is a little slow to use as an air to air reliably. |
| |Guard= | |
| |Startup= | |
| |Active=
| |
| |Recovery=
| |
| |Adv. Hit=
| |
| |On Block=
| |
| |Invulnerability= | |
| |description=Air flaming wave attack. It mimics the ground version except done in the air now and pushes Kyo back slightly after activation. You will most likely be using this more in Kyo's drive cancels or HD combos. It's start up is a little slow to use as an air to air reliably.
| |
| }}
| |
| }} | | }} |
|
| |
|
| ===== <span class="invisible-header"></span> ===== | | ==Neo Max Super Special Moves== |
| <font style="visibility:hidden" size="0"></font>
| |
| {{MoveData
| |
| |image=
| |
| |caption=
| |
| |name=EX Orochinagi (qcb~hcf+AC)
| |
| |data=
| |
| {{AttackData-KOFXIII
| |
| |Damage=210 / 120 x3
| |
| |Guard=Mid
| |
| |Startup=
| |
| |Active=
| |
| |Recovery=
| |
| |Adv. Hit=
| |
| |On Block=
| |
| |Invulnerability=
| |
| |description=2 frame start-up if held briefly, causes more damage and does three hits instead of one. It's fast startup and range makes it great to use as a preemptive anti-air midscreen, or to catch opponents trying to jump out of the corner. The air version has faster startup and is very useful for extending many of Kyo’s corner combos. If you're feeling lucky, you can use this as an air-to-air, or to attempt to snuff out someones anti-air against you. Max Cancel-able on ground, on hit.
| |
| }}
| |
| }}
| |
|
| |
|
| ==Neomax==
| | {{FrameDataCargo-KOFXIII |
| ===== <span class="invisible-header"></span> =====
| | |moveId=kyo_qcfqcf+ac |
| <font style="visibility:hidden" size="0"></font>
| | |display= 200px |
| {{MoveData | | |input=qcfqcf+AC |
| |image= | | |input2=236236AC |
| |caption= | | |description= |
| |name=Ama No Murakumo (qcfx2 +AC) | |
| |data=
| |
| {{AttackData-KOFXIII
| |
| |Damage=42 x10 (423 total)
| |
| |Guard=Mid
| |
| |Startup= | |
| |Active=
| |
| |Recovery=
| |
| |Adv. Hit=
| |
| |On Block=
| |
| |Invulnerability=
| |
| |description=Kyo throws a small flame across the screen and if it hits the opponent fire pillars rise from the ground hitting the opponent ten times. Fast start up makes it useful to punish everything from fireballs to laggy moves; however, if it misses, Kyo stands in place for about a second and a half leaving him wide open to be punished. | |
| }}
| |
| }} | | }} |
|
| |
| ==Combos==
| |
|
| |
| '''Legend'''
| |
|
| |
| qcf = Quarter Circle Forward<br>
| |
| qcb = Quarter Circle Back<br>
| |
| hcb = Half Circle Backward<br>
| |
| hcf = Half Circle Forward<br>
| |
| rdp = reverse dragon punch<br>
| |
| dp = dragon punch<br>
| |
| d. = Crouching or down B<br>
| |
| s. = Standing close attack<br>
| |
| j. = Jumping<br>
| |
| (3) = The number of hits needed to Drive Cancel<br>
| |
| DC = Drive Cancel<br>
| |
| HD = HD Activate<br>
| |
| HDC = Hyper Drive Cancel<br>
| |
| SC = Super Cancel<br>
| |
| CH = Counter Hit<br>
| |
| MC = Max Cancel<br>
| |
| K = B or D<br>
| |
| P = A or C<br>
| |
| dmg: damage
| |
|
| |
| '''Starters'''
| |
|
| |
| * cr.Bx1~2, s.B => A 3-hit low starter. It's best to use just one cr.B into s.B if it connects at the maximum distance in which his cr.A may whiff. You cannot cancel his s.B into df+D which decreases its damage output, but you can connect either of his dp+P's, his qcf+B and hcb+K.
| |
|
| |
| * cr.B, cr.A, df+D (1) => A 3-hit starter which begins with a low attack and ends with a low attack. The df+D on first hit is cancel-able into many of his special moves which extends his the combo damage output and for starting HD combos. It's very easy to confirm into, but should not be used as a blockstring against an opponent with meter stocked for risk of a Guard Cancel AB/Roll punish. If the opponent does not have meter, a full blockstring of cr.B, cr.A, df+D (no cancel) or cr.B, cr.A, df+D (1), qcf+A can be used to create more space between you and the opponent both mid-screen and in the corner.
| |
|
| |
| * s.C, df+D (1) => A 2-hit beginning with a mid attack. The s.C is rather hard to confirm into because of it's speed which makes it an ideal starter for punishing moves at a close range or frame-trapping after a blocked cr.B or a st.B.
| |
|
| |
| * cr.B, s.C, df+D (1) => cr.B to s.C is a tough link but it adds a low attack at the start and a bit more damage towards whatever you end the combo with. The cr.B must be landed very close in order for the s.C to activate rather than a far C.
| |
|
| |
| Note: A jump or hop attack can be added on to many of these combos for added damage, if not noted. Besides starting the combos with st.C, df+D (1), alternatively you can start with a cr.B, cr.A, df+D (1)
| |
|
| |
| === Mid-Screen Combos ===
| |
|
| |
| '''No Stock, No Drive Gauge -'''
| |
|
| |
| cr.Bx1~2, s.B, hcb+K = 218 dmg
| |
|
| |
| * A easy combo to learn which is low hit confirm into a hard knockdown. Be sure to get the s. B into hcb+K down as consistently as you can or else the hcb+K might come out too late and get blocked. Builds around 45% of meter.
| |
|
| |
|
| |
| cr.B, cr.A, df+D (1), qcf+D, hcb+K = 245 dmg
| |
|
| |
| * This is another very essential combo to learn and use in battle, and the timing isn't as tight as the s.B to hcb+K cancel. It does more damage and builds more meter (around 50% of stock) than the combo above. Builds around 50% of meter.
| |
|
| |
|
| |
| cr.B, cr.A, df+D (1), qcf+D, rdp+D = 232 dmg, 49% mg, 40% opmg
| |
|
| |
| * Does a bit less damage than the combo above, and builds 50% of the stock meter.
| |
|
| |
| s.C, df+D (1), qcf+D, rdp+D = 261 dmg, 50% mg, 45% opmg
| |
|
| |
| s.C, df+D (1), qcf+D, hcb+K = 275 dmg, 55% mg, 45% opmg
| |
|
| |
| * Compared to the rdp+D ending combo above this one, this combo is more important. It does more damage and builds more meter (around 55% of stock).
| |
|
| |
| CH j.CD, hcb+K = 261 dmg
| |
|
| |
| * An easy confirm off a counter hit j.CD.
| |
|
| |
|
| |
| '''No Stock, 1+ Drive Gauge -'''
| |
|
| |
| s.C, df+D (1), hcb+K, (DC) qcf+K, rdp+D = 277 dmg, 60% mg, 45% opmg
| |
|
| |
| s.C, df+D (1), hcb+K, (DC) qcf+K, hcb+K = 290 dmg, 60% mg, 45% opmg
| |
|
| |
| cr.Bx1~2, s.B, dp+C (1), (DC) qcf+D, rdp+D = 295 dmg, 70% mg, 50% opmg
| |
|
| |
| cr.Bx1~2, s.B, dp+C (1), (DC) qcf+D, hcb+D = 307 dmg, 75% mg, 50% opmg
| |
|
| |
| * From a low attack, this combo ending in hcb+D is most damaging and builds close to 70% meter.
| |
|
| |
| CH j.CD, hcb+K, rdp+D = 266 dmg
| |
|
| |
|
| |
| '''1 Stock, No Drive Gauge -'''
| |
|
| |
| s.C, df+D (1), qcb~hcf+P = 287 dmg, 10% mg, 40% opmg
| |
|
| |
| s.C, df+D (1), qcf+D, rdp+B, rdp+BD = 334 dmg, 40% mg, 50% opmg
| |
|
| |
| * Good combo to carry your opponent to the corner and grants you a hard knock down.
| |
|
| |
| CH j.CD, rdp+BD = 308 dmg
| |
|
| |
| CH j.CD, qcb~hcf+P = 311 dmg
| |
|
| |
| * You'll have to hit the rdp+BD and the qcb~hcf+P on time or else it will whiff.
| |
|
| |
|
| |
| '''1 Stock, 1+ Drive Gauge -'''
| |
|
| |
| cr.Bx1~2, s.B, dp+C (1), (DC) qcf+D, qcb~hcf+P = 346 dmg
| |
|
| |
| s.C, df+D (1), qcf+D, rdp+D (2), (SC in air) qcb~hcf+P = 338 dmg
| |
|
| |
| CH j.CD, rdp+D (DC), air qcb~hcf+P = 339 dmg
| |
|
| |
|
| |
| '''2 Stock, No Drive Gauge -'''
| |
|
| |
| cr.Bx2, s.B, qcf+B, qcb~hcf+AC = 412 dmg
| |
|
| |
| * A very easy, swift and damaging 2 bar combo that starts from a low attack. Highly recommended to learn.
| |
|
| |
| s.C, df+D (1), qcf+D, rdp+B, qcb~hcf+AC = 452 dmg
| |
|
| |
| s.C, df+D (1), qcf+D, rdp+B, rdp+B, qcb~hcf+AC (hold briefly) = 464 dmg, 50% mp, 65% opmg
| |
|
| |
| * This combo requires you to charge the EX Orochinagi very briefly to get it out in 2 frames in order to work.
| |
|
| |
|
| |
| '''2 Stock, 1+ Drive Gauge -'''
| |
|
| |
| cr.Bx1~2, s.B, dp+C (1), qcf+D, rdp+B, qcb~hcf+AC = 461 dmg
| |
|
| |
|
| |
|
| |
| '''3 Stock, 2 Drive Gauge-'''
| |
|
| |
| j.C, s.C, df+D (1), qcf+D, rdp+B, qcfx2+A+C = 550 dmg
| |
|
| |
| === Corner Combos ===
| |
|
| |
| * ''A majority of these combos do not work on backturned opponents.''
| |
|
| |
| '''0 Stock, No Drive Gauge'''
| |
|
| |
| s.C, df+D (1), qcf+D, rdp+B, qcf+B, dp+C = 312 dmg, 75% mg, 49% opmg
| |
|
| |
| s.C, df+D (1), qcf+D, rdp+B, qcf+B, rdp+B, dp+A = 304 dmg, 80% mg, 49% opmg
| |
|
| |
| * Instead of ending the combo with dp+A, alternatively you can end with st.C for a reset
| |
|
| |
|
| |
| '''0 Stock, 1+ Drive Gauge'''
| |
|
| |
| s.C, df+D (1), qcf+D, rdp+B, qcf+D, rdp+B, dp+A, (DC) qcf+D, rdp+B, dp+C = 381 dmg
| |
|
| |
|
| |
| '''0 Stock, 2 Drive Gauge'''
| |
|
| |
| s.C, df+D (1), qcf+D, rdp+B, qcf+B, rdp+B, dp+A (1), (DC) qcf+D, rdp+B, dp+C (1), (DC) rdp+D = 414 dmg
| |
|
| |
| s.C, df+D (1), qcf+D, rdp+B, qcf+B, rdp+B, dp+A (1), (DC) qcf+D, rdp+B, dp+A (1), (DC) qcf+D, (wait), rdp+B, qcf+B, rdp+B, dp+A = 419 dmg (builds almost 2 stocks)
| |
|
| |
| s.C, df+D (1), qcf+D, rdp+B, qcf+B, rdp+B, dp+A (1), (DC) qcf+D, rdp+B, dp+A (1), (DC) qcf+D, (wait), rdp+B, qcf+B, dp+C = 377 dmg
| |
|
| |
| s.C, df+D (1), qcf+D, rdp+B, qcf+B, rdp+B, dp+A (1), (DC) qcf+D, rdp+B, dp+C (1), (DC) hcb+K = 422 dmg
| |
|
| |
|
| |
| '''1 Stock, No Drive Gauge'''
| |
|
| |
| s.C, df+D (1), qcf+D, rdp+B, qcf+B, rdp+BD = 362 dmg
| |
|
| |
| s.C, df+D (1), qcf+D, rdp+B, qcf+B, rdp+B, dp+AC = 364 dmg
| |
|
| |
|
| |
|
| |
| '''1 Stock, 1+ Drive Gauge'''
| |
|
| |
| s.C, df+D (1), qcf+D, rdp+B, (SC in air) qcb~hcf+P, rdp+B, dp+C = 425 dmg
| |
|
| |
| s.C, df+D (1), qcf+D, rdp+B, (SC in air) qcb~hcf+P, qcf+A, hcb+D = 459 dmg
| |
|
| |
| s.C, df+D (1), qcf+D, rdp+B, qcf+B, rdp+B, dp+A (2),(SC) air qcb hcf+A, hcb+D = 461 dmg
| |
|
| |
| s.C, df+D (1), qcf+D, rdp+B, dp+A (1) (DC), qcf+D, TK qcb~hcf+P, qcf+B, rdp+B, dp+C = 473 dmg
| |
|
| |
| * Builds back 1 and 1/4th stock. The TK qcb~hcf+P which should be inputted as qcb~hcf,uf+P
| |
|
| |
|
| |
| '''1 Stock, 2 Drive Gauge'''
| |
|
| |
| j.2C, s.C, df+D (1), qcf+D, rdp+B, qcf+B, rdp+B, dp+A, (DC) qcf+BD, (wait) rdp+B, qcf+B, rdp+B, dp+A, (DC) qcf+D, rdp+B, qcf+B, rdp+B, dp+A = 463 dmg, 105 stun, builds back 1.1 stock
| |
|
| |
| * A long combo that deals a lot of stun. If you happen to convert off of a reset, go for this combo to get a stun.
| |
|
| |
|
| |
| '''2 Stock, No Drive Gauge'''
| |
|
| |
| s.C, df+D (1), qcf+D, TK qcb~hcf+AC, rdp+B, qcf+B, dp+C = 517 dmg
| |
|
| |
| * The input for the tiger knee EX Orochinagi is qcb~hcf,uf+AC
| |
|
| |
| s.C, df+D (1), qcf+D, TK qcb~hcf+AC, qcf+A, hcb+D = 521 dmg
| |
|
| |
| s.C, df+D (1), qcf+D, TK qcb~hcf+AC, qcf+A, qcf+B, dp+C = 530 dmg
| |
|
| |
| * The TK qcb~hcf+AC must be done as early as possible.
| |
|
| |
|
| |
| '''2 Stock, 1+ Drive Gauge'''
| |
|
| |
| s.C, df+D (1), qcf+D, rdp+Bx2, (SC) qcb hcf+P, rdp+B, dp+AC = 470 dmg
| |
|
| |
| cr.Bx2, st. B, qcf+B, dp+A (2) (SC) qcb~hcf+AC, qcf+Ax2, rdp+D = 503 dmg
| |
|
| |
| s.C, df+D (1), qcf+D, rdp+B, qcf+B, rdp+B, (SC) qcb~hcf+AC, rdp+B, qcf+B, rdp+B, dp+A = 512 dmg (builds 1 stock back)
| |
|
| |
| s.C, df+D (1), qcf+D, rdp+B, qcf+B, rdp+B, dp+A (SC), qcf+D, TK qcb~hcf+AC, rdp+B, qcf+B, rdp+B, dp+A = 513 dmg
| |
|
| |
| s.C, df+D (1), qcf+D, rdp+B, (SC) qcb~hcf+AC, (wait), qcf+A, hcb+K = 526 dmg
| |
|
| |
| s.C, df+D (1), qcf+D, TK qcb~hcf+AC, qcf+A, rdp+B, dp+A (1) (DC), qcf+D, rdp+B, qcf+B, rdp+B, dp+A = 572 dmg (601 dmg with j.C, builds around 1 and 1/4th of meter)
| |
|
| |
| s.C, df+D (1), qcf+D, TK qcb~hcf+AC, qcf+A, rdp+B, dp+A (1) (DC), qcf+D, rdp+B, qcf+B, dp+C = 577 dmg (605 dmg with j.C)
| |
|
| |
| CH j.CD, rdp+D (2) (DC), air qcb~hcf+AC, (land), hcb+K = 549 dmg
| |
|
| |
| * can be started near the corner too
| |
|
| |
|
| |
| '''2 Stock, 2 Drive Gauge'''
| |
|
| |
| s.C, df+D (1), qcf+D, rdp+Bx2, (SC) qcb~hcf+P, rdp+B, (SC) qcb~hcf+P = 472 dmg
| |
|
| |
| s.C, df+D (1), qcf+D, rdp+B, (SC) qcb~hcf+P, rdp+D (2), (SC) qcb~hcf+P, hcb+K = 509 dmg
| |
|
| |
| s.C, df+D, (1) qcf+D, rdp+B, qcf+B, rdp+B, (SC) qcb~hcf+AC, rdp+B, qcf+B, rdp+B, dp+A, (DC) qcf+D, rdp+B, dp+C = 547 dmg (builds 1 and 3/4ths stock back)
| |
|
| |
| s.C, df+D, (1) qcf+D, rdp+B, qcf+B, rdp+B, dp+A (DC), qcb+D, TK qcb~hcf+AC, rdp+B, qcf+B, rdp+B, dp+A, (DC) qcf+D, rdp+B, dp+C = 548 dmg
| |
|
| |
| '''3 Stock, 1+ Drive Gauge'''
| |
|
| |
| cr. B, cr. A, df+D (1), qcf+D, rdp+B, (SC in air) qcb hcf+P, (rdp+B), qcb~hcf+AC = 445 dmg
| |
|
| |
| j.C, st.C, df+D (1), qcf+D, rdp+B, (SC) air qcb~hcf+P, qcb~hcf+AC = 604 dmg
| |
|
| |
| s.C, df+D, (1) qcf+D, rdp+B, qcf+B, rdp+B, (SC) qcb~hcf+AC, rdp+B, qcf+B, rdp+B, dp+A, (DC) qcf+D, air qcb~hcf+P = 616 dmg
| |
|
| |
| === Hyper Drive Combos ===
| |
|
| |
|
| |
| '''Common HD starters'''
| |
|
| |
| * s.C, df+D, (BC) => Packs a lot of damage, and rather easy to confirm into when you use both of the hits of the df+D, then activate with the second hit. If the whole string is blocked, some characters may have the ability to punish him, so be careful.
| |
|
| |
| * cr.B, cr.A, df+D (BC) => Similar in concept with his s.C, df+D starter but starting with a low attack. Really easy 4 hit confirm into activation but has less damage that starting with s.C.
| |
|
| |
| * f+B, (BC) => Second strongest HD starter in terms of damage, but not by too much. It's an overhead attack into HD which is a rather powerful mix-up option, but it is pretty hard to confirm into because it is a single hit.
| |
|
| |
|
| |
| '''''0 Stock'''''
| |
|
| |
| '''(1)''' (corner) s.C, df+D, [BC] s.C, df+D, qcf+D, rdp+B, [dp+C (HDC) rdp+B]x3, dp+A [HDC], qcf+D, rdp+B, qcf+B, dp+C = 541 dmg
| |
|
| |
| '''(2)''' (corner) s.C, df+D, [BC] s.C, df+D, qcf+D, [rdp+B, dp+A, qcf+D]x3, rdp+B, qcf+B, dp+C = 492 dmg
| |
|
| |
|
| |
|
| |
| '''''1 Stock'''''
| |
|
| |
| '''(1)''' (corner) s.C, df+D, [BC] s.C, df+D, qcf+D, rdp+B, (dp+C (1), [HDC] rdp+B)x3, dp+A, qcf+D, [HDC] rdp+B, (SC in air) qcb~hcf+P, (wait) rdp+B, qcf+B, dp+C = 621 dmg
| |
|
| |
|
| |
|
| |
| '''''2 Stock'''''
| |
|
| |
| '''(1)''' (anywhere) s.C, df+D, [BC] s.D, dp+A, (HDC) rdp+B, [dp+A, (HDC) hcb+B (whiff)] x4, dp+C, qcfx2+AC = 699 dmg
| |
| *Switches sides every time after hcb+B if done midscreen
| |
|
| |
| '''(2)''' (anywhere) s.C, df+D, [BC] s.D, dp+A, (HDC) rdp+B, [dp+C, (HDC) rdp+B, dp+A, (HDC) hcb+B (whiff)] x2, dp+C, [HDC] rdp+B, dp+A, [HDC] qcfx2+AC = 747 dmg
| |
| *An advanced version of (1) that deals more damage
| |
|
| |
| '''(3)''' (midscreen) s.C, df+D (2), [BC] s.C, df+D (1), qcf+D, hcb+K, (HDC) dp+A, (HDC) qcf+D, (wait) rdp+B, qcf+B, rdp+B, dp+A, (HDC) qcf+D, rdp+B, dp+C, (HDC) qcf~qcf+AC = 685 dmg
| |
|
| |
| '''(4)''' (midscreen) s.C, df+D (2), [BC] s.C, df+D (1), qcf+D, hcb+K, (HDC) dp+A, (HDC) qcf+D, (wait) rdp+B, [dp+C (1), (HDC) rdp+B]x2, dp+C, (HDC) qcfx2+AC = 707 dmg
| |
|
| |
| '''(5)''' (corner) s.C, df+D, [BC] s.C, df+D, qcf+D, rdp+B, [dp+C (1), (HDC) rdp+B]x3, dp+A (1), (SC) qcfx2+AC = 730 dmg
| |
|
| |
| '''(6)''' (corner) s.C, df+D, [BC] s.D, qcf+D, rdp+B, [dp+C (1), (HDC) rdp+B]x3, dp+A (1), qcf+D, hcb+K, (SC) qcfx2+AC = 750 dmg
| |
|
| |
| '''(7)''' (corner) s.C, df+D(2),[BC] s.D, dp+A(HDC), rdp+B, [dp+C (1), (HDC)rdp+B]x2, dp+A (HDC), rdp+B, dp+C, (HDC), rdp+B, dp+C,(HDC) qcfx2+AC = 790 dmg (819 starting with j.C)
| |
|
| |
| '''(8)''' (Anywhere) (j.C) s.C, df+D(2),[BC] s.D, dp+C, (HDC) qcf+D, hcb+D, (HDC), rdp+B, dp+C, (HDC) hcb+D, (HDC) rdp+B, dp+C, (HDC) rdp+B, dp+C, (HDC) qcfx2+AC = 779 dmg
| |
|
| |
|
| |
| '''''3 Stock'''''
| |
|
| |
| '''(1)''' (corner) s.C, df+D (2), [BC] s.C, df+D (2), qcf+D, rdp+B, [SC in air] qcb~hcf+P, qcf+A, qcfx2+AC = 690 dmg
| |
|
| |
| '''(2)''' (midscreen) s.C, df+D (2), [BC] s.D, qcf+C, [HDC] qcb~hcf+P, [MC] qcfx2+AC = 717 dmg
| |
| *omit qcf+C for an easier combo with slightly less damage
| |
|
| |
| '''(3)''' (corner) s.C, df+D, [BC] s.D, qcf+D, rdp+B, [dp+C (1), (HDC) rdp+B]x3, dp+A (1), qcf+D, qcb~hcf+P, (MC) qcfx2+AC = 827 dmg
| |
|
| |
| '''(4)''' (corner) s.C, [BC], s.D, dp+A (1), (HDC) rdp+B, [dp+C (1), (HDC) rdp+B]x2, dp+A (1), (HDC) qcb~hcf+P, dp+A (1), (HDC) rdp+B, dp+C (1), qcfx2+AC = 873 dmg
| |
|
| |
|
| |
| '''''4 Stock'''''
| |
|
| |
| '''(1)''' (midscreen) s.C, df+D (2), [BC], s.D, qcb~hcf+AC, (MC) qcfx2+AC = 743 dmg
| |
|
| |
| '''(2)''' (midscreen) s.C, df+D (2), [BC], s.C, df+D (1), qcf+D, hcb+K, (HDC) dp+A, (HDC) qcf+D, (wait), rdp+B, (SC) qcb~hcf+AC, qcf+A, qcfx2+AC = 748 dmg
| |
|
| |
| *omit the qcf+A if you dont even up close to the corner)
| |
|
| |
| '''(3)''' (corner) j.C, s.C, df+D, [BC] s.D, qcf+D, rdp+B, [dp+C (1), (HDC) rdp+B]x3, (SC in air) qcb~hcf+AC, qcf+A, hcb+K, (HDC) qcfx2+AC = 891 dmg
| |
|
| |
| '''(4)''' (corner) j.C, s.C, df+D, [BC] s.C, df+D, qcf+D, rdp+B, [dp+C (1), (HDC) rdp+B]x3, dp+A, (SC in air) qcb~hcf+A, qcb~qcf+A, (HDC) qcfx2+AC = 922 dmg
| |
|
| |
| '''(5)''' (corner) s.D, [BC], s.D, dp+A (1), (HDC) rdp+B, [dp+A (1), (HDC)(slightly charged and standing) qcb~hcf+A/C]x2, dp+A (1),(HDC) rdp+B, dp+C(1),(HDC) rdp+B, dp+C(1), (HDC) qcfx2+AC = 1001 dmg
| |
|
| |
| ==Strategies==
| |
|
| |
| ===Far Range===
| |
| * Kyo can't do much of anything here except zone, use Yamibarai (qcf+P) to try and build some meter while your out of range, and if your opponent wants to zone back try throwing out a random EX as they're not likely to see it coming, drive and super canceling is out the window for now, random Kotokskio's aren't a good idea either by the way. At this range it would be better to counter jump-in's with your neutral j.D because of it's great horizontal hitbox, and his dp+C only against superjumps.
| |
|
| |
| * If you have enough meter for his NeoMax, you can use it to punish full screen fireball zoners or even to anti-air against hyper hops or jumps from that distance.
| |
|
| |
| ===Mid Range===
| |
| * This is a range where you will need to be careful both offensive while even moreso defensively. Proper jump-ins to use are his j.D for air-to-air, j.CD/j.B for to apply hop pressure, and fade away jumpback j.Cs against opponents jumping in. If you spot any sloppy or predicable jump-ins you can tag them with his dp+A or his crouching C which is a safer alternative (which may be prone to trading or becoming beaten out if not timed correctly). He has difficultly defending against incoming hop pressure because his st.A lacks horizontal range, and he doesn't have a great long ranged st. B like Benimaru. It is not impossible to stop incoming hops with his standing jab, but its lack of distance makes it unreliable.
| |
|
| |
| ===Close Range===
| |
| * Kyo can use his Naraku Otoshi (j.2C) to start BnB's/Combos from jump-ins, he can also free cancel the first hit of 88 Shiki (df+D) into a variety of moves (Kotokskio/Kai/etc), he gains a command grab with EX Kotokskio, just about every option of drive/super canceling is open to him now. He can lightly zone with his st.D which has lower body invincibility, has a good amount of pushback on block but has slow start-up. You will probably be poking most with his cr.B fishing for a hit confirm for a combo, but stay on alert for hop attacks to counter it. If you have the meter both in super stocks and drive, try one of his midscreen HD combos for some good damage if you punish anything or score a random hit with his cr.B or st.C.
| |
|
| |
| '''Cornered Opponent'''
| |
| * Even though Kyo's pressure isn't as intense as NESTS Kyo because of is qcf+A rekka, it is best to use his grounds normals to keep them locked down in the corner (ie. cr.B, cr.A, close C) while waiting in between for any reversals. After his block strings its okay to end them into qcf+P (for pushback) but it isn't foolproof against Guard Rolling. His j.2C and j.CD is very strong in this area which can give the opponent a good amount of block stun to keep them locked while you alternate in-between high/low and empty jump pressure. Any hit landed should score into a damaging combo, another hard knockdown to keep the okizeme game intense, or a reset that leads to high/low/grab mixups.
| |
|
| |
|
| |
| '''Cornered'''
| |
|
| |
| * Be patient, block and wait for any unsafe moves from the opponent or any kind of decrease of offensive attempts. Move out slowly and try your best not to dp while you leaving the corner. Don't mash any EX moves (like rdp+BD) but you can be risky whip out dp+AC against any incoming jump-ins or hop pressure if you're desperate to leave the corner.
| |
|
| |
|
| |
| ===Best Team Position?===
| |
|
| |
| * Kyo functions the best either as point or 2nd. As a point character, Kyo is excellent in building (and spending) meter. Your opponent also lacks meter to deal with Kyo’s rush down. Kyo also functions well in second position, you gain access to EX orochinagi which is one of the best, if not the best, reversal moves. In addition, you could also go for overhead into HD shenanigans for good damage. Kyo works fine as anchor, but doesn’t perform the job as well compared to many other characters. He lacks reliable touch of death HD combos, especially in mid-screen.
| |
|
| |
| ==Tips==
| |
|
| |
| '''Wall Reset'''
| |
|
| |
| 1.) s.C (or cr.B, cr.A), df+D, qcf+D, rdp+B, qcf+B, rdp+B, s.C
| |
|
| |
| The stand C resets them briefly mid-air at neutral hop level. You can use this to bait a reversal, hit them with a low attack (cr.B) or an overhead (either f+B or a hop j.B, j.2C), or throw them a normal throw or his EX hcb+K.
| |
|
| |
|
| |
| '''Frame Traps and Links'''
| |
|
| |
| *'''(L)''' = Link, can be a frame trap as well.
| |
|
| |
| *"(n) frame gap" = The amount of frames that opponent has to counter a frame trap.
| |
|
| |
| 1.) st. A > cl. C '''(L)''' - 0 frame gap between st. A and cl. C. St. A whiffs on crouching opponents, except on Daimon, Raiden, and Maxima when they are in guard position.
| |
|
| |
| 2.) st. A > cr. C - 2 frame gap between st. A and cr. C. St. A whiffs on crouching opponents, except on Daimon, Raiden, and Maxima when they are in guard position.
| |
|
| |
| 3.) cr. A > cl. C '''(L)''' - 2 frame gap between cr. A and cl. C.
| |
|
| |
| 4.) cr. A > cr. C - 4 frame gap between cr. A and cr. C.
| |
|
| |
| 5.) st. B > cl. C - 4 frame gap between st. B and cl. C.
| |
|
| |
| 6.) cr. B > cl. C '''(L)''' - 2 frame gap between cr. B and cl. C.
| |
|
| |
| 7.) cr. B > cr. C - 4 frame gap between cr. B and cr. C.
| |
|
| |
| 8.) qcf+AC > st. B - 1 frame gap between qcf+AC and st. B.
| |
|
| |
| 9.) qcf+AC > st. D - 3 frame gap between qcf+AC and st. D.
| |
|
| |
| 10.) qcf+AC > cr. D - 3 frame gap between qcf+AC and cr. D.
| |
|
| |
| 11.) qcf+AC > df+D - 4 frame gap between qcf+AC and df+D.
| |
|
| |
| 12.) qcf+BD > st. A - 4 frame gap between qcf+BD and st. A. St. A whiffs on crouching opponents, except on Daimon, Raiden, and Maxima when they are in guard position.
| |
|
| |
| 13.) qcf+BD > cr. A - 4 frame gap between qcf+BD and cr. A.
| |
|
| |
| 14.) qcf+BD > cr. B - 3 frame gap between qcf+BD and cr. B
| |
|
| |
| 15.) qcf+BD > cl. C - 2 frame gap between qcf+BD and cl. c.
| |
|
| |
| 16.) qcf+BD > cr. C - 4 frame gap between qcf+BD and cr. C.
| |
|
| |
|
| |
|
| |
| '''Evading Projectiles and Certain Moves with df+D, cr. B, and cr. D'''
| |
|
| |
| Kyo's df+D, cr. B, and cr.D gives him a rather low profile which can be useful to evade certain projectiles, special moves, normals and command moves.
| |
|
| |
| 1.) Andy's ''qcb+A'' with df+D, cr. B, or cr. D. His qcb+C can only be evaded with df+D
| |
|
| |
| 2.) Ash's ''b~f+A'' with df+D, ''b~f+C'' with df+D, cr. B, and cr.D, ''b~f+AC'' with df+D
| |
|
| |
| 3.) Saiki's ''qcf+A'' & ''qcfx2+P'' with df+D
| |
|
| |
| 4.) Robert's ''qcf+P'' with df+D
| |
|
| |
| 5.) DouLon's ''f+A'' with df+D, cr.D
| |
|
| |
| 6.) K's ''qcf+A~f+A'' with df+D and qcf+C~f+A
| |
|
| |
| 7.) King's ''qcf+K'', ''ex qcf+K'', & ''qcfx2+K'' with df+D
| |
|
| |
| 8.) Athena's ''qcb+P'' & ''ex qcb+P'' with df+D
| |
|
| |
| 9.) Takuma's ''qcf+P'' & ''qx qcf+AC'' with df+D
| |
|
| |
| ==Character Matchups==
| |
|
| |
| '''Andy Bogard'''
| |
|
| |
| * Punish light elbows (db~f+A) with st.D, EX dp, or EX orochinagi.
| |
|
| |
| '''Ash Crimson'''
| |
|
| |
| * Pay attention to whether Ash is buffering his Sans Coulette before jumping in.
| |
|
| |
| '''Athena Asamiya'''
| |
|
| |
| * f+B on block can be punished with qcf+AC or qcfx2+AC while she descends.
| |
|
| |
| '''Benimaru Nikaido'''
| |
|
| |
| * Qcf+A on block can only be punished by the 2 frame Orochinagi (qcb~hcf+AC charged briefly), or his hcb+BD command throw.
| |
|
| |
| * His qcf+C on block, at max close range midscreen can be punished by Kyo's stand B, dp+AC, 2 frame Orochinagi (qcb~hcf+AC charged briefly) and his NeoMax. Any distance farther grants Benimaru safety (example: after 2 crouching B's). In the corner (either Benimaru or Kyo), it is more punishable because of the slight pushback Kyo gains.
| |
|
| |
| * Punish Beni's air d.D with dp+C Oniyaki (dp+A and s.C will result in a hit trade)
| |
|
| |
| * Punish Beni's hop j.D with s.C, cr.C, dp+A, or rdp+b
| |
|
| |
| * Beni's dp+D will beat out all versions of Kyo's dp+P series except for EX Oniyaki DP).
| |
| '''Billy Kane'''
| |
|
| |
| * Punish his EX dp by holding forward, hit him immediately as he lands.
| |
|
| |
| '''Chin Gentsai'''
| |
|
| |
| * Watch out for Chin’s EX roll when throwing fireballs. Try to mix in empty hops in your game to bait out counters.
| |
|
| |
| * Punish Chin’s overhead with a dp on block. Even better yet, just dp him when you see the overhead animation, in case he feints the overhead.
| |
|
| |
| '''Clark Still'''
| |
|
| |
| * Any of Clark's b~f+P moves and his EX version can be punished Kyo's dp+A/C, dp+AC, rdp+BD, and qcb~hcf+AC. If Clark is close to you after you blocked the b~f+P, you can also punish with st.C followed by a full combo.
| |
|
| |
| * If you get caught by Clark’s armor on the B version of SAB, you could potentially salvage the situation by immediately canceling into qcf+D, which beats out Clark’s grab and launches him into the air.
| |
|
| |
| '''Duo Lon'''
| |
|
| |
| * Kyo's s.A, dp+A Oniyaki, and rdp+B will out prioritize Duo's f+A move. (If the player uses s.A too close to Duo while his f+A is executed this will result in a hit trade instead).
| |
|
| |
| * Kyo's d.B, s.C, or a EX HCB+K can punish teleport attempts and provide meaty attacks.
| |
|
| |
| * A preemptive j.CD from Duo will beat out Kyo's j.d.C command move
| |
|
| |
| * Duo's regular DM will go through most of Kyo's attacks, even his projectile. It is possible to hit Duo out of his DM during his active movement with s.B and CD but it will result in a hit trade.
| |
|
| |
| * Try to space Kyo two characters away from Duo to emphasize on normals and punish combos.
| |
|
| |
| * Punish Duo's j.f+B and jump-in's with s.C, cr.C, and dp+A. EX rdp+K helps thanks to its slight invulnerability start up.
| |
|
| |
| * Duo Lon’s rekka > B teleport could be punished by EX orochinagi. To do so, you need to input the motion backwards while you are in block stun of the rekka, and once Duo Lon cancels into teleport, hold down AC briefly and let go when the screen goes dark. Alternatively, rdp+B and EX rdp+K also works.
| |
|
| |
| '''Elisabeth Branctorche'''
| |
|
| |
| * Her dp+A and dp+C on block can be punished by dp+AC. Dp+C can be punished by his his dp+A, or his NeoMax.
| |
|
| |
| * Her dp+AC can be punished by Kyo's qcb~hcf+AC, rdp+B, rdp+BD and his dp+AC.
| |
|
| |
| * Her qcf+P can eat up his fireballs, except for his EX version.
| |
|
| |
| '''Goro Daimon'''
| |
|
| |
| * Watch out for earthquakes when throwing fireballs full screen.
| |
|
| |
| '''Hwa Jai'''
| |
|
| |
| * Try to stand block his dragon tails if possible. When you block high, the dragon tails have less frame advantage and fewer chances to cross up.
| |
|
| |
| '''Iori Yagami (Claw)'''
| |
|
| |
| * His block strings that ends in qcb+C is -2 on block and work as frame traps, but there is a gap before qcb+C comes out that you can mash a dp, or GC roll for a full punish.
| |
|
| |
| '''Iori Yagami (Flame)'''
| |
|
| |
| * Iori’s rekka (1st and 2nd hit) could be punished with an EX orochinagi.
| |
|
| |
| * Be careful when trying to safe jump EX Iori, as his EX command grab beats most safe jump set ups.
| |
|
| |
| '''Joe Higashi'''
| |
|
| |
| * Try not to engage in fireball wars with him. Approach him slowly, and keep him in the corner.
| |
|
| |
| '''K' '''
| |
|
| |
| * Be patient when being cornered. K’ will attempt to frametrap you all day long in the corner. If you have meter, you can GC roll out of the corner.
| |
|
| |
| '''Kim Kaphwan'''
| |
|
| |
| * Use cr.A to beat Kim’s far standing D.
| |
|
| |
| * Do not jump at him on his wakeup. His EX Flash Kick (EX d~u+K) beats everything and is hard to safe jump.
| |
|
| |
| '''King'''
| |
|
| |
| * Slowly walk her into the corner and pay attention to how she attempts to get out. Keep her in the corner and be careful of her reversals.
| |
|
| |
| '''Kula Diamond'''
| |
|
| |
| * Kula’s B Ray spin could be punished by a DP if blocked up close. The dp will hit regardless of what follow up (if any) Kula does.
| |
|
| |
| '''Kyo Kusanagi (XIII) (mirror match)'''
| |
|
| |
| '''Kyo Kusanagi (NESTS)'''
| |
|
| |
| * Tough matchup for Kyo. NEST Kyo has better normals than Kyo, and his rekkas gives him better space control. Fortunately, regular Kyo has superior damage output, so play the match carefully, wait for mistakes, and punish accordingly.
| |
|
| |
| '''Leona Heidern'''
| |
|
| |
| * Walk forward and block when Leona throws her ear ring at mid to far range.
| |
|
| |
| * Watch out for Leona’s instant overhead.
| |
|
| |
| * Her b~f+D move is neutral on block.
| |
|
| |
| '''Mai Shiranui'''
| |
|
| |
| * Another tough match up for Kyo. Mai’s excellent normal shuts down Kyo’s hop pressure. However, Mai lacks a good reversal, so try to get a knockdown and keep her on defense.
| |
|
| |
| '''Mature'''
| |
|
| |
| * Her Dp+C move is plus on block if blocked close to the waist, or blocked as a cross up.
| |
|
| |
| * Watch out for her frame traps with qcb+b move.
| |
|
| |
| '''Maxima'''
| |
|
| |
| * Cr.B is your friend, as it beats all but one of maxima’s armored normals. When Maxima starts using cr.C to counter your cr.B, this is the time to hop in.
| |
|
| |
| * Punish C vapor cannon by rolling through it.
| |
|
| |
| * When cornered and knocked down, be very careful to press any buttons as Maxima’s air EX vapor cannon has complete armor until he lands, and he could convert into a full combo on hit.
| |
|
| |
| '''Raiden'''
| |
|
| |
| * Try to abuse j.dC early in the match as much as you could, especially if Raiden is charging with B dropkicks. Raiden’s huge size makes him very easy to cross up, and his inability to roll (since he’s holding down B) doesn’t help. Later on in the match, once Raiden gets a fully charged drop kick, start playing patient, try not to jump if possible. A single jump CD could mean death to you when he has a level 4 drop kick charged!
| |
|
| |
| '''Ralf Jones'''
| |
|
| |
| * Try to get a knock down, and rush him down on wake up as he lacks a good reversal.
| |
|
| |
| '''Robert Garcia'''
| |
|
| |
| * Watch out for his wall jumps when cornering Robert. One wall jump out of the corner > cross up taco will change the tide of the match.
| |
|
| |
| '''Ryo Sakazaki'''
| |
|
| |
| * Watch out for his overhead shenenigans.
| |
|
| |
| GC roll to punish Ryo’s st.C, fireball block string.
| |
|
| |
| '''Saiki'''
| |
|
| |
| * GC roll to punish Saiki’s st.C, fireball block string.
| |
|
| |
| '''Shen Woo'''
| |
|
| |
| * Always stand block in the middle of Shen’s block strings.
| |
|
| |
| * Watch for whiffed j.CD and punish with cr.B.
| |
|
| |
| '''Sie Kensou'''
| |
|
| |
| * Watch out for a corner grab in the corner, as Kensou can convert his normal grab into huge damage in the corner.
| |
|
| |
| '''Takuma Sakazaki'''
| |
|
| |
| * Try not to meet him air to air. His j.CD will beat you most of the time. Instead, punish him with cr.B for any mistimed j.CDs.
| |
|
| |
| * Watch out for command grabs when Takuma is fully loaded with drive gauge.
| |
|
| |
| '''Mr. Karate'''
| |
|
| |
| * Similar to Takuma, do not meet him air to air, and watch out for random full screen EX command grabs.
| |
|
| |
| '''Terry Bogard'''
| |
|
| |
| * Punish his crack shoots with well-timed cr.Bs which lets you duck under. Also try to stand block crack shoots if possible, crouch guard leaves you at negative frame advantage.
| |
|
| |
| * Always stand block in the middle of Terry’s block strings to guard against EX crack shoot.
| |
|
| |
| '''Vice'''
| |
|
| |
| * Do not jump at Vice when she is fully loaded with meter. One j.CD from her leads to full HD combos.
| |
|
| |
| '''Yuri Sakazaki'''
| |
|
| |
| * Yuri's hcb+BD blocked at close range can be punished by a sweep, st.D, dp+AC, st.B, a briefly charged 2f qcb~hcf+AC, and his NeoMax (qcfx2+AC). If blocked any farther, only the 2f qcb~hcf+AC and NeoMax can only reach and punish Yuri in time.
| |
|
| |
| * Yuri’s st.B, dp+D mixups could be punished with a stand C before her dive kick comes out.
| |
|
| |
|
| ==Move Metadata== | | ==Move Metadata== |
| Line 1,649: |
Line 592: |
| {{#ev:youtube|qI76NcGahMU}} | | {{#ev:youtube|qI76NcGahMU}} |
|
| |
|
| =Discussion Threads= | | ==Discussion Threads== |
| Discuss at [http://dreamcancel.com/forum/index.php?board=95.0 Dream Cancel] | | Discuss at [http://dreamcancel.com/forum/index.php?board=95.0 Dream Cancel] |
|
| |
|
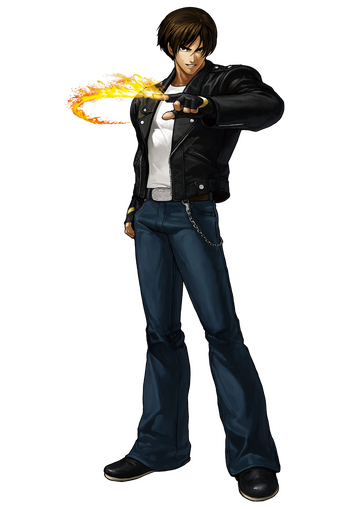
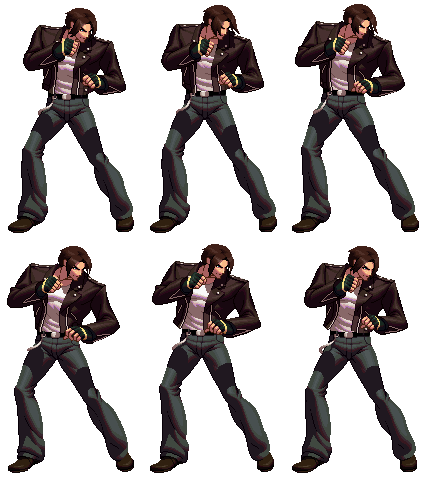
![]() /
/![]() +
+ ![]() /
/![]() close
close
![]() /
/ ![]() /
/ ![]() +
+ ![]() in the air
in the air
