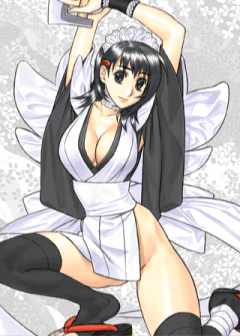
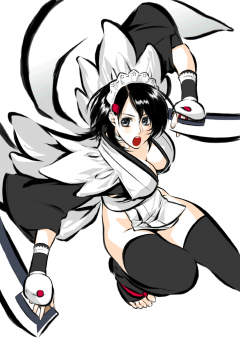
Samurai Shodown VI/Iroha
Introduction
We all horny on main tonight.
Iroha is defined by two things as far as movement is concerned: her double jump, which allows her to play a sort of footsies in the air and position herself for zoning, setups and crossups, and having a step dash instead of a run. Some returning characters have also replaced their run with a step yet they don't get quite as much mileage out of this new system as Iroha, whose steps not only travel far and fast enabling easy pressure after a knockdown but who also has normals designed around the step's limitations. Her feather shots leave her advantageous and can be tiger knee'd for different properties, and furthermore Iroha has an assortment of normals which can be kara cancelled into her air specials making her execution somewhat technical. Iroha is very strong in this game so the time it will take you to figure out these quirks is well worth the investment.
Data
- Dash type: Step
- Damage taken: 110%
- Rage retention: 180
- Rage duration: 9 seconds (4th Shortest)
Gameplan
Iroha is a crane with a sore foot. This means you will be hopping instead of running, 'flying' with double jumps, throwing feathers for frame advantage and space control and squabbling your opponent with forward hops, strong meaties and quirky mixup options. Your vitality and damage output are both pretty low, so you'll have to be ready to switch between zoning with feathers and dashing in their face on the fly.
The first thing you must know about Iroha is how her step works. She can't run, which means she has no running normals nor can she run-up grab as seamlessly as other characters are able to. Furthermore while her backdash is cancellable into air specials, her step is not. However, your step not only travels extremely far and can hop over very low attacks but it recovers quickly, making it easy to get in the opponent's face and go for either a meaty with n5B which can hit confirm easily, one of Iroha's various overheads (5D 214S up close, 6D 214S from a distance), a crossup over a crouching opponent (6D 623A/B point blank, though this does pitiful damage) or one of her low attacks (2B, 2D, 3D). If you are in Rage you may be tempted to throw in your WFT as a mixup option, as it is a command grab which deals respectable damage - however, it can be jumped on reaction, so it won't hit unless the opponent is stuck in an attack. 623C and WFT are your invincible reversals. To compensate for her limited ground movement, Iroha has 5C, 3D and 4D for long-ranged punish options. 5C travels extremely far but is unsafe. 4D is not too safe either and doesn't travel as far but it can be cancelled into specials, moreover it can be performed while unarmed.
The extra mobility option of double jumping is very important for Iroha. It not only allows her to change up her air approaches for crossups, reverse crossups and anti-air baits, but also allows her to space her Wind Slash (236S/D) projectiles effectively. These feathers are essential not only for irritating the opponent into making a move but for also leaving you advantageous. Faster versions of feathers have longer recovery which can be circumvented by tiger knee'ing them. However, it is 236A on the ground which gives you the slowest feather and the quickest recovery, allowing you to chase behind it safely or at least let it occupy the lower half of the screen while you control the skies. Using feathers in conjunction with your extra mobility options is key for not only controlling space and making your way in but for keeping Iroha herself safe, as her defense is quite low.
Iroha's WFT hits hard but she only keeps her Rage for nine seconds at most. What to do? An obvious solution is to run VI so you can hold onto meter as long as possible - you don't even need to waste meter on Hyper Guard most of the time because your Rain Hollyhock (646D) is capable of parrying a great deal of moves. If you're fine with working within that time window, you may consider II and V Spirits for the ability to roll cancel into WFT. While II gives you access to your secret move, V gives you the option to meditate away your Rage rather than bother trying to land WFT all the time. During State Of Nothingness Iroha can take advantage of 4D as a launcher, meaning the opponent can't use Rage Explosion to get out of a potentially game-winning combo.
Normal Moves
Far Slashes
- 5A - Standard jab. Not very rewarding as you can't cancel it.
- 5B - Forward swipe with decent range. Your longest range for recoil cancels, which Iroha can do best with 236S and 214A.
- 5C - Iroha lunges forward from over a dash away, which makes it great for punishes considering you can't run. Can go over low attacks but is not kara cancellable like Suija's 5C for instance. Can not be deflected.
- 2A - 5A but lower and with less range.
- 2B - 5B but lower. Hits low.
- 2C - Sluggish uppercut. Special cancellable.
Near Slashes
- n5A - Short swipe. Special cancellable but doesn't combo into anything.
- n5B - Two-hit meaty attack. Very good at catching upbacks and for hit confirming. Both hits are special cancellable.
- n5C - Two-hit punisher with no special cancel window. Does the same amount of damage as the far version.
- n2A - n5A but lower. Also special cancellable.
- n2B - Same as far version.
- n2C - Same as far version but with better frame data on block.
Kicks
- 5D - Sobat. Hits mid but is cancellable into air specials, including your j214S which hits high.
- 6D - A somersault which is also cancellable into air specials. Both hits will land on a standing opponent but only the latter will hit on a croucher, but both are special cancellable. If performed point blank on a crouching opponent Iroha will leap over them and the attack will not hit, but you can cancel into j623S for a crossup.
- 2D - Low-hitting short. Special cancellable but you won't combo into many things.
- 3D - Midscreen slide. Hits low. It can be spaced to make safer but you still lose a turn.
Air Normals
- jA - Aerial n5A in appearance.
- jB - Aerial 5B which makes it a decent air-to-air.
- jC - Beefy jump-in with some crossup potential, but you have to be on point with your spacing. Double jumping may be used to help with this.
- jD - Crossup kick that can be special cancelled even on whiff. Be mindful that VI has crossup protection so you won't be making TAS unblockables with this (e.g. by hitting in front with jD then crossing up with j214S), but given the low hitstun you get from jumping in with this special cancelling your jD will make it more rewarding.
Unarmed Normals
- u5S - Same as 5A.
- u2S - Same as 2A.
- juS - Same as jA.
Hyper Slash (I)
- A+B - Essentially her 5C but the active period travels further and she rolls further forward afterwards. Has the worst damage out of all Hyper Slashes tied with Mina and Amakusa.
Command Moves
Triangle Get Off - j3 near wall
- You don't have a regular triangle jump (you can already jump again from anywhere on the screen), but this will not consume your double jump if you haven't used it already. Your jC and jD crossup so coupled with the ability to crossup normally in the corner this movement option can be used for some cheeky setups.
Contingency Jump - j7 or j8 or j9
- This is your double jump. There is a small height restriction to this move so you can't be too tricky with it, nor can you cancel your backdash into it or anything crazy like that. Regardless, your double jump is essential for spacing feather shots, setting up crossups with Dew Drizzle and other tricks.
4D, can be done unarmed
- Shoulder tackle which launches on hit. Can be cancelled into ground specials on hit or whiff, ideally her 214A or 623B for combos. The startup is pretty slow but it reaches over a dash away fast, making it useful as a punishment tool. If spaced correctly you can whiff cancel this into your WFT for a fakeout in a similar fashion to what Blanka can do with his rolling attacks. When unarmed this is the strongest punish tool you have.
Special Moves
Wind Slash - 236S/D (air OK) (Samurai Drive)
- Iroha shoots a feather straight. Strength determines startup, feather speed and, if grounded, recovery. When performed in the air Iroha will be pushed back a bit as she falls in the same way for each version. For greater strengths of this move you may choose to tiger knee the motion to lessen its recovery, as the feather is suspended a bit above the ground already. 236A has the slowest startup and feather speed but the fastest recovery. This makes it ideal for covering your approach as you hop in, and can even link into 5C or 623A if you are spaced properly. 236C is the opposite, making it more useful for poking. 236B, of course, strikes a balance somewhere in the middle.
- 236D is a diagonal variant with 236B's startup, 236C's feather speed and the longest grounded recovery by a bit. On the ground the feather goes upward, in the air downward. Though you probably won't be using this move as an anti-air, its angle makes it ideal for locking down the screen and this is aided by your double jump.
Pinwheel - 214S (air OK) (Samurai Drive)
- A tatsu-looking move but not necessarily for the same purpose. Strength determines the startup, amount of hits and recovery. 236A has the slowest startup but is safe on block. 236B and 236C invert these and are suitable for combos, and maybe frame traps after 4D.
- This move beats pretty much everything both in front of and behind Iroha. This makes it a very effective anti-air and 236A in particular a strong pressure tool.
- The air version is an overhead which is fast enough to combo from anything in the air that's special cancellable. There is no difference between strengths.
Dew Drizzle - 623S (air OK) (Samurai Drive)
- Iroha charges like Blanka in a straight line. Strength determines the angle and amount of hits. 236A will charge horizontally, 236B diagonally and 236C near-vertically. In the air these are inverted, and the diagonals will point downward instead of upward. These are mainly combo tools. Grounded 623C is an invincible reversal but be mindful of its bad horizontal range. j236A and j236B can potentially crossup the opponent if spaced correctly, which double jumps can help you with.
Rain Hollyhock - 646D, can be done unarmed
- A parry which has a fast startup, but isn't instant. The parry itself has a brief active period but the motion makes it easy to OS with a block if they attack a bit earlier than you predict. This will parry anything high enough including fireballs, WFTs and Secret Moves, but will get hit by anything below its guard point. Anything parried will be treated as if it whiffed and Iroha is able to act immediately after a successful parry. Between 5C when armed and 3D otherwise Iroha is more than capable of capitalising off of good parries.
Toy Transformation - 321421E (II)
Supers
Crane's Dance - 236AB, can be done unarmed
- Command grab which can not be combo'd into, but deals respectable damage. Has invincibility on startup. Iroha's roll is quite good which helps her to land this move in II and V Spirits, but the downside is that she doesn't stay in Rage for long. In theory this is an effective option for recoil cancels, but it can be jumped on reaction. As such it is only really useful as a reversal or for punishes.
Dawn In Winter Snow Moon Flower - 6463214BC (II), 236BC (VI) (air OK)
- Enhanced version of 623B, travelling at the same angles on the ground and in the air but travelling farther and quicker. This attack has one damaging hit as opposed to multiple hits. Will combo reliably from jD no matter how you hit it.
Combos
Standard Combos
- n5B 214B/C/623A/B - Standard combo, easy enough to hit confirm. For damage and okizeme 214C is your best ender so use that.
- 2C 214S/623A - Same as above.
- 4D 214S/623S - Stick with 623S for this version, mainly 623B but if it hits close enough try going for 623C for a bit more damage. 214A is the only Pinwheel ender that won't reset them into blocking the rest for a free punish but it whiffs in the corner so don't bother.
- 5D/6D/jD j214S/j623S - Air combos. j214S is your best ender.
- 3C, 236AB - Arcade-only glitch. Iroha can follow up from her pursuit attack with a WFT. This can be re-enabled in console versions by switching the game mode to Arcade.
Secret Move (II, VI)
- 2C 236A, 2D SM - Corner only and only seems to work on Kusaregedo. The main takeaway is that you can combo into SM from a very quick low.
Continuous Slash (IV)
- A+B BBC j214S/j623C - Other 623S strengths can be cancelled into but they will only hit once.
State Of Nothingness (V)
- 4D, n5C, ABC - Combo from a launcher in the minimum amount of time you get for State Of Nothingness. Replacing n5C with 2C will make this combo easier but you will do a tiny bit less damage. You can juggle with n5C or jC afterwards if you have extra time.
Frame Data - Provided by Tekitogate
| Attack | Startup | On Hit | On Standing Block | On Crouching Block | Notes |
|---|---|---|---|---|---|
| n5A | 4 | -1 | -2 | +3 | |
| n2A | 4 | +1 | -2 | +3 | |
| 5A | 4 | -7 | -2 | +3 | |
| 2A | 4 | -4 | -2 | +3 | |
| jA | 7 | N/A | N/A | N/A | |
| n5B | 7 | -5 | -8 | -3 | |
| 5B | 8 | -11 | -8 | -3 | |
| 2B | 8 | -7 | N/A | -3 | |
| jB | 9 | N/A | N/A | N/A | |
| n5C | 11 | -1~0 | -20 | -15 | |
| n2C | 13 | 0~+1 | -20 | -15 | |
| 5C | 15 | KD | -33 | -28 | |
| 2C | 13 | 0~+1 | -25 | -20 | |
| jC | 10 | N/A | N/A | N/A | |
| 4D | 15 | KD | -22 | -17 | |
| 5D | 12 | -13 | -15 | -10 | -3 on crouching opponents |
| 6D | 23 | -13 | -15 | N/A | -3 on crouching opponents |
| 2D | 3 | -1 | N/A | 0 | |
| 3D | 15 | KD | N/A | -18 | |
| jD | 9 | N/A | N/A | N/A | |
| Hyper Slash | 25 | KD | -56 | -46 | |
| Continuous Slash | 8 | N/A | -20 | -15 |


