
Difference between revisions of "XV Broken/Iori Yagami"
Jump to navigation
Jump to search
Ayoitsdave (talk | contribs) Tag: Manual revert |
|||
| (21 intermediate revisions by 8 users not shown) | |||
| Line 1: | Line 1: | ||
{{CharNavbox_XV}} | {{CharNavbox_XV}} | ||
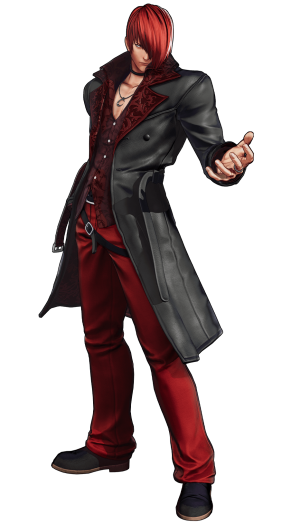
[[File:KOFXV Iori Profile.png|thumb|The Yagami clan is one of three ancient clans entrusted with a Sacred Treasure. As a descendent of this clan, Iori has access to abilities that allow him to tear apart his foes, and powerful amethyst flames granted by his knowledge of the Yagami Style of Ancient Martial Arts. His ancestors signed a blood-pact with Orochi 660 years ago, sparking a feud with the Kusanagi clan. Despite this, he decides to up-hold his duties as a member of the original sacred clans and joins KOF.]] | <section begin="image"/>[[File:KOFXV Iori Profile.png|thumb|The Yagami clan is one of three ancient clans entrusted with a Sacred Treasure. As a descendent of this clan, Iori has access to abilities that allow him to tear apart his foes, and powerful amethyst flames granted by his knowledge of the Yagami Style of Ancient Martial Arts. His ancestors signed a blood-pact with Orochi 660 years ago, sparking a feud with the Kusanagi clan. Despite this, he decides to up-hold his duties as a member of the original sacred clans and joins KOF.]]<section end="image"/> | ||
{{TOClimit|3}} | {{TOClimit|3}} | ||
==Movelist== | ==Movelist== | ||
| Line 51: | Line 51: | ||
'''Climax Super Special Moves''' | '''Climax Super Special Moves''' | ||
Ura | Ura 1131 Shiki * Hozuki - [[image:qcb.gif]][[image:db.gif]][[image:qcf.gif]] + [[image:c.gif]][[image:d.gif]] | ||
{| border="1" align="center" style="font-size:90%" | {| border="1" align="center" style="font-size:90%" | ||
| Line 123: | Line 123: | ||
==Gameplay Overview== | ==Gameplay Overview== | ||
Iori, the perennial poster child of KOF after his rival Kyo, enters into KOFXV as a all-rounder with rushdown flair. Iori's deal is speed. He loves to get into his opponents face with his fast running speed, wide-reaching normals, and fast special moves. Once he's in, Iori can confirm into his rekka series and get a hard knockdown where it really begins. He can run high/low, left/right crossup and even command grab pressure to open his opponents up. Then, he can either spend meter to cancel into big damage or stock his resources and force hard knockdown again. Overall, Iori is a mainstay in the KOF series for a reason, and beginners and veterans alike flock to him for all he offers. | |||
{{StrengthsAndWeaknesses | {{StrengthsAndWeaknesses | ||
| intro = {{SUBPAGENAME}} is an | | intro = '''''{{SUBPAGENAME}} is an all-rounder character. A KOF mainstay, he has long rewarded players with strong fundamentals. His versatile toolkit enables a flexible gameplan able to adapt to any situation.''''' | ||
| pros= | | pros= | ||
* '''Strong Rushdown''': Iori can be rather frightening once he's allowed to get in. His suite of good standing normals, far-reaching specials and a great DP let him push through the opponents offense. His ground-travelling fireball is also incredibly fast, letting him put on pressure with it from afar. With his wide toolset, Iori has the ability to fight at all ranges while aggressively approaching. | * '''Strong Rushdown''': Iori can be rather frightening once he's allowed to get in. His suite of good standing normals, great jumping buttons, far-reaching specials and a great DP let him push through the opponents offense. His ground-travelling fireball is also incredibly fast, letting him put on pressure with it from afar. With his wide toolset, Iori has the ability to fight at all ranges while aggressively approaching. | ||
* '''Great Conversions''': Easy to combo into his Rekka series for consistent damage at all ranges. The EX version launches, letting Iori continue the combo further. Iori is also constantly threatening hard knockdown thanks to his Rekka ender, which leads right into his close-range mixup game. | * '''Great Conversions''': Easy to combo into his Rekka series for consistent damage at all ranges. The EX version launches, letting Iori continue the combo further. Iori is also constantly threatening hard knockdown thanks to his Rekka ender, which leads right into his close-range mixup game. | ||
* '''Hard Knockdowns Galore''': Iori gets hard knockdown off of tons of stuff, like his rekka ender, his running command grab, and his Yaotome super. From here, Iori can get some great mixup potential and force it all over again, or back off and space out his opponent. | |||
* '''Solid Mix''': Iori has great mixup off of a hard knockdown. He has great buttons for the usual KOF jumpin high/low, but he can also cross up with j.4B, otherwise known as the infamous "taco kick". He also has a fast command grab to open up blockers, and though it doesn't deal damage, he can link it into f.C for a full combo or CD for full screen corner carry and hard knockdown. | * '''Solid Mix''': Iori has great mixup off of a hard knockdown. He has great buttons for the usual KOF jumpin high/low, but he can also cross up with j.4B, otherwise known as the infamous "taco kick". He also has a fast command grab to open up blockers, and though it doesn't deal damage, he can link it into f.C for a full combo or CD for full screen corner carry and hard knockdown. | ||
* '''Meter Dump''': All of Iori's EX moves and supers are fantastic meter dump opportunities. He can use them to help him combo, tack on extra damage after a hard knockdown, or punish approaches from fullscreen. His two-bar Quick Max meter dump also does great damage for the cost, making him a serious threat when he has access to Max Mode. | * '''Meter Dump''': All of Iori's EX moves and supers are fantastic meter dump opportunities. He can use them to help him combo, tack on extra damage after a hard knockdown, or punish approaches from fullscreen. His two-bar Quick Max meter dump also does great damage for the cost, making him a serious threat when he has access to Max Mode. His 0.5/1 bar combos are also highly damaging, with midscreen combos dealing close to 450 damage and corner combos dealing 500. | ||
* '''Mobility''': Iori's run speed is among the fastest in the game, but where he truly distinguishes himself is with "taco backdashes". These two factors give him both incredible forward mobility and nigh unmatched backward mobility respectively, making Iori not only difficult to catch, but also difficult to outspace. | * '''Mobility''': Iori's run speed is among the fastest in the game, but where he truly distinguishes himself is with "taco backdashes". These two factors give him both incredible forward mobility and nigh unmatched backward mobility respectively, making Iori not only difficult to catch, but also difficult to outspace. | ||
| cons= | | cons= | ||
* '''Poor Kick Normals''': His big kick normals have all been neutered from previous entries, being slower and easier to punish. Since Iori usually relies on his kick normals to contest space in the midrange, this has noticeably weakened his overall gameplan. | * '''Poor Kick Normals''': His big kick normals have all been neutered from previous entries, being slower and easier to punish. Since Iori usually relies on his kick normals to contest space in the midrange, this has noticeably weakened his overall gameplan. | ||
* '''Systemic Weakness''': KOFXV has made serious changes to wakeup throw that overall hamper his mix and pressure. Iori must now space himself out much more than usual or risk going for a mixup to open his opponents up. | * '''Systemic Weakness''': KOFXV has made serious changes to wakeup throw that overall hamper his mix and pressure. Iori must now space himself out much more than usual or risk going for a mixup to open his opponents up. | ||
* '''Fireball War Loser''': Iori's fireballs are only ok, with longer than average recovery. This makes him really vulnerable to fireball wars, although he has some other moves to alleviate keepaway. | * '''Fireball War Loser''': Iori's fireballs are only ok, with longer than average recovery. This makes him really vulnerable to fireball wars, although he has some other moves to alleviate keepaway. | ||
}} | }} | ||
==Normals== | ==Normals== | ||
| Line 148: | Line 147: | ||
* Mid poke that is plus on block. | * Mid poke that is plus on block. | ||
* Furthest reaching cancellable light normal. | * Furthest reaching cancellable light normal. | ||
A generic midrange poke. Notably good for blockstrings, as Far A into 236A makes Iori somewhat plus. | |||
}} | }} | ||
====Far B==== | ====Far B==== | ||
| Line 155: | Line 156: | ||
* Long and fast mid poke. | * Long and fast mid poke. | ||
* Excellent for frametraps at the end of light strings. | * Excellent for frametraps at the end of light strings. | ||
Since Far D got neutered, this is probably the best possible normal to throw out at semi-close range. Since it is not special cancellable, you won't get much on hit. Still good for contesting space. | |||
}} | }} | ||
====Far C==== | ====Far C==== | ||
| Line 169: | Line 172: | ||
* Iori's biggest poke. | * Iori's biggest poke. | ||
* A shadow of its former self. Being both slower and shorter. | * A shadow of its former self. Being both slower and shorter. | ||
Once one of Iori's best tools, Far D has gone through a rough time. Its far slower than usual, far shorter than usual, and leads to overall less reward on hit. That being said, this move is still incredibly useful if you have Max Mode stocked, since you can easily cancel it into Quick Max > cl.C > 6B > 236C > Yaotome > Saika for big damage. | |||
}} | }} | ||
| Line 186: | Line 191: | ||
* Low attack, doing more damage than 2B. | * Low attack, doing more damage than 2B. | ||
* Can be linked into Close C or canceled directly. | * Can be linked into Close C or canceled directly. | ||
If your opponent is conditioned to sit still on a jumpin, Close B can be a great way to empty low them. It instantly goes into 6A which then combos into whatever you want. | |||
}} | }} | ||
| Line 227: | Line 233: | ||
* Short horizontal range, only hits crouching opponents from very close. | * Short horizontal range, only hits crouching opponents from very close. | ||
* Has a later than usual cancel window. | * Has a later than usual cancel window. | ||
* Buffer this into 214A when anti-airing to fish for counter hits. Easily confirmable into the remaining rekkas on counter hit or stop on whiff and stay plus. | |||
}} | }} | ||
| Line 232: | Line 239: | ||
{{FrameDataCargo-KOFXV | {{FrameDataCargo-KOFXV | ||
|moveId=iori_2d | |moveId=iori_2d | ||
|captions= '98 veterans will remind you to not just throw this move out. | |||
|description= | |description= | ||
* Incredible speed and range for a sweep, but also incredibly punishable. | * Incredible speed and range for a sweep, but also incredibly punishable. | ||
| Line 260: | Line 268: | ||
|name=jump C | |name=jump C | ||
|input=j.C | |input=j.C | ||
|description2=* | |description2= | ||
* Go-to jumpin button. | |||
* Hitbox is low enough to even catch low profiling opponents. | |||
}} | }} | ||
====Jump D==== | ====Jump D==== | ||
{{FrameDataCargo-KOFXV | {{FrameDataCargo-KOFXV | ||
| Line 304: | Line 315: | ||
|description2=* Very aggressive CD attack. | |description2=* Very aggressive CD attack. | ||
* Can get low-profiled under. | * Can get low-profiled under. | ||
Iori's best jumping button for getting into his opponents grill. Hyperhop j.CD is a great way to force respect thanks to its aggressive angle and great hitbox. Can be hard for many characters to contest, even with anti-airs. | |||
}} | }} | ||
| Line 312: | Line 324: | ||
|name=Sakahagi | |name=Sakahagi | ||
|input=(close) 4/6C | |input=(close) 4/6C | ||
|captions="Inverted Ripper" | |||
|description=* Sets up a hyper hop safejump in the corner. | |description=* Sets up a hyper hop safejump in the corner. | ||
}} | }} | ||
| Line 319: | Line 332: | ||
|name=Kanyarai | |name=Kanyarai | ||
|input=(close) 4/6D | |input=(close) 4/6D | ||
|captions="God Chasing" | |||
|description=* Hard knockdown but Iori doesn't really have time to set up anything. | |description=* Hard knockdown but Iori doesn't really have time to set up anything. | ||
}} | }} | ||
| Line 325: | Line 339: | ||
{{FrameDataCargo-KOFXV | {{FrameDataCargo-KOFXV | ||
|moveId=iori_f+a | |moveId=iori_f+a | ||
|captions="Outer Method: Dream Flicking" | |||
|description= | |description= | ||
* Virtually identical to his 5C, only less damage. | * Virtually identical to his 5C, only less damage. | ||
| Line 342: | Line 357: | ||
{{FrameDataCargo-KOFXV | {{FrameDataCargo-KOFXV | ||
|moveId=iori_f+b | |moveId=iori_f+b | ||
|captions="Outer Method: Booming Axe Yin 'God of Death'" | |||
|description= | |description= | ||
* Slow grounded overhead that can be Max cancelled. | * Slow grounded overhead that can be Max cancelled. | ||
* As a string filler it's almost identical to 6A, but the slower speed makes it easier to hitconfirm. | * As a string filler it's almost identical to 6A, but the slower speed makes it easier to hitconfirm. | ||
* Frame traps when cancelled into. | * Frame traps when cancelled into. | ||
Outside of combo filler, throwing this out in pressure and meterdumping is a great way to put the fear of god into your opponent. | |||
}} | }} | ||
| Line 352: | Line 370: | ||
{{FrameDataCargo-KOFXV | {{FrameDataCargo-KOFXV | ||
|moveId=iori_jb+b | |moveId=iori_jb+b | ||
|captions="Outer Method: Lily Snapper" | |||
|description= | |description= | ||
* Iori's "Taco" Kick. Originating from the Spanish word "Tacón", referring to the heel of a shoe. | * Iori's "Taco" Kick. Originating from the Spanish word "Tacón", referring to the heel of a shoe. | ||
* Crossup tool. Neither ambiguous nor an overhead, but still a staple of his pressure/mixup game. Often used with hyper hops on opponent's wakeup. | * Crossup tool. Neither ambiguous nor an overhead, but still a staple of his pressure/mixup game. Often used with hyper hops on opponent's wakeup. | ||
* While somewhat predictable, the threat of Iori's command grab and the sheer speed of his movement can open people up with this if you run enough pressure. | |||
* Can be used during backdashes to slightly increase the distance. | * Can be used during backdashes to slightly increase the distance. | ||
* Allows for combos the deeper it hits. | * Allows for combos the deeper it hits. | ||
| Line 366: | Line 386: | ||
|name=108 Shiki • Yamibarai | |name=108 Shiki • Yamibarai | ||
|input=236A/C/AC | |input=236A/C/AC | ||
|captions="Method 108: Darkness Sweeper" | |||
|description3=* Ground-following projectile. | |description3=* Ground-following projectile. | ||
* A is slow, C is fast. | * A is slow, C is fast. | ||
| Line 380: | Line 401: | ||
|name=100 Shiki • Oniyaki | |name=100 Shiki • Oniyaki | ||
|input=623A/C/AC | |input=623A/C/AC | ||
|captions="Method 100: Ogre Baker" | |||
|description3=* Reversal/anti-air. | |description3=* Reversal/anti-air. | ||
* A version has invincibility vs air attacks. | * A version has invincibility vs air attacks. | ||
* C & EX versions have full invincibility. | * C & EX versions have full invincibility. | ||
A version recovers incredibly fast. Its negativity on block is a result of very low blockstun. | |||
}} | }} | ||
===127 Shiki • Aoibana=== | ===127 Shiki • Aoibana=== | ||
{{FrameDataCargo-KOFXV | {{FrameDataCargo-KOFXV | ||
| Line 389: | Line 413: | ||
|name=127 Shiki • Aoibana 1 | |name=127 Shiki • Aoibana 1 | ||
|input=214A/C/AC | |input=214A/C/AC | ||
|captions="Method 127: Hollyhock Flower" | |||
|description3=* Iori's rekka string done by repeating the input 3 times. | |description3=* Iori's rekka string done by repeating the input 3 times. | ||
* He ducks down before delivering a high poke, with the whole string comboing even on anti-air. | * He ducks down before delivering a high poke, with the whole string comboing even on anti-air. | ||
| Line 413: | Line 438: | ||
|name=212 Shiki • Kototsuki In | |name=212 Shiki • Kototsuki In | ||
|input=63214B/D/BD | |input=63214B/D/BD | ||
|captions="Method 212: Zither Moon Yin" | |||
|description3= | |description3= | ||
* B version is a command run with no hitbox. Can be used to reset pressure or create mix-ups from an air reset. | * B version is a command run with no hitbox. Can be used to reset pressure or create mix-ups from an air reset. | ||
| Line 425: | Line 451: | ||
|name=Kuzukaze | |name=Kuzukaze | ||
|input=632146A/C/AC | |input=632146A/C/AC | ||
|captions="Scum Wind" | |||
|description3=* Command grab that puts the opponent in a combo-able state. | |description3=* Command grab that puts the opponent in a combo-able state. | ||
* 2C > (whiff) 6A ~ 6A is sure to connect after, leading to good damage. | * 2C > (whiff) 6A ~ 6A is sure to connect after, leading to good damage. | ||
| Line 436: | Line 463: | ||
|name=311 Shiki • Tsumakushi | |name=311 Shiki • Tsumakushi | ||
|input=623B/D/BD | |input=623B/D/BD | ||
|captions="Method 311: Claw Comb" | |||
|description3= | |description3= | ||
*B version is simply an extender into his rekkas. Punishable on hit even, so get those rekkas going. | *B version is simply an extender into his rekkas. Punishable on hit even, so get those rekkas going. | ||
*D version has some projectile immunity. Safe on block and cancels into any specials. | *D version has some projectile immunity. Safe on block and cancels into any specials. Extremely useful as a pickup from 236AC, as you can cancel it into C Rekkas to do good damage and corner carry. If performed as a kara from CD will travel almost the entire screen. | ||
*EX version is a launcher with complete projectile immunity. Plus on block. | *EX version is a launcher with complete projectile immunity. Plus on block. | ||
}} | }} | ||
| Line 448: | Line 476: | ||
|name=Kin 1211 Shiki • Yaotome | |name=Kin 1211 Shiki • Yaotome | ||
|input=236214A/C/AC | |input=236214A/C/AC | ||
|captions="Forbidden Method 1211: Eight Maidens" | |||
|description3= | |description3= | ||
* Combo super, with no invul. | * Combo super, with no invul. | ||
| Line 453: | Line 482: | ||
* Has a unique follow-up super that can be performed after A or C version. | * Has a unique follow-up super that can be performed after A or C version. | ||
* A.k.a. the "Maiden Masher". | * A.k.a. the "Maiden Masher". | ||
Ol' reliable. Maiden Masher aka Shiki Yaotome is Iori's go-to ender with meter. Decent damage for the cost, but the real prize is forcing Oki or being able to cancel into Saika (see below) for an immediate kill confirm. With this, Iori can confidently meter dump and still retain a safejump opportunity anywhere on the screen, making this a great tool. Plus, the quick animation means there's lots of places to combo into this super in Iori's combo structure- 623A and 236C being good examples. | |||
}} | }} | ||
{{FrameDataCargo-KOFXV | {{FrameDataCargo-KOFXV | ||
| Line 458: | Line 489: | ||
|name=Ura 316 Shiki • Saika | |name=Ura 316 Shiki • Saika | ||
|input=236214A/C > 236236AC | |input=236214A/C > 236236AC | ||
|captions="Reverse Method 316: Jackal Luster" | |||
|description=* A follow-up to Yaotome that costs 1 bar (none in Max Mode). | |description=* A follow-up to Yaotome that costs 1 bar (none in Max Mode). | ||
Inputting this after Yaotome will allow Iori to squeeze out a bit more damage. Very useful as a kill confirm or just getting out as much damage as possible, since it still gives hard knockdown and better Oki the closer to the corner you are. | |||
Functionally, there's no difference between inputting this versus the MAX version of Yaotome- both do about the same amount of damage. That being said, the lower number of hits in this move with an odd number damage causes it to scale better in longer combos, meaning it can be useful to perform in Iori's longer corner combos. | |||
}} | }} | ||
===Ura 1018 Shiki • Yashiori=== | ===Ura 1018 Shiki • Yashiori=== | ||
{{FrameDataCargo-KOFXV | {{FrameDataCargo-KOFXV | ||
| Line 465: | Line 502: | ||
|name=Ura 1018 Shiki • Yashiori | |name=Ura 1018 Shiki • Yashiori | ||
|input=214236A/C/AC | |input=214236A/C/AC | ||
|captions="Reverse Method 1018: Eight Times Snapper" | |||
|description3=* *Values in [] indicate when the move is held. | |description3=* *Values in [] indicate when the move is held. | ||
* A big projectile cloud that lingers for quite a while. | * A big projectile cloud that lingers for quite a while. | ||
| Line 470: | Line 508: | ||
* The long startup coupled with the short lockdown makes this very hard to use outside of corner juggle resets. | * The long startup coupled with the short lockdown makes this very hard to use outside of corner juggle resets. | ||
* In any case it is still +15 on block, giving you a "free" mixup (you still have to mind escape rolls). | * In any case it is still +15 on block, giving you a "free" mixup (you still have to mind escape rolls). | ||
A weird move, but useful in some circumstances. It's primary purpose seems to be as an Oki tool, but Iori already gets tons of hard knockdown anyways and you can simply roll out of it. The MAX version has much better purpose as an extra damage tool tacked on at the end of Saika in the corner, which can really lay on the hurt. If you cancel into it after Saika and then immediately let go and slightly delay a 214A, you can relaunch them into it and retain hard knockdown. The resulting combo can easily deal close to 800 damage. | |||
}} | }} | ||
==Climax Super Special Moves== | ==Climax Super Special Moves== | ||
===Ura | ===Ura 1131 Shiki • Hozuki=== | ||
{{FrameDataCargo-KOFXV | {{FrameDataCargo-KOFXV | ||
|moveId=iori_2141236cd | |moveId=iori_2141236cd | ||
|input=2141236CD | |input=2141236CD | ||
|captions="Reverse Method 1131: Ogre Lantern" | |||
|description=* Dashes nearly full screen while fully invincible. | |description=* Dashes nearly full screen while fully invincible. | ||
}} | }} | ||
Revision as of 02:56, 25 November 2022

The Yagami clan is one of three ancient clans entrusted with a Sacred Treasure. As a descendent of this clan, Iori has access to abilities that allow him to tear apart his foes, and powerful amethyst flames granted by his knowledge of the Yagami Style of Ancient Martial Arts. His ancestors signed a blood-pact with Orochi 660 years ago, sparking a feud with the Kusanagi clan. Despite this, he decides to up-hold his duties as a member of the original sacred clans and joins KOF.
Movelist
(*) = EX OK
(!) = MAX OK
(Midair Only) = Can only be done in the air.
(Air OK) = Can be done both on the ground and in the air.
Throws
Sakahagi - ![]() /
/ ![]() +
+ ![]()
Kanyarai - ![]() /
/ ![]() +
+ ![]()
Command Normals
Ge-Shiki * Yumebiki - ![]() +
+ ![]()
- ┗Follow Up -

Ge-Shiki * Gofu In "Shinigami" - ![]() +
+ ![]()
Ge-Shiki * Yurioki - ![]() +
+ ![]() (Midair Only)
(Midair Only)
Special Moves
108 Shiki * Yamibarai - ![]() +
+ ![]() /
/ ![]() (*)
(*)
100 Shiki * Oniyaki - ![]() +
+ ![]() /
/ ![]() (*)
(*)
127 Shiki * Aoibana 1 - ![]() +
+ ![]() /
/ ![]() (*)
(*)
- ┗127 Shiki * Aoibana 2 -
 + /
+ / 
- ┗127 Shiki * Aoibana 3 - + /
- ┗127 Shiki * Aoibana 3 -
212 Sihiki * Kototsuki In - ![]() +
+ ![]() /
/ ![]() (*)
(*)
Kuzukaze - ![]()
![]() +
+ ![]() /
/ ![]() (*)
(*)
311 Shiki * Tsumakushi - ![]() +
+ ![]() /
/ ![]() (*)
(*)
Super Special Moves
Kin 1211 Shiki * Yaotome - ![]()
![]()
![]() +
+ ![]() /
/ ![]() (!)
(!)
- ┗Ura 316 Shiki * Saika -
 +
+
Ura 1018 Shiki * Yashiori - ![]()
![]()
![]() +
+ ![]() /
/ ![]() (!)
(!)
Climax Super Special Moves
Ura 1131 Shiki * Hozuki - ![]()
![]()
![]() +
+ ![]()
![]()
| 0 Meter |
Anywhere |
2B 2A 6A 214C~214P~214P = 185 dmg |
| 0.5 Meter |
Anywhere |
2B 2A 236AC, 623D~63214K = 276 dmg |
| 1 Meter |
Anywhere |
2B 2A 6A 214AC~214P~214P, 214A~214P~214P, 63214BD = 314 dmg |
| 1.5 Meters |
Anywhere |
2B 2A 236AC, 623BD, 214AC~214P~214P, 214A~214P~214P = 361 dmg |
| 2.0 Meters |
Anywhere |
2B 2A 236AC, 623BD, 236A 2363214P = 371 dmg |
| 2.5 Meters |
Midscreen |
2B 2A 236AC, 623D~236C 2363214P 236236AC = 455 dmg |
| 3.0 Meters |
Anywhere |
2B 2B f.5B BC, cl.5C 236C 2363214P 2141236CD = 560 dmg |
| 4.0 Meters |
Anywhere |
2B 2B f.5B BC, cl.5C 236C 2363214AC 2141236CD = 647 dmg |
Gameplay Overview
Iori, the perennial poster child of KOF after his rival Kyo, enters into KOFXV as a all-rounder with rushdown flair. Iori's deal is speed. He loves to get into his opponents face with his fast running speed, wide-reaching normals, and fast special moves. Once he's in, Iori can confirm into his rekka series and get a hard knockdown where it really begins. He can run high/low, left/right crossup and even command grab pressure to open his opponents up. Then, he can either spend meter to cancel into big damage or stock his resources and force hard knockdown again. Overall, Iori is a mainstay in the KOF series for a reason, and beginners and veterans alike flock to him for all he offers.
| Iori Yagami is an all-rounder character. A KOF mainstay, he has long rewarded players with strong fundamentals. His versatile toolkit enables a flexible gameplan able to adapt to any situation. | |
| Pros | Cons |
|
|
Normals
Far Standing Normals
Far A
| stand A
5A
5A  |
|---|
Far B
| stand B
5B
5B   |
|---|
Far C
| stand C
5C
5C   |
|---|
Far D
| stand D
5D
5D   |
|---|
Close Standing Normals
Close A
| close A
cl.A
cl.A   |
|---|
Close B
| close B
cl.B
cl.B   |
|---|
Close C
| close C
cl.C
cl.C     |
|---|
Close D
| close D
cl.D
cl.D   |
|---|
Crouch Normals
Crouch A
| crouch A
2A
2A   |
|---|
Crouch B
| crouch B
2B
2B   |
|---|
Crouch C
| crouch C
2C
2C   |
|---|
Crouch D
| crouch D
2D
2D   |
|---|
Jump Normals
Jump A
| jump A
j.A
j.A    |
|---|
Jump B
| jump B
j.B
j.B    |
|---|
Jump C
| jump C
j.C
j.C    |
|---|
Jump D
| jump D
j.D
j.D    |
|---|
Rush Moves
| rush
cl.AA/cl.AAX
cl.AA/cl.AAX   |
|---|
Blowback
Blowback
| Blowback
CD
CD   |
|---|
ShatterStrike
| ShatterStrike
236CD
236CD    |
|---|
jump CD
| jump CD
j.CD
j.CD    |
|---|
Throws
Sakahagi
| Sakahagi
(close) 4/6C
(close) 4/6C   |
|---|
Kanyarai
| Kanyarai
(close) 4/6D
(close) 4/6D   |
|---|
Command Moves
| Ge Shiki • Yumebiki
6A
6A  |
|---|
| Ge Shiki • Yumebiki (Follow-up)
A after Ge Shiki • Yumebiki
A after Ge Shiki • Yumebiki   |
|---|
| Ge-Shiki • Gofu in "Shinigami"
6b
6b    |
|---|
| Ge-Shiki • Yuriori
j.4B
j.4B   |
|---|
Special Moves
108 Shiki • Yamibarai
| 108 Shiki • Yamibarai
236A/C/AC
236A/C/AC      |
|---|
100 Shiki • Oniyaki
| 100 Shiki • Oniyaki
623A/C/AC
623A/C/AC             |
|---|
127 Shiki • Aoibana
| 127 Shiki • Aoibana 1
214A/C/AC
214A/C/AC         |
|---|
| 127 Shiki • Aoibana 2
214A/C/AC~214A/C
214A/C/AC~214A/C    |
|---|
| 127 Shiki • Aoibana 3
214A/C/AC~214A/C~214A/C
214A/C/AC~214A/C~214A/C     |
|---|
212 Shiki • Kototsuki In
| 212 Shiki • Kototsuki In
63214B/D/BD
63214B/D/BD         |
|---|
Kuzukaze
| Kuzukaze
632146A/C/AC
632146A/C/AC     |
|---|
311 Shiki • Tsumakushi
| 311 Shiki • Tsumakushi
623B/D/BD
623B/D/BD       |
|---|
Super Special Moves
Kin 1211 Shiki • Yaotome
| Kin 1211 Shiki • Yaotome
236214A/C/AC
236214A/C/AC     |
|---|
| Ura 316 Shiki • Saika
236214A/C > 236236AC
236214A/C > 236236AC  |
|---|
Ura 1018 Shiki • Yashiori
| Ura 1018 Shiki • Yashiori
214236A/C/AC
214236A/C/AC      |
|---|
Climax Super Special Moves
Ura 1131 Shiki • Hozuki
| Ura 1131 Shiki • Hozuki
2141236CD
2141236CD   |
|---|
Misc
Videos
Combo Guides
- Iori Basic Combos by Meno: https://youtu.be/3JdLUoq4Wrk
- Iori Basic Combos by Kakuge: https://youtu.be/FwI1dp50cH4


