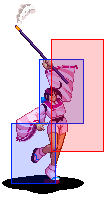
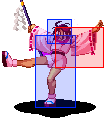
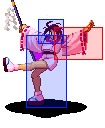
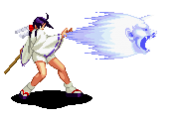
|
|
| Line 949: |
Line 949: |
|
| |
|
| ===Power and EX Mode=== | | ===Power and EX Mode=== |
| * 2C (link) 28C, 2146AB | | * 2C (link) 28C(1) 2146AB |
| * 5A/5B, 632146B | | * 5A/5B, 632146B |
| * j.B, 6C, 4B 632146B (corner) | | * j.B, 6C, 4B 632146B (corner) |
Revision as of 02:03, 25 May 2023
Overview
Placeholder. We could copy some of this stuff after review: http://wiki.shoryuken.com/Akari_(LB2)#Advanced_Strategy
| Style
|
Strengths
|
Weaknesses
|
| Power
|
- faster meter gain gain, higher overall damage making small pokes add up quickly.
- Can shut down most air approaches thanks to the threat eating a DM from her anti air when she has meter/desperation
|
- combos are more difficult than speed, 4B linked to 6C is needed for her stronger combos
|
| Speed
|
- can extend combos thanks to 4B being a chain combo normal
- one of a few characters than can combo into fandango (22A/B) making her damage potential higher than average.
- DM has more horizontal range than power, allowing it to be combod into farther away.
|
- slower meter gain than power
|
| EX
|
- 2A confirm to dm
- anti air is as big of a threat as power mode when she has meter/desperation
- DM shares the same range increase as speed, and does nearly a bar of health by itself.
|
- No meter gained for blocked normals, damage taken increased 1.3x
|
Normals
Standing
| 5A
Text
|
| DamageHow much damage the move does on hit/block. Characters in TLB2 have 256 health, but different defense modifiers.
|
StartupNumber of frames for the move to become active, first active frame included.
|
ActiveNumber of frames the move remains active for, and can hit the opponent on.
|
RecoveryNumber of frames after the active frames for the move to end and the character to become actionable, unless canceled from.
|
StateState your opponent must be in for the move to come out. Some moves can only be done when the opponent is on the ground, for example. Most moves can be done in any state.
|
Frame AdvHow much sooner or later you can act on hit/block when compared to your opponent, assuming the move is not canceled. +2 means you can act 2 frames before your opponent, -2 means your opponent can act 2 frames before you
|
MeterHow much meter the move builds on hit/block. A full bar of meter is 64 points.
|
GuardWhether the move can be blocked standing, crouching, or both. L means it has to be blocked crouching, H means standing, M means it can be blocked either way. Some moves cannot be blocked.
|
CancelWhether the move can be canceled on hit/block. ○ means it can be canceled and × means it cannot. △ means it has a special type of cancel, usually Desperation Move.
|
TechWhether you can tech the move. Air techs are performed by pressing D in the air, ground techs are rolls performed during otg recovery.
|
| P12/1 S8/0
|
9
|
2
|
14
|
-
|
P+7/-7 S+7/-8
|
-
|
M
|
-
|
-
|
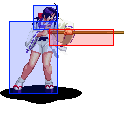
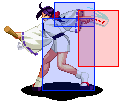
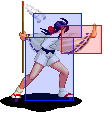
Slow jab with a high priority hitbox
|
|
| 4A
Text
|
| DamageHow much damage the move does on hit/block. Characters in TLB2 have 256 health, but different defense modifiers.
|
StartupNumber of frames for the move to become active, first active frame included.
|
ActiveNumber of frames the move remains active for, and can hit the opponent on.
|
RecoveryNumber of frames after the active frames for the move to end and the character to become actionable, unless canceled from.
|
StateState your opponent must be in for the move to come out. Some moves can only be done when the opponent is on the ground, for example. Most moves can be done in any state.
|
Frame AdvHow much sooner or later you can act on hit/block when compared to your opponent, assuming the move is not canceled. +2 means you can act 2 frames before your opponent, -2 means your opponent can act 2 frames before you
|
MeterHow much meter the move builds on hit/block. A full bar of meter is 64 points.
|
GuardWhether the move can be blocked standing, crouching, or both. L means it has to be blocked crouching, H means standing, M means it can be blocked either way. Some moves cannot be blocked.
|
CancelWhether the move can be canceled on hit/block. ○ means it can be canceled and × means it cannot. △ means it has a special type of cancel, usually Desperation Move.
|
TechWhether you can tech the move. Air techs are performed by pressing D in the air, ground techs are rolls performed during otg recovery.
|
| P12/1 S8/0
|
9
|
2
|
13
|
-
|
+8/-7
|
-
|
M
|
-
|
-
|
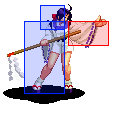
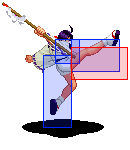
An equally slow jab with slightly less range
|
|
| 5B
Text
|
| DamageHow much damage the move does on hit/block. Characters in TLB2 have 256 health, but different defense modifiers.
|
StartupNumber of frames for the move to become active, first active frame included.
|
ActiveNumber of frames the move remains active for, and can hit the opponent on.
|
RecoveryNumber of frames after the active frames for the move to end and the character to become actionable, unless canceled from.
|
StateState your opponent must be in for the move to come out. Some moves can only be done when the opponent is on the ground, for example. Most moves can be done in any state.
|
Frame AdvHow much sooner or later you can act on hit/block when compared to your opponent, assuming the move is not canceled. +2 means you can act 2 frames before your opponent, -2 means your opponent can act 2 frames before you
|
MeterHow much meter the move builds on hit/block. A full bar of meter is 64 points.
|
GuardWhether the move can be blocked standing, crouching, or both. L means it has to be blocked crouching, H means standing, M means it can be blocked either way. Some moves cannot be blocked.
|
CancelWhether the move can be canceled on hit/block. ○ means it can be canceled and × means it cannot. △ means it has a special type of cancel, usually Desperation Move.
|
TechWhether you can tech the move. Air techs are performed by pressing D in the air, ground techs are rolls performed during otg recovery.
|
| P26/3 S16/0
|
13
|
3
|
25
|
-
|
P+1/-10 S+1/-19
|
-
|
M
|
-
|
-
|
|
|
|
| 6B
Text
|
| DamageHow much damage the move does on hit/block. Characters in TLB2 have 256 health, but different defense modifiers.
|
StartupNumber of frames for the move to become active, first active frame included.
|
ActiveNumber of frames the move remains active for, and can hit the opponent on.
|
RecoveryNumber of frames after the active frames for the move to end and the character to become actionable, unless canceled from.
|
StateState your opponent must be in for the move to come out. Some moves can only be done when the opponent is on the ground, for example. Most moves can be done in any state.
|
Frame AdvHow much sooner or later you can act on hit/block when compared to your opponent, assuming the move is not canceled. +2 means you can act 2 frames before your opponent, -2 means your opponent can act 2 frames before you
|
MeterHow much meter the move builds on hit/block. A full bar of meter is 64 points.
|
GuardWhether the move can be blocked standing, crouching, or both. L means it has to be blocked crouching, H means standing, M means it can be blocked either way. Some moves cannot be blocked.
|
CancelWhether the move can be canceled on hit/block. ○ means it can be canceled and × means it cannot. △ means it has a special type of cancel, usually Desperation Move.
|
TechWhether you can tech the move. Air techs are performed by pressing D in the air, ground techs are rolls performed during otg recovery.
|
| P50/6 S23/0
|
P22 S18
|
4
|
29
|
-
|
P-3/-13 S-3/-23
|
-
|
M
|
-
|
-
|
|
|
|
| 4B
Ever want to learn an infinite?
|
| DamageHow much damage the move does on hit/block. Characters in TLB2 have 256 health, but different defense modifiers.
|
StartupNumber of frames for the move to become active, first active frame included.
|
ActiveNumber of frames the move remains active for, and can hit the opponent on.
|
RecoveryNumber of frames after the active frames for the move to end and the character to become actionable, unless canceled from.
|
StateState your opponent must be in for the move to come out. Some moves can only be done when the opponent is on the ground, for example. Most moves can be done in any state.
|
Frame AdvHow much sooner or later you can act on hit/block when compared to your opponent, assuming the move is not canceled. +2 means you can act 2 frames before your opponent, -2 means your opponent can act 2 frames before you
|
MeterHow much meter the move builds on hit/block. A full bar of meter is 64 points.
|
GuardWhether the move can be blocked standing, crouching, or both. L means it has to be blocked crouching, H means standing, M means it can be blocked either way. Some moves cannot be blocked.
|
CancelWhether the move can be canceled on hit/block. ○ means it can be canceled and × means it cannot. △ means it has a special type of cancel, usually Desperation Move.
|
TechWhether you can tech the move. Air techs are performed by pressing D in the air, ground techs are rolls performed during otg recovery.
|
| P24/4 S16/0
|
3
|
2
|
15
|
-
|
+12/-8
|
-
|
M
|
-
|
-
|
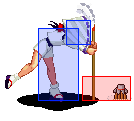
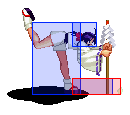
An incredibly fast move which just so happens to be untechable in the air. As such, it leads to some of the easiest loops in the game. However, do note that it won't launch on its own, so you'll need to combo into a launcher before looping your opponent. This move is also relatively safe on block and can be combo'd off of normally. Can link into every ground normal she has not named 6B, making it her go to normal for extended combos. Nullifies non dm projectiles during its active frames. Can link from 2C, 2A, 4A, 5A (for power mode combos)
|
|
| 5C
Text
|
| DamageHow much damage the move does on hit/block. Characters in TLB2 have 256 health, but different defense modifiers.
|
StartupNumber of frames for the move to become active, first active frame included.
|
ActiveNumber of frames the move remains active for, and can hit the opponent on.
|
RecoveryNumber of frames after the active frames for the move to end and the character to become actionable, unless canceled from.
|
StateState your opponent must be in for the move to come out. Some moves can only be done when the opponent is on the ground, for example. Most moves can be done in any state.
|
Frame AdvHow much sooner or later you can act on hit/block when compared to your opponent, assuming the move is not canceled. +2 means you can act 2 frames before your opponent, -2 means your opponent can act 2 frames before you
|
MeterHow much meter the move builds on hit/block. A full bar of meter is 64 points.
|
GuardWhether the move can be blocked standing, crouching, or both. L means it has to be blocked crouching, H means standing, M means it can be blocked either way. Some moves cannot be blocked.
|
CancelWhether the move can be canceled on hit/block. ○ means it can be canceled and × means it cannot. △ means it has a special type of cancel, usually Desperation Move.
|
TechWhether you can tech the move. Air techs are performed by pressing D in the air, ground techs are rolls performed during otg recovery.
|
| P12/1 S11/0
|
12
|
4
|
4
|
-
|
+4/-11
|
-
|
M
|
-
|
-
|
Hits OTG, only real use for this normal
|
|
| 6C
Metered confirm here we go!
|
| DamageHow much damage the move does on hit/block. Characters in TLB2 have 256 health, but different defense modifiers.
|
StartupNumber of frames for the move to become active, first active frame included.
|
ActiveNumber of frames the move remains active for, and can hit the opponent on.
|
RecoveryNumber of frames after the active frames for the move to end and the character to become actionable, unless canceled from.
|
StateState your opponent must be in for the move to come out. Some moves can only be done when the opponent is on the ground, for example. Most moves can be done in any state.
|
Frame AdvHow much sooner or later you can act on hit/block when compared to your opponent, assuming the move is not canceled. +2 means you can act 2 frames before your opponent, -2 means your opponent can act 2 frames before you
|
MeterHow much meter the move builds on hit/block. A full bar of meter is 64 points.
|
GuardWhether the move can be blocked standing, crouching, or both. L means it has to be blocked crouching, H means standing, M means it can be blocked either way. Some moves cannot be blocked.
|
CancelWhether the move can be canceled on hit/block. ○ means it can be canceled and × means it cannot. △ means it has a special type of cancel, usually Desperation Move.
|
TechWhether you can tech the move. Air techs are performed by pressing D in the air, ground techs are rolls performed during otg recovery.
|
| P17/2 S14/0
|
9
|
7
|
23
|
-
|
-/-23
|
-
|
M
|
-
|
-
|
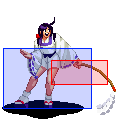
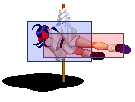
Low priority kick that causes a wallbounce. Sets up all your damaging juggles. Never throw it out on its own (unless you have a punish). Note that hitting on its later frames makes follow ups more difficult due to the recovery. This can be in issue in speed/ex, in power mode it doesn’t come up as often.
|
|
| 3B
Text
|
| DamageHow much damage the move does on hit/block. Characters in TLB2 have 256 health, but different defense modifiers.
|
StartupNumber of frames for the move to become active, first active frame included.
|
ActiveNumber of frames the move remains active for, and can hit the opponent on.
|
RecoveryNumber of frames after the active frames for the move to end and the character to become actionable, unless canceled from.
|
StateState your opponent must be in for the move to come out. Some moves can only be done when the opponent is on the ground, for example. Most moves can be done in any state.
|
Frame AdvHow much sooner or later you can act on hit/block when compared to your opponent, assuming the move is not canceled. +2 means you can act 2 frames before your opponent, -2 means your opponent can act 2 frames before you
|
MeterHow much meter the move builds on hit/block. A full bar of meter is 64 points.
|
GuardWhether the move can be blocked standing, crouching, or both. L means it has to be blocked crouching, H means standing, M means it can be blocked either way. Some moves cannot be blocked.
|
CancelWhether the move can be canceled on hit/block. ○ means it can be canceled and × means it cannot. △ means it has a special type of cancel, usually Desperation Move.
|
TechWhether you can tech the move. Air techs are performed by pressing D in the air, ground techs are rolls performed during otg recovery.
|
| 21
|
21
|
2
|
30
|
-
|
N/A
|
-
|
N/A
|
-
|
-
|
Hits OTG. Doesn’t get much use
|
|
| 8C
Text
|
| DamageHow much damage the move does on hit/block. Characters in TLB2 have 256 health, but different defense modifiers.
|
StartupNumber of frames for the move to become active, first active frame included.
|
ActiveNumber of frames the move remains active for, and can hit the opponent on.
|
RecoveryNumber of frames after the active frames for the move to end and the character to become actionable, unless canceled from.
|
StateState your opponent must be in for the move to come out. Some moves can only be done when the opponent is on the ground, for example. Most moves can be done in any state.
|
Frame AdvHow much sooner or later you can act on hit/block when compared to your opponent, assuming the move is not canceled. +2 means you can act 2 frames before your opponent, -2 means your opponent can act 2 frames before you
|
MeterHow much meter the move builds on hit/block. A full bar of meter is 64 points.
|
GuardWhether the move can be blocked standing, crouching, or both. L means it has to be blocked crouching, H means standing, M means it can be blocked either way. Some moves cannot be blocked.
|
CancelWhether the move can be canceled on hit/block. ○ means it can be canceled and × means it cannot. △ means it has a special type of cancel, usually Desperation Move.
|
TechWhether you can tech the move. Air techs are performed by pressing D in the air, ground techs are rolls performed during otg recovery.
|
| 21
|
27
|
3
|
23
|
-
|
N/A
|
-
|
N/A
|
-
|
-
|
- Hits OTG. Slow but great effective range
- A, B, and C can cancel in both Power Mode and Speed Mode
- forward + B (Power and Speed) is not cancellable
- forward + C in Speed Mode is not cancellable
|
|
Special Taunt
| Taunt Button
Achievement Unlocked: Childish Gumbino
|
| DamageHow much damage the move does on hit/block. Characters in TLB2 have 256 health, but different defense modifiers.
|
StartupNumber of frames for the move to become active, first active frame included.
|
ActiveNumber of frames the move remains active for, and can hit the opponent on.
|
RecoveryNumber of frames after the active frames for the move to end and the character to become actionable, unless canceled from.
|
StateState your opponent must be in for the move to come out. Some moves can only be done when the opponent is on the ground, for example. Most moves can be done in any state.
|
Frame AdvHow much sooner or later you can act on hit/block when compared to your opponent, assuming the move is not canceled. +2 means you can act 2 frames before your opponent, -2 means your opponent can act 2 frames before you
|
MeterHow much meter the move builds on hit/block. A full bar of meter is 64 points.
|
GuardWhether the move can be blocked standing, crouching, or both. L means it has to be blocked crouching, H means standing, M means it can be blocked either way. Some moves cannot be blocked.
|
CancelWhether the move can be canceled on hit/block. ○ means it can be canceled and × means it cannot. △ means it has a special type of cancel, usually Desperation Move.
|
TechWhether you can tech the move. Air techs are performed by pressing D in the air, ground techs are rolls performed during otg recovery.
|
| P2 S2
|
-
|
-
|
-
|
-
|
-
|
-
|
-
|
-
|
-
|
Only use this move as a meme if your opponent is at a pixel of HP. It's unblockable in the air however it's able to be deflected. If you manage to KO with this then congratulations, you might as well have won a lottery with this. :D
|
|
Crouching
| 2A
Text
|
| DamageHow much damage the move does on hit/block. Characters in TLB2 have 256 health, but different defense modifiers.
|
StartupNumber of frames for the move to become active, first active frame included.
|
ActiveNumber of frames the move remains active for, and can hit the opponent on.
|
RecoveryNumber of frames after the active frames for the move to end and the character to become actionable, unless canceled from.
|
StateState your opponent must be in for the move to come out. Some moves can only be done when the opponent is on the ground, for example. Most moves can be done in any state.
|
Frame AdvHow much sooner or later you can act on hit/block when compared to your opponent, assuming the move is not canceled. +2 means you can act 2 frames before your opponent, -2 means your opponent can act 2 frames before you
|
MeterHow much meter the move builds on hit/block. A full bar of meter is 64 points.
|
GuardWhether the move can be blocked standing, crouching, or both. L means it has to be blocked crouching, H means standing, M means it can be blocked either way. Some moves cannot be blocked.
|
CancelWhether the move can be canceled on hit/block. ○ means it can be canceled and × means it cannot. △ means it has a special type of cancel, usually Desperation Move.
|
TechWhether you can tech the move. Air techs are performed by pressing D in the air, ground techs are rolls performed during otg recovery.
|
| P12/1 S11/0
|
6
|
2
|
15
|
-
|
+6/-7
|
-
|
L
|
-
|
-
|
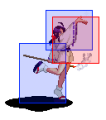
A very fast but long range jab which hits low for good measure. An incredible normal in general. Links into itself up to 4 times, links to 4B up close for damaging conversions. Use it
|
|
| 2B
1st hit
|
| DamageHow much damage the move does on hit/block. Characters in TLB2 have 256 health, but different defense modifiers.
|
StartupNumber of frames for the move to become active, first active frame included.
|
ActiveNumber of frames the move remains active for, and can hit the opponent on.
|
RecoveryNumber of frames after the active frames for the move to end and the character to become actionable, unless canceled from.
|
StateState your opponent must be in for the move to come out. Some moves can only be done when the opponent is on the ground, for example. Most moves can be done in any state.
|
Frame AdvHow much sooner or later you can act on hit/block when compared to your opponent, assuming the move is not canceled. +2 means you can act 2 frames before your opponent, -2 means your opponent can act 2 frames before you
|
MeterHow much meter the move builds on hit/block. A full bar of meter is 64 points.
|
GuardWhether the move can be blocked standing, crouching, or both. L means it has to be blocked crouching, H means standing, M means it can be blocked either way. Some moves cannot be blocked.
|
CancelWhether the move can be canceled on hit/block. ○ means it can be canceled and × means it cannot. △ means it has a special type of cancel, usually Desperation Move.
|
TechWhether you can tech the move. Air techs are performed by pressing D in the air, ground techs are rolls performed during otg recovery.
|
| 15+17+2+?
|
10
|
4-1-1-1-1
|
48
|
-
|
P-32/-10 S-32/-52
|
-
|
-10/-52
|
-
|
-
|
- A multi-hit anti-air with good priority on most of the hits. Only the first two hits come out on block.
- The first hitbox is active for 4f, subsequent hits are only active for a frame each and have gaps between one another.
|
|
| 2C
Text
|
| DamageHow much damage the move does on hit/block. Characters in TLB2 have 256 health, but different defense modifiers.
|
StartupNumber of frames for the move to become active, first active frame included.
|
ActiveNumber of frames the move remains active for, and can hit the opponent on.
|
RecoveryNumber of frames after the active frames for the move to end and the character to become actionable, unless canceled from.
|
StateState your opponent must be in for the move to come out. Some moves can only be done when the opponent is on the ground, for example. Most moves can be done in any state.
|
Frame AdvHow much sooner or later you can act on hit/block when compared to your opponent, assuming the move is not canceled. +2 means you can act 2 frames before your opponent, -2 means your opponent can act 2 frames before you
|
MeterHow much meter the move builds on hit/block. A full bar of meter is 64 points.
|
GuardWhether the move can be blocked standing, crouching, or both. L means it has to be blocked crouching, H means standing, M means it can be blocked either way. Some moves cannot be blocked.
|
CancelWhether the move can be canceled on hit/block. ○ means it can be canceled and × means it cannot. △ means it has a special type of cancel, usually Desperation Move.
|
TechWhether you can tech the move. Air techs are performed by pressing D in the air, ground techs are rolls performed during otg recovery.
|
| P10/1 S9/0
|
10
|
2
|
11
|
-
|
+10/-5
|
-
|
L
|
-
|
-
|
A kick that hits low and is very plus on hit, links into a lot of Akari's stuff which makes it a pretty useful normal despite having slower startup than 2A.
|
|
| 3C
Text
|
| DamageHow much damage the move does on hit/block. Characters in TLB2 have 256 health, but different defense modifiers.
|
StartupNumber of frames for the move to become active, first active frame included.
|
ActiveNumber of frames the move remains active for, and can hit the opponent on.
|
RecoveryNumber of frames after the active frames for the move to end and the character to become actionable, unless canceled from.
|
StateState your opponent must be in for the move to come out. Some moves can only be done when the opponent is on the ground, for example. Most moves can be done in any state.
|
Frame AdvHow much sooner or later you can act on hit/block when compared to your opponent, assuming the move is not canceled. +2 means you can act 2 frames before your opponent, -2 means your opponent can act 2 frames before you
|
MeterHow much meter the move builds on hit/block. A full bar of meter is 64 points.
|
GuardWhether the move can be blocked standing, crouching, or both. L means it has to be blocked crouching, H means standing, M means it can be blocked either way. Some moves cannot be blocked.
|
CancelWhether the move can be canceled on hit/block. ○ means it can be canceled and × means it cannot. △ means it has a special type of cancel, usually Desperation Move.
|
TechWhether you can tech the move. Air techs are performed by pressing D in the air, ground techs are rolls performed during otg recovery.
|
| P19/2 S14/0
|
8f
|
4
|
28
|
-
|
KD/-23
|
-
|
L
|
-
|
-
|
|
|
|
Air
| jA
Text
|
| DamageHow much damage the move does on hit/block. Characters in TLB2 have 256 health, but different defense modifiers.
|
StartupNumber of frames for the move to become active, first active frame included.
|
ActiveNumber of frames the move remains active for, and can hit the opponent on.
|
RecoveryNumber of frames after the active frames for the move to end and the character to become actionable, unless canceled from.
|
StateState your opponent must be in for the move to come out. Some moves can only be done when the opponent is on the ground, for example. Most moves can be done in any state.
|
Frame AdvHow much sooner or later you can act on hit/block when compared to your opponent, assuming the move is not canceled. +2 means you can act 2 frames before your opponent, -2 means your opponent can act 2 frames before you
|
MeterHow much meter the move builds on hit/block. A full bar of meter is 64 points.
|
GuardWhether the move can be blocked standing, crouching, or both. L means it has to be blocked crouching, H means standing, M means it can be blocked either way. Some moves cannot be blocked.
|
CancelWhether the move can be canceled on hit/block. ○ means it can be canceled and × means it cannot. △ means it has a special type of cancel, usually Desperation Move.
|
TechWhether you can tech the move. Air techs are performed by pressing D in the air, ground techs are rolls performed during otg recovery.
|
| P12/1 S11/0
|
5
|
2
|
N/A
|
-
|
-
|
-
|
H
|
-
|
-
|
Has both strong air to ground and air to air priority while still coming out quite quickly
|
|
| jB
Text
|
| DamageHow much damage the move does on hit/block. Characters in TLB2 have 256 health, but different defense modifiers.
|
StartupNumber of frames for the move to become active, first active frame included.
|
ActiveNumber of frames the move remains active for, and can hit the opponent on.
|
RecoveryNumber of frames after the active frames for the move to end and the character to become actionable, unless canceled from.
|
StateState your opponent must be in for the move to come out. Some moves can only be done when the opponent is on the ground, for example. Most moves can be done in any state.
|
Frame AdvHow much sooner or later you can act on hit/block when compared to your opponent, assuming the move is not canceled. +2 means you can act 2 frames before your opponent, -2 means your opponent can act 2 frames before you
|
MeterHow much meter the move builds on hit/block. A full bar of meter is 64 points.
|
GuardWhether the move can be blocked standing, crouching, or both. L means it has to be blocked crouching, H means standing, M means it can be blocked either way. Some moves cannot be blocked.
|
CancelWhether the move can be canceled on hit/block. ○ means it can be canceled and × means it cannot. △ means it has a special type of cancel, usually Desperation Move.
|
TechWhether you can tech the move. Air techs are performed by pressing D in the air, ground techs are rolls performed during otg recovery.
|
| P26/2 S13/0
|
12
|
3
|
N/A
|
-
|
-
|
-
|
H
|
-
|
-
|
Higher damage for a jump in. Can be used as air to air if they’re a bit below you but it’s not as reliable as her other air normals.
|
|
| jC
Her reliable crossup button. Also tied for fastest button in the game
|
| DamageHow much damage the move does on hit/block. Characters in TLB2 have 256 health, but different defense modifiers.
|
StartupNumber of frames for the move to become active, first active frame included.
|
ActiveNumber of frames the move remains active for, and can hit the opponent on.
|
RecoveryNumber of frames after the active frames for the move to end and the character to become actionable, unless canceled from.
|
StateState your opponent must be in for the move to come out. Some moves can only be done when the opponent is on the ground, for example. Most moves can be done in any state.
|
Frame AdvHow much sooner or later you can act on hit/block when compared to your opponent, assuming the move is not canceled. +2 means you can act 2 frames before your opponent, -2 means your opponent can act 2 frames before you
|
MeterHow much meter the move builds on hit/block. A full bar of meter is 64 points.
|
GuardWhether the move can be blocked standing, crouching, or both. L means it has to be blocked crouching, H means standing, M means it can be blocked either way. Some moves cannot be blocked.
|
CancelWhether the move can be canceled on hit/block. ○ means it can be canceled and × means it cannot. △ means it has a special type of cancel, usually Desperation Move.
|
TechWhether you can tech the move. Air techs are performed by pressing D in the air, ground techs are rolls performed during otg recovery.
|
| P12/1 S11/0
|
1
|
6
|
N/A
|
-
|
-
|
-
|
H
|
-
|
-
|
Horrible hitbox, but that 1f startup can't be ignored. Despite the hitbox being not the best it’s her best air to air thanks to the speed of it (only Zan has a normal at the same speed) Pretty reliable as a cross up.
|
|
| j2C
Stomp for knockdown
|
| DamageHow much damage the move does on hit/block. Characters in TLB2 have 256 health, but different defense modifiers.
|
StartupNumber of frames for the move to become active, first active frame included.
|
ActiveNumber of frames the move remains active for, and can hit the opponent on.
|
RecoveryNumber of frames after the active frames for the move to end and the character to become actionable, unless canceled from.
|
StateState your opponent must be in for the move to come out. Some moves can only be done when the opponent is on the ground, for example. Most moves can be done in any state.
|
Frame AdvHow much sooner or later you can act on hit/block when compared to your opponent, assuming the move is not canceled. +2 means you can act 2 frames before your opponent, -2 means your opponent can act 2 frames before you
|
MeterHow much meter the move builds on hit/block. A full bar of meter is 64 points.
|
GuardWhether the move can be blocked standing, crouching, or both. L means it has to be blocked crouching, H means standing, M means it can be blocked either way. Some moves cannot be blocked.
|
CancelWhether the move can be canceled on hit/block. ○ means it can be canceled and × means it cannot. △ means it has a special type of cancel, usually Desperation Move.
|
TechWhether you can tech the move. Air techs are performed by pressing D in the air, ground techs are rolls performed during otg recovery.
|
| P12/1 S11/0
|
7
|
2
|
N/A
|
-
|
-
|
-
|
H
|
-
|
-
|
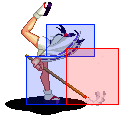
- Behaves differently in power and speed/ex. In power mode it will knock a grounded opponent down, in speed and ex it only knocks down against airborne opponents. On hit or block in speed/ex you can cancel into 8C (quick flip away), 2C (diving roll that knocks down on hit), 8B (jumping stomp that knocks down) or 8A (slowish rolling attack that will knockdown if the downward hits somehow connect)
- Best air to ground priority of Akari's jump ins
- All but low A and low C in Power mode can cancel when crouching
|
|
Dashing
| 66A
High five!
|
| DamageHow much damage the move does on hit/block. Characters in TLB2 have 256 health, but different defense modifiers.
|
StartupNumber of frames for the move to become active, first active frame included.
|
ActiveNumber of frames the move remains active for, and can hit the opponent on.
|
RecoveryNumber of frames after the active frames for the move to end and the character to become actionable, unless canceled from.
|
StateState your opponent must be in for the move to come out. Some moves can only be done when the opponent is on the ground, for example. Most moves can be done in any state.
|
Frame AdvHow much sooner or later you can act on hit/block when compared to your opponent, assuming the move is not canceled. +2 means you can act 2 frames before your opponent, -2 means your opponent can act 2 frames before you
|
MeterHow much meter the move builds on hit/block. A full bar of meter is 64 points.
|
GuardWhether the move can be blocked standing, crouching, or both. L means it has to be blocked crouching, H means standing, M means it can be blocked either way. Some moves cannot be blocked.
|
CancelWhether the move can be canceled on hit/block. ○ means it can be canceled and × means it cannot. △ means it has a special type of cancel, usually Desperation Move.
|
TechWhether you can tech the move. Air techs are performed by pressing D in the air, ground techs are rolls performed during otg recovery.
|
| P26/3 S19/0
|
12
|
2
|
30
|
-
|
P-2/-23 S-3/-23
|
-
|
M
|
Special/dm/sdm
|
-
|
|
|
|
| 66B
Le faceplant
|
| DamageHow much damage the move does on hit/block. Characters in TLB2 have 256 health, but different defense modifiers.
|
StartupNumber of frames for the move to become active, first active frame included.
|
ActiveNumber of frames the move remains active for, and can hit the opponent on.
|
RecoveryNumber of frames after the active frames for the move to end and the character to become actionable, unless canceled from.
|
StateState your opponent must be in for the move to come out. Some moves can only be done when the opponent is on the ground, for example. Most moves can be done in any state.
|
Frame AdvHow much sooner or later you can act on hit/block when compared to your opponent, assuming the move is not canceled. +2 means you can act 2 frames before your opponent, -2 means your opponent can act 2 frames before you
|
MeterHow much meter the move builds on hit/block. A full bar of meter is 64 points.
|
GuardWhether the move can be blocked standing, crouching, or both. L means it has to be blocked crouching, H means standing, M means it can be blocked either way. Some moves cannot be blocked.
|
CancelWhether the move can be canceled on hit/block. ○ means it can be canceled and × means it cannot. △ means it has a special type of cancel, usually Desperation Move.
|
TechWhether you can tech the move. Air techs are performed by pressing D in the air, ground techs are rolls performed during otg recovery.
|
| P26/3 S19/0
|
12
|
2
|
41
|
-
|
KD/-35
|
-
|
L
|
-
|
-
|
|
|
|
Universal Mechanics
| Throw
|
| DamageHow much damage the move does on hit/block. Characters in TLB2 have 256 health, but different defense modifiers.
|
StartupNumber of frames for the move to become active, first active frame included.
|
ActiveNumber of frames the move remains active for, and can hit the opponent on.
|
RecoveryNumber of frames after the active frames for the move to end and the character to become actionable, unless canceled from.
|
StateState your opponent must be in for the move to come out. Some moves can only be done when the opponent is on the ground, for example. Most moves can be done in any state.
|
Frame AdvHow much sooner or later you can act on hit/block when compared to your opponent, assuming the move is not canceled. +2 means you can act 2 frames before your opponent, -2 means your opponent can act 2 frames before you
|
MeterHow much meter the move builds on hit/block. A full bar of meter is 64 points.
|
GuardWhether the move can be blocked standing, crouching, or both. L means it has to be blocked crouching, H means standing, M means it can be blocked either way. Some moves cannot be blocked.
|
CancelWhether the move can be canceled on hit/block. ○ means it can be canceled and × means it cannot. △ means it has a special type of cancel, usually Desperation Move.
|
TechWhether you can tech the move. Air techs are performed by pressing D in the air, ground techs are rolls performed during otg recovery.
|
| -
|
-
|
-
|
33
|
-
|
-
|
-
|
-
|
-
|
-
|
Can follow with 8C otg for extra damage with good timing. Recovery time is for a missed throw
|
|
Power
| B+C
Special Attack
|
| DamageHow much damage the move does on hit/block. Characters in TLB2 have 256 health, but different defense modifiers.
|
StartupNumber of frames for the move to become active, first active frame included.
|
ActiveNumber of frames the move remains active for, and can hit the opponent on.
|
RecoveryNumber of frames after the active frames for the move to end and the character to become actionable, unless canceled from.
|
StateState your opponent must be in for the move to come out. Some moves can only be done when the opponent is on the ground, for example. Most moves can be done in any state.
|
Frame AdvHow much sooner or later you can act on hit/block when compared to your opponent, assuming the move is not canceled. +2 means you can act 2 frames before your opponent, -2 means your opponent can act 2 frames before you
|
MeterHow much meter the move builds on hit/block. A full bar of meter is 64 points.
|
GuardWhether the move can be blocked standing, crouching, or both. L means it has to be blocked crouching, H means standing, M means it can be blocked either way. Some moves cannot be blocked.
|
CancelWhether the move can be canceled on hit/block. ○ means it can be canceled and × means it cannot. △ means it has a special type of cancel, usually Desperation Move.
|
TechWhether you can tech the move. Air techs are performed by pressing D in the air, ground techs are rolls performed during otg recovery.
|
| 59
|
39-59
|
2
|
44
|
-
|
KD
|
-
|
UB
|
-
|
-
|
Incredibly short range and insanely long starup that can be held to make longer. Basically useless despite being unblockable
|
|
Speed
| B+C
Overhead
|
| DamageHow much damage the move does on hit/block. Characters in TLB2 have 256 health, but different defense modifiers.
|
StartupNumber of frames for the move to become active, first active frame included.
|
ActiveNumber of frames the move remains active for, and can hit the opponent on.
|
RecoveryNumber of frames after the active frames for the move to end and the character to become actionable, unless canceled from.
|
StateState your opponent must be in for the move to come out. Some moves can only be done when the opponent is on the ground, for example. Most moves can be done in any state.
|
Frame AdvHow much sooner or later you can act on hit/block when compared to your opponent, assuming the move is not canceled. +2 means you can act 2 frames before your opponent, -2 means your opponent can act 2 frames before you
|
MeterHow much meter the move builds on hit/block. A full bar of meter is 64 points.
|
GuardWhether the move can be blocked standing, crouching, or both. L means it has to be blocked crouching, H means standing, M means it can be blocked either way. Some moves cannot be blocked.
|
CancelWhether the move can be canceled on hit/block. ○ means it can be canceled and × means it cannot. △ means it has a special type of cancel, usually Desperation Move.
|
TechWhether you can tech the move. Air techs are performed by pressing D in the air, ground techs are rolls performed during otg recovery.
|
| 19
|
22
|
3
|
23
|
-
|
-/-20
|
-
|
H
|
-
|
-
|
- Available in EX as well.
- An overhead that causes a stagger (vs crouching opponent blocking) launches otherwise. Average speed for an overhead (most universal overheads share the same startup) but can still catch opponents off guard thanks to how diverse Akari's toolkit is. In a corner you can confirm a 4B into whatever followup you like, midscreen you can reset with a 5A/2A, 236A or try to tech chase
|
|
Speed Chain
| A>A
Behold the combo filler-inator
|
| DamageHow much damage the move does on hit/block. Characters in TLB2 have 256 health, but different defense modifiers.
|
StartupNumber of frames for the move to become active, first active frame included.
|
ActiveNumber of frames the move remains active for, and can hit the opponent on.
|
RecoveryNumber of frames after the active frames for the move to end and the character to become actionable, unless canceled from.
|
StateState your opponent must be in for the move to come out. Some moves can only be done when the opponent is on the ground, for example. Most moves can be done in any state.
|
Frame AdvHow much sooner or later you can act on hit/block when compared to your opponent, assuming the move is not canceled. +2 means you can act 2 frames before your opponent, -2 means your opponent can act 2 frames before you
|
MeterHow much meter the move builds on hit/block. A full bar of meter is 64 points.
|
GuardWhether the move can be blocked standing, crouching, or both. L means it has to be blocked crouching, H means standing, M means it can be blocked either way. Some moves cannot be blocked.
|
CancelWhether the move can be canceled on hit/block. ○ means it can be canceled and × means it cannot. △ means it has a special type of cancel, usually Desperation Move.
|
TechWhether you can tech the move. Air techs are performed by pressing D in the air, ground techs are rolls performed during otg recovery.
|
| 8
|
3
|
2
|
25
|
-
|
-4/-19
|
-
|
M
|
-
|
-
|
Moves akari forward marginally. Despite this it can miss in chain combos from farther out, making 2A a better option for some combos.
|
|
| A>B>C
Stumbling into a shmixup Second hitbox
|
| DamageHow much damage the move does on hit/block. Characters in TLB2 have 256 health, but different defense modifiers.
|
StartupNumber of frames for the move to become active, first active frame included.
|
ActiveNumber of frames the move remains active for, and can hit the opponent on.
|
RecoveryNumber of frames after the active frames for the move to end and the character to become actionable, unless canceled from.
|
StateState your opponent must be in for the move to come out. Some moves can only be done when the opponent is on the ground, for example. Most moves can be done in any state.
|
Frame AdvHow much sooner or later you can act on hit/block when compared to your opponent, assuming the move is not canceled. +2 means you can act 2 frames before your opponent, -2 means your opponent can act 2 frames before you
|
MeterHow much meter the move builds on hit/block. A full bar of meter is 64 points.
|
GuardWhether the move can be blocked standing, crouching, or both. L means it has to be blocked crouching, H means standing, M means it can be blocked either way. Some moves cannot be blocked.
|
CancelWhether the move can be canceled on hit/block. ○ means it can be canceled and × means it cannot. △ means it has a special type of cancel, usually Desperation Move.
|
TechWhether you can tech the move. Air techs are performed by pressing D in the air, ground techs are rolls performed during otg recovery.
|
| 11+19
|
12
|
5-5
|
13
|
-
|
KD/-12
|
-
|
M
|
-
|
-
|
5f gap between first and second hits.
|
|
Special Moves
Messianic Blast
236A/B
A version B version
|
| Version
|
DamageHow much damage the move does on hit/block. Characters in TLB2 have 256 health, but different defense modifiers.
|
StartupNumber of frames for the move to become active, first active frame included.
|
ActiveNumber of frames the move remains active for, and can hit the opponent on.
|
RecoveryNumber of frames after the active frames for the move to end and the character to become actionable, unless canceled from.
|
StateState your opponent must be in for the move to come out. Some moves can only be done when the opponent is on the ground, for example. Most moves can be done in any state.
|
Frame AdvHow much sooner or later you can act on hit/block when compared to your opponent, assuming the move is not canceled. +2 means you can act 2 frames before your opponent, -2 means your opponent can act 2 frames before you
|
MeterHow much meter the move builds on hit/block. A full bar of meter is 64 points.
|
GuardWhether the move can be blocked standing, crouching, or both. L means it has to be blocked crouching, H means standing, M means it can be blocked either way. Some moves cannot be blocked.
|
CancelWhether the move can be canceled on hit/block. ○ means it can be canceled and × means it cannot. △ means it has a special type of cancel, usually Desperation Move.
|
TechWhether you can tech the move. Air techs are performed by pressing D in the air, ground techs are rolls performed during otg recovery.
|
| A
|
-
|
P13 S12
|
-
|
-
|
-
|
-
|
-
|
-
|
-
|
-
|
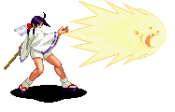
- Akari launches a blue fireball. Decent for zoning use and some combos, travels full screen.
- Cannot be blocked in the air
|
| B
|
-
|
P17 S15
|
-
|
-
|
-
|
-
|
-
|
-
|
-
|
-
|
- B version is stronger, but travels a shorter distance
- Cannot be blocked in the air
|
|
Astro-Revolve
28C
Ever wanted to make people stop jumping?
|
| DamageHow much damage the move does on hit/block. Characters in TLB2 have 256 health, but different defense modifiers.
|
StartupNumber of frames for the move to become active, first active frame included.
|
ActiveNumber of frames the move remains active for, and can hit the opponent on.
|
RecoveryNumber of frames after the active frames for the move to end and the character to become actionable, unless canceled from.
|
StateState your opponent must be in for the move to come out. Some moves can only be done when the opponent is on the ground, for example. Most moves can be done in any state.
|
Frame AdvHow much sooner or later you can act on hit/block when compared to your opponent, assuming the move is not canceled. +2 means you can act 2 frames before your opponent, -2 means your opponent can act 2 frames before you
|
MeterHow much meter the move builds on hit/block. A full bar of meter is 64 points.
|
GuardWhether the move can be blocked standing, crouching, or both. L means it has to be blocked crouching, H means standing, M means it can be blocked either way. Some moves cannot be blocked.
|
CancelWhether the move can be canceled on hit/block. ○ means it can be canceled and × means it cannot. △ means it has a special type of cancel, usually Desperation Move.
|
TechWhether you can tech the move. Air techs are performed by pressing D in the air, ground techs are rolls performed during otg recovery.
|
| -
|
8
|
-
|
-
|
-
|
-
|
-
|
-
|
-
|
-
|
- Akari leaps into the air swirling blue energy around her
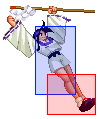
- Anti-air properties, and incredibly good at it. One of very few moves that boasts some invincibility. (upper body) Only Lee’s flash kick is as reliable as an anti air special. In power(or ex) this move is a major deterrent for anyone jumping in on you since you can confirm dm from it for a chunk of damage.
- Is Super Cancelable in Power/EX on the first hit
|
| Tenmon Kakageshi Tenshin
|
-
|
-
|
-
|
-
|
-
|
-
|
-
|
-
|
-
|
-
|
- Follow up with Tenmon Kakageshi Tenshin (28B) standard juggle ender
|
| Tenmon Tenzuru Hokuto
|
-
|
-
|
-
|
-
|
-
|
-
|
-
|
-
|
-
|
-
|
- Follow up with Tenmon Tenzuru Hokuto (28C) super cancel. Timing required to connect the dm as a juggle here, you can cancel late in the animation as well. Dm will not connect on a cornered opponent from this followup
- 28C can also be followed with 28D to make akari jump, allowing you to connect an air throw or j2C
|
|
Rice Patty Demon Dicer
623X
A version B version C version
|
| Version
|
DamageHow much damage the move does on hit/block. Characters in TLB2 have 256 health, but different defense modifiers.
|
StartupNumber of frames for the move to become active, first active frame included.
|
ActiveNumber of frames the move remains active for, and can hit the opponent on.
|
RecoveryNumber of frames after the active frames for the move to end and the character to become actionable, unless canceled from.
|
StateState your opponent must be in for the move to come out. Some moves can only be done when the opponent is on the ground, for example. Most moves can be done in any state.
|
Frame AdvHow much sooner or later you can act on hit/block when compared to your opponent, assuming the move is not canceled. +2 means you can act 2 frames before your opponent, -2 means your opponent can act 2 frames before you
|
MeterHow much meter the move builds on hit/block. A full bar of meter is 64 points.
|
GuardWhether the move can be blocked standing, crouching, or both. L means it has to be blocked crouching, H means standing, M means it can be blocked either way. Some moves cannot be blocked.
|
CancelWhether the move can be canceled on hit/block. ○ means it can be canceled and × means it cannot. △ means it has a special type of cancel, usually Desperation Move.
|
TechWhether you can tech the move. Air techs are performed by pressing D in the air, ground techs are rolls performed during otg recovery.
|
| A
|
-
|
-
|
-
|
-
|
-
|
-
|
-
|
-
|
-
|
-
|
- Akari disappears and uses her demon forces to drop her around her opponent.
- A version puts her in front of opponent
|
| B
|
-
|
-
|
-
|
-
|
-
|
-
|
-
|
-
|
-
|
-
|
- B version puts her behind the opponent
|
| C
|
-
|
-
|
-
|
-
|
-
|
-
|
-
|
-
|
-
|
-
|
- C version puts her directly above opponent
- Follow up with MeiRyu Mari Otoshi (2C) so Akari can bounce back and do more damage
- Follow up with MeiRyu Mari Houri (8C) so Akari can move away safely after attack
- Follow up with MeiRyu Houri (8B) so Akari additionally stomps on opponent
- Follow up with MeiRyu Mari Koroge (hold A/B) so Akari moves away (A) or toward (B) opponent
|
|
Koumyou Gojuugo
421A/B/C
|
| Version
|
DamageHow much damage the move does on hit/block. Characters in TLB2 have 256 health, but different defense modifiers.
|
StartupNumber of frames for the move to become active, first active frame included.
|
ActiveNumber of frames the move remains active for, and can hit the opponent on.
|
RecoveryNumber of frames after the active frames for the move to end and the character to become actionable, unless canceled from.
|
StateState your opponent must be in for the move to come out. Some moves can only be done when the opponent is on the ground, for example. Most moves can be done in any state.
|
Frame AdvHow much sooner or later you can act on hit/block when compared to your opponent, assuming the move is not canceled. +2 means you can act 2 frames before your opponent, -2 means your opponent can act 2 frames before you
|
MeterHow much meter the move builds on hit/block. A full bar of meter is 64 points.
|
GuardWhether the move can be blocked standing, crouching, or both. L means it has to be blocked crouching, H means standing, M means it can be blocked either way. Some moves cannot be blocked.
|
CancelWhether the move can be canceled on hit/block. ○ means it can be canceled and × means it cannot. △ means it has a special type of cancel, usually Desperation Move.
|
TechWhether you can tech the move. Air techs are performed by pressing D in the air, ground techs are rolls performed during otg recovery.
|
| A
|
-
|
P16 S15
|
-
|
-
|
-
|
-
|
-
|
-
|
-
|
-
|
- Reifu Uou Saou (A version) Akari hits opponent with a talisman making the left or right controls reversed
- Drains some super meter
|
| B
|
-
|
P16 S15
|
-
|
-
|
-
|
-
|
-
|
-
|
-
|
-
|
- Reifu Tenchi Muyou (B version) Akari hits opponent with a talisman making the up or down controls reversed
- Drains some super meter
|
| C
|
-
|
P16 S15
|
-
|
-
|
-
|
-
|
-
|
-
|
-
|
-
|
- Reifu Anchuu Mosaku (C version) Akari hits opponent with a talisman temporarily locking out special moves
- Drains some super meter
|
|
Pure Princess Parry
63214A
Text
|
| DamageHow much damage the move does on hit/block. Characters in TLB2 have 256 health, but different defense modifiers.
|
StartupNumber of frames for the move to become active, first active frame included.
|
ActiveNumber of frames the move remains active for, and can hit the opponent on.
|
RecoveryNumber of frames after the active frames for the move to end and the character to become actionable, unless canceled from.
|
StateState your opponent must be in for the move to come out. Some moves can only be done when the opponent is on the ground, for example. Most moves can be done in any state.
|
Frame AdvHow much sooner or later you can act on hit/block when compared to your opponent, assuming the move is not canceled. +2 means you can act 2 frames before your opponent, -2 means your opponent can act 2 frames before you
|
MeterHow much meter the move builds on hit/block. A full bar of meter is 64 points.
|
GuardWhether the move can be blocked standing, crouching, or both. L means it has to be blocked crouching, H means standing, M means it can be blocked either way. Some moves cannot be blocked.
|
CancelWhether the move can be canceled on hit/block. ○ means it can be canceled and × means it cannot. △ means it has a special type of cancel, usually Desperation Move.
|
TechWhether you can tech the move. Air techs are performed by pressing D in the air, ground techs are rolls performed during otg recovery.
|
| -
|
25f
|
-
|
-
|
-
|
-
|
-
|
-
|
-
|
-
|
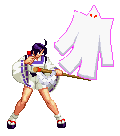
- Akari puts her staff to the ground. If hit connects, a demon bell drops on her her opponent, exploding seconds later. Can be combod into, or used as a tick throw. Has a 2nd animation that can trigger that does slightly more damage, but it makes otg follows impossible (akari falls inside the bell). There’s no way to control which you get, it’s purely rng. Has a lot of range for a grab (2nd only to Shigen’s 41236B/C command grabs and his dm/sdm)
- Command Grab
|
|
Changing Troll
63214B
Text
|
| DamageHow much damage the move does on hit/block. Characters in TLB2 have 256 health, but different defense modifiers.
|
StartupNumber of frames for the move to become active, first active frame included.
|
ActiveNumber of frames the move remains active for, and can hit the opponent on.
|
RecoveryNumber of frames after the active frames for the move to end and the character to become actionable, unless canceled from.
|
StateState your opponent must be in for the move to come out. Some moves can only be done when the opponent is on the ground, for example. Most moves can be done in any state.
|
Frame AdvHow much sooner or later you can act on hit/block when compared to your opponent, assuming the move is not canceled. +2 means you can act 2 frames before your opponent, -2 means your opponent can act 2 frames before you
|
MeterHow much meter the move builds on hit/block. A full bar of meter is 64 points.
|
GuardWhether the move can be blocked standing, crouching, or both. L means it has to be blocked crouching, H means standing, M means it can be blocked either way. Some moves cannot be blocked.
|
CancelWhether the move can be canceled on hit/block. ○ means it can be canceled and × means it cannot. △ means it has a special type of cancel, usually Desperation Move.
|
TechWhether you can tech the move. Air techs are performed by pressing D in the air, ground techs are rolls performed during otg recovery.
|
| -
|
-
|
-
|
-
|
-
|
-
|
-
|
-
|
-
|
-
|
- Akari fakes sleeping and awaits a counter. If opponent hits her as she "sleeps" she disappears and reappears above opponent to land on them
|
|
Transforming Troll
63214C
Copy Zantetsu, profit
|
| DamageHow much damage the move does on hit/block. Characters in TLB2 have 256 health, but different defense modifiers.
|
StartupNumber of frames for the move to become active, first active frame included.
|
ActiveNumber of frames the move remains active for, and can hit the opponent on.
|
RecoveryNumber of frames after the active frames for the move to end and the character to become actionable, unless canceled from.
|
StateState your opponent must be in for the move to come out. Some moves can only be done when the opponent is on the ground, for example. Most moves can be done in any state.
|
Frame AdvHow much sooner or later you can act on hit/block when compared to your opponent, assuming the move is not canceled. +2 means you can act 2 frames before your opponent, -2 means your opponent can act 2 frames before you
|
MeterHow much meter the move builds on hit/block. A full bar of meter is 64 points.
|
GuardWhether the move can be blocked standing, crouching, or both. L means it has to be blocked crouching, H means standing, M means it can be blocked either way. Some moves cannot be blocked.
|
CancelWhether the move can be canceled on hit/block. ○ means it can be canceled and × means it cannot. △ means it has a special type of cancel, usually Desperation Move.
|
TechWhether you can tech the move. Air techs are performed by pressing D in the air, ground techs are rolls performed during otg recovery.
|
| -
|
-
|
-
|
-
|
-
|
-
|
-
|
-
|
-
|
-
|
- Uses paper talisman to turn into her opponent temporarily (same character and power type). Cannot use DM or SDM as transformed person, and will revert to herself if hit
|
|
Desperation Moves
Sextex Synthesis
2146AB
Gives people Scolopendrphobia
|
| DamageHow much damage the move does on hit/block. Characters in TLB2 have 256 health, but different defense modifiers.
|
StartupNumber of frames for the move to become active, first active frame included.
|
ActiveNumber of frames the move remains active for, and can hit the opponent on.
|
RecoveryNumber of frames after the active frames for the move to end and the character to become actionable, unless canceled from.
|
StateState your opponent must be in for the move to come out. Some moves can only be done when the opponent is on the ground, for example. Most moves can be done in any state.
|
Frame AdvHow much sooner or later you can act on hit/block when compared to your opponent, assuming the move is not canceled. +2 means you can act 2 frames before your opponent, -2 means your opponent can act 2 frames before you
|
MeterHow much meter the move builds on hit/block. A full bar of meter is 64 points.
|
GuardWhether the move can be blocked standing, crouching, or both. L means it has to be blocked crouching, H means standing, M means it can be blocked either way. Some moves cannot be blocked.
|
CancelWhether the move can be canceled on hit/block. ○ means it can be canceled and × means it cannot. △ means it has a special type of cancel, usually Desperation Move.
|
TechWhether you can tech the move. Air techs are performed by pressing D in the air, ground techs are rolls performed during otg recovery.
|
| -
|
P24/S25
|
1
|
-
|
-
|
-/-30
|
-
|
-
|
-
|
-
|
- Akari hops and hits low to summon a demon centipede. If it hits, the centipede will come from the ground to carry opponet, while Akari rides the centipede on its side. Has slightly more horizontal range in speed than in power. Can connect from any B attack (minus 6B) as a ground combo in any mode, and from 4B in juggle. Has 1F more startup in speed/ex than it does in power, this does not effect combos though.
|
|
Super Desperation Moves
100 Demon Sabbath
632146B
Que parade fanfare
|
| DamageHow much damage the move does on hit/block. Characters in TLB2 have 256 health, but different defense modifiers.
|
StartupNumber of frames for the move to become active, first active frame included.
|
ActiveNumber of frames the move remains active for, and can hit the opponent on.
|
RecoveryNumber of frames after the active frames for the move to end and the character to become actionable, unless canceled from.
|
StateState your opponent must be in for the move to come out. Some moves can only be done when the opponent is on the ground, for example. Most moves can be done in any state.
|
Frame AdvHow much sooner or later you can act on hit/block when compared to your opponent, assuming the move is not canceled. +2 means you can act 2 frames before your opponent, -2 means your opponent can act 2 frames before you
|
MeterHow much meter the move builds on hit/block. A full bar of meter is 64 points.
|
GuardWhether the move can be blocked standing, crouching, or both. L means it has to be blocked crouching, H means standing, M means it can be blocked either way. Some moves cannot be blocked.
|
CancelWhether the move can be canceled on hit/block. ○ means it can be canceled and × means it cannot. △ means it has a special type of cancel, usually Desperation Move.
|
TechWhether you can tech the move. Air techs are performed by pressing D in the air, ground techs are rolls performed during otg recovery.
|
| -
|
14
|
-
|
-
|
-
|
-
|
-
|
-
|
-
|
-
|
- A legion of demons or spirits come to trample opponent and Akari. Opponent will take damage, Akari will not. Has some use as anti air, but mostly used in juggles. Horizontal range is slightly less than 5A. Fast enough to combo from anything cancelable on the ground if you’re in range. 4A 4A 5A 632146B can work in power
|
|
Combos
Any Mode
- Juggling with 4B more than twice in a combo is generally frowned upon
- 4B, 4B
- 4B can be repeated indefinitely vs grounded opponent, (albeit difficultly) short dash forwards between 4B hits.
- Dash A/B, 236B
- Dash A/B, 421C
- 2C, 28C 28B/C. 28C here is a link for power mode
- j.B, 2B, 28C, 28C, 8C
- j.B, 6C, 4B, 28C, 28B 5C
- j.B, 4B, 2B(1) 2146AB
- j.B, 4B, 4B, 5B, 2146AB. 4B, 5B is a one frame link. Corner only in power mode.
- Grounded portion of combos works from any jump in attack
- 28C 28D, j2C/jCD
Power Mode
- 6C, 2146AB
- 6C, 632146B corner
- learning to link into 4B and the 4B, 6C link is important for her stronger combos in power.
- 2A, 4B, 6C, dash 4B 236A. Good damage from a strong low poke.
- 2C, 4A, 4B, 6C dash 4B 236A
- 4/5A, 2A, 4B, 6C dash 4B 2146AB
- 6C dash 4B dash jCD
- whatever into 4B, 6C, dash 28C 28C 2146AB
EX Mode
- 2A 2A 28C(1) 2146AB
- 5A 2B(1) BC, 632146B (corner only)
- 4A 5A 2A 2B(1) 632146B
- 4A 5A 5A 632146B (easier than the above combo)
- 5A 2A 4B 5A 2A 6C 28C 28C 2146AB works anywhere but deep in a corner. Fancy confirm for fun, doing an extended chain into Dm is slightly more damage.
- chain combo to 6C 4B 28C(1) 2146AB (corner) you need to hold the dm to have it connect.
- All speed combos work in ex
Power and EX Mode
- 2C (link) 28C(1) 2146AB
- 5A/5B, 632146B
- j.B, 6C, 4B 632146B (corner)
- 5A, 28C, 28C, 2146AB
- 4A, 4A, 5A 632146B
Speed
- 4A 5A 5A 5B 6C 8C otg
- BC, 236A
- 5A, 2A, 2B(1), 4B, 5A, 2A, 5B 2146AB
- Dash A/B 5B, 236B
- 4A 5A 5A 5B 6C, dash 4B, 2146AB
- 4A 5A 2A 2B(1) 6C, 4B, 236A, 9CD (corner)
- A + B + C + A + B + C + C + B + 236A, 4B 28C 28B (corner)
- 5A, 2A, 2B(1), 4B, 5A, 2A, 2B(1), 6C dash 4B 236A (bnb outside a corner) can end with 4B 2146AB with meter/desperation.
- 5A, 2A, 2B(1), 4B, 5A, 2A, 2B(1), 6C, 4B, 22B(1), 5A, 2A, 2B(1), 4B, 5A, 2A, 2B(1), 6C, 4B, 28C 28B otg 5C (corner)
- chain into 6C 4B 22B(1) 4B, dash 4B, dash 5A 2A 4B, 5A 2A 6C 4B 28C 28B corner. Above combo is more consistent, this is for showing off.
Super Speed Combos
- A + B + C + A + B + C + A + B + 236C
- A + B + C + A + B + C + C + B + 236A
- A + B + C + 2C + A + 2C + 6BC
- A + B + C + 2C + A + BC + A + 236B
Guard cancel
- 421D, 4B, dash 4B 236A. Use 4B 28C 28B if opponent is put in a corner
- 421D, 4B, dash 4B 2146AB (with desperation)
- 412D, 28C, 28B otg 5C (easiest)
