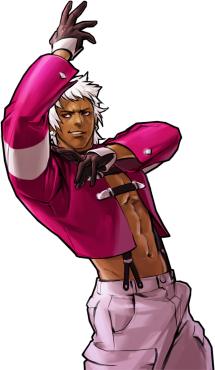
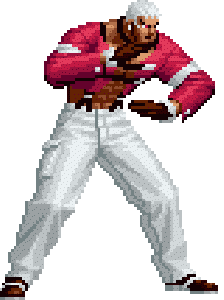
The King of Fighters 2002 UM/Orochi Yashiro
Movelist
Throws
Command Moves
Special Moves
Desperation Moves
Ankoku Jigoku Otoshi Gokuraku - ![]()
![]() +
+ ![]() /
/ ![]()
Super Desperation Moves
Ankoku Jigoku Otoshi Gokuraku - ![]()
![]() +
+ ![]()
![]()
Hidden Super Desperation Move
| 0 Bar |
Anywhere |
cr.A, cr.A/st.A, st.B / hcb,f+P = 10/23% |
| 1 Bar |
Anywhere |
(jump-in), cl.C, f+A, hcbx2+P = 34% |
| 3 Bar |
Anywhere |
(jump-in), cl.C, f+A, hcbx2+AC = 55% |
Gameplay Overview
Normals
Close
- cl. A/B/C/D are all cancel-able
- cl. A is chain-able into itself, and cl.B
- cl. A whiffs on crouching opponents
- cl. B and cl. D isn't a low
- cl. C and cl. D starts many of his ground combos
Standing
- st. A is chain-able into itself and st. B
- st. A/B/C/D are not cancel-able
- st. B is a good short ranged poked
- st. C/D moves Yashiro forward slightly
- st. D is good for stopping incoming hops
Crouching
- cr. A/C/D are cancel-able on hit and block
- cr. A is chain-able into itself and st. A
- cr. B is chain-able into cr. A and cl. A
- cr. A is a good close ranged poke
- cr. C is an uppercut that can be used as an anti-air or a combo starter
- cr. D can be canceled into special moves on whiffed
Jumping
- j. A points downward, and is a good attack for ground to air, and jumping away
- j. B swings from down to up, is good for air to air situations, and using from ground to the air
- j. C aims downward and is a great jump-in/air to ground
- j. D swings horizontal and is good for air-to-air and jump-in attack
Blowback
- A good ranged shoulder attack, cancel-able on hit and block, and whiff cancel-able
- j. CD is a good attack for air-to-air which can be low profiled and whiffs on crouching opponents
Throws
Baku - Close, b/f + C
- Yashiro knocks them back in the direction that he was facing
Beki - Close, b/f + D
- Yashiro grabs them and throws them in the opposite direction they were facing
- hard knockdown and the opponent's back is turned when waking up
- gives you enough time to run up to them or jump in before they get up, even from midscreen
Command Moves
Saku - f + A
- Yashiro does a slow overhead smash with his fist
- overhead
- cancellable if cancelled into
- if cancelled into, this move does almost no damage and loses the overhead property but comes out much faster and doesn't knock down
- this move makes Yashiro move forward, making combos more likely to land than if using the more damaging f+B
Bu - f + B
- Yashiro does a horizontal kick forward, which has decent range
- cancellable
Special Moves
Niragu Daichi - hcf + A/C
- delayed command throw that has invincibility before the point when the throw contact will register. The opponent is thrown into the air, and can be juggled on the way down
- if Yashiro does not hit the opponent, opponent suffers a hard knockdown and falls with their back turned
- great move for setting up some resets that lead to some good damage
Musebu Daichi - hcb, f + A/C
- instant one frame grab
- hard knockdown
- opponent is knocked down with their back turned
Odoru Daichi - hcf + B/D
- Yashiro runs forward and grabs the opponent
- can't be comboed into unlike in kof98
- hard knockdown
Kujiku Daichi - qcb + A/C
- Yashiro jumps into the air, and grabs the opponent if he falls on them and they are on the ground. qcb+C jumps further and higher than qcb+A
- if this move is successful, Yashiro switches sides with opponent and has enough time to walk up and combo them
- very easy to evade and punish and not recommended to be used much, if at all
- free cancellable into
Unaru Daichi - dp + A/C
- Slow startup moves that leaves Yashiro at considerable frame advantage.
- Can link into hcb,f+P and super in the corner.
- This move has an enormous amount of active frame and is therefore good to hit meaty which opens possibilities to walk in and combo.
Desperation Moves
Ankoku Jigoku Otoshi Gokuraku - hcb x 2 + A/C
- instant one frame grab
- Yashiro has alot of time to move around as the opponent falls, giving him opportunity for mixups
Araburu Daichi - qcf x 2 + B/D
- Yashiro leaps across the screen, about 3/4 screen length and grabs the opponent if he connects
- hard knockdown and opponent gets up with their back turned
- extremely easy to see coming and evade due to the super flash before he leaps
Super Desperation Moves
Ankoku Jigoku Otoshi Gokuraku - hcb x 2 + AC
- one frame grab that does more damage than his hcbx2+P DM
Araburu Daichi - qcf x 2 + BD
- same as his DM version, but alot more damaging
- unblockable
- hard knockdown and opponent gets up with their back turned
- extremely easy to see coming and evade because of the super flash
Hidden Super Desperation Move
Armaggedon - hcb x 2 + BD
- Yashiro does a massive punch across the screen that takes a long time to come out
- Yashiro has full body autoguard and invincibility during the entire startup and active period.
- unblockable
- Combos of a hcf+P in the corner.
Combos
Written as is you can add a jump-in to every combo though you may need to remove a cr.A if the combo starts with one.
- Replacing cl.C and f+A by cl.D and f+B does more damage but also more pushback, making them harder to fit with a jump-in.
- Similarly, you can replace the first cr.A of a chain with cr.B for a low starter but the timing for cr.B, cr.A is annoyingly awkward so it's not recommended.
cl.A whiffs on everyone crouching but Whip and Chang so make sure the opponent is standing or you're far enough to get the more reliable far A, like after 2 cr.As.
- If the opponent is standing and you use cl.A, you can link hcb,f+P / hcbx2+P/AC after it instead of canceling, which may be a bit easier.
0 Stock
Anywhere
- cr.A, cr.A/st.A, hcb,f+P / st.B
- Good and easy poke string. hcb,f+A does more damage but it's whiff punishable if you don't properly confirm into it. If unsure, stick to st.B, in which case you can add a cr.A. 23% with hcb,f+P.
★ cl.C, f+A, hcf+B / hcb,f+P
- Your main, very reliable bnb. hcb,f+P does more damage but hcf+B has better carry and oki, stop at f+A on block. 22/28%.
1 Stock
Anywhere
- cr.A, cr.A/st.A, hcbx2+P
- Not a low conversion which sucks but still practical since cr.A is fast and has decent range. Do it as cr.A, hcb, cr.A/st.A, hcb+P or incorporate cr.A/st.A in the first hcb. 30%.
- cl.C, f+A, hcbx2+P
- Somewhat decent 1 bar conversion with great oki. Not much damage gained over the meterless version. 34%.
2 Stocks
You can replace cl.C, f+A, BC run with f+A, BC run for a good overhead starter into the same max routes.
Anywhere
- cl.C, f+A, BC run, cl.C, f+A, hcbx2+P
- Barely more damaging than the 1 bar version, not worth the extra meter. 38%.
- cr.B, BC, cr.C, f+A, hcbx2+P
- Awfully unreliable and little damage but your one of your rare options from low. 30%.
3 Stocks
Anywhere
- Replace hcbx2+P by hcbx2+AC in 1&2 stocks combos.
- Adds 21%.
Corner
- hcf+P, delay f+A, hcbx2+BD
- Interesting grab conversion and your only route to combo into HSDM. One way to time f+A is to do cl.D and whiff cancel it into f+A. You need to do this fairly close to the corner. 50%.
- hcf+P, delay f+A, BC slight walk, f+A, hcbx2+BD
- Optimized version of the previous that can start more around midscreen. One way to time the first f+A is to do cl.D and whiff cancel it into f+A. 55%.
Combo Animations
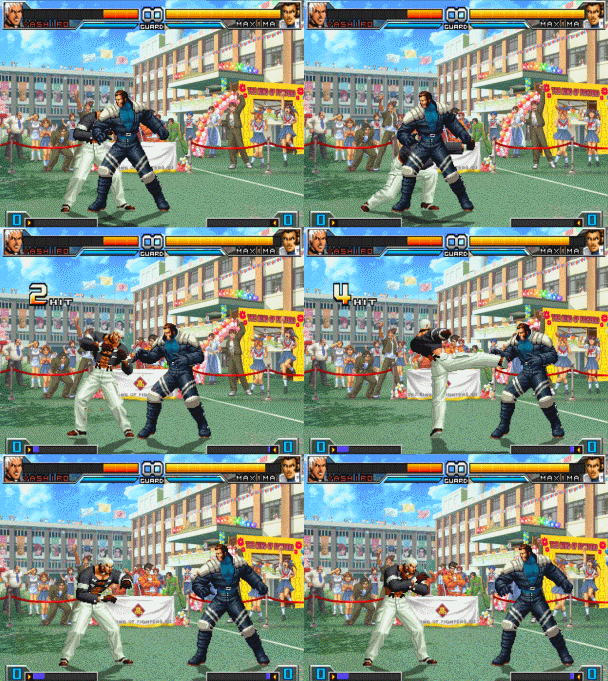
- cr. A, cr. A, st. A, st. B
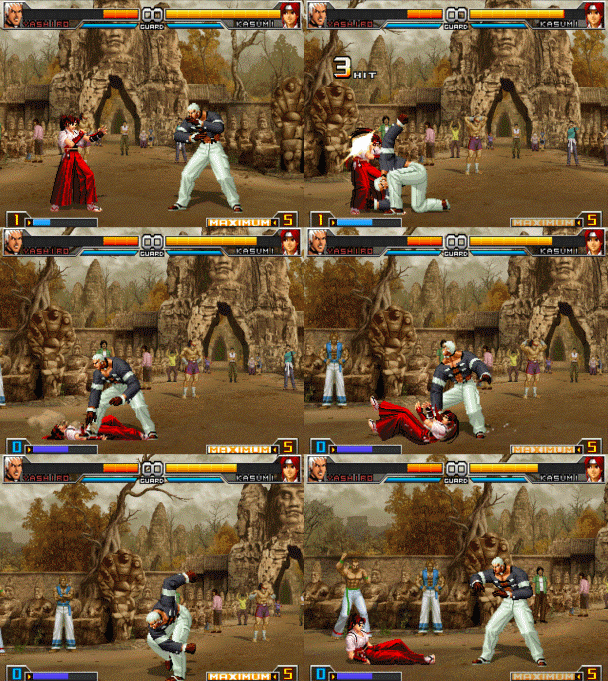
- j. C, cl. C, f+A, hcbx2+P
Notes
Hcf+P Command Grab Setups
1. hcf+P, superjump C, walk under close D or hcf+P
This is the standard and most common mixup. If you keep walking underneath the entire time, you will pass through them...and that itself is pretty obvious for the opponent to see. However, if right before the opponent lands, you stop walking, you will not pass under them and can hit them from the front. If done right, it can look very ambigious.
2. hcf+P, run underneath, close C, hcf+B(goes underneath them again), close D or hcf+P
This mixup is one that should be done more seldomly because it is easy to catch on. The hcf+K will go under the opponent and Yashiro will recover the same time the opponent does, allowing for another mixup. If the opponent hasn't seen it before (or hasn't seen it recently), they might be caught off guard. This mixup is even more useful against opponents that have one frame grabs, because the opponent will be facing the wrong way and there is a glitch where reversal one frame grabs whiff if facing the wrong way.
3. hcf+P, immediate hyperhop D, forward jump D(crossup)
This setup needs to be done exactly as stated or it won't work. If done properly, Yashiro's forward jump D will be facing backwards (even though opponent is positioned behind him) but since it has a crossup hitbox, it will hit behind from behind. Very ambiguous, though if done too often, loses effectiveness.
Videos
External Links
Check Orochi Yashiro's frame data
Discuss at 02UM Discord server
Discuss at Dream Cancel


