-Happy New Year 2025!
The King of Fighters XIII/Raiden: Difference between revisions
Krazykone123 (talk | contribs) |
Krazykone123 (talk | contribs) |
||
| Line 228: | Line 228: | ||
- Combos from: Strong normals, EX tackle in corner | - Combos from: Strong normals, EX tackle in corner | ||
- Combos into: the EX poison mist can be use to combo into anything with a fast start-up, EX tackle | |||
[[Image:Raiden_Bomb.png]] | [[Image:Raiden_Bomb.png]] | ||
Revision as of 03:28, 31 October 2010
Gameplay Overview
Gameplay Notes
Pros
Cons
Normals
Standing
st. A - A simple slap move, comes out very fast, good priority, great recovery, and it has suprisingly GOOD range as well, this will be the normal you use the most because it has so many uses, preferably used as an anti-air to set-up reset combos for his 3/4 dropkicks, chains into other lights so feel free to do so whenever the oppurtunity comes up, same rules apply to both the close and far version.
- Chain/Cancel-able, far and close
- Hit Detection: High
- Damage: 30
- Combos into: When used as an anti-air it can set-up Level 3/4 Super Dropkick reset combos.
- Combos from: Crouch light normals, also Level 3/4 Super Dropkick, as soon as they begin to recover from the first dropkick use this normal again to reset their body and set them up to get hit by the other dropkick.
st. B - A kick aimed at the gut area, comes out a bit slower than his stand A and it isn't chain-able in any shape or form making it a less useful normal compared to the rest of his arsenal, however can possibly be used as a good poke if timed correctly, not sure about the priority as of yet but you'll find some use for it in some way, the close and far versions are the same so the same rules apply.
- Hit Detection: High
- Damage: 35
- Combos from: Since it isn't cancel-able is has to be chained into from other light normals.
- Combos into: EX Super Raiden Drop
st. C - Strong punch aimed at the mid-section, comes out at a good speed making it a good poke when timed well, sadly it's only a poke because it isn't cancel-able, level 3 or 4 dropkick can be used after this move, more so in the corner to keep the pressure on your opponent.
- Hit Detection: High
- Damage: 80
- Combos into: Level 3/4 Super Dropkick when timed correctly
st. D - A regular high kick, comes out fast and has great range, doesn't have much use in combos but most people end up using it in block strings.
- Hit Detection: High
- Damage: 70
cl. C - Headbutt attack, short range, comes out at a fast speed, cancel-able on the first hit so it makes up for it's mediocre range to a degree, combos into just about anything with a fast start-up.
- Cancel-able
- Hit Detection: High
- Damage: 40+45
- Combos into: Weak/EX Poison mist, EX/Head Crusher, Level 3/4 Super Dropkick, Crazy Train DM, EX/Super Raiden Drop DM
cl. D - High kick, does two hits, good range, but it isn't cancel-able and the recovery is mediocre so you probably won't be using it much compared to the rest of his normals.
- Hit Detection: High
- Damage: 45+50
Crouching
cr. A - Crouching slap, take his stand A into consideration then use it while crouching, while it doesn't have the luxury of being an anti-air it can be used to chain together lights into devastating combos, good range and recovery.
- Chain/Cancel-able
- Hit Detection: High
- Damage: 30
- Combos from: Other light normals, standing or crouching
- Combos into: Other lights normals, mostly standing one's
cr. B - Crouching low kick, fast start-up, great range, combos into other lights easily, this normal will help you start at a lot of combos when you're up close, use it well.
- Chain-able
- Hit Detection: Low
- Damage: 35
- Combos from: Other light normals stand or crouching
- Combos into: Other light normals, EX Super Raiden Drop
cr. C - Punch aimed at the gut, good range, okay recovery, can be canceled but you'll probably whiff the canceled move unless it's something with a lot of range and fast start-up.
- Cancel-able
- Hit Detection: High
- Damage: 70
- Combos into: level 3/4 Super Dropkicks, EX tackle, Weak/EX Poison Mist, Crazy Train DM, EX Super Raiden Drop
cr. D - Low kick, trips the opponent when it makes contact with the opponent, whiff cancel-able before it hits, doesn't have much combo use unless you stick to whiff canceling it, hits low therefore it much be blocked whilst crouching.
- Whiff/Cancel-able
- Hit Detection: Low
- Damage: 80
- Combos into: When whiff canceled it can combo into most of his EX attacks and anything else with a fast start-up.
Jumping
j. A - Jumping slap, take his stand A into consideration then use it while he's jumping, a good air-to-air move I suppose, doesn't do muc else besides that.
- Hit Detection: Mid
- Damage: 45(40)
- Combos into: level 3/4 Super Dropkick rest combos.
j. B - Jumping light kick, comes out fast, doesn't have enough priority to combo into much of anything, just a good poke to use from time to time.
- Hit Detection: Mid
- Damage: 45(40)
- Combos into: Mostly crouch normals
j. C - Jumping double handed slap, good priority, okay range, nice air-to-air use, comes out at a good speed, not the prefered jump-in attack but still good none the less.
- Hit Detection: Mid
- Damage: 72
j. D - Raiden does a bellyflop!, the prefered jump-in of choice because it does a lot of stun, good priority and range because of Raiden's big hitbox, I believe it crosses up as well as long as you aimed for the opponents head on the way down.
- Hit Detection: Mid
- Damage: 70(68)
- Combos into: Stand/Crouch light/strong normals of your choice
Blowback Attack
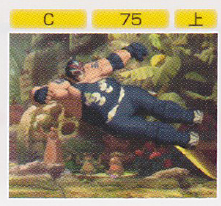
CD - Raiden does a short range dropkick, comes out at an okay speed but yeah the range is a little short at least compared to the rest of his moves, use at mid range or stick to whiff canceling it to throw your opponent off their game.
- Whiff/Cancel-able
- Hit Detection: High
- Damage: 75
- Combos into: whiff cancel it into level 3/4 Super Dropkick, the opponent won't see it coming.
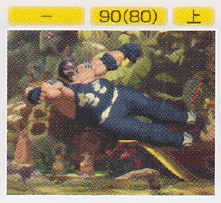
j. CD - The exact same rules apply from his stand CD except you can't whiff cancel it, if you want to use it use it as an air-to-air move.
- Hit Detection: High
- Damage: 90(80)
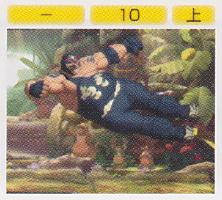
GCCD - The best, most useful Guard Cancel blowback in the whole game, not only can this move be used as a get off me (just like every other character in the game this move costs one meter), it can be used to set-up level 3/4 Super Dropkicks combos, first the GCCD puts the opponent in a juggled state, then add the fact that the level 3/4 (mostly level 4) dropkick comes out at such immense speed that it can hit your opponent before they even touch the ground to recover, at the cost of one meter it's completely worth it.
- Hit Detection: High
- Damage: 10
- Combos into: level 3/4 Super Dropkick
Throws
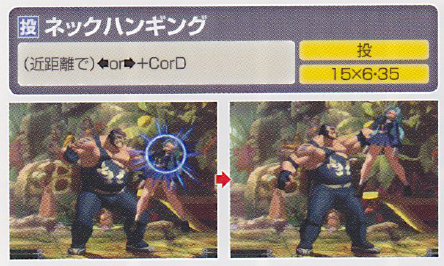
Neck Hanging = (b/f + C/D) - Raiden lifts the opponent into the air and chokes them for about a second and a half, it does a little bit more damage than most neutral throws in game.
- Can be broken
- Hit Detection: Close
- Damage: 15x6+35
Command Moves
Filler Picture
Raiden doesn't need any command moves, he's not incompetent like the rest of the cast.
Special Attacks
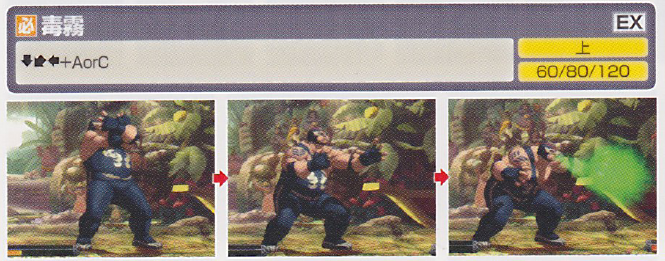
Poison Mist = (qcb+P) - Raiden quickly breaths in, then spits out a green gaseous cloud hitting the opponent in the face, the weak version comes out and goes away fairly at a rather fast speed, doesn't knock down either and they recover pretty quickly so keep your guard when the move is done, combos from strong normals but best used after EX tackle in the corner, the strong version has a slightly slower start-up but it of course stays out longer if you do use it from a strong normal you may land a counter hit because your opponent may try to hit you thinking you'll recover at a slower speed, this move will end up being your zoning tool of choice, preferably used to keep the opponent at bay when you're charging your dropkicks to mow them over, doesn't combo from much of anything but yeah zoning tool.
(EX) = qcb+AC - The green cloud stays out a bit long, faster start-up, does two hits instead of one, upon the second hit it makes the opponent slowly fall to the ground leaving them open to get hit again, the follow-up attack needs to be something fast so it's suggested that you use a crouch normal or something with a very fast start-up otherwise the move you use will whiff.
- Hit Detection: High
- Damage: 60/80/120
- Combos from: Strong normals, EX tackle in corner
- Combos into: the EX poison mist can be use to combo into anything with a fast start-up, EX tackle
Raiden Bomb = (dp+P) -
(EX) = dp+AC -
- Hit Detection: Close/High
- Damage: 15+120/70+120
Head Crusher = (hcf+K) -
(EX) = hcf+BD -
- Hit Detection: Close
- Damage: 150/200
Giant Bomb = (db~f+P) - Raiden crouches like a quarterback then yells "Ready!? GO!!!" as he proceeds to do a shoulder tackle knocking the opponent onto the ground, the charge time is about half a second, the weak version has a pretty short start-up and makes Raiden travel halfway across the screen, it's also quite safe, the strong version has a slightly longer start-up but it makes him travel farther across the screen, this move does pretty good chip damage on block, the strong version also has a good chunk of auto-guard at start-up making it somewhat safe but very convenient if you use it along with his feint, the weak version combos from strong normals but you'll have to think up your own set-ups for the strong version, drive/super cancel-able as soon as it makes contact with the opponent.
(EX) = db~f+AC - Significantly faster start-up, the auto-guard is removed, makes him travel a little bit farther compared to the weak and strong versions, does two hits instead of one, on the second hit it launches the opponent into the air whether they were in a juggled state or not, as soon they're hit they're a juggled state which means you can continue whatever you want as soon as you recover, this move can and will be the move you use to quickly carry your opponent to the corner, in the corner this move combo's into weak Poison Mist twice, Raiden Bomb/EX, Super Dropkick if you wait until they're body falls to the mid part of the stage, and his neomax "Raiden Bomber" if you time it correctly.
- Drive/Super Cancel-able
- Hit Detection: High
- Damage: 70/100/70+100
-
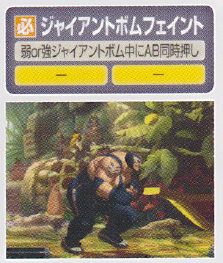
Giant Bomb Feint = (db~f+P, AB) - Raiden crouches like a quarterback then yells "Ready!?" but if you press AB afterward it makes him stop and then go back to his neutral fighting stance, very useful for faking people out, but this move will probably get most of it's use when you accidentally put in the input for strong tackle instead of weak which is okay because this move will save your butt.
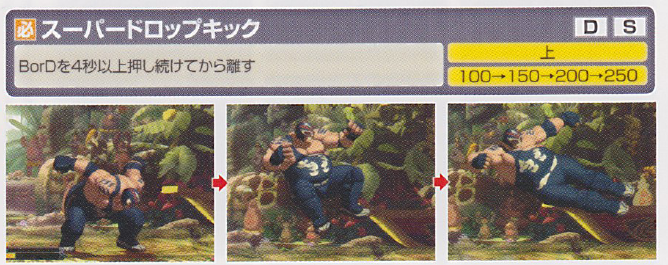
Super Dropkick = [B]/D] -
- Drive/Super Cancel-able
- Hit Detection: High
- Damage: 100, 150, 200, 250
Desperation Moves
Super Raiden Drop = (hcfx2+P) -
(EX) = hcbx2+AC -
- Hit Detection: Close
- Damage: 240/360
Crazy Train = (qcfx2+P) -
- Max Cancel-able
- Hit Detection: High
- Damage: 40x4+60
Neomax
Raiden Bomber = (qcfx2+BD) -
- Hit Detection: High
- Damage: 480
Combos
Tips
Miscellaneous
Character Sprite
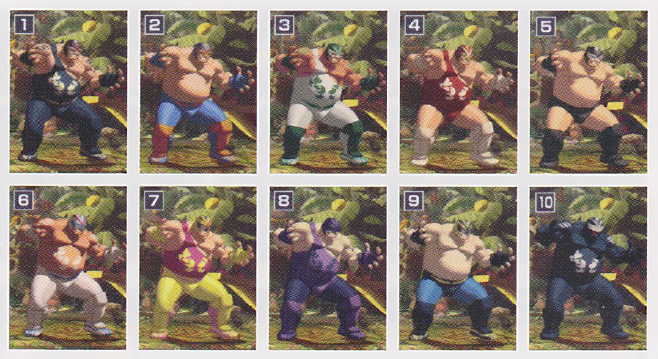
Colors
Big Bear
Other
Taunt
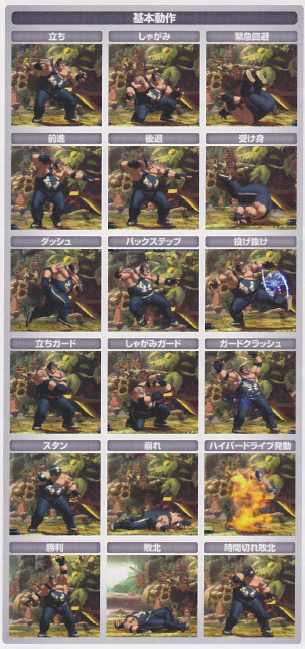
First Row: Standing/Crouching/Evasive Roll
Second Row: Walking (forward/Walking (Backward)/Safe Roll
Third Row: Running/Back Step/Throw Break
Fourth Row: Standing Guard/Crouching Guard/Guard Crush
Fifth Row: Dizzy/Downed/Hyper Drive Activation
Last Row: Win Pose/Knock Out/Time Up Pose
Links & References
Technical Reference


