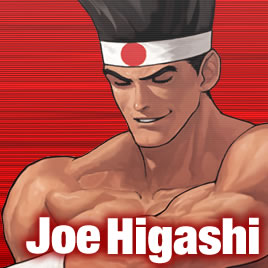
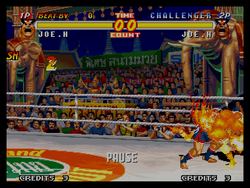
Real Bout Fatal Fury 2/Joe Higashi
Gameplay Overview
Gameplay Notes
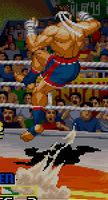
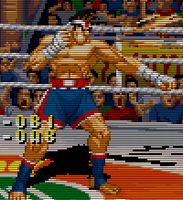
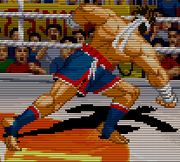
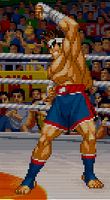
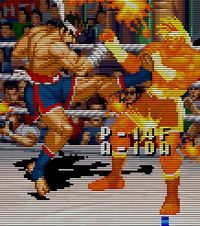
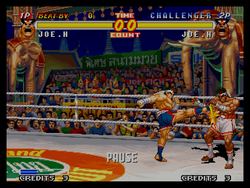
Joe is one of those characters that could best be described as "solid". He has a nice set of normals, some combos, very all-round special moves, and a decent P-Pwer. Joe's strengths lie in his distance and poking game. His standing C and dashing C are great pokes that come out very fast and recover fast enough that you may keep up the pressure even when blocked. His projectile does ok damage and cannot be hopped over, and the double projectile does very good damage for a non-super projectile, slightly higher than Geese's double Reppuken. In addition, this version will ensure he wins any fireball fight against normal projectiles. His Tiger Knee is probably one of the highest priority uppercut moves in the game. You almost never see this beat by anything, as he has invincibility frames on start-up. In addition, his Crescent Moon Kick special can work as a long range air counter against predicted jumps. Since Joe's projectiles have to be high-jumped, this can be useful at times. Also, his Slash Kick is an excellent combo-finisher, punisher, and surprise move. Blazingly fast, and the ;b version is somewhat safe on block. The ;c version can punish a mistake across the screen, and does good damage. Joe is also a king of anti air. Here are the different ones at his disposal:
b + B - High Roundhouse
qcb + B - Crescent Kick
dp + B - Tiger Kick
f, hcf + B + C - Screw Upper (S-Power)
When it comes to Joe's weaknesses, Joe's d + C has horribly short range, and what's worse, he is one of the few characters in the game that cannot use a strong low move in his combos. In fact, the only low-hitting move he can do in his combos is the d + B, and the follow-ups that this move allows are not really that damaging. Even though Joe can finish his combos with u + C, which is an overhead, he does not have any low equivalents, and this makes his mix-up game rather weak. On the plus side, his ;dn ;c recovers quickly, and can be cancelled on block or hit.
Joe's combos are very bad when it comes to mix-up potential, and he has several redundant chains that does nothing but get in your way. On the other hand, the most damaging ones can all start with an A or B, allowing him some threatening power in trading situations.
Play style-wise, Joe should try to utilize his great pokes and long-range moves to intercept the opponent's movements. Joe is fast enough to get out of pressure, so he can fight up close as well if needed, just don't expect to be doing any fancy mix-up with him. Joe has two grabs, the first one is unique in that the opponent can fast-recover from it, and his second grab can be mashed out of, but even if you press nothing and your opponent mashes you will usually get in most hits. Hits a maximum of 10 times for above average damage.
Pros
-Nice normals, combos, and special moves
-Decent P-Power
-Good distance and poking game
-Typcially can win any fireball fight against normal projectiles
-Tiger knee has very high priority
-Is a king of anti-air
Cons
-His d + C has very short range
-Cannot use a strong low move in combos
-Has a weak mix-up game
-Very bad mix-up potential with combos
-Has several redundant chains
Normals
Standing
st.A - Joe's punch is a quick, short ranged straight jab.
-Cancellable
-Can lead into two different combos
-Misses most crouching opponents
cl.A - Joe does a quick elbow to the opponent's face.
-Cancellable
-Same as st.A, but a bit faster
-Can lead into most of Joe's combos
st.B - A quick kick to the shin
-Cancellable
-Comes out fast
-Can lead into Joe's special combo
cl.B - Joe does a quick straight kick to the body.
-Cancellable
-This can only lead into one short combo
-Does high stun damage
-The high stun damage allows for a Hard Special Move follow-up
st.C - Joe kicks at the opponent's mid-section with his leg.
-An excellent poke and staple move in Joe's arsenal
-Comes out quickly and has decent range
-Range is upgraded from decent to great if you perform it during a dash
-This move is unique in that it's animation stops early if it actually hits or is blocked, so the recovery is much faster than on most strong normals
Crouching
cr.A - Joe squats down and punches, similar to his st.A.
-Cancellable
-Can lead into the same combos as cl.A
cr.B - A short ranged kick.
-Cancellable
-Hits low
-Mediocre speed
-Not very good range
-Cannot start any combos
-Very few situations where this could be useful
cr. C - Joe sweeps the opponent with his leg.
-Cancellable
-Hits low
-Fast start-up and recovery
-Safe as long as its not whiffed
-Poor range
-Cannot be used in any combos
Jumping
nj.A - A quick punch with virtually no horisontal range.
-Aerial
-Overhead
-Might be used to beat opponents below himself in air
j.A - A quick downwards punch.
-Aerial
-Overhead
-Decent horizontal range
-Comes out fast
-Can be used as anti-air, but damage is minimal
j.B - A very short-ranged jumping knee
-Aerial
-Overhead
-Has the shortest (about zero) range of any attack in the game
-Is pretty much completely useless
-Better off using a punch if you need a fast air move
j.C - Joe leaps into the air and delivers an arcing kick to the opponent.
-Aerial
-Overhead
-A good air C
-Decent range, and a good angle for air to ground combat
-Easy to use it as a crossover after turning in air with D, but less useful for air to air
nj.C - A kick that goes straight up.
-Aerial
-Overhead
-This move has bad horizontal range
-Good range diagonally upwards
-Mostly suited for countering high jumpers
-Bad for air to ground combat
sj.C - Joe does a flying kick without jumping quite as high.
-Aerial
-Overhead
-Excellent horizontal range
-Allows you to attack without getting too close to the opponent
Throws
Lifting Pressure=(f/b + C - Joe grabs his opponent and knees him into the air, going upwards with him and delivering a kick.
-Unblockable
-Hit Detection: Close
-Unless the opponent uses the follow-up, this throw cannot be recovered from with Safe Fall
Down Heel=(d + C) - Joe follows up Lifting Pressure with a downward arcing kick to slam them into the ground.
-Hit Detection: Close, during Lifting Pressure right as the second kick connects
-Follow-up
-Must be used when the second hit of Lifting Pressure goes through
-Since this follow-up is not considered a throw, the opponent can Safe Fall this
Rapid Knees=(df + C) - Joe grabs the opponent and rapidly knees them in the gut multiple times.
-Hit Detection: Close
-Can be mashed to do up to ten hits doing above average damage
-Opponent can mash out of
-Still gets in most hits even if mashed out of
Avoid Attack
Side Kick - Joe will become impervious to any attack for a split-second and deliver a kick to the side.
-Cancellable
-Evasive move
-Does not work on projectiles
-A very handy poking tool
-Good upper-body invincibility and decent range
-Poke and cancel into a suitable special
Feints
Feint Slash Kick=(f + A + C) - Joe starts to do the Slash Kick before stopping before the move comes out.
-Is invincible to low attacks for a brief moment
-Doesn't seem to be useful for any of Joe's combos
Feint Hurricane Upper=(d + A + C) - Joe begins to do a Hurricane Upper, but stops before it comes out.
-Good for faking out the opponent in a projectile war
-Doesn't seem to help much with combos
Command Normals
Sliding Roundhouse=(f, f + C) - When performed while dashing, Joe's standing C will slide towards the opponent instead of stopping.
-This is a fantastic poking tool
-Good range
-Comes out blazingly fast. Use this!
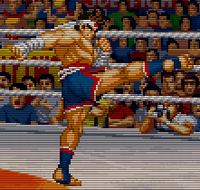
High Kick=(b + B) - A kick to the head with decent range.
-Cancellable
-This move can be used as a cancellable poke
-Can also work as anti-air somewhat
-Range is a bit better than his standing C, but will miss crouching opponents
-Damage is slightly lower than a standing C
-Can chain it into most special moves and the P-Power
Slide Kick=(df + B) - A short and rather slow slide on the ground.
-Hits low
-Knocks down
-Rather slow
-Poor range
Special Taunt=(d + C) - Joe taunts the opponent when they are on the ground.
-Hit Detection: Any range, downed opponent only
-Pursuit
-Does no damage what so ever
-Does help increase his gauge a bit
-If used close on knock down, Joe is wide open to an attack unless the opponent is stunned
-Only use this if you get knock down and are at range (like his P-Power)
Special Moves
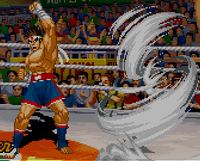
Hurricane Upper=(hcf + A) - Joe fires a large whirlwind projectile at the enemy.
-Projectile
-Breakshot
-Cannot be hopped over
-Cannot be crouched under
-A useful move for distance combat and zone control
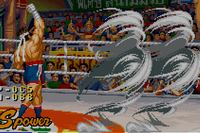
Exploding Hurricane=(hcf + C) - Joe fires two whirlwind projectiles in rapid succession.
-Projectile
-Breakshot
-Most damaging normal projectile move in the game if you can hit with both
-Will beat other normal projectiles considering it fires two projectiles
-The recovery and startup on this move is a bit slower than the Hurricane Upper, so be careful with it
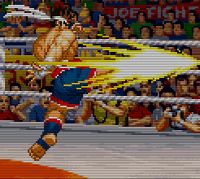
Slash Kick=(db, f/hcf + A) - Joe does a very fast forwards flying kick.
-Aerial
-Can be done with either db, f + A, or hcf + A
-This move is easy to combo into
-Usually safe on block if you perform it from some range away
-If you do it too close you will be at point blank range at your opponent's mercy
-Follow up your connected pokes with this one
-The move in itself travels through air, so if he is hit by any ground-based move he will be hit out of it instead of suffering a ground stun-hit that would allow him to be comboed
-If the move is not blocked, both Joe and the opponent will reset, with Joe gaining a small frame advantage
Dual Slash Kick=(db, f + C) - Joe does Slash Kick, but he follows it up with a second kick afterwards.
-Aerial
-Cannot be done using hcf
-More damaging, yet more risky version of the Slash Kick
-Unsafe on block
-If it connects, Joe will follow up with a second kick that knocks the opponent to the ground
-This move is best used in combos
-Due to the slow start-up you can only do it after a combo that gives the opponent a heavy stun animation
-Damage and range are both very good
-Can use this move to punish your opponent's mistakes at ANY range
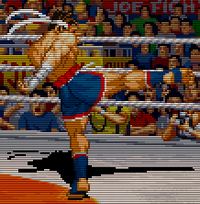
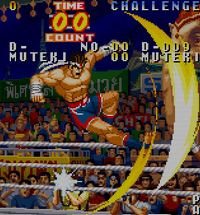
Golden Heel Blast=(qcb + B) - Joe performs a high jumping kick that covers a large area.
-Aerial
-Breakshot
-Too slow to combo into
-Can juggle with it after connecting a launcher combo
-Can be used to counter predict jumpers from long range
-Works very well against predicted projectiles
-If this move is blocked, Joe is safer than you'd think, but he is still in a unfavourable position
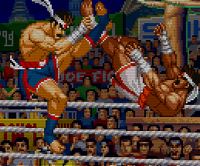
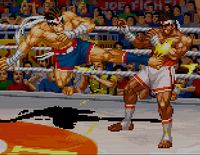
Tiger Kick=(dp + B) - Joe quickly knees upward into the opponent, covered in a red aura.
-Aerial
-Breakshot
-Good invincibility at startup
-Good range and damage
-Will counter "everything" if performed at the right time
-Will get you killed if performed at the wrong time
-Combined with his Hurricanes, this move gives you the ability to play the classic fireball trap game
Exploding Punch=(A) - Joe punches several times over and over in quick succession.
-Hit Detection: Any range, tap A four times to get it started. Mashing A will keep it going a bit longer
-Not very useful
-Can do rather good damage if you manage to connect the second follow-up
-If you mistime your follow-up you might just as well be the one taking the damage
-Can also use this as an easy breakshot, but don't expect to get in many hits that way
-Has two possible follow-ups
Exploding Hook=(qcf + A) - Joe follows-up his Exploding Punch with a downward punch.
-Hit Detection: Any range, during Exploding Punch
-Follow-up
-Overhead
-Hits twice for miniscule damage
-This move is an overhead, but since Joe has no low-hitting follow-up to the Hurricane Fists, this is completely useless against someone who knows what they are doing
Exploding Uppercut=(qcf + C) - Joe does a fancy uppercut that launches the opponent into the air.
-Hit Detection: Any range, during Exploding Punch
-Follow-up
-The launch allows a free juggle with a Slash kick or a Tiger kick
-This is the follow-up to Exploding punch you always want to use
-If this move is blocked, expect to be at least thrown
S-Power
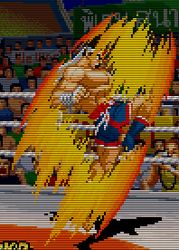
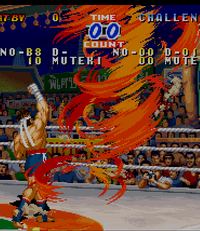
Screw Upper=(f, hcf + B + C) - Joe does an uppercut motion and a red funnel of wind appears in front of him.
-Super Projectile
-This move works much in the same manner as Geese's Raging Storm, but has less coverage and doesn't hit the back plane
-Can be comboed into from his launcher combo
-Use this against predicted jumps or from the launcher combo
-Beware that Joe is vulnerable for quite some time after the wind disappears, so be careful with this move
-In addition, this move will absorb projectiles, but is destroyed by P-Power projectiles
P-Power
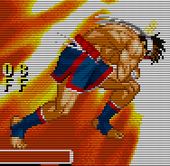
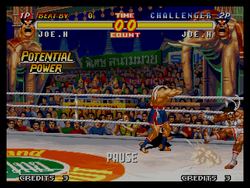
Thunder Fire=(f, hcf + C) - Joe does a flurry of combos before ending with a flaming Tiger Kick.
-Autocombo
-The hits are performed regardless whether they hit or not
-The startup on this move is very fast, and thus very easy to combo into
-Only the burning Tiger Kick move at the end of the move count as a special/super though, so don't expect this move to win any trades against similarly fast moves
-Only the last few hits where he does a burning tiger kick actually counts as a super move when determining tick damage and invincibility, so despite what it seems, the move does very little tick damage
Thunder Fire=(f, hcf + D) - his time Joe will do a quick line sway, then come back into the main plane with a burning knee before doing the rest of the combo as usual.
-Autocombo
-This is handy for countering pokes and missiles, as Joe will line sway past the missile/poke and get there just in time to punish
Combos
Chain Combos
Punch Starters
``````````````
P (*)  --------> K             -----> S (2, E)
                S (E)
P close (*)----> P (*, 1)      -----> P (E)
          :     K (*, 1)             K (*, E)
          :     d + K (*, 1, _)      S (E)
          :     S (*, 1, E)          df + S (*, A, E)
          :                          u + S (O, E)
          :
          :
          ----> d + P (*)     -----> K (*, 1)----> K (*, E)
                                     S (*, 1, E)   S (E)
                                                   df + S (*, A, E)
d + P (*)------> P (*, 1)      -----> P (E)
                K (*, 1)             K (*, E)
                d + K (*, 1, _)      S (E)
                S (*, 1, E)          df + S (*, A, E)
                                     u + S (O, E)
P in air (O)---> S (1, H, O, E)
Kick Starters
`````````````
K (*)  --------> S (*)         -----> qcf + S (E)
K close (*)----> S (*, E)
K in air (O)---> S (1, H, O, E)
Strong Starters
```````````````
None
Combos. For many characters, this is where they get most of their power from. Joe on the other hand has to rely a bit more on his normals and special moves. His combos allow for little mix-up, they include many redundant chains, and most have bad range.
I will list the combos that are of importance. If a combo is missing here it is either because I consider it to have no use, or I have simply forgotten. Feel free to comment if you feel I have missed something.
A, B, C
This very basic combo can only be done from a far version standing A, which can be crouched and has short range. What you can do is kara the rest of the combo from the punch so you get a long range double kick combo that can be useful for poking. Can be useful at times, but do not use this combo for punishing purposes, as there are more damaging ones.
d + A, C, -> Slash Kick / Tiger Kick / Hurricane Upper / Exploding Punch / Thunder Fire (P-power)
This basic combo may seem very small and weak at first, but it has some use because the C is one of only two combo enders that give enough frame advantage to follow up with a strong Slash Kick. The bad thing about this combo is that the very same C can be ducked.
This combo also leads into Joe's most damaging combo setup without meter. More on this in the advanced combos section further down the page.
Close d + B, C, -> Slash Kick / Tiger Kick / Hurricane Upper / Exploding Fists / Thunder Fire (P-power)
Very similar to the previous combo mentioned, except this one cannot be crouched. The bad thing about this is that it requires you to be at point blank range in order for the second hit of the combo to hit. Otherwise the first hit will push them out of range, which can and will be fatal. This is the second of the two ground combos Joe has that can lead into a strong Slash Kick.
d + A, d B, df + C, -> Tiger Kick / Slash Kick / Golden Heel Blast / Screw Upper (S-power)
This is the potentially most damaging combo that Joe can dish out unless he has P power. As with most of his other combos, it has horrible range, but the last hit of this one is a launcher, and Joe has many moves that can juggle after it, the most notable being his S Power. If the S-Power is unavailable, you can pretty much choose the follow up you want. The C version Slash Kick does the most, but requires precise timing to hit properly. The Golden Heel Blast comes in second in damage.
This is the most useful punishing combo Joe has, but you should avoid using the launcher on block, since it can be punished unless you cancel it into a special move, which is a risky situation either way.
d + A, d + B, B, -> Tiger Kick / Slash Kick / Thunder Fire (P-power)
A safer version of the previous combo. This one does not launch the opponent, nor does it provide sufficient frame advantage to use the strong followups.
B, C, qcf + C
This is Joe's command combo. Joe performs a shin kick, then a high hook, then performs three roundhouse kicks in increasing height at his opponent. The last hit launches them. You can then juggle with a Tiger Kick in corners. Damage is more or less the same as the A, B, C combo unless you get off the juggle.
Be aware that if the second hit of the combo misses the opponent, then only the first kick of the qcf + C combo will hit, and the last two kicks will pass through the opponent without hitting. Against an opponent who knows, this will be a fatal mistake, so be careful and make sure to hit confirm the second hit before you input the qcf + C
You can cancel the second hit of the combo into any special or super or feint move.
Miscellaneous
Notes
Frame Specifics
-> Marks the continuation of a chain
Far A: 6f, +0 on block, +4 on hit
-> B: -4 on block, +2 on hit
-> B -> C: -4 on block, +2 on hit
-> C: -4 on block, +2 on hit
Far B: 7f, -3 on block, +1 on hit
-> C: -5 on block, -1 on hit
-> C -> qcf+C: -13 on block
Far C: 9f, +2 on block, +8 on hit
Close A: 6f, +0 on block, +4 on hit
-> A: -5 on block, -1 on hit
-> A -> A: -6 on block, -2 on hit
-> A -> B: -3 on block, +1 on hit
-> A -> C: -5 on block, +1 on hit
-> A -> d/f+C: -10 on block
-> A -> u+C: +0 on block, +6 on standing hit, +8 on crouching hit
-> B: -3 on block, +1 on hit
-> B -> A: Same as A-A-A
-> B -> B: Same as A-A-B
-> B -> C: Same as A-A-C
-> B -> d/f+C: Same as A-A-d/f+C
-> B -> u+C: Same as A-A-u+C
-> d+B: -3 on block, +1 on hit
-> d+B -> A: Same as A-A-A
-> d+B -> B: Same as A-A-B
-> d+B -> C: Same as A-A-C
-> d+B -> d/f+C: Same as A-A-d/f+C
-> d+B -> u+C: Same as A-A-u+C
-> C: -4 on block, +2 on hit
Close B: 7f, -3 on block, +1 on hit
-> C: -6 on block, +0 on hit
Close C: 9f, -6 on block, +0 on hit
Crouching A: 6f, +0 on block, +4 on hit
-> Same strings as Close A
Crouching B: 7f, -3 on block, +1 on hit
Crouching C: 9f, -3 on block
Jumping A: 6f
Jumping B: 7f
Jumping C: 9f
Neutral Jumping A: 6f
Neutral Jumping C: 9f
Hopping C: 9f
A+B: 11f, -9 on block, -3 on hit
Standing D: 9f, -6 on block, -3 on hit
Crouching D: 10f, -3 on block
Backplane A: 26f, +1 on block, +3 on hit
Backplane B: 23f, -1 on block, +1 on block
Backplane C: 25f, -2 on block, +12 on hit
b+B: 10f, -2 on block, +4 on hit
d/f+B: 11-23f depending on distance, -12 to +0 on block
Dashing C: 9f, +2 on block, +8 on hit
Mash A: 9f, -16 or worse on block, -2 or worse on hit
-> qcf+A: 15f, -7 on block, -1 on hit
-> qcf+C: 19f, -4 on block
hcf+A: 15f, -12 or better on block, -10 or better on hit
hcf+C: 20f, -17 or better on block, -15 or better on hit
dp+B: 6f, -37 on block
qcb+B: 22-31f depending on distance -8 on standing block, -4 on crouching block, -2 on standing hit, +2 on crouching hit
d/b,f+B: 10-20f depending on distance, -10 to +0 on block
d/b,f+C: 21-34f depending on distance, -22 to -10 on block
f,hcf+B+C: 28f, -30 on block
f,hcf+C: 2f, -39 on block
f,hcf+D: 23f, -39 on block
f+A+C: 18f
d+A+C: 18f
Notes: During the startup of the f,hcf+D, Joe goes into the backplane; he is vulnerable to D attacks but not anything else.
His Far C is like Sokaku's - its recovery is kinda long when whiffed, but cut short when it hits or gets blocked. That's why the frame data is so good.
