Template:FrameDataCargo-KOF02UM/Documentation

From Dream Cancel Wiki
Jump to navigation Jump to search
{{FrameDataCargo-KOF02UM
| moveId = 
| description = 
| phases = 
}}

Usage

This template provides a direct and simple way to display the data stored via Template:MoveData-KOF02UM.

Example

No results
No results
No results


NO IMAGE FOUND

No results


No results
qcf+B>K or qcf+D>K
qcf+B>K or qcf+D>K


NO IMAGE FOUND

No resultsNo results

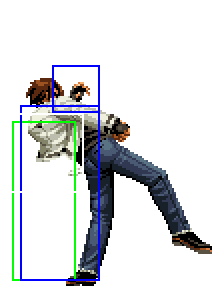
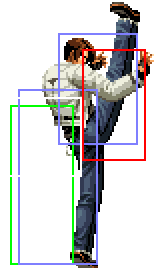
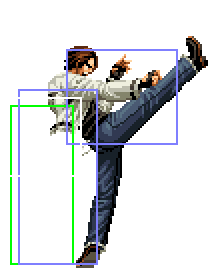
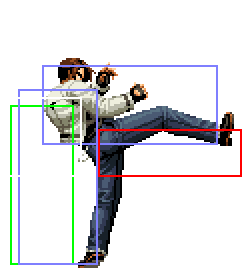
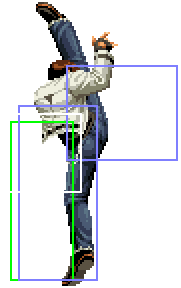
Kyo lifts his leg then does a quick heel drop, very simple overhead but doesn't have much use, especially without meter. On paper the average speed and short active period feels lacking but a better look shows that the small active period is great since the hurtbox shrinks in quickly making it much less likely to be whiff punished. Furthermore, its good pushback also keeps it safe on block making this a fairly good mix-up option if it doesn't get stuffed first.

  • Standing Overhead.
  • Mix-up Advice: After cr.B/A, cr.A you can delay cancel into f+B to get the raw f+B out faster than linking it for an overhead option versus canceling into df+D for a low.
  • Combo Advice: You can do BC run, cl.C to combo off a very close f+B. Off the previous mix-up, you can max bypass f+B into qcf+BC, [(C)qcf+A, (C)qcf+C]x1~2 (SC) qcfx2+A or qcf+BC, [(C)qcf+A, (C)qcf+C]x2 (SC) qcb,hcf+P(Charge) to spend 2 bars on a 36~41% conversion.
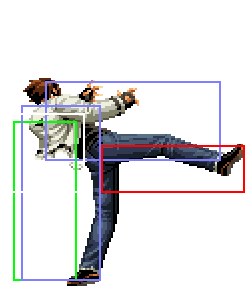
Like most standing overheads, canceling f+B out of a normal on hit/block makes it faster and cancelable although they usually don't change animation like Kyo's f+B that then looks like his 98 Goufu You instead for some reason. It is faster but the first hit's range is tiny, whiffing on almost every non-backturned character for only the second hit to connect, although it only combos off cl.C/D on hit.
It is mostly safe if it gets blocked but falls short of being a true blockstring in the first place, it's still a good frametrap but shouldn't be too relied on since the opponent can OS it with a fast invincible reversal.

Both hits properly combo on the front only on Chang, standing(Shermie) and crouching(Chin, Choi, Xiangfei). Special note that against crouching Choi cl.C, f+B, qcf+C > hcb+P > f+P > dp+P is a true and good combo.

  • Combo Advice: The go-to meterless option on hit is cl.C, f+B, qcf+A, it's mostly very safe on block but qcf+A can whiff on block so using qcf+C instead is a bit less safe but more consistent. The same max bypass as with raw f+B is still possible.