Difference between revisions of "User:SquidlyPoli1/Articles"

From Dream Cancel Wiki
Jump to navigation Jump to search
(→‎Movelist: Readjusted frame data based on KoF Ari-Jigoku website and documented crouching Normals.)
(Documented aerial Normals and Command Moves. Due to the Command Moves having a lot of text it was easy to adapt them into Database-like terms.)
Line 256: Line 256:
|data=
|data=
  {{AttackData-02UM  
  {{AttackData-02UM  
  |damage=
  |damage=30
  |gbar=
  |guard=High
  |startup=
  |startup=3
  |active=  
  |active=7...
  |recovery=  
  |recovery=
  |hitAdv=
  |hitAdv=
  |blockAdv=
  |blockAdv=
  |guard=
  |gbar=
  |description=
  |description=Terry deals a downward chop to the opponent. This can be used for a multitude of ideas, but mainly as an air-to-ground, jump-in, or instant overhead.
  }}
  }}
}}
}}
Line 274: Line 274:
|data=
|data=
  {{AttackData-02UM  
  {{AttackData-02UM  
  |damage=
  |damage=25
  |gbar=
  |guard=High
  |startup=
  |startup=2
  |active=  
  |active=8...
  |recovery=  
  |recovery=  
  |hitAdv=
  |hitAdv=
  |blockAdv=
  |blockAdv=
  |guard=
  |gbar=
  |description=
  |description=Terry does a funky horizontal kick with his right leg. This is good as an air-to-air and can also be used stop incoming hops and jumps from a middle or long-ranged distance, but can be low profiled if performed too early.
  }}
  }}
}}
}}
Line 292: Line 292:
|data=
|data=
  {{AttackData-02UM  
  {{AttackData-02UM  
  |damage=
  |damage=55
  |gbar=
  |guard=High
  |startup=
  |startup=3
  |active=  
  |active=9...
  |recovery=  
  |recovery=  
  |hitAdv=
  |hitAdv=
  |blockAdv=
  |blockAdv=
  |guard=
  |gbar=
  |description=
  |description=Terry punches at a position angled downward. This is another move best used as an air-to-ground or jump-in.
  }}
  }}
}}
}}
Line 310: Line 310:
|data=
|data=
  {{AttackData-02UM  
  {{AttackData-02UM  
  |damage=
  |damage=55
  |gbar=
  |guard=High
  |startup=
  |startup=8
  |active=  
  |active=7...
  |recovery=  
  |recovery=  
  |hitAdv=
  |hitAdv=
  |blockAdv=
  |blockAdv=
  |guard=
  |gbar=
  |description=
  |description=Terry does a jumping kick angled downward. This is can be used as a cross-up, usable against standing or crouching opponents, and is probably Terry's best air-to-ground option despite its slower start-up.
  }}
  }}
}}
}}
Line 328: Line 328:
|data=
|data=
  {{AttackData-02UM  
  {{AttackData-02UM  
  |damage=
  |damage=55
  |gbar=
  |guard=High
  |startup=
  |startup=2
  |active=  
  |active=10...
  |recovery=  
  |recovery=  
  |hitAdv=
  |hitAdv=
  |blockAdv=
  |blockAdv=
  |guard=
  |gbar=
  |description=
  |description=Terry does an upward kick mid-air. This can be used as an air-to-air, since its hitbox doesn't directly target opponents above him.
  }}
  }}
}}
}}
Line 346: Line 346:
|data=
|data=
  {{AttackData-02UM  
  {{AttackData-02UM  
  |damage=
  |damage=70
  |gbar=
  |guard=Mid
  |startup=
  |startup=13
  |active=  
  |active=6...
  |recovery=  
  |recovery=  
  |hitAdv=
  |hitAdv=Soft Knockdown
  |blockAdv=
  |blockAdv=
  |guard=
  |gbar=
  |description=
  |description=Terry does a horizontally-aimed jumping kick as an aerial Blowback. This is Terry's best air-to-air due to its knockdown property and taller hitbox, and can be used as a tool to pressure opponents in the corner. Despite this, however, it can be low profiled.
  }}
  }}
}}
}}
<!--*j.A is good for air to ground attacks
*j.B is good to use for air-to-air and to stop incoming hops and jumps from a mid to long range distance, can be low profiled if performed too early in jump
*j.C is good for air to ground
*j.D is good for air to ground and can cross up standing and crouching opponents easily
*neutral j.D can be used for air-to-air but it has a more vertical hit box
*j.CD: great air-to-air attack, and can be used to pressure the opponent in the corner, can be low profiled-->


===<u>Throws</u>===
===<u>Throws</u>===
Line 378: Line 366:
|data=
|data=
  {{AttackData-02UM  
  {{AttackData-02UM  
  |damage=
  |damage=80
  |gbar=
  |guard=n/a
  |startup=
  |startup=
  |active=  
  |active=  
  |recovery=  
  |recovery=  
  |hitAdv=
  |hitAdv=Soft Knockdown
  |blockAdv=
  |blockAdv=
  |guard=
  |gbar=
  |description=
  |description=Terry grabs the opponent and uppercuts them. Due to the opponent landing near the corner of the screen and its ability as a throw, this can be seen as a good "get off me" tool, but will not work in this way if escaped.
  }}
  }}
}}
}}
Line 396: Line 384:
|data=
|data=
  {{AttackData-02UM  
  {{AttackData-02UM  
  |damage=
  |damage=80
  |gbar=
  |guard=n/a
  |startup=
  |startup=
  |active=  
  |active=  
  |recovery=  
  |recovery=  
  |hitAdv=
  |hitAdv=Hard Knockdown
  |blockAdv=
  |blockAdv=
  |guard=
  |gbar=
  |description=
  |description=Terry slams the opponent in the opposite direction. The opponent lands a character space away from the corner of the screen, but if Terry gets close enough again it can see itself being used for okizeme setups involving jumping attacks.
  }}
  }}
}}
}}
<!--'''Grasping''' (b/f + C) close
* Terry grabs the opponent then uppercuts them (df+C animation). The opponent lands near the corner of the screen.
* Soft knockdown
'''Buster Throw''' - (b/f + D) close
* Grabs and slams opponent in opposite direction. The opponent lands 1 character space away from the corner of the screen.
* This throw is great for okizeme setups like cross-ups with j.D or empty jump low mixups, etc.
* Hard knockdown-->


===<u>Command Moves</u>===
Line 430: Line 404:
|data=
|data=
  {{AttackData-02UM  
  {{AttackData-02UM  
  |damage=
  |damage=50
|guard=Mid
|startup=3
|active=6
|recovery=19
|hitAdv=-5
|blockAdv=-7
  |gbar=
  |gbar=
|startup=
  |description=Terry does a quick uppercut before going back into a crouching position. This Command Move is good and easy to use in combos before a Special or Desperation Move due to its ease in chaining from most Normals and Special cancel ability, or can be used to end a blockstring if any attempts at confirming are not successful. It can also be used as an anti-air, but the player should be mindful of its slow start-up as it may trade or get beaten out by the opponent's jumping Normals if timed improperly.
|active=
|recovery=
|hitAdv=
|blockAdv=
|guard=
  |description=
  }}
  }}
}}
}}
Line 448: Line 422:
|data=
|data=
  {{AttackData-02UM  
  {{AttackData-02UM  
  |damage=
  |damage=45
|guard=High (Mid if cancelled)
|startup=20 (18 if cancelled)
|active=4
|recovery=21 (23 if cancelled)
|hitAdv=-5 (-7 if cancelled)
|blockAdv=-7 (-9 if cancelled)
  |gbar=
  |gbar=
|startup=
  |description=Terry takes a large step forward to deliver a low aiming hook punch that hits overhead. This Command Move is not cancel-able by itself, but it is as easy to cancel into from many of his crouching and standing Normals, similar to ''Rising Upper''. It only combos from heavy Normals, and gains the ability to Special Cancel at the cost of its overhead property. The player should be careful when using the move, however; at the end of a blockstring, the opponent can roll before the move hits if they are expecting it, but Terry gets pushed back a great distance if it is successfully blocked, which may be good if the player needs some space away from the opponent so they can properly react and read their next actions of movement.
|active=
|recovery=
|hitAdv=
|blockAdv=
|guard=
  |description=
  }}
  }}
}}
}}
<!--'''Rising Upper''' - (df + C)
* *This is Terry's command normal uppercut. Good & easy to use in combos before a special move or DM, or at the end blockstrings. It can be used as an anti-air but be mindful of its slow start-up as it may trade or get beaten out by the opponent's jump normals if timed improperly.
* Very easy to combo into from a cr.B, cr.A, st.A, close C, crouching C, close D, and crouching D.
* Special cancel-able
'''Hammer Punch''' - (f + A)
* Terry takes a large step forward to deliver a low aiming hook punch that hits overhead. Not cancel-able by itself, but it is as easy to cancel into from many of his crouching and standing normals similar to his df+C command normal. It can combo only from heavy normals, and it is special cancel-able but loses its overhead properties. Terry gets pushed back a great distance if its blocked, which is good if you need some space away from the opponent for you can properly react and read their next actions of movement.
*Be careful using f+A at the end of a blockstring, the opponent can roll before the f+A hits if your opponent is expecting it.
* Hits overhead
* Special cancel-able if cancelled from other normals-->


===<u>Special Moves</u>===

Revision as of 21:12, 28 December 2020

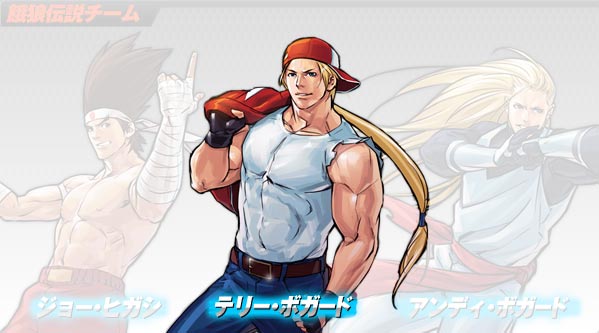
One of the most iconic SNK characters, Terry has been with the King of Fighters series since its debut, and as always, is one of the simplest characters in the game. He has good damage on his bread-and-butters, but lacks somewhat in mixups and has generally average tools; don't let this discourage you, however, as he is a beginner-friendly all-rounder and works well for a starting pick.

Terry.jpg

Movelist

Kof02ummovelistterry.png

Normals

Standing (Close)

cl.A
Damage Guard Startup Active Recovery Hit Advantage Block Advantage Guard Bar
20 Mid 3 5 5 2 0

A jab that can hit most opponents in a high or low state. It can be chained into itself, a light kick button, df+C, or cancelled into any Special Move.

cl.B
Damage Guard Startup Active Recovery Hit Advantage Block Advantage Guard Bar
20 Mid 4 5 7 0 -2

A knee to the chest that can also hit crouching opponents. It is only chainable into itself or st.B, but can be cancelled into a Command Move or Special/Desperation Move (although only df+C combos from it).

cl.C
Damage Guard Startup Active Recovery Hit Advantage Block Advantage Guard Bar
55 (40 + 15) Mid 3 10 (7 + 3) 15 -2 -4

A gut punch that hits twice and leans slightly on the unsafe side. Either hit of the punch is cancellable into a Command Move or Special and can be used to start or continue a high or middle-level combo.

cl.D
Damage Guard Startup Active Recovery Hit Advantage Block Advantage Guard Bar
55 Mid 4 4 22 -6 -8

A rather fast, but punishable upward kick. Despite its slow recovery, it can also be cancelled into Command Moves or Special Moves, giving it a similar use to cl.C but without the extra hit.

Standing (Far)

st.A
Damage Guard Startup Active Recovery Hit Advantage Block Advantage Guard Bar
30 Mid 3 4 5 3 1

A light jab that can hit most standing or airborne opponents, making it one of Terry's better tools for stopping hops. It can chain into st.B and can be cancelled into Command or Special Moves, but cancels best into df+C.

st.B
Damage Guard Startup Active Recovery Hit Advantage Block Advantage Guard Bar
20 Mid 5 4 9 -1 -3

A weak, but rather far kick from the left leg. This cannot be cancelled into anything, which makes it work better as a poke.

st.C
Damage Guard Startup Active Recovery Hit Advantage Block Advantage Guard Bar
60 Mid 5 7 16 -3 -5

A far punch from the left arm. It is rather unsafe, but it can be cancelled into any Special Move.

st.D
Damage Guard Startup Active Recovery Hit Advantage Block Advantage Guard Bar
70 Mid 19 4 15 1 -1

A slow and moving kick that newer players may use on accident. It is rather safe, leaving Terry at the smallest advantage on hit, but will move him back when blocked and can be easily stopped.

st.CD
Damage Guard Startup Active Recovery Hit Advantage Block Advantage Guard Bar
70 Mid 14 3 21 Soft Knockdown -2

A standard Blowback attack that is a hop kick that moves Terry forward. Like others, it knocks down on hit, but it pushes Terry back when blocked; alongside this, it can also be whiff cancelled.

Crouching

cr.A
Damage Guard Startup Active Recovery Hit Advantage Block Advantage Guard Bar
25 Mid 3 4 6 2 0

A crouching punch that is both chainable and cancellable. It mainly chains into light kicks, but can also be cancelled into any Command Move or Special Move, best cancelling into df+C.

cr.B
Damage Guard Startup Active Recovery Hit Advantage Block Advantage Guard Bar
25 Low 3 3 8 1 -1

A low-hitting kick that chains into other light normals and can be whiff cancelled. Like other crouching normals, it can be cancelled into any Command Move or Special Move, with df+C being an ideal cancel option for combos.

cr.C
Damage Guard Startup Active Recovery Hit Advantage Block Advantage Guard Bar
60 Mid 6 5 19 -4 -6

A slower crouching punch from the right arm. Can be cancelled into any Command Move or Special Move with ease, and furthermore whiff cancelled.

cr.D
Damage Guard Startup Active Recovery Hit Advantage Block Advantage Guard Bar
70 Low 10 18 22 Soft Knockdown -12

A slow sweep kick that knocks the opponent down. It can be cancelled into any Command or Special Move, although the poor practicality of doing it on a successful hit may encourage the player to whiff cancel or cancel it when blocked.

Jumping

j.A
Damage Guard Startup Active Recovery Hit Advantage Block Advantage Guard Bar
30 High 3 7... - - -

Terry deals a downward chop to the opponent. This can be used for a multitude of ideas, but mainly as an air-to-ground, jump-in, or instant overhead.

j.B
Damage Guard Startup Active Recovery Hit Advantage Block Advantage Guard Bar
25 High 2 8... - - -

Terry does a funky horizontal kick with his right leg. This is good as an air-to-air and can also be used stop incoming hops and jumps from a middle or long-ranged distance, but can be low profiled if performed too early.

j.C
Damage Guard Startup Active Recovery Hit Advantage Block Advantage Guard Bar
55 High 3 9... - - -

Terry punches at a position angled downward. This is another move best used as an air-to-ground or jump-in.

j.D
Damage Guard Startup Active Recovery Hit Advantage Block Advantage Guard Bar
55 High 8 7... - - -

Terry does a jumping kick angled downward. This is can be used as a cross-up, usable against standing or crouching opponents, and is probably Terry's best air-to-ground option despite its slower start-up.

nj.D
Damage Guard Startup Active Recovery Hit Advantage Block Advantage Guard Bar
55 High 2 10... - - -

Terry does an upward kick mid-air. This can be used as an air-to-air, since its hitbox doesn't directly target opponents above him.

j.CD
Damage Guard Startup Active Recovery Hit Advantage Block Advantage Guard Bar
70 Mid 13 6... - Soft Knockdown -

Terry does a horizontally-aimed jumping kick as an aerial Blowback. This is Terry's best air-to-air due to its knockdown property and taller hitbox, and can be used as a tool to pressure opponents in the corner. Despite this, however, it can be low profiled.

Throws

Grasping (b/f + C when close to opponent)
Damage Guard Startup Active Recovery Hit Advantage Block Advantage Guard Bar
80 n/a - - - Soft Knockdown -

Terry grabs the opponent and uppercuts them. Due to the opponent landing near the corner of the screen and its ability as a throw, this can be seen as a good "get off me" tool, but will not work in this way if escaped.

Buster Throw (b/f + D when close to opponent)
Damage Guard Startup Active Recovery Hit Advantage Block Advantage Guard Bar
80 n/a - - - Hard Knockdown -

Terry slams the opponent in the opposite direction. The opponent lands a character space away from the corner of the screen, but if Terry gets close enough again it can see itself being used for okizeme setups involving jumping attacks.

Command Moves

Rising Upper (df + C)
Damage Guard Startup Active Recovery Hit Advantage Block Advantage Guard Bar
50 Mid 3 6 19 -5 -7

Terry does a quick uppercut before going back into a crouching position. This Command Move is good and easy to use in combos before a Special or Desperation Move due to its ease in chaining from most Normals and Special cancel ability, or can be used to end a blockstring if any attempts at confirming are not successful. It can also be used as an anti-air, but the player should be mindful of its slow start-up as it may trade or get beaten out by the opponent's jumping Normals if timed improperly.

Hammer Punch (f + A)
Damage Guard Startup Active Recovery Hit Advantage Block Advantage Guard Bar
45 High (Mid if cancelled) 20 (18 if cancelled) 4 21 (23 if cancelled) -5 (-7 if cancelled) -7 (-9 if cancelled)

Terry takes a large step forward to deliver a low aiming hook punch that hits overhead. This Command Move is not cancel-able by itself, but it is as easy to cancel into from many of his crouching and standing Normals, similar to Rising Upper. It only combos from heavy Normals, and gains the ability to Special Cancel at the cost of its overhead property. The player should be careful when using the move, however; at the end of a blockstring, the opponent can roll before the move hits if they are expecting it, but Terry gets pushed back a great distance if it is successfully blocked, which may be good if the player needs some space away from the opponent so they can properly react and read their next actions of movement.

Special Moves

Power Wave (qcf, A)
Damage Guard Startup Active Recovery Hit Advantage Block Advantage Guard Bar
- - - - - - -
Round Wave (qcf, C)
Damage Guard Startup Active Recovery Hit Advantage Block Advantage Guard Bar
- - - - - - -
Burn Knuckle (qcb, P)
Damage Guard Startup Active Recovery Hit Advantage Block Advantage Guard Bar
- - - - - - -
Quick Burning (dp, P)
Damage Guard Startup Active Recovery Hit Advantage Block Advantage Guard Bar
- - - - - - -
Power Dunk (dp, K)
Damage Guard Startup Active Recovery Hit Advantage Block Advantage Guard Bar
- - - - - - -
Power Charge (hcf, K)
Damage Guard Startup Active Recovery Hit Advantage Block Advantage Guard Bar
- - - - - - -
Rising Tackle ([d]~u, K)
Damage Guard Startup Active Recovery Hit Advantage Block Advantage Guard Bar
- - - - - - -
Crack Shoot (qcb, K)
Damage Guard Startup Active Recovery Hit Advantage Block Advantage Guard Bar
- - - - - - -


Desperation Moves

Power Geyser (qcb, db, f, P or qcb, f, P)
Damage Guard Startup Active Recovery Hit Advantage Block Advantage Guard Bar
- - - - - - -
High Angle Geyser (qcf, qcf, K)
Damage Guard Startup Active Recovery Hit Advantage Block Advantage Guard Bar
- - - - - - -


Super Desperation Moves

Power Geyser (qcb, db, f, 2P or qcb, f, 2P)
Damage Guard Startup Active Recovery Hit Advantage Block Advantage Guard Bar
- - - - - - -


Hidden Super Desperation Move

Rising Force (qcf, qcf, 2P)
Damage Guard Startup Active Recovery Hit Advantage Block Advantage Guard Bar
- - - - - - -


Combos

Strategy

Use Burn Knuckle when they least expect it.

Videos

Terry -Max- combos by Franck Frost
阿澤.Aze (Terry Best Rounds)
Terry Master Class

External Links

Dream Cancel discussion forum thread


{{Navbox 2002UM}} [[Category:The King of Fighters 2k2UM]]