Difference between revisions of "The King of Fighters XIII/Duo Lon"
| Line 11: | Line 11: | ||
===Gameplay Notes=== | ===Gameplay Notes=== | ||
Duo Lon is one of the more versatile players in the XIII roster | Duo Lon is one of the more versatile players in the XIII roster. His gameplay revolves around his fast mix up with Rekkas (Suteki Juryu, qcf+P x3) and his teleports. With the introduction of Ex specials in XIII, his (air) f+A and (air) f+B command/special attack become very useful for setting up mixups. He's typically a rush down character but at the time can zone his opponent well with his f+A ground and A version. His f+B also prevents opponents from turtling him from a far. | ||
Despite having overall a low damage output and losing his other variation of Rekkas from '03 and XI he's still a very capable [i]silent assasin[/i] like his official nickname suggests. | |||
===Pros=== | ===Pros=== | ||
Revision as of 22:58, 24 June 2011
Gameplay Overview
Starts at 2m37 (http://www.youtube.com/watch?v=gFX8UBiyo8w#t=2m37)
Gameplay Notes
Duo Lon is one of the more versatile players in the XIII roster. His gameplay revolves around his fast mix up with Rekkas (Suteki Juryu, qcf+P x3) and his teleports. With the introduction of Ex specials in XIII, his (air) f+A and (air) f+B command/special attack become very useful for setting up mixups. He's typically a rush down character but at the time can zone his opponent well with his f+A ground and A version. His f+B also prevents opponents from turtling him from a far.
Despite having overall a low damage output and losing his other variation of Rekkas from '03 and XI he's still a very capable [i]silent assasin[/i] like his official nickname suggests.
Pros
Cons
Normals
Standing
st. A
- Cancellable / Chain-able
- Hit Detection: High
- Damage: 25
st. B
- Cancellable
- Hit Detection: Low
- Damage: 30
st. C
- Cancellable
- Hit Detection: High
- Damage: 70
st. D
- Can't be cancelled
- Hit Detection: High
- Damage: 70
cl. D
- Cancellable
- Hit Detection: High
- Damage: 70
Crouching
cr. A
- Cancellable / Chain-able
- Hit Detection: High
- Damage: 25
cr. B
- Chain-able
- Hit Detection: Low
- Damage: 30
cr. C
- Cancellable
- Hit Detection: High
- Damage: 70
cr. D
- Can't be cancelled
- Hit Detection: Low
- Damage: 80
Jumping
j. A
- Cancellable
- Hit Detection: Mid
- Damage: 45 (40)
j. B
- Cancellable
- Hit Detection: Mid
- Damage: 45 (40)
j. C
- Cancellable
- Hit Detection: Mid
- Damage: 72 (70)
j. D
- Can't be cancelled
- Hit Detection: Mid
- Damage: 70 (68)
Blowback Attack
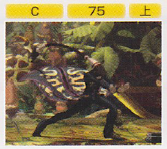
CD
- Cancellable
- Hit Detection: High
- Damage: 75
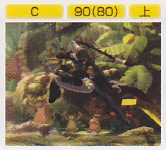
j. CD
- Cancellable
- Hit Detection: High
- Damage: 90 (80)
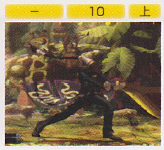
GCCD
- Can't be cancelled
- Hit Detection: High
- Damage: 10
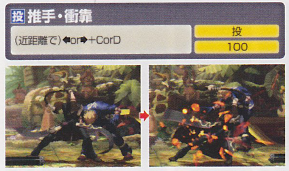
Throw
Suite Shikon = (b/f+C/D)
- Can be broken
- Hit Detection: Throw
- Damage: 100
Special Moves
Genmu Ken = (f+A)
(EX) = f+AC
- Cancellable
- Hit Detection: High
- Damage: 40; EX Damage: 30 x 2
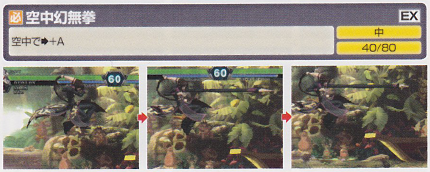
Genmu Ken Air = (f+A) in air
(EX) = f+AC in air
- Hit Detection: Mid
- Damage: 40; EX Damage: 80
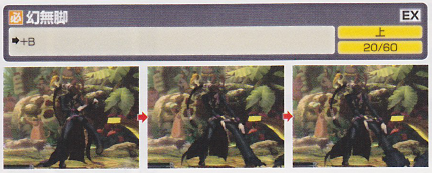
Genmu Kyaku = (f+B)
(EX) = f+BD
- Hit Detection: High
- Damage: 20; EX Damage: 60
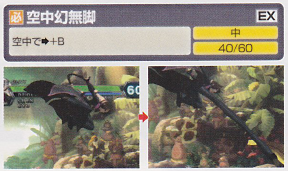
Genmu Kyaku Air = (f+B) in air
(EX) = f+BD in air
- Hit Detection: Mid
- Damage: 40; EX Damage: 60
Hike Kyaku Zen = (qcf+K)
(EX) = qcf+BD
- No Damage
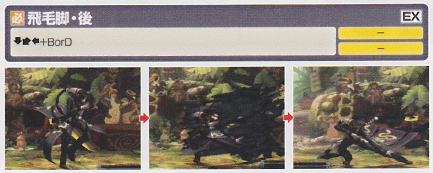
Hike Kyaku Ushiro = (qcb+K)
(EX) = qcb+BD
- No Damage
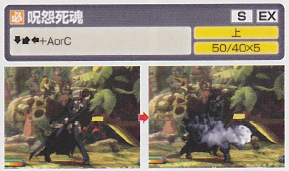
Juon Shikon = (qcb+P)
(EX) = qcb+AC
- Super-Cancellable
- Hit Detection: High
- Damage: 50; EX Damage: 40 x 5
Suteki Juryu = (qcf+P) x3
(EX) = qcf+AC x3
- Drive- / Super-Cancellable
- Hit Detection: High
- Damage: 30, 30, 40; EX Damage: 60, 30, 40
Desperation Moves
Genmu Bakko Shikon = (qcb hcf+P)
(EX) = qcb hcf+AC
- MAX Cancellable
- Hit Detection: High
- Damage: 200; EX Damage: 60 x 3, 140
Neomax
Juon Ko Ha = (hcbx2+AC)
- Hit Detection: Throw (/ High if MAX canceled into)
- Damage: 10 x 40
Combos
Character tutorial by Don't Drop That Combo
No Drive Gauge
No Power Gauge
- [cr.B, cr.A / st.C, f+A], (qcf+P)x3, qcf+K, st.C/D (reset)
1 Power Gauges
- j.CD, f+AC in air
- [cr.B, cr.A / st.C, f+A], qcb hcf+P
2 Power Gauges
- [cr.B, cr.A / st.C, f+A], (qcf+P)x3, qcf+K, qcb hcf+AC
50% Drive Gauge
1 Power Gauge
- [cr.B, cr.A / st.C, f+A], (qcf+P)x2, (DC) f+AC, cr.A, st.C, (qcf+P)x3
- [cr.B, cr.A / st.C, f+A], (qcf+P)x2, (DC) (qcf+AC)x3, qcf+D, CD
Corner
- [cr.B, cr.A / st.C, f+A], (qcf+P)x3, (DC) qcb+P, qcb hcf+P
2 Power Gauges
- [cr.B, cr.A / st.C, f+A], (qcf+P)x2, (DC) (qcf+AC)x3, qcf+D, qcb hcf+P
- f+BD, (DC) qcb hcf+P
3 Power Gauges
- [cr.B, cr.A / st.C, f+A], (qcf+P)x2, (DC) (qcf+AC)x3, qcf+D, qcb hcf+AC
- f+BD, qcb hcf+AC
HD Combos
NOTE: All combos listed below start with st/cr.X or anything that properly linksinto the rest of the combo
Legend
① = [(qcf+P)x2, (HDC) f+A]*N
1 Power Gauge
- st.C, f+A, ①, (qcf+P)x2, (DC) qcb+P (HD end), qcb hcf+P
2 Power Gauges
- st.C, f+A, ①, (qcf+P)x3, (DC) qcf+D (HD end), qcb hcf+AC
3 Power Gauges
- st.C, f+A, ①, (qcf+P)x3, (MC) hcbx2+AC
4 Power Gauges
- st.C, f+A, ①, (qcf+P)x2, (SC) qcb hcf+P, (MC) hcbx2+AC
5 Power Gauges
- st.C, f+A, ①, (qcf+P)x2, (SC) qcb hcf+AC, (MC) hcbx2+AC
Miscellaneous
Character Sprite
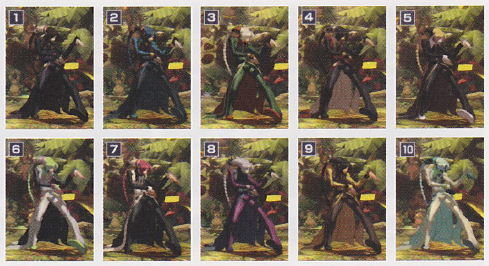
Colors
Other
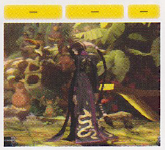
Taunt
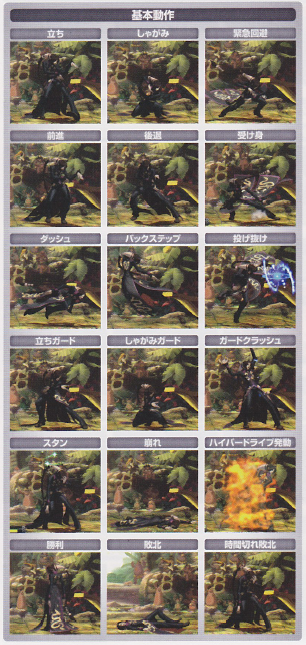
First Row: Standing/Crouching/Evasive Roll
Second Row: Walking (forward/Walking (Backward)/Safe Roll
Third Row: Running/Back Step/Throw Break
Fourth Row: Standing Guard/Crouching Guard/Guard Crush
Fifth Row: Dizzy/Downed/Hyper Drive Activation
Last Row: Win Pose/Knock Out/Time Up Pose
Links & References
Technical Reference
http://www.youtube.com/watch?v=gFX8UBiyo8w&t=2m40s
Discussion Threads
Discuss at Dream Cancel


