-Happy New Year 2025!
The Last Blade 2/Kouryu: Difference between revisions
No edit summary |
|||
| (48 intermediate revisions by 2 users not shown) | |||
| Line 1: | Line 1: | ||
{{The Last Blade 2 Character Intro|char=Kouryu|sub=0|content= | |||
==Unlocking== | ==Unlocking== | ||
You can access Kouryu by highlighting Kaede at the character select screen, and pressing C 10 times, B 5 times, and C 4 more times. | You can access Kouryu by highlighting Kaede at the character select screen, and pressing C 10 times, B 5 times, and C 4 more times. If you perform this correctly, you'll hear his voice, then you can select him with A or D. | ||
'''N.B. Kouryu is not playable on the MVS arcade versions of The Last Blade 2''' | |||
==Overview== | ==Overview== | ||
The resident boss character of LB2, Kouryu is designed to | The resident boss character of LB2, Kouryu is designed to extremely challenging to fight. Armed with a phenomenal set of fullscreen zoning tools, incredibly high damage output, the fastest dashes in the game, and ludicrous pressure extensions, Kouryu dominates virtually all aspects of the game with ease. | ||
| | Kouryu is ideally played as a projectile zoner, abusing his 236A and large disjoints to keep the opponent at bay while racking up chip. This gameplan is incredibly effective despite being simple, and Kouryu is still able to go on the offensive when called for. His incredible run and backdash synergize well with his advancing 4A to force the opponent into blocking many safe, high damage mixups. In speed/EX mode he is also capable of starting his offense from mid range by utilizing chains from 5A to repeatedly frame trap the opponent, likely from outside their ideal range. Kouryu's very free-form playstyle makes him very difficult to pin down initially, though his disadvantage state cannot be ignored as he is effectively unable to crouch, making it essential that you have a contingency plan in mind if the opponent successfully defends against you. Despite this, many of Kouryu's moves have massively skewed risk/reward in his favor, so as long as you avoid overextending very few characters can legitimately start their offense in practice. | ||
<br> | |||
<div class="movelist-toggles"> | |||
<div id="movelist-toggle-1" class="movelist-toggle-button"> [[File:Power_Icon.png|50px|link=]]</div> | |||
<div id="movelist-toggle-2" class="movelist-toggle-button"> [[File:Speed_Icon.png|50px|link=]]</div> | |||
! | <div id="movelist-toggle-3" class="movelist-toggle-button"> [[File:EX_Icon.png|50px|link=]]</div> | ||
| | </div> | ||
* Virtually unbeatable fireball (best zoning tools of any mode) | <div id="movelist-1" class="movelist"><!-- Power --> | ||
{{ProConTable | |||
|pros= * Virtually unbeatable fireball (best zoning tools of any mode) | |||
* Gigantic, damaging disjoints | * Gigantic, damaging disjoints | ||
* High mobility | * High mobility | ||
| Line 23: | Line 25: | ||
* Racks up chip safely from anywhere on the screen | * Racks up chip safely from anywhere on the screen | ||
* Capable of switching to speed mode at will | * Capable of switching to speed mode at will | ||
| | |cons = * Large hurtbox and weak recovery rolls leave him susceptable to many character specific forms of pressure | ||
* Large hurtbox and weak recovery rolls leave him susceptable to many character specific forms of pressure | * Maintaining an advantage state is somewhat meter reliant}} | ||
* Maintaining an advantage state is somewhat meter reliant | </div> | ||
<div id="movelist-2" class="movelist"><!-- Speed --> | |||
! | {{ProConTable | ||
| | |pros=* Virtually unbeatable fireball | ||
* Virtually unbeatable fireball | |||
* Gigantic, damaging disjoints | * Gigantic, damaging disjoints | ||
* High mobility | * High mobility | ||
| Line 36: | Line 37: | ||
* Pseudo block infinite allows for easy pressure resets | * Pseudo block infinite allows for easy pressure resets | ||
* Capable of switching to power mode at will | * Capable of switching to power mode at will | ||
| | |cons =* Large hurtbox and weak recovery rolls leave him susceptable to many character specific forms of pressure}} | ||
* Large hurtbox and weak recovery rolls leave him susceptable to many character specific forms of pressure | </div> | ||
<div id="movelist-3" class="movelist"><!-- EX --> | |||
! | {{ProConTable | ||
| | |pros=* Same strengths as speed, though with much higher damage and being unable to switch modes | ||
* Same strengths as speed, though with much higher damage and being unable to switch modes | |||
* High guaranteed chip from stray blocked normals/fireballs | * High guaranteed chip from stray blocked normals/fireballs | ||
| | |cons =* Large hurtbox and weak recovery rolls leave him susceptable to many character specific forms of pressure | ||
* Large hurtbox and weak recovery rolls leave him susceptable to many character specific forms of pressure | * Notable defense penalty}} | ||
* Notable defense penalty | </div> | ||
}} | |||
==Normals== | ==Normals== | ||
| Line 61: | Line 57: | ||
{{AttackData-LB2 | {{AttackData-LB2 | ||
|damage= | |damage= | ||
|startup= | |startup= 6 | ||
|active= 2 | |active= 2 | ||
|recovery= | |recovery= | ||
| Line 80: | Line 76: | ||
{{AttackData-LB2 | {{AttackData-LB2 | ||
|damage= | |damage= | ||
|startup= | |startup= 5 | ||
|active= 2 | |active= 2 | ||
|recovery= | |recovery= | ||
| Line 99: | Line 95: | ||
{{AttackData-LB2 | {{AttackData-LB2 | ||
|damage= | |damage= | ||
|startup= | |startup= 11 | ||
|active= | |active= | ||
|recovery= | |recovery= | ||
| Line 121: | Line 117: | ||
{{AttackData-LB2 | {{AttackData-LB2 | ||
|damage= | |damage= | ||
|startup= | |startup= 16 | ||
|active= 2 | |active= 2 | ||
|recovery= | |recovery= | ||
| Line 140: | Line 136: | ||
{{AttackData-LB2 | {{AttackData-LB2 | ||
|damage= | |damage= | ||
|startup= | |startup= 10 | ||
|active= 4 | |active= 4 | ||
|recovery= | |recovery= | ||
| Line 159: | Line 155: | ||
{{AttackData-LB2 | {{AttackData-LB2 | ||
|damage= | |damage= | ||
|startup= | |startup= 11 | ||
|active= 3 | |active= 3 | ||
|recovery= | |recovery= | ||
| Line 179: | Line 175: | ||
{{AttackData-LB2 | {{AttackData-LB2 | ||
|damage= | |damage= | ||
|startup= | |startup= 48-68 | ||
|active= 2 | |active= 2 | ||
|recovery= | |recovery= | ||
| Line 198: | Line 194: | ||
{{AttackData-LB2 | {{AttackData-LB2 | ||
|damage= | |damage= | ||
|startup= | |startup= 25 | ||
|active= 3 | |active= 3 | ||
|recovery= | |recovery= | ||
| Line 241: | Line 237: | ||
{{AttackData-LB2 | {{AttackData-LB2 | ||
|damage= | |damage= | ||
|startup= | |startup= 10 | ||
|active= 2 | |active= 2 | ||
|recovery= | |recovery= | ||
| Line 260: | Line 256: | ||
{{AttackData-LB2 | {{AttackData-LB2 | ||
|damage= | |damage= | ||
|startup= | |startup= 16 | ||
|active= 3 | |active= 3 | ||
|recovery= | |recovery= | ||
| Line 279: | Line 275: | ||
{{AttackData-LB2 | {{AttackData-LB2 | ||
|damage= | |damage= | ||
|startup= | |startup= 7 | ||
|active= 2 | |active= 2 | ||
|recovery= | |recovery= | ||
| Line 298: | Line 294: | ||
{{AttackData-LB2 | {{AttackData-LB2 | ||
|damage= | |damage= | ||
|startup= | |startup= 13 | ||
|active= 2 | |active= 2 | ||
|recovery= | |recovery= | ||
| Line 319: | Line 315: | ||
{{AttackData-LB2 | {{AttackData-LB2 | ||
|damage= | |damage= | ||
|startup= | |startup= 10 | ||
|active= 2 | |active= 2 | ||
|recovery= | |recovery= | ||
| Line 338: | Line 334: | ||
{{AttackData-LB2 | {{AttackData-LB2 | ||
|damage= | |damage= | ||
|startup= | |startup= 13 | ||
|active= 2 | |active= 2 | ||
|recovery=N/A | |recovery=N/A | ||
| Line 357: | Line 353: | ||
{{AttackData-LB2 | {{AttackData-LB2 | ||
|damage= | |damage= | ||
|startup= | |startup= 5 | ||
|active= 4 | |active= 4 | ||
|recovery= N/A | |recovery= N/A | ||
| Line 402: | Line 398: | ||
{{AttackData-LB2 | {{AttackData-LB2 | ||
|damage= | |damage= | ||
|startup= | |startup= 23 | ||
|active= | |active= | ||
|recovery= | |recovery= | ||
| Line 452: | Line 448: | ||
{{AttackData-LB2 | {{AttackData-LB2 | ||
|damage= | |damage= | ||
|startup= | |startup= 1 | ||
|active= 37 | |active= 37 | ||
|recovery= | |recovery= | ||
| Line 474: | Line 470: | ||
{{AttackData-LB2 | {{AttackData-LB2 | ||
|damage= | |damage= | ||
|startup= | |startup= 15 | ||
|active= 5 | |active= 5 | ||
|recovery= | |recovery= | ||
| Line 496: | Line 492: | ||
{{AttackData-LB2 | {{AttackData-LB2 | ||
|damage= | |damage= | ||
|startup= | |startup= 21 | ||
|active= 1 | |active= 1 | ||
|recovery= | |recovery= | ||
| Line 517: | Line 513: | ||
{{AttackData-LB2 | {{AttackData-LB2 | ||
|damage= | |damage= | ||
|startup= | |startup= 30 | ||
|active= 8 | |active= 8 | ||
|recovery= | |recovery= | ||
| Line 538: | Line 534: | ||
{{AttackData-LB2 | {{AttackData-LB2 | ||
|damage= | |damage= | ||
|startup= | |startup= 20 | ||
|active= 1 | |active= 1 | ||
|recovery= | |recovery= | ||
| Line 560: | Line 556: | ||
{{AttackData-LB2 | {{AttackData-LB2 | ||
|damage= 180 | |damage= 180 | ||
|startup= | |startup= 23 | ||
|active= 21 | |active= 21 | ||
|recovery= | |recovery= | ||
| Line 572: | Line 568: | ||
}} | }} | ||
}} | }} | ||
{{Navbox LB2}} | {{Navbox LB2}} | ||
[[Category:The Last Blade 2]] | [[Category:The Last Blade 2]] | ||
Revision as of 00:36, 20 October 2023
Unlocking
You can access Kouryu by highlighting Kaede at the character select screen, and pressing C 10 times, B 5 times, and C 4 more times. If you perform this correctly, you'll hear his voice, then you can select him with A or D.
N.B. Kouryu is not playable on the MVS arcade versions of The Last Blade 2
Overview
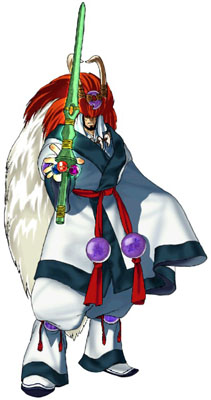
The resident boss character of LB2, Kouryu is designed to extremely challenging to fight. Armed with a phenomenal set of fullscreen zoning tools, incredibly high damage output, the fastest dashes in the game, and ludicrous pressure extensions, Kouryu dominates virtually all aspects of the game with ease.
Kouryu is ideally played as a projectile zoner, abusing his 236A and large disjoints to keep the opponent at bay while racking up chip. This gameplan is incredibly effective despite being simple, and Kouryu is still able to go on the offensive when called for. His incredible run and backdash synergize well with his advancing 4A to force the opponent into blocking many safe, high damage mixups. In speed/EX mode he is also capable of starting his offense from mid range by utilizing chains from 5A to repeatedly frame trap the opponent, likely from outside their ideal range. Kouryu's very free-form playstyle makes him very difficult to pin down initially, though his disadvantage state cannot be ignored as he is effectively unable to crouch, making it essential that you have a contingency plan in mind if the opponent successfully defends against you. Despite this, many of Kouryu's moves have massively skewed risk/reward in his favor, so as long as you avoid overextending very few characters can legitimately start their offense in practice.
| Strengths | Weaknesses |
|---|---|
|
|
| Strengths | Weaknesses |
|---|---|
|
|
| Strengths | Weaknesses |
|---|---|
|
|
Normals
Standing
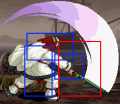
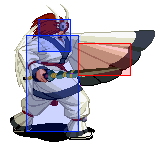
5A
 |
|---|
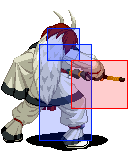
4A
 |
|---|
5B
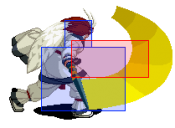 |
|---|
6B
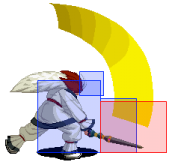 |
|---|
5C
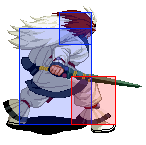 |
|---|
6C
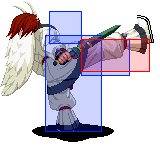 |
|---|
BC(Power)
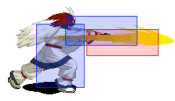 on the sword |
|---|
BC(Speed/EX)
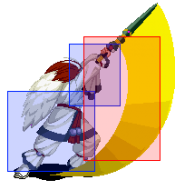 |
|---|
3B
 |
|---|
- A, B, and C can cancel in both Power Mode and Speed Mode
- forward + B (Power and Speed) is not cancellable
- forward + C in Speed Mode is not cancellable
Crouching
2A
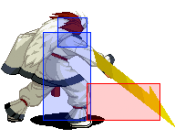 |
|---|
2B
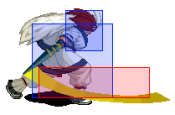 |
|---|
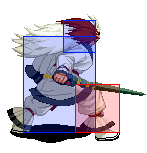
2C
 |
|---|
3C
 |
|---|
Air
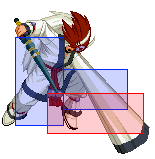
j.A
 |
|---|
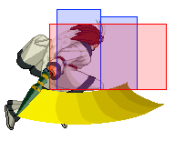
j.B
 |
|---|
j.C
 |
|---|
Special Moves
| Arrow Show 236A/B 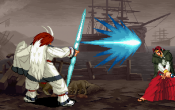 |
|---|
| Big Slash 214C 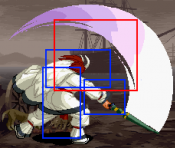 |
|---|
| Quad Rusher 214A/B(x4) 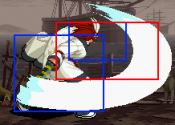 |
|---|
| Mode Swap BCD 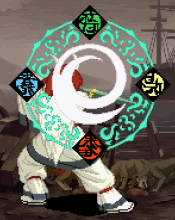 The immortality I mean. |
|---|
Desperation Moves
| Fire Phoenix Super 641236A (in air) 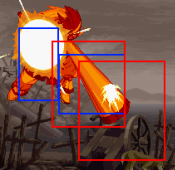 |
|---|
| Earth Slasher Super 641236B 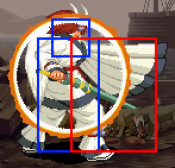 |
|---|
| Water Tornado Super 641236C  |
|---|
| Lightning Dragon Super 641236D 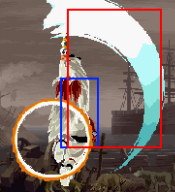 |
|---|
Super Desperation Moves
| Ultimate End 463214B 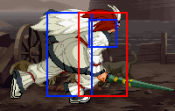 |
|---|
