-Happy New Year 2025!
The Last Blade 2/Genbu no Okina: Difference between revisions
Felsen 2020 (talk | contribs) |
|||
| (9 intermediate revisions by 3 users not shown) | |||
| Line 3: | Line 3: | ||
Largely considered to be the token zoner of the game, Okina relies on fast disjointed pokes and high damage projectiles to whittle down the opponent from mid to long range. Although the majoriy of his kit is unsafe on block, he has access to a combo-able command grab that leads to either strong safe jumps or an opportunity to build space. In addition to this, Okina possesses a pair of unique command grabs at half and full screen respectively in the form of 623B and 623C, letting Okina threaten the opponent from afar even without lifelead. He also has access to some very strong jabs and a teleport that allow him to get away from the opponent even if they do manage to make him block, making him especially slippery and lets you waste precious seconds from the clock. Despite all of this, Okina has a massive deadzone at roughly 2 character lengths ahead which he must constantly play around with either committal approach attempts or fleeing with his surprisingly strong ground mobility, and his lack of damage output can make him reliant on risky plays in neutral or constantly resetting the opponent. Regardless of his weaknesses, Okina has a very unique playstyle which will likely appeal to those looking for a chance to take the game at their own leisure, breaking down the opponent's mentality with a strong keepaway game or an onslaught of infuriating gimmicks. | Largely considered to be the token zoner of the game, Okina relies on fast disjointed pokes and high damage projectiles to whittle down the opponent from mid to long range. Although the majoriy of his kit is unsafe on block, he has access to a combo-able command grab that leads to either strong safe jumps or an opportunity to build space. In addition to this, Okina possesses a pair of unique command grabs at half and full screen respectively in the form of 623B and 623C, letting Okina threaten the opponent from afar even without lifelead. He also has access to some very strong jabs and a teleport that allow him to get away from the opponent even if they do manage to make him block, making him especially slippery and lets you waste precious seconds from the clock. Despite all of this, Okina has a massive deadzone at roughly 2 character lengths ahead which he must constantly play around with either committal approach attempts or fleeing with his surprisingly strong ground mobility, and his lack of damage output can make him reliant on risky plays in neutral or constantly resetting the opponent. Regardless of his weaknesses, Okina has a very unique playstyle which will likely appeal to those looking for a chance to take the game at their own leisure, breaking down the opponent's mentality with a strong keepaway game or an onslaught of infuriating gimmicks. | ||
<br> | |||
| | <div class="movelist-toggles"> | ||
<div id="movelist-toggle-1" class="movelist-toggle-button"> [[File:Power_Icon.png|50px|link=]]</div> | |||
<div id="movelist-toggle-2" class="movelist-toggle-button"> [[File:Speed_Icon.png|50px|link=]]</div> | |||
<div id="movelist-toggle-3" class="movelist-toggle-button"> [[File:EX_Icon.png|50px|link=]]</div> | |||
</div> | |||
! | <div id="movelist-1" class="movelist"><!-- Power --> | ||
| | {{ProConTable | ||
|pros= | |||
* High damage combo-able command grab | * High damage combo-able command grab | ||
* Strong disjointed pokes and projectiles that can easily rack up stun | * Strong disjointed pokes and projectiles that can easily rack up stun | ||
* Powerful SDM to build space or chip out the opponent | * Powerful SDM to build space or chip out the opponent | ||
* 2f low that leads to oki (does the most damage in this mode) | * 2f low that leads to oki (does the most damage in this mode) | ||
| | |cons= | ||
* Singnificant deadzone between 5A and 623B which forces you to reposition often | * Singnificant deadzone between 5A and 623B which forces you to reposition often | ||
* Highly unsafe/reactable mixups beyond safe jumps | * Highly unsafe/reactable mixups beyond safe jumps | ||
* Difficult hitconfirms | * Difficult hitconfirms | ||
}}</div> | |||
! | <div id="movelist-2" class="movelist"><!-- Speed--> | ||
| | {{ProConTable | ||
|pros= | |||
* Strong disjoints with good empty cancels | * Strong disjoints with good empty cancels | ||
* Long blockstrings with multiple mixes and strong hitconfirms | * Long blockstrings with multiple mixes and strong hitconfirms | ||
| Line 27: | Line 29: | ||
* Reset opportunities off nearly any hit of a combo | * Reset opportunities off nearly any hit of a combo | ||
* 2f low that leads to oki | * 2f low that leads to oki | ||
| | |cons= | ||
* Significant deadzone between 5a and 623B which forces you to reposition often | * Significant deadzone between 5a and 623B which forces you to reposition often | ||
* Prone to getting guard canceled often | * Prone to getting guard canceled often | ||
* Lacks super confirms without deflects or very hard reads | * Lacks super confirms without deflects or very hard reads | ||
* Turtles can't stun in a match, making them even more unsafe than normal | * Turtles can't stun in a match, making them even more unsafe than normal | ||
}}</div> | |||
! | <div id="movelist-3" class="movelist"><!-- EX --> | ||
| | {{ProConTable | ||
|pros= | |||
* Long blockstrings with multiple mixes, strong hitconfirms, and a surprising amount of chip | * Long blockstrings with multiple mixes, strong hitconfirms, and a surprising amount of chip | ||
* Powerful SDM to build chip or build distance | * Powerful SDM to build chip or build distance | ||
* Highest meterless damage of Okina's modes, though only barely off common bnb's | * Highest meterless damage of Okina's modes, though only barely off common bnb's | ||
* 2f low that leads to oki | * 2f low that leads to oki | ||
* Healthy beard | * '''Healthy beard''' | ||
| | |cons= | ||
* Significant deadzone between 5a and 623B which forces you to reposition often | * Significant deadzone between 5a and 623B which forces you to reposition often | ||
* Lacks super confirms without deflects or very hard reads | * Lacks super confirms without deflects or very hard reads | ||
| Line 46: | Line 49: | ||
* Turtles still can't stun | * Turtles still can't stun | ||
* Massive defense penalty, exacerbated by Okina's already low base defense | * Massive defense penalty, exacerbated by Okina's already low base defense | ||
* By extension of the previous point, loses almost every trade imaginable. Especially problematic as this requires using 623B/C instead of 236A/B to punish fireball attempts | * By extension of the previous point, loses almost every trade imaginable. Especially problematic as this requires using 623B/C instead of 236A/B to punish fireball attempts}} | ||
</div> | |||
==Normals== | ==Normals== | ||
| Line 59: | Line 62: | ||
|version= Power | |version= Power | ||
|damage=12/1 | |damage=12/1 | ||
|startup= | |startup=4 | ||
|active=2 | |active=2 | ||
|recovery=17 | |recovery=17 | ||
| Line 73: | Line 76: | ||
|version= Speed | |version= Speed | ||
|damage=8/0 | |damage=8/0 | ||
|startup= | |startup=4 | ||
|active=2 | |active=2 | ||
|recovery=17 | |recovery=17 | ||
| Line 93: | Line 96: | ||
|version= Power | |version= Power | ||
|damage=12/1 | |damage=12/1 | ||
|startup= | |startup=4 | ||
|active=3 | |active=3 | ||
|recovery=14 | |recovery=14 | ||
| Line 107: | Line 110: | ||
|version= Speed | |version= Speed | ||
|damage=8/0 | |damage=8/0 | ||
|startup= | |startup=4 | ||
|active=3 | |active=3 | ||
|recovery=14 | |recovery=14 | ||
| Line 127: | Line 130: | ||
|version= Power | |version= Power | ||
|damage=24/3 | |damage=24/3 | ||
|startup= | |startup=14 | ||
|active=9 | |active=9 | ||
|recovery=24 | |recovery=24 | ||
| Line 141: | Line 144: | ||
|version= Speed | |version= Speed | ||
|damage=16/0 | |damage=16/0 | ||
|startup= | |startup=14 | ||
|active=9 | |active=9 | ||
|recovery=24 | |recovery=24 | ||
| Line 164: | Line 167: | ||
|version= Power | |version= Power | ||
|damage=21[+19]+31/2+4 | |damage=21[+19]+31/2+4 | ||
|startup= | |startup=20 | ||
|active=3-(3)-3-(7)-4 | |active=3-(3)-3-(7)-4 | ||
|recovery=23 | |recovery=23 | ||
| Line 178: | Line 181: | ||
|version= Speed | |version= Speed | ||
|damage=9[+11]+21/0+0 | |damage=9[+11]+21/0+0 | ||
|startup= | |startup=12 | ||
|active=3-(3)-3-(7)-4 | |active=3-(3)-3-(7)-4 | ||
|recovery=23 | |recovery=23 | ||
| Line 198: | Line 201: | ||
|version= Power | |version= Power | ||
|damage=10/1 | |damage=10/1 | ||
|startup= | |startup=6 | ||
|active=6 | |active=6 | ||
|recovery=14 | |recovery=14 | ||
| Line 212: | Line 215: | ||
|version= Speed | |version= Speed | ||
|damage=9/0 | |damage=9/0 | ||
|startup= | |startup=6 | ||
|active=6 | |active=6 | ||
|recovery=14 | |recovery=14 | ||
| Line 232: | Line 235: | ||
|version= Power | |version= Power | ||
|damage=17/2 | |damage=17/2 | ||
|startup= | |startup=6 | ||
|active=5 | |active=5 | ||
|recovery=26 | |recovery=26 | ||
| Line 246: | Line 249: | ||
|version= Speed | |version= Speed | ||
|damage=14/0 | |damage=14/0 | ||
|startup= | |startup=6 | ||
|active=5 | |active=5 | ||
|recovery=26 | |recovery=26 | ||
| Line 265: | Line 268: | ||
{{AttackData-LB2 | {{AttackData-LB2 | ||
|damage=59 | |damage=59 | ||
|startup= | |startup=87~117 | ||
|active=4 | |active=4 | ||
|recovery=53 | |recovery=53 | ||
| Line 286: | Line 289: | ||
{{AttackData-LB2 | {{AttackData-LB2 | ||
|damage=19/0 | |damage=19/0 | ||
|startup= | |startup=23 | ||
|active=3 | |active=3 | ||
|recovery=25 | |recovery=25 | ||
| Line 306: | Line 309: | ||
|version= Power | |version= Power | ||
|damage=21 | |damage=21 | ||
|startup= | |startup=6 | ||
|active=4 | |active=4 | ||
|recovery=18 | |recovery=18 | ||
| Line 320: | Line 323: | ||
|version= Speed | |version= Speed | ||
|damage=21 | |damage=21 | ||
|startup= | |startup=6 | ||
|active=4 | |active=4 | ||
|recovery=18 | |recovery=18 | ||
| Line 336: | Line 339: | ||
{{MoveData | {{MoveData | ||
|image=LB2_Okina_Start.png | |image=LB2_Okina_Start.png | ||
|caption=Unreactable, unblockable meaties | |caption=Unreactable, unblockable meaties, so powerful that even a mere sneeze can wreak havoc on your fortune! | ||
|name=START | |name=START | ||
|data= | |data= | ||
| Line 342: | Line 345: | ||
|version= Power | |version= Power | ||
|damage= 0 | |damage= 0 | ||
|startup= | |startup= 17 | ||
|active= 5 | |active= 5 | ||
|recovery= 69 | |recovery= 69 | ||
| Line 356: | Line 359: | ||
|version= Speed | |version= Speed | ||
|damage= 0 | |damage= 0 | ||
|startup= | |startup= 18 | ||
|active= 5 | |active= 5 | ||
|recovery= 69 | |recovery= 69 | ||
| Line 379: | Line 382: | ||
|version= Power | |version= Power | ||
|damage=10+6/1+0 | |damage=10+6/1+0 | ||
|startup= | |startup=3 | ||
|active=1-(7)-1 | |active=1-(7)-1 | ||
|recovery=19 | |recovery=19 | ||
| Line 393: | Line 396: | ||
|version= Speed | |version= Speed | ||
|damage=9+4/0+0 | |damage=9+4/0+0 | ||
|startup= | |startup=3 | ||
|active=1-(7)-1 | |active=1-(7)-1 | ||
|recovery=19 | |recovery=19 | ||
| Line 414: | Line 417: | ||
|version= Power | |version= Power | ||
|damage=21/2 | |damage=21/2 | ||
|startup= | |startup=8 | ||
|active=2 | |active=2 | ||
|recovery=29 | |recovery=29 | ||
| Line 428: | Line 431: | ||
|version= Speed | |version= Speed | ||
|damage=19/0 | |damage=19/0 | ||
|startup= | |startup=8 | ||
|active=2 | |active=2 | ||
|recovery=29 | |recovery=29 | ||
| Line 449: | Line 452: | ||
|version= Power | |version= Power | ||
|damage=4+6/0+0 | |damage=4+6/0+0 | ||
|startup= | |startup=6 | ||
|active=2-3 | |active=2-3 | ||
|recovery=22 | |recovery=22 | ||
| Line 463: | Line 466: | ||
|version= Speed | |version= Speed | ||
|damage=2+4/0+0 | |damage=2+4/0+0 | ||
|startup= | |startup=6 | ||
|active=2-3 | |active=2-3 | ||
|recovery=22 | |recovery=22 | ||
| Line 485: | Line 488: | ||
|version= Power | |version= Power | ||
|damage=19/2 | |damage=19/2 | ||
|startup= | |startup=6 | ||
|active=2 | |active=2 | ||
|recovery=22 | |recovery=22 | ||
| Line 499: | Line 502: | ||
|version= Speed | |version= Speed | ||
|damage=16/0 | |damage=16/0 | ||
|startup= | |startup=6 | ||
|active=2 | |active=2 | ||
|recovery=22 | |recovery=22 | ||
| Line 522: | Line 525: | ||
|version= Power | |version= Power | ||
|damage=13+13/1+1 | |damage=13+13/1+1 | ||
|startup= | |startup=6 | ||
|active=2-(6)-2 | |active=2-(6)-2 | ||
|recovery=N/A | |recovery=N/A | ||
| Line 536: | Line 539: | ||
|version= Speed | |version= Speed | ||
|damage=11+11/0+0 | |damage=11+11/0+0 | ||
|startup= | |startup=4 | ||
|active=2-(6)-2 | |active=2-(6)-2 | ||
|recovery=N/A | |recovery=N/A | ||
| Line 557: | Line 560: | ||
|version= Power | |version= Power | ||
|damage=24/3 | |damage=24/3 | ||
|startup= | |startup=13 | ||
|active=5 | |active=5 | ||
|recovery=N/A | |recovery=N/A | ||
| Line 571: | Line 574: | ||
|version= Speed | |version= Speed | ||
|damage=13/0 | |damage=13/0 | ||
|startup= | |startup=13 | ||
|active=5 | |active=5 | ||
|recovery=N/A | |recovery=N/A | ||
| Line 593: | Line 596: | ||
|version= Power | |version= Power | ||
|damage=13/1 | |damage=13/1 | ||
|startup= | |startup=4 | ||
|active=4 | |active=4 | ||
|recovery= N/A | |recovery= N/A | ||
| Line 607: | Line 610: | ||
|version= Speed | |version= Speed | ||
|damage=11/0 | |damage=11/0 | ||
|startup= | |startup=4 | ||
|active=4 | |active=4 | ||
|recovery=N/A | |recovery=N/A | ||
| Line 629: | Line 632: | ||
|version= Power | |version= Power | ||
|damage=26/3 | |damage=26/3 | ||
|startup= | |startup=7 | ||
|active=3 | |active=3 | ||
|recovery=31 | |recovery=31 | ||
| Line 643: | Line 646: | ||
|version= Speed | |version= Speed | ||
|damage=19/0 | |damage=19/0 | ||
|startup= | |startup=14 | ||
|active=3 | |active=3 | ||
|recovery=24 | |recovery=24 | ||
| Line 666: | Line 669: | ||
|version= Power | |version= Power | ||
|damage=26/3 | |damage=26/3 | ||
|startup= | |startup=10 | ||
|active=3 | |active=3 | ||
|recovery=29 | |recovery=29 | ||
| Line 680: | Line 683: | ||
|version= Speed | |version= Speed | ||
|damage=19/0 | |damage=19/0 | ||
|startup= | |startup=10 | ||
|active=3 | |active=3 | ||
|recovery=29 | |recovery=29 | ||
| Line 702: | Line 705: | ||
{{AttackData-LB2 | {{AttackData-LB2 | ||
|damage=5+4/0+0 | |damage=5+4/0+0 | ||
|startup= | |startup=4 | ||
|active=2-(6)-2 | |active=2-(6)-2 | ||
|recovery=12 | |recovery=12 | ||
| Line 722: | Line 725: | ||
{{AttackData-LB2 | {{AttackData-LB2 | ||
|damage=9+4/0+0 | |damage=9+4/0+0 | ||
|startup= | |startup=4 | ||
|active=1-(6)-1 | |active=1-(6)-1 | ||
|recovery=16 | |recovery=16 | ||
| Line 742: | Line 745: | ||
{{AttackData-LB2 | {{AttackData-LB2 | ||
|damage=28/0 | |damage=28/0 | ||
|startup= | |startup=8 | ||
|active=4 | |active=4 | ||
|recovery=25 | |recovery=25 | ||
| Line 892: | Line 895: | ||
{{AttackData-LB2 | {{AttackData-LB2 | ||
|damage= | |damage= | ||
|startup= | |startup= 14 | ||
|active= 8 | |active= 8 | ||
|recovery= 30 | |recovery= 30 | ||
| Line 921: | Line 924: | ||
|tech= None | |tech= None | ||
|description=A long range command grab that reaches roughly half-screen. Causes a hard knockdown and does a decent chunk of damage, allowing you to set up more zoning nonsense on hit. Note that the hitbox is on the turtle's mouth, creating a small deadzone between 623A and this move's range, preventing you from viably threatening a grab at that range. | |description=A long range command grab that reaches roughly half-screen. Causes a hard knockdown and does a decent chunk of damage, allowing you to set up more zoning nonsense on hit. Note that the hitbox is on the turtle's mouth, creating a small deadzone between 623A and this move's range, preventing you from viably threatening a grab at that range. | ||
: Be warned that Moriya can easily teleport through an attempted meaty | : Be warned that Moriya can easily teleport through an attempted meaty 623/B on reaction and punish you with a full combo, so don't even bother trying. | ||
}} | }} | ||
}} | }} | ||
| Line 1,036: | Line 1,039: | ||
{{AttackData-LB2 | {{AttackData-LB2 | ||
|damage= | |damage= | ||
|startup= | |startup= 37 | ||
|active= | |active= | ||
|recovery= | |recovery= | ||
| Line 1,055: | Line 1,058: | ||
===Any Mode=== | ===Any Mode=== | ||
* 2A 2A 623A | * 2A 2A 623A | ||
* Throw, 236A. Opponent can ground tech the throw, if you use this near or in the corner it’s guaranteed damage wether they tech or not. Mid screen it depends on you opponents habits for ground tech. | |||
* Dash A/B, 236B | * Dash A/B, 236B | ||
* Dash A/B, 63214A | * Dash A/B, 63214A | ||
| Line 1,084: | Line 1,088: | ||
* j.B, 5A 5A, 5A 5B 236A (corner only) | * j.B, 5A 5A, 5A 5B 236A (corner only) | ||
* j.B, 5A 5A, 2C 623A, 66 3BCD | * j.B, 5A 5A, 2C 623A, 66 3BCD | ||
* any chain to 2B/5B BC 236A guaranteed damage whether opponent ground techs or stays down | * any chain to 2B/5B BC 236A guaranteed damage whether opponent ground techs or stays down. If a fast turtle comes out it will juggle. | ||
* 63214B, 22B (2 hits), A + B + C (2 hits)+ 2C (2 hits) + A + BC + A (2 hits) + 236B | * 63214B, 22B (2 hits), A + B + C (2 hits)+ 2C (2 hits) + A + BC + A (2 hits) + 236B | ||
* 63214B, 22B (2 hits), A + B + C (2 hits)+ 2C (2 hits) + A + 2C (2 hits)+ 6BC, (delay) 641236AB | * 63214B, 22B (2 hits), A + B + C (2 hits)+ 2C (2 hits) + A + 2C (2 hits)+ 6BC, (delay) 641236AB | ||
Latest revision as of 04:31, 17 April 2024
Overview
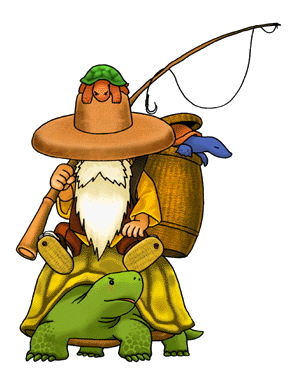
Largely considered to be the token zoner of the game, Okina relies on fast disjointed pokes and high damage projectiles to whittle down the opponent from mid to long range. Although the majoriy of his kit is unsafe on block, he has access to a combo-able command grab that leads to either strong safe jumps or an opportunity to build space. In addition to this, Okina possesses a pair of unique command grabs at half and full screen respectively in the form of 623B and 623C, letting Okina threaten the opponent from afar even without lifelead. He also has access to some very strong jabs and a teleport that allow him to get away from the opponent even if they do manage to make him block, making him especially slippery and lets you waste precious seconds from the clock. Despite all of this, Okina has a massive deadzone at roughly 2 character lengths ahead which he must constantly play around with either committal approach attempts or fleeing with his surprisingly strong ground mobility, and his lack of damage output can make him reliant on risky plays in neutral or constantly resetting the opponent. Regardless of his weaknesses, Okina has a very unique playstyle which will likely appeal to those looking for a chance to take the game at their own leisure, breaking down the opponent's mentality with a strong keepaway game or an onslaught of infuriating gimmicks.
| Strengths | Weaknesses |
|---|---|
|
|
Normals
Standing
5A
 |
|---|
4A
 |
|---|
5B
 |
|---|
6B
   |
|---|
5C
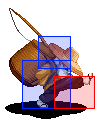 |
|---|
6C
 |
|---|
BC(Power)
 |
|---|
BC(Speed/EX)
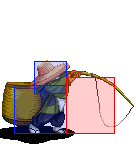 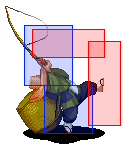 |
|---|
3B
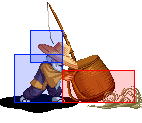 |
|---|
Special Taunt
START
 |
|---|
Crouching
2A
  |
|---|
2B
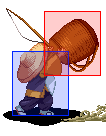 |
|---|
2C
  |
|---|
3C
 |
|---|
Air
j.A
  |
|---|
j.B
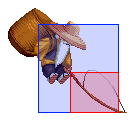 |
|---|
j.C
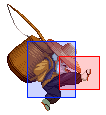 |
|---|
Dashing
Dashing high
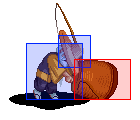 |
|---|
Dashing low
 |
|---|
Speed chain
5A>5A
  |
|---|
5A>2A
  |
|---|
5A>5B>5C
 |
|---|
Special Moves
Turtle Thrust - 236A/B/C
236A
 |
|---|
236B
 |
|---|
236C
 |
|---|
Turtle Tremor - 63214A/B
63214A
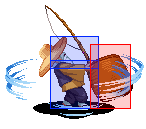 |
|---|
63214B
 Oh they're dead |
|---|
Tortoise Tromp - 63214C
63214C
 Pop quiz! |
|---|
Fisherman's Feint - 623A/B/C
623A
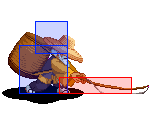 |
|---|
623B
 |
|---|
623C
 |
|---|
Pacificst Pounce - 412A/B/C
421A
 |
|---|
421B
 |
|---|
421C
 |
|---|
Desperation Moves
Genbu Blast - 641236AB
641236AB
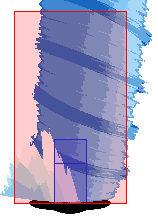 |
|---|
Super Desperation Moves
Rage of Genbu - 641236B
641236B
 |
|---|
Combos
Any Mode
- 2A 2A 623A
- Throw, 236A. Opponent can ground tech the throw, if you use this near or in the corner it’s guaranteed damage wether they tech or not. Mid screen it depends on you opponents habits for ground tech.
- Dash A/B, 236B
- Dash A/B, 63214A
- j.B, 5B, 236B
- j.B, 5B, 623A
- 63214B, 641236AB
*Optimal deflect conversion in power, or in speed/EX while flashing without meter
- (Guard cancel) 5D 236A/C
*Builds a ton of distance while dealing decent damage/healing. Primary GC conversion if you intend to run the clock immediately after.
- (Guard cancel) 63214C
*Most damaging of your consistent GC conversions. Leads to oki.
- (Guard cancel) 623A 663BCD
*High damage unblockable reset that gives good oki. Effectively Okina's most damaging GC conversion in any mode, but requires the opponent to be closer than your other go-to's.
*Any 623A landed in the corner can combo into 3B, or midscreen 663BCD
Power Mode
- j.B, 6C, 641236B
- 4Ax2 5A 623A dash 3B bnb
Speed and EX Mode
- 5A 6B (enables resets)
- j.B, 4A 5A 5A 5B, 6B
- j.B, 4A 5B 3C, 5C
- Dash A/B, 2B 63214C
- Dash A/B, 2B, BC, (hop) j.A
*Leads to effective tech chases if j.A is landed while the opponent is high enough by following up with 2B canceled into 623A, 421A, 3C, or 63214C. Beware that if the opponent techs and gets hit, Lee and Zan are able to directly punish the 2B on hit unless canceled into 421A, and all characters are theoretically capable of deflecting the 2B.
- j.B, 5A 2B, 63214A
- j.B, 5A 2B, 63214C
- j.B, 5A 5A, 5A 5B 236A (corner only)
- j.B, 5A 5A, 2C 623A, 66 3BCD
- any chain to 2B/5B BC 236A guaranteed damage whether opponent ground techs or stays down. If a fast turtle comes out it will juggle.
- 63214B, 22B (2 hits), A + B + C (2 hits)+ 2C (2 hits) + A + BC + A (2 hits) + 236B
- 63214B, 22B (2 hits), A + B + C (2 hits)+ 2C (2 hits) + A + 2C (2 hits)+ 6BC, (delay) 641236AB
- 63214B, 22B (2 hits), A + B + C (2 hits)+ 2C (2 hits) + A + 2C (2 hits)+ 6BC, (delay) 63214C (corner only)
*Since both this series and SSC 4 do 180 damage against low defense characters in EX, this is preferable as it will lead to a better position compared to SSC 4
Super Speed Combos
Some parts of Okina's super speed combos have multiple hits, delaying your input and canceling off the second hit will cause the chain to do overall more damage.
- A + B + C + A + B + C + A + B + 236C
- Easy to perform universal SSC, but lacks a second mixup and won't lead to much damage or advantage. Training wheels.
- A + B + C + A + B + C + C + B + 236A
- In theory leads to some solid setplay while doing good damage, but it's largely inferior to even your meterless options after a launching SSC.
- A + B + C + 2C + A + 2C + 6BC
- Hits low for a true 50/50 in combination with the next listed SSC. Launches at the end, making this your most damaging route if you have DM on deck. Can also juggle into 63214C, 236B, or sBC which makes this pretty much just a better version of the previous SSC if you have the awareness to use the correct follow up.
- A + B + C + 2C + A + BC + A + 236B
- Hits overhead for a true 50/50 in combination with the previous SSC. If you allow all hits to play out, this is your most damaging route without meter. The last hit launches the opponent a very large distance away and won't even cause a HKD, immediately ending your turn but potentially allowing you to start zoning depending on the matchup.