-Happy New Year 2025!
| (22 intermediate revisions by 4 users not shown) | |||
| Line 2: | Line 2: | ||
==Overview== | ==Overview== | ||
Sporting an array of fast, safe normals at close range and a wide variety of effective hitconfirms, Lee is an aggressive rushdown character who thrives in the opponent's face. In addition to his incredible frame data, Lee has access to an invincible stance and some deceptively long pokes that can allow him to force the opponent to whiff buttons and punish them with ease. Though he lacks a traditional set of zoning tools, Lee can more than make up for it by cheating his way around most common zoning methods with evasive hurtboxes and incredible mobility to ensure he finds an opportunity to begin his terrifying offense. If you're looking for a character with access to explosive robbery potential without giving up the option to patiently watch the opponent dig their own grave, Lee has you covered. | Sporting an array of fast, safe normals at close range and a wide variety of effective hitconfirms, Lee is an aggressive rushdown character who thrives in the opponent's face. In addition to his incredible frame data, Lee has access to an invincible stance and some deceptively long pokes that can allow him to force the opponent to whiff buttons and punish them with ease. Though he lacks a traditional set of zoning tools, Lee can more than make up for it by cheating his way around most common zoning methods with evasive hurtboxes and incredible mobility to ensure he finds an opportunity to begin his terrifying offense. If you're looking for a character with access to explosive robbery potential without giving up the option to patiently watch the opponent dig their own grave, Lee has you covered. | ||
<br> | |||
| | <div class="movelist-toggles"> | ||
<div id="movelist-toggle-1" class="movelist-toggle-button"> [[File:Power_Icon.png|50px|link=]]</div> | |||
<div id="movelist-toggle-2" class="movelist-toggle-button"> [[File:Speed_Icon.png|50px|link=]]</div> | |||
<div id="movelist-toggle-3" class="movelist-toggle-button"> [[File:EX_Icon.png|50px|link=]]</div> | |||
</div> | |||
! | <div id="movelist-1" class="movelist"><!-- Power --> | ||
| | {{ProConTable | ||
|pros= | |||
* Invincible stance forces opponents to play at your pace | * Invincible stance forces opponents to play at your pace | ||
* Hitconfirms off almost everything, ensuring that any stray hit leads to oki | * Hitconfirms off almost everything, ensuring that any stray hit leads to oki | ||
| Line 16: | Line 17: | ||
* Has access to the only truly invincible reversal in the game, letting him escape pressure at any time with a read | * Has access to the only truly invincible reversal in the game, letting him escape pressure at any time with a read | ||
* High stun potential, turning his above average damage into potential 2-hit kill sequences | * High stun potential, turning his above average damage into potential 2-hit kill sequences | ||
| | |cons= | ||
* Lacks notable disjoints | * Lacks notable disjoints | ||
* No ways to safely build chip, often forcing Lee to take big risks after losing lifelead | * No ways to safely build chip, often forcing Lee to take big risks after losing lifelead | ||
* Over-reliance on whiff punishing in neutral, leading to dedicated zoners being able to keep him at bay with low recovery disjoints | * Over-reliance on whiff punishing in neutral, leading to dedicated zoners being able to keep him at bay with low recovery disjoints | ||
* Unlike other power characters, Lee lacks any rebounding normals. This leads to him being abnormally easy to guard cancel against. | * Unlike other power characters, Lee lacks any rebounding normals. This leads to him being abnormally easy to guard cancel against. | ||
* All of Lee’s wake up animations (except neutral wake up from being facedown) make him airborne for a few frames. If your opponent has an air throw they can grab you here and loop this indefinitely. True for all modes. | |||
! | }}</div> | ||
| | <div id="movelist-2" class="movelist"><!-- Speed--> | ||
{{ProConTable | |||
|pros= | |||
* Invincible stance forces opponents to play at your pace | * Invincible stance forces opponents to play at your pace | ||
* Even better hitconfirms than power mode, letting most hits lead to full combo | * Even better hitconfirms than power mode, letting most hits lead to full combo | ||
| Line 29: | Line 32: | ||
* Incredibly fast startup on mid-range pokes/counter-pokes, often boasting whiff cancels for good measure | * Incredibly fast startup on mid-range pokes/counter-pokes, often boasting whiff cancels for good measure | ||
* Has access to the only truly invincible reversal in the game, letting him escape pressure at any time with a read | * Has access to the only truly invincible reversal in the game, letting him escape pressure at any time with a read | ||
| | |cons= | ||
* Lacks notable disjoints, and loses trades easily | * Lacks notable disjoints, and loses trades easily | ||
* No ways to safely build chip, often forcing Lee to take big risks after losing lifelead | * No ways to safely build chip, often forcing Lee to take big risks after losing lifelead | ||
* Over-reliance on whiff punishing in neutral, leading to dedicated zoners being able to keep him at bay with low recovery disjoints | * Over-reliance on whiff punishing in neutral, leading to dedicated zoners being able to keep him at bay with low recovery disjoints | ||
}}</div> | |||
! | <div id="movelist-3" class="movelist"><!-- EX --> | ||
| | {{ProConTable | ||
|pros= | |||
* Same strengths as speed, with slightly higher damage output and access to his phenomenal SDM | * Same strengths as speed, with slightly higher damage output and access to his phenomenal SDM | ||
| | |cons= | ||
* Same weaknesses as speed | * Same weaknesses as speed | ||
* Defense penalty makes trades even worse | * Defense penalty makes trades even worse}} | ||
</div> | |||
==Normals== | ==Normals== | ||
| Line 52: | Line 56: | ||
|version=Power | |version=Power | ||
|damage= 12/1 | |damage= 12/1 | ||
|startup= | |startup= 5 | ||
|active= 4 | |active= 4 | ||
|recovery= 17 | |recovery= 17 | ||
| Line 66: | Line 70: | ||
|version=Speed | |version=Speed | ||
|damage= 8/0 | |damage= 8/0 | ||
|startup= | |startup= 5 | ||
|active= 4 | |active= 4 | ||
|recovery= 17 | |recovery= 17 | ||
| Line 87: | Line 91: | ||
|version=Power | |version=Power | ||
|damage= 12/1 | |damage= 12/1 | ||
|startup= | |startup= 4 | ||
|active= 2 | |active= 2 | ||
|recovery= 8 | |recovery= 8 | ||
| Line 101: | Line 105: | ||
|version=Speed | |version=Speed | ||
|damage= 8/0 | |damage= 8/0 | ||
|startup= | |startup= 4 | ||
|active= 2 | |active= 2 | ||
|recovery= 8 | |recovery= 8 | ||
| Line 110: | Line 114: | ||
|cancel= o/o | |cancel= o/o | ||
|tech= Air | |tech= Air | ||
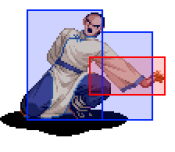
|description=A fast jab that's safe on block even when switch guarded. Leads to full combo and whiffs very quickly, making it a useful button to throw out at closer ranges. Lacks any sort of disjoint, so this button will almost always get beaten at midrange. | |description=A fast jab that's safe on block vs strikes even when switch guarded, throws can technically punish it, though pushback makes this unlikely. Leads to full combo and whiffs very quickly, making it a useful button to throw out at closer ranges. Lacks any sort of disjoint, so this button will almost always get beaten at midrange. | ||
}} | }} | ||
}} | }} | ||
| Line 122: | Line 126: | ||
|version=Power | |version=Power | ||
|damage= 26/3 | |damage= 26/3 | ||
|startup= | |startup= 4 | ||
|active= 1 | |active= 1 | ||
|recovery= 21 | |recovery= 21 | ||
| Line 136: | Line 140: | ||
|version=Speed | |version=Speed | ||
|damage= 16/0 | |damage= 16/0 | ||
|startup= | |startup= 4 | ||
|active= 1 | |active= 1 | ||
|recovery= 21 | |recovery= 21 | ||
| Line 159: | Line 163: | ||
|version=Power | |version=Power | ||
|damage= 26+28/3+3 | |damage= 26+28/3+3 | ||
|startup= | |startup= 12 | ||
|active= 2-[15]-8 | |active= 2-[15]-8 | ||
|recovery= 22 | |recovery= 22 | ||
| Line 173: | Line 177: | ||
|version=Speed | |version=Speed | ||
|damage= 14+16/0+0 | |damage= 14+16/0+0 | ||
|startup= | |startup= 7 | ||
|active= 2-[15]-8 | |active= 2-[15]-8 | ||
|recovery= 22 | |recovery= 22 | ||
| Line 194: | Line 198: | ||
|version=Power | |version=Power | ||
|damage= 26/3 | |damage= 26/3 | ||
|startup= | |startup= 11 | ||
|active= 2 | |active= 2 | ||
|recovery= 17 | |recovery= 17 | ||
| Line 208: | Line 212: | ||
|version=Speed | |version=Speed | ||
|damage= 16/0 | |damage= 16/0 | ||
|startup= | |startup= 11 | ||
|active= 2 | |active= 2 | ||
|recovery= 17 | |recovery= 17 | ||
| Line 229: | Line 233: | ||
|version=Power | |version=Power | ||
|damage= 19/2 | |damage= 19/2 | ||
|startup= | |startup= 8 | ||
|active= 3 | |active= 3 | ||
|recovery= 24 | |recovery= 24 | ||
| Line 243: | Line 247: | ||
|version=Speed | |version=Speed | ||
|damage= 16/0 | |damage= 16/0 | ||
|startup= | |startup= 8 | ||
|active= 3 | |active= 3 | ||
|recovery= 24 | |recovery= 24 | ||
| Line 263: | Line 267: | ||
{{AttackData-LB2 | {{AttackData-LB2 | ||
|damage= 61 | |damage= 61 | ||
|startup= | |startup= 52~72 | ||
|active= 2 | |active= 2 | ||
|recovery= 38 | |recovery= 38 | ||
| Line 283: | Line 287: | ||
{{AttackData-LB2 | {{AttackData-LB2 | ||
|damage= 19/0 | |damage= 19/0 | ||
|startup= | |startup= 23 | ||
|active= 1 | |active= 1 | ||
|recovery= 25 | |recovery= 25 | ||
| Line 303: | Line 307: | ||
{{AttackData-LB2 | {{AttackData-LB2 | ||
|damage= 21 | |damage= 21 | ||
|startup= | |startup= 25 | ||
|active= 4 | |active= 4 | ||
|recovery= 47 | |recovery= 47 | ||
| Line 325: | Line 329: | ||
|version=Power | |version=Power | ||
|damage= 12/1 | |damage= 12/1 | ||
|startup= | |startup= 4 | ||
|active= 1 | |active= 1 | ||
|recovery= 19 | |recovery= 19 | ||
| Line 339: | Line 343: | ||
|version=Speed | |version=Speed | ||
|damage= 9/0 | |damage= 9/0 | ||
|startup= | |startup= 4 | ||
|active= 1 | |active= 1 | ||
|recovery= 19 | |recovery= 19 | ||
| Line 360: | Line 364: | ||
|version=Power | |version=Power | ||
|damage= 21/2 | |damage= 21/2 | ||
|startup= | |startup= 7 | ||
|active= 4 | |active= 4 | ||
|recovery= 20 | |recovery= 20 | ||
| Line 374: | Line 378: | ||
|version=Speed | |version=Speed | ||
|damage= 19/0 | |damage= 19/0 | ||
|startup= | |startup= 7 | ||
|active= 4 | |active= 4 | ||
|recovery= 20 | |recovery= 20 | ||
| Line 395: | Line 399: | ||
|version=Power | |version=Power | ||
|damage= 13/1 | |damage= 13/1 | ||
|startup= | |startup= 4 | ||
|active= 2 | |active= 2 | ||
|recovery= 15 | |recovery= 15 | ||
| Line 409: | Line 413: | ||
|version=Speed | |version=Speed | ||
|damage= 11/0 | |damage= 11/0 | ||
|startup= | |startup= 4 | ||
|active= 2 | |active= 2 | ||
|recovery= 15 | |recovery= 15 | ||
| Line 418: | Line 422: | ||
|cancel= o/o | |cancel= o/o | ||
|tech= N/A | |tech= N/A | ||
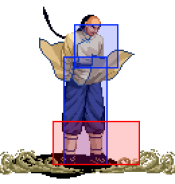
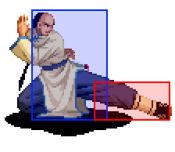
|description=Lee's most commonly used low, comes out quickly with good range while canceling into itself for easy hitconfirms. Also serves as your primary combo starter and punish button on the ground. At the fastest timing there is a 2f gap between 2c's, making it impossible to | |description=Lee's most commonly used low, comes out quickly with good range while canceling into itself for easy hitconfirms. Also serves as your primary combo starter and punish button on the ground. At the fastest timing there is a 2f gap between 2c's, making it impossible for the opponent to interrupt with a normal. Deflecting is technically possibly here, but is very difficult to do. | ||
}} | }} | ||
}} | }} | ||
| Line 430: | Line 434: | ||
|version=Power | |version=Power | ||
|damage= 24/3 | |damage= 24/3 | ||
|startup= | |startup= 5 | ||
|active= 2 | |active= 2 | ||
|recovery= 20 | |recovery= 20 | ||
| Line 444: | Line 448: | ||
|version=Speed | |version=Speed | ||
|damage= 16/0 | |damage= 16/0 | ||
|startup= | |startup= 5 | ||
|active= 2 | |active= 2 | ||
|recovery= 20 | |recovery= 20 | ||
| Line 466: | Line 470: | ||
|version=Power | |version=Power | ||
|damage= 12/1 | |damage= 12/1 | ||
|startup= | |startup= 4 | ||
|active= 16 | |active= 16 | ||
|recovery= N/A | |recovery= N/A | ||
| Line 480: | Line 484: | ||
|version=Speed | |version=Speed | ||
|damage= 10/0 | |damage= 10/0 | ||
|startup= | |startup= 4 | ||
|active= 16 | |active= 16 | ||
|recovery= N/A | |recovery= N/A | ||
| Line 505: | Line 509: | ||
|version=Power | |version=Power | ||
|damage= 6+27/0+3 | |damage= 6+27/0+3 | ||
|startup= | |startup= 8 | ||
|active= 2-2 | |active= 2-2 | ||
|recovery= N/A | |recovery= N/A | ||
| Line 519: | Line 523: | ||
|version=Speed | |version=Speed | ||
|damage= 4+13/0+0 | |damage= 4+13/0+0 | ||
|startup= | |startup= 8 | ||
|active= 2-2 | |active= 2-2 | ||
|recovery= N/A | |recovery= N/A | ||
| Line 540: | Line 544: | ||
|version=Power | |version=Power | ||
|damage= 12/1 | |damage= 12/1 | ||
|startup= | |startup= 4 | ||
|active= 12 | |active= 12 | ||
|recovery= N/A | |recovery= N/A | ||
| Line 554: | Line 558: | ||
|version=Speed | |version=Speed | ||
|damage= 10/0 | |damage= 10/0 | ||
|startup= | |startup= 4 | ||
|active= 12 | |active= 12 | ||
|recovery= N/A | |recovery= N/A | ||
| Line 577: | Line 581: | ||
|version=Power | |version=Power | ||
|damage= 26/3 | |damage= 26/3 | ||
|startup= | |startup= 8 | ||
|active= 3 | |active= 3 | ||
|recovery= 31 | |recovery= 31 | ||
| Line 591: | Line 595: | ||
|version=Speed | |version=Speed | ||
|damage= 19/0 | |damage= 19/0 | ||
|startup= | |startup= 7 | ||
|active= 3 | |active= 3 | ||
|recovery= 31 | |recovery= 31 | ||
| Line 612: | Line 616: | ||
|version=Power | |version=Power | ||
|damage= 26/3 | |damage= 26/3 | ||
|startup= | |startup= 6 | ||
|active= 14 | |active= 14 | ||
|recovery= 23 | |recovery= 23 | ||
| Line 626: | Line 630: | ||
|version=Speed | |version=Speed | ||
|damage= 19/0 | |damage= 19/0 | ||
|startup= | |startup= 6 | ||
|active= 14 | |active= 14 | ||
|recovery= 23 | |recovery= 23 | ||
| Line 647: | Line 651: | ||
{{AttackData-LB2 | {{AttackData-LB2 | ||
|damage= 8/0 | |damage= 8/0 | ||
|startup= | |startup= 6 | ||
|active= 1 | |active= 1 | ||
|recovery= 21 | |recovery= 21 | ||
| Line 667: | Line 671: | ||
{{AttackData-LB2 | {{AttackData-LB2 | ||
|damage= 24/0 | |damage= 24/0 | ||
|startup= | |startup= 15 | ||
|active= 2 | |active= 2 | ||
|recovery= 20 | |recovery= 20 | ||
| Line 739: | Line 743: | ||
{{AttackData-LB2 | {{AttackData-LB2 | ||
|damage= | |damage= | ||
|startup= | |startup= 4 | ||
|active= | |active= | ||
|recovery= | |recovery= | ||
| Line 750: | Line 754: | ||
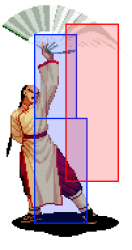
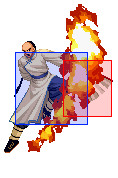
|description= Lee rises and swings his fans creating a fiery attack. Lee's go-to anti-air; this move has a massive hitbox, enables your setplay on hit, and comes with invincibility during its startup to boot. Has a follow up with 2B that will cause a knockdown so you can go for oki. Serves as one of the game's incredibly rare true reversals, as it will at worst trade with any meaty attempted at close range. Thanks to charge partitioning and a relatively short charge time it can even be buffered out of an AB stance or a dash | |description= Lee rises and swings his fans creating a fiery attack. Lee's go-to anti-air; this move has a massive hitbox, enables your setplay on hit, and comes with invincibility during its startup to boot. Has a follow up with 2B that will cause a knockdown so you can go for oki. Serves as one of the game's incredibly rare true reversals, as it will at worst trade with any meaty attempted at close range. Thanks to charge partitioning and a relatively short charge time it can even be buffered out of an AB stance or a dash | ||
Behaves strangely with the game's input priority due to command overlap with jump. When performed raw rather than being buffered, this move effectively becomes | Behaves strangely with the game's input priority due to command overlap with jump. When performed raw rather than being buffered, this move effectively becomes 7f startup with the first three frames being completely vulnerable as the move is unable to interrupt pre-jump frames. To work around this, one can attempt the input [2]B8. If 8 is input the frame after B is pressed the game will register a successful flash kick before entering pre-jump, making the move function as intended with 4f startup and instant invulnerability. | ||
What is actually happening here is you are canceling 5B’s startup frames, Lee’s amazing hair gives him the ability to kara cancel. | |||
<gallery class="mw-collapsible mw-collapsed" data-expandtext="show followup" data-collapsetext="hide followup"> | <gallery class="mw-collapsible mw-collapsed" data-expandtext="show followup" data-collapsetext="hide followup"> | ||
LB2_Lee_d-u+B2.png|2nd hit | LB2_Lee_d-u+B2.png|2nd hit | ||
| Line 770: | Line 775: | ||
{{AttackData-LB2 | {{AttackData-LB2 | ||
|damage= N/A | |damage= N/A | ||
|startup= | |startup= 4 | ||
|active= 20 | |active= 20 | ||
|recovery= | |recovery= | ||
| Line 781: | Line 786: | ||
|description= A strike and projectile invincible stance with 4 unique options out of it, performed simply by tapping a button. If Lee is crossed up at any point during the dodge, it will be canceled and Lee will instantly turn to face his opponent, granting him some nasty crossup potential in a large number of oki situations. The initial dodge can also be cancelled into any of Lee’s specials (except another dodge), dm, fandangos, or Sdm. Any follow up or special used out of dodge will start their animation after 10 frames of the dodge at fastest. Active frames listed are the amount of frames Lee is invincible without any additional input. | |description= A strike and projectile invincible stance with 4 unique options out of it, performed simply by tapping a button. If Lee is crossed up at any point during the dodge, it will be canceled and Lee will instantly turn to face his opponent, granting him some nasty crossup potential in a large number of oki situations. The initial dodge can also be cancelled into any of Lee’s specials (except another dodge), dm, fandangos, or Sdm. Any follow up or special used out of dodge will start their animation after 10 frames of the dodge at fastest. Active frames listed are the amount of frames Lee is invincible without any additional input. | ||
* A follow up is a long ranged mid that is special cancelable, can interrupt opponents trying to set up from just beyond the range of your other options, and is difficult to punish on block when spaced. Confirms SDM at max range in power/EX, giving it some niche uses as a damaging counter-poke. | * A follow up is a long ranged mid that is special cancelable, can interrupt opponents trying to set up from just beyond the range of your other options, and is difficult to punish on block when spaced. Confirms SDM at max range in power/EX, giving it some niche uses as a damaging counter-poke. | ||
* B follow up is an overhead axe kick which comes out too quickly to react to at | * B follow up is an overhead axe kick which comes out too quickly to react to at 8f and launches the opponent slightly, enabling a tech chase. Lee is fully invincible from the legs down and treated as airborn until he recovers. If delayed slightly, becomes a true 50/50 alongside the C follow up. Requires a switch guard to punish, and even then it's character specific, so this move is relatively safe to throw out. Strangely this move can be deflected while crouching, no other overhead in the game has this quirk. | ||
* C follow up is a low kick which can be chained into itself up to 3 times by inputting 2C, and until the 3rd hit may be special canceled (most notably into 214C). The first hit possesses a very deceptive hurtbox giving it great effective priority. Also chains into a unique multihit overhead with 6C which can be combo'd off of from close range, however this can be both option selected and reacted to so this is mostly a gimmick. | * C follow up is a low kick which can be chained into itself up to 3 times by inputting 2C, and until the 3rd hit may be special canceled (most notably into 214C). If you stop at the first hit you can link a 2C or 5B. The first hit possesses a very deceptive hurtbox giving it great effective priority. Also chains into a unique multihit overhead with 6C which can be combo'd off of from close range, however this can be both option selected and reacted to so this is mostly a gimmick. | ||
* D follow up has Lee swat the space immediately in front of him, reflecting projectiles. Not especially useful since the stance itself is both less committal and mathematically better at dealing with most fireballs, however this does have some niche use cases if you need to react to a fireball after already entering the stance. Also has enough frame advantage on hit you can link 2C or 5B after to start a bnb | * D follow up has Lee swat the space immediately in front of him, reflecting projectiles. Not especially useful since the stance itself is both less committal and mathematically better at dealing with most fireballs, however this does have some niche use cases if you need to react to a fireball after already entering the stance. Also has enough frame advantage on hit you can link 2C or 5B after to start a bnb | ||
| Line 834: | Line 839: | ||
|tech= Air | |tech= Air | ||
|description=A slower and more damaging version of the move above. Can be followed up with 41236B for a launcher that can cross up, but can be fuzzy mashed on block so it's not a real option to save yourself from a bad whiff punish attempt. Additionally, the second part of the move is unsafe on hit. Both hits are super cancelable, though nothing will connect on hit after the second. Launches crouching opponents on the first hit, allowing for juggles into 2146AB. | |description=A slower and more damaging version of the move above. Can be followed up with 41236B for a launcher that can cross up, but can be fuzzy mashed on block so it's not a real option to save yourself from a bad whiff punish attempt. Additionally, the second part of the move is unsafe on hit. Both hits are super cancelable, though nothing will connect on hit after the second. Launches crouching opponents on the first hit, allowing for juggles into 2146AB. | ||
*Has a fair amount of stun value attached to it, and one of the only moves in game that can stun an opponent in an actual match if playing Lee in Ex mode. | *Has a fair amount of stun value attached to it, and one of the only moves in game that can stun an opponent in an actual match if playing Lee in Ex mode. This is unlikely to happen but it ''is'' possible | ||
*While the 41236B follow can be air teched by the opponent, it can still be super cancelled. If the opponent air techs this and you super cancel the follow up, the fan portion of the dm can hit them. In a corner this can be devastating as the fan cannot be guarded or deflected in the air, and is very active while it’s on screen. | |||
<gallery class="mw-collapsible mw-collapsed" data-expandtext="show followup" data-collapsetext="hide followup"> | <gallery class="mw-collapsible mw-collapsed" data-expandtext="show followup" data-collapsetext="hide followup"> | ||
LB2_Lee_63214b41236b.png|41236B follow up | LB2_Lee_63214b41236b.png|41236B follow up | ||
| Line 892: | Line 898: | ||
{{AttackData-LB2 | {{AttackData-LB2 | ||
|damage= | |damage= | ||
|startup= | |startup= 21 | ||
|active= | |active= | ||
|recovery= | |recovery= | ||
| Line 902: | Line 908: | ||
|tech= | |tech= | ||
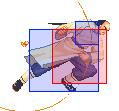
|description=Lee swings his fan into the air, staggering the opponent, before rushing forwards for a massive amount of damage. Your go-to metered combo ender as it does a massive amount of damage that scales very well and leads into HKD. If the first hit hits a grounded opponent, the stagger can be mashed out of, causing the second hit to uncombo or get blocked/deflected. As such, it is heavily advised to juggle into 2146AB from 6C since the series is a true combo as a juggle. | |description=Lee swings his fan into the air, staggering the opponent, before rushing forwards for a massive amount of damage. Your go-to metered combo ender as it does a massive amount of damage that scales very well and leads into HKD. If the first hit hits a grounded opponent, the stagger can be mashed out of, causing the second hit to uncombo or get blocked/deflected. As such, it is heavily advised to juggle into 2146AB from 6C since the series is a true combo as a juggle. | ||
*The fan portion of the dm is air unblockable and can’t be deflected in the air | *The fan portion of the dm is air unblockable and can’t be deflected in the air. It can have some use as an anti air if you read your opponent well enough | ||
}} | }} | ||
}} | }} | ||
| Line 915: | Line 921: | ||
{{AttackData-LB2 | {{AttackData-LB2 | ||
|damage= | |damage= | ||
|startup= | |startup= 23 | ||
|active= 18 | |active= 18 | ||
|recovery= | |recovery= | ||
| Line 924: | Line 930: | ||
|cancel= | |cancel= | ||
|tech= None | |tech= None | ||
|description= Lee quickly dashes forwards, playing a cinematic upon hitting the opponent. Does a massive amount of damage whether combo'd into or landed raw. Travels surprisingly quickly across the screen (14f from one corner to the other), letting you catch the startup of most fireballs or punish many long ranged pokes on reaction. Serves as a consistent combo ender against grounded opponents as well, since unlike | |description= Lee quickly dashes forwards, playing a cinematic upon hitting the opponent. Does a massive amount of damage whether combo'd into or landed raw. Travels surprisingly quickly across the screen (14f from one corner to the other), letting you catch the startup of most fireballs or punish many long ranged pokes on reaction. Serves as a consistent combo ender against grounded opponents as well, since unlike 2146AB it can't be mashed out of. Drags both players back to midscreen on hit, regardless of where the super landed, while also generating a very advantageous hard knockdown. This allows Lee to create some incredibly powerful oki by running through the opponent and canceling into dodge for potential 5 way mixups. Notably knocks the opponent face down and allows OTG 5C, allowing Lee to lock the Kaede's out of their recovery rolls. Cannot be juggled into, and you need to be fairly close to have it combo from normals. | ||
*If this is blocked Lee can cancel the rebound animation into his B+C unblockable in power mode, or his B+C overhead in ex mode. This also makes it the only thing in Lee’s moveset that can’t be guard cancelled against in any mode. | |||
}} | }} | ||
}} | }} | ||
| Line 970: | Line 978: | ||
* jB/C xx j236C(min. 2 hits), 5B xx 214C(x3), 8C/5C | * jB/C xx j236C(min. 2 hits), 5B xx 214C(x3), 8C/5C | ||
A tight link which is only possible at certain heights of j.236C. Lee must land immediately after one of the divekick's hits connect. | A tight link which is only possible at certain heights of j.236C. Lee must land immediately after one of the divekick's hits connect. | ||
*jB/C j236C, 2C to bnb of choice. 4A and 5A can connect here as well. | |||
Same conditions as above combo. Can work in any mode | |||
* 6C, (hop) jB/C xx 214C(x2) | * 6C, (hop) jB/C xx 214C(x2) | ||
Can occasionally drop based on the matchup and camera position when 6c | Can occasionally drop based on the matchup and camera position when 6c hits, but will still allow for OTG 5c in those cases. Microdashing before the hop can improve consistency midscreen, and Speed/EX can use j.A>C instead. jC 214Cx2 is more reliable than jB 214Cx2 as a follow up | ||
* (4a 6)xN | * (4a 6)xN | ||
| Line 992: | Line 1,003: | ||
* 2Cx3, 5B 63214B 2146AB | * 2Cx3, 5B 63214B 2146AB | ||
Dm confirm vs crouching opponents, most effective in a corner. If you start with a jump in | Dm confirm vs crouching opponents, most effective in a corner. It works from distances outside of the middle 3rd of the screen (roughly the distance between starting positions of the characters) with some adjustments to the supercancel timing. If you start with a jump in this can hit the damage cap on anyone. This works in ex mode as well | ||
===EX Mode Only=== | ===EX Mode Only=== | ||
| Line 1,031: | Line 1,042: | ||
* 2Cx3 5B>2C>2C xx 214Cx3/[2]8B | * 2Cx3 5B>2C>2C xx 214Cx3/[2]8B | ||
bnb combos. 5A is a tighter link than 5B after 2C, though it does net some more damage. Use whichever is easier for you. | bnb combos. 5A is a tighter link than 5B after 2C, though it does net some more damage. Use whichever is easier for you. | ||
*5A 2A 5B 2C 2C 214Cx3 max range confirm | |||
* 22A/B, A + B + C + 2C + A + 2C + 6BC, 63214A(whiff) [2]8B | * 22A/B, A + B + C + 2C + A + 2C + 6BC, 63214A(whiff) [2]8B | ||
Midscreen only. Can also do jA>B>C xx j214C(x2) to end this after the 63214A whiff. Just doing jA jC j214Cx2 will net slightly more damage at the cost of a bit less meter gain | Midscreen only. Can also do jA>B>C xx j214C(x2) to end this after the 63214A whiff. Just doing jA jC j214Cx2 will net slightly more damage at the cost of a bit less meter gain | ||
| Line 1,037: | Line 1,049: | ||
* 22A/B, A + B + C + 2C + A + 2C + 6BC, 2146AB | * 22A/B, A + B + C + 2C + A + 2C + 6BC, 2146AB | ||
Time it so the fan hits on the way up for better damage in the corner. Requires desperation status | Time it so the fan hits on the way up for better damage in the corner. Requires desperation status | ||
*5B and 2B are interchangeable in chains. If you use 2B you get only one 2C chain follow up however. | |||
===Super Speed Combos=== | ===Super Speed Combos=== | ||
| Line 1,045: | Line 1,058: | ||
===Guard Cancel=== | ===Guard Cancel=== | ||
*412D, J.C, J.214Cx2 otg 5C | *412D, J.C, J.214Cx2 otg 5C easy and consistent | ||
*412D J.A J.C 214Cx2 otg 5C (speed/ex) | *412D J.A J.C 214Cx2 otg 5C (speed/ex) | ||
*412D, [2]8B j2B otg 5C | *412D, [2]8B j2B otg 5C | ||
*412D, 5D otg 5C | *412D, 5D otg 5C | ||
*421D, hop jB (2 hits) land [2]8B j2B otg 5C/8C best for damage outside of desperation. | *421D, hop jB (2 hits) land [2]8B j2B otg 5C/8C best for damage outside of desperation. If done correctly the 28B will hit before the opponent can air recover. Fairly Difficult to time correctly. More consistent when guard canceling vs. a jump in | ||
*421D, hop jB (2 hits) land jA jC j214Cx2 otg 5C (speed/ex) | *421D, hop jB (2 hits) land jA jC j214Cx2 otg 5C (speed/ex) done correctly jA will hit before the opponent can air recover from jB. Also fairly difficult. Easier vs. guard cancelling a jump in. | ||
*412D, 2146AB (corner and desperation) | *412D, 2146AB (corner and desperation) | ||
*412D, hop jB (2hits) land 2146AB. Corner and desperation. This doesn’t combo but is instead a setup. If the opponent air recovers after jB they can be tagged with the fan and juggled into the rest of the Dm. The fan portion of the dm can’t be blocked or deflected in the air and is very active while it’s on screen. | |||
*412D dash under 82, 2C/4A into bnb. There is a 1 frame window during which a landing opponent cannot guard from behind. Dashing under and pressing 82 will turn you around to face to opponent. This is very difficult to do, but highly rewarding. | |||
*These can work from a ground to air deflect depending on timing and distance from opponent. Most will work after an air to air deflect as well. | |||
{{Navbox LB2}} | {{Navbox LB2}} | ||
[[Category:The Last Blade 2]] | [[Category:The Last Blade 2]] | ||
[[Category:Rekka Lee]] | [[Category:Rekka Lee]] | ||
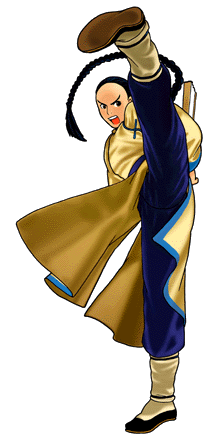
Sporting an array of fast, safe normals at close range and a wide variety of effective hitconfirms, Lee is an aggressive rushdown character who thrives in the opponent's face. In addition to his incredible frame data, Lee has access to an invincible stance and some deceptively long pokes that can allow him to force the opponent to whiff buttons and punish them with ease. Though he lacks a traditional set of zoning tools, Lee can more than make up for it by cheating his way around most common zoning methods with evasive hurtboxes and incredible mobility to ensure he finds an opportunity to begin his terrifying offense. If you're looking for a character with access to explosive robbery potential without giving up the option to patiently watch the opponent dig their own grave, Lee has you covered.
| Strengths | Weaknesses |
|---|---|
|
|
| Strengths | Weaknesses |
|---|---|
|
|
| Strengths | Weaknesses |
|---|---|
|
|
4A
 |
| ||||||||||||||||||||||||||||||||||||||||||||
|---|---|---|---|---|---|---|---|---|---|---|---|---|---|---|---|---|---|---|---|---|---|---|---|---|---|---|---|---|---|---|---|---|---|---|---|---|---|---|---|---|---|---|---|---|---|
5B
 |
| ||||||||||||||||||||||||||||||||||||||||||||
|---|---|---|---|---|---|---|---|---|---|---|---|---|---|---|---|---|---|---|---|---|---|---|---|---|---|---|---|---|---|---|---|---|---|---|---|---|---|---|---|---|---|---|---|---|---|
6B
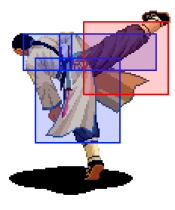  |
| ||||||||||||||||||||||||||||||||||||||||||||
|---|---|---|---|---|---|---|---|---|---|---|---|---|---|---|---|---|---|---|---|---|---|---|---|---|---|---|---|---|---|---|---|---|---|---|---|---|---|---|---|---|---|---|---|---|---|
5C
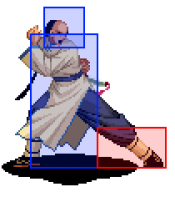 |
| ||||||||||||||||||||||||||||||||||||||||||||
|---|---|---|---|---|---|---|---|---|---|---|---|---|---|---|---|---|---|---|---|---|---|---|---|---|---|---|---|---|---|---|---|---|---|---|---|---|---|---|---|---|---|---|---|---|---|
6C
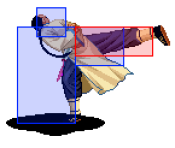 |
| ||||||||||||||||||||||||||||||||||||||||||||
|---|---|---|---|---|---|---|---|---|---|---|---|---|---|---|---|---|---|---|---|---|---|---|---|---|---|---|---|---|---|---|---|---|---|---|---|---|---|---|---|---|---|---|---|---|---|
BC(Power)
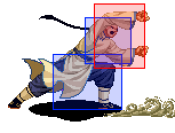 |
| ||||||||||||||||||||||||||||||
|---|---|---|---|---|---|---|---|---|---|---|---|---|---|---|---|---|---|---|---|---|---|---|---|---|---|---|---|---|---|---|---|
BC(Speed/EX)
 |
| ||||||||||||||||||||||||||||||
|---|---|---|---|---|---|---|---|---|---|---|---|---|---|---|---|---|---|---|---|---|---|---|---|---|---|---|---|---|---|---|---|
8C
 |
| ||||||||||||||||||||||||||||||
|---|---|---|---|---|---|---|---|---|---|---|---|---|---|---|---|---|---|---|---|---|---|---|---|---|---|---|---|---|---|---|---|
2A
 |
| ||||||||||||||||||||||||||||||||||||||||||||
|---|---|---|---|---|---|---|---|---|---|---|---|---|---|---|---|---|---|---|---|---|---|---|---|---|---|---|---|---|---|---|---|---|---|---|---|---|---|---|---|---|---|---|---|---|---|
2B
 |
| ||||||||||||||||||||||||||||||||||||||||||||
|---|---|---|---|---|---|---|---|---|---|---|---|---|---|---|---|---|---|---|---|---|---|---|---|---|---|---|---|---|---|---|---|---|---|---|---|---|---|---|---|---|---|---|---|---|---|
2C
 |
| ||||||||||||||||||||||||||||||||||||||||||||
|---|---|---|---|---|---|---|---|---|---|---|---|---|---|---|---|---|---|---|---|---|---|---|---|---|---|---|---|---|---|---|---|---|---|---|---|---|---|---|---|---|---|---|---|---|---|
3C
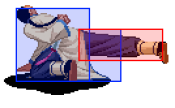 |
| ||||||||||||||||||||||||||||||||||||||||||||
|---|---|---|---|---|---|---|---|---|---|---|---|---|---|---|---|---|---|---|---|---|---|---|---|---|---|---|---|---|---|---|---|---|---|---|---|---|---|---|---|---|---|---|---|---|---|
jA
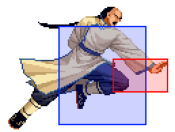 |
| ||||||||||||||||||||||||||||||||||||||||||||
|---|---|---|---|---|---|---|---|---|---|---|---|---|---|---|---|---|---|---|---|---|---|---|---|---|---|---|---|---|---|---|---|---|---|---|---|---|---|---|---|---|---|---|---|---|---|
| jB |
| ||||||||||||||||||||||||||||||||||||||||||||
|---|---|---|---|---|---|---|---|---|---|---|---|---|---|---|---|---|---|---|---|---|---|---|---|---|---|---|---|---|---|---|---|---|---|---|---|---|---|---|---|---|---|---|---|---|---|
jC
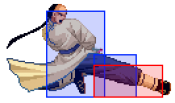 |
| ||||||||||||||||||||||||||||||||||||||||||||
|---|---|---|---|---|---|---|---|---|---|---|---|---|---|---|---|---|---|---|---|---|---|---|---|---|---|---|---|---|---|---|---|---|---|---|---|---|---|---|---|---|---|---|---|---|---|
Dashing high
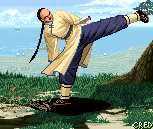 No 5a from dash |
| ||||||||||||||||||||||||||||||||||||||||||||
|---|---|---|---|---|---|---|---|---|---|---|---|---|---|---|---|---|---|---|---|---|---|---|---|---|---|---|---|---|---|---|---|---|---|---|---|---|---|---|---|---|---|---|---|---|---|
Dashing low
 |
| ||||||||||||||||||||||||||||||||||||||||||||
|---|---|---|---|---|---|---|---|---|---|---|---|---|---|---|---|---|---|---|---|---|---|---|---|---|---|---|---|---|---|---|---|---|---|---|---|---|---|---|---|---|---|---|---|---|---|
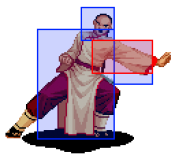
5A>A
 |
| ||||||||||||||||||||||||||||||
|---|---|---|---|---|---|---|---|---|---|---|---|---|---|---|---|---|---|---|---|---|---|---|---|---|---|---|---|---|---|---|---|
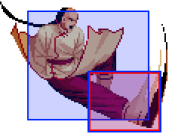
5A>B>C
 |
| ||||||||||||||||||||||||||||||
|---|---|---|---|---|---|---|---|---|---|---|---|---|---|---|---|---|---|---|---|---|---|---|---|---|---|---|---|---|---|---|---|
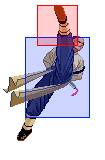
Dragon Hammer - 214C (x3)
214C
 |
| ||||||||||||||||||||||||||||||
|---|---|---|---|---|---|---|---|---|---|---|---|---|---|---|---|---|---|---|---|---|---|---|---|---|---|---|---|---|---|---|---|
Ryu Shou Sen - 214C (x2) (in air)
j214C
 |
| ||||||||||||||||||||||||||||||
|---|---|---|---|---|---|---|---|---|---|---|---|---|---|---|---|---|---|---|---|---|---|---|---|---|---|---|---|---|---|---|---|
Fan of Flames - [2]8B
[2]8B
 |
| ||||||||||||||||||||||||||||||
|---|---|---|---|---|---|---|---|---|---|---|---|---|---|---|---|---|---|---|---|---|---|---|---|---|---|---|---|---|---|---|---|
Mist Mauler - AB
AB
 |
| ||||||||||||||||||||||||||||||
|---|---|---|---|---|---|---|---|---|---|---|---|---|---|---|---|---|---|---|---|---|---|---|---|---|---|---|---|---|---|---|---|
Serpent Rush - 63214A/B
63214A
 |
| ||||||||||||||||||||||||||||||
|---|---|---|---|---|---|---|---|---|---|---|---|---|---|---|---|---|---|---|---|---|---|---|---|---|---|---|---|---|---|---|---|
63214B
 |
| ||||||||||||||||||||||||||||||
|---|---|---|---|---|---|---|---|---|---|---|---|---|---|---|---|---|---|---|---|---|---|---|---|---|---|---|---|---|---|---|---|
Invisible Kick - 236C (in air)
j236C
 |
| ||||||||||||||||||||||||||||||
|---|---|---|---|---|---|---|---|---|---|---|---|---|---|---|---|---|---|---|---|---|---|---|---|---|---|---|---|---|---|---|---|
Ibuki - Start
Start
 |
| ||||||||||||||||||||||||||||||
|---|---|---|---|---|---|---|---|---|---|---|---|---|---|---|---|---|---|---|---|---|---|---|---|---|---|---|---|---|---|---|---|
Hidden Serpent Slam - 2146AB
21416AB
 |
| ||||||||||||||||||||||||||||||
|---|---|---|---|---|---|---|---|---|---|---|---|---|---|---|---|---|---|---|---|---|---|---|---|---|---|---|---|---|---|---|---|
Concealed Javelin of Judgement - 2146AB
21416B
 |
| ||||||||||||||||||||||||||||||
|---|---|---|---|---|---|---|---|---|---|---|---|---|---|---|---|---|---|---|---|---|---|---|---|---|---|---|---|---|---|---|---|
Primary BNB.
Variant of the above combo which can stun the opponent if used immediately after said combo (using 5c OTG). If 63214A fails to stun it will become unsafe on hit
Optimized BNB. Builds a full bar of meter in power mode if both hits of jB connect
Lee's go-to air-to-air. Grants a knockdown which is a rare trait for an air-to-air.
Also serves as a reliable anti-air deflect conversion without fandango and air to air deflect conversion. Side note [2]8B > 2B does slightly more damage in that situation, but may not always work depending on distance when you deflect, this one is very easy and reliable.
Simple confirm from ab>a
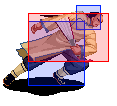
41236B requires to be executed when the 63214B crosses up the opponent in order to get the follow up. Unsafe on hit.
A bit of timing is required here to combo the 2C follow up into 214C. Works at all ranges of AB>C
Optimized version of the combo above. Relatively safe in comparison making the link worthwhile.
Higher damage version of the combo above which will only work at point blank. Delay the 2C input to get the regular normal instead of AB>C's chain.
Corner only. Note that AB>C>6C does not combo.
A buffered follow up from divekick that will connect even when used as an instant overhead. Prone to uncombo midscreen
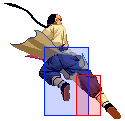
A tight link which is only possible at certain heights of j.236C. Lee must land immediately after one of the divekick's hits connect.
Same conditions as above combo. Can work in any mode
Can occasionally drop based on the matchup and camera position when 6c hits, but will still allow for OTG 5c in those cases. Microdashing before the hop can improve consistency midscreen, and Speed/EX can use j.A>C instead. jC 214Cx2 is more reliable than jB 214Cx2 as a follow up
Lee's jab "infinite". Incredibly tight and prone to drop after a few dozen hits, making more than 2 or 3 reps for the sake of hitconfirming impractical. 4a easily links into 2c, allowing you to cash out into your normal routes.
Most tournaments will provide a hard limit on infinites, which includes this one.
In a corner as a tech chase or from an early anti air/deflect. Tricky as it only works from certain heights but more damage than jC j214cx2
6C xx 2146AB can work midscreen, however is prone to drop due to camera position. In the corner the sequence is more consistent and significantly higher damage
hitconfirm into dm
Stylish midscreen 6C combo from most distances. Skip the 63214A in the corner.
Dm confirm vs crouching opponents, most effective in a corner. It works from distances outside of the middle 3rd of the screen (roughly the distance between starting positions of the characters) with some adjustments to the supercancel timing. If you start with a jump in this can hit the damage cap on anyone. This works in ex mode as well
2146AB can be mashed out of, making it unsafe on hit.
SDM confirm.
Super confirm against crouching opponents. 63214B pops crouching opponents in the air making the dm juggle. In a corner this is more damaging, mid screen you need to delay the dm a bit so the fan juggles, but this isn’t really worth it midscreen unless it will absolutely kill or you’re in desperation.
Gimmicky super confirm. The first hit of 2146AB can be mashed out of, making the move unsafe on hit.
Another gimmick from AB>5A
SDM confirm from AB>A. By inputting the motion early and pressing B on reaction, one can hitconfirm the SDM to avoid wasting meter.
SDM confirm. The cancel from 5b is tight, it is recommended to use the input 214B6B after 2C in order to land the cancel more consistently.
Max range sdm confirm in power.
2146AB can be mashed out of, however the lack of super freeze in this route makes it incredibly difficult and opens the opponent up to resets
Corner only. Can also link [2]8B after the wall bounce
bnb combos. 5A is a tighter link than 5B after 2C, though it does net some more damage. Use whichever is easier for you.
Midscreen only. Can also do jA>B>C xx j214C(x2) to end this after the 63214A whiff. Just doing jA jC j214Cx2 will net slightly more damage at the cost of a bit less meter gain
Corner only, tricky to pull off
Time it so the fan hits on the way up for better damage in the corner. Requires desperation status
| The Last Blade 2 | |
| General | |
| Characters |
Akari Ichijo • Genbu no Okina • Hibiki Takane • Hyo Amano • Juzoh Kanzaki • Kaede (Original) • Kaede • Keiichiro Washizuka • Kojiroh Sanada • Kouryu • Moriya Minakata • Mukuro • Rekka Lee • Setsuna • Shigen Naoe • Shinnosuke Kagami • Yuki • Zantetsu |