-The Dream Cancel Wiki has successfully upgraded it's wiki software and editing has returned. Tables for data have returned.
The King of Fighters XIII/Takuma Sakazaki: Difference between revisions
No edit summary |
No edit summary |
||
| (38 intermediate revisions by 12 users not shown) | |||
| Line 1: | Line 1: | ||
{| style="margin- | {{CharNavbox XIII}} | ||
{| class="wikitable" style="float:right; margin-left:10px;" | |||
|- | |||
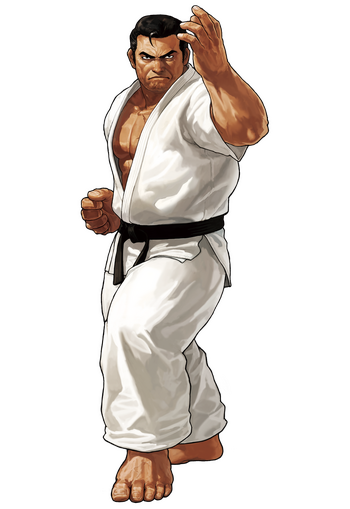
[[ | |[[File:XIII_Takuma_Profile.png|350px]] | ||
<center><font size="4"><b>Takuma Sakazaki</b></font></center> | |||
|- | |||
|- | |||
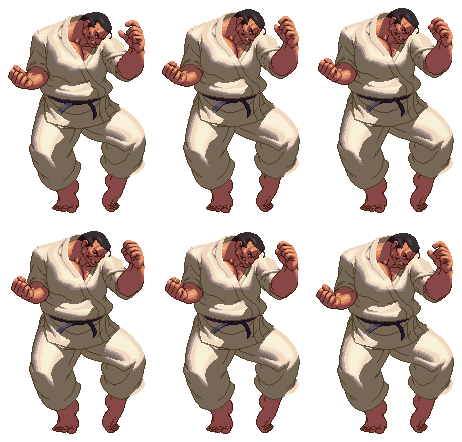
| [[File:XIII_Takuma.gif]] | |||
|} | |||
{{TOClimit|3}} | |||
==Movelist== | |||
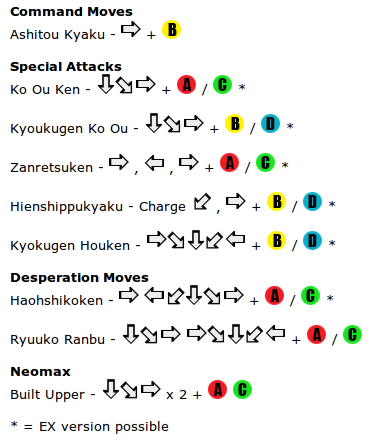
[[Image:Takumaxiiimoves.png]] | [[Image:Takumaxiiimoves.png]] | ||
=Console Changes= | |||
* Jump CD comes out faster | |||
* Stun value on attacks has been lowered | |||
* EX Kyokugen Koou comes out faster and has quicker recovery. Still can’t be comboed from a normal or direction attack. | |||
* Fierce Ryuuko Ranbu comes out faster. It’s still slower than the weak version, but it has invincibility until after the hit detection comes out. | |||
* Weak Hienshippukyaku’s damage reduced from 70 to 50. | |||
Producer Yamamoto says: | |||
''He has less stun values than the arcade, but he’s still easier to dizzy the opponent than other characters. Also, it’s not written above but damages on his other specials have also been raised, and he’s a character that can do high damage. He’s been buffed in a lot of places like his air CD and invincible Fierce Ryuuko Ranbu, so please try using him.'' | |||
=Gameplay Overview= | |||
Takuma is what you would call a "powerhouse character" that revolves around really strong close range combat with proficient zoning ability. He can keep his opponents at bay with Ko Ou Ken and Haohshikouken and if those don't work the EX versions should get it done. He is a very powerful character that fits the bill for anyone looking for a high tier character for their team. | Takuma is what you would call a "powerhouse character" that revolves around really strong close range combat with proficient zoning ability. He can keep his opponents at bay with Ko Ou Ken and Haohshikouken and if those don't work the EX versions should get it done. He is a very powerful character that fits the bill for anyone looking for a high tier character for their team. | ||
| Line 25: | Line 48: | ||
HD combos consist of Takuma getting his opponent into the corner and possibly finishing the combo with his NeoMax. | HD combos consist of Takuma getting his opponent into the corner and possibly finishing the combo with his NeoMax. | ||
=== | {{StrengthsAndWeaknesses | ||
| pros= | |||
* Decent~adept zoning ability | |||
* Makes good use of the drive meter and power gauge | |||
* Strong rushdown | |||
* Powerful jumping CD attack | |||
* He can carry the opponent to corner with ease | |||
* Good recovery on the majority of his moves | |||
| cons= | |||
* Overall mediocre reach | |||
* Max potential requires the drive gauge & meter | |||
* Lacks a true anti-air outside of his Neo Max | |||
}} | |||
=Normals= | |||
{{TOClimit|2}} | |||
=====<font style="visibility:hidden; float:right">st.A</font>===== | |||
{{MoveData | |||
|image=KOFIII_Takuma_st.A.png | |||
|caption= | |||
|name= | |||
|input=st.A | |||
|data= | |||
{{AttackData-KOFXIII | |||
|Startup=4 | |||
|Active=3 | |||
|Recovery=9 | |||
|Adv. Hit= +3 | |||
|On Block= +1 | |||
}} | |||
}} | |||
=====<font style="visibility:hidden; float:right">cr.A</font>===== | |||
{{MoveData | |||
|image=KOFIII_Takuma_cr.A.png | |||
|caption= | |||
|name= | |||
|input=cr.A | |||
|data= | |||
{{AttackData-KOFXIII | |||
|Startup=3 | |||
|Active=3 | |||
|Recovery=9 | |||
|Adv. Hit= +3 | |||
|On Block= +1 | |||
}} | |||
}} | |||
=====<font style="visibility:hidden; float:right">st.B</font>===== | |||
{{MoveData | |||
|image=KOFIII_Takuma_st.B.png | |||
|caption= | |||
|name= | |||
|input=st.B | |||
|data= | |||
{{AttackData-KOFXIII | |||
|Startup=5 | |||
|Active=3 | |||
|Recovery=10 | |||
|Adv. Hit= +2 | |||
|On Block= 0 | |||
}} | |||
}} | |||
=====<font style="visibility:hidden; float:right">cr.B</font>===== | |||
{{MoveData | |||
|image=KOFIII_Takuma_cr.B.png | |||
|caption= | |||
|name= | |||
|input=cr.B | |||
|data= | |||
{{AttackData-KOFXIII | |||
|Startup=4 | |||
|Active=3 | |||
|Recovery=10 | |||
|Adv. Hit= +2 | |||
|On Block= 0 | |||
}} | |||
}} | |||
=====<font style="visibility:hidden; float:right">cl.C</font>===== | |||
{{MoveData | |||
|image=KOFIII_Takuma_cl.C.png | |||
|caption= | |||
|name= | |||
|input=cl.C | |||
|data= | |||
{{AttackData-KOFXIII | |||
|Startup=4 | |||
|Active=4 | |||
|Recovery=17 | |||
|Adv. Hit= 0 | |||
|On Block= -2 | |||
}} | |||
}} | |||
=====<font style="visibility:hidden; float:right">st.C</font>===== | |||
{{MoveData | |||
|image=KOFIII_Takuma_st.C.png | |||
|caption= | |||
|name= | |||
|input=st.C | |||
|data= | |||
{{AttackData-KOFXIII | |||
|Startup=8 | |||
|Active=4 | |||
|Recovery=19 | |||
|Adv. Hit= -2 | |||
|On Block= -4 | |||
}} | |||
}} | |||
=====<font style="visibility:hidden; float:right">cr.C</font>===== | |||
{{MoveData | |||
|image=KOFIII_Takuma_cr.C.png | |||
|caption= | |||
|name= | |||
|input=cr.C | |||
|data= | |||
{{AttackData-KOFXIII | |||
|Startup=7 | |||
|Active=6 | |||
|Recovery=26 | |||
|Adv. Hit= -11 | |||
|On Block= -13 | |||
}} | |||
}} | |||
=====<font style="visibility:hidden; float:right">st.D</font>===== | |||
{{MoveData | |||
|image=KOFIII_Takuma_st.D.png | |||
|caption= | |||
|name= | |||
|input=st.D | |||
|data= | |||
{{AttackData-KOFXIII | |||
|Startup=13 | |||
|Active=3 | |||
|Recovery=14 | |||
|Adv. Hit= +4 | |||
|On Block= +2 | |||
}} | |||
}} | |||
=====<font style="visibility:hidden; float:right">cr.D</font>===== | |||
{{MoveData | |||
|image=KOFIII_Takuma_cr.D.png | |||
|caption= | |||
|name= | |||
|input=cr.D | |||
|data= | |||
{{AttackData-KOFXIII | |||
|Startup=7 | |||
|Active=4 | |||
|Recovery=25 | |||
|Adv. Hit=Knockdown | |||
|On Block= -10 | |||
}} | |||
}} | |||
=====<font style="visibility:hidden; float:right">→B</font>===== | |||
{{MoveData | |||
|image=KOFIII_Takuma_→B.png | |||
|caption= | |||
|name= | |||
|input=→B | |||
|data= | |||
{{AttackData-KOFXIII | |||
|Startup=18 | |||
|Active=6 | |||
|Recovery=20 | |||
|Adv. Hit= -5 | |||
|On Block= -7 | |||
}} | |||
}} | |||
=====<font style="visibility:hidden; float:right">→B Cancel</font>===== | |||
{{MoveData | |||
|image=KOFIII_Takuma_→B Cancel.png | |||
|caption= | |||
|name= | |||
|input=→B Cancel | |||
|data= | |||
{{AttackData-KOFXIII | |||
|Startup=18 | |||
|Active=6 | |||
|Recovery=20 | |||
|Adv. Hit= -5 | |||
|On Block= -7 | |||
}} | |||
}} | |||
=====<font style="visibility:hidden; float:right">st.CD</font>===== | |||
{{MoveData | |||
|image=KOFIII_Takuma_st.CD.png | |||
|caption= | |||
|name= | |||
|input=st.CD | |||
|data= | |||
{{AttackData-KOFXIII | |||
|Startup=18 | |||
|Active=5 | |||
|Recovery=19 | |||
|Adv. Hit=Knockdown | |||
|On Block= -1 | |||
}} | |||
}} | |||
== DM == | |||
=====<font style="visibility:hidden; float:right">↓↘→A</font>===== | |||
{{MoveData | |||
|image=KOFIII_Takuma_↓↘→A.png | |||
|caption= | |||
|name= | |||
|input=↓↘→A | |||
|data= | |||
{{AttackData-KOFXIII | |||
|Startup=13 | |||
|Active=- | |||
|Recovery=33 | |||
|Adv. Hit= -6 | |||
|On Block= -9 | |||
}} | |||
}} | |||
=====<font style="visibility:hidden; float:right">↓↘→C</font>===== | |||
{{MoveData | |||
|image=KOFIII_Takuma_↓↘→C.png | |||
|caption= | |||
|name= | |||
|input=↓↘→C | |||
|data= | |||
{{AttackData-KOFXIII | |||
|Startup=18 | |||
|Active=- | |||
|Recovery=32 | |||
|Adv. Hit= -5 | |||
|On Block= -8 | |||
}} | |||
}} | |||
=====<font style="visibility:hidden; float:right">↓↘→AC</font>===== | |||
{{MoveData | |||
|image=KOFIII_Takuma_↓↘→AC.png | |||
|caption= | |||
|name= | |||
|input=↓↘→AC | |||
|data= | |||
{{AttackData-KOFXIII | |||
|Startup=18 | |||
|Active=7 | |||
|Recovery=23 | |||
|Adv. Hit= +3 | |||
|On Block= -1 | |||
}} | |||
}} | |||
=====<font style="visibility:hidden; float:right">↓↘→B</font>===== | |||
{{MoveData | |||
|image=KOFIII_Takuma_↓↘→B.png | |||
|caption= | |||
|name= | |||
|input=↓↘→B | |||
|data= | |||
{{AttackData-KOFXIII | |||
|Startup=14 | |||
|Active=4 | |||
|Recovery=22 | |||
|Adv. Hit=Knockdown | |||
|On Block= -8 | |||
}} | |||
}} | |||
=====<font style="visibility:hidden; float:right">↓↘→D</font>===== | |||
{{MoveData | |||
|image=KOFIII_Takuma_↓↘→D.png | |||
|caption= | |||
|name= | |||
|input=↓↘→D | |||
|data= | |||
{{AttackData-KOFXIII | |||
|Startup=20 | |||
|Active=5 | |||
|Recovery=23 | |||
|Adv. Hit= +3 | |||
|On Block= -10 | |||
}} | |||
}} | |||
=====<font style="visibility:hidden; float:right">↓↘→BD</font>===== | |||
{{MoveData | |||
|image=KOFIII_Takuma_↓↘→BD.png | |||
|caption= | |||
|name= | |||
|input=↓↘→BD | |||
|data= | |||
{{AttackData-KOFXIII | |||
|Startup=26 | |||
|Active=5 | |||
|Recovery=20 | |||
|Adv. Hit=Crumple | |||
|On Block= -3 | |||
}} | |||
}} | |||
=====<font style="visibility:hidden; float:right">→↘↓↙←B</font>===== | |||
{{MoveData | |||
|image=KOFIII_Takuma_→↘↓↙←B.png | |||
|caption= | |||
|name= | |||
|input=→↘↓↙←B | |||
|data= | |||
{{AttackData-KOFXIII | |||
|Startup=8 | |||
|Active=1 | |||
|Recovery=30 | |||
|Adv. Hit= +10 | |||
|On Block=Unblockable | |||
}} | |||
}} | |||
=====<font style="visibility:hidden; float:right">→↘↓↙←D</font>===== | |||
{{MoveData | |||
|image=KOFIII_Takuma_→↘↓↙←D.png | |||
|caption= | |||
|name= | |||
|input=→↘↓↙←D | |||
|data= | |||
{{AttackData-KOFXIII | |||
|Startup=8 | |||
|Active=1 | |||
|Recovery=30 | |||
|Adv. Hit= +10 | |||
|On Block=Unblockable | |||
}} | |||
}} | |||
=====<font style="visibility:hidden; float:right">→↘↓↙←BD</font>===== | |||
{{MoveData | |||
|image=KOFIII_Takuma_→↘↓↙←BD.png | |||
|caption= | |||
|name= | |||
|input=→↘↓↙←BD | |||
|data= | |||
{{AttackData-KOFXIII | |||
|Startup=6 | |||
|Active=1 | |||
|Recovery=30 | |||
|Adv. Hit= +26 | |||
|On Block=Unblockable | |||
}} | |||
}} | |||
=====<font style="visibility:hidden; float:right">→,←,→A</font>===== | |||
{{MoveData | |||
|image=KOFIII_Takuma_→,←,→A.png | |||
|caption= | |||
|name= | |||
|input=→,←,→A | |||
|data= | |||
{{AttackData-KOFXIII | |||
|Startup=10 | |||
|Active=1,(1),1,(1),1,(1),1 | |||
|Recovery=24 | |||
|Adv. Hit=Knockdown | |||
|On Block= -6 | |||
}} | |||
}} | |||
=====<font style="visibility:hidden; float:right">→,←,→C</font>===== | |||
{{MoveData | |||
|image=KOFIII_Takuma_→,←,→C.png | |||
|caption= | |||
|name= | |||
|input=→,←,→C | |||
|data= | |||
{{AttackData-KOFXIII | |||
|Startup=10 | |||
|Active=1,(1),1,(1),1,(1),1 | |||
|Recovery=24 | |||
|Adv. Hit=Knockdown | |||
|On Block= -6 | |||
}} | |||
}} | |||
=====<font style="visibility:hidden; float:right">→,←,→AC</font>===== | |||
{{MoveData | |||
|image=KOFIII_Takuma_→,←,→AC.png | |||
|caption= | |||
|name= | |||
|input=→,←,→AC | |||
|data= | |||
{{AttackData-KOFXIII | |||
|Startup=15 | |||
|Active=1,(1),1,(1),1,(1),1,(1),1 | |||
|Recovery=27 | |||
|Adv. Hit=Knockdown | |||
|On Block= -9 | |||
}} | |||
}} | |||
=====<font style="visibility:hidden; float:right">Charge ↙,→B</font>===== | |||
{{MoveData | |||
|image=KOFIII_Takuma_Charge ↙,→B.png | |||
|caption= | |||
|name= | |||
|input=Charge ↙,→B | |||
|data= | |||
{{AttackData-KOFXIII | |||
|Startup=9 | |||
|Active=8 | |||
|Recovery=21 | |||
|Adv. Hit=Knockdown | |||
|On Block= -7 | |||
}} | |||
}} | |||
- | =====<font style="visibility:hidden; float:right">Charge ↙,→D</font>===== | ||
{{MoveData | |||
|image=KOFIII_Takuma_Charge ↙,→D.png | |||
|caption= | |||
|name= | |||
|input=Charge ↙,→D | |||
|data= | |||
{{AttackData-KOFXIII | |||
|Startup=16 | |||
|Active=15 | |||
|Recovery=28 | |||
|Adv. Hit=Knockdown | |||
|On Block= -9 | |||
}} | |||
}} | |||
- | =====<font style="visibility:hidden; float:right">Charge ↙,→BD</font>===== | ||
{{MoveData | |||
|image=KOFIII_Takuma_Charge ↙,→BD.png | |||
|caption= | |||
|name= | |||
|input=Charge ↙,→BD | |||
|data= | |||
{{AttackData-KOFXIII | |||
|Startup=12 | |||
|Active=11 | |||
|Recovery=23 | |||
|Adv. Hit=Knockdown | |||
|On Block= -2 | |||
}} | |||
}} | |||
== SDM/NeoMAX == | |||
- | =====<font style="visibility:hidden; float:right">↓↘→,→↘↓↙←A</font>===== | ||
{{MoveData | |||
|image=KOFIII_Takuma_↓↘→,→↘↓↙←A.png | |||
|caption= | |||
|name= | |||
|input=↓↘→,→↘↓↙←A | |||
|data= | |||
{{AttackData-KOFXIII | |||
|Startup=6 | |||
|Active=12 | |||
|Recovery=26 | |||
|Adv. Hit=Knockdown | |||
|On Block=-19 | |||
}} | |||
}} | |||
- | =====<font style="visibility:hidden; float:right">↓↘→,→↘↓↙←C</font>===== | ||
{{MoveData | |||
|image=KOFIII_Takuma_↓↘→,→↘↓↙←C.png | |||
|caption= | |||
|name= | |||
|input=↓↘→,→↘↓↙←C | |||
|data= | |||
{{AttackData-KOFXIII | |||
|Startup=11 | |||
|Active=20 | |||
|Recovery=26 | |||
|Adv. Hit=Knockdown | |||
|On Block=-27 | |||
}} | |||
}} | |||
=== | =====<font style="visibility:hidden; float:right">→,←↙↓↘→A</font>===== | ||
{{MoveData | |||
|image=KOFIII_Takuma_→,←↙↓↘→A.png | |||
|caption= | |||
|name= | |||
|input=→,←↙↓↘→A | |||
|data= | |||
{{AttackData-KOFXIII | |||
|Startup=18 | |||
|Active=- | |||
|Recovery=52 | |||
|Adv. Hit=Knockdown | |||
|On Block=-20 | |||
}} | |||
}} | |||
- | =====<font style="visibility:hidden; float:right">→,←↙↓↘→C</font>===== | ||
{{MoveData | |||
|image=KOFIII_Takuma_→,←↙↓↘→C.png | |||
|caption= | |||
|name= | |||
|input=→,←↙↓↘→C | |||
|data= | |||
{{AttackData-KOFXIII | |||
|Startup=16 | |||
|Active=- | |||
|Recovery=52 | |||
|Adv. Hit=Knockdown | |||
|On Block=-20 | |||
}} | |||
}} | |||
- | =====<font style="visibility:hidden; float:right">→,←↙↓↘→AC</font>===== | ||
{{MoveData | |||
|image=KOFIII_Takuma_→,←↙↓↘→AC.png | |||
|caption= | |||
|name= | |||
|input=→,←↙↓↘→AC | |||
|data= | |||
{{AttackData-KOFXIII | |||
|Startup=16 | |||
|Active=- | |||
|Recovery=110 | |||
|Adv. Hit=Knockdown | |||
|On Block=-42 | |||
}} | |||
}} | |||
== | =====<font style="visibility:hidden; float:right">↓↘→↓↘→AC</font>===== | ||
{{MoveData | |||
|image=KOFIII_Takuma_↓↘→↓↘→AC.png | |||
|caption= | |||
|name= | |||
|input=↓↘→↓↘→AC | |||
|data= | |||
{{AttackData-KOFXIII | |||
|Startup=5 | |||
|Active=8,(51),2 | |||
|Recovery=69 | |||
|Adv. Hit=Knockdown | |||
|On Block=-53 | |||
}} | |||
}} | |||
| Line 86: | Line 639: | ||
'''GCCD:''' 10 damage, hits mid. Guard Cancel Blowback Attack | '''GCCD:''' 10 damage, hits mid. Guard Cancel Blowback Attack | ||
=Throws= | |||
'''Oosotogari = b/f + C/D''' close - Takuma grabs his opponent then throws him/her over his shoulder | '''Oosotogari = b/f + C/D''' close - Takuma grabs his opponent then throws him/her over his shoulder. The distance is good enough for Takuma to cross-up on the fallen opponent with a j.D. | ||
- Can be broken | - Can be broken | ||
| Line 96: | Line 649: | ||
- Damage: 100 | - Damage: 100 | ||
=Command Moves= | |||
'''Ashitou Kyaku = f+B''' - Takuma does a thrust kick kicking his opponent in the gut, good hit-stun and good reach. The recovery is pretty decent as well. | '''Ashitou Kyaku = f+B''' - Takuma does a thrust kick kicking his opponent in the gut, good hit-stun and good reach. The recovery is pretty decent as well. | ||
| Line 106: | Line 659: | ||
- Damage: 50 | - Damage: 50 | ||
=Special Attacks= | |||
'''Ko Ou Ken = qcf+P''' - Takuma gathers energy in his hand, then throws it toward his opponent. The start-up is slow, but the projectile is large and fast so it's worth using with the right timing or if you're on the opposite side of the screen trying to safely build meter. The weak version slowly travels across while the strong version goes much faster. Both versions are super cancellable upon activation. | '''Ko Ou Ken = qcf+P''' - Takuma gathers energy in his hand, then throws it toward his opponent. The start-up is slow, but the projectile is large and fast so it's worth using with the right timing or if you're on the opposite side of the screen trying to safely build meter. The weak version slowly travels across while the strong version goes much faster. Both versions are super cancellable upon activation. | ||
| Line 161: | Line 714: | ||
- Damage: 0 | - Damage: 0 | ||
=Desperation Moves= | |||
'''Haohshikouken = f hcf+P''' - Takuma forms a very large energy sphere using both hands, then throws it at his opponent. Weak version goes at a slow speed, while the strong version travels much faster. This move isn't all that combo friendly because of slow start-up. Can be used to catch some airborne opponents off guard, or opponents that are in a juggled state. | '''Haohshikouken = f hcf+P''' - Takuma forms a very large energy sphere using both hands, then throws it at his opponent. Weak version goes at a slow speed, while the strong version travels much faster. This move isn't all that combo friendly because of slow start-up. Can be used to catch some airborne opponents off guard, or opponents that are in a juggled state. | ||
| Line 181: | Line 734: | ||
- Damage: 0+10x11+30+100 | - Damage: 0+10x11+30+100 | ||
=Neomax= | |||
'''Built Upper = qcfx2+AC''' - Takuma does an uppercut flying up into the air taking the opponent with him, then descends slamming the opponent onto the ground with a devastating karate chop causing a plume of smoke & dust to fly up. This move has poor horizontal range, but it makes up for it in enormous vertical range. The initial start-up (the first hit) doesn't do any damage, but the follow up attack does. A unique thing with this move is that it can be used as an anti-air. If the opponent tries to jump-in, it can be used as a counter-attack/reversal, but strict timing is required. If the start-up attack whiffs, the descending karate chop can hit for 450 damage. | '''Built Upper = qcfx2+AC''' - Takuma does an uppercut flying up into the air taking the opponent with him, then descends slamming the opponent onto the ground with a devastating karate chop causing a plume of smoke & dust to fly up. This move has poor horizontal range, but it makes up for it in enormous vertical range. The initial start-up (the first hit) doesn't do any damage, but the follow up attack does. A unique thing with this move is that it can be used as an anti-air. If the opponent tries to jump-in, it can be used as a counter-attack/reversal, but strict timing is required. If the start-up attack whiffs, the descending karate chop can hit for 450 damage. | ||
| Line 189: | Line 742: | ||
- Damage: 0+450 | - Damage: 0+450 | ||
=Combos= | |||
'''No Stock, No Drive Gauge -''' | '''No Stock, No Drive Gauge -''' | ||
cr.B×1~3, qcf+A/qcf+B/db~f+B/ | cr.B×1~3/cr.Bx1~2, s.B > qcf+A/qcf+B/db~f+B/f,b,f+C | ||
j.D, cl.C, f+B, special attack | j.D, cl.C, f+B, special attack | ||
cl.C, f+B, db~f+D, special attack | cl.C, f+B, db~f+D, special attack | ||
(corner) j.D, s.C, f+B, db~f+D, db~f+B, fbf+C = 417 dmg | |||
(corner) j.D, s.C, f+B, db~f+D, db~f+B, db~f+B, s.C | |||
'''No Stock, 1+ Drive Gauge -''' | |||
j.D, s.C, f+B, db~f+D, db~f+B, f,b,f+C (DC) qcb+B, s.C, f+B, db~f+D, db~f+B, f,b,f+C | |||
'''1 Stock, 1+ Drive Gauge -''' | |||
j.D, s.C, f+B, db~f+D, db~f+B, f,b,f+C (DC) qcb+B, s.C, f+B, db~f+D, db~f+B, db~f+B, qcf~hcb+P | |||
| Line 204: | Line 769: | ||
cl.C, f+B, db~f+BD, special attack | cl.C, f+B, db~f+BD, special attack | ||
(corner) cr.Bx1-3 / cl.C, f+B, db~f+BD, qcb+D, db~f+B, f,b,f+C | |||
'''2 Stock, 1 | '''2 Stock, 1 Drive Gauge -''' | ||
(corner) cr.B, cr.A / cl.C, f+B db~f+BD, qcf+ | (corner) cr.B, cr.A / cl.C, f+B, db~f+BD, qcf+D, db~f+B, f,b,f+C,(DC) hcb+B, cl.C, f+B, db~f+D, db~f+B, db~f+B, qcf~hcb+A | ||
'''2 Stock, 2 Drive Gauge -''' | |||
(corner) j.D, s.C, f+B, db~f+D, db~f+B, db~f+B, s.C, f,b,f+AC, (DC) hcb+BD, hop j.C, s.C, f+B, db~f+D, db~f+B, db~f+B, s.C, f,b,f+AC, (DC) hcb+B, s.C, f+B, db~f+D, db~f+B, db~f+B, s.C (stun) j.D, j.C, s.C, f+B, db~f+D, db~f+B, db~f+B, s.C, f,b,f+AC, (DC) hcb+B, s.C, f+B, db~f+D, db~f+B, db~f+B, s.C = 1002 dmg | |||
===Hyper Drive Combos=== | ===Hyper Drive Combos=== | ||
'''''1 Stock''''' | |||
'''(1)''' j.C, cl.C, f+B [HD] cl.C, f+B XX db~f+D, (db~f+B XX qcf+D)x4, fbf+A XX hcb+B, cl.C, f+B, db~f+D, db~f+B, db~f+B, qcf~hcb+P = 913 dmg | |||
'''(2)''' j.C, cl.C, f+B, qcf+D, cr.A [HD], cl.C, f+B, db~f+D, (db~f+B [!] qcf+D)x4, f b f+A [!] hcb+B, cl.C, f+B, db~f+D, db~f+B, db~f+B, qcf~hcb+P = 927 dmg | |||
'''(3)''' j.C, cl.C, f+B, qcf+D, cr.A, st.B, [HD], cl.C, f+B, qcf+D, cr.A, db~f+BD,(qcf+D, db~f+B)x4, f b f+A, [HDC] hcb+B, cl.C, f+B, db~f+D, db~f+B, db~f+B, qcf~hcb A = 940 dmg | |||
=Tips= | |||
'''Frame Traps and Links''' | |||
*'''(LO)''' = Link only, not a frame trap. | |||
*"(n) frame gap" = The amount of frames that opponent has to counter a frame trap. | |||
1.) st. A > cl. C - 3 frame gap between st. A and cl. C. St. A whiffs on crouching opponents, except on Daimon, Raiden, and Maxima. | |||
2.) cr. A > cl. C - 3 frame gap between cr. A and cl. C. | |||
3.) st. B > st. A - 4 frame gap between st. B and st. A. St. A whiffs on crouching opponents, except on Daimon, Raiden, and Maxima. | |||
4.) st. B > cr. A - 3 frame gap between st. B and cr. A. | |||
5.) st. B > cr. B - 4 frame gap between st. B and cr. B. | |||
6.) st. B > cl. C - 4 frame gap between st. B and cl. C. | |||
7.) cr. B > cl. C - 4 frame gap between cr. B and cl. C. | |||
8.) (hit-confirmed) qcf+D > cr. A '''(LO)''' | |||
=Strategies= | |||
===Far Range=== | |||
===Mid Range=== | |||
===Close Range=== | |||
'''Cornered Opponent''' | |||
'''Cornered''' | |||
===With No Meter/No Drive=== | |||
===With 1+ Meter/No Drive=== | |||
===With No Meter/50%-100% Drive=== | |||
===With 1+ Meter/50%-100% Drive=== | |||
===Best Team Position?=== | |||
==Tips== | ==Tips== | ||
== | ==Character Matchups== | ||
'''Andy Bogard''' | |||
'''Ash Crimson''' | |||
'''Athena Asamiya''' | |||
'''Benimaru Nikaido''' | |||
'''Billy Kane''' | |||
'''Chin Gentsai''' | |||
'''Clark Still''' | |||
'''Duo Lon''' | |||
'''Elisabeth Branctorche''' | |||
'''Goro Daimon''' | |||
'''Hwa Jai''' | |||
'''Iori Yagami (Claw)''' | |||
'''Iori Yagami (Flame)''' | |||
'''Joe Higashi''' | |||
'''K' ''' | |||
'''Kim Kaphwan''' | |||
==Discussion Threads | '''King''' | ||
'''Kula Diamond''' | |||
'''Kyo Kusanagi (XIII) ''' | |||
'''Kyo Kusanagi (NESTS)''' | |||
'''Leona Heidern''' | |||
'''Mai Shiranui''' | |||
'''Mature''' | |||
'''Maxima''' | |||
'''Raiden''' | |||
'''Ralf Jones''' | |||
'''Robert Garcia''' | |||
'''Ryo Sakazaki''' | |||
'''Saiki''' | |||
'''Shen Woo''' | |||
'''Sie Kensou''' | |||
'''Takuma Sakazaki (mirror match)''' | |||
'''Mr. Karate''' | |||
'''Terry Bogard''' | |||
''''Vice''' | |||
'''Yuri Sakazaki''' | |||
= Move Metadata = | |||
{| style="color:#FFFFFF; background-color:#0066CC;" border="9" cellpadding="5" cellspacing="1" | |||
!Move || Damage || Stun || Startup || On Guard || Remarks | |||
|- style="color:#003366; background-color:#99CCFF;" align="left" | |||
!s.A | |||
| 25 || 3 || 4 || +1 || | |||
|- style="color:#003366; background-color:#99CCFF;" align="left" | |||
!d.A | |||
| 25 || 6 || 3 || +1 || | |||
|- style="color:#003366; background-color:#99CCFF;" align="left" | |||
!Far A | |||
| 25 || 3 || 4 || +1 || | |||
|- style="color:#003366; background-color:#99CCFF;" align="left" | |||
!j.A | |||
| 45 || 3 || 6 || - || | |||
|- style="color:#003366; background-color:#99CCFF;" align="left" | |||
!hop A | |||
| 40 || 3 || 6 || - || | |||
|- style="color:#003366; background-color:#99CCFF;" align="left" | |||
!s.B | |||
| 30 || 6 || 5 || 0 || | |||
|- style="color:#003366; background-color:#99CCFF;" align="left" | |||
!d.B | |||
| 30 || 3 || 4 || 0 || | |||
|- style="color:#003366; background-color:#99CCFF;" align="left" | |||
!Far B | |||
| 30 || 6 || 5 || 0 || | |||
|- style="color:#003366; background-color:#99CCFF;" align="left" | |||
!j.B | |||
| 45 || 3 || 4 || - || | |||
|- style="color:#003366; background-color:#99CCFF;" align="left" | |||
!hop B | |||
| 40 || 3 || 4 || - || | |||
|- style="color:#003366; background-color:#99CCFF;" align="left" | |||
!s.C | |||
| 70 || 7 || 4 || -2 || | |||
|- style="color:#003366; background-color:#99CCFF;" align="left" | |||
!d.C | |||
| 70 || 7 || 7 || -13 || | |||
|- style="color:#003366; background-color:#99CCFF;" align="left" | |||
!Far C | |||
| 80 || 7 || 8 || -4 || | |||
|- style="color:#003366; background-color:#99CCFF;" align="left" | |||
!j.C | |||
| 72 || 7 || 9 || - || | |||
|- style="color:#003366; background-color:#99CCFF;" align="left" | |||
!hop C | |||
| 70 || 7 || 9 || - || | |||
|- style="color:#003366; background-color:#99CCFF;" align="left" | |||
!s.D | |||
| 80 || 7 || 13 || +2 || | |||
|- style="color:#003366; background-color:#99CCFF;" align="left" | |||
!d.D | |||
| 80 || 7 || 7 || -10 || | |||
|- style="color:#003366; background-color:#99CCFF;" align="left" | |||
!Far D | |||
| 80 || 7 || 13 || +2 || | |||
|- style="color:#003366; background-color:#99CCFF;" align="left" | |||
!j.D | |||
| 70 || 7 || 8 || - || | |||
|- style="color:#003366; background-color:#99CCFF;" align="left" | |||
!hop D | |||
| 68 || 7 || 8 || - || | |||
|- style="color:#003366; background-color:#99CCFF;" align="left" | |||
!s.CD | |||
| 75 || 10 || 18 || -1 || | |||
|- style="color:#003366; background-color:#99CCFF;" align="left" | |||
!j.CD | |||
| 90 || 8 || 9 || - || | |||
|- style="color:#003366; background-color:#99CCFF;" align="left" | |||
!hop CD | |||
| 80 || 8 || 9 || - || | |||
|- style="color:#003366; background-color:#99CCFF;" align="left" | |||
!Sokutougeri (f.B) | |||
| 70 || 6 || 18 || -7 || | |||
|- style="color:#003366; background-color:#99CCFF;" align="left" | |||
!Normal Throw = b/f+C/D | |||
| 100 || 0 || 1 || - ||Hard knockdown | |||
|- style="color:#003366; background-color:#99CCFF;" align="left" | |||
!GCCD | |||
| 4 || 0 || 13 || -15 ||Startup vs: Wk 13, St 17, Jump Atk 17 | |||
|- style="color:#003366; background-color:#99CCFF;" align="left" | |||
!Kouou Ken = qcf+P | |||
| 65 || 6 || 13,18 || -9,-8 ||Close Wk,St | |||
|- style="color:#003366; background-color:#99CCFF;" align="left" | |||
!B Kyokugen Kouou = qcf+B | |||
| 70 || 4 || 14 || -8 || | |||
|- style="color:#003366; background-color:#99CCFF;" align="left" | |||
!D Kyokugen Kouou = qcf+D | |||
| 85 || 4 || 20 || -10 || | |||
|- style="color:#003366; background-color:#99CCFF;" align="left" | |||
!B Hienshippu Kyaku = [db]~f+B | |||
| 50 || 4 || 9 || -7 || | |||
|- style="color:#003366; background-color:#99CCFF;" align="left" | |||
!D Hienshippu Kyaku(1) = [db]~f+D | |||
| 60 || 4 || 16 || - || | |||
|- style="color:#003366; background-color:#99CCFF;" align="left" | |||
!D Hienshippu Kyaku(2) | |||
| 70 || 4 || - || -9 || | |||
|- style="color:#003366; background-color:#99CCFF;" align="left" | |||
!Zanretsuken(1) = f,b,f+P | |||
| 0 || 0 || 10 || - || | |||
|- style="color:#003366; background-color:#99CCFF;" align="left" | |||
!Zanretsuken(2,4,6) | |||
| 25 || 0 || - || - || | |||
|- style="color:#003366; background-color:#99CCFF;" align="left" | |||
!Zanretsuken(3,5) | |||
| 20 || 0 || - || - || | |||
|- style="color:#003366; background-color:#99CCFF;" align="left" | |||
!Zanretsuken(7) | |||
| 30 || 0 || - || -6 || | |||
|- style="color:#003366; background-color:#99CCFF;" align="left" | |||
!Kyokugen Hougeki = hcb+K | |||
| 0 || 0 || 8 || +10 ||Whiff 38 | |||
|- style="color:#003366; background-color:#99CCFF;" align="left" | |||
!EX Kou Ou Ken = qcf+AC | |||
| 120 || 0 || 18 || -1 ||Close | |||
|- style="color:#003366; background-color:#99CCFF;" align="left" | |||
!EX Kyokugen Kou Ou = qcf+BD | |||
| 140 || 0 || 26 || -3 || | |||
|- style="color:#003366; background-color:#99CCFF;" align="left" | |||
!EX Hienshippu Kyaku(1) = [db]~f+BD | |||
| 60 || 0 || 12 || - || | |||
|- style="color:#003366; background-color:#99CCFF;" align="left" | |||
!EX Hienshippu Kyaku(2) | |||
| 80 || 0 || - || -2 || | |||
|- style="color:#003366; background-color:#99CCFF;" align="left" | |||
!EX Zanretsuken (1) = f,b,f+AC | |||
| 0 || 0 || 15 || - ||Number of hits dependent on distance | |||
|- style="color:#003366; background-color:#99CCFF;" align="left" | |||
!EX Zanretsuken (2-14) | |||
| 18 || 0 || - || - || | |||
|- style="color:#003366; background-color:#99CCFF;" align="left" | |||
!EX Zanretsuken (15) | |||
| 49 || 0 || - || -9 || | |||
|- style="color:#003366; background-color:#99CCFF;" align="left" | |||
!EX Kykugen Hougeki = hcb+BD | |||
| 0 || 0 || 6 || +26 ||Whiff 36 | |||
|- style="color:#003366; background-color:#99CCFF;" align="left" | |||
!Haoh Shikou Ken = f,hcf+P | |||
| 230 || 0 || 47(18), 45(16) || -20 ||Freeze 29 | |||
|- style="color:#003366; background-color:#99CCFF;" align="left" | |||
!Ryuuko Ranbu(1) = qcf~hcb+P | |||
| 0 || 0 || 35(6), 40(11) || -19 ||Freeze 29 | |||
|- style="color:#003366; background-color:#99CCFF;" align="left" | |||
!Ryuuko Ranbu(2-12) | |||
| 10 || 0 || - || - || | |||
|- style="color:#003366; background-color:#99CCFF;" align="left" | |||
!Ryuuko Ranbu(13) | |||
| 30 || - || - || - || | |||
|- style="color:#003366; background-color:#99CCFF;" align="left" | |||
!Ryuuko Ranbu(14) | |||
| 100 || 0 || - || - || | |||
|- style="color:#003366; background-color:#99CCFF;" align="left" | |||
!EX Haoh Shikou Ken(1) = f,hcf+AC | |||
| 120 || 0 || 45(16) || - ||Freeze 29 | |||
|- style="color:#003366; background-color:#99CCFF;" align="left" | |||
!EX Haoh Shikou Ken(2,3) | |||
| 120 || 0 || - || -42 || | |||
|- style="color:#003366; background-color:#99CCFF;" align="left" | |||
!Built Upper(1) = qcfx2+AC | |||
| 0 || 0 || 34(5) || - ||Freeze 29 | |||
|- style="color:#003366; background-color:#99CCFF;" align="left" | |||
!Built Upper(2) | |||
| 450 || 0 || - || - || | |||
|} | |||
= Videos = | |||
'''Juicy Bits - Takuma''' | |||
{{#ev:youtube|RM4CcmBBV4o}} | |||
'''How To Boss #1 - Takuma - Club Versus (KOF XIII)''' | |||
{{#ev:youtube|ZX7dfMtimIg}} | |||
'''Takuma Hit Boxes''' | |||
{{#ev:youtube|sVgsgR-ZiOM}} | |||
=Links & References= | |||
[http://dreamcancel.com/forum/index.php?action=profile;u=3887 keykakko] [http://www.dreamcancel.com/wiki/index.php?title=Takuma_Sakazaki_%28XIII%29#Move_Metadata] | |||
=Discussion Threads= | |||
Discuss at [http://dreamcancel.com/forum/index.php?board=107.0 Dream Cancel] | Discuss at [http://dreamcancel.com/forum/index.php?board=107.0 Dream Cancel] | ||
{{Navbox XIII}} | {{Navbox XIII}} | ||
[[Category:The King of Fighters XIII]] | [[Category:The King of Fighters XIII]] | ||
[[Category:Takuma Sakazaki]] | |||
Latest revision as of 13:25, 19 April 2023
|
|
Movelist
Console Changes
- Jump CD comes out faster
- Stun value on attacks has been lowered
- EX Kyokugen Koou comes out faster and has quicker recovery. Still can’t be comboed from a normal or direction attack.
- Fierce Ryuuko Ranbu comes out faster. It’s still slower than the weak version, but it has invincibility until after the hit detection comes out.
- Weak Hienshippukyaku’s damage reduced from 70 to 50.
Producer Yamamoto says: He has less stun values than the arcade, but he’s still easier to dizzy the opponent than other characters. Also, it’s not written above but damages on his other specials have also been raised, and he’s a character that can do high damage. He’s been buffed in a lot of places like his air CD and invincible Fierce Ryuuko Ranbu, so please try using him.
Gameplay Overview
Takuma is what you would call a "powerhouse character" that revolves around really strong close range combat with proficient zoning ability. He can keep his opponents at bay with Ko Ou Ken and Haohshikouken and if those don't work the EX versions should get it done. He is a very powerful character that fits the bill for anyone looking for a high tier character for their team.
Gameplay Notes
Kyoukugen Ko Ou his possibly is his best move as it helps him keep the pressure on while he's in the opponents face.
Kyokugen Houken that can prevent the opponent from doing a counter-attack and quickly turn the tables in your favor.
Hieshippukyaku is the preferred move to use after crouch normals to help carry the opponent to the corner.
Zanretsuken and Ryukko Ranbu can be used as combo ender's.
NeoMax, Built Upper, can be used as an anti-air to counter jump-ins because of it's sheer vertical range.
HD combos consist of Takuma getting his opponent into the corner and possibly finishing the combo with his NeoMax.
| [ Info Needed ] | |
| Pros | Cons |
|
|
Normals
st.A
st.A 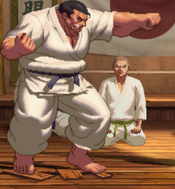 |
|---|
cr.A
cr.A 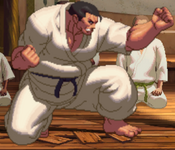 |
|---|
st.B
st.B 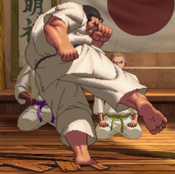 |
|---|
cr.B
cr.B  |
|---|
cl.C
cl.C 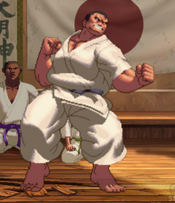 |
|---|
st.C
st.C 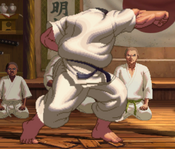 |
|---|
cr.C
cr.C 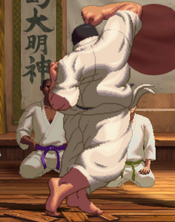 |
|---|
st.D
st.D 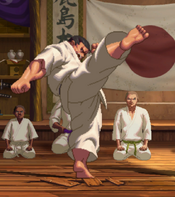 |
|---|
cr.D
cr.D 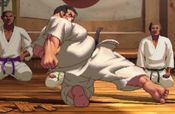 |
|---|
→B
→B 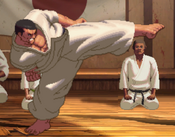 |
|---|
→B Cancel
→B Cancel  |
|---|
st.CD
st.CD 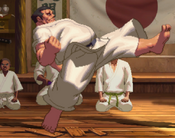 |
|---|
DM
↓↘→A
↓↘→A |
|---|
↓↘→C
↓↘→C |
|---|
↓↘→AC
↓↘→AC |
|---|
↓↘→B
↓↘→B |
|---|
↓↘→D
↓↘→D |
|---|
↓↘→BD
↓↘→BD |
|---|
→↘↓↙←B
→↘↓↙←B |
|---|
→↘↓↙←D
→↘↓↙←D |
|---|
→↘↓↙←BD
→↘↓↙←BD |
|---|
→,←,→A
→,←,→A |
|---|
→,←,→C
→,←,→C |
|---|
→,←,→AC
→,←,→AC |
|---|
Charge ↙,→B
Charge ↙,→B |
|---|
Charge ↙,→D
Charge ↙,→D |
|---|
Charge ↙,→BD
Charge ↙,→BD |
|---|
SDM/NeoMAX
↓↘→,→↘↓↙←A
↓↘→,→↘↓↙←A |
|---|
↓↘→,→↘↓↙←C
↓↘→,→↘↓↙←C |
|---|
→,←↙↓↘→A
→,←↙↓↘→A |
|---|
→,←↙↓↘→C
→,←↙↓↘→C |
|---|
→,←↙↓↘→AC
→,←↙↓↘→AC |
|---|
↓↘→↓↘→AC
↓↘→↓↘→AC |
|---|
Standing
st. A: 25 damage, cancellable/chainable, hits mid. A quick punch attack, a basic move, can work as an anti-air if timed correctly.
st. B: 35 damage, chainable, hits low. A simple kick attack, hits low.
st. C: 80 damage, cancellable, hits mid. Strong punch attack, comes out a couple frames slower than his light punch but does more damage.
st. D: 70 damage, hits mid. A standard high kick, goes high but range is rather mediocre.
cl. C: 70 damage, cancellable, hits mid. A punch aimed towards the stomach, this will be your combo starter of choice preferably after jump-ins.
Crouching
cr. A: 30 damage, cancellable/chainable, hits mid. Crouching light punch, quick and simple, can be used to chain lights or to start combos while crouching.
cr. B: 30 damage, cancellable/chainable, hits low. Crouching low kick, one of his better pokes because it's fast, hits low. Definitely the preferred move to use when starting combos from low attacks.
cr. C: 70 damage, cancellable, hits mid. Crouching uppercut, good vertical attack range so it can be used as an AA if timed correctly.
cr. D: 80 damage, cancellable, hits low. Sweep kick, knocks the opponent down if it hits them, whiff cancellable as usual.
Jumping
j. A: 45 (40) damage, hits overhead. A quick punch attack.
j. B: 45 (40) damage, hits overhead. Air knee attack, doubles as a decent meaty attack.
j. C: 72 (70) damage, hits overhead. Strong air punch attack, like his j.A except with more range and damage.
j. D: 70 (68) damage, hits overhead. Air kick attack, a great meaty attack, also does a lot of hit-stun when making contact with his opponent.
Blowback Attack
CD: 75 damage, whiff/cancellable, hits mid. Takuma does a really hard thrust kick, excellent range and priority.
j. CD: 90 (80) damage, hits mid. A heavy kick attack, okay reach but good priority.
GCCD: 10 damage, hits mid. Guard Cancel Blowback Attack
Throws
Oosotogari = b/f + C/D close - Takuma grabs his opponent then throws him/her over his shoulder. The distance is good enough for Takuma to cross-up on the fallen opponent with a j.D.
- Can be broken
- Hit Detection: Close
- Damage: 100
Command Moves
Ashitou Kyaku = f+B - Takuma does a thrust kick kicking his opponent in the gut, good hit-stun and good reach. The recovery is pretty decent as well.
- Cancellable
- Hit Detection: High
- Damage: 50
Special Attacks
Ko Ou Ken = qcf+P - Takuma gathers energy in his hand, then throws it toward his opponent. The start-up is slow, but the projectile is large and fast so it's worth using with the right timing or if you're on the opposite side of the screen trying to safely build meter. The weak version slowly travels across while the strong version goes much faster. Both versions are super cancellable upon activation.
(EX) = qcf+AC - Takuma throws energy from his hand, except it instantly hits the opponent even if they are on the other side of the screen, very fast start-up.
- Super Cancellable
- Hit Detection: High
- Damage: 60/120
Kyoukugen Ko Ou = qcf+K - Takuma makes a Ko Ou Ken energy sphere in his hand, then hits the opponent in the stomach with it. After making contact, he dashes towards for the strong version (not the weak version). This move is GOOD, possibly the best thing that ever happened to Takuma. When you use it after a "st. strong normal" it makes Takuma move forward, whereas other any other move in the game would generally push the opponent away because of the hit-stun. This move bypasses the hit-stun, making it rather easy to follow-up with another move as long as it's something with a really short start-up. If you use it on an opponent in the air it will juggle them. This move also makes it easy to get opponents in the corner. All versions are drive/super cancellable on hit.
(EX) = qcf+BD - The EX version has "guard point" properties, which means that if you use it against an opponents normals or special moves at the right time it will guard it then bypass it hitting the opponent.
- Drive/Super Cancellable
- Hit Detection: Close/High
- Damage: 70/80/140
Zanretsuken = f,b,f+P - Takuma does a flurry of rapid punches hitting the opponent 7 times ending with a pose as they fall to the ground. Good range. Relatively fast start-up and, if whiffed, the recovery isn't bad, but try to use it after command normals or just drive cancel into just to be safe. Both versions are drive/super cancellable on the last hit.
(EX) = f,b,f+AC - Can hit opponents that are in hit-stun, does 15 hits now and has an invincible start-up.
- Drive/Super Cancellable
- Hit Detection: Close/High
- Damage: 0+20x6/0+18x14
Hienshippukyaku = db~f+K - Takuma does a flying thrust kick hitting the opponent in the gut. The weak goes a short distance and does one hit, but it is also Drive/Super Cancellable as soon as his feet touche the ground. The strong version goes a bit farther and does two hits. Knocks the opponent down on the second hit. Preferably used in combos that start from light crouch normals.
(EX) = db~f+BD - Works the same way as the strong version except the second hit launches the opponent into the air for a possible follow-up attack. Faster start-up as well.
- Drive/Super Cancellable, Weak version only
- Hit Detection: Close/High
- Damage: 70/50+70/60+80
Kyokugen Houken = hcb+K - Takuma grabs his opponent and hits them, breaking their fighting stance for a brief moment. This is one of Takuma's newer, more unique moves in his moveset. It's a command grab that can be used to quickly stop the opponent from hitting you and quickly turn the match in your favor. This move does no damage, but enough hit-stun for you to follow-up with an attack. The weak version just breaks their guard, while the strong version does the same, but makes the opponent and Takuma switch sides. Good when you are cornered. The recovery when whiffed is poor so make sure to time it right or drive cancel into it.
(EX) = hcb+BD - Has a faster and more invincible start-up, works rather well as a reversal.
- Hit Detection: Close
- Damage: 0
Desperation Moves
Haohshikouken = f hcf+P - Takuma forms a very large energy sphere using both hands, then throws it at his opponent. Weak version goes at a slow speed, while the strong version travels much faster. This move isn't all that combo friendly because of slow start-up. Can be used to catch some airborne opponents off guard, or opponents that are in a juggled state.
(EX) = f hcf+AC - Shoots three energy spheres instead of one.
- Hit Detection: High
- Damage: 200/120x3
Ryukko Ranbu = qcf hcb+P - Takuma quickly dashes forward and, if he makes contact with the opponent, does an 11 hit combo ending with a thrust kick then a Haohshikouken. The start-up is very fast, making it easy and useful to use after command normals and some EX attacks. Max Cancellable on the 11th hit.
- Max Cancellable
- Hit Detection: High
- Damage: 0+10x11+30+100
Neomax
Built Upper = qcfx2+AC - Takuma does an uppercut flying up into the air taking the opponent with him, then descends slamming the opponent onto the ground with a devastating karate chop causing a plume of smoke & dust to fly up. This move has poor horizontal range, but it makes up for it in enormous vertical range. The initial start-up (the first hit) doesn't do any damage, but the follow up attack does. A unique thing with this move is that it can be used as an anti-air. If the opponent tries to jump-in, it can be used as a counter-attack/reversal, but strict timing is required. If the start-up attack whiffs, the descending karate chop can hit for 450 damage.
- Hit Detection: High/Very High
- Damage: 0+450
Combos
No Stock, No Drive Gauge -
cr.B×1~3/cr.Bx1~2, s.B > qcf+A/qcf+B/db~f+B/f,b,f+C
j.D, cl.C, f+B, special attack
cl.C, f+B, db~f+D, special attack
(corner) j.D, s.C, f+B, db~f+D, db~f+B, fbf+C = 417 dmg
(corner) j.D, s.C, f+B, db~f+D, db~f+B, db~f+B, s.C
No Stock, 1+ Drive Gauge -
j.D, s.C, f+B, db~f+D, db~f+B, f,b,f+C (DC) qcb+B, s.C, f+B, db~f+D, db~f+B, f,b,f+C
1 Stock, 1+ Drive Gauge -
j.D, s.C, f+B, db~f+D, db~f+B, f,b,f+C (DC) qcb+B, s.C, f+B, db~f+D, db~f+B, db~f+B, qcf~hcb+P
1 Stock, No Drive Gauge -
cl.C, f+B, db~f+BD, special attack
(corner) cr.Bx1-3 / cl.C, f+B, db~f+BD, qcb+D, db~f+B, f,b,f+C
2 Stock, 1 Drive Gauge -
(corner) cr.B, cr.A / cl.C, f+B, db~f+BD, qcf+D, db~f+B, f,b,f+C,(DC) hcb+B, cl.C, f+B, db~f+D, db~f+B, db~f+B, qcf~hcb+A
2 Stock, 2 Drive Gauge -
(corner) j.D, s.C, f+B, db~f+D, db~f+B, db~f+B, s.C, f,b,f+AC, (DC) hcb+BD, hop j.C, s.C, f+B, db~f+D, db~f+B, db~f+B, s.C, f,b,f+AC, (DC) hcb+B, s.C, f+B, db~f+D, db~f+B, db~f+B, s.C (stun) j.D, j.C, s.C, f+B, db~f+D, db~f+B, db~f+B, s.C, f,b,f+AC, (DC) hcb+B, s.C, f+B, db~f+D, db~f+B, db~f+B, s.C = 1002 dmg
Hyper Drive Combos
1 Stock
(1) j.C, cl.C, f+B [HD] cl.C, f+B XX db~f+D, (db~f+B XX qcf+D)x4, fbf+A XX hcb+B, cl.C, f+B, db~f+D, db~f+B, db~f+B, qcf~hcb+P = 913 dmg
(2) j.C, cl.C, f+B, qcf+D, cr.A [HD], cl.C, f+B, db~f+D, (db~f+B [!] qcf+D)x4, f b f+A [!] hcb+B, cl.C, f+B, db~f+D, db~f+B, db~f+B, qcf~hcb+P = 927 dmg
(3) j.C, cl.C, f+B, qcf+D, cr.A, st.B, [HD], cl.C, f+B, qcf+D, cr.A, db~f+BD,(qcf+D, db~f+B)x4, f b f+A, [HDC] hcb+B, cl.C, f+B, db~f+D, db~f+B, db~f+B, qcf~hcb A = 940 dmg
Tips
Frame Traps and Links
- (LO) = Link only, not a frame trap.
- "(n) frame gap" = The amount of frames that opponent has to counter a frame trap.
1.) st. A > cl. C - 3 frame gap between st. A and cl. C. St. A whiffs on crouching opponents, except on Daimon, Raiden, and Maxima.
2.) cr. A > cl. C - 3 frame gap between cr. A and cl. C.
3.) st. B > st. A - 4 frame gap between st. B and st. A. St. A whiffs on crouching opponents, except on Daimon, Raiden, and Maxima.
4.) st. B > cr. A - 3 frame gap between st. B and cr. A.
5.) st. B > cr. B - 4 frame gap between st. B and cr. B.
6.) st. B > cl. C - 4 frame gap between st. B and cl. C.
7.) cr. B > cl. C - 4 frame gap between cr. B and cl. C.
8.) (hit-confirmed) qcf+D > cr. A (LO)
Strategies
Far Range
Mid Range
Close Range
Cornered Opponent
Cornered
With No Meter/No Drive
With 1+ Meter/No Drive
With No Meter/50%-100% Drive
With 1+ Meter/50%-100% Drive
Best Team Position?
Tips
Character Matchups
Andy Bogard
Ash Crimson
Athena Asamiya
Benimaru Nikaido
Billy Kane
Chin Gentsai
Clark Still
Duo Lon
Elisabeth Branctorche
Goro Daimon
Hwa Jai
Iori Yagami (Claw)
Iori Yagami (Flame)
Joe Higashi
K'
Kim Kaphwan
King
Kula Diamond
Kyo Kusanagi (XIII)
Kyo Kusanagi (NESTS)
Leona Heidern
Mai Shiranui
Mature
Maxima
Raiden
Ralf Jones
Robert Garcia
Ryo Sakazaki
Saiki
Shen Woo
Sie Kensou
Takuma Sakazaki (mirror match)
Mr. Karate
Terry Bogard
'Vice
Yuri Sakazaki
Move Metadata
| Move | Damage | Stun | Startup | On Guard | Remarks |
|---|---|---|---|---|---|
| s.A | 25 | 3 | 4 | +1 | |
| d.A | 25 | 6 | 3 | +1 | |
| Far A | 25 | 3 | 4 | +1 | |
| j.A | 45 | 3 | 6 | - | |
| hop A | 40 | 3 | 6 | - | |
| s.B | 30 | 6 | 5 | 0 | |
| d.B | 30 | 3 | 4 | 0 | |
| Far B | 30 | 6 | 5 | 0 | |
| j.B | 45 | 3 | 4 | - | |
| hop B | 40 | 3 | 4 | - | |
| s.C | 70 | 7 | 4 | -2 | |
| d.C | 70 | 7 | 7 | -13 | |
| Far C | 80 | 7 | 8 | -4 | |
| j.C | 72 | 7 | 9 | - | |
| hop C | 70 | 7 | 9 | - | |
| s.D | 80 | 7 | 13 | +2 | |
| d.D | 80 | 7 | 7 | -10 | |
| Far D | 80 | 7 | 13 | +2 | |
| j.D | 70 | 7 | 8 | - | |
| hop D | 68 | 7 | 8 | - | |
| s.CD | 75 | 10 | 18 | -1 | |
| j.CD | 90 | 8 | 9 | - | |
| hop CD | 80 | 8 | 9 | - | |
| Sokutougeri (f.B) | 70 | 6 | 18 | -7 | |
| Normal Throw = b/f+C/D | 100 | 0 | 1 | - | Hard knockdown |
| GCCD | 4 | 0 | 13 | -15 | Startup vs: Wk 13, St 17, Jump Atk 17 |
| Kouou Ken = qcf+P | 65 | 6 | 13,18 | -9,-8 | Close Wk,St |
| B Kyokugen Kouou = qcf+B | 70 | 4 | 14 | -8 | |
| D Kyokugen Kouou = qcf+D | 85 | 4 | 20 | -10 | |
| B Hienshippu Kyaku = [db]~f+B | 50 | 4 | 9 | -7 | |
| D Hienshippu Kyaku(1) = [db]~f+D | 60 | 4 | 16 | - | |
| D Hienshippu Kyaku(2) | 70 | 4 | - | -9 | |
| Zanretsuken(1) = f,b,f+P | 0 | 0 | 10 | - | |
| Zanretsuken(2,4,6) | 25 | 0 | - | - | |
| Zanretsuken(3,5) | 20 | 0 | - | - | |
| Zanretsuken(7) | 30 | 0 | - | -6 | |
| Kyokugen Hougeki = hcb+K | 0 | 0 | 8 | +10 | Whiff 38 |
| EX Kou Ou Ken = qcf+AC | 120 | 0 | 18 | -1 | Close |
| EX Kyokugen Kou Ou = qcf+BD | 140 | 0 | 26 | -3 | |
| EX Hienshippu Kyaku(1) = [db]~f+BD | 60 | 0 | 12 | - | |
| EX Hienshippu Kyaku(2) | 80 | 0 | - | -2 | |
| EX Zanretsuken (1) = f,b,f+AC | 0 | 0 | 15 | - | Number of hits dependent on distance |
| EX Zanretsuken (2-14) | 18 | 0 | - | - | |
| EX Zanretsuken (15) | 49 | 0 | - | -9 | |
| EX Kykugen Hougeki = hcb+BD | 0 | 0 | 6 | +26 | Whiff 36 |
| Haoh Shikou Ken = f,hcf+P | 230 | 0 | 47(18), 45(16) | -20 | Freeze 29 |
| Ryuuko Ranbu(1) = qcf~hcb+P | 0 | 0 | 35(6), 40(11) | -19 | Freeze 29 |
| Ryuuko Ranbu(2-12) | 10 | 0 | - | - | |
| Ryuuko Ranbu(13) | 30 | - | - | - | |
| Ryuuko Ranbu(14) | 100 | 0 | - | - | |
| EX Haoh Shikou Ken(1) = f,hcf+AC | 120 | 0 | 45(16) | - | Freeze 29 |
| EX Haoh Shikou Ken(2,3) | 120 | 0 | - | -42 | |
| Built Upper(1) = qcfx2+AC | 0 | 0 | 34(5) | - | Freeze 29 |
| Built Upper(2) | 450 | 0 | - | - |
Videos
Juicy Bits - Takuma
How To Boss #1 - Takuma - Club Versus (KOF XIII)
Takuma Hit Boxes
Links & References
Discussion Threads
Discuss at Dream Cancel
