-The Dream Cancel Wiki has successfully upgraded it's wiki software and editing has returned. Tables for data have returned.
Real Bout Fatal Fury 2/Andy Bogard: Difference between revisions
Jump to navigation
Jump to search
No edit summary |
|||
| (12 intermediate revisions by 3 users not shown) | |||
| Line 10: | Line 10: | ||
| | | | ||
*Good fireball traps and zoning | *Good fireball traps and zoning | ||
*Can anti-air from afar with Shoryudan | |||
*Long range High Avoid attack that can convert easily into further damage | *Long range High Avoid attack that can convert easily into further damage | ||
*Versatile Breakshots | *Versatile Breakshots | ||
| Line 18: | Line 19: | ||
|- | |- | ||
|} | |} | ||
==Normals== | |||
===Standing=== | |||
{{MoveData | |||
|image=RBFF2_Andy_5a.jpg | |||
|caption= | |||
|name=5A | |||
|data= | |||
{{AttackData-RBFF2 | |||
|damage=8 | |||
|stun= | |||
|startup=5 | |||
|active=4 | |||
|recovery=8 | |||
|hitAdv=4 | |||
|blockAdv=0 | |||
|guard=HL | |||
|cancel=Y | |||
|bs= | |||
|juggle= | |||
|description= | |||
}} | |||
}} | |||
{{MoveData | |||
|image=RBFF2_Andy_n5a.jpg | |||
|caption= | |||
|input=(within 46 px of opponent) | |||
|name=n.5A | |||
|data= | |||
{{AttackData-RBFF2 | |||
|damage=8 | |||
|stun= | |||
|startup=5 | |||
|active=4 | |||
|recovery=8 | |||
|hitAdv=4 | |||
|blockAdv=0 | |||
|guard=HL | |||
|cancel=Y | |||
|bs= | |||
|juggle= | |||
|description= | |||
}} | |||
}} | |||
{{MoveData | |||
|image=RBFF2_Andy_5b.jpg | |||
|caption= | |||
|name=5B | |||
|data= | |||
{{AttackData-RBFF2 | |||
|damage=10 | |||
|stun= | |||
|startup=7 | |||
|active=5 | |||
|recovery=10 | |||
|hitAdv=1 | |||
|blockAdv=-3 | |||
|guard=HL | |||
|cancel=Y | |||
|bs= | |||
|juggle= | |||
|description= | |||
}} | |||
}} | |||
{{MoveData | |||
|image=RBFF2_Andy_n5b.jpg | |||
|caption= | |||
|input=(within 53 px of opponent) | |||
|name=n.5B | |||
|data= | |||
{{AttackData-RBFF2 | |||
|damage=10 | |||
|stun= | |||
|startup=5 | |||
|active=6 | |||
|recovery=9 | |||
|hitAdv=1 | |||
|blockAdv=-3 | |||
|guard=HL | |||
|cancel=Y | |||
|bs= | |||
|juggle= | |||
|description= | |||
}} | |||
}} | |||
== | {{MoveData | ||
|image=RBFF2_Andy_5c.jpg | |||
|caption= | |||
|name=5C | |||
|data= | |||
{{AttackData-RBFF2 | |||
|damage=23 | |||
|stun= | |||
|startup=8 | |||
|active=6 | |||
|recovery=20 | |||
|hitAdv=0 | |||
|blockAdv=-6 | |||
|guard=HL | |||
|cancel=N | |||
|bs= | |||
|juggle= | |||
|description= | |||
}} | |||
}} | |||
{{MoveData | |||
|image=RBFF2_Andy_n5c.jpg | |||
|image2=RBFF2_Andy_n5c2.jpg | |||
|caption= | |||
|input=(within 52 px of opponent) | |||
|name=n.5C | |||
|data= | |||
{{AttackData-RBFF2 | |||
|damage=10,10 | |||
|stun= | |||
|startup=8 | |||
|active=2,3 | |||
|recovery=20 | |||
|hitAdv=3 | |||
|blockAdv=-3 | |||
|guard=HL | |||
|cancel=Y | |||
|bs= | |||
|juggle= | |||
|description= | |||
}} | |||
}} | |||
===Crouching=== | |||
{{MoveData | |||
|image=RBFF2_Andy_2a.jpg | |||
|caption= | |||
|name=2A | |||
|data= | |||
{{AttackData-RBFF2 | |||
|damage=8 | |||
|stun= | |||
|startup=5 | |||
|active=5 | |||
|recovery=7 | |||
|hitAdv=4 | |||
|blockAdv=0 | |||
|guard=HL | |||
|cancel=Y | |||
|bs= | |||
|juggle= | |||
|description= | |||
}} | |||
}} | |||
{{MoveData | |||
|image=RBFF2_Andy_2b.jpg | |||
|caption= | |||
|name=2B | |||
|data= | |||
{{AttackData-RBFF2 | |||
|damage=10 | |||
|stun= | |||
|startup=5 | |||
|active=6 | |||
|recovery=9 | |||
|hitAdv=1 | |||
|blockAdv=-3 | |||
|guard=L | |||
|cancel=Y | |||
|bs= | |||
|juggle= | |||
|description= | |||
}} | |||
}} | |||
== | {{MoveData | ||
|image=RBFF2_Andy_2c.jpg | |||
|caption= | |||
|name=2C | |||
|data= | |||
{{AttackData-RBFF2 | |||
|damage=10 | |||
|stun= | |||
|startup=8 | |||
|active=6 | |||
|recovery=20 | |||
|hitAdv=KD | |||
|blockAdv=-6 | |||
|guard=L | |||
|cancel=Y | |||
|bs= | |||
|juggle= | |||
|description= | |||
}} | |||
}} | |||
===Command=== | |||
{{MoveData | |||
|image=RBFF2_Andy_3a.jpg | |||
|image2=RBFF2_Andy_3a2.jpg | |||
|caption= | |||
|input=3A | |||
|name=Rising Palm | |||
|data= | |||
{{AttackData-RBFF2 | |||
|damage=19 | |||
|stun= | |||
|startup=7 | |||
|active=2,9 | |||
|recovery=20 | |||
|hitAdv=-5 | |||
|blockAdv=-11 | |||
|guard=HL | |||
|cancel=Y | |||
|bs= | |||
|juggle= | |||
|description= | |||
}} | |||
}} | |||
===Command=== | |||
{{MoveData | |||
|image=RBFF2_Andy_6b.jpg | |||
|image2=RBFF2_Andy_6b2.jpg | |||
|caption= | |||
|input=6B | |||
|name=Falling Roll Kick | |||
|data= | |||
{{AttackData-RBFF2 | |||
|damage=19 | |||
|stun= | |||
|startup=12 | |||
|active=2,3 | |||
|recovery=20 | |||
|hitAdv=3 | |||
|blockAdv=-3 | |||
|guard=HL | |||
|cancel=N | |||
|bs= | |||
|juggle= | |||
|description= | |||
}} | |||
}} | |||
{{MoveData | |||
|image=RBFF2_Andy_ab.jpg | |||
|image2=RBFF2_Andy_ab2.jpg | |||
|caption2=High Avoid Attack | |||
|input=5AB | |||
|name=Lean Down Kick | |||
|data= | |||
{{AttackData-RBFF2 | |||
|damage=14 | |||
|stun= | |||
|startup=10 | |||
|active=6 | |||
|recovery=23 | |||
|hitAdv=-3 | |||
|blockAdv=-9 | |||
|guard=HL | |||
|cancel=Y | |||
|bs= | |||
|juggle= | |||
|description= | |||
}} | |||
}} | |||
===Jumping=== | |||
{{MoveData | |||
|image=RBFF2_Andy_ja.jpg | |||
|name=j.A | |||
|data= | |||
{{AttackData-RBFF2 | |||
|version=Neutral Hop | |||
|damage=8 | |||
|stun= | |||
|startup=5 | |||
|active=till landing | |||
|recovery=6 | |||
|hitAdv=+8 | |||
|blockAdv=+4 | |||
|guard=H | |||
|cancel=N | |||
|bs= | |||
|juggle= | |||
|description= | |||
}} | |||
{{AttackData-RBFF2 | |||
|version=Diagonal Hop | |||
|header=no | |||
|damage=8 | |||
|stun= | |||
|startup=5 | |||
|active=till landing | |||
|recovery=6 | |||
|hitAdv=+8 | |||
|blockAdv=+4 | |||
|guard=H | |||
|cancel=N | |||
|bs= | |||
|juggle= | |||
|description= | |||
}} | |||
{{AttackData-RBFF2 | |||
|version=Neutral Jump | |||
|header=no | |||
|damage=8 | |||
|stun= | |||
|startup=5 | |||
|active=8 | |||
|recovery=6 | |||
|hitAdv=+8 | |||
|blockAdv=+4 | |||
|guard=H | |||
|cancel= | |||
|bs= | |||
|juggle= | |||
|description= | |||
}} | |||
{{AttackData-RBFF2 | |||
|version=Diagonal Jump | |||
|header=no | |||
|damage=8 | |||
|stun= | |||
|startup=5 | |||
|active=10 | |||
|recovery=6 | |||
|hitAdv=+8 | |||
|blockAdv=+4 | |||
|guard=H | |||
|cancel= | |||
|bs= | |||
|juggle= | |||
|description= | |||
}} | |||
}} | |||
{{MoveData | |||
|image=RBFF2_Andy_jb.jpg | |||
|name=j.B | |||
|data= | |||
{{AttackData-RBFF2 | |||
|version=Neutral Hop | |||
|damage=10 | |||
|stun= | |||
|startup=6 | |||
|active=till landing | |||
|recovery=6 | |||
|hitAdv=+8 | |||
|blockAdv=+4 | |||
|guard=H | |||
|cancel=N | |||
|bs= | |||
|juggle= | |||
|description= | |||
}} | |||
{{AttackData-RBFF2 | |||
|version=Diagonal Hop | |||
|header=no | |||
|damage=10 | |||
|stun= | |||
|startup=6 | |||
|active=till landing | |||
|recovery=6 | |||
|hitAdv=+8 | |||
|blockAdv=+4 | |||
|guard=H | |||
|cancel=N | |||
|bs= | |||
|juggle= | |||
|description= | |||
}} | |||
{{AttackData-RBFF2 | |||
|version=Neutral Jump | |||
|header=no | |||
|damage=10 | |||
|stun= | |||
|startup=6 | |||
|active=6 | |||
|recovery=6 | |||
|hitAdv=+8 | |||
|blockAdv=+4 | |||
|guard=H | |||
|cancel=Y | |||
|bs= | |||
|juggle= | |||
|description= | |||
}} | |||
{{AttackData-RBFF2 | |||
|version=Diagonal Jump | |||
|header=no | |||
|damage=10 | |||
|stun= | |||
|startup=6 | |||
|active=8 | |||
|recovery=6 | |||
|hitAdv=+8 | |||
|blockAdv=+4 | |||
|guard=H | |||
|cancel=Y | |||
|bs= | |||
|juggle= | |||
|description= | |||
}} | |||
}} | |||
{{MoveData | |||
|image=RBFF2_Andy_jc2.jpg | |||
|image2=RBFF2_Andy_jc.jpg | |||
|caption=Neutral Jump/Hop | |||
|caption2=Diagonal Jump/Hop | |||
|name=j.C | |||
|data= | |||
{{AttackData-RBFF2 | |||
|version=Neutral Hop | |||
|damage=19 | |||
|stun= | |||
|startup=8 | |||
|active=8 | |||
|recovery=8 | |||
|hitAdv=+15 | |||
|blockAdv=+9 | |||
|guard=H | |||
|cancel=N | |||
|bs= | |||
|juggle= | |||
|description= | |||
}} | |||
{{AttackData-RBFF2 | |||
|version=Diagonal Hop | |||
|header=no | |||
|damage=19 | |||
|stun= | |||
|startup=8 | |||
|active=8 | |||
|recovery=8 | |||
|hitAdv=+15 | |||
|blockAdv=+9 | |||
|guard=H | |||
|cancel=N | |||
|bs= | |||
|juggle= | |||
|description= | |||
}} | |||
{{AttackData-RBFF2 | |||
|version=Neutral Jump | |||
|header=no | |||
|damage=19 | |||
|stun= | |||
|startup=8 | |||
|active=6 | |||
|recovery=8 | |||
|hitAdv=+15 | |||
|blockAdv=+9 | |||
|guard=H | |||
|cancel=Y | |||
|bs= | |||
|juggle= | |||
|description= | |||
}} | |||
{{AttackData-RBFF2 | |||
|version=Diagonal Jump | |||
|header=no | |||
|damage=19 | |||
|stun= | |||
|startup=8 | |||
|active=6 | |||
|recovery=8 | |||
|hitAdv=+15 | |||
|blockAdv=+9 | |||
|guard=H | |||
|cancel=Y | |||
|bs= | |||
|juggle= | |||
|description= | |||
}} | |||
}} | |||
==Oversway Actions== | |||
{{MoveData | |||
|image=RBFF2_Andy_5d.jpg | |||
|caption= | |||
|input=(opponent in oversway) | |||
|name=5D | |||
|data= | |||
{{AttackData-RBFF2 | |||
|damage=19 | |||
|stun= | |||
|startup=9 | |||
|active=5 | |||
|recovery=20 | |||
|hitAdv=-1 | |||
|blockAdv=12 | |||
|guard=H | |||
|cancel=Y | |||
|bs= | |||
|juggle= | |||
|description= | |||
}} | |||
}} | |||
{{MoveData | |||
|image=RBFF2_Andy_2d.jpg | |||
|image2=RBFF2_Andy_2d2.jpg | |||
|caption= | |||
|input=(opponent in oversway) | |||
|name=2D | |||
|data= | |||
{{AttackData-RBFF2 | |||
|damage=19 | |||
|stun= | |||
|startup=10 | |||
|active=4,5 | |||
|recovery=16 | |||
|hitAdv=1 | |||
|blockAdv=-5 | |||
|guard=L | |||
|cancel=Y | |||
|bs= | |||
|juggle= | |||
|description= | |||
}} | |||
}} | |||
{{MoveData | |||
|image=RBFF2_Andy_SA.jpg | |||
|caption= | |||
|input=(from oversway) | |||
|name=A | |||
|data= | |||
{{AttackData-RBFF2 | |||
|damage=10 | |||
|stun= | |||
|startup=24 | |||
|active=3 | |||
|recovery=13 | |||
|hitAdv=3 | |||
|blockAdv=-1 | |||
|guard=H | |||
|cancel=N | |||
|bs= | |||
|juggle= | |||
|description= | |||
}} | |||
}} | |||
{{MoveData | |||
|image=RBFF2_Andy_SB.jpg | |||
|caption= | |||
|input=(from oversway) | |||
|name=B | |||
|data= | |||
{{AttackData-RBFF2 | |||
|damage=10 | |||
|stun= | |||
|startup=20 | |||
|active=4 | |||
|recovery=16 | |||
|hitAdv=1 | |||
|blockAdv=-1 | |||
|guard=L | |||
|cancel=N | |||
|bs= | |||
|juggle= | |||
|description= | |||
}} | |||
}} | |||
{{MoveData | |||
|image=RBFF2_Andy_SC.jpg | |||
|caption= | |||
|input=(from oversway) | |||
|name=C | |||
|data= | |||
{{AttackData-RBFF2 | |||
|damage=19 | |||
|stun= | |||
|startup=24 | |||
|active=4 | |||
|recovery=11 | |||
|hitAdv=12 | |||
|blockAdv=-2 | |||
|guard=HL | |||
|cancel=N | |||
|bs= | |||
|juggle= | |||
|description= | |||
}} | |||
}} | |||
==Throw== | |||
{{MoveData | |||
|image=RBFF2_Andy_throw.jpg | |||
|caption= | |||
|input=4/6C | |||
|name=Uchimata | |||
|data= | |||
{{AttackData-RBFF2 | |||
|damage=26 | |||
|stun= | |||
|startup= | |||
|active= | |||
|recovery= | |||
|hitAdv= | |||
|blockAdv= | |||
|guard= | |||
|cancel= | |||
|bs= | |||
|juggle= | |||
|description= | |||
}} | |||
}} | |||
==Feints== | |||
{{MoveData | |||
|image=RBFF2_Andy_2bc.jpg | |||
|caption= | |||
|input=2BC | |||
|name=Feint Choreppa Dan | |||
|data= | |||
{{AttackData-RBFF2 | |||
|damage= | |||
|stun= | |||
|startup= | |||
|active= | |||
|recovery=32 | |||
|hitAdv= | |||
|blockAdv= | |||
|guard= | |||
|cancel= | |||
|bs= | |||
|juggle= | |||
|description= | |||
}} | |||
}} | |||
{{MoveData | |||
|image=RBFF2_Andy_2ac.jpg | |||
|caption= | |||
|input=2AC | |||
|name=Feint Hi Sho Ken | |||
|data= | |||
{{AttackData-RBFF2 | |||
|damage= | |||
|stun= | |||
|startup= | |||
|active= | |||
|recovery=18 | |||
|hitAdv= | |||
|blockAdv= | |||
|guard= | |||
|cancel= | |||
|bs= | |||
|juggle= | |||
|description= | |||
}} | |||
}} | |||
{{MoveData | |||
|image=RBFF2_Andy_6ac.jpg | |||
|caption= | |||
|input=6AC | |||
|name=Feint Zanei Ken | |||
|data= | |||
{{AttackData-RBFF2 | |||
|damage= | |||
|stun= | |||
|startup= | |||
|active= | |||
|recovery=18 | |||
|hitAdv= | |||
|blockAdv= | |||
|guard= | |||
|cancel= | |||
|bs= | |||
|juggle= | |||
|description= | |||
}} | |||
}} | |||
==Special Moves== | ==Special Moves== | ||
{{MoveData | |||
|image=RBFF2_Andy_214a.jpg | |||
|image2=RBFF2_Andy_214a2.jpg | |||
|image3=RBFF2_Andy_214c.jpg | |||
|image4=RBFF2_Andy_214c2.jpg | |||
|caption2=A version | |||
|caption4=C version | |||
|input=214A/C | |||
|name=Hi Sho Ken/Geki Hi Sho Ken | |||
|data= | |||
{{AttackData-RBFF2 | |||
|version=A | |||
|damage=16 | |||
|stun= | |||
|startup=12 | |||
|active= | |||
|recovery=49 total | |||
|hitAdv=1 | |||
|blockAdv=-3 | |||
|guard=HL | |||
|cancel= | |||
|bs=Y | |||
|juggle=Y | |||
|description= | |||
}} | |||
{{AttackData-RBFF2 | |||
|header=no | |||
|version=C | |||
|damage=10,8,8,8,8(35) | |||
|stun= | |||
|startup=10 | |||
|active=9(7)12 | |||
|recovery=37 | |||
|hitAdv=-18 | |||
|blockAdv=-20 | |||
|guard=HL | |||
|cancel= | |||
|bs=Y | |||
|juggle= | |||
|description= | |||
}} | |||
}} | |||
{{MoveData | |||
|image=RBFF2_Andy_623c.jpg | |||
|image2=RBFF2_Andy_623c2.jpg | |||
|image3=RBFF2_Andy_623c3.jpg | |||
|image4=RBFF2_Andy_623c4.jpg | |||
|image5=RBFF2_Andy_623c5.jpg | |||
|caption= | |||
|input=623C | |||
|name=Shoryudan | |||
|data= | |||
{{AttackData-RBFF2 | |||
|damage=12,10,10,10 | |||
|stun= | |||
|startup=3 | |||
|active=9 | |||
|recovery=58 | |||
|hitAdv=-9 | |||
|blockAdv=-36 | |||
|guard=HL | |||
|cancel= | |||
|bs=Y | |||
|juggle= | |||
|description= | |||
}} | |||
}} | |||
{{MoveData | |||
|image=RBFF2_Andy_16a.jpg | |||
|image2=RBFF2_Andy_16c.jpg | |||
|caption2= C version follow-up | |||
|input=16A/C | |||
|name=Zanei Ken | |||
|data= | |||
{{AttackData-RBFF2 | |||
|version=A | |||
|damage=28 | |||
|stun= | |||
|startup=10 | |||
|active=17 | |||
|recovery=8 | |||
|hitAdv=1 | |||
|blockAdv=-5 | |||
|guard=HL | |||
|cancel= | |||
|bs=Y | |||
|juggle= | |||
|description= | |||
}} | |||
{{AttackData-RBFF2 | |||
|version=C | |||
|damage=32 | |||
|stun= | |||
|startup=11 | |||
|active=19 | |||
|recovery=8 | |||
|hitAdv=-2 | |||
|blockAdv=-8 | |||
|guard=HL | |||
|cancel= | |||
|bs= | |||
|juggle= | |||
|description= | |||
}} | |||
{{AttackData-RBFF2 | |||
|version=C>16C | |||
|damage=11 | |||
|stun= | |||
|startup=8 | |||
|active=6 | |||
|recovery=28 | |||
|hitAdv=KD | |||
|blockAdv=-11 | |||
|guard=HL | |||
|cancel= | |||
|bs=N | |||
|juggle= | |||
|description= | |||
}} | |||
}} | |||
{{MoveData | |||
|image=RBFF2_Andy_1236b.jpg | |||
|image2=RBFF2_Andy_1236b2.jpg | |||
|caption= | |||
|input=1236B | |||
|name=Kuhadan | |||
|data= | |||
{{AttackData-RBFF2 | |||
|damage=12,29(37) | |||
|stun= | |||
|startup=14 | |||
|active=10,5 | |||
|recovery=4 | |||
|hitAdv=1 | |||
|blockAdv=-11 | |||
|guard= | |||
|cancel= | |||
|bs=Y | |||
|juggle= | |||
|description= | |||
}} | |||
}} | |||
{{MoveData | |||
|image=RBFF2_Andy_j214d.jpg | |||
|image2=RBFF2_Andy_j214d2.jpg | |||
|caption= | |||
|input=j.214D | |||
|name=Genei Shiranui | |||
|data= | |||
{{AttackData-RBFF2 | |||
|damage=10,26(32) | |||
|stun= | |||
|startup=14 | |||
|active=till landing(24), 4 | |||
|recovery=20 | |||
|hitAdv=4 | |||
|blockAdv=-2 | |||
|guard=HL | |||
|cancel= | |||
|bs=N | |||
|juggle= | |||
|description= | |||
}} | |||
}} | |||
==S-Power== | |||
{{MoveData | |||
|image=RBFF2_Andy_21416bc.jpg | |||
|image2=RBFF2_Andy_21416bc2.jpg | |||
|image3=RBFF2_Andy_21416bc3.jpg | |||
|image4=RBFF2_Andy_21416bc4.jpg | |||
|caption= | |||
|input=21416BC | |||
|name=Choreppa Dan | |||
|data= | |||
{{AttackData-RBFF2 | |||
|damage=20,20,20,29 | |||
|stun= | |||
|startup=18 | |||
|active=7,6,3,12 | |||
|recovery=29 | |||
|hitAdv=KD | |||
|blockAdv=-10 | |||
|guard=HL | |||
|cancel= | |||
|bs=Y | |||
|juggle= | |||
|description= | |||
}} | |||
}} | |||
==P-Power== | |||
{{MoveData | |||
|image=RBFF2_Andy_21416c.jpg | |||
|image2=RBFF2_Andy_21416c2.jpg | |||
|caption= | |||
|input=21416C | |||
|name=Dan Da Dan | |||
|data= | |||
{{AttackData-RBFF2 | |||
|damage=24,11,16,18,45(91) | |||
|stun= | |||
|startup=1+12 | |||
|active=2,[(4),1]*3(21),3 | |||
|recovery=12 | |||
|hitAdv=KD | |||
|blockAdv=-4 | |||
|guard=HL | |||
|cancel= | |||
|bs=N | |||
|juggle= | |||
|description= 22C is a valid shortcut | |||
}} | |||
}} | |||
==Chain Attacks== | |||
== | ==Combos== | ||
====Meterless==== | |||
====Metered==== | |||
== | ==Strategy== | ||
{{Navbox RBFF2}} | {{Navbox RBFF2}} | ||
[[Category:Real Bout Fatal Fury 2: The Newcomers]] | [[Category:Real Bout Fatal Fury 2: The Newcomers]] | ||
Latest revision as of 22:31, 24 August 2024

Gameplay Overview
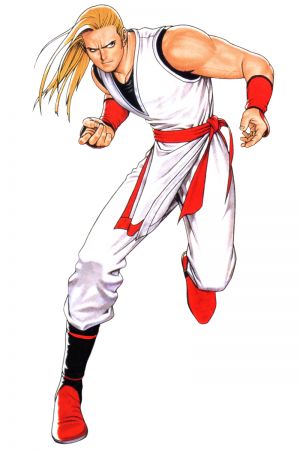
Andy Bogard, despite not being the poster child, plays the most traditional fireball-and-uppercut game in Real Bout 2. A strong defensive character, he has lots of powerful zoning tools and moves that can get him out of tight situations. He's fairly cut-and-dry even compared to the other characters that share his archetype, but his strong points truly shine when a patient and calculated player is controlling him.
| Pros | Cons |
|---|---|
|
|
Normals
Standing
5A
 |
|---|
| n.5A (within 46 px of opponent)  |
|---|
5B
 |
|---|
| n.5B (within 53 px of opponent)  |
|---|
5C
 |
|---|
| n.5C (within 52 px of opponent)   |
|---|
Crouching
2A
 |
|---|
2B
 |
|---|
2C
 |
|---|
Command
| Rising Palm 3A   |
|---|
Command
| Falling Roll Kick 6B   |
|---|
| Lean Down Kick 5AB   |
|---|
Jumping
j.A
 |
|---|
j.B
 |
|---|
j.C
  |
|---|
Oversway Actions
| 5D (opponent in oversway)  |
|---|
| 2D (opponent in oversway)   |
|---|
| A (from oversway)  |
|---|
| B (from oversway)  |
|---|
| C (from oversway)  |
|---|
Throw
| Uchimata 4/6C  |
|---|
Feints
| Feint Choreppa Dan 2BC  |
|---|
| Feint Hi Sho Ken 2AC  |
|---|
| Feint Zanei Ken 6AC  |
|---|
Special Moves
| Hi Sho Ken/Geki Hi Sho Ken 214A/C     |
|---|
| Shoryudan 623C      |
|---|
| Zanei Ken 16A/C   |
|---|
| Kuhadan 1236B   |
|---|
| Genei Shiranui j.214D   |
|---|
S-Power
| Choreppa Dan 21416BC     |
|---|
P-Power
| Dan Da Dan 21416C   |
|---|