-Happy New Year 2025!
Real Bout Fatal Fury 2/Cheng Sinzan: Difference between revisions
| (26 intermediate revisions by one other user not shown) | |||
| Line 5: | Line 5: | ||
A business man who loves eating and was considered part of the Big Three alongside Geese Howard and Jeff Bogard, can't say if that holds up currently. | A business man who loves eating and was considered part of the Big Three alongside Geese Howard and Jeff Bogard, can't say if that holds up currently. | ||
Gameplay wise, Cheng is a very unorthodox, semi-joke character. He has many gimmicks with his command normals and even Sideline attacks, but that doesn't mean he is only tricks. He has genuinely good zoning and set-play with his energy balls, a good far reaching attack with his [4]6B/C that is also a great breakshot, and decent damage when the situation calls for it | Gameplay wise, Cheng is a very unorthodox, semi-joke character. He has many gimmicks with his command normals and even Sideline attacks, but that doesn't mean he is only tricks. He has genuinely good zoning and set-play with his energy balls, a good far reaching attack with his [4]6B/C that is also a great breakshot, and decent damage when the situation calls for it. He can be very hard to pin down, especially if the Cheng player knows how to trick their opponent. His P-Power can be hard to do in a combo, but it's safe if blocked and you are able to link something afterwards. | ||
Sadly, Cheng has among the shortest range in the game | Sadly, Cheng has among the shortest range in the game and doesn't have the rushdown capabilities to compensate, so an opponent with a lifelead can feasibly lame him out. His combos require you to have charge already, and his non-sweep low 2B can't be chained again, so cancelling into [4]6B to get a low combo is more of a hard read rather than a confirm. He lacks any real mix-up and his buttons with + frames are short, making his pressure lackluster. His S-Power is the worst in the game, so you are stuck with using meter for Breakshots and P-Power. | ||
Cheng can easily keep the lead in a match just as easy as his opponent can keep theirs, | Cheng can easily keep the lead in a match just as easy as his opponent can keep theirs, playing Cheng requires knowing how to take advantage as quick as possible and being as unpredictable as you can be. He is considered bottom 1 in most tier lists but that doesn't mean you can't make good use of him. | ||
| Line 52: | Line 52: | ||
|juggle= | |juggle= | ||
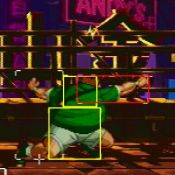
|description=*Quite average 5A. It's his fastest normal and it's cancellable so it's good to know what punishes you can only get with this, like Krauser's Leg Tomahawk. | |description=*Quite average 5A. It's his fastest normal and it's cancellable so it's good to know what punishes you can only get with this, like Krauser's Leg Tomahawk. | ||
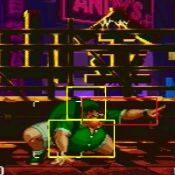
*Has a chain into 5C which is what you should if you can get a punish with it, as it's also special cancellable | *Has a chain into 5C which is what you should if you can get a punish with it, as it's also special cancellable. | ||
}} | }} | ||
}} | }} | ||
| Line 74: | Line 74: | ||
|bs= | |bs= | ||
|juggle= | |juggle= | ||
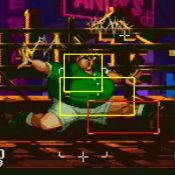
|description=*Average n.5A, | |description=*Average n.5A, It has a chain into 5C which is great since it let's you combo into [4]6B with no previous charge. | ||
}} | }} | ||
}} | }} | ||
| Line 161: | Line 161: | ||
|bs= | |bs= | ||
|juggle= | |juggle= | ||
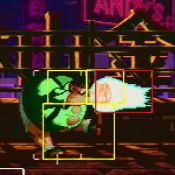
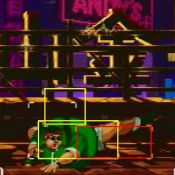
|description=*This | |description=*This deals less damage than the 5A>5C chain and it's slower, so it's not used it as a punish starter, but it has the advantages of having a chain to 5C>5C for movement, and if you use it as a meaty and link a [https://streamable.com/an4bqa 5A>5C, [4<nowiki>]</nowiki>6B] after it, you can get more damage than normal. | ||
*The activation range can be finicky so get used to it | |||
}} | }} | ||
}} | }} | ||
| Line 204: | Line 205: | ||
|bs= | |bs= | ||
|juggle= | |juggle= | ||
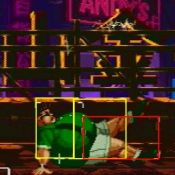
|description=*Your only non-sweep low. If you aren't completely sure they are gonna block high, cancel into 236A, as you are at least safe and still get a combo on hit. | |description=*Your only non-sweep low. If you aren't completely sure they are gonna block high, cancel into 2C>236A, as you are at least safe and still get a combo on hit. | ||
}} | }} | ||
}} | }} | ||
| Line 228: | Line 229: | ||
}} | }} | ||
}} | }} | ||
===Command=== | ===Command=== | ||
{{MoveData | {{MoveData | ||
| Line 234: | Line 236: | ||
|input=4A | |input=4A | ||
|name=Glowing Orb | |name=Glowing Orb | ||
|data= | |||
{{AttackData-RBFF2 | |||
|damage=19 | |||
|stun= | |||
|startup=12 | |||
|active=8 | |||
|recovery=20 | |||
|hitAdv=-4 | |||
|blockAdv=-8 | |||
|guard=HL | |||
|cancel=Y | |||
|bs= | |||
|juggle= | |||
|description=*It will send the opponent to the other plane, and has a chain into 5D, which you can cancel into [4]6B. This is sometimes the biggest punish in some scenarios | |||
*Annoyingly, the range of 5D as it is is small, so there are a lot of angles where it will whiff. Cancel into 214B in those cases. | |||
}} | |||
}} | |||
{{MoveData | |||
|image=RBFF2_Cheng_6a.jpg | |||
|image2=RBFF2_Cheng_6a2.jpg | |||
|input=6A | |||
|caption= | |||
|name=Double Orb Attack | |||
|data= | |data= | ||
{{AttackData-RBFF2 | {{AttackData-RBFF2 | ||
| Line 248: | Line 273: | ||
|juggle= | |juggle= | ||
|description=*Slow overhead. Use them if they are sleeping. Has a good hitbox so it may be good to stop approaches. | |description=*Slow overhead. Use them if they are sleeping. Has a good hitbox so it may be good to stop approaches. | ||
*A really weird move. You have an in-built kara cancel with 1/3C which moves Cheng backwards/forward respectively without attacking. Can work as a ghetto grab set-up or to get away, but use with caution. | |||
}} | }} | ||
}} | }} | ||
{{MoveData | {{MoveData | ||
|image= | |image=RBFF2_Cheng_ab.jpg | ||
|image2= | |image2=RBFF2_Cheng_ab2.jpg | ||
|input= | |input=5AB | ||
|caption= | |caption= | ||
|name= | |name=Open Palm Strike | ||
|data= | |data= | ||
{{AttackData-RBFF2 | {{AttackData-RBFF2 | ||
|damage= | |damage=14 | ||
|stun= | |stun= | ||
|startup= | |startup=9 | ||
|active= | |active=7 | ||
|recovery=20 | |recovery=20 | ||
|hitAdv=- | |hitAdv=-1 | ||
|blockAdv=- | |blockAdv=-7 | ||
|guard=HL | |guard=HL | ||
|cancel=Y | |cancel=Y | ||
|bs= | |bs= | ||
|juggle= | |juggle= | ||
|description= | |description= | ||
}} | }} | ||
}} | }} | ||
===Jumping=== | ===Jumping=== | ||
{{MoveData | {{MoveData | ||
| Line 545: | Line 572: | ||
|bs= | |bs= | ||
|juggle= | |juggle= | ||
|description= | |description=*Most Character's Sideline attacks are pretty universal about their use, and Cheng is no different, but he has the unique trait of having 2 chains starting from them, which is shown in the chain attack section below. This is mostly used to disuade characters of pressing something after they block SB or SC, but it's even more minus on block, so be careful. | ||
}} | }} | ||
}} | }} | ||
| Line 589: | Line 616: | ||
|bs= | |bs= | ||
|juggle= | |juggle= | ||
|description= | |description= | ||
}} | }} | ||
}} | }} | ||
| Line 810: | Line 837: | ||
|juggle= | |juggle= | ||
|description=*You are high invul while holding it, but this sees more use as to cancel things with bad recovery, as his fastest feint is 3 frames slower. | |description=*You are high invul while holding it, but this sees more use as to cancel things with bad recovery, as his fastest feint is 3 frames slower. | ||
*The only cancellable attacks that see a frame advantage improvement by cancelling into this are 5B, 2C and 4A. | |||
}} | }} | ||
}} | }} | ||
| Line 859: | Line 887: | ||
*Like seriously, don't. Have you seen that startup? It's not that big while in the air and it's death on whiff. The opponent will not get hit by it, just forget it. I don't know why they made it like this either. | *Like seriously, don't. Have you seen that startup? It's not that big while in the air and it's death on whiff. The opponent will not get hit by it, just forget it. I don't know why they made it like this either. | ||
*This is really detrimental for Cheng and one of the reasons why he has such a hard time making a comeback. The fact that characters can spam their S-Power while on red life is something he doesn't get since his is so terrible. Other characters become absolute menaces at low health like Krauser or Kim, but Cheng cannot do this. | |||
}} | }} | ||
}} | }} | ||
| Line 891: | Line 921: | ||
==Chain Attacks== | ==Chain Attacks== | ||
'''*5A | '''*From 5A Starter''' | ||
{{MoveData | |||
|image=RBFF2_Cheng_ab2.jpg | |||
|caption= | |||
|name=5AC | |||
|data= | |||
{{AttackData-RBFF2 | |||
|damage=22 | |||
|stun= | |||
|startup=9 | |||
|active=7 | |||
|recovery=20 | |||
|hitAdv=1 | |||
|blockAdv=-7 | |||
|guard=HL | |||
|cancel=Y | |||
|bs= | |||
|juggle= | |||
|description=*Good damage from a far 5A. You can combo into [4]6B if you charge immediately after pressing C | |||
*The biggest problem with this chain is how range dependant it is. It can whiff if you are not close enough, and then, if you are too close, you get n.5A instead. | |||
}} | |||
}} | |||
{{MoveData | |||
|image=RBFF2_Cheng_n5c2.jpg | |||
|caption= | |||
|name=5A3C | |||
|data= | |||
{{AttackData-RBFF2 | |||
|damage=21 | |||
|stun= | |||
|startup=18 | |||
|active=7 | |||
|recovery=20 | |||
|hitAdv=Launches | |||
|blockAdv=-22 | |||
|guard=HL | |||
|cancel=Y | |||
|bs= | |||
|juggle= | |||
|description=*This won't combo, but it can act as a weird anti-air. The recovery is HORRENDOUS as Cheng will fall to the ground after it, so always make sure to cancel into fireball or 214B. | |||
}} | |||
}} | |||
'''*From n.5A Starter''' | |||
{{MoveData | |||
|image=RBFF2_Cheng_n5ac.jpg | |||
|caption= | |||
|name=n.5AC | |||
|data= | |||
{{AttackData-RBFF2 | |||
|damage=22 | |||
|stun= | |||
|startup=7 | |||
|active=3 | |||
|recovery=20 | |||
|hitAdv=-7 | |||
|blockAdv=-13 | |||
|guard=L | |||
|cancel=Y | |||
|bs= | |||
|juggle= | |||
|description=*This is a great chain as it allows you to charge for enough time to get a [4]6B as a combo ender without any previous one. The timing is a bit tricky but it is very worthy to learn. | |||
}} | |||
}} | |||
{{MoveData | |||
|image=RBFF2_Cheng_n5c2.jpg | |||
|caption= | |||
|name=n.5A3C | |||
|data= | |||
{{AttackData-RBFF2 | |||
|damage=9 | |||
|stun= | |||
|startup=5 | |||
|active=6 | |||
|recovery=12 | |||
|hitAdv=-2 | |||
|blockAdv=-6 | |||
|guard=HL | |||
|cancel=Y | |||
|bs= | |||
|juggle= | |||
|description=*Fairly situational chain, since n.5A>5C exists. Can be used delayed to try to hit someone that wants to jump out, as n.5A>5C has a low hitbox. | |||
*It has a tiny bit more range, so sometimes, your punish will be n.5A>3C>623A, as n.5A>5C would whiff. | |||
}} | |||
}} | |||
'''*From 2A/2B Starter''' | |||
{{MoveData | |||
|image=RBFF2_Cheng_2c.jpg | |||
|caption= | |||
|name=2AC | |||
|data= | |||
{{AttackData-RBFF2 | |||
|damage=23 | |||
|stun= | |||
|startup=9 | |||
|active=23 | |||
|recovery=20 | |||
|hitAdv=Knocks down | |||
|blockAdv=-23 | |||
|guard=L | |||
|cancel=Y | |||
|bs= | |||
|juggle= | |||
|description=*Cheng will slide forward during the sweep so it has more range than displayed in combos. 2B>2C>623A is a nice string with not much risk that gives you good oki if it hits. | |||
}} | |||
}} | |||
'''* | '''*From 5C/n.5C ''' | ||
{{MoveData | |||
|image=RBFF2_Cheng_5cc.jpg | |||
|caption= | |||
|name=5CC | |||
|data= | |||
{{AttackData-RBFF2 | |||
|damage=9 | |||
|stun= | |||
|startup=4 | |||
|active=9 | |||
|recovery=28 | |||
|hitAdv=Launches | |||
|blockAdv=-20 | |||
|guard=HL | |||
|cancel=N | |||
|bs= | |||
|juggle= | |||
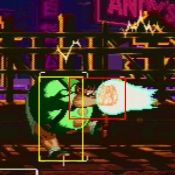
|description=*An energy blast that will propel Cheng backwards. A good movement tool in neutral as it protects your escape. | |||
}} | |||
}} | |||
•A chain attack without the attack part. Cheng will crawl backwards or forward depending on the direction. Can be nice for adjusting your movement, and if they think you are going to hit them with 6A, move towards them and throw them. Use with caution. | '''*From 4A Starter''' | ||
{{MoveData | |||
|image=RBFF2_Cheng_5d.jpg | |||
|image2=RBFF2_Cheng_5d2.jpg | |||
|caption= | |||
|input= | |||
|name=5D | |||
|data= | |||
{{AttackData-RBFF2 | |||
|damage=20 | |||
|stun= | |||
|startup=7 | |||
|active=2,3 | |||
|recovery=15 | |||
|hitAdv=2 | |||
|blockAdv=1 | |||
|guard=H | |||
|cancel=N | |||
|bs= | |||
|juggle= | |||
|description=*No reason not to go for it aside from baiting breakshots. Combo into [4]6B if it hits or one of the fireballs if it doesn't. | |||
*Sometimes the 5D part whill whiff if you are far away. In those cases, cancel into 214B instead for better frame advantage | |||
}} | |||
}} | |||
'''*From 6A Starter''' | |||
{{MoveData | |||
|image=RBFF2_Cheng_6a1c.jpg | |||
|caption= | |||
|name=6A1C | |||
|data= | |||
{{AttackData-RBFF2 | |||
|damage= | |||
|stun= | |||
|startup= | |||
|active= | |||
|recovery=39 total | |||
|hitAdv= | |||
|blockAdv= | |||
|guard= | |||
|cancel= | |||
|bs= | |||
|juggle= | |||
|description=* | |||
}} | |||
}} | |||
{{MoveData | |||
|image=RBFF2_Cheng_6a3c.jpg | |||
|caption= | |||
|name=6A3C | |||
|data= | |||
{{AttackData-RBFF2 | |||
|damage= | |||
|stun= | |||
|startup= | |||
|active= | |||
|recovery=39 total | |||
|hitAdv= | |||
|blockAdv= | |||
|guard= | |||
|cancel= | |||
|bs= | |||
|juggle= | |||
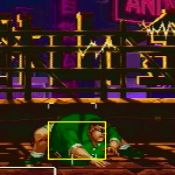
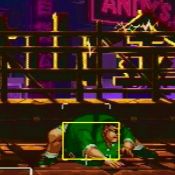
|description=*•A chain attack without the attack part. Cheng will crawl backwards or forward depending on the direction. Can be nice for adjusting your movement, and if they think you are going to hit them with 6A, move towards them and throw them. Use with caution. | |||
}} | |||
}} | |||
'''*From SA/SB/SC Starter''' | |||
{{MoveData | |||
|image=RBFF2_Cheng_SX5c.jpg | |||
|image2=RBFF2_Cheng_SC5c4b.jpg | |||
|caption=SXC(-C-C-C-) | |||
|caption2=SXC-C-C-C-44B | |||
|name=SXC | |||
|data= | |||
{{AttackData-RBFF2 | |||
|version=SXC | |||
|damage=24 | |||
|stun= | |||
|startup=7 | |||
|active=27,10 | |||
|recovery=20 | |||
|hitAdv=-1 | |||
|blockAdv=-7 | |||
|guard=H | |||
|cancel=N | |||
|bs= | |||
|juggle= | |||
|description=* | |||
}} | |||
{{AttackData-RBFF2 | |||
|version=SXCC | |||
|damage=18 | |||
|stun= | |||
|startup=14 | |||
|active=3 | |||
|recovery=17 | |||
|hitAdv=+3 | |||
|blockAdv=-1 | |||
|guard=L | |||
|cancel=N | |||
|bs= | |||
|juggle= | |||
|description=* | |||
}} | |||
{{AttackData-RBFF2 | |||
|version=SXCCC | |||
|damage=18 | |||
|stun= | |||
|startup=9 | |||
|active=5 | |||
|recovery=18 | |||
|hitAdv=+3 | |||
|blockAdv=-3 | |||
|guard=L | |||
|cancel=N | |||
|bs= | |||
|juggle= | |||
|description=* | |||
}} | |||
{{AttackData-RBFF2 | |||
|version=SXCCCC | |||
|damage=18 | |||
|stun= | |||
|startup=9 | |||
|active=5 | |||
|recovery=18 | |||
|hitAdv=+3 | |||
|blockAdv=-3 | |||
|guard=L | |||
|cancel=N | |||
|bs= | |||
|juggle= | |||
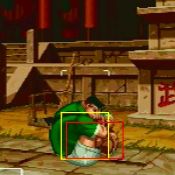
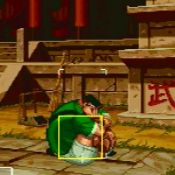
|description=*Cheng is the only character that cancel their sideline attacks. This chain can make people scared to punish your - on block chains like SB or SC. | |||
}} | |||
{{AttackData-RBFF2 | |||
|version=SXCCCC44B | |||
|damage= | |||
|stun= | |||
|startup= | |||
|active= | |||
|recovery=39 total | |||
|hitAdv= | |||
|blockAdv= | |||
|guard= | |||
|cancel= | |||
|bs= | |||
|juggle= | |||
|description=*Go for 44B if you think they are going to attack right after the last attack, or don't if they think you are going to do it and keep your turn. | |||
}} | |||
}} | |||
{{MoveData | |||
|image=RBFF2_Cheng_SX2c.jpg | |||
|caption= | |||
|name=SX2C | |||
|data= | |||
{{AttackData-RBFF2 | |||
|damage= | |||
|stun= | |||
|startup= | |||
|active= | |||
|recovery= | |||
|hitAdv= | |||
|blockAdv= | |||
|guard= | |||
|cancel= | |||
|bs= | |||
|juggle= | |||
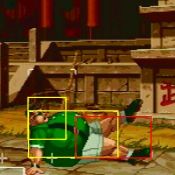
|description=*Simply ending in sweep is okay too. Cancel into whatever you think is good at the moment | |||
}} | |||
}} | |||
==Combos== | ==Combos== | ||
====Meterless==== | ====Meterless==== | ||
'''2A,2A>[4]6B''' | |||
'''n.5A>5C, [4]6B''' | |||
'''4A>5D>[4]6B | |||
*These are your most common ways to combo into [4]6B. | |||
====Metered==== | ====Metered==== | ||
'''j.C>j.41236C, n.5A>5C>[4]6B''' | |||
*Pretty much your only metered combo. End in 2A>2C>623A if you prefer the oki. | |||
==Strategy== | ==Strategy== | ||
Latest revision as of 19:35, 9 November 2023
Introduction
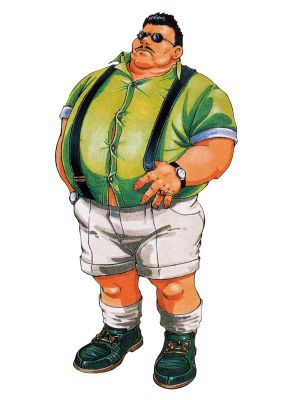
A business man who loves eating and was considered part of the Big Three alongside Geese Howard and Jeff Bogard, can't say if that holds up currently.
Gameplay wise, Cheng is a very unorthodox, semi-joke character. He has many gimmicks with his command normals and even Sideline attacks, but that doesn't mean he is only tricks. He has genuinely good zoning and set-play with his energy balls, a good far reaching attack with his [4]6B/C that is also a great breakshot, and decent damage when the situation calls for it. He can be very hard to pin down, especially if the Cheng player knows how to trick their opponent. His P-Power can be hard to do in a combo, but it's safe if blocked and you are able to link something afterwards.
Sadly, Cheng has among the shortest range in the game and doesn't have the rushdown capabilities to compensate, so an opponent with a lifelead can feasibly lame him out. His combos require you to have charge already, and his non-sweep low 2B can't be chained again, so cancelling into [4]6B to get a low combo is more of a hard read rather than a confirm. He lacks any real mix-up and his buttons with + frames are short, making his pressure lackluster. His S-Power is the worst in the game, so you are stuck with using meter for Breakshots and P-Power.
Cheng can easily keep the lead in a match just as easy as his opponent can keep theirs, playing Cheng requires knowing how to take advantage as quick as possible and being as unpredictable as you can be. He is considered bottom 1 in most tier lists but that doesn't mean you can't make good use of him.
| Pros | Cons |
|---|---|
|
|
Normals
Standing
5A
 |
|---|
| n.5A (within 69 px of opponent) 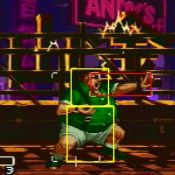 |
|---|
5B
 |
|---|
| n.5B (within 54 px of opponent) 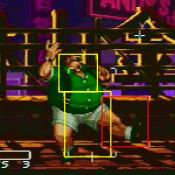 |
|---|
5C
 |
|---|
| n.5C (within 54 px of opponent) 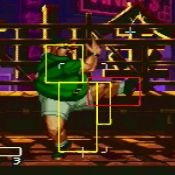 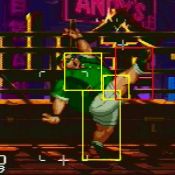 |
|---|
Crouching
2A
 |
|---|
2B
 |
|---|
2C
 |
|---|
Command
| Glowing Orb 4A 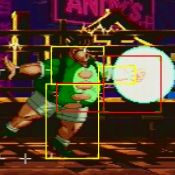 |
|---|
| Double Orb Attack 6A 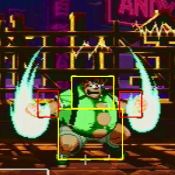 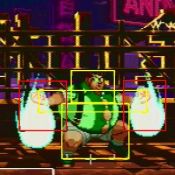 |
|---|
| Open Palm Strike 5AB 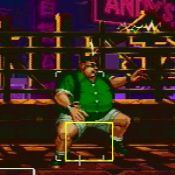 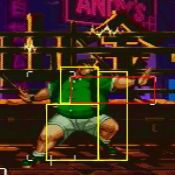 |
|---|
Jumping
j.A
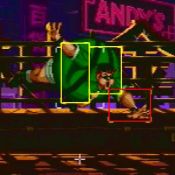 |
|---|
j.B
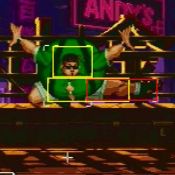 |
|---|
j.C
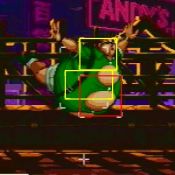 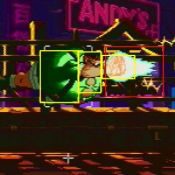 |
|---|
Oversway Actions
| 5D (opponent in oversway) 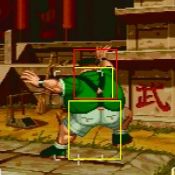 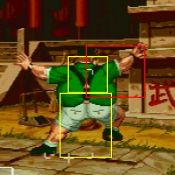 |
|---|
| 2D (opponent in oversway)  |
|---|
| A (A from oversway)  |
|---|
| B (B from oversway) 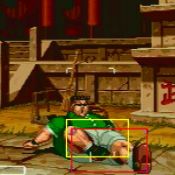 |
|---|
| C (C in oversway) 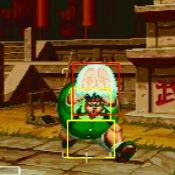 |
|---|
Throws
| Double Hand Toss 4/6C next to opponent 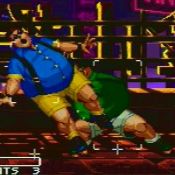 |
|---|
| Headbutts 3C next to opponent 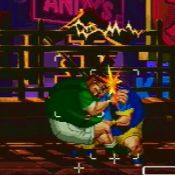 |
|---|
Feints
| Feint Avalanche Crunch 6AC 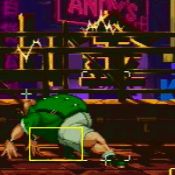 |
|---|
| Feint Fatty Bazooka 2AC 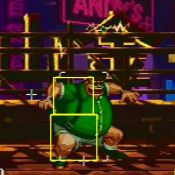 |
|---|
Specials
| Kiten Hinzan 236A 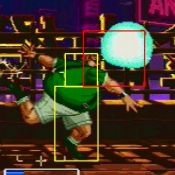 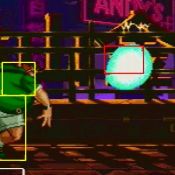 |
|---|
| High Kiten Hinzan 623A 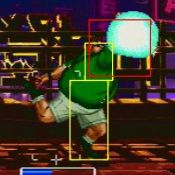 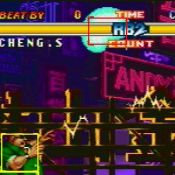 |
|---|
| Belly Drum Blast [2]8A 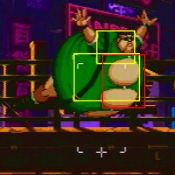 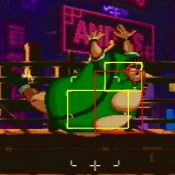 |
|---|
| Avalanche Crunch [4]B/C 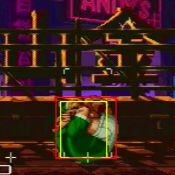 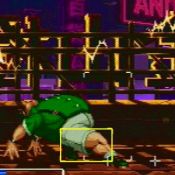 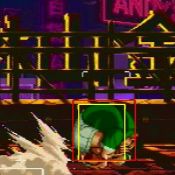 |
|---|
| Flexible Geezer 214B (Hold B to keep moving) 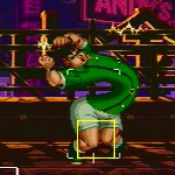 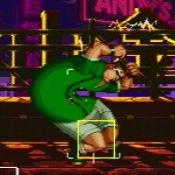 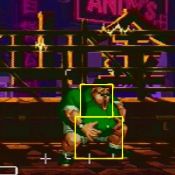 |
|---|
| Fatty Bazooka 214C 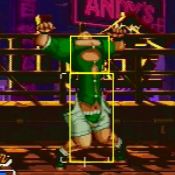 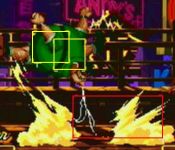 |
|---|
S-Power
| Bursting Heavens [1]26BC 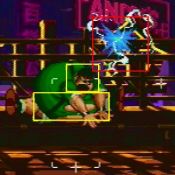 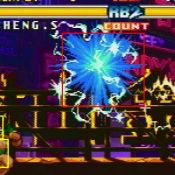 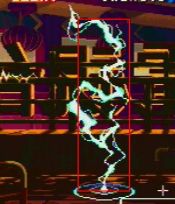 |
|---|
P-Power
| Collapse of Creation j.41236C 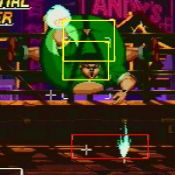 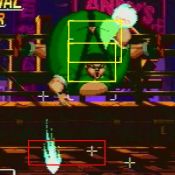 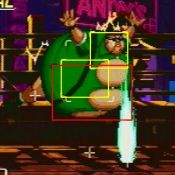 |
|---|
Chain Attacks
*From 5A Starter
5AC
 |
|---|
5A3C
 |
|---|
*From n.5A Starter
n.5AC
 |
|---|
n.5A3C
 |
|---|
*From 2A/2B Starter
2AC
 |
|---|
*From 5C/n.5C
5CC
 |
|---|
*From 4A Starter
5D
  |
|---|
*From 6A Starter
6A1C
 |
|---|
6A3C
 |
|---|
*From SA/SB/SC Starter
SXC
  |
|---|
SX2C
 |
|---|
Combos
Meterless
2A,2A>[4]6B
n.5A>5C, [4]6B
4A>5D>[4]6B
- These are your most common ways to combo into [4]6B.
Metered
j.C>j.41236C, n.5A>5C>[4]6B
- Pretty much your only metered combo. End in 2A>2C>623A if you prefer the oki.