-Happy New Year 2025!
No edit summary |
|||
| (29 intermediate revisions by 4 users not shown) | |||
| Line 3: | Line 3: | ||
==Overview== | ==Overview== | ||
Serving as the "shoto" of the roster, Kaede is a fairly well-rounded character with minimal execution barriers. Primarily aiming to fight at mid to close range and built to bait deflects. He's easily the best in Power mode. However, his Speed mode does have some unique advantages. | Serving as the "shoto" of the roster, Kaede is a fairly well-rounded character with minimal execution barriers. Primarily aiming to fight at mid to close range and built to bait deflects. He's easily the best in Power mode. However, his Speed mode does have some unique advantages. | ||
<br> | |||
| | <div class="movelist-toggles"> | ||
<div id="movelist-toggle-1" class="movelist-toggle-button"> [[File:Power_Icon.png|50px|link=]]</div> | |||
<div id="movelist-toggle-2" class="movelist-toggle-button"> [[File:Speed_Icon.png|50px|link=]]</div> | |||
<div id="movelist-toggle-3" class="movelist-toggle-button"> [[File:EX_Icon.png|50px|link=]]</div> | |||
</div> | |||
! | <div id="movelist-1" class="movelist"><!-- Power --> | ||
| | {{ProConTable | ||
|pros= | |||
* Strong pokes in neutral | * Strong pokes in neutral | ||
* Simple yet effective hit confirms | * Simple yet effective hit confirms | ||
| Line 16: | Line 17: | ||
* Incredible anti-air and air-to-air presence | * Incredible anti-air and air-to-air presence | ||
* Highest meterless damage from command grab | * Highest meterless damage from command grab | ||
| | |cons= | ||
* Long range pokes typically have significant hurtbox extension | * Long range pokes typically have significant hurtbox extension | ||
* No mix beyond his basic stagger pressure | * No mix beyond his basic stagger pressure | ||
* Poor oki | * Poor oki | ||
* A bug that forces him to stand up after being in a hard knockdown state and getting hit by an OTG means opponents can loop their pressure on him, or even get a guaranteed 50/50 in the form of fandango | |||
! | }}</div> | ||
| | <div id="movelist-2" class="movelist"><!-- Speed--> | ||
{{ProConTable | |||
|pros= | |||
* 5A>A is one of the best empty cancels in the game | * 5A>A is one of the best empty cancels in the game | ||
* Simple yet effective hit confirms | * Simple yet effective hit confirms | ||
* Effective low crushes to accentuate strike/throw game plan | * Effective low crushes to accentuate strike/throw game plan | ||
* High metered damage off command grab | * High metered damage off command grab | ||
| | |cons= | ||
* Long range pokes typically have significant hurtbox extension | * Long range pokes typically have significant hurtbox extension | ||
* Low damage on individual hits, compounding the above weakness | * Low damage on individual hits, compounding the above weakness | ||
* Struggles to confirm super outside of command grab | * Struggles to confirm super outside of command grab | ||
* Recovery roll bug is still present, with the above disadvantages | |||
! | }}</div> | ||
| | <div id="movelist-3" class="movelist"><!-- EX --> | ||
{{ProConTable | |||
|pros= | |||
* Same strengths as speed, with slightly higher potential damage from command grab | * Same strengths as speed, with slightly higher potential damage from command grab | ||
| | |cons= | ||
* Same weaknesses as speed | * Same weaknesses as speed | ||
* Massive defense penalty makes trades even worse | * Massive defense penalty makes trades even worse | ||
* 214A super cancels don't work mid combo | * 214A super cancels don't work mid combo}} | ||
</div> | |||
==Strategy== | ==Strategy== | ||
For the majority of matchups, you'll be attempting to poke out the opponent at mid range until you find a chance to get a hop, at which point you can begin baiting deflects and fishing for his incredibly rewarding command grab. Although his mixups are fairly linear and often reactable, Kaede can steal the opponent's turn surprisingly easily even in power mode. This allows him to go on the offensive while still maintaining access to high damage pokes and whiff punishes. Although his long range presence is not particularly strong, he has access to both a fireball and some strong (and frankly underrated) options from dashing in. Put this in tandem with the unique properties of his air-fireball, and Kaede can effectively threaten the opponent from any range. In speed mode, Kaede can bank a lot harder on his pressure, gaining access to a pair of fast overheads and becoming even better at baiting deflects. This makes his command grab all the more threatening, especially when you consider that in speed he can confirm fandangos off of it. However, the majority of Kaede's confirms become weaker in speed, and he generally trades less favorably with most normals (a huge weakness given that Kaede has significant hurtbox extension on his more commital pokes). In either mode, Kaede's disadvantage state is disproportionately strong. This is because he has access to a high-priority jab, standing A reaches relatively far compared to most 4f jabs, and during tech chase situations he has access to two different air fireballs as well as a fast high priority jumping normal. This allows him to viably air tech against the majority of the roster, as he will often force a favorable trade and get the opponent off of him. | For the majority of matchups, you'll be attempting to poke out the opponent at mid range until you find a chance to get a hop, at which point you can begin baiting deflects and fishing for his incredibly rewarding command grab. Although his mixups are fairly linear and often reactable, Kaede can steal the opponent's turn surprisingly easily even in power mode. This allows him to go on the offensive while still maintaining access to high damage pokes and whiff punishes. Although his long range presence is not particularly strong, he has access to both a fireball and some strong (and frankly underrated) options from dashing in. Put this in tandem with the unique properties of his air-fireball, and Kaede can effectively threaten the opponent from any range. In speed mode, Kaede can bank a lot harder on his pressure, gaining access to a pair of fast overheads and becoming even better at baiting deflects. This makes his command grab all the more threatening, especially when you consider that in speed he can confirm fandangos off of it. However, the majority of Kaede's confirms become weaker in speed, and he generally trades less favorably with most normals (a huge weakness given that Kaede has significant hurtbox extension on his more commital pokes). In either mode, Kaede's disadvantage state is disproportionately strong. This is because he has access to a high-priority jab, standing A reaches relatively far compared to most 4f jabs, and during tech chase situations he has access to two different air fireballs as well as a fast high priority jumping normal. This allows him to viably air tech against the majority of the roster, as he will often force a favorable trade and get the opponent off of him. | ||
| Line 55: | Line 59: | ||
|version=Power | |version=Power | ||
|damage=13/1 | |damage=13/1 | ||
|startup= | |startup=5 | ||
|active=2 | |active=2 | ||
|recovery=16 | |recovery=16 | ||
| Line 69: | Line 73: | ||
|version=Speed | |version=Speed | ||
|damage=8/0 | |damage=8/0 | ||
|startup= | |startup=5 | ||
|active=2 | |active=2 | ||
|recovery=16 | |recovery=16 | ||
| Line 78: | Line 82: | ||
|cancel=○/○ | |cancel=○/○ | ||
|tech=Air | |tech=Air | ||
|description=A very fast but decently long range poke with good horizontal priority. Easily Kaede's best grounded poke due to being incredibly noncommital and stuffing most approach attempts. Notably it can also combo into most specials depending on your range, with DP in particular being very consistent at even longer ranges. Can serve as an anti-air if spaced against jump ins with weak air-to-ground priority. | |description=A very fast but decently long range poke with good horizontal priority. Has the most reach for any 5A of any character in game by a few pixels. Easily Kaede's best grounded poke due to being incredibly noncommital and stuffing most approach attempts. Notably it can also combo into most specials depending on your range, with DP in particular being very consistent at even longer ranges. Can serve as an anti-air if spaced against jump ins with weak air-to-ground priority. Confirms into 236236B sdm as well for a comeback tool. | ||
}} | }} | ||
}} | }} | ||
| Line 90: | Line 94: | ||
|version=Power | |version=Power | ||
|damage=13/1 | |damage=13/1 | ||
|startup= | |startup=5 | ||
|active=2 | |active=2 | ||
|recovery=12 | |recovery=12 | ||
| Line 104: | Line 108: | ||
|version=Speed | |version=Speed | ||
|damage=8/0 | |damage=8/0 | ||
|startup= | |startup=5 | ||
|active=2 | |active=2 | ||
|recovery=12 | |recovery=12 | ||
| Line 126: | Line 130: | ||
|version=Power | |version=Power | ||
|damage=30/3 | |damage=30/3 | ||
|startup= | |startup=11 | ||
|active=2,1 | |active=2,1 | ||
|recovery=22 | |recovery=22 | ||
| Line 140: | Line 144: | ||
|version=Speed | |version=Speed | ||
|damage=16/0 | |damage=16/0 | ||
|startup= | |startup=11 | ||
|active=2,1 | |active=2,1 | ||
|recovery=22 | |recovery=22 | ||
| Line 149: | Line 153: | ||
|cancel=○/○ | |cancel=○/○ | ||
|tech=Air | |tech=Air | ||
|description=A fairly slow normal with moderate range and is unsafe on block. Notably can combo into 214A from a significant distance away from the opponent, making it a solid punish tool in power mode against unsafe blockstrings. Not advisable to use in neutral. The 2nd hitbox can hit behind opponents on the ground, and if you can land it in | |description=A fairly slow normal with moderate range and is unsafe on block. Notably can combo into 214A from a significant distance away from the opponent, making it a solid punish tool in power mode against unsafe blockstrings. Not advisable to use in neutral. The 2nd hitbox can hit behind opponents on the ground, and if you can land it in that way it can combo to 214B. | ||
}} | }} | ||
}} | }} | ||
| Line 161: | Line 165: | ||
|version=Power | |version=Power | ||
|damage=50/6 | |damage=50/6 | ||
|startup= | |startup=20 | ||
|active=4 | |active=4 | ||
|recovery=34 | |recovery=34 | ||
| Line 175: | Line 179: | ||
|version=Speed | |version=Speed | ||
|damage=23/0 | |damage=23/0 | ||
|startup= | |startup=14 | ||
|active=4 | |active=4 | ||
|recovery=34 | |recovery=34 | ||
| Line 196: | Line 200: | ||
|version=Power | |version=Power | ||
|damage=13/1 | |damage=13/1 | ||
|startup= | |startup=10 | ||
|active=4 | |active=4 | ||
|recovery=16 | |recovery=16 | ||
| Line 231: | Line 235: | ||
|version=Power | |version=Power | ||
|damage=19/2 | |damage=19/2 | ||
|startup= | |startup=8 | ||
|active=3 | |active=3 | ||
|recovery=32 | |recovery=32 | ||
| Line 245: | Line 249: | ||
|version=Speed | |version=Speed | ||
|damage=16/0 | |damage=16/0 | ||
|startup= | |startup=8 | ||
|active=3 | |active=3 | ||
|recovery=32 | |recovery=32 | ||
| Line 265: | Line 269: | ||
{{AttackData-LB2 | {{AttackData-LB2 | ||
|damage=61 | |damage=61 | ||
|startup= | |startup=46~86 | ||
|active=2 | |active=2 | ||
|recovery=44 | |recovery=44 | ||
| Line 285: | Line 289: | ||
{{AttackData-LB2 | {{AttackData-LB2 | ||
|damage=16 | |damage=16 | ||
|startup= | |startup=23 | ||
|active=3 | |active=3 | ||
|recovery=23 | |recovery=23 | ||
| Line 306: | Line 310: | ||
|version=Power | |version=Power | ||
|damage=21 | |damage=21 | ||
|startup= | |startup=16 | ||
|active=2 | |active=2 | ||
|recovery=27 | |recovery=27 | ||
| Line 320: | Line 324: | ||
|version=Speed | |version=Speed | ||
|damage=21 | |damage=21 | ||
|startup= | |startup=16 | ||
|active=2 | |active=2 | ||
|recovery=27 | |recovery=27 | ||
| Line 343: | Line 347: | ||
|version=Power | |version=Power | ||
|damage=13/1 | |damage=13/1 | ||
|startup= | |startup=5 | ||
|active=3 | |active=3 | ||
|recovery=16 | |recovery=16 | ||
| Line 357: | Line 361: | ||
|version=Speed | |version=Speed | ||
|damage=11/0 | |damage=11/0 | ||
|startup= | |startup=5 | ||
|active=3 | |active=3 | ||
|recovery=16 | |recovery=16 | ||
| Line 366: | Line 370: | ||
|cancel= | |cancel= | ||
|tech= Air | |tech= Air | ||
|description=A normal which doesn't lead to anything, and despite the animation, doesn't require a low deflect. Inferior to standing 4A in almost every way. In speed or EX, you can continue chaining off of it if chained into from 5A, but it's still generally worse than just following up with the second hit of 5A unless you manage to get a punish at point blank, in which case it will do 1 more point of damage. | |description=A normal which doesn't lead to anything, and despite the animation, doesn't require a low deflect. Inferior to standing 4A in almost every way. In speed or EX, you can continue chaining off of it if chained into from 4A or 5A, but it's still generally worse than just following up with the second hit of 5A unless you manage to get a punish at point blank, in which case it will do 1 more point of damage. | ||
}} | }} | ||
}} | }} | ||
| Line 379: | Line 383: | ||
|version=Power | |version=Power | ||
|damage=28/3 | |damage=28/3 | ||
|startup= | |startup=14 | ||
|active=4 | |active=4 | ||
|recovery=26 | |recovery=26 | ||
| Line 393: | Line 397: | ||
|version=Speed | |version=Speed | ||
|damage=23/0 | |damage=23/0 | ||
|startup= | |startup=14 | ||
|active=4 | |active=4 | ||
|recovery=26 | |recovery=26 | ||
| Line 414: | Line 418: | ||
|version=Power | |version=Power | ||
|damage=13/1 | |damage=13/1 | ||
|startup= | |startup=6 | ||
|active=2 | |active=2 | ||
|recovery=17 | |recovery=17 | ||
| Line 428: | Line 432: | ||
|version=Speed | |version=Speed | ||
|damage=11/0 | |damage=11/0 | ||
|startup= | |startup=6 | ||
|active=2 | |active=2 | ||
|recovery=17 | |recovery=17 | ||
| Line 449: | Line 453: | ||
|version=Power | |version=Power | ||
|damage=24/3 | |damage=24/3 | ||
|startup= | |startup=9 | ||
|active=3 | |active=3 | ||
|recovery=26 | |recovery=26 | ||
| Line 463: | Line 467: | ||
|version=Speed | |version=Speed | ||
|damage=19/0 | |damage=19/0 | ||
|startup= | |startup=9 | ||
|active=3 | |active=3 | ||
|recovery=26 | |recovery=26 | ||
| Line 486: | Line 490: | ||
|version=Power | |version=Power | ||
|damage=13/1 | |damage=13/1 | ||
|startup= | |startup=6 | ||
|active=2 | |active=2 | ||
|recovery=N/A | |recovery=N/A | ||
| Line 500: | Line 504: | ||
|version=Speed | |version=Speed | ||
|damage=11/0 | |damage=11/0 | ||
|startup= | |startup=6 | ||
|active=2 | |active=2 | ||
|recovery=N/A | |recovery=N/A | ||
| Line 521: | Line 525: | ||
|version=Power | |version=Power | ||
|damage=26/3 | |damage=26/3 | ||
|startup= | |startup=8 | ||
|active=4 | |active=4 | ||
|recovery=N/A | |recovery=N/A | ||
| Line 535: | Line 539: | ||
|version=Speed | |version=Speed | ||
|damage=11/0 | |damage=11/0 | ||
|startup= | |startup=8 | ||
|active=4 | |active=4 | ||
|recovery=N/A | |recovery=N/A | ||
| Line 556: | Line 560: | ||
|version=Power | |version=Power | ||
|damage=13/1 | |damage=13/1 | ||
|startup= | |startup=4 | ||
|active=2 | |active=2 | ||
|recovery= N/A | |recovery= N/A | ||
| Line 570: | Line 574: | ||
|version=Speed | |version=Speed | ||
|damage=11/0 | |damage=11/0 | ||
|startup= | |startup=4 | ||
|active=2 | |active=2 | ||
|recovery=N/A | |recovery=N/A | ||
| Line 579: | Line 583: | ||
|cancel= o/o | |cancel= o/o | ||
|tech= Air | |tech= Air | ||
|description=A fast jump in and best crossup option. A very useful air-to-ground after a hop or can be used as an instant overhead against big bodies by canceling into j.236 A. In any mode, you can use this move partway into a hop in order to leave yourself at advantage and extend pressure, making it a very valuable tool when attempting to go on the offensive. Due to the very few active frames, this move can be very convincingly whiffed against an opponent for an empty hop 41236C. Be warned that any use of this move which would be an air-tight blockstring leaves you unsafe (even on hit unless canceled into j.236A), so don't get caught relying on this move too heavily. If landed as an air-to-air, it can be canceled into j.236B in order to disengage from the opponent and reliably cover ground techs. | |description=A fast jump in and best crossup option. A very useful air-to-ground after a hop or can be used as an instant overhead against big bodies by canceling into j.236 A. In any mode, you can use this move partway into a hop in order to leave yourself at advantage and extend pressure, making it a very valuable tool when attempting to go on the offensive. Due to the very few active frames, this move can be very convincingly whiffed against an opponent for an empty hop 41236C. Be warned that any use of this move which would be an air-tight blockstring leaves you unsafe (even on hit unless canceled into j.236A), so don't get caught relying on this move too heavily. If landed as an air-to-air, it can be canceled into j.236B in order to disengage from the opponent and reliably cover ground techs. This can be risky though. Depending on your opponent it’s possible for them to punish your landing recovery from the air fireball | ||
}} | }} | ||
}} | }} | ||
| Line 593: | Line 597: | ||
|version=Power | |version=Power | ||
|damage=26/3 | |damage=26/3 | ||
|startup= | |startup=10 | ||
|active=4 | |active=4 | ||
|recovery=28 | |recovery=28 | ||
| Line 607: | Line 611: | ||
|version=Speed | |version=Speed | ||
|damage=11/0 | |damage=11/0 | ||
|startup= | |startup=10 | ||
|active=4 | |active=4 | ||
|recovery=28 | |recovery=28 | ||
| Line 616: | Line 620: | ||
|cancel= o/o | |cancel= o/o | ||
|tech= Air | |tech= Air | ||
|description=A dashing normal with an incredibly large disjoint, and can combo into 214A or 236236B from the majority of its range. Safe on block if spaced correctly, and can be a massively useful tool to scare opponents out of throwing pokes out haphazardly thanks to its massive base damage. If the opponent begins respecting this move's priority too much, it's not difficult to run in grab or even 41236C. | |description=A dashing normal with an incredibly large disjoint, and can combo into 214A or 236236B from the majority of its range. Safe on block if spaced correctly, and can be a massively useful tool to scare opponents out of throwing pokes out haphazardly thanks to its massive base damage. If the opponent begins respecting this move's priority too much, it's not difficult to run in grab or even 41236C. Against crouching opponents in a corner (and a standing Okina) this can combo to 214B if you hit it deep enough. | ||
}} | }} | ||
}} | }} | ||
| Line 628: | Line 632: | ||
|version=Power | |version=Power | ||
|damage=26/3 | |damage=26/3 | ||
|startup= | |startup=10 | ||
|active=2 | |active=2 | ||
|recovery=30 | |recovery=30 | ||
| Line 642: | Line 646: | ||
|version=Speed | |version=Speed | ||
|damage=19/0 | |damage=19/0 | ||
|startup= | |startup=10 | ||
|active=2 | |active=2 | ||
|recovery=30 | |recovery=30 | ||
| Line 664: | Line 668: | ||
{{AttackData-LB2 | {{AttackData-LB2 | ||
|damage=8/0 | |damage=8/0 | ||
|startup= | |startup=8 | ||
|active=2 | |active=2 | ||
|recovery=20 | |recovery=20 | ||
| Line 685: | Line 689: | ||
{{AttackData-LB2 | {{AttackData-LB2 | ||
|damage=16/0 | |damage=16/0 | ||
|startup= | |startup=10 | ||
|active=3 | |active=3 | ||
|recovery=17 | |recovery=17 | ||
| Line 705: | Line 709: | ||
{{AttackData-LB2 | {{AttackData-LB2 | ||
|damage=28/0 | |damage=28/0 | ||
|startup= | |startup=10 | ||
|active=2 | |active=2 | ||
|recovery=36 | |recovery=36 | ||
| Line 802: | Line 806: | ||
|version=Power | |version=Power | ||
|damage=6+17/1+2 | |damage=6+17/1+2 | ||
|startup= | |startup=6 | ||
|active=2-2 | |active=2-2 | ||
|recovery=38 | |recovery=38 | ||
| Line 816: | Line 820: | ||
|version=Speed | |version=Speed | ||
|damage=4+16/1+2 | |damage=4+16/1+2 | ||
|startup= | |startup=6 | ||
|active=2-2 | |active=2-2 | ||
|recovery=35 | |recovery=35 | ||
| Line 843: | Line 847: | ||
|version=Power | |version=Power | ||
|damage=6+10+24(+15)/1+1+3 | |damage=6+10+24(+15)/1+1+3 | ||
|startup= | |startup=4(8) | ||
|active=2-2-2(-4) | |active=2-2-2(-4) | ||
|recovery=67 | |recovery=67 | ||
| Line 857: | Line 861: | ||
|version=Speed | |version=Speed | ||
|damage=7+9+16(+9)/1+1+2 | |damage=7+9+16(+9)/1+1+2 | ||
|startup= | |startup=4(8) | ||
|active=2-4-[1]-2(-4) | |active=2-4-[1]-2(-4) | ||
|recovery=54 | |recovery=54 | ||
| Line 866: | Line 870: | ||
|cancel= x/x | |cancel= x/x | ||
|tech= Ground | |tech= Ground | ||
|description=A high-flying DP which can function as a committal anti-air. Has a unique follow up on hit or block performed with 623B. Useful as a combo ender thanks to its high meterless damage, fast startup, and causing a soft knockdown afterwords. Notably, the first part of the move is a multihit, and if the second hit uncombos the opponent is able to ground tech and punish you on hit. Amusingly, this is Kaede's fastest strike from standing. There is a 1f gap between the second and third hits in speed/EX, but power is active for the full duration between both hits. | |description=A high-flying DP which can function as a committal anti-air. Has a unique follow up on hit or block performed with 623B. Useful as a combo ender thanks to its high meterless damage, fast startup, and causing a soft knockdown afterwords. Notably, the first part of the move is a multihit, and if the second hit uncombos the opponent is able to ground tech and punish you on hit. Amusingly, this is Kaede's fastest strike from standing. There is a 1f gap between the second and third hits in speed/EX, but power is active for the full duration between both hits. The grounded initial hit (the elbow) is air unblockable. | ||
}} | }} | ||
}} | }} | ||
| Line 886: | Line 890: | ||
|version=Power | |version=Power | ||
|damage=13+13+32/1+1+4 | |damage=13+13+32/1+1+4 | ||
|startup= | |startup=19 | ||
|active=25-2-2-2 | |active=25-2-2-2 | ||
|recovery=41 | |recovery=41 | ||
| Line 900: | Line 904: | ||
|version=Speed | |version=Speed | ||
|damage=9+9+13/1+1+2 | |damage=9+9+13/1+1+2 | ||
|startup= | |startup=19 | ||
|active=25-2-2-2 | |active=25-2-2-2 | ||
|recovery=41 | |recovery=41 | ||
| Line 927: | Line 931: | ||
|version=Power | |version=Power | ||
|damage=15+19+35/1+2+4 | |damage=15+19+35/1+2+4 | ||
|startup= | |startup=25 | ||
|active=31-2-2-2 | |active=31-2-2-2 | ||
|recovery=38 | |recovery=38 | ||
| Line 941: | Line 945: | ||
|version=Speed | |version=Speed | ||
|damage=11+14+28/1+1+3 | |damage=11+14+28/1+1+3 | ||
|startup= | |startup=25 | ||
|active=31-2-2-2 | |active=31-2-2-2 | ||
|recovery=38 | |recovery=38 | ||
| Line 950: | Line 954: | ||
|cancel= x/x | |cancel= x/x | ||
|tech= Air | |tech= Air | ||
|description=A slower version of qcb A that ends in an overhead, this is however irrelevant as the only option it's remotely ambiguous to hits mid. Notably you gain enough hit advantage after the launch to OTG from midscreen. This is generally seen as the inferior version of Kaede's tatsu due to being unable to be combo'd into normally | |description=A slower version of qcb A that ends in an overhead, this is however irrelevant as the only option it's remotely ambiguous to hits mid. Notably you gain enough hit advantage after the launch to OTG from midscreen. This is generally seen as the inferior version of Kaede's tatsu due to being unable to be combo'd into normally and even worse in neutral due to the opponent gaining additional options for how they wish to punish you on block due to Kaede jumping at the end and there being a wider gap between the individual hits. | ||
*It can combo from a dashing B attack vs a crouching cornered opponent (and standing Okina) if the B hits as close as possible. Also possible to combo from 5B if 5B’s 2nd hitbox hits an opponent from behind. | |||
}} | }} | ||
}} | }} | ||
| Line 1,070: | Line 1,075: | ||
|version=Power | |version=Power | ||
|damage= | |damage= | ||
|startup= | |startup=1 | ||
|active=N/A | |active=N/A | ||
|recovery= | |recovery= | ||
| Line 1,084: | Line 1,089: | ||
|version=Speed | |version=Speed | ||
|damage= | |damage= | ||
|startup= | |startup=1 | ||
|active=N/A | |active=N/A | ||
|recovery= | |recovery= | ||
| Line 1,106: | Line 1,111: | ||
|version=Power | |version=Power | ||
|damage=14 | |damage=14 | ||
|startup= | |startup=1 | ||
|active=N/A | |active=N/A | ||
|recovery=34 | |recovery=34 | ||
| Line 1,120: | Line 1,125: | ||
|version=Speed | |version=Speed | ||
|damage=13 | |damage=13 | ||
|startup= | |startup=1 | ||
|active=N/A | |active=N/A | ||
|recovery=34 | |recovery=34 | ||
| Line 1,166: | Line 1,171: | ||
|cancel= x/x | |cancel= x/x | ||
|tech= Ground | |tech= Ground | ||
|description=A very high priority projectile which leads to very high damage. This super does about what you'd expect, with the most noteworthy thing being that it's air blockable (however, it's still very advantageous upon the opponent doing so). Punishable on block, but usually not with a full combo unless the opponent did so at close range, as such it becomes a very useful neutral tool to check the opponent with while in desperation. If the opponent trades with this move, the projectile will still play through the entire animation, allowing for some very flashy juggles off of it. Notably does more damage than 236236AB if all hits land, so midscreen it's ideal for command grab conversions. | |description=A very high priority projectile which leads to very high damage. This super does about what you'd expect, with the most noteworthy thing being that it's air blockable (however, it's still very advantageous upon the opponent doing so). Punishable on block, but usually not with a full combo unless the opponent did so at close range, as such it becomes a very useful neutral tool to check the opponent with while in desperation. If the opponent trades with this move, the projectile will still play through the entire animation, allowing for some very flashy juggles off of it. Notably does more damage than 236236AB if all hits land, so midscreen it's ideal for command grab conversions. You can delay the dm by holding A+B | ||
}} | }} | ||
}} | }} | ||
| Line 1,179: | Line 1,184: | ||
|version=Power | |version=Power | ||
|damage=90/11 | |damage=90/11 | ||
|startup= | |startup=23-63 | ||
|active=2 | |active=2 | ||
|recovery=50 | |recovery=50 | ||
| Line 1,193: | Line 1,198: | ||
|version=Speed | |version=Speed | ||
|damage=75/9 | |damage=75/9 | ||
|startup= | |startup=31-71 | ||
|active=2 | |active=2 | ||
|recovery=50 | |recovery=50 | ||
| Line 1,202: | Line 1,207: | ||
|cancel= x/x | |cancel= x/x | ||
|tech= Ground | |tech= Ground | ||
|description=A massive slash forward with a deceptively short hitbox (virtually no anti-air presence, this ain't captain sword), and a noticeable amount of hurtbox extension. In power mode it's a great confirm off of 214A or 6C, and can also be used as a committal read against fireballs. Due to being a single hit, you can also use this move to deal a massive burst of damage to armored opponents without fear of counter-attack if it will kill (which is particularly useful in the Juzoh matchup, where he would normally run through your projectile super). In speed/EX this move becomes significantly slower, and as such is only really used to combo off a fandango in the corner when in desperation. | |description=A massive slash forward with a deceptively short hitbox (virtually no anti-air presence, this ain't captain sword), and a noticeable amount of hurtbox extension. In power mode it's a great confirm off of 214A or 6C, and can also be used as a committal read against fireballs. Due to being a single hit, you can also use this move to deal a massive burst of damage to armored opponents without fear of counter-attack if it will kill (which is particularly useful in the Juzoh matchup, where he would normally run through your projectile super). In speed/EX this move becomes significantly slower, and as such is only really used to combo off a fandango in the corner when in desperation. Can be delayed by holding A+B, and doing so is needed for some combos. | ||
}} | }} | ||
}} | }} | ||
| Line 1,236: | Line 1,241: | ||
{{AttackData-LB2 | {{AttackData-LB2 | ||
|damage=141/1 | |damage=141/1 | ||
|startup= | |startup=16-56 | ||
|active=10 | |active=10 | ||
|recovery=16 | |recovery=16 | ||
| Line 1,247: | Line 1,252: | ||
|description=A short range, cinematic super. Unsafe on block and difficult to confirm due to pushback, as well as having relatively average base damage compared to other SDMs. But this super scales incredibly well, and can often end up being the optimal conversion of most starters regardless. Combos from anything cancelable in range, notably 5A at almost its max range. | |description=A short range, cinematic super. Unsafe on block and difficult to confirm due to pushback, as well as having relatively average base damage compared to other SDMs. But this super scales incredibly well, and can often end up being the optimal conversion of most starters regardless. Combos from anything cancelable in range, notably 5A at almost its max range. | ||
*To combo this from 5A input it as 236AB/236AC ~236B. Using 236AB or AC prevents a special from coming out so it gives you 5A 236236B smoothly. It’s not impossible to connect from 5A without buffering but it is very difficult. | *To combo this from 5A input it as 236AB/236AC ~236B. Using 236AB or AC prevents a special from coming out so it gives you 5A 236236B smoothly. It’s not impossible to connect from 5A without buffering but it is very difficult. | ||
* Your opponent can ground tech after this connects, making it -47. If your opponent is in speed/ex and has full meter they can ground tech and fandango, forcing you to chose between high and low block. Deflecting the fandango is not possible here. Kaede is technically invincible during this time, but when his hurtboxes reappear he can only block or start a jump. Every character can guarantee a throw here at the very least. Due to this it may be best to only use this when you are certain it will take the round. | * Your opponent can ground tech after this connects, making it -47. If your opponent is in speed/ex and has full meter they can ground tech and fandango, forcing you to chose between high and low block. Deflecting the fandango is not possible here. Kaede is technically invincible during this time, but when his hurtboxes reappear he can only block or start a jump. Every character can guarantee a throw here at the very least. Juzoh, Mukuro, Kaede (with meter or desperation), Hibiki and Zantetsu (with sdm on deck) can kill you outright as there is no way for Kaede to escape. Due to this it may be best to only use this when you are certain it will take the round, or if your opponent doesn’t know this. | ||
*2323B is also accepted by the game as an input for this sdm. | *2323B is also accepted by the game as an input for this sdm. | ||
}} | }} | ||
| Line 1,256: | Line 1,261: | ||
* 4A(x3), 5A, 623B(x2) | * 4A(x3), 5A, 623B(x2) | ||
* 41236C, j.CD | * 41236C, j.CD | ||
* 41236C, j.B, j.CD | * 41236C, j.B, j.CD in or near a corner | ||
: Optimized version of the combo above. Land after j.B and then jump into the opponent quickly to throw | : Optimized version of the combo above. Land after j.B and then jump into the opponent quickly to throw | ||
* Dash A/B, | * Dash A/B, 236x/214A/623Bx2 | ||
* j.B, 5B, 623B(x2) | * j.B, 5B, 623B(x2) | ||
* 41236C, 623B(x2) | * 41236C, 623B(x2) | ||
| Line 1,290: | Line 1,295: | ||
* Dash A/B, 236236B | * Dash A/B, 236236B | ||
* j.B, 5B, 236236B | * j.B, 5B, 236236B | ||
* 5B 214B (2 hits) 236236AB or 2146AB. This works if you hit with 5B’s 2nd hitbox from behind a grounded opponent, do 214B in the direction kaede is facing. You can aim for this after an anti air deflect | * 5B 214B (2 hits) 236236AB or 2146AB. This works if you hit with 5B’s 2nd hitbox from behind a grounded opponent, do 214B in the direction kaede is facing. You can aim for this after an anti air deflect and guard cancel by running under the opponent and hitting B, or on an opponents wake up. It’s not very practical but it is possible. You need desperation status to connect a dm here after a guard cancel | ||
*Dashing B 214B (2 hits) 236236AB. Only works on crouching opponents in a corner and the dashing attack must hit as close as possible. Works on standing Okina in a corner as well. | |||
===Speed and EX Mode=== | ===Speed and EX Mode=== | ||
| Line 1,296: | Line 1,302: | ||
* j.B, 4A 5A 5A 5B 6C, 3B | * j.B, 4A 5A 5A 5B 6C, 3B | ||
* j.B, 5A 5B, 5A 5A 2B 6B | * j.B, 5A 5B, 5A 5A 2B 6B | ||
* 5A 2A 5B 214A | |||
* Dash A/B 2B 236B | * Dash A/B 2B 236B | ||
* Dash A/B 5B, 214A | * Dash A/B 5B, 214A | ||
* Dash A/B 5B BC, 623B(x2) | * Dash A/B 5B BC, 623B(x2) corner | ||
* j.B, 4A 5A 5A 5B, 236B | * j.B, 4A 5A 5A 5B, 236B | ||
* 5A 5B 2C 623Bx2 | * 5A 5B 2C 623Bx2 | ||
* 5A 5B 5A 5B 6B/236B bnb | * 5A 5B 5A 5B 6B/236B bnb | ||
* 5A 5B 5A 5B 5A 6B | |||
* 5A 5B 5A 5B 5A 6C dash otg 3B/5C | |||
* 4A 5A 5B 5A 5A 2B 6B. The first 5A is a link from 4A. Ending with 2B 236B gives the same damage as 6B. Optimized speed/ex bnb for damage | * 4A 5A 5B 5A 5A 2B 6B. The first 5A is a link from 4A. Ending with 2B 236B gives the same damage as 6B. Optimized speed/ex bnb for damage | ||
* 5A 5B 5A 5B BC 623Bx2 corner | * 5A 5B 5A 5B BC 623Bx2 corner | ||
* jB micro-dash 4A 5A 5A 2B BC 623A 623B 3B/5C otg. Corner. If only the 2nd hit of 623A connects you can juggle after with 623B. Against big bodies you can connect 623Bx2. Other routes work for this, but this is a stable one. | * jB micro-dash 4A 5A 5A 2B BC 623A 623B 3B/5C otg. Corner. If only the 2nd hit of 623A connects you can juggle after with 623B. Against big bodies you can connect 623Bx2. Other routes work for this, but this is a stable one. Vs. non big bodies 623Ax2 is more consistent. | ||
* 41236C 623Bx2, 623Bx2 9CD or otg 3B/5C. Mid screen. first 623B needs to hit the opponent as high as possible. | * 41236C 623Bx2, 623Bx2 9CD or otg 3B/5C. Mid screen. first 623B needs to hit the opponent as high as possible. | ||
* 41236C, 22A/B, A + B + C + A + B + C + C + B + 236A Kaede's best route both in and out of desperation. | * 41236C, 22A/B, A + B + C + A + B + C + C + B + 236A Kaede's best route both in and out of desperation. | ||

Serving as the "shoto" of the roster, Kaede is a fairly well-rounded character with minimal execution barriers. Primarily aiming to fight at mid to close range and built to bait deflects. He's easily the best in Power mode. However, his Speed mode does have some unique advantages.
| Strengths | Weaknesses |
|---|---|
|
|
| Strengths | Weaknesses |
|---|---|
|
|
| Strengths | Weaknesses |
|---|---|
|
|
For the majority of matchups, you'll be attempting to poke out the opponent at mid range until you find a chance to get a hop, at which point you can begin baiting deflects and fishing for his incredibly rewarding command grab. Although his mixups are fairly linear and often reactable, Kaede can steal the opponent's turn surprisingly easily even in power mode. This allows him to go on the offensive while still maintaining access to high damage pokes and whiff punishes. Although his long range presence is not particularly strong, he has access to both a fireball and some strong (and frankly underrated) options from dashing in. Put this in tandem with the unique properties of his air-fireball, and Kaede can effectively threaten the opponent from any range. In speed mode, Kaede can bank a lot harder on his pressure, gaining access to a pair of fast overheads and becoming even better at baiting deflects. This makes his command grab all the more threatening, especially when you consider that in speed he can confirm fandangos off of it. However, the majority of Kaede's confirms become weaker in speed, and he generally trades less favorably with most normals (a huge weakness given that Kaede has significant hurtbox extension on his more commital pokes). In either mode, Kaede's disadvantage state is disproportionately strong. This is because he has access to a high-priority jab, standing A reaches relatively far compared to most 4f jabs, and during tech chase situations he has access to two different air fireballs as well as a fast high priority jumping normal. This allows him to viably air tech against the majority of the roster, as he will often force a favorable trade and get the opponent off of him.
| 5A |
| ||||||||||||||||||||||||||||||||||||||||||||
|---|---|---|---|---|---|---|---|---|---|---|---|---|---|---|---|---|---|---|---|---|---|---|---|---|---|---|---|---|---|---|---|---|---|---|---|---|---|---|---|---|---|---|---|---|---|
| 4A |
| ||||||||||||||||||||||||||||||||||||||||||||
|---|---|---|---|---|---|---|---|---|---|---|---|---|---|---|---|---|---|---|---|---|---|---|---|---|---|---|---|---|---|---|---|---|---|---|---|---|---|---|---|---|---|---|---|---|---|
| 5B |
| ||||||||||||||||||||||||||||||||||||||||||||
|---|---|---|---|---|---|---|---|---|---|---|---|---|---|---|---|---|---|---|---|---|---|---|---|---|---|---|---|---|---|---|---|---|---|---|---|---|---|---|---|---|---|---|---|---|---|
| 6B |
| ||||||||||||||||||||||||||||||||||||||||||||
|---|---|---|---|---|---|---|---|---|---|---|---|---|---|---|---|---|---|---|---|---|---|---|---|---|---|---|---|---|---|---|---|---|---|---|---|---|---|---|---|---|---|---|---|---|---|
| 5C |
| ||||||||||||||||||||||||||||||||||||||||||||
|---|---|---|---|---|---|---|---|---|---|---|---|---|---|---|---|---|---|---|---|---|---|---|---|---|---|---|---|---|---|---|---|---|---|---|---|---|---|---|---|---|---|---|---|---|---|
| 6C |
| ||||||||||||||||||||||||||||||||||||||||||||
|---|---|---|---|---|---|---|---|---|---|---|---|---|---|---|---|---|---|---|---|---|---|---|---|---|---|---|---|---|---|---|---|---|---|---|---|---|---|---|---|---|---|---|---|---|---|
| BC(Power) |
| ||||||||||||||||||||||||||||||
|---|---|---|---|---|---|---|---|---|---|---|---|---|---|---|---|---|---|---|---|---|---|---|---|---|---|---|---|---|---|---|---|
| BC(Speed/EX) |
| ||||||||||||||||||||||||||||||
|---|---|---|---|---|---|---|---|---|---|---|---|---|---|---|---|---|---|---|---|---|---|---|---|---|---|---|---|---|---|---|---|
| 3B |
| ||||||||||||||||||||||||||||||||||||||||||||
|---|---|---|---|---|---|---|---|---|---|---|---|---|---|---|---|---|---|---|---|---|---|---|---|---|---|---|---|---|---|---|---|---|---|---|---|---|---|---|---|---|---|---|---|---|---|
| 2A |
| ||||||||||||||||||||||||||||||||||||||||||||
|---|---|---|---|---|---|---|---|---|---|---|---|---|---|---|---|---|---|---|---|---|---|---|---|---|---|---|---|---|---|---|---|---|---|---|---|---|---|---|---|---|---|---|---|---|---|
| 2B |
| ||||||||||||||||||||||||||||||||||||||||||||
|---|---|---|---|---|---|---|---|---|---|---|---|---|---|---|---|---|---|---|---|---|---|---|---|---|---|---|---|---|---|---|---|---|---|---|---|---|---|---|---|---|---|---|---|---|---|
| 2C |
| ||||||||||||||||||||||||||||||||||||||||||||
|---|---|---|---|---|---|---|---|---|---|---|---|---|---|---|---|---|---|---|---|---|---|---|---|---|---|---|---|---|---|---|---|---|---|---|---|---|---|---|---|---|---|---|---|---|---|
| 3C |
| ||||||||||||||||||||||||||||||||||||||||||||
|---|---|---|---|---|---|---|---|---|---|---|---|---|---|---|---|---|---|---|---|---|---|---|---|---|---|---|---|---|---|---|---|---|---|---|---|---|---|---|---|---|---|---|---|---|---|
| j.A |
| ||||||||||||||||||||||||||||||||||||||||||||
|---|---|---|---|---|---|---|---|---|---|---|---|---|---|---|---|---|---|---|---|---|---|---|---|---|---|---|---|---|---|---|---|---|---|---|---|---|---|---|---|---|---|---|---|---|---|
| j.B |
| ||||||||||||||||||||||||||||||||||||||||||||
|---|---|---|---|---|---|---|---|---|---|---|---|---|---|---|---|---|---|---|---|---|---|---|---|---|---|---|---|---|---|---|---|---|---|---|---|---|---|---|---|---|---|---|---|---|---|
| j.C |
| ||||||||||||||||||||||||||||||||||||||||||||
|---|---|---|---|---|---|---|---|---|---|---|---|---|---|---|---|---|---|---|---|---|---|---|---|---|---|---|---|---|---|---|---|---|---|---|---|---|---|---|---|---|---|---|---|---|---|
| Dashing High |
| ||||||||||||||||||||||||||||||||||||||||||||
|---|---|---|---|---|---|---|---|---|---|---|---|---|---|---|---|---|---|---|---|---|---|---|---|---|---|---|---|---|---|---|---|---|---|---|---|---|---|---|---|---|---|---|---|---|---|
| Dashing Low |
| ||||||||||||||||||||||||||||||||||||||||||||
|---|---|---|---|---|---|---|---|---|---|---|---|---|---|---|---|---|---|---|---|---|---|---|---|---|---|---|---|---|---|---|---|---|---|---|---|---|---|---|---|---|---|---|---|---|---|
| 5A>A |
| ||||||||||||||||||||||||||||||
|---|---|---|---|---|---|---|---|---|---|---|---|---|---|---|---|---|---|---|---|---|---|---|---|---|---|---|---|---|---|---|---|
| 5A>B |
| ||||||||||||||||||||||||||||||
|---|---|---|---|---|---|---|---|---|---|---|---|---|---|---|---|---|---|---|---|---|---|---|---|---|---|---|---|---|---|---|---|
| 5A>B>C |
| ||||||||||||||||||||||||||||||
|---|---|---|---|---|---|---|---|---|---|---|---|---|---|---|---|---|---|---|---|---|---|---|---|---|---|---|---|---|---|---|---|
Morning Star Squall - 236A/B
236B
 |
| ||||||||||||||||||||||||||||||||||||||||||||
|---|---|---|---|---|---|---|---|---|---|---|---|---|---|---|---|---|---|---|---|---|---|---|---|---|---|---|---|---|---|---|---|---|---|---|---|---|---|---|---|---|---|---|---|---|---|
Morning Star Wind Fang - 623A/B
| 623A |
| ||||||||||||||||||||||||||||||||||||||||||||
|---|---|---|---|---|---|---|---|---|---|---|---|---|---|---|---|---|---|---|---|---|---|---|---|---|---|---|---|---|---|---|---|---|---|---|---|---|---|---|---|---|---|---|---|---|---|
| 623B |
| ||||||||||||||||||||||||||||||||||||||||||||
|---|---|---|---|---|---|---|---|---|---|---|---|---|---|---|---|---|---|---|---|---|---|---|---|---|---|---|---|---|---|---|---|---|---|---|---|---|---|---|---|---|---|---|---|---|---|
Morning Star Fillet Flash = 214A/B
| 214A |
| ||||||||||||||||||||||||||||||||||||||||||||
|---|---|---|---|---|---|---|---|---|---|---|---|---|---|---|---|---|---|---|---|---|---|---|---|---|---|---|---|---|---|---|---|---|---|---|---|---|---|---|---|---|---|---|---|---|---|
| 214B |
| ||||||||||||||||||||||||||||||||||||||||||||
|---|---|---|---|---|---|---|---|---|---|---|---|---|---|---|---|---|---|---|---|---|---|---|---|---|---|---|---|---|---|---|---|---|---|---|---|---|---|---|---|---|---|---|---|---|---|
Shinmei Oite - 236A/B (in air)
j.236A
 |
| ||||||||||||||||||||||||||||||||||||||||||||
|---|---|---|---|---|---|---|---|---|---|---|---|---|---|---|---|---|---|---|---|---|---|---|---|---|---|---|---|---|---|---|---|---|---|---|---|---|---|---|---|---|---|---|---|---|---|
j.236B
 |
| ||||||||||||||||||||||||||||||||||||||||||||
|---|---|---|---|---|---|---|---|---|---|---|---|---|---|---|---|---|---|---|---|---|---|---|---|---|---|---|---|---|---|---|---|---|---|---|---|---|---|---|---|---|---|---|---|---|---|
East Wind Wallop - 214C
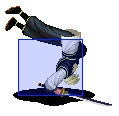
214C
 |
| ||||||||||||||||||||||||||||||||||||||||||||
|---|---|---|---|---|---|---|---|---|---|---|---|---|---|---|---|---|---|---|---|---|---|---|---|---|---|---|---|---|---|---|---|---|---|---|---|---|---|---|---|---|---|---|---|---|---|
Ittou Raitei - 7/8/9CD (in air)
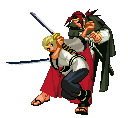
j.CD
 |
| ||||||||||||||||||||||||||||||||||||||||||||
|---|---|---|---|---|---|---|---|---|---|---|---|---|---|---|---|---|---|---|---|---|---|---|---|---|---|---|---|---|---|---|---|---|---|---|---|---|---|---|---|---|---|---|---|---|---|
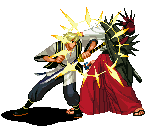
Morning Star Storm Blast - 41236C (in close)
41236C
 |
| ||||||||||||||||||||||||||||||||||||||||||||
|---|---|---|---|---|---|---|---|---|---|---|---|---|---|---|---|---|---|---|---|---|---|---|---|---|---|---|---|---|---|---|---|---|---|---|---|---|---|---|---|---|---|---|---|---|---|
Morning Star Pounce - 2146AB
2146AB
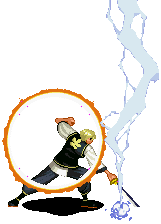 |
| ||||||||||||||||||||||||||||||||||||||||||||
|---|---|---|---|---|---|---|---|---|---|---|---|---|---|---|---|---|---|---|---|---|---|---|---|---|---|---|---|---|---|---|---|---|---|---|---|---|---|---|---|---|---|---|---|---|---|
Morning Star Revival - 236236AB
236236AB
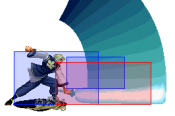 |
| ||||||||||||||||||||||||||||||||||||||||||||
|---|---|---|---|---|---|---|---|---|---|---|---|---|---|---|---|---|---|---|---|---|---|---|---|---|---|---|---|---|---|---|---|---|---|---|---|---|---|---|---|---|---|---|---|---|---|
Lively "Bad Dragon Rising" - 21416B
21416B
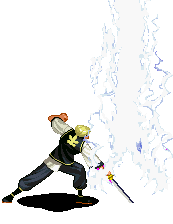 |
| ||||||||||||||||||||||||||||||
|---|---|---|---|---|---|---|---|---|---|---|---|---|---|---|---|---|---|---|---|---|---|---|---|---|---|---|---|---|---|---|---|
Morning Star Lance - 236236B
236236B
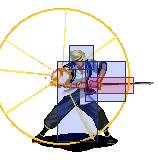 |
| ||||||||||||||||||||||||||||||
|---|---|---|---|---|---|---|---|---|---|---|---|---|---|---|---|---|---|---|---|---|---|---|---|---|---|---|---|---|---|---|---|
| The Last Blade 2 | |
| General | |
| Characters |
Akari Ichijo • Genbu no Okina • Hibiki Takane • Hyo Amano • Juzoh Kanzaki • Kaede (Original) • Kaede • Keiichiro Washizuka • Kojiroh Sanada • Kouryu • Moriya Minakata • Mukuro • Rekka Lee • Setsuna • Shigen Naoe • Shinnosuke Kagami • Yuki • Zantetsu |