-Happy New Year 2025!
The King of Fighters XIII/Kyo Kusanagi: Difference between revisions
Franck Frost (talk | contribs) |
|||
| (16 intermediate revisions by 4 users not shown) | |||
| Line 2: | Line 2: | ||
{| class="wikitable" style="float:right; margin-left:10px;" | {| class="wikitable" style="float:right; margin-left:10px;" | ||
|- | |- | ||
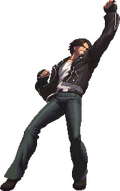
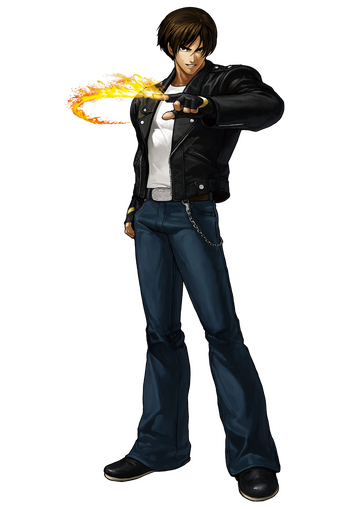
|[[File:XIII_Kyo_Profile.png|350px]] | |<section begin="image"/>[[File:XIII_Kyo_Profile.png|350px]]<section end="image"/> | ||
<center><font size="4"><b>Kyo Kusanagi</b></font></center> | <center><font size="4"><b>Kyo Kusanagi</b></font></center> | ||
|- | |- | ||
| Line 14: | Line 14: | ||
'''Throws''' | '''Throws''' | ||
Issetsu Seoi Nage: [[File:bk.gif]]/[[File:fd.gif]] + [[File:c.gif]]/[[File:d.gif]] | Issetsu Seoi Nage: Close, [[File:bk.gif]] / [[File:fd.gif]] + [[File:c.gif]] / [[File:d.gif]] | ||
'''Command Moves''' | '''Command Moves''' | ||
| Line 23: | Line 22: | ||
88 Shiki: [[File:df.gif]] + [[File:d.gif]] | 88 Shiki: [[File:df.gif]] + [[File:d.gif]] | ||
Naraku Otoshi: [[File:db.gif]]/ [[File:dn.gif]]/ [[File:df.gif]] + [[File:c.gif]] | Naraku Otoshi: In air, [[File:db.gif]] / [[File:dn.gif]] / [[File:df.gif]] + [[File:c.gif]] | ||
'''Special Moves''' | '''Special Moves''' | ||
Yamibarai: [[File:qcf.gif]] + [[File:a.gif]]/[[File:c.gif]] * | Yamibarai: [[File:qcf.gif]] + [[File:a.gif]] / [[File:c.gif]] (*) | ||
Oniyaki: [[File:dp.gif]] + [[File:a.gif]] / [[File:c.gif]] (*) | |||
Kotokskio: [[File:hcb.gif]] + [[File:b.gif]] / [[File:d.gif]] (*) | |||
Oborogurma: [[File:rdp.gif]] + [[File:b.gif]] / [[File:d.gif]] (*) | |||
75 Shiki: [[File:qcf.gif]] + [[File:b.gif]] / [[File:d.gif]] (*) | |||
'''Desperation Moves''' | '''Desperation Moves''' | ||
Orochinagi: [[File:qcb.gif]][[File:hcf.gif]] + [[File:a.gif]]/[[File:c.gif]] * | Orochinagi: [[File:qcb.gif]][[File:hcf.gif]] + [[File:a.gif]] / [[File:c.gif]] (*) (AIR OK) | ||
'''Neomax''' | '''Neomax''' | ||
Ama no Murakumo: [[File:qcf.gif]][[File:qcf.gif]] + [[File:a.gif]] | Ama no Murakumo: [[File:qcf.gif]][[File:qcf.gif]] + [[File:a.gif]][[File:c.gif]] | ||
* = EX version possible | (*) = EX version possible<br> | ||
(AIR OK) = can be done in the air | |||
:[http://www.youtube.com/watch?v=gFGRHodcFYM Kyo Kusanagi's Move List VIdeo] | :[http://www.youtube.com/watch?v=gFGRHodcFYM Kyo Kusanagi's Move List VIdeo] | ||
| Line 57: | Line 51: | ||
{| border="1" align="center" style="font-size:90%" | {| border="1" align="center" style="font-size:90%" | ||
|+ | |+ | ||
== Quick Combo Reference == | == Quick Combo Reference == | ||
| Line 66: | Line 61: | ||
Anywhere<br/> | Anywhere<br/> | ||
| | | | ||
cr.B, cr.A, df+D(1), qcf+D, rdp+D = 245 dmg<br/> | |||
j.C, cl.C, | j.C, cl.C, df+D(1), qcf+D, rdp+D = 330 dmg<br/> | ||
|- | |- | ||
| Line 75: | Line 70: | ||
Corner<br/> | Corner<br/> | ||
| | | | ||
j.C, cl.C, | j.C, cl.C, df+D(1), qcf+D, rdp+B, rdp+BD = 363 dmg<br/> | ||
cl.C, | cl.C, df+D(1), qcf+D, rdp+B, qcf+B, rdp+B, dp+AC = 364 dmg<br/> | ||
|- | |- | ||
| '''1 Stock, 1+ Drive Gauge''' | | '''1 Stock, 1+ Drive Gauge''' | ||
| Line 82: | Line 77: | ||
Corner<br/> | Corner<br/> | ||
| | | | ||
j.C, cl.C, | j.C, cl.C, df+D(1), qcf+D, rdp+B, (SC) j.qcb,hcf+P, qcf+A, hcb+K = 510 dmg<br/> | ||
|- | |- | ||
| '''2 Stock, No Drive Gauge''' | | '''2 Stock, No Drive Gauge''' | ||
| Line 88: | Line 83: | ||
Low<br/> | Low<br/> | ||
| | | | ||
cr.Bx2, st.B, qcf+B, qcb,hcf+AC = 412 dmg<br/> | |||
|- | |- | ||
|} | |} | ||
| Line 94: | Line 89: | ||
==Console Changes== | ==Console Changes== | ||
- 88 Shiki ( | - 88 Shiki (df+D) moves forward more. As a result, 5C, 3D, 236K now does the full four hits. | ||
- Kototsuki You ( | - Kototsuki You (hcb+K) has more lag on block | ||
- B version of 75 Shiki Kai ( | - B version of 75 Shiki Kai (qcf+K) can now be followed up with other attacks. On the ground you can only follow up with an uppercut, but on a mid-air hit you can do more interesting things. | ||
- Added an EX version for his mid-air Orochinagi. It does 3 hits and 300 damage. Unlike the ground version it has no invincibility but is very fast, so you can use it in combos or in air-to-air battles. | - Added an EX version for his mid-air Orochinagi. It does 3 hits and 300 damage. Unlike the ground version it has no invincibility but is very fast, so you can use it in combos or in air-to-air battles. | ||
| Line 104: | Line 99: | ||
- f.D has less lag. | - f.D has less lag. | ||
Yamamoto – ''"The air Orochinagi which he learned in KOF Sky Stage (laughs) and now the EX version on top of that has made him a master of the move. It’s now possible to do high damage combos off of a hit confirm with his | Yamamoto – ''"The air Orochinagi which he learned in KOF Sky Stage (laughs) and now the EX version on top of that has made him a master of the move. It’s now possible to do high damage combos off of a hit confirm with his df+D > qcf+D combo. Please try him out now that he has so many more attack options." | ||
'' | '' | ||
==Gameplay Overview== | ==Gameplay Overview== | ||
{{StrengthsAndWeaknesses | |||
| intro = Kyo is a very noteworthy character with many powerful options to exploit during game play. He is a versatile character who has the tools to zone the opponent and/or rush the opponent down. He can also punish jump-ins very well with his Oniyaki (dp+P), EX Oborogurma (rdp+BD) but can also carry his opponent across the screen with moves such as 75 Shiki (qcf+K) and Oborogurma (rdp+K). His HD combos involve him using most of his moveset to get the most damaging combo out possible whether it's midscreen or in the corner. His play-style tends to be favored by people looking for someone who is flashy but at the same time isn't too difficult to learn. | |||
Compared to alternate version NESTS Kyo, this version of Kyo is a bit more reliant on scoring easy hard knockdowns to set up either a safe jump option, a high/low okizeme mix-up or using his j.d+C for some annoying cross-ups. He has stronger long range options using is qcf+P for zoning, and his NeoMax which can punish opponents at full screen. His HD combos are a bit more flashier and juggle-heavy which may require a fair amount of execution to pull off consistently but they are very damaging. His mid-range game both offensively and defensively are somewhat lacking in proper tools and options compared to NESTS Kyo, but long-range and close range potential can still make him a highly valid threat. | |||
Compared to alternate version NESTS Kyo, this version of Kyo is a bit more reliant on scoring easy hard knockdowns to set up either a safe jump option, a high/low okizeme mix-up or using his j. | |||
| pros= | | pros= | ||
* Has a wide range of options with his EX attacks | * Has a wide range of options with his EX attacks | ||
| Line 141: | Line 119: | ||
* Can use meter just as quickly as he builds it | * Can use meter just as quickly as he builds it | ||
}} | }} | ||
===XIII Kyo vs NESTS Kyo Differences=== | |||
* XIII Kyo does not combo from cl.C to f+B, while NESTS Kyo does. | |||
* The XIII Kyo's cl.A whiffs completely on crouching opponents. However, NESTS Kyo's cl.A will actually hit crouching opponents. | |||
* The XIII Kyo's EX Orochinagi DM has a quicker start up than NESTS Kyo's EX Orochinagi DM. | |||
* NESTS Kyo is not capable of using Orochinagi in mid-air | |||
* XIII Kyo's Oniyaki dp+A hits twice and dp+C hits three times. NESTS Kyo's dp+A hits once and the C version hits twice with autoguard properties. | |||
* XIII Kyo's EX DP has him traveling straight up in a spiral. NESTS Kyo is stationary in mid-air during his EX DP. | |||
* XIII Kyo has more long range and zoning options than NESTS Kyo does. | |||
* XIII Kyo's qcf+K up-kicks are automatic. NESTS Kyo will require the player to input an K to finish the move. | |||
* NESTS Kyo’s dp+D is not cancellable. | |||
* NESTS Kyo's hcb+K requires him to "catch" the opponent and then cause an explosion, while the EX version works as another damaging reversal option. NESTS Kyo will still go through the same animation sequence making the move unsafe. The XIII Kyo's version of this move automatically works after the first successful hit and the animations stops with Kyo's elbow in front of him. The EX version of the move works as a 4 frame command throw. | |||
* XIII Kyo lacks any safe special move reversals while NESTS Kyo has somewhat safer reversal options. | |||
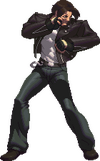
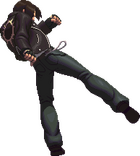
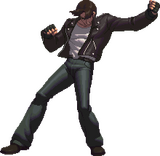
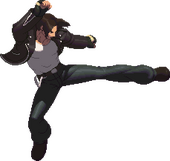
==Normals== | ==Normals== | ||
| Line 198: | Line 190: | ||
{{FrameDataCargo-KOFXIII | {{FrameDataCargo-KOFXIII | ||
|moveId=kyo_crB | |moveId=kyo_crB | ||
|display= | |display= 160px | ||
|description= | |description= | ||
Cancellable. A quick crouching kick. It's a great poke that's good for chaining into combos, has excellent range and can be chained. It is neutral on block, so you can use this kick to try to read if your opponent will mash or try to move around if they are itching to get out of the corner. | Cancellable. A quick crouching kick. It's a great poke that's good for chaining into combos, has excellent range and can be chained. It is neutral on block, so you can use this kick to try to read if your opponent will mash or try to move around if they are itching to get out of the corner. | ||
| Line 213: | Line 205: | ||
{{FrameDataCargo-KOFXIII | {{FrameDataCargo-KOFXIII | ||
|moveId=kyo_crD | |moveId=kyo_crD | ||
|display= | |display= 180px | ||
|size=17% | |||
|description=Whiff and hit cancellable. A crouch sweep attack. It knocks standing opponents down when hits and has good reach but it's rather slow. You can try to cancel it into another move if blocked or whiffed. | |description=Whiff and hit cancellable. A crouch sweep attack. It knocks standing opponents down when hits and has good reach but it's rather slow. You can try to cancel it into another move if blocked or whiffed. | ||
}} | }} | ||
| Line 220: | Line 213: | ||
==== ==== | ==== ==== | ||
{{FrameDataCargo-KOFXIII | {{FrameDataCargo-KOFXIII | ||
|moveId=kyo_jA | |moveId=kyo_jA, kyo_ha | ||
|display= 150px | |display= 150px | ||
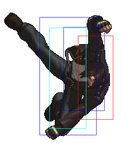
| | |description2=Cancellable. Jumping elbow attack. It comes out fast but the range is mediocre. You can use this as an air-to-air too but it might get beaten out by longer jump attacks. This attack might whiff if used incorrectly against crouching opponents. | ||
}} | }} | ||
| Line 234: | Line 227: | ||
==== ==== | ==== ==== | ||
{{FrameDataCargo-KOFXIII | {{FrameDataCargo-KOFXIII | ||
|moveId=kyo_jC | |moveId=kyo_jC, kyo_hc | ||
|display= 160px | |display= 160px | ||
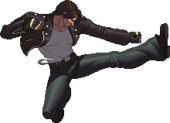
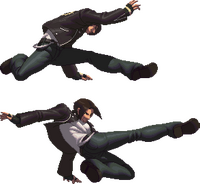
| | |description2=Jumping punch attack. A great jump-in move that does good damage. It points down at a 60 degree angle which good for jumping in with. If you use it as an air-to-air it may get beaten out by jump attacks that have a more horizontal hitbox. Defensively you can use it while you are jumping away against opponents trying to advance on you in mid-range, either by them jumping at you, or running towards you. You can also use it to jump away after blocking a j.CD if the opponent likes to hop at you afterwards to continue pressure. | ||
}} | }} | ||
==== ==== | ==== ==== | ||
{{FrameDataCargo-KOFXIII | {{FrameDataCargo-KOFXIII | ||
|moveId=kyo_jD | |moveId=kyo_jD, kyo_hd | ||
|display= 170px | |display= 170px | ||
| | |description2=A very useful air-to-air kick that should be used earlier than later because of it's range. A great move to be used defensively to keep advancing opponents out. The only risk with this kick is that it completely whiffs on crouching opponents, so be very careful using this offensively. Your opponent can just duck under it and punish you with a low attack. | ||
}} | }} | ||
| Line 256: | Line 249: | ||
==== ==== | ==== ==== | ||
{{FrameDataCargo-KOFXIII | {{FrameDataCargo-KOFXIII | ||
|moveId=kyo_jcd | |moveId=kyo_jcd, kyo_hcd | ||
|display= 130px | |display= 130px | ||
| | |description2=Cancellable. Air shoulder tackle. It comes out pretty quick and delivers a chunk of hit-stun like many other CD attacks. It has a pretty massive hit box, though the range is pretty short. After the opponent blocks this, you can either continue your pressure to go low (cr.B, etc.) or hit them with an overhead (f+B, or j.B, etc). | ||
}} | }} | ||
==Throws== | ==Throws== | ||
===Issetsu Seoi Nage=== | |||
{{FrameDataCargo-KOFXIII | {{FrameDataCargo-KOFXIII | ||
|moveId=kyo_throw | |moveId=kyo_throw | ||
| Line 269: | Line 263: | ||
==Command Normals== | ==Command Normals== | ||
===Goufu You=== | |||
{{FrameDataCargo-KOFXIII | {{FrameDataCargo-KOFXIII | ||
|moveId=kyo_rawf+B,kyo_cancelf+b | |moveId=kyo_rawf+B,kyo_cancelf+b | ||
|display= 200px | |display= 200px | ||
|size=17% | |||
|description2=* Only cancellable from a canceled normal. | |description2=* Only cancellable from a canceled normal. | ||
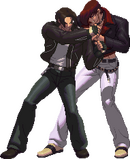
* Kyo's axe kick that hits crouching opponents but has limited cancel properties. Unlike KOF02's Kusanagi, Kyo's overhead isn't ridiculous at all in this game and is somewhat subpar in this game. On block it is around -2 frames, while he receives a fair amount of pushback from the opponent, which makes it hard to punish. | * Kyo's axe kick that hits crouching opponents but has limited cancel properties. Unlike KOF02's Kusanagi, Kyo's overhead isn't ridiculous at all in this game and is somewhat subpar in this game. On block it is around -2 frames, while he receives a fair amount of pushback from the opponent, which makes it hard to punish. | ||
| Line 279: | Line 274: | ||
}} | }} | ||
===88 Shiki=== | |||
{{FrameDataCargo-KOFXIII | {{FrameDataCargo-KOFXIII | ||
|moveId=kyo_df+D | |moveId=kyo_df+D | ||
|display= 200px | |display= 200px | ||
|size=17% | |||
|description=* Free cancel-able on 1st hit, hits low twice. | |description=* Free cancel-able on 1st hit, hits low twice. | ||
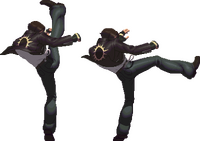
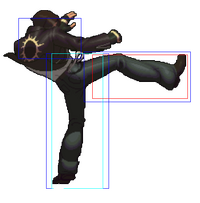
* It has good range, connects after crouch normals and his st. C fairly well. You can also free cancel this move into his special moves incase you need a quick low aiming punish if his cr.B is out of range. This move is not safe on block at all, even if performed at a end of a blockstring (ex. cr.B, cr.A, df+D). If a character has a fast special move (or DM) that can reach him while he's recovering, he can get punished rather hard. You MAY get away with it if a certain character lacks a move that can punish him or if the player doesn't realize that isn't safe, but still use this move on block sparingly. | * It has good range, connects after crouch normals and his st. C fairly well. You can also free cancel this move into his special moves incase you need a quick low aiming punish if his cr.B is out of range. This move is not safe on block at all, even if performed at a end of a blockstring (ex. cr.B, cr.A, df+D). If a character has a fast special move (or DM) that can reach him while he's recovering, he can get punished rather hard. You MAY get away with it if a certain character lacks a move that can punish him or if the player doesn't realize that isn't safe, but still use this move on block sparingly. | ||
}} | }} | ||
===Naraku Otoshi=== | |||
{{FrameDataCargo-KOFXIII | {{FrameDataCargo-KOFXIII | ||
|moveId=kyo_jd+C | |moveId=kyo_jd+C | ||
| Line 298: | Line 294: | ||
==Special Moves== | ==Special Moves== | ||
===Yamibarai=== | |||
{{FrameDataCargo-KOFXIII | {{FrameDataCargo-KOFXIII | ||
|moveId=kyo_qcf+A,kyo_qcf+C,kyo_qcf+AC | |moveId=kyo_qcf+A,kyo_qcf+C,kyo_qcf+AC | ||
|display= 200px | |display= 200px | ||
|size=17% | |||
|input=qcf+A/C/AC | |input=qcf+A/C/AC | ||
|input2=236A/C/AC | |input2=236A/C/AC | ||
| Line 309: | Line 306: | ||
}} | }} | ||
===Oniyaki=== | |||
{{FrameDataCargo-KOFXIII | {{FrameDataCargo-KOFXIII | ||
|moveId=kyo_dp+A,kyo_dp+C,kyo_dp+AC | |moveId=kyo_dp+A,kyo_dp+C,kyo_dp+AC | ||
| Line 320: | Line 317: | ||
}} | }} | ||
===Kotokskio=== | |||
{{FrameDataCargo-KOFXIII | {{FrameDataCargo-KOFXIII | ||
|moveId=kyo_hcb+B,kyo_hcb+D,kyo_hcb+BD | |moveId=kyo_hcb+B,kyo_hcb+D,kyo_hcb+BD | ||
| Line 332: | Line 329: | ||
}} | }} | ||
===Oborogurma=== | |||
{{FrameDataCargo-KOFXIII | {{FrameDataCargo-KOFXIII | ||
|moveId=kyo_rdp+B,kyo_rdp+D,kyo_rdp+BD | |moveId=kyo_rdp+B,kyo_rdp+D,kyo_rdp+BD | ||
| Line 343: | Line 340: | ||
}} | }} | ||
===75 Shiki=== | |||
{{FrameDataCargo-KOFXIII | {{FrameDataCargo-KOFXIII | ||
|moveId=kyo_qcf+B,kyo_qcf+D,kyo_qcf+BD | |moveId=kyo_qcf+B,kyo_qcf+D,kyo_qcf+BD | ||
| Line 355: | Line 352: | ||
==Super Special Moves== | ==Super Special Moves== | ||
===Orochinagi=== | |||
{{FrameDataCargo-KOFXIII | {{FrameDataCargo-KOFXIII | ||
|moveId=kyo_qcbhcf+p | |moveId=kyo_qcbhcf+p,kyo_qcbhcf+ac,kyo_j_qcbhcf+p | ||
|input=qcb,hcb+A/C | |display= 200px | ||
|input2=2141236A/C/ | |input=qcb,hcb+A/C/AC (AIR OK) | ||
|input2=2141236A/C/AC (AIR OK) | |||
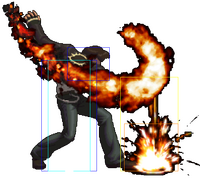
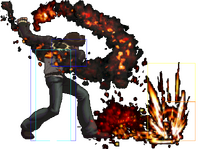
|description= Flaming wave attack. Holding either punch button, delays the attack. It does a nice amount of chip damage. You can use it as a preemptive anti-air against opponents jumping towards you, but beyond that, it's use is rather limited. Both ground and EX versions can be Max Canceled on hit. | |description= Flaming wave attack. Holding either punch button, delays the attack. It does a nice amount of chip damage. You can use it as a preemptive anti-air against opponents jumping towards you, but beyond that, it's use is rather limited. Both ground and EX versions can be Max Canceled on hit. | ||
|description2= 2 frame start-up if held briefly, causes more damage and does three hits instead of one. It's fast startup and range makes it great to use as a preemptive anti-air midscreen, or to catch opponents trying to jump out of the corner. The air version has faster startup and is very useful for extending many of Kyo’s corner combos. If you're feeling lucky, you can use this as an air-to-air, or to attempt to snuff out someones anti-air against you. Max Cancel-able on ground, on hit. | |description2= 2 frame start-up if held briefly, causes more damage and does three hits instead of one. It's fast startup and range makes it great to use as a preemptive anti-air midscreen, or to catch opponents trying to jump out of the corner. The air version has faster startup and is very useful for extending many of Kyo’s corner combos. If you're feeling lucky, you can use this as an air-to-air, or to attempt to snuff out someones anti-air against you. Max Cancel-able on ground, on hit. | ||
|description3= Air flaming wave attack. It mimics the ground version except done in the air now and pushes Kyo back slightly after activation. You will most likely be using this more in Kyo's drive cancels or HD combos. It's start up is a little slow to use as an air to air reliably. | |||
}} | }} | ||
==Neo Max Super Special Moves== | |||
===Ama no Murakumo=== | |||
{{FrameDataCargo-KOFXIII | {{FrameDataCargo-KOFXIII | ||
|moveId= | |moveId=kyo_qcfx2+ac | ||
|display= 200px | |||
|input=qcfx2+AC | |||
| | |||
|input= | |||
|input2=236236AC | |input2=236236AC | ||
|description= | |description= - | ||
}} | }} | ||
==Move Metadata== | ==Move Metadata== | ||
{| style="color:#FFFFFF; background-color:#0066CC;" border="9" cellpadding="5" cellspacing="1" | {| style="color:#FFFFFF; background-color:#0066CC;" border="9" cellpadding="5" cellspacing="1" | ||
| Line 588: | Line 571: | ||
'''Juicy Bits - Kyo ''' | '''Juicy Bits - Kyo ''' | ||
{{#ev:youtube|783zVruYCFY}} | {{#ev:youtube|783zVruYCFY}} | ||
'''Kyo Combos by GuttsCL''' | '''Kyo Combos by GuttsCL''' | ||
{{#ev:youtube|ujxTX2s9Ljc}} | {{#ev:youtube|ujxTX2s9Ljc}} | ||
'''Kyo optimized combos & safe jump set up''' | '''Kyo optimized combos & safe jump set up''' | ||
{{#ev:youtube|ZRXZKbVdWfI}} | {{#ev:youtube|ZRXZKbVdWfI}} | ||
'''Kyo Kusanagi Short Combo vid''' | |||
{{#ev:youtube|E1V-v7gCYWQ}} | |||
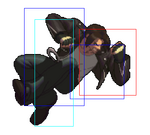
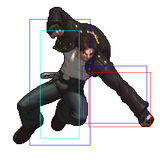
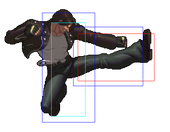
'''Kyo Hit Boxes''' | '''Kyo Hit Boxes''' | ||
Latest revision as of 13:43, 1 April 2025
|
|
Movelist
Throws
Issetsu Seoi Nage: Close, ![]() /
/ ![]() +
+ ![]() /
/ ![]()
Command Moves
Special Moves
Desperation Moves
Neomax
(*) = EX version possible
(AIR OK) = can be done in the air
| 0 Stock, No Drive Gauge |
Low |
cr.B, cr.A, df+D(1), qcf+D, rdp+D = 245 dmg |
| 1 Stock, No Drive Gauge |
Anywhere |
j.C, cl.C, df+D(1), qcf+D, rdp+B, rdp+BD = 363 dmg |
| 1 Stock, 1+ Drive Gauge |
Corner |
j.C, cl.C, df+D(1), qcf+D, rdp+B, (SC) j.qcb,hcf+P, qcf+A, hcb+K = 510 dmg |
| 2 Stock, No Drive Gauge |
Low |
cr.Bx2, st.B, qcf+B, qcb,hcf+AC = 412 dmg |
Console Changes
- 88 Shiki (df+D) moves forward more. As a result, 5C, 3D, 236K now does the full four hits.
- Kototsuki You (hcb+K) has more lag on block
- B version of 75 Shiki Kai (qcf+K) can now be followed up with other attacks. On the ground you can only follow up with an uppercut, but on a mid-air hit you can do more interesting things.
- Added an EX version for his mid-air Orochinagi. It does 3 hits and 300 damage. Unlike the ground version it has no invincibility but is very fast, so you can use it in combos or in air-to-air battles.
- f.D has less lag.
Yamamoto – "The air Orochinagi which he learned in KOF Sky Stage (laughs) and now the EX version on top of that has made him a master of the move. It’s now possible to do high damage combos off of a hit confirm with his df+D > qcf+D combo. Please try him out now that he has so many more attack options."
Gameplay Overview
|
Kyo is a very noteworthy character with many powerful options to exploit during game play. He is a versatile character who has the tools to zone the opponent and/or rush the opponent down. He can also punish jump-ins very well with his Oniyaki (dp+P), EX Oborogurma (rdp+BD) but can also carry his opponent across the screen with moves such as 75 Shiki (qcf+K) and Oborogurma (rdp+K). His HD combos involve him using most of his moveset to get the most damaging combo out possible whether it's midscreen or in the corner. His play-style tends to be favored by people looking for someone who is flashy but at the same time isn't too difficult to learn. Compared to alternate version NESTS Kyo, this version of Kyo is a bit more reliant on scoring easy hard knockdowns to set up either a safe jump option, a high/low okizeme mix-up or using his j.d+C for some annoying cross-ups. He has stronger long range options using is qcf+P for zoning, and his NeoMax which can punish opponents at full screen. His HD combos are a bit more flashier and juggle-heavy which may require a fair amount of execution to pull off consistently but they are very damaging. His mid-range game both offensively and defensively are somewhat lacking in proper tools and options compared to NESTS Kyo, but long-range and close range potential can still make him a highly valid threat. |
|
| Pros | Cons |
|
|
XIII Kyo vs NESTS Kyo Differences
- XIII Kyo does not combo from cl.C to f+B, while NESTS Kyo does.
- The XIII Kyo's cl.A whiffs completely on crouching opponents. However, NESTS Kyo's cl.A will actually hit crouching opponents.
- The XIII Kyo's EX Orochinagi DM has a quicker start up than NESTS Kyo's EX Orochinagi DM.
- NESTS Kyo is not capable of using Orochinagi in mid-air
- XIII Kyo's Oniyaki dp+A hits twice and dp+C hits three times. NESTS Kyo's dp+A hits once and the C version hits twice with autoguard properties.
- XIII Kyo's EX DP has him traveling straight up in a spiral. NESTS Kyo is stationary in mid-air during his EX DP.
- XIII Kyo has more long range and zoning options than NESTS Kyo does.
- XIII Kyo's qcf+K up-kicks are automatic. NESTS Kyo will require the player to input an K to finish the move.
- NESTS Kyo’s dp+D is not cancellable.
- NESTS Kyo's hcb+K requires him to "catch" the opponent and then cause an explosion, while the EX version works as another damaging reversal option. NESTS Kyo will still go through the same animation sequence making the move unsafe. The XIII Kyo's version of this move automatically works after the first successful hit and the animations stops with Kyo's elbow in front of him. The EX version of the move works as a 4 frame command throw.
- XIII Kyo lacks any safe special move reversals while NESTS Kyo has somewhat safer reversal options.
Normals
Far Standing Normals
| stand A
st.A
5A |
|---|
| stand B
st.B
5B |
|---|
| stand C
st.C
5C |
|---|
| stand D
st.D
5D |
|---|
Close Standing Normals
| close C
cl.C
cl.C |
|---|
Crouching Normals
| crouch A
cr.A
2A |
|---|
| crouch B
cr.B
2B |
|---|
| crouch C
cr.C
2C |
|---|
| crouch D
cr.D
2D |
|---|
Jump Normals
| jump A
j.A
j.A |
|---|
| jump B
j.B
j.B |
|---|
| jump C
j.C
j.C |
|---|
| jump D
j.D
j.D |
|---|
Blowback Normals
| stand CD
st.CD
CD |
|---|
| jump CD
j.CD
j.CD |
|---|
Throws
Issetsu Seoi Nage
| Issetsu Seoi Nage
Close, b/f+C/D
Close, 4/6C/D |
|---|
Command Normals
Goufu You
| Ge Shiki • Gofu Yo
f+B
6B |
|---|
88 Shiki
| 88 Shiki
df+D
3D |
|---|
Naraku Otoshi
| Ge Shiki • Naraku Otoshi
j.d+C
j.2C |
|---|
Special Moves
Yamibarai
| 108 Shiki • Yamibarai
qcf+A/C/AC
236A/C/AC |
|---|
Oniyaki
| 100 Shiki • Oniyaki
dp+A/C/AC
623A/C/AC |
|---|
Kotokskio
| 212 Shiki • Kototsuki Yo
hcb+B/D/BD
63214B/D/BD |
|---|
Oborogurma
| 101 Shiki • Oboroguruma
rdp+B/D/BD
421B/D/BD |
|---|
75 Shiki
| 75 Shiki • Kai
qcf+B/D/BD
236B/D/BD |
|---|
Super Special Moves
Orochinagi
| Ura 108 Shiki • Orochinagi
qcb,hcb+A/C/AC (AIR OK)
2141236A/C/AC (AIR OK) |
|---|
Neo Max Super Special Moves
Ama no Murakumo
| Ura 121 Shiki • Ama no Murakumo
qcfx2+AC
236236AC |
|---|
Move Metadata
| Move | Damage | Stun | Startup | On Guard | Remarks |
|---|---|---|---|---|---|
| cl.A | 25 | 3 | 5 | +3 | |
| cr.A | 25 | 3 | 5 | +1 | |
| st.A | 25 | 3 | 5 | +3 | |
| j.A | 45 | 3 | 6 | - | |
| h.A | 40 | 3 | 6 | - | |
| cl.B | 30 | 3 | 6 | -1 | |
| cr.B | 30 | 3 | 4 | +1 | |
| st.B | 30 | 3 | 6 | -1 | |
| j.B | 45 | 3 | 5 | - | |
| hop B | 40 | 3 | 5 | - | |
| cl.C | 70 | 7 | 3 | 0 | |
| cr.C | 70 | 7 | 5 | -8 | |
| st.C | 80 | 7 | 10 | -9 | |
| j.C | 72 | 7 | 6 | - | |
| hop C | 70 | 7 | 6 | - | |
| cl.D | 80 | 7 | 8 | -3 | |
| cr.D | 80 | 7 | 8 | -8 | |
| st.D | 80 | 7 | 8 | -3 | |
| j.D | 70 | 7 | 8 | - | |
| hop D | 68 | 7 | 8 | - | |
| st.CD | 75 | 10 | 15 | -1 | |
| j.CD | 90 | 8 | 13 | - | |
| hop CD | 80 | 8 | 10 | - | |
| Naraku Otoshi = j.2C | 50 | 12 | 8 | - | |
| Goufu You (Cancel) | 75 | 4 | - | - | |
| Goufu You (No Cancel) | 60 | 8 | 19 | -2 | |
| 88 Shiki1 = df+D | 30 | 4 | 9 | -19 | Recover for whiff of 2nd hit |
| 88 Shiki2 | 42 | 4 | - | 11 | |
| 88 Shiki(2) | 45 | 4 | - | - 11 | |
| Issetsu Seoi Nage = b/f+C/D | 100 | 0 | 1 | - | Hard knockdown |
| GCCD | 4 | 0 | 13 | -15 | 17 Frame startup vs jump atk? |
| A Yamibarai = qcf+A | 60 | 4 | 16 | -2 | Close |
| C Yamibarai = qcf+C | 60 | 4 | 15 | -5 | Close |
| A Oniyaki1 = dp+A | 55 | 5 | 4 | -30 | |
| A Oniyaki2 | 25 | 2 | - | - | |
| C Oniyaki1 = dp+C | 80 | 4 | 7 | -44 | |
| C Oniyaki2、3 | 25 | 2 | - | - | |
| Kototsuki1 = hcb+B | 30 | 0 | 14 | -8 | |
| Kototsuki2 | 135 | 0 | 14 | -8 | |
| B 75 Shiki Kai1-2 = qcf+B | 35 | 4 | 12 | -1 | |
| D 75 Shiki Kai1-2 = qcf+D | 30 | 4 | 18 | -3 | |
| B Oboroguruma = rdp+B | 40 | 6 | 10 | -11 | |
| D Oboroguruma1,2 | 40 | 4 | 13 | - | |
| D Oboroguruma3 | 70 | 12 | - | - | |
| EX Yamibarai = qcf+AC | 100 | 0 | 13 | +5 | Close |
| EX Oniyaki1 = dp+AC | 70 | 0 | 4 | - | |
| EX Oniyaki2-10 | 20 | 0 | - | - | |
| EX Kototsuki = hcb+BD | 180 | 0 | 4 | - | |
| EX 75 Shiki Kai1 = qcf+BD | 40 | 0 | 18 | - | |
| EX 75 Shiki Kai2 | 40 | 0 | - | +1 | |
| EX Oboroguruma1 = rdp+BD | 60 | 0 | 10 | - | |
| EX Oboroguruma2 | 60 | 0 | - | - | |
| EX Oboroguruma3 | 100 | 0 | - | - | |
| Orochinagi = qcb,hcf+P | 210 | 0 | 46(17) | -20 | Freeze 29. w Slight charge 40(11) |
| Air Orochinagi | 180 | 0 | 41(12) | - | Freeze 29 |
| EX Orochinagi1 = qcb,hcf+AC | 120 | 0 | 38(9) | - | Freeze 29. w Slight charge (2) |
| EX Orochinagi2,3 | 120 | 0 | - | - | |
| EX Air Orochinagi1 = air qcb,hcf+AC | 100 | 0 | 36(7) | - | Freeze 29 |
| EX Air Orochinagi2,3 | 100 | 0 | - | - | |
| Ama no Murakumo1 = qcf,qcf+AC | 45 | 0 | 47(7) | - | Freeze 40 |
| Ama no Murakumo2-10 | 42 | 0 | - | - |
Videos, Links & References
Juicy Bits - Kyo
Kyo Combos by GuttsCL
Kyo optimized combos & safe jump set up
Kyo Kusanagi Short Combo vid
Kyo Hit Boxes
Discussion Threads
Discuss at Dream Cancel

