Our Fatal Fury: City of the Wolves wiki page is ready for editing: https://dreamcancel.com/wiki/Fatal_Fury:_City_of_the_Wolves
The Last Blade 2/Hibiki Takane: Difference between revisions
mNo edit summary |
|||
| Line 65: | Line 65: | ||
|cancel=P ○/○ S ○/○ | |cancel=P ○/○ S ○/○ | ||
|tech=Air | |tech=Air | ||
|description=Hibiki does a quick poke}}}} | |description=Hibiki does a quick poke | ||
}} | |||
}} | |||
{{MoveData | {{MoveData | ||
|image=LB2_Hibiki_b+A.jpg | |image=LB2_Hibiki_b+A.jpg | ||
| Line 82: | Line 84: | ||
|cancel=P ○/○ S ○/○ | |cancel=P ○/○ S ○/○ | ||
|tech=Air | |tech=Air | ||
|description=Hibiki punches you and gets a free combo because of the outstanding framedata}}}} | |description=Hibiki punches you and gets a free combo because of the outstanding framedata | ||
}} | |||
}} | |||
{{MoveData | {{MoveData | ||
|image=LB2_Hibiki_B1.jpg | |image=LB2_Hibiki_B1.jpg | ||
| Line 153: | Line 157: | ||
|cancel=P ×/△ S ×/× | |cancel=P ×/△ S ×/× | ||
|tech=Air | |tech=Air | ||
|description=Hibiki slashes forward.<br \>The △ indicates that you can cancel it with BC}}}} | |description=Hibiki slashes forward.<br \>The △ indicates that you can cancel it with BC | ||
}} | |||
}} | |||
{{MoveData | {{MoveData | ||
|image=LB2_Hibiki_C.jpg | |image=LB2_Hibiki_C.jpg | ||
| Line 170: | Line 176: | ||
|cancel=P ○/○ S ○/○ | |cancel=P ○/○ S ○/○ | ||
|tech=None | |tech=None | ||
|description=Hibiki does a low kick.<br \>Hits OTG}}}} | |description=Hibiki does a low kick.<br \>Hits OTG | ||
}} | |||
}} | |||
{{MoveData | {{MoveData | ||
|image=LB2_Hibiki_f+C.jpg | |image=LB2_Hibiki_f+C.jpg | ||
| Line 187: | Line 195: | ||
|cancel=P ○/○ S ×/× | |cancel=P ○/○ S ×/× | ||
|tech=Air | |tech=Air | ||
|description=Hibiki hits you with the end of her scabbard.<br \>Knocks down.}}}} | |description=Hibiki hits you with the end of her scabbard.<br \>Knocks down. | ||
}} | |||
}} | |||
{{MoveData | {{MoveData | ||
| Line 205: | Line 215: | ||
|cancel=P ×/× S ×/× | |cancel=P ×/× S ×/× | ||
|tech=None | |tech=None | ||
|description=Hibiki slashes downwards.<br \>Hits OTG, Do it with df+BCD so you don't have to dash before it.}}}} | |description=Hibiki slashes downwards.<br \>Hits OTG, Do it with df+BCD so you don't have to dash before it. | ||
}} | |||
}} | |||
====Crouching==== | ====Crouching==== | ||
| Line 224: | Line 236: | ||
|cancel=P ×/○ S ○/○ | |cancel=P ×/○ S ○/○ | ||
|tech=Air | |tech=Air | ||
|description=Hibiki does a crouching poke.}}}} | |description=Hibiki does a crouching poke. | ||
}} | |||
}} | |||
{{MoveData | {{MoveData | ||
|image=LB2_Hibiki_d+B.jpg | |image=LB2_Hibiki_d+B.jpg | ||
| Line 241: | Line 255: | ||
|cancel=P ×/○ S ○/○ | |cancel=P ×/○ S ○/○ | ||
|tech=Air | |tech=Air | ||
|description=Hibiki does a crouching swing, leaving you with worse framedata on hit than on block. Just, Don't.}}}} | |description=Hibiki does a crouching swing, leaving you with worse framedata on hit than on block. Just, Don't. | ||
}} | |||
}} | |||
{{MoveData | {{MoveData | ||
|image=LB2_Hibiki_d+C.jpg | |image=LB2_Hibiki_d+C.jpg | ||
| Line 258: | Line 274: | ||
|cancel=P ○/○ S ○/○ | |cancel=P ○/○ S ○/○ | ||
|tech=Air | |tech=Air | ||
|description=Hibiki does a low kick.}}}} | |description=Hibiki does a low kick. | ||
}} | |||
}} | |||
{{MoveData | {{MoveData | ||
|image=LB2_Hibiki_df+C.jpg | |image=LB2_Hibiki_df+C.jpg | ||
| Line 275: | Line 293: | ||
|cancel=P ○/○ S ○/○ | |cancel=P ○/○ S ○/○ | ||
|tech=None | |tech=None | ||
|description=Hibiki swings her scabbard, tripping you down.}}}} | |description=Hibiki swings her scabbard, tripping you down. | ||
}} | |||
}} | |||
====Air==== | ====Air==== | ||
| Line 294: | Line 314: | ||
|cancel=P ×/× S ×/× | |cancel=P ×/× S ×/× | ||
|tech=Air | |tech=Air | ||
|description=Hibiki puts her sword forward, good hitbox.}}}} | |description=Hibiki puts her sword forward, good hitbox. | ||
}} | |||
}} | |||
{{MoveData | {{MoveData | ||
|image=LB2_Hibiki_jB.jpg | |image=LB2_Hibiki_jB.jpg | ||
| Line 311: | Line 333: | ||
|cancel=P ×/× S ×/× | |cancel=P ×/× S ×/× | ||
|tech=Air | |tech=Air | ||
|description=Your best combo starter and best air normal in general.}}}} | |description=Your best combo starter and best air normal in general. | ||
}} | |||
}} | |||
{{MoveData | {{MoveData | ||
|image=LB2_Hibiki_jC.jpg | |image=LB2_Hibiki_jC.jpg | ||
| Line 328: | Line 352: | ||
|cancel=P ×/× S ×/× | |cancel=P ×/× S ×/× | ||
|tech=Air | |tech=Air | ||
|description=Use this when memeing.}}}} | |description=Use this when memeing. | ||
}} | |||
}} | |||
===Universal Mechanics=== | ===Universal Mechanics=== | ||
| Line 415: | Line 441: | ||
|cancel= | |cancel= | ||
|tech= | |tech= | ||
|description=Forward slash that hits mid and deals good damage.<br \>Do it on round start to catch aggressive opponents, the only way they can escape is by dashing backwards, so you'll be safe.}}}} | |description=Forward slash that hits mid and deals good damage.<br \>Do it on round start to catch aggressive opponents, the only way they can escape is by dashing backwards, so you'll be safe. | ||
}} | |||
}} | |||
{{MoveData | {{MoveData | ||
|image=LB2_Hibiki_qcf+A2.jpg | |image=LB2_Hibiki_qcf+A2.jpg | ||
| Line 432: | Line 460: | ||
|cancel= | |cancel= | ||
|tech= | |tech= | ||
|description=Same as above.}}}} | |description=Same as above. | ||
}} | |||
}} | |||
{{MoveData | {{MoveData | ||
|image=LB2_Hibiki_qcf+B1.jpg | |image=LB2_Hibiki_qcf+B1.jpg | ||
| Line 449: | Line 479: | ||
|cancel= | |cancel= | ||
|tech= | |tech= | ||
|description=Low slash that hits low (wau) and deals reasonable damage.<br \>Do it on round start as well, or as combo ender.<br \>You'll only reset neutral because you can't OTG after this, you can try to make an okizeme, but it'll most likely not happen.}}}} | |description=Low slash that hits low (wau) and deals reasonable damage.<br \>Do it on round start as well, or as combo ender.<br \>You'll only reset neutral because you can't OTG after this, you can try to make an okizeme, but it'll most likely not happen. | ||
}} | |||
}} | |||
{{MoveData | {{MoveData | ||
|image=LB2_Hibiki_qcf+B2.jpg | |image=LB2_Hibiki_qcf+B2.jpg | ||
| Line 466: | Line 498: | ||
|cancel= | |cancel= | ||
|tech= | |tech= | ||
|description=Same as above.}}}} | |description=Same as above. | ||
}} | |||
}} | |||
'''Beckoning Slash''' - 623B | '''Beckoning Slash''' - 623B | ||
| Line 485: | Line 519: | ||
|cancel= | |cancel= | ||
|tech= | |tech= | ||
|description=This bad boy hits differently with the time it has been held for some weird reason.<br \>You can hold B so you can keep running, it'll deal 39 damage.<br \>If you do it right away, will do 26 damage.}}}} | |description=This bad boy hits differently with the time it has been held for some weird reason.<br \>You can hold B so you can keep running, it'll deal 39 damage.<br \>If you do it right away, will do 26 damage. | ||
}} | |||
}} | |||
{{MoveData | {{MoveData | ||
|image=LB2_Hibiki_dp+B2.jpg | |image=LB2_Hibiki_dp+B2.jpg | ||
| Line 502: | Line 538: | ||
|cancel= | |cancel= | ||
|tech= | |tech= | ||
|description=If you release early, it'll hit like this.<br \>If you're close, it'll crossup and you can dash df+B for optimized damage.}}}} | |description=If you release early, it'll hit like this.<br \>If you're close, it'll crossup and you can dash df+B for optimized damage. | ||
}} | |||
}} | |||
'''Piercing Moon Pounce''' - 623C | '''Piercing Moon Pounce''' - 623C | ||
| Line 521: | Line 559: | ||
|cancel= | |cancel= | ||
|tech= | |tech= | ||
|description=Very slow attack and usually not worth it, has some nice setups in the corner.<br \>You can hold C and it hits overhead.}}}} | |description=Very slow attack and usually not worth it, has some nice setups in the corner.<br \>You can hold C and it hits overhead. | ||
}} | |||
}} | |||
{{MoveData | {{MoveData | ||
|image=LB2_Hibiki_dp+C2.jpg | |image=LB2_Hibiki_dp+C2.jpg | ||
| Line 538: | Line 578: | ||
|cancel= | |cancel= | ||
|tech= | |tech= | ||
|description=No it is NOT unblockable.}}}} | |description=No it is NOT unblockable. | ||
}} | |||
}} | |||
'''Heavenly Being Blade''' - 41236C | '''Heavenly Being Blade''' - 41236C | ||
| Line 557: | Line 599: | ||
|cancel= | |cancel= | ||
|tech= | |tech= | ||
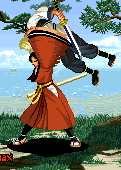
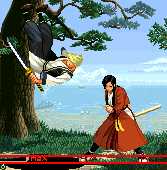
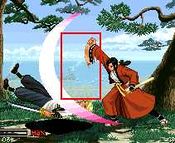
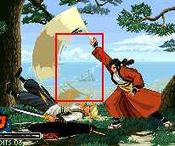
|description=Counter movement.<br \>You'll probably never use it in a real match.* Follow up with '''Nukaba Kiru Nari''' (C) to slash airborne opponent<br \>* Follow up with '''Nukazuba Kiranu Nari''' (BC) to hit opponet with scabbard}}}} | |description=Counter movement.<br \>You'll probably never use it in a real match.* Follow up with '''Nukaba Kiru Nari''' (C) to slash airborne opponent<br \>* Follow up with '''Nukazuba Kiranu Nari''' (BC) to hit opponet with scabbard | ||
}} | |||
}} | |||
{{MoveData | {{MoveData | ||
|image=LB2_Hibiki_hcf+C2.jpg | |image=LB2_Hibiki_hcf+C2.jpg | ||
| Line 574: | Line 618: | ||
|cancel= | |cancel= | ||
|tech= | |tech= | ||
|description=Same as above.}}}} | |description=Same as above. | ||
}} | |||
}} | |||
{{MoveData | {{MoveData | ||
|image=LB2_Hibiki_hcf+C3.jpg | |image=LB2_Hibiki_hcf+C3.jpg | ||
| Line 591: | Line 637: | ||
|cancel= | |cancel= | ||
|tech= | |tech= | ||
|description=Same as above.}}}} | |description=Same as above. | ||
}} | |||
}} | |||
{{MoveData | {{MoveData | ||
|image=LB2_Hibiki_hcf+CC.jpg | |image=LB2_Hibiki_hcf+CC.jpg | ||
| Line 608: | Line 656: | ||
|cancel= | |cancel= | ||
|tech= | |tech= | ||
|description=If you do, however, hit them with this button since it deals more damage.}}}} | |description=If you do, however, hit them with this button since it deals more damage. | ||
}} | |||
}} | |||
{{MoveData | {{MoveData | ||
|image=LB2_Hibiki_hcf+CBC.jpg | |image=LB2_Hibiki_hcf+CBC.jpg | ||
| Line 625: | Line 675: | ||
|cancel= | |cancel= | ||
|tech= | |tech= | ||
|description=It's her other option.<br \> You don't really have to do it.}}}} | |description=It's her other option.<br \> You don't really have to do it. | ||
}} | |||
}} | |||
'''Kami Hitoe ni te Kawasu Nari''' - AB | '''Kami Hitoe ni te Kawasu Nari''' - AB | ||
| Line 644: | Line 696: | ||
|cancel= | |cancel= | ||
|tech= | |tech= | ||
|description=This move can dodge from high attacks.<br \>Probably has potential, still unexplored.}}}} | |description=This move can dodge from high attacks.<br \>Probably has potential, still unexplored. | ||
}} | |||
}} | |||
{{MoveData | {{MoveData | ||
|image=LB2_Hibiki_AB2.jpg | |image=LB2_Hibiki_AB2.jpg | ||
| Line 661: | Line 715: | ||
|cancel= | |cancel= | ||
|tech= | |tech= | ||
|description=It is pretty good, however, there's not much reason to use it.<br \>You can dodge some fireballs but it's a high commitment.}}}} | |description=It is pretty good, however, there's not much reason to use it.<br \>You can dodge some fireballs but it's a high commitment. | ||
}} | |||
}} | |||
{{MoveData | {{MoveData | ||
|image=LB2_Hibiki_AB3.jpg | |image=LB2_Hibiki_AB3.jpg | ||
| Line 678: | Line 734: | ||
|cancel= | |cancel= | ||
|tech= | |tech= | ||
|description=Plus, you might get punished here.<br \>* Quick evasion move<br \>* Follow up with '''Ma O Tsumeru Koto Kanyou Nari''' (6C) to dash forward.<br \>* Follow up with '''Ma O Oku Koto Kanyou Nari''' (4C) to hop backwards}}}} | |description=Plus, you might get punished here.<br \>* Quick evasion move<br \>* Follow up with '''Ma O Tsumeru Koto Kanyou Nari''' (6C) to dash forward.<br \>* Follow up with '''Ma O Oku Koto Kanyou Nari''' (4C) to hop backwards | ||
}} | |||
}} | |||
{{MoveData | {{MoveData | ||
|image=LB2_Hibiki_ABf+C1.jpg | |image=LB2_Hibiki_ABf+C1.jpg | ||
| Line 695: | Line 753: | ||
|cancel= | |cancel= | ||
|tech= | |tech= | ||
|description=This looks like 623B so you can trick people, but no one will fall for it.<br \>* '''Ma O Tsumeru Koto Kanyou Nari''' can be cancelled}}}} | |description=This looks like 623B so you can trick people, but no one will fall for it.<br \>* '''Ma O Tsumeru Koto Kanyou Nari''' can be cancelled | ||
}} | |||
}} | |||
{{MoveData | {{MoveData | ||
|image=LB2_Hibiki_ABf+C2.jpg | |image=LB2_Hibiki_ABf+C2.jpg | ||
| Line 712: | Line 772: | ||
|cancel= | |cancel= | ||
|tech= | |tech= | ||
|description=Same as above}}}} | |description=Same as above | ||
}} | |||
}} | |||
{{MoveData | {{MoveData | ||
|image=LB2_Hibiki_ABf+C3.jpg | |image=LB2_Hibiki_ABf+C3.jpg | ||
| Line 729: | Line 791: | ||
|cancel= | |cancel= | ||
|tech= | |tech= | ||
|description=Same as above.}}}} | |description=Same as above. | ||
}} | |||
}} | |||
{{MoveData | {{MoveData | ||
|image=LB2_Hibiki_ABb+C1.jpg | |image=LB2_Hibiki_ABb+C1.jpg | ||
| Line 746: | Line 810: | ||
|cancel= | |cancel= | ||
|tech= | |tech= | ||
|description=Hibiki jumps backwards, may or may not dodge a ground projectile.}}}} | |description=Hibiki jumps backwards, may or may not dodge a ground projectile. | ||
}} | |||
}} | |||
{{MoveData | {{MoveData | ||
|image=LB2_Hibiki_ABb+C2.jpg | |image=LB2_Hibiki_ABb+C2.jpg | ||
| Line 763: | Line 829: | ||
|cancel= | |cancel= | ||
|tech= | |tech= | ||
|description=Same as above.}}}} | |description=Same as above. | ||
}} | |||
}} | |||
{{MoveData | {{MoveData | ||
|image=LB2_Hibiki_ABb+C3.jpg | |image=LB2_Hibiki_ABb+C3.jpg | ||
| Line 780: | Line 848: | ||
|cancel= | |cancel= | ||
|tech= | |tech= | ||
|description=Same as above.}}}} | |description=Same as above. | ||
}} | |||
}} | |||
{{MoveData | {{MoveData | ||
|image=LB2_Hibiki_ABb+C4.jpg | |image=LB2_Hibiki_ABb+C4.jpg | ||
| Line 797: | Line 867: | ||
|cancel= | |cancel= | ||
|tech= | |tech= | ||
|description=Same as above.}}}} | |description=Same as above. | ||
}} | |||
}} | |||
'''Sanae O Okotaranu Kokoro Nari''' - Hold Start | '''Sanae O Okotaranu Kokoro Nari''' - Hold Start | ||
| Line 822: | Line 894: | ||
|cancel= | |cancel= | ||
|tech= | |tech= | ||
|description=Description.}}}} | |description=Description. | ||
}} | |||
}} | |||
{{MoveData | {{MoveData | ||
|image=LB2_Hibiki_qcb+db+f+AB2.jpg | |image=LB2_Hibiki_qcb+db+f+AB2.jpg | ||
| Line 839: | Line 913: | ||
|cancel= | |cancel= | ||
|tech= | |tech= | ||
|description=Description.}}}} | |description=Description. | ||
}} | |||
}} | |||
{{MoveData | {{MoveData | ||
|image=LB2_Hibiki_qcb+db+f+AB3.jpg | |image=LB2_Hibiki_qcb+db+f+AB3.jpg | ||
| Line 856: | Line 932: | ||
|cancel= | |cancel= | ||
|tech= | |tech= | ||
|description=Description.}}}} | |description=Description. | ||
}} | |||
}} | |||
{{MoveData | {{MoveData | ||
|image=LB2_Hibiki_qcb+db+f+AB4.jpg | |image=LB2_Hibiki_qcb+db+f+AB4.jpg | ||
| Line 873: | Line 951: | ||
|cancel= | |cancel= | ||
|tech= | |tech= | ||
|description=Description.}}}} | |description=Description. | ||
}} | |||
}} | |||
* Hibiki dashes forward to slash through opponet. | * Hibiki dashes forward to slash through opponet. | ||
* Travels a great distance, hits from 3/4 screen. | * Travels a great distance, hits from 3/4 screen. | ||
| Line 896: | Line 976: | ||
|cancel= | |cancel= | ||
|tech= | |tech= | ||
|description=Description.}}}} | |description=Description. | ||
}} | |||
}} | |||
{{MoveData | {{MoveData | ||
|image=LB2_Hibiki_f+hcf+B2.jpg | |image=LB2_Hibiki_f+hcf+B2.jpg | ||
| Line 913: | Line 995: | ||
|cancel= | |cancel= | ||
|tech= | |tech= | ||
|description=Description.}}}} | |description=Description. | ||
}} | |||
}} | |||
{{MoveData | {{MoveData | ||
|image=LB2_Hibiki_f+hcf+B3.jpg | |image=LB2_Hibiki_f+hcf+B3.jpg | ||
| Line 930: | Line 1,014: | ||
|cancel= | |cancel= | ||
|tech= | |tech= | ||
|description=Description.}}}} | |description=Description. | ||
}} | |||
}} | |||
{{MoveData | {{MoveData | ||
|image=LB2_Hibiki_f+hcf+B4.jpg | |image=LB2_Hibiki_f+hcf+B4.jpg | ||
| Line 947: | Line 1,033: | ||
|cancel= | |cancel= | ||
|tech= | |tech= | ||
|description=Description.}}}} | |description=Description. | ||
}} | |||
}} | |||
{{MoveData | {{MoveData | ||
|image=LB2_Hibiki_f+hcf+B5.jpg | |image=LB2_Hibiki_f+hcf+B5.jpg | ||
| Line 964: | Line 1,052: | ||
|cancel= | |cancel= | ||
|tech= | |tech= | ||
|description=Description.}}}} | |description=Description. | ||
}} | |||
}} | |||
* If connects near opponent, makes a flash of light and deals %50+ damage | * If connects near opponent, makes a flash of light and deals %50+ damage | ||
{{MoveData | {{MoveData | ||
| Line 982: | Line 1,072: | ||
|cancel= | |cancel= | ||
|tech= | |tech= | ||
|description=Description.}}}} | |description=Description. | ||
}} | |||
}} | |||
{{MoveData | {{MoveData | ||
|image=LB2_Hibiki_f+hcf+B2h.jpg | |image=LB2_Hibiki_f+hcf+B2h.jpg | ||
| Line 999: | Line 1,091: | ||
|cancel= | |cancel= | ||
|tech= | |tech= | ||
|description=Description.}}}} | |description=Description. | ||
}} | |||
}} | |||
{{MoveData | {{MoveData | ||
|image=LB2_Hibiki_f+hcf+B3h.jpg | |image=LB2_Hibiki_f+hcf+B3h.jpg | ||
| Line 1,016: | Line 1,110: | ||
|cancel= | |cancel= | ||
|tech= | |tech= | ||
|description=Description.}}}} | |description=Description. | ||
}} | |||
}} | |||
* If opponent is a distance away, will strike upwards with less damage | * If opponent is a distance away, will strike upwards with less damage | ||
{{MoveData | {{MoveData | ||
| Line 1,034: | Line 1,130: | ||
|cancel= | |cancel= | ||
|tech= | |tech= | ||
|description=Description.}}}} | |description=Description. | ||
}} | |||
}} | |||
==Combos== | ==Combos== | ||
Revision as of 21:26, 28 April 2020
Overview
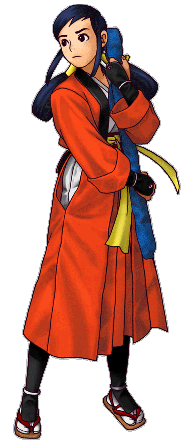
Hibiki in general is the type of character who uses her long reaching normals to control space, if you've played Samurai Shodown she is basically a female Ukyo Tachibana, and her B buttons are also great in this game. No matter the mode you choose. She's very strong in both Power and Speed/EX modes, Power being more focused on space control, neutral and punishes, while Speed is more focused on rushdown and pressure.
| Style | Strengths | Weaknesses |
|---|---|---|
| Power |
|
|
| Speed |
|
|
| EX |
|
|
Strategy
Hibiki's best way of dealing damage is by zoning out her opponents, but in Speed and EX modes she works aggressively as well. If you're going to play with her in power, learn how to use your B normals, especially f+B and B. And your A normals, for pokes and confirms. B is going to be your best friend, it's a 3f anti-air (Takes 9f to get to the ground) and cancels into everything, it's simply good. Your bnb in power are going to be these two:
(jX) B qcf+A/B
(jX) b+A b+A A qcf+A/B
The difference from one another is that the second option deals a little more damage. The optimized version is, however
(jX) B dp+B (changes sides) dash df+B
If you're going to play in speed, they won't be as necessary as your main focus of damage will be your combos with A starters, for example,
b+A AA/{A d+A} B qcf+A/B
b+A AA/{A d+A} d+B BC qcf+A/B
Which is your bnb in that mode.
Normals
Standing
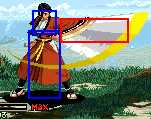
5A
 |
|---|
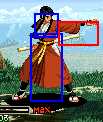
4A
 |
|---|
5B
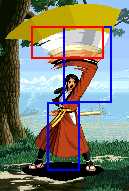 |
|---|
6B
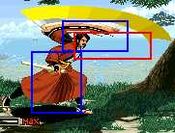 |
|---|
5C
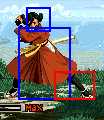 |
|---|
6C
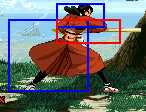 |
|---|
3B
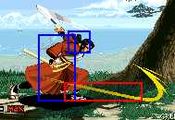 |
|---|
Crouching
2A
 |
|---|
2B
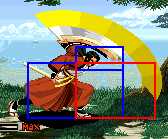 |
|---|
2C
 |
|---|
3C
 |
|---|
Air
j.A
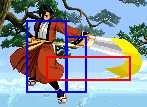 |
|---|
j.B
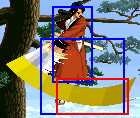 |
|---|
j.C
 |
|---|
Universal Mechanics
| Throw
|
|---|
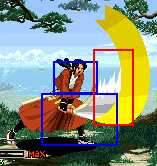
Power
5B+C
 |
|---|
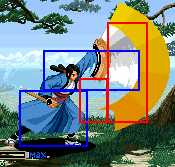
Speed / EX
5B+C
 |
|---|
Special Moves
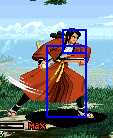
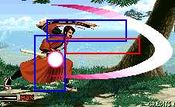
Distance Slash - 236A/B
236A, 1
 |
|---|
236A, 2
 |
|---|
236B, 1
 |
|---|
236B, 2
 |
|---|
Beckoning Slash - 623B
623B, 1
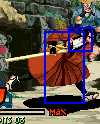 |
|---|
623B, 2
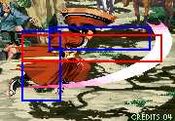 |
|---|
Piercing Moon Pounce - 623C
623C, 1
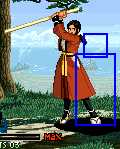 |
|---|
623C, 2
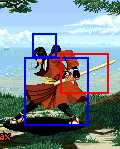 |
|---|
Heavenly Being Blade - 41236C
41236C, 1
 |
|---|
41236C, 2
 |
|---|
41236C, 3
 |
|---|
41236C>C
 |
|---|
41236C>BC
 |
|---|
Kami Hitoe ni te Kawasu Nari - AB
AB, 1
 |
|---|
AB, 2
 |
|---|
AB, 3
 |
|---|
AB>6C, 1
 |
|---|
AB>6C, 2
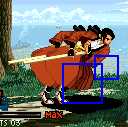 |
|---|
AB>6C, 3
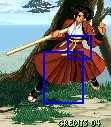 |
|---|
AB>4C, 1
 |
|---|
AB>4C, 2
 |
|---|
AB>b+C, 3
 |
|---|
AB>4C, 4
 |
|---|
Sanae O Okotaranu Kokoro Nari - Hold Start
- Hibiki holds her sword close as it glows, asking her father for help.
- Meter is charged slowly in this motion.
- No hurtbox provided, since it's the same as her standing
Desperation Moves
Heavenly Spirit of Victory - qcb,db,f + AB
qcb+db+f+AB, 1
 |
|---|
qcb+db+f+AB, 2
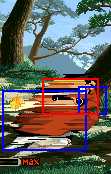 |
|---|
qcb+db+f+AB, 3
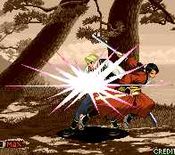 |
|---|
qcb+db+f+AB, 4
 |
|---|
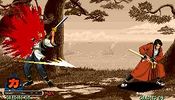
- Hibiki dashes forward to slash through opponet.
- Travels a great distance, hits from 3/4 screen.
- Confirms from any normal on hit except the ones which aren't cancellable.
Super Desperation Move
No Fear Feint - f, hcf + B
f+hcf+B, 1
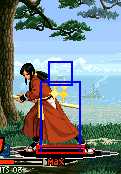 |
|---|
f+hcf+B, 2
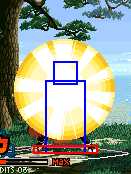 |
|---|
f+hcf+B, 3
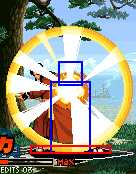 |
|---|
f+hcf+B, 4
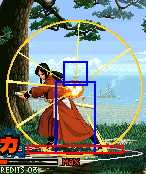 |
|---|
f+hcf+B, 5
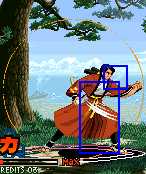 |
|---|
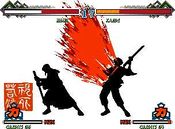
- If connects near opponent, makes a flash of light and deals %50+ damage
f+hcf+B hit, 1
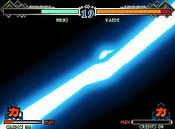 |
|---|
f+hcf+B hit, 2
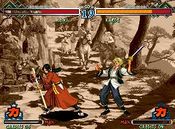 |
|---|
f+hcf+B hit, 3
 |
|---|
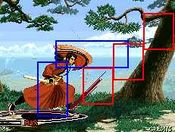
- If opponent is a distance away, will strike upwards with less damage
f+hcf+B whiff
 |
|---|
Combos
Hibiki is a very fun character, during matches you won't be doing much more than your BnBs, but it's possible to make her a powerhouse. One of her best characteristics, is that both her Power and Speed damage outputs are similar, so you can freely choose the one who best suits our playstyle. Power for a more defensive gameplay, and Speed for a more offensive gameplay.
NOTE: Before every combo, except those with 623C and 6[6]A/B (Dash A/B) starters, you can use a jX starter.
NOTE: In both modes, you can exchange a 4A for a 2B (except during chain combos on Speed mode), with a harder link but a low starter. The damage is the same.
Power Mode
For a more in depth view of Power Hibiki combos, please see the doc in #External Links.
Meterless BnBs
- 5B 236A/B
- 6C 623B
- If it crosses sides, end with a 3B
- Dash A/B 236A/B
Metered BnBs
- 5B 2146AB
- 6C 2146AB
- j.X 641236B
- You're not going to use this one much
Optmized meterless BnBs
- 4A 4A 5A 236A/B
- 4A 4A 4A 4A 5A 236A/B
- Only works on crouching Mukuro. If he's not crouching, do 4Ax3
- 5B 623B Dash 3B
- Dash A/B 623B Dash 3B
- j.X 4A 5B 236A/B
- Only works on Juzoh, Amano, Kagami, Shigen and Kouryu. j.X starter is obligatory
Optmized metered BnBs
- 4A 4A 5A 2146AB
- You can't buffer 214A>6A>AB. You have to buffer it on the 5A
- 5B 623B 2146AB
- 623B has to cross sides
Corner and near corner only
- 5B 623B 236A/B
- A version has to be done exactly in the corner
- 6C 623C 3B
Speed and EX Mode
- EX can't cancel 623B into 236A/B
Bread and Butter combos
- 5A 5B 5C (Dash 3B)
- If you're in the corner, you don't need to dash for the 3B to reach
- 4A 5AA 5B (Ender)
- Doing 4AAA works as 4A 5AA
- 4A 5A 2A 2B (Ender)
- You have many variations on how to end Speed and EX combos, and they'll be listed in the next section
Combo Enders
- 6B
- 6C (3B)
- Range dependant
DM 236A/B 623B (Can Delay) 236A/B 623B DM
- 3C (3B)
- 5BC Normal
- 5BC 5B Setups a 236B if you can time it right, high risk
- 5BC 236A/B
- 5BC (Wait for the fall) 3B
Super Speed Combos
- A + B + C + A + B + C + A + B + 236C
- A + B + C + A + B + C + C + B + A + 236A
- A + B + C + 2C + A + 2C + 6BC
- A + B + C + 2C + A + 6BC + A + 236B
