-Happy New Year 2025!
Undo revision 74269 by Felsen 2020 (talk) Tag: Undo |
No edit summary |
||
| Line 3: | Line 3: | ||
==Overview== | ==Overview== | ||
Serving as the "shoto" of the roster, Kaede is a fairly well-rounded character with minimal execution barriers. Primarily aiming to fight at mid to close range and built to bait deflects. He's easily the best in Power mode. However, his Speed mode does have some unique advantages. | Serving as the "shoto" of the roster, Kaede is a fairly well-rounded character with minimal execution barriers. Primarily aiming to fight at mid to close range and built to bait deflects. He's easily the best in Power mode. However, his Speed mode does have some unique advantages. | ||
<br> | |||
| | <div class="movelist-toggles"> | ||
<div id="movelist-toggle-1" class="movelist-toggle-button"> [[File:Power_Icon.png|50px|link=]]</div> | |||
<div id="movelist-toggle-2" class="movelist-toggle-button"> [[File:Speed_Icon.png|50px|link=]]</div> | |||
<div id="movelist-toggle-3" class="movelist-toggle-button"> [[File:EX_Icon.png|50px|link=]]</div> | |||
</div> | |||
! | <div id="movelist-1" class="movelist"><!-- Power --> | ||
| | {{ProConTable | ||
|pros= | |||
* Strong pokes in neutral | * Strong pokes in neutral | ||
* Simple yet effective hit confirms | * Simple yet effective hit confirms | ||
| Line 16: | Line 17: | ||
* Incredible anti-air and air-to-air presence | * Incredible anti-air and air-to-air presence | ||
* Highest meterless damage from command grab | * Highest meterless damage from command grab | ||
| | |cons= | ||
* Long range pokes typically have significant hurtbox extension | * Long range pokes typically have significant hurtbox extension | ||
* No mix beyond his basic stagger pressure | * No mix beyond his basic stagger pressure | ||
* Poor oki | * Poor oki | ||
* A bug that forces him to stand up after being in a hard knockdown state and getting hit by an OTG means opponents can loop their pressure on him, or even get a guaranteed 50/50 in the form of fandango | * A bug that forces him to stand up after being in a hard knockdown state and getting hit by an OTG means opponents can loop their pressure on him, or even get a guaranteed 50/50 in the form of fandango | ||
}}</div> | |||
! | <div id="movelist-2" class="movelist"><!-- Speed--> | ||
| | {{ProConTable | ||
|pros= | |||
* 5A>A is one of the best empty cancels in the game | * 5A>A is one of the best empty cancels in the game | ||
* Simple yet effective hit confirms | * Simple yet effective hit confirms | ||
* Effective low crushes to accentuate strike/throw game plan | * Effective low crushes to accentuate strike/throw game plan | ||
* High metered damage off command grab | * High metered damage off command grab | ||
| | |cons= | ||
* Long range pokes typically have significant hurtbox extension | * Long range pokes typically have significant hurtbox extension | ||
* Low damage on individual hits, compounding the above weakness | * Low damage on individual hits, compounding the above weakness | ||
* Struggles to confirm super outside of command grab | * Struggles to confirm super outside of command grab | ||
* Recovery roll bug is still present, with the above disadvantages | * Recovery roll bug is still present, with the above disadvantages | ||
}}</div> | |||
! | <div id="movelist-3" class="movelist"><!-- EX --> | ||
| | {{ProConTable | ||
|pros= | |||
* Same strengths as speed, with slightly higher potential damage from command grab | * Same strengths as speed, with slightly higher potential damage from command grab | ||
| | |cons= | ||
* Same weaknesses as speed | * Same weaknesses as speed | ||
* Massive defense penalty makes trades even worse | * Massive defense penalty makes trades even worse | ||
* 214A super cancels don't work mid combo | * 214A super cancels don't work mid combo}} | ||
</div> | |||
==Strategy== | ==Strategy== | ||
For the majority of matchups, you'll be attempting to poke out the opponent at mid range until you find a chance to get a hop, at which point you can begin baiting deflects and fishing for his incredibly rewarding command grab. Although his mixups are fairly linear and often reactable, Kaede can steal the opponent's turn surprisingly easily even in power mode. This allows him to go on the offensive while still maintaining access to high damage pokes and whiff punishes. Although his long range presence is not particularly strong, he has access to both a fireball and some strong (and frankly underrated) options from dashing in. Put this in tandem with the unique properties of his air-fireball, and Kaede can effectively threaten the opponent from any range. In speed mode, Kaede can bank a lot harder on his pressure, gaining access to a pair of fast overheads and becoming even better at baiting deflects. This makes his command grab all the more threatening, especially when you consider that in speed he can confirm fandangos off of it. However, the majority of Kaede's confirms become weaker in speed, and he generally trades less favorably with most normals (a huge weakness given that Kaede has significant hurtbox extension on his more commital pokes). In either mode, Kaede's disadvantage state is disproportionately strong. This is because he has access to a high-priority jab, standing A reaches relatively far compared to most 4f jabs, and during tech chase situations he has access to two different air fireballs as well as a fast high priority jumping normal. This allows him to viably air tech against the majority of the roster, as he will often force a favorable trade and get the opponent off of him. | For the majority of matchups, you'll be attempting to poke out the opponent at mid range until you find a chance to get a hop, at which point you can begin baiting deflects and fishing for his incredibly rewarding command grab. Although his mixups are fairly linear and often reactable, Kaede can steal the opponent's turn surprisingly easily even in power mode. This allows him to go on the offensive while still maintaining access to high damage pokes and whiff punishes. Although his long range presence is not particularly strong, he has access to both a fireball and some strong (and frankly underrated) options from dashing in. Put this in tandem with the unique properties of his air-fireball, and Kaede can effectively threaten the opponent from any range. In speed mode, Kaede can bank a lot harder on his pressure, gaining access to a pair of fast overheads and becoming even better at baiting deflects. This makes his command grab all the more threatening, especially when you consider that in speed he can confirm fandangos off of it. However, the majority of Kaede's confirms become weaker in speed, and he generally trades less favorably with most normals (a huge weakness given that Kaede has significant hurtbox extension on his more commital pokes). In either mode, Kaede's disadvantage state is disproportionately strong. This is because he has access to a high-priority jab, standing A reaches relatively far compared to most 4f jabs, and during tech chase situations he has access to two different air fireballs as well as a fast high priority jumping normal. This allows him to viably air tech against the majority of the roster, as he will often force a favorable trade and get the opponent off of him. | ||

Serving as the "shoto" of the roster, Kaede is a fairly well-rounded character with minimal execution barriers. Primarily aiming to fight at mid to close range and built to bait deflects. He's easily the best in Power mode. However, his Speed mode does have some unique advantages.
| Strengths | Weaknesses |
|---|---|
|
|
| Strengths | Weaknesses |
|---|---|
|
|
| Strengths | Weaknesses |
|---|---|
|
|
For the majority of matchups, you'll be attempting to poke out the opponent at mid range until you find a chance to get a hop, at which point you can begin baiting deflects and fishing for his incredibly rewarding command grab. Although his mixups are fairly linear and often reactable, Kaede can steal the opponent's turn surprisingly easily even in power mode. This allows him to go on the offensive while still maintaining access to high damage pokes and whiff punishes. Although his long range presence is not particularly strong, he has access to both a fireball and some strong (and frankly underrated) options from dashing in. Put this in tandem with the unique properties of his air-fireball, and Kaede can effectively threaten the opponent from any range. In speed mode, Kaede can bank a lot harder on his pressure, gaining access to a pair of fast overheads and becoming even better at baiting deflects. This makes his command grab all the more threatening, especially when you consider that in speed he can confirm fandangos off of it. However, the majority of Kaede's confirms become weaker in speed, and he generally trades less favorably with most normals (a huge weakness given that Kaede has significant hurtbox extension on his more commital pokes). In either mode, Kaede's disadvantage state is disproportionately strong. This is because he has access to a high-priority jab, standing A reaches relatively far compared to most 4f jabs, and during tech chase situations he has access to two different air fireballs as well as a fast high priority jumping normal. This allows him to viably air tech against the majority of the roster, as he will often force a favorable trade and get the opponent off of him.
| 5A |
| ||||||||||||||||||||||||||||||||||||||||||||
|---|---|---|---|---|---|---|---|---|---|---|---|---|---|---|---|---|---|---|---|---|---|---|---|---|---|---|---|---|---|---|---|---|---|---|---|---|---|---|---|---|---|---|---|---|---|
| 4A |
| ||||||||||||||||||||||||||||||||||||||||||||
|---|---|---|---|---|---|---|---|---|---|---|---|---|---|---|---|---|---|---|---|---|---|---|---|---|---|---|---|---|---|---|---|---|---|---|---|---|---|---|---|---|---|---|---|---|---|
| 5B |
| ||||||||||||||||||||||||||||||||||||||||||||
|---|---|---|---|---|---|---|---|---|---|---|---|---|---|---|---|---|---|---|---|---|---|---|---|---|---|---|---|---|---|---|---|---|---|---|---|---|---|---|---|---|---|---|---|---|---|
| 6B |
| ||||||||||||||||||||||||||||||||||||||||||||
|---|---|---|---|---|---|---|---|---|---|---|---|---|---|---|---|---|---|---|---|---|---|---|---|---|---|---|---|---|---|---|---|---|---|---|---|---|---|---|---|---|---|---|---|---|---|
| 5C |
| ||||||||||||||||||||||||||||||||||||||||||||
|---|---|---|---|---|---|---|---|---|---|---|---|---|---|---|---|---|---|---|---|---|---|---|---|---|---|---|---|---|---|---|---|---|---|---|---|---|---|---|---|---|---|---|---|---|---|
| 6C |
| ||||||||||||||||||||||||||||||||||||||||||||
|---|---|---|---|---|---|---|---|---|---|---|---|---|---|---|---|---|---|---|---|---|---|---|---|---|---|---|---|---|---|---|---|---|---|---|---|---|---|---|---|---|---|---|---|---|---|
| BC(Power) |
| ||||||||||||||||||||||||||||||
|---|---|---|---|---|---|---|---|---|---|---|---|---|---|---|---|---|---|---|---|---|---|---|---|---|---|---|---|---|---|---|---|
| BC(Speed/EX) |
| ||||||||||||||||||||||||||||||
|---|---|---|---|---|---|---|---|---|---|---|---|---|---|---|---|---|---|---|---|---|---|---|---|---|---|---|---|---|---|---|---|
| 3B |
| ||||||||||||||||||||||||||||||||||||||||||||
|---|---|---|---|---|---|---|---|---|---|---|---|---|---|---|---|---|---|---|---|---|---|---|---|---|---|---|---|---|---|---|---|---|---|---|---|---|---|---|---|---|---|---|---|---|---|
| 2A |
| ||||||||||||||||||||||||||||||||||||||||||||
|---|---|---|---|---|---|---|---|---|---|---|---|---|---|---|---|---|---|---|---|---|---|---|---|---|---|---|---|---|---|---|---|---|---|---|---|---|---|---|---|---|---|---|---|---|---|
| 2B |
| ||||||||||||||||||||||||||||||||||||||||||||
|---|---|---|---|---|---|---|---|---|---|---|---|---|---|---|---|---|---|---|---|---|---|---|---|---|---|---|---|---|---|---|---|---|---|---|---|---|---|---|---|---|---|---|---|---|---|
| 2C |
| ||||||||||||||||||||||||||||||||||||||||||||
|---|---|---|---|---|---|---|---|---|---|---|---|---|---|---|---|---|---|---|---|---|---|---|---|---|---|---|---|---|---|---|---|---|---|---|---|---|---|---|---|---|---|---|---|---|---|
| 3C |
| ||||||||||||||||||||||||||||||||||||||||||||
|---|---|---|---|---|---|---|---|---|---|---|---|---|---|---|---|---|---|---|---|---|---|---|---|---|---|---|---|---|---|---|---|---|---|---|---|---|---|---|---|---|---|---|---|---|---|
| j.A |
| ||||||||||||||||||||||||||||||||||||||||||||
|---|---|---|---|---|---|---|---|---|---|---|---|---|---|---|---|---|---|---|---|---|---|---|---|---|---|---|---|---|---|---|---|---|---|---|---|---|---|---|---|---|---|---|---|---|---|
| j.B |
| ||||||||||||||||||||||||||||||||||||||||||||
|---|---|---|---|---|---|---|---|---|---|---|---|---|---|---|---|---|---|---|---|---|---|---|---|---|---|---|---|---|---|---|---|---|---|---|---|---|---|---|---|---|---|---|---|---|---|
| j.C |
| ||||||||||||||||||||||||||||||||||||||||||||
|---|---|---|---|---|---|---|---|---|---|---|---|---|---|---|---|---|---|---|---|---|---|---|---|---|---|---|---|---|---|---|---|---|---|---|---|---|---|---|---|---|---|---|---|---|---|
| Dashing High |
| ||||||||||||||||||||||||||||||||||||||||||||
|---|---|---|---|---|---|---|---|---|---|---|---|---|---|---|---|---|---|---|---|---|---|---|---|---|---|---|---|---|---|---|---|---|---|---|---|---|---|---|---|---|---|---|---|---|---|
| Dashing Low |
| ||||||||||||||||||||||||||||||||||||||||||||
|---|---|---|---|---|---|---|---|---|---|---|---|---|---|---|---|---|---|---|---|---|---|---|---|---|---|---|---|---|---|---|---|---|---|---|---|---|---|---|---|---|---|---|---|---|---|
| 5A>A |
| ||||||||||||||||||||||||||||||
|---|---|---|---|---|---|---|---|---|---|---|---|---|---|---|---|---|---|---|---|---|---|---|---|---|---|---|---|---|---|---|---|
| 5A>B |
| ||||||||||||||||||||||||||||||
|---|---|---|---|---|---|---|---|---|---|---|---|---|---|---|---|---|---|---|---|---|---|---|---|---|---|---|---|---|---|---|---|
| 5A>B>C |
| ||||||||||||||||||||||||||||||
|---|---|---|---|---|---|---|---|---|---|---|---|---|---|---|---|---|---|---|---|---|---|---|---|---|---|---|---|---|---|---|---|
Morning Star Squall - 236A/B
236B
 |
| ||||||||||||||||||||||||||||||||||||||||||||
|---|---|---|---|---|---|---|---|---|---|---|---|---|---|---|---|---|---|---|---|---|---|---|---|---|---|---|---|---|---|---|---|---|---|---|---|---|---|---|---|---|---|---|---|---|---|
Morning Star Wind Fang - 623A/B
| 623A |
| ||||||||||||||||||||||||||||||||||||||||||||
|---|---|---|---|---|---|---|---|---|---|---|---|---|---|---|---|---|---|---|---|---|---|---|---|---|---|---|---|---|---|---|---|---|---|---|---|---|---|---|---|---|---|---|---|---|---|
| 623B |
| ||||||||||||||||||||||||||||||||||||||||||||
|---|---|---|---|---|---|---|---|---|---|---|---|---|---|---|---|---|---|---|---|---|---|---|---|---|---|---|---|---|---|---|---|---|---|---|---|---|---|---|---|---|---|---|---|---|---|
Morning Star Fillet Flash = 214A/B
| 214A |
| ||||||||||||||||||||||||||||||||||||||||||||
|---|---|---|---|---|---|---|---|---|---|---|---|---|---|---|---|---|---|---|---|---|---|---|---|---|---|---|---|---|---|---|---|---|---|---|---|---|---|---|---|---|---|---|---|---|---|
| 214B |
| ||||||||||||||||||||||||||||||||||||||||||||
|---|---|---|---|---|---|---|---|---|---|---|---|---|---|---|---|---|---|---|---|---|---|---|---|---|---|---|---|---|---|---|---|---|---|---|---|---|---|---|---|---|---|---|---|---|---|
Shinmei Oite - 236A/B (in air)
j.236A
 |
| ||||||||||||||||||||||||||||||||||||||||||||
|---|---|---|---|---|---|---|---|---|---|---|---|---|---|---|---|---|---|---|---|---|---|---|---|---|---|---|---|---|---|---|---|---|---|---|---|---|---|---|---|---|---|---|---|---|---|
j.236B
 |
| ||||||||||||||||||||||||||||||||||||||||||||
|---|---|---|---|---|---|---|---|---|---|---|---|---|---|---|---|---|---|---|---|---|---|---|---|---|---|---|---|---|---|---|---|---|---|---|---|---|---|---|---|---|---|---|---|---|---|
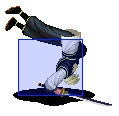
East Wind Wallop - 214C
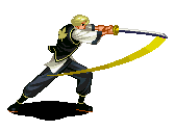
214C
 |
| ||||||||||||||||||||||||||||||||||||||||||||
|---|---|---|---|---|---|---|---|---|---|---|---|---|---|---|---|---|---|---|---|---|---|---|---|---|---|---|---|---|---|---|---|---|---|---|---|---|---|---|---|---|---|---|---|---|---|
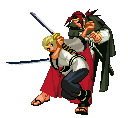
Ittou Raitei - 7/8/9CD (in air)
j.CD
 |
| ||||||||||||||||||||||||||||||||||||||||||||
|---|---|---|---|---|---|---|---|---|---|---|---|---|---|---|---|---|---|---|---|---|---|---|---|---|---|---|---|---|---|---|---|---|---|---|---|---|---|---|---|---|---|---|---|---|---|
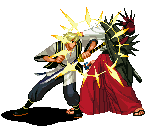
Morning Star Storm Blast - 41236C (in close)
41236C
 |
| ||||||||||||||||||||||||||||||||||||||||||||
|---|---|---|---|---|---|---|---|---|---|---|---|---|---|---|---|---|---|---|---|---|---|---|---|---|---|---|---|---|---|---|---|---|---|---|---|---|---|---|---|---|---|---|---|---|---|
Morning Star Pounce - 2146AB
2146AB
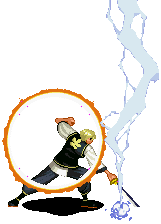 |
| ||||||||||||||||||||||||||||||||||||||||||||
|---|---|---|---|---|---|---|---|---|---|---|---|---|---|---|---|---|---|---|---|---|---|---|---|---|---|---|---|---|---|---|---|---|---|---|---|---|---|---|---|---|---|---|---|---|---|
Morning Star Revival - 236236AB
236236AB
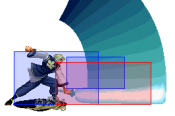 |
| ||||||||||||||||||||||||||||||||||||||||||||
|---|---|---|---|---|---|---|---|---|---|---|---|---|---|---|---|---|---|---|---|---|---|---|---|---|---|---|---|---|---|---|---|---|---|---|---|---|---|---|---|---|---|---|---|---|---|
Lively "Bad Dragon Rising" - 21416B
21416B
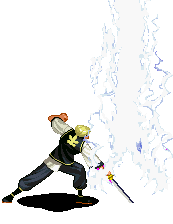 |
| ||||||||||||||||||||||||||||||
|---|---|---|---|---|---|---|---|---|---|---|---|---|---|---|---|---|---|---|---|---|---|---|---|---|---|---|---|---|---|---|---|
Morning Star Lance - 236236B
236236B
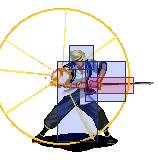 |
| ||||||||||||||||||||||||||||||
|---|---|---|---|---|---|---|---|---|---|---|---|---|---|---|---|---|---|---|---|---|---|---|---|---|---|---|---|---|---|---|---|
| The Last Blade 2 | |
| General | |
| Characters |
Akari Ichijo • Genbu no Okina • Hibiki Takane • Hyo Amano • Juzoh Kanzaki • Kaede (Original) • Kaede • Keiichiro Washizuka • Kojiroh Sanada • Kouryu • Moriya Minakata • Mukuro • Rekka Lee • Setsuna • Shigen Naoe • Shinnosuke Kagami • Yuki • Zantetsu |