Difference between revisions of "Real Bout Fatal Fury 2/Jin Chonshu"

From Dream Cancel Wiki
Jump to navigation Jump to search
Line 400: Line 400:
  |juggle=
  |juggle=
  |description= A pretty nutty button. It can cross up, will stomp airborne opponents below you with ease, and lock the opponent down long enough on block to pressure and on hit to combo. If they're unwilling or unable to anti-air you, you use this. A lot.
  |description= A pretty nutty button. It can cross up, will stomp airborne opponents below you with ease, and lock the opponent down long enough on block to pressure and on hit to combo. If they're unwilling or unable to anti-air you, you use this. A lot.
}}
}}
==Oversway Actions==
{{MoveData
|image=RBFF2_Chonshu_5d.jpg
|image2=RBFF2_Chonshu_5d2.jpg
|caption=
|input=(opponent in oversway)
|name=5D
|data=
{{AttackData-RBFF2
|damage=18
|stun=4/15
|startup=5
|active=3+3
|recovery=14
|hitAdv=4/6
|blockAdv=1/0
|guard=H
|cancel=Y
|bs=
|juggle=
|description=Be sure to combo this into 66A if you connect with it.
}}
}}
{{MoveData
|image=RBFF2_Chonshu_2d.jpg
|image2=RBFF2_Chonshu_2d2.jpg
|caption=
|input=(opponent in oversway)
|name=2D
|data=
{{AttackData-RBFF2
|damage=18
|stun=4/15
|startup=8
|active=3+4
|recovery=15
|hitAdv=KD/7
|blockAdv=15/-2
|guard=L
|cancel=N
|bs=
|juggle=
|description=
}}
}}
{{MoveData
|image=RBFF2_Chonshu_SA.jpg
|caption=
|input=(from oversway)
|name=A
|data=
{{AttackData-RBFF2
|damage=8
|stun=2/9
|startup=26
|active=1
|recovery=12
|hitAdv=3
|blockAdv=-1
|guard=H
|cancel=N
|bs=
|juggle=
|description=
}}
}}
{{MoveData
|image=RBFF2_Chonshu_SB.jpg
|caption=
|input=(from oversway)
|name=B
|data=
{{AttackData-RBFF2
|damage=8
|stun=2/11
|startup=24
|active=3
|recovery=13
|hitAdv=1
|blockAdv=-1
|guard=L
|cancel=N
|bs=
|juggle=
|description=
}}
}}
{{MoveData
|image=RBFF2_Chonshu_SC.jpg
|caption=
|input=(from oversway)
|name=C
|data=
{{AttackData-RBFF2
|damage=18
|stun=6/18
|startup=23
|active=4
|recovery=10
|hitAdv=13
|blockAdv=-3
|guard=HL
|cancel=N
|bs=
|juggle=
|description=If you're farther away when hitting with this, you can combo straight into 66A for the hard knockdown and oki (though this can still drop at max range). If you're close enough, confirm into the full n.5C string for more damage and somewhat worse oki.
  }}
  }}
}}
}}

Revision as of 04:04, 20 November 2020

Jin Chonshu (RB2)

Introduction

Tiny shoto child #2, and one of Real Bout 2's infamous top tiers. He's impossible to keep out and impossible to block. He has a projectile S-Power that can be used in the air and heals him, the ability to vortex off of any knockdown, plus frames for days, and a bunch of teleports for some reason. His scant weaknesses are mostly that he's stuck with lame small normals and a poor midrange game. This is further exacerbated by his ground movement not being quite quick enough to let him force his way in at that awkward spacing. But that's a very minor set of weaknesses when one touch can guarantee his offense and likely win him the round.

Pros Cons
  • Zippy ground movement
  • Unreactable left/right vortex that's plus on block
  • Smothering up-close offense
  • P-Power enables huge damage combos
  • Incredibly quick DP that hits behind him and enables his vortex
  • Mediocre Breakshots
  • Susceptible to getting bullied by long range footsies
  • Feint is completely unviable for Feint Cancelling

Normals

Standing

5A
RBFF2 Chonshu 5a.jpg
RBFF2 Chonshu 5a2.jpg
Damage Stun Startup Active Recovery Hit Advantage Block Advantage Guard Cancel BS Juggle
3x2 3/5x2 4 1,1 10 5 1 HL N - -

Quick two-hitting jab. The existence of your 6A overhead limits your ability to walk and pressure with this. It **can** go into further combos, but Chonshu is a bit too stubby for this to reliably allow such.

If they get pushed out too far for the second hit to connect, you're +4 on hit and even on block.

5B
RBFF2 Chonshu 5b2.jpg
Damage Stun Startup Active Recovery Hit Advantage Block Advantage Guard Cancel BS Juggle
5x2 3/5x2 5 2,1 12 -3 -1 HL N - -

Weird-looking two-hitting kick move. This is what you walk and pester with. The startup and recovery aren't quite as good as your 5A, but it has a better hitbox for the job and there's no 6B to get in your way. Like 5A, it's not likely to start any meaningful combos for you.

If they get pushed too far out for the second hit to connect, you're +1 on hit and -3 on block.

5C
RBFF2 Chonshu 5c.jpg
RBFF2 Chonshu 5c2.jpg
Damage Stun Startup Active Recovery Hit Advantage Block Advantage Guard Cancel BS Juggle
11x2 3/9x2 7 3,3 20 3 -3 HL N - -

Advancing two-hitter axe kick. This goes over some low attacks and lets you press your offense. There's no cancel window on it, though, so what you see here is what you get.

If the second hit whiffs (a rare occurrence, but it happens), you're even on hit and -6 on block.

n.5A
(within 48px of opponent)
RBFF2 Chonshu n5a2.jpg
Damage Stun Startup Active Recovery Hit Advantage Block Advantage Guard Cancel BS Juggle
4x2 2/5x2 4 1,1 10 5 1 HL N - -

5A but close. At this distance you'll be able to get a proper combo chain going, so be ready to confirm the hit. The existence of 6A continues to be the bane of this move's usefulness in pressure.

n.5B
(within 42px of opponent)
Damage Stun Startup Active Recovery Hit Advantage Block Advantage Guard Cancel BS Juggle
4x2 2/5x2 5 2,1 12 3 -1 HL N - -

It's your 5B but close. Quick scramble combo starter and mash button that can be confirmed, like you'd expect.

n.5C
(within 54px of opponent)
RBFF2 Chonshu n5c2.jpg
Damage Stun Startup Active Recovery Hit Advantage Block Advantage Guard Cancel BS Juggle
11x2 3/9x2 7 3,3 20 3 -3 HL Y - -

The moneymaker. Hitting with this button lets you start the carnage. It's the beginner of Chonshu's vortex as well as a wicked fast punish, with lots of ways to keep the initiative even if blocked. It can only be cancelled or chained out of on the first hit, but the second hit is safe on block outside of Breakshots anyways. A funny side effect of this move reaching upwards is it can sometimes tag people trying to neutral jump, but that's a fringe case. If it happens, it happens.

Crouching

2A
RBFF2 Chonshu 2a2.jpg
Damage Stun Startup Active Recovery Hit Advantage Block Advantage Guard Cancel BS Juggle
3x2 3/5x2 4 1,1 10 5 1 HL N - -

It's like 5A but crouching, with almost identical properties. This one has slightly more use, as it goes into Chonshu's 2A2C string. More on that later.

2B
Damage Stun Startup Active Recovery Hit Advantage Block Advantage Guard Cancel BS Juggle
5x2 3/5x2 5 2,1 12 -3 -1 L N - -

This move is to 2A what 5B is to 5A. That's really it.

2C
RBFF2 Chonshu 2c.jpg
Damage Stun Startup Active Recovery Hit Advantage Block Advantage Guard Cancel BS Juggle
21 6/24 7 6 20 KD -3 L Y - -

Chonshu's sweep. It's probably your longest reaching normal, and safe on block. Note that Chonshu's hurtbox actually stays a bit higher up than his sprite makes it appear, so it isn't good as a low-profile anti-air.

Like any shoto sweep worth its salt, it possesses a cancel window -- try thinking a little more creatively than just cancelling it into fireball.

Command

Falling Slap
6A
RBFF2 Chonshu 6a.jpg
Damage Stun Startup Active Recovery Hit Advantage Block Advantage Guard Cancel BS Juggle
16 3/9 15 5 22 -1 -7 H N - -

Your overhead. It's very fast and has similar reach to 2C, so it can net you a cheap bit of damage if your opponent is turtling in the corner. Thanks to your fast jabs, you might trade and keep your turn even if they mash their fastest button out afterwards.

High Avoid Attack
5AB
RBFF2 Chonshu ab.jpg
RBFF2 Chonshu ab2.jpg
Damage Stun Startup Active Recovery Hit Advantage Block Advantage Guard Cancel BS Juggle
14 5/15 6 7 20 -11 -15 HL Y - -

It's quick, but the range is notably lacking. Overall has the same universal applications as other high avoids, with low-profiling incoming attacks and jumpins.

Jumping

j.A
RBFF2 Chonshu ja.jpg
Version Damage Stun Startup Active Recovery Hit Advantage Block Advantage Guard Cancel BS Juggle
Hop 6 3/9 4 ... 6 9 5 HL - - -
Jump 6 3/9 4 10 6 9 5 HL - - -

An upwards angled air to air with good priority and speed.

j.B
RBFF2 Chonshu jb.jpg
Version Damage Stun Startup Active Recovery Hit Advantage Block Advantage Guard Cancel BS Juggle
Neutral Jump/Hop 8 3/9 5 6 6 9 5 H - - -
Diagonal Jump 8 3/9 5 6 6 9 5 H - - -
Diagonal Hop 8 3/9 5 8 6 9 5 H - - -

A downwards angled j.A, with a hitbox behind his head. It's actually pretty hard to cross up with this.

j.C
RBFF2 Chonshu jc.jpg
Version Damage Stun Startup Active Recovery Hit Advantage Block Advantage Guard Cancel BS Juggle
Neutral/Diagonal Hop, Neutral Jump 21 6/18 7 8 8 18 12 H - - -
Diagonal Jump 21 6/18 7 6 8 18 12 H - - -

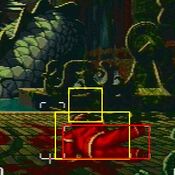
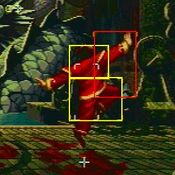
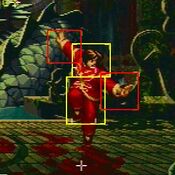
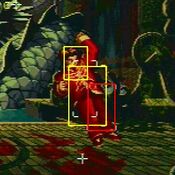
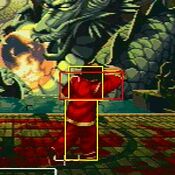
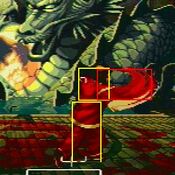
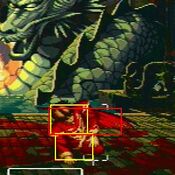
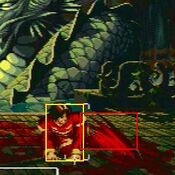
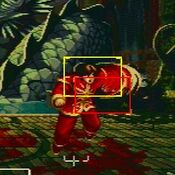
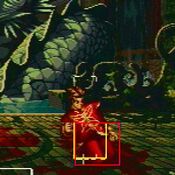
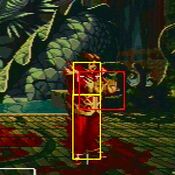
A pretty nutty button. It can cross up, will stomp airborne opponents below you with ease, and lock the opponent down long enough on block to pressure and on hit to combo. If they're unwilling or unable to anti-air you, you use this. A lot.


Oversway Actions

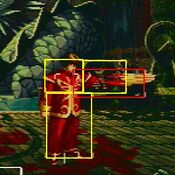
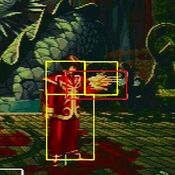
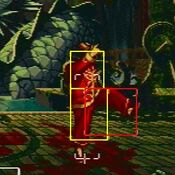
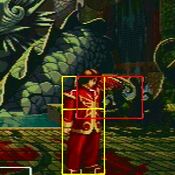
5D
(opponent in oversway)
RBFF2 Chonshu 5d.jpg
RBFF2 Chonshu 5d2.jpg
Damage Stun Startup Active Recovery Hit Advantage Block Advantage Guard Cancel BS Juggle
18 4/15 5 3+3 14 4/6 1/0 H Y - -

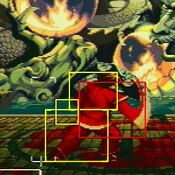
Be sure to combo this into 66A if you connect with it.

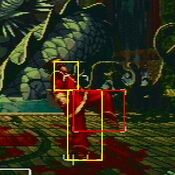
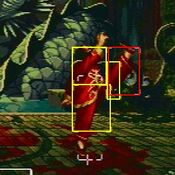
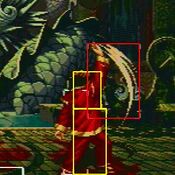
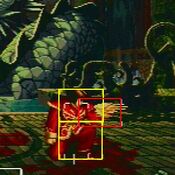
2D
(opponent in oversway)
RBFF2 Chonshu 2d.jpg
RBFF2 Chonshu 2d2.jpg
Damage Stun Startup Active Recovery Hit Advantage Block Advantage Guard Cancel BS Juggle
18 4/15 8 3+4 15 KD/7 15/-2 L N - -
A
(from oversway)
RBFF2 Chonshu SA.jpg
Damage Stun Startup Active Recovery Hit Advantage Block Advantage Guard Cancel BS Juggle
8 2/9 26 1 12 3 -1 H N - -
B
(from oversway)
RBFF2 Chonshu SB.jpg
Damage Stun Startup Active Recovery Hit Advantage Block Advantage Guard Cancel BS Juggle
8 2/11 24 3 13 1 -1 L N - -
C
(from oversway)
RBFF2 Chonshu SC.jpg
Damage Stun Startup Active Recovery Hit Advantage Block Advantage Guard Cancel BS Juggle
18 6/18 23 4 10 13 -3 HL N - -

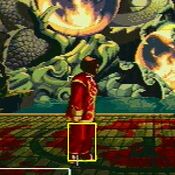
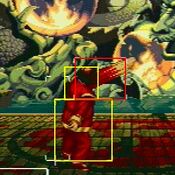
If you're farther away when hitting with this, you can combo straight into 66A for the hard knockdown and oki (though this can still drop at max range). If you're close enough, confirm into the full n.5C string for more damage and somewhat worse oki.


Real Bout Fatal Fury 2
General

ControlsFAQSystem

Characters

Andy BogardBilly KaneBlue MaryBob WilsonCheng SinzanDuck KingFranco BashGeese HowardHon FuJin ChonreiJin ChonshuJoe HigashiKim KaphwanLaurence BloodLi XiangfeiMai ShiranuiRick StrowdRyuji YamazakiSokaku MochizukiTerry BogardTung Fu RueWolfgang Krauser