Difference between revisions of "Real Bout Fatal Fury 2/Terry Bogard"

From Dream Cancel Wiki
Jump to navigation Jump to search
Line 2: Line 2:


==Introduction==
==Introduction==
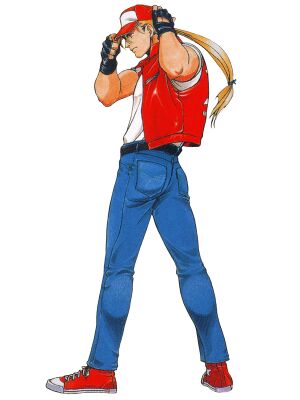
The main character of the Fatal Fury series and the mascot for SNK as a whole, Terry is exactly the kind of character you probably expect him to be.  Straightforward and well rounded, Terry has a flexible kit that lets him play the game in a variety of styles.  He doesn't have the overwhelming strengths of a top tier character, but Terry is more than equipped to handle just about anything the RB2 cast can throw at him.


==Normal Moves==
==Normal Moves==
Line 41: Line 43:
  |bs=
  |bs=
  |juggle=  
  |juggle=  
  |description=
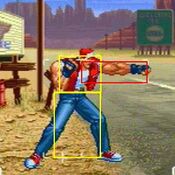
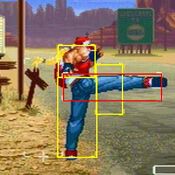
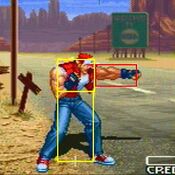
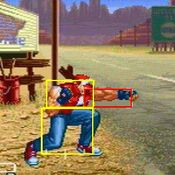
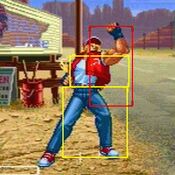
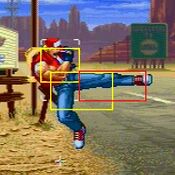
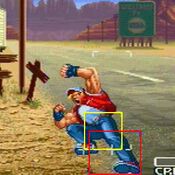
  |description=Decently fast, great horizontal range and no hurtbox from his calf downwards.  Used along with 5C as essential parts of Terry's neutral, poking and pressure games.
  }}
  }}
}}
}}
Line 61: Line 63:
  |bs=
  |bs=
  |juggle=  
  |juggle=  
  |description=
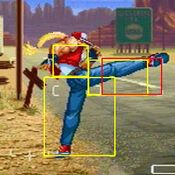
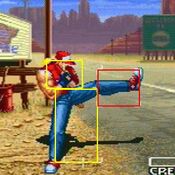
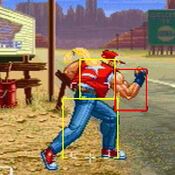
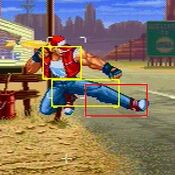
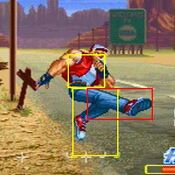
  |description=This massive horizontal hitbox is one of Terry's longest ranged normals.  Only a single frame slower than 5B, but the slightly higher angle means it can be low profiled by certain situations.
  }}
  }}
}}
}}
Line 125: Line 127:
  |bs=
  |bs=
  |juggle=  
  |juggle=  
  |description=
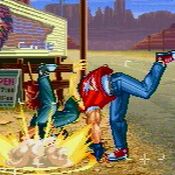
  |description=Hits twice, making for easy confirms into special.
  }}
  }}
}}
}}
Line 165: Line 167:
  |bs=
  |bs=
  |juggle=  
  |juggle=  
  |description=
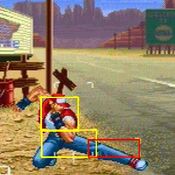
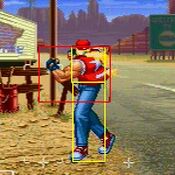
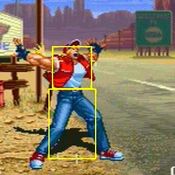
  |description=Terry's answer to the time honored shoto crouching MK from Street Fighter, a decently ranged low that cancels into itself, 2C and special moves. 
  }}
  }}
}}
}}
Line 185: Line 187:
  |bs=
  |bs=
  |juggle=  
  |juggle=  
  |description=
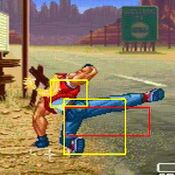
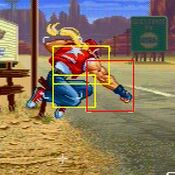
  |description=Despite the odd angle of Terry's leg on the attack animation, this is a pretty standard sweep.
  }}
  }}
}}
}}
Line 209: Line 211:
  |bs=
  |bs=
  |juggle=  
  |juggle=  
  |description=
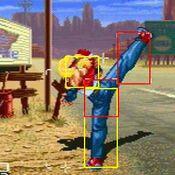
  |description=Anti air attack with more vertical range and faster startup than 5AB, but without the invincibility. 
  }}
  }}
}}
}}
Line 230: Line 232:
  |bs=
  |bs=
  |juggle=  
  |juggle=  
  |description=
  |description=Knocks opponents into oversway, where you can get a combo or a mixup.
  }}
  }}
}}
}}
Line 252: Line 254:
  |bs=
  |bs=
  |juggle=
  |juggle=
  |description=
  |description=Terry's overhead, get comfortable inputting this quickly so you can open your opponents up.
  }}
  }}
}}
}}
Line 274: Line 276:
  |bs=
  |bs=
  |juggle=  
  |juggle=  
  |description=
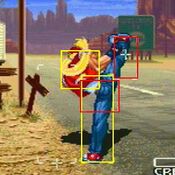
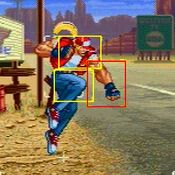
  |description=Univeral upper body invincible attack.  While it may not have the vertical distance or fast startup of 3A, the invincibility frames make it a solid anti air in its own right and gives it utility against grounded opponents as well.
  }}
  }}
}}
}}
Line 438: Line 440:
  |bs=
  |bs=
  |juggle=
  |juggle=
  |description=
  |description=Commonly chained from 6B for a combo, including one of the few reliable ways to confirm into Triple Geyser.
  }}
  }}
}}
}}
Line 591: Line 593:
  |bs=
  |bs=
  |juggle=
  |juggle=
  |description=
  |description=For combo purposes, this is the feint you'll want to use. 
  }}
  }}
}}
}}
Line 616: Line 618:
  |bs=Y
  |bs=Y
  |juggle=N
  |juggle=N
  |description=
  |description=Terry's basic projectile attack, it travels along the ground.  As you'd expect, it's a cornerstone of Terry's zoning, and being low to the ground means opponents have to jump to get across it. 
  }}
  }}
}}
}}
Line 662: Line 664:
  |bs=Y
  |bs=Y
  |juggle=Y
  |juggle=Y
  |description=
  |description=Horizontal travelling attack, Terry's "tatsu" if you will.  The light version is a common combo ender thanks to the quick startup and decent corner carry.  If spaced well it's not the most unsafe thing in the world, but excessively throwing out light burn knuckles is a bad habit that plagues many a Terry player across all the games he's been in.
  }}
  }}
  {{AttackData-RBFF2  
  {{AttackData-RBFF2  
Line 678: Line 680:
  |bs=Y
  |bs=Y
  |juggle=Y
  |juggle=Y
  |description=
  |description=Slower startup than the light version so you can't combo into it as freely, but travels much further at a higher speed and knocks down.  As you probably expected, this move is horrendously unsafe, so if it gets blocked you are almost certainly going to get hurt.
  }}
  }}
}}
}}
Line 703: Line 705:
  |bs=N
  |bs=N
  |juggle=Y
  |juggle=Y
  |description=
  |description=Terry's reversal, a very "flash kick" type move.  It's quite fast and has pretty solid horizontal range as well.  However the latter also means it can whiff in some niche scenarios.
  }}
  }}
}}
}}
Line 727: Line 729:
  |bs=Y
  |bs=Y
  |juggle=Y
  |juggle=Y
  |description=
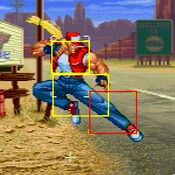
  |description=Horizontally travelling crescent flip kick, puts Terry in the air so it can travel over certain things.  Reliable pre-emptive anti air and at -2 it's not super unsafe if spaced properly.  As a breakshot it has use thanks to the high profile property.
  }}
  }}
}}
}}
Line 749: Line 751:
  |bs=N
  |bs=N
  |juggle=N
  |juggle=N
  |description=
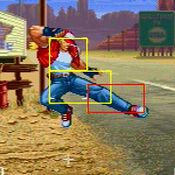
  |description=Terry slides along the ground, and if he connects with an opponent on hit (NOT on block) he follows up with a high kick that launches them into the air.  This launch can be followed up with a Rising Tackle juggle, but note that if you aren't very close to the opponent the juggle will whiff.  For this reason, combo using this move tend to either come from low pushback starters (such as 2B) or be done in the corner.  This move makes for a really annoying breakshot because of the low profile properties, and you're almost guaranteed the juggle in most instances as well.  One last thing to note, the slide doesn't have as much range as it looks and is very unsafe on whiff and block.
  }}
  }}
}}
}}
Line 771: Line 773:
  |bs=N
  |bs=N
  |juggle=N
  |juggle=N
  |description=
  |description=Puts Terry into oversway.
  }}
  }}
}}
}}
Line 795: Line 797:
  |bs=Y
  |bs=Y
  |juggle=N
  |juggle=N
  |description=
  |description=Gigantic vertical range, but there's no reliable way to combo into it.  Past the point where Terry raises his arm (saying "Power...!") any attempt to hit him will result in a trade in his favor.
  }}
  }}
}}
}}
Line 820: Line 822:
  |bs=N
  |bs=N
  |juggle=Y
  |juggle=Y
  |description=
  |description=Like Power Geyser, but there's three of them.  Unlike Power Geyser, there are ways to combo into it, most notably from 5D against an opponent in oversway, or from chain combos ending in 3C.  Unfortunately, the whole move will NOT connect when done against an opponent in the corner.
  }}
  }}
}}
}}

Revision as of 23:03, 19 April 2021

RBFF2 Terry.jpg

Introduction

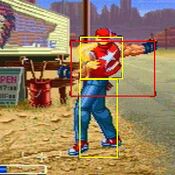
The main character of the Fatal Fury series and the mascot for SNK as a whole, Terry is exactly the kind of character you probably expect him to be. Straightforward and well rounded, Terry has a flexible kit that lets him play the game in a variety of styles. He doesn't have the overwhelming strengths of a top tier character, but Terry is more than equipped to handle just about anything the RB2 cast can throw at him.

Normal Moves

5A
RBFF2 Terry 5A.jpg
Damage Stun Startup Active Recovery Hit Advantage Block Advantage Guard Cancel BS Juggle
8 3/11 5 2 10 4 0 HL Y - -

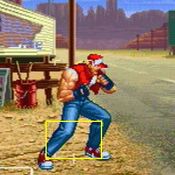
Standard jab.

5B
RBFF2 Terry 5b.jpg
Damage Stun Startup Active Recovery Hit Advantage Block Advantage Guard Cancel BS Juggle
10 3/11 8 5 13 -2 -6 HL Y - -

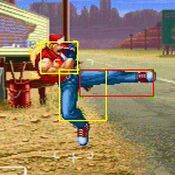
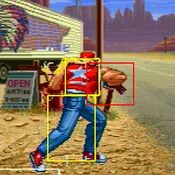
Decently fast, great horizontal range and no hurtbox from his calf downwards. Used along with 5C as essential parts of Terry's neutral, poking and pressure games.

5C
RBFF2 Terry 5c.jpg
Damage Stun Startup Active Recovery Hit Advantage Block Advantage Guard Cancel BS Juggle
10 6/22 9 6 23 -3 -9 HL Y - -

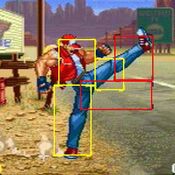
This massive horizontal hitbox is one of Terry's longest ranged normals. Only a single frame slower than 5B, but the slightly higher angle means it can be low profiled by certain situations.

n.5A
(within 49px)
RBFF2 Terry n5a.jpg
Damage Stun Startup Active Recovery Hit Advantage Block Advantage Guard Cancel BS Juggle
10 3/11 5 2 10 4 0 HL Y - -
n.5B
(within 57px)
RBFF2 Terry n5b.jpg
Damage Stun Startup Active Recovery Hit Advantage Block Advantage Guard Cancel BS Juggle
10 3/11 6 6 9 1 -3 HL Y - -
n.5C
(within 70px)
RBFF2 Terry n5c.jpg
RBFF2 Terry n5c2.jpg
Damage Stun Startup Active Recovery Hit Advantage Block Advantage Guard Cancel BS Juggle
10+10 4/11 8 5 20 3(7) -3(1) HL Y - -

Hits twice, making for easy confirms into special.

2A
RBFF2 Terry 2a.jpg
Damage Stun Startup Active Recovery Hit Advantage Block Advantage Guard Cancel BS Juggle
8 3/11 5 5 7 4 0 HL Y - -
2B
RBFF2 Terry 2b.jpg
Damage Stun Startup Active Recovery Hit Advantage Block Advantage Guard Cancel BS Juggle
10 3/11 6 3 12 1 -3 HL Y - -

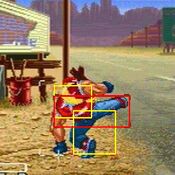
Terry's answer to the time honored shoto crouching MK from Street Fighter, a decently ranged low that cancels into itself, 2C and special moves.

2C
RBFF2 Terry 2c.jpg
Damage Stun Startup Active Recovery Hit Advantage Block Advantage Guard Cancel BS Juggle
23 6/26 8 5 20 -KD -6(1) HL Y - -

Despite the odd angle of Terry's leg on the attack animation, this is a pretty standard sweep.

Command Moves

Wild Upper
3A
RBFF2 Terry 3a.jpg
RBFF2 Terry 3a2.jpg
Damage Stun Startup Active Recovery Hit Advantage Block Advantage Guard Cancel BS Juggle
19 4/18 6 3+9 20 -5(7) -11(1) HL Y - -

Anti air attack with more vertical range and faster startup than 5AB, but without the invincibility.

Backspin Kick
6B
RBFF2 Terry 6b.jpg
Damage Stun Startup Active Recovery Hit Advantage Block Advantage Guard Cancel BS Juggle
19 6/12 14 4 22 2 -3 HL N - -

Knocks opponents into oversway, where you can get a combo or a mixup.

Charging Kick
6[6]C
RBFF2 Terry 66c.jpg
Damage Stun Startup Active Recovery Hit Advantage Block Advantage Guard Cancel BS Juggle
16 6/22 17 4 20 2 -4 H N - -

Terry's overhead, get comfortable inputting this quickly so you can open your opponents up.

High Avoid Attack
5AB
RBFF2 Terry ab.jpg
RBFF2 Terry ab2.jpg
Damage Stun Startup Active Recovery Hit Advantage Block Advantage Guard Cancel BS Juggle
19 5/18 10 6 23 -3(7) -9(1) HL Y - -

Univeral upper body invincible attack. While it may not have the vertical distance or fast startup of 3A, the invincibility frames make it a solid anti air in its own right and gives it utility against grounded opponents as well.

Jumping

j.A
RBFF2 Terry j.a.jpg
Version Damage Stun Startup Active Recovery Hit Advantage Block Advantage Guard Cancel BS Juggle
Full Jump 8 3/11 5 10 6 8 4 H - - -
Hop 8 3/11 5 Until Landing 6 8 4 H - - -
j.B
RBFF2 Terry jb.jpg
All except diagonal full jump
RBFF2 Terry jb2.jpg
Diagonal full jump
Version Damage Stun Startup Active Recovery Hit Advantage Block Advantage Guard Cancel BS Juggle
Neutral Full Jump 10 3/11 6 6 6 8 4 H - - -
Diagonal Full Jump 10 3/11 6 8 6 8 4 H - - -
Hop 10 3/11 6 Until Landing 6 8 4 H - - -
j.C
RBFF2 Terry jc.jpg
Neutral full jump
RBFF2 Terry jc2.jpg
Diagonal full jump
RBFF2 Terry jc3.jpg
Hop
Version Damage Stun Startup Active Recovery Hit Advantage Block Advantage Guard Cancel BS Juggle
Neutral Full Jump 19 6/22 8 6 8 15 9 H - - -
Diagonal FJ and Hop 19 6/22 8 8 8 15 9 H - - -

Oversway Actions

5D
(opponent in oversway)
RBFF2 Terry 5d.jpg
RBFF2 Terry 5d2.jpg
Damage Stun Startup Active Recovery Hit Advantage Block Advantage Guard Cancel BS Juggle
19 4/18 8 3, 3 - -2(7) -7(1) H Y - -

Commonly chained from 6B for a combo, including one of the few reliable ways to confirm into Triple Geyser.

2D
(opponent in oversway)
RBFF2 Terry 2d.jpg
RBFF2 Terry 2d2.jpg
Damage Stun Startup Active Recovery Hit Advantage Block Advantage Guard Cancel BS Juggle
19 4/18 7 4, 2 12 8 7 L Y - -
A
(from oversway)
RBFF2 Terry SA.jpg
Damage Stun Startup Active Recovery Hit Advantage Block Advantage Guard Cancel BS Juggle
10 2/11 24 4 12 3 1 H N - -
B
(from oversway)
RBFF2 Terry SB.jpg
Damage Stun Startup Active Recovery Hit Advantage Block Advantage Guard Cancel BS Juggle
10 2/11 24 4 12 1 -1 L N - -
C
(from oversway)
RBFF2 Terry SC.jpg
Damage Stun Startup Active Recovery Hit Advantage Block Advantage Guard Cancel BS Juggle
18 6/22 26 4 12 11 -3 HL N - -

Throws

Buster Throw
4/6C
RBFF2 Terry throw.jpg
Damage Stun Startup Active Recovery Hit Advantage Block Advantage Guard Cancel BS Juggle
26 - - - - - - - - - -

Feint

Burn Knuckle Feint
6AC
RBFF2 Terry 6ac.jpg
Damage Stun Startup Active Recovery Hit Advantage Block Advantage Guard Cancel BS Juggle
- - - - 18 - - - - - -
Power Geyser Feint
2BC
RBFF2 Terry 2bc.jpg
Damage Stun Startup Active Recovery Hit Advantage Block Advantage Guard Cancel BS Juggle
- - - - 18 - - - - - -

For combo purposes, this is the feint you'll want to use.

Special Moves

Power Wave
236A
RBFF2 Terry 236a.jpg
Initial Hitbox
RBFF2 Terry 236a2.jpg
Projectile
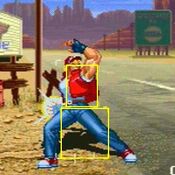
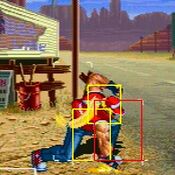
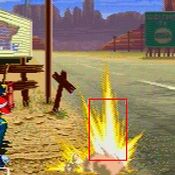
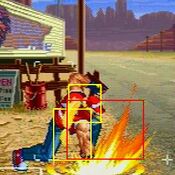
Damage Stun Startup Active Recovery Hit Advantage Block Advantage Guard Cancel BS Juggle
16 5 16 - 56 -2 -4 HL - Y N

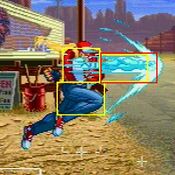
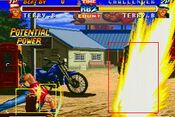
Terry's basic projectile attack, it travels along the ground. As you'd expect, it's a cornerstone of Terry's zoning, and being low to the ground means opponents have to jump to get across it.

Round Wave
236C
RBFF2 Terry 236c.jpg
RBFF2 Terry 236c2.jpg
Damage Stun Startup Active Recovery Hit Advantage Block Advantage Guard Cancel BS Juggle
16 2 24 13 19 -2 -4 HL - Y N

Hits opponent in oversway.

Burning Knuckle
214A/C
RBFF2 Terry 214a.jpg
Light
RBFF2 Terry 214c.jpg
Heavy
Version Damage Stun Startup Active Recovery Hit Advantage Block Advantage Guard Cancel BS Juggle
Light 32 5 15 16 13 -8 -7 HL - Y Y

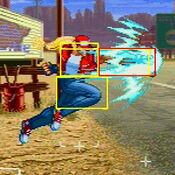
Horizontal travelling attack, Terry's "tatsu" if you will. The light version is a common combo ender thanks to the quick startup and decent corner carry. If spaced well it's not the most unsafe thing in the world, but excessively throwing out light burn knuckles is a bad habit that plagues many a Terry player across all the games he's been in.

Heavy 38 7 26 20 26 -1 -24 HL - Y Y

Slower startup than the light version so you can't combo into it as freely, but travels much further at a higher speed and knocks down. As you probably expected, this move is horrendously unsafe, so if it gets blocked you are almost certainly going to get hurt.

Rising Tackle
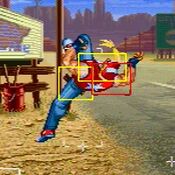
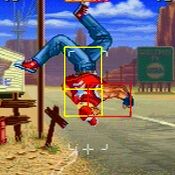
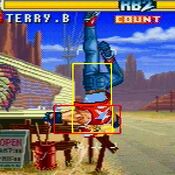
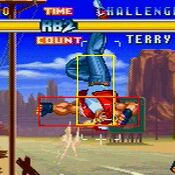
[2]8A 46f charge
RBFF2 Terry 28a.jpg
RBFF2 Terry 28a2.jpg
RBFF2 Terry 28a3.jpg
RBFF2 Terry 28a4.jpg
RBFF2 Terry 28a5.jpg
Damage Stun Startup Active Recovery Hit Advantage Block Advantage Guard Cancel BS Juggle
10+8*4 (35) 5 5 21 51 KD -44 HL - N Y

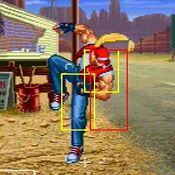
Terry's reversal, a very "flash kick" type move. It's quite fast and has pretty solid horizontal range as well. However the latter also means it can whiff in some niche scenarios.

Crack Shoot
214B
RBFF2 Terry 214b.jpg
RBFF2 Terry 214b2.jpg
RBFF2 Terry 214b3.jpg
RBFF2 Terry 214b4.jpg
Damage Stun Startup Active Recovery Hit Advantage Block Advantage Guard Cancel BS Juggle
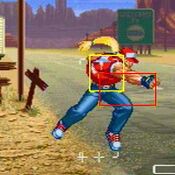
11*3 (28) 5 8 6 22 4 -2 HL - Y Y

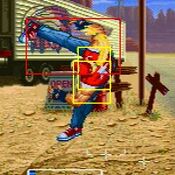
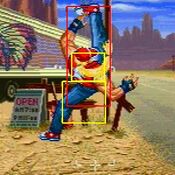
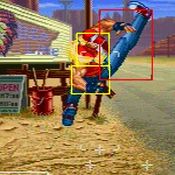
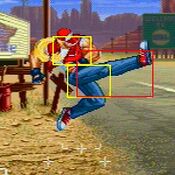
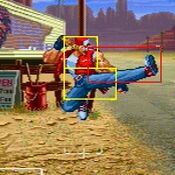
Horizontally travelling crescent flip kick, puts Terry in the air so it can travel over certain things. Reliable pre-emptive anti air and at -2 it's not super unsafe if spaced properly. As a breakshot it has use thanks to the high profile property.

Fire Kick
236B
RBFF2 Terry 236b.jpg
RBFF2 Terry 236b2.jpg
Damage Stun Startup Active Recovery Hit Advantage Block Advantage Guard Cancel BS Juggle
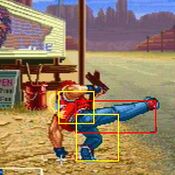
8+21 (18) 2+2 9 6 30 17 -13 L - N N

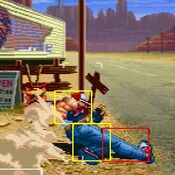
Terry slides along the ground, and if he connects with an opponent on hit (NOT on block) he follows up with a high kick that launches them into the air. This launch can be followed up with a Rising Tackle juggle, but note that if you aren't very close to the opponent the juggle will whiff. For this reason, combo using this move tend to either come from low pushback starters (such as 2B) or be done in the corner. This move makes for a really annoying breakshot because of the low profile properties, and you're almost guaranteed the juggle in most instances as well. One last thing to note, the slide doesn't have as much range as it looks and is very unsafe on whiff and block.

Passing Sway
236D
RBFF2 Terry 236d.jpg
RBFF2 Terry 236d2.jpg
Damage Stun Startup Active Recovery Hit Advantage Block Advantage Guard Cancel BS Juggle
10+26 (32) 0 8 3, 2 15 12 6 HL - N N

Puts Terry into oversway.

S-Power

Power Geyser
21416BC
RBFF2 Terry geyser.jpg
RBFF2 Terry geyser2.jpg
Damage Stun Startup Active Recovery Hit Advantage Block Advantage Guard Cancel BS Juggle
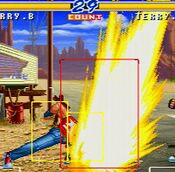
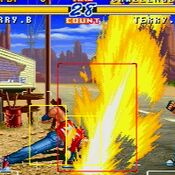
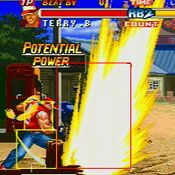
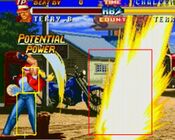
76 - 34 4, 13 31 KD -8 HL - Y N

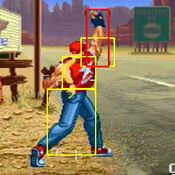
Gigantic vertical range, but there's no reliable way to combo into it. Past the point where Terry raises his arm (saying "Power...!") any attempt to hit him will result in a trade in his favor.

Super Desperation Move

Triple Geyser
21416C
RBFF2 Terry triple.jpg
RBFF2 Terry triple2.jpg
RBFF2 Terry triple3.jpg
Damage Stun Startup Active Recovery Hit Advantage Block Advantage Guard Cancel BS Juggle
30+35+40 (90) - 20 - 70 KD -10 HL - N Y

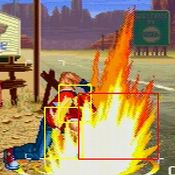
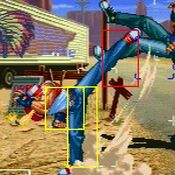
Like Power Geyser, but there's three of them. Unlike Power Geyser, there are ways to combo into it, most notably from 5D against an opponent in oversway, or from chain combos ending in 3C. Unfortunately, the whole move will NOT connect when done against an opponent in the corner.

Real Bout Fatal Fury 2
General

ControlsFAQSystem

Characters

Andy BogardBilly KaneBlue MaryBob WilsonCheng SinzanDuck KingFranco BashGeese HowardHon FuJin ChonreiJin ChonshuJoe HigashiKim KaphwanLaurence BloodLi XiangfeiMai ShiranuiRick StrowdRyuji YamazakiSokaku MochizukiTerry BogardTung Fu RueWolfgang Krauser