Difference between revisions of "The King of Fighters XIII/Ryo Sakazaki"
| Line 394: | Line 394: | ||
Discuss at [http://dreamcancel.com/forum/index.php?topic=23.0 Dream Cancel] | Discuss at [http://dreamcancel.com/forum/index.php?topic=23.0 Dream Cancel] | ||
{{Navbox XIII}} | |||
[[Category:The King of Fighters XIII]] | [[Category:The King of Fighters XIII]] | ||
Revision as of 03:00, 28 April 2011
Normals
Standing
st. A
- Chain / Cancellable
- Hit Detection: High
- Damage: 25
st. B
- Cancellable
- Hit Detection: High
- Damage: 30
st. C
- Cancellable
- Hit Detection: High
- Damage: 80
st. D
- Cancellable
- Hit Detection: High
- Damage: 70
cl. C
- Cancellable
- Hit Detection: High
- Damage: 70
Crouching
cr. A
- Chain / Cancellable
- Hit Detection: High
- Damage: 25
cr. B
- Chain-able
- Hit Detection: Low
- Damage: 30
cr. C
- Cancellable
- Hit Detection: High
- Damage: 70
cr. D
- Cancellable
- Hit Detection: Low
- Damage: 80
Jumping
j. A
- Hit Detection: Mid
- Damage: 45 (40)
j. B
- Hit Detection: Mid
- Damage: 45 (40)
j. C
- Hit Detection: Mid
- Damage: 72 (70)
j. D
- Hit Detection: Mid
- Damage: 70 (68)
Blowback Attack
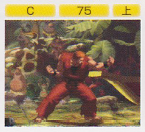
CD
- Hit Detection: High
- Damage: 75
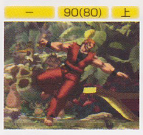
j. CD
- Hit Detection: High
- Damage: 90 (80)
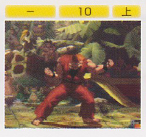
GC CD
- Hit Detection: High
- Damage: 10
Throw
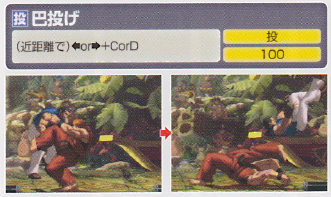
Tomoe Nage = (b/f+C/D)
- Can be broken
- Hit Detection: Throw
- Damage: 100
Command Moves
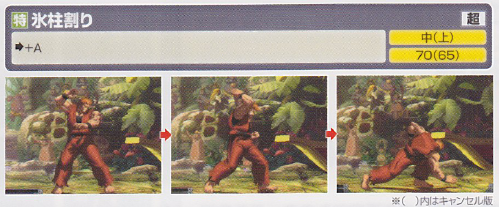
Hyochuwari = (f+A)
- Super-cancellable only
- Hit Detection: Mid (High if cancelled into)
- Damage: 70 (65)
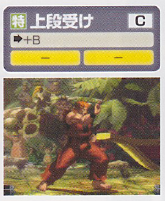
Jodanuke = (f+B)
- Cancellable
- Counters high attacks
- No damage
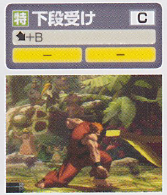
Gedanuke = (df+B)
- Cancellable
- Counters low attacks
- No damage
Special Moves
Kohken = (qcf+P)
(EX) = qcf+AC
- Super cancellable
- Hit Detection: High
- A Damage: 55; C Damage: 70, EX Damage: 120
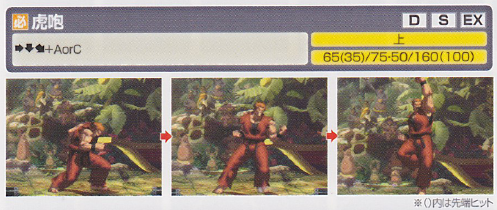
Koho = (dp+P)
(EX) = dp+AC
- Drive- / Super cancellable (first hit)
- Hit Detection: High
- A Damage: 63 (35); C Damage: 75, 50; EX Damage: 160 (100)
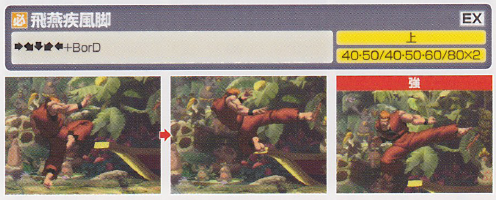
Hienshippukyaku = (hcb+K)
(EX) = hcb+BD
- Hit Detection: High
- B Damage: 40, 50; D Damage: 40, 50, 60; EX Damage: 80 x 2
Zanretsuken = (f,b,f+P)
(EX) = f,b,f+AC
- Drive- / Super cancellable
- Hit Detection: High
- A Damage: 0, 12 x 11, 80; C Damage: 0, 12x11, 50; EX Damage: 0, 15 x 19, 90
Desperation Moves
Ryukohranbu = (qcf hcb+P)
(EX) = qcf hcb+AC
- Max Cancellable
- Hit Detection: High
- Damage: 0, 5 x 2, 10 x 4, 5, 10 x 2, 5, 10, 5, 115; EX Damage: 0, 10 x 2, 15 x 2, 10, 15 x 4, 10, 15 x 4, 30, 40, 100
Haohshokohken = (f,hcf+P)
- Hit Detection: High
- Damage: 200
Neomax
Tenchihahoken = (qcfx2+AC)
- Hit Detection: High
- Damage: 480
Combos
- cr.Bx2, cr.A, hcb+B/qcf+AC
- cr.B, cr.C, special attack
- cr. B, cr. A / cl.C, hcb + BD, f b f+A/ qcf hcb+AC
- cl.C, hcb+D (standing opponents only)
- st.C, f+A, qcf hcb+P
HD Combos
- (corner) cl.C -> f+A -> BC -> D -> qcf+A -> dp+C -> DC qcf+A -> [dp+C -> DC qcf+A -> qcf+A]x3 -> finisher
1 Power Gauge
- [HD] dp+AC, (HDC) qcf+Ax2, dp+C, (HDC) qcf+Ax2, dp+C, (HDC) qcf+A, dp+C, (HDC) qcf+Ax2, dp+C, (HDC) qcf+Ax2, f b f+A
- [HD] qcf+A, dp+C, (HDC) qcf+A, dp+C, (HDC) qcf+Ax2, dp+C, (HDC) qcf+Ax2, dp+C, (HDC) qcfx2+A, dp+C, (HDC) qcf+A, qcf hcb+P
2 Power Gauges
- [HD] dp+AC, (HDC) qcf+Ax2, dp+C, (HDC) qcf+Ax2, dp+C, (HDC) qcf+Ax2, dp+C, (HDC) qcf+Ax2, dp+C, (HDC) qcf hcb+P
- [HD] qcf+A, dp+C, (HDC) qcf+A, dp+C, (HDC) qcf+Ax2, dp+C, (HDC) qcf+Ax2, dp+C, (HDC) qcf+Ax2, dp+C, (HDC) qcf+Ax2, qcf hcb+AC
3 Power Gauges
- [HD] f+A, hcb+BD, dp+C, (HDC) hcb+D, dp+C, (HDC) hcb+D, dp+C, (HDC) f b f+AC, dp+C, (HDC) qcf+Ax2, qcf hcb+P
- [HD] qcf+A, dp+C, (HDC) qcf+A, dp+C, (HDC) qcf+Ax2, dp+C, (HDC) qcf+Ax2, dp+C, (HDC) qcf+Ax2, dp+C, (HC) qcfx2+AC
4 Power Gauges
- [HD] f+A, hcb+BD, dp+C, (HDC) hcb+D, dp+C, (HDC) hcb+D, dp+C, (HDC) f b f+AC, dp+C, (HDC) qcf+Ax2, qcf hbc+AC
5 Power Gauges
- [HD] dp+AC, (HDC) qcf+Ax2, dp+C, (HDC) qcf+Ax2, dp+C, (HDC) qcf+Ax2, qcf hcb+P, (MC) qcfx2+AC
Tips
Ok so I've been playing Ryo for a couple months now, and what I've found to be his most effective weapon is his Kohken. This move IMO, sets up a good deal of your offense and is a great defensive tool.
Though Ryo's fireball is not a fullscreen forward progressing projectile this is in no way a weakness. When you use Ryo Consider his projectile to be a shell that expands and contracts accordingly to the right situations, and Fireball A,C, and ex versions maintian it
the facts are
1. the fireball itself has a much larger hit box than it appears, especially when using the A version which looks deceptively small, and often catching as an anti air
2. the fireball knocks down on any version, which is huge in resetting your position, or transitioning into rushdown
3. blockstun and recovery on the A version is really good, especially in the corner to set up mix up situations, blockstun on C version is also great long distance but can be punished with a fast move if you decide to do it close range. however if you wiff C version Kohken It can be punished even from long distance from plenty of characters, K' comes to mind, and this is the version people are hoping to jump over or roll through to punish you for a fat combo.
4. ex version comes out really fast and has invincibility, and you recover before they do so I usually use this move to throw the opponent off from reading my patterns since its not expected, also a good and safe option to use to get out of K's fireball traps in the corner
Now with all these uses for the fireballs it sets up everything from being easier to predict when to parry, mix in uppercuts, set up jumps for anti airs, or super, EX super.
He also has a very effective fireball trap in the corner with A, EX version, and even C version with particular spacing to bait the other person to stick something out then follow up with a parry or uppercut.
The downside though is that against against maybe one particular character (Chin!!) the fireball game becomes a dangerous game to play with his low to the ground size, and moves make him invulnerable to the fireballs since majority of the hit box is lower middle to high and makes it really easy for chin to penetrate your defense.
now with all that said and done I would like to state that I am not a top player, or expert Ryo user, but I have dedicated much time into this game and I feel that at the very least I can Interpret when something a character I've been using has a high success rate against other talented players, so hopefully this is something of interest
Miscellaneous
Character Sprite
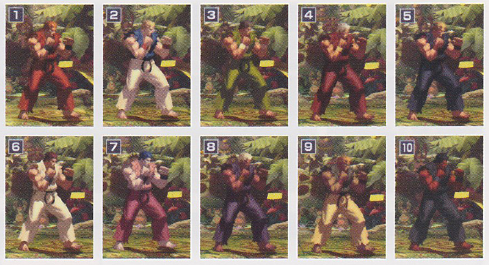
Colors
Other
Taunt
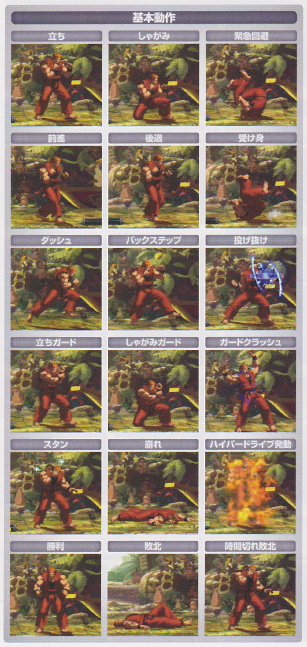
First Row: Standing/Crouching/Evasive Roll
Second Row: Walking (forward/Walking (Backward)/Safe Roll
Third Row: Running/Back Step/Throw Break
Fourth Row: Standing Guard/Crouching Guard/Guard Crush
Fifth Row: Dizzy/Downed/Hyper Drive Activation
Last Row: Win Pose/Knock Out/Time Up Pose
Links & References
Technical Reference
http://www.youtube.com/watch?v=jk6pULuOck8
Discussion Threads
Discuss at Dream Cancel


