-The Dream Cancel Wiki has successfully upgraded it's wiki software and editing has returned. Tables for data have returned.
Samurai Shodown VI/Kyoshiro: Difference between revisions
mNo edit summary |
|||
| (28 intermediate revisions by 5 users not shown) | |||
| Line 1: | Line 1: | ||
{{CharNavbox SSVI}} | |||
[[File:kyoshiro-select.png|240px|thumb|right]] | [[File:kyoshiro-select.png|240px|thumb|right]] | ||
__TOC__ | |||
==Introduction== | ==Introduction== | ||
| Line 9: | Line 11: | ||
*Dash type: Step | *Dash type: Step | ||
*Damage taken: 101% | *Damage taken: 101% | ||
*Rage retention: | *Rage retention: 195 | ||
*Rage duration: 10 seconds | *Rage duration: 10 seconds | ||
*Miscellaneous: Kyoshiro can cancel the beginning of his weapon pickup animation. | |||
==Gameplan== | ==Gameplan== | ||
Poke, poke, poke. 2A, 5B and 2B have you covered, 5C too I guess. 2A is the fastest of these pokes and thus recoils faster as well. 2B isn't too safe, but the fact it hits low and is thus immune to deflects means you might be able to press 5B a lot more often, which is a better normal as far as vertical range and recovery goes. Another decent poke Kyoshiro has in his arsenal is 6B, a leaping overhead which reaches far and goes over a ton of stuff, but it doesn't recoil. The recoil cancel Kyoshiro is intended to use is Lion's Tail (214S), which is quite quick and rewarding but also unsafe. To complement this he has a fakeout version (214D) which also counts as a stance, with built in high/low/empty hop mixups. Alternatively Kyoshiro can just do 214D on its own then settle for another mixup option independent of this stance, which is sometimes preferable because if any of the followups get blocked he's in for a world of hurt. He can't use backdash air spin (j2S) | Poke, poke, poke. 2A, 5B and 2B have you covered, 5C too I guess. 2A is the fastest of these pokes and thus recoils faster as well. 2B isn't too safe, but the fact it hits low and is thus immune to deflects means you might be able to press 5B a lot more often, which is a better normal as far as vertical range and recovery goes. Another decent poke Kyoshiro has in his arsenal is 6B, a leaping overhead which reaches far and goes over a ton of stuff, but it doesn't recoil. The recoil cancel Kyoshiro is intended to use is Lion's Tail (214S), which is quite quick and rewarding but also unsafe. To complement this he has a fakeout version (214D) which also counts as a stance, with built in high/low/empty hop mixups. Alternatively Kyoshiro can just do 214D on its own then settle for another mixup option independent of this stance, which is sometimes preferable because if any of the followups get blocked he's in for a world of hurt. He can't use backdash air spin (j2S) anymore because it deals very little damage and doesn't even knock down, so you'll have to settle with 6B for your overhead. For a low mixup, you have a risky option in Toad Plague (236D) which actually has a lot going for it. It deals a great amount of damage, causes a hard knockdown, gives Kyoshiro an extreme high profile and will eat a single fireball hit for him while it's out. Furthermore this move is less risky than in other games at the cost of having a bit less range, as its recovery has been reduced, but it's still a risk. Use it in mixups or as another recoil cancel option. At fullscreen Kyoshiro can safely send out his tsunamis (236S) which are quick enough and travel fullscreen but are unsafe up close. | ||
To balance out the ground game, Kyoshiro has more anti-airs than you can poke a stick at: 2C which hits above him, leaping spin (623S) to cover an even greater area, Yoga Flame (421S) for a dependable far anti-air and WFT if you are in Rage. You can attempt to use 214S as an anti-air with some success but it is usually outclassed by the options listed above. For air-to-airs he has jB and jC, but be mindful that Kyoshiro's jump is not only floaty but also travels high. | To balance out the ground game, Kyoshiro has more anti-airs than you can poke a stick at: 2C which hits above him, leaping spin (623S) to cover an even greater area, Yoga Flame (421S) for a dependable far anti-air and WFT if you are in Rage. You can attempt to use 214S as an anti-air with some success but it is usually outclassed by the options listed above. For air-to-airs he has jB and jC, but be mindful that Kyoshiro's jump is not only floaty but also travels high. | ||
| Line 19: | Line 22: | ||
Kyoshiro cannot play hit-and-run well at all, particularly because he has a step dash now instead of a run which was already quite slow. As such, when his opponent has the life lead he is either going to have to rely on defensive pokes and stance mixups stemming from these pokes or take big risks. Toad, leaping spin, 214D~A and WFT are some tools which permit reckless play from Kyoshiro, as they travel extremely far for what they are, deal high damage and lead to important knockdowns and other advantages. Of course, these are all extremely unsafe. Ideally one should aim to never be in situations where landing either of these becomes your only way to clutch out the game, but if the clock is ticking then you certainly have the tools to YOLO it. | Kyoshiro cannot play hit-and-run well at all, particularly because he has a step dash now instead of a run which was already quite slow. As such, when his opponent has the life lead he is either going to have to rely on defensive pokes and stance mixups stemming from these pokes or take big risks. Toad, leaping spin, 214D~A and WFT are some tools which permit reckless play from Kyoshiro, as they travel extremely far for what they are, deal high damage and lead to important knockdowns and other advantages. Of course, these are all extremely unsafe. Ideally one should aim to never be in situations where landing either of these becomes your only way to clutch out the game, but if the clock is ticking then you certainly have the tools to YOLO it. | ||
As for Spirit choices, Kyoshiro can take advantage of I Spirit to make his poking game stronger with the highest damage boost in the game and Hyper Slashes at his disposal. Kyoshiro doesn't particularly need his WFT for his gameplan, so he can afford to ditch it to make his poking game stronger. If you want access to WFT then II Spirit is viable | As for Spirit choices, Kyoshiro can take advantage of I Spirit to make his poking game stronger with the highest damage boost in the game and Hyper Slashes at his disposal. Kyoshiro doesn't particularly need his WFT for his gameplan, so he can afford to ditch it to make his poking game stronger. If you want access to his WFT then II Spirit is viable for its high attack power and its ability to destroy weapons potentially turning entire games around in your favour. V Spirit is another choice, as he has plenty of space to meditate and his instant overhead no longer knocking down means he can convert from it into Issen. | ||
==Normal Moves== | ==Normal Moves== | ||
===Far Slashes=== | ===Far Slashes=== | ||
{| class="wikitable" | |||
|- | |||
! Attack !! Description | |||
|- | |||
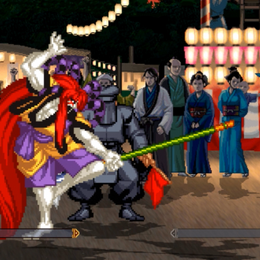
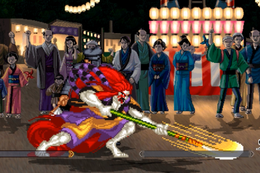
| <b>5A<br>[[File:SSVI Kyoshiro 5A.png|260px|flame]] || A hit with the butt of your weapon. This has a higher hitbox than 2A making it better for catching high profiles but it doesn't reach as far. | |||
|- | |||
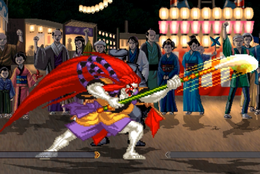
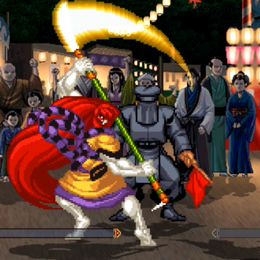
| <b>5B<br>[[File:SSVI Kyoshiro 5B.png|260px|フレーム]] || A very far-reaching poke. Pretty fast startup and recovery, but be mindful about getting deflected. | |||
|- | |||
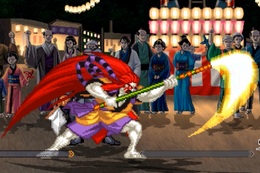
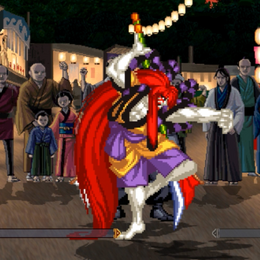
| <b>5C<br>[[File:SSVI Kyoshiro 5C.png|260px|フレーム]]|| Has the exact same appearance and range as 5B, but in return for worse recovery you get high damage for punishes. This will now only deal one hit instead of two. | |||
|- | |||
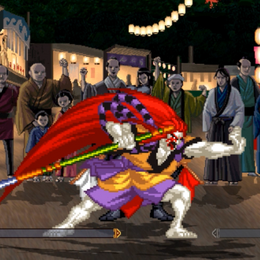
| <b>2A<br>[[File:SSVI Kyoshiro 2A.png|260px|フレーム]] || A straight poke which reaches further than 5A. Does not hit low despite appearances. | |||
|- | |||
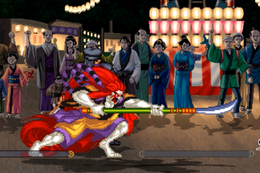
| <b>2B<br>[[File:SSVI Kyoshiro 2B.png|260px|フレーム]] || A dig to the shins. This reaches as far as your 5B, hits low, can't be deflected and recoils on block. However it is vulnerable to hops or any other high profile your opponent may have, as its recovery is notably slow. | |||
|- | |||
| <b>2C<br>[[File:SSVI Kyoshiro 2C.png|260px|フレーム]] || An anti-air covering the area above Kyoshiro which is fairly quick and deals a great amount of damage. As a crouching anti-air it still carries an inherent proneness to deephits if it at least trades. New to this game is its ability to hit grounded opponents right in front of him, but this still doesn't have the best range out there. | |||
|} | |||
===Near Slashes=== | ===Near Slashes=== | ||
{| class="wikitable" | |||
! Attack !! Description | |||
|- | |||
| <b>n5A<br>[[File:SSVI Kyoshiro n5A.png|260px|flame]] || A punch. Special cancellable. | |||
|- | |||
| <b>n5B<br>[[File:SSVI Kyoshiro n5B.png|260px|flame]] || A palm shove. Your main close medium starter as it is special cancellable. | |||
|- | |||
| <b>n5C<br>[[File:SSVI Kyoshiro n5C.png|260px|flame]] || A downward swipe. Tied with 2C as your highest-damaging normal and will punish jump-outs just as well but is outclassed by n5B combos damage-wise. | |||
|- | |||
| <b>n2A<br>[[File:SSVI Kyoshiro n2A.png|260px|flame]] || n5A but lower. Also special cancellable. | |||
|- | |||
| <b>n2B<br>[[File:SSVI Kyoshiro n2B.png|260px|flame]] || n5B but lower. It doesn't special cancel for some reason so use that other move instead. | |||
|- | |||
| <b>n2C<br>[[File:SSVI Kyoshiro n2C.png|260px|flame]] || Same as far version. | |||
|} | |||
===Kicks=== | ===Kicks=== | ||
{| class="wikitable" | |||
! Attack !! Description | |||
|- | |||
| <b>5D<br>[[File:SSVI Kyoshiro 5D.png|260px|flame]] || A forward boot with decent range, but when unarmed u5S actually reaches further for a bit less damage. | |||
|- | |||
| <b>6D<br>[[File:SSVI Kyoshiro 6D.png|260px|flame]] || A standing low which looks conspicuously like a mid attack. Stays active for a while, making it an effective meaty which can link into close mediums. | |||
|- | |||
| <b>2D<br>[[File:SSVI Kyoshiro 2D.png|260px|flame]] || A low kick. Counts as a medium hit unlike most other moves of this nature, but is still weak damage-wise. Special cancellable. | |||
|- | |||
| <b>3D<br>[[File:SSVI Kyoshiro 3D.png|260px|flame]] || A low-hitting sweep. | |||
|} | |||
===Air Normals=== | ===Air Normals=== | ||
{| class="wikitable" | |||
! Attack !! Description | |||
|- | |||
| <b>jA<br>[[File:SSVI Kyoshiro jA.png|260px|flame]] || Aerial palm thrust. Active for a long time. | |||
|- | |||
| <b>jB<br>[[File:SSVI Kyoshiro jB.png|260px|flame]] || An air-to-air stab angled a bit lower. This has the longest range of Kyoshiro's air normals. | |||
|- | |||
| <b>jC<br>[[File:SSVI Kyoshiro jC.png|260px|flame]] || Kyoshiro swings downward, covering the area around him nicely for decent priority. This is Kyoshiro's main jump-in. | |||
|- | |||
| <b>jD<br>[[File:SSVI Kyoshiro jD.png|260px|flame]] || A quirky air-to-air where Kyoshiro kicks above his waist. Has better reach than jA but isn't active for nearly as long. | |||
|} | |||
===Unarmed Normals=== | ===Unarmed Normals=== | ||
{| class="wikitable" | |||
! Attack !! Description | |||
' | |- | ||
| <b>u5S<br>[[File:SSVI Kyoshiro u5S.png|260px|flame]] || Standing palm thrust. Kyoshiro's longest-reaching poke when unarmed. | |||
|- | |||
| <b>u2S<br>[[File:SSVI Kyoshiro u2S.png|260px|flame]] || Crouching palm thrust which doesn't reach as far. | |||
|- | |||
| <b>ujS<br>[[File:SSVI Kyoshiro ujS.png|260px|flame]] || Same as jA. | |||
|} | |||
== | ===Hyper Slash (I)=== | ||
{| class="wikitable" | |||
! Attack !! Description | |||
|- | |||
| <b>A+B<br>[[File:SSVI_Kyoshiro_Hyper slash.png|260px|flame]] || His 5C, but with a fire effect. The Guy Fieri of Hyper Slashes. | |||
|} | |||
===Command Moves=== | |||
{| class="wikitable" | |||
! Attack !! Description | |||
|- | |||
| <b>6B<br>[[File:SSVI Kyoshiro 6B.png|260px|flame]] || Kyoshiro's universal overhead from V Special. Causes a soft knockdown pretty quick after the hit. This is still quite good at poking for its high profile and forward movement, but you would do well to space this correctly. | |||
|} | |||
==Special Moves== | |||
{| class="wikitable" | |||
'''Toy Transformation''' - 6412364E (II) | ! Attack !! Description | ||
|- | |||
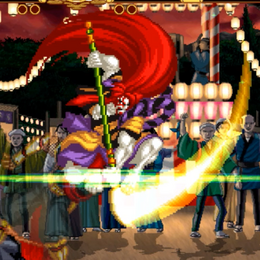
|'''Twisting Heavens''' - 623S[[File:SSVI Kyoshiro 623S.png|260px|flame]] || Kyoshiro's spinning move, which is traditionally used as an anti-air. Strength determines how high Kyoshiro leaps and the landing recovery. These will only hit once for a soft knockdown but are all capable of dealing multiple hits of chip damage. 623A is unique in that, in a similar fashion to Bust-Kyoshiro's take on the move in IV, Kyoshiro does not leave the ground but merely spins forward. All strengths do the exact same damage, but you're better off sticking with 623A for combos because it will reliably combo from near light slashes from any screen position. 623B and 623C, of course, are solid anti-airs, though 623C's trajectory may be a bit excessive. | |||
|- | |||
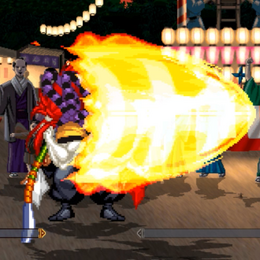
|'''Dance Of Fire''' - 421S, can be done unarmed[[File:SSVI Kyoshiro 421S.png|260px|flame]] || After a lengthy startup Kyoshiro breathes a large ball of fire in front of him. Strength determines how long, with 421C dealing slightly more damage than the other versions which deal the same as each other. These different timings are mainly there to mess with an opponent's punish timing, but the strength is telegraphed by how fast Kyoshiro is shaking with each strength. This is a potent chipping tool, particularly in the corner, but it also works as a surprisingly effective far anti-air. This will also eat up most fireballs. | |||
|- | |||
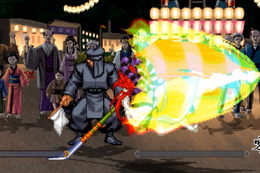
|'''Tsunami Crunch''' - 236S, can be done unarmed <br>(Samurai Drive)[[File:SSVI Kyoshiro 236S.png|260px|flame]] || A ground-skimming tidal wave. Strength determines the startup and speed. This is a projectile Kyoshiro can use to force a jump, in which he can act on it with any of his various anti-airs. This is best used at a distance as even though the startup for all versions is quite fast they don't give the best advantage, particularly up close where they are punishable on block. | |||
|- | |||
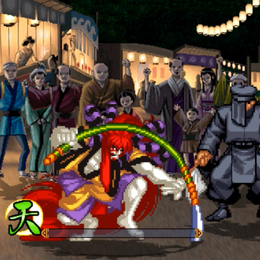
|'''Lion's Tail Blast''' - 214S[[File:SSVI Kyoshiro 214S.png|260px|flame]] || Yet another anti-air. Strength determines the startup and damage. It hits a bit higher than 421S while also being stationary, and furthermore it can high profile over various attacks, so as an anti-air it may potentially be good for that one specific purpose, but in practice it's not worth using over his other anti-airs which outclass it in common situations. In recoil cancels you may as well learn to use it as a counter-poke, if only to make the opponent respect its brand new fakeout. | |||
|- | |||
| '''Imitation Lion's Tail''' - 214D[[File:SSVI Kyoshiro 214D.png|260px|flame]] || A fakeout version of 214S where Kyoshiro prepares to hop on his pole, but returns to his feet. But this is no ordinary fakeout - this is a stance! | |||
|- | |||
| '''Raging Lion''' - A during 214D[[File:SSVI Kyoshiro 214DA.png|260px|flame]] || This can be thought of as his 214AB from V Special as Kyoshiro charges forward well over half the stage to hit the opponent with a Lion's Tail. This is as safe as you think it is, but it is also the only followup which he can't be poked out of. You may just want to do an empty 214D and deflect if you're expecting a poke, though. Given Kyoshiro must do the fakeout first the startup is rather poor, making this not too great for punishes, however it does notably more damage than any strength of 214S. | |||
|- | |||
| '''Behead''' - B during 214D <br>(Samurai Drive)[[File:SSVI Kyoshiro 214DB.png|260px|flame]] || *Kyoshiro leaps a great distance from his pole and swings downward mid-jump. This is an overhead which ends with Kyoshiro taunting, making it rather unsafe. The leap is designed to connect from 5B range, where it is most safe. | |||
|- | |||
| '''Shin''' - C during 214D <br>(Samurai Drive)[[File:SSVI Kyoshiro 214DC.png|260px|flame]] || Kyoshiro leaps a great distance from his pole then lands with a sweep. This is a low which does a bit more damage than 214D~B, but it takes a bit longer to come out. A fuzzy guard against either option is feasible. | |||
|- | |||
|'''Jump''' - D during 214D[[File:SSVI Kyoshiro 214DD.png|260px|flame]] || Kyoshiro leaps a great distance from his pole then lands on his sweep. This is used to counter opponents fuzzy guarding the above options, being able to go for a throw, a backdash j2S or some other option. | |||
|- | |||
|'''Toad Plague''' - 236D, can be done unarmed[[File:SSVI Kyoshiro 236D.png|260px|flame]] || A fast low poke which reaches as far as halfscreen as Kyoshiro summons a giant toad from beneath his feet. The range has been nerfed a little though, and furthermore it can no longer hit OTG. To compensate for this the move recovers way quicker and the toad itself will absorb one projectile hit, while Kyoshiro still retains a very high profile while standing on the toad. This is fast enough to be combo'd into and it deals very good damge and a hard knockdown. | |||
|- | |||
|'''Smoldering Blood Pounce''' - j2S[[File:SSVI Kyoshiro 82S.png|260px|flame]] || An aerial, ovehead spin with near-instant startup capable of crossing up. Must be performed at around the peak of your jump, but this height restriction is ignored if performed from a backdash, which notably results in this move being an instant overhead. The pose Kyoshiro strikes after landing has been shortened, but this move has also received sheer nerfs. Not only does this move no longer knock down but damage is now spread across multiple spins, with each hit only doing a few measly pixels of damage. Kyoshiro can still use this as an instant overhead to close a round but otherwise this move has a great deal of risk for little reward. | |||
Backdash j2S has more of a reward during State Of Nothingness as an instant overhead, as Kyoshiro can easily link into Issen from it. If he hasn't meditated much this requires you to do it early in the time given. | |||
|- | |||
| '''Toy Transformation''' - 6412364E (II) | |||
[[File:kyoshiro-6412364E.png]] | [[File:kyoshiro-6412364E.png]] | ||
|} | |||
==Supers== | ==Supers== | ||
'''Ruffian Kyoshiro's Flesh And Blood Fandango''' - 236AB | {| class="wikitable" | ||
! Attack !! Description | |||
|- | |||
| '''Ruffian Kyoshiro's Flesh And Blood Fandango''' - 236AB<br>[[File:SSVI_Kyoshiro_Weapon_Flip.png|260px|flame]] [[File:SSVI_Kyoshiro_Weapon_Flip2.png|260px|flame]] || The same WFT that Kyoshiro has had for a while, spinning forward quickly for a hitgrab. This will deal very good damage and will secure a hard knockdown, but on block it will also deal a great amount of chip. It's not the best idea to try chipping with this all day as it is rather unsafe, so you may want to save this for combos. Unless you can anti-air with this well, in which case do that. | |||
'''Demon Flames Fandango''' - 641236BC (II), 236BC (VI) | |- | ||
| '''Demon Flames Fandango''' - 641236BC (II), 236BC (VI)[[File:SSVI Kyoshiro 236BC1.png|260px|flame]] [[File:SSVI Kyoshiro 236BC2.png|260px|flame]] || This move comes from the end of Slash-Kyoshiro's WFT in Samurai Shodown IV, where Kyoshiro blows fire to the groud and three successive explosions burst in front of him. This deals nine hits of damage and causes a soft knockdown. The final hit of this super will actually reach fullscreen, and that's how far away Kyoshiro will be from his opponent if he lands it, but the opponent will be pushed back well over half that distance on block as well. Which is a good thing, considering Kyoshiro is supposed to be a zoner after all. The only problem with this Secret Move is it's too slow to combo from most attacks and it deals suprisingly low damage, which means it's probably not going to steal any lifeleads for Kyoshiro. | |||
|} | |||
==Combos== | ==Combos== | ||
'''Standard Combos''' | '''Standard Combos''' | ||
*'''n5A/n2A 623A''' - | *'''5A/n5A/n2A 623A''' - Light combo for good reward. Won't combo from max range 5A but does work over most of its range. | ||
*'''n5B/2D 623A/ | *'''n5B/2D 623A/214A/236D/236AB''' - Close medium combos. Use toad as it's the GOAT. | ||
'''Continuous Slash (IV)''' | '''Continuous Slash (IV)''' | ||
*'''A+B BBC 623B/214S/236D/236AB''' - 623B is better than 623C because it leaves you safer and in poking distance, while 623A won't work in general. You should be combo'ing into toad or WFT anyway. | *'''A+B BBC 623B/214S/236D/236AB''' - 623B is better than 623C because it leaves you safer and in poking distance, while 623A won't work in general. You should be combo'ing into toad or WFT anyway. | ||
'''State | '''State Of Nothingness (V)''' | ||
*''' | *'''j2S, ... ABC''' - Only real use for Kyoshiro's instant overhead is during slowed time where he can convert into Issen after he recovers. Kyoshiro has a wide selection of lows to mix this in with. | ||
==Frame Data - Provided by Tekitogate== | |||
{| class="wikitable" | |||
|+ | |||
|- | |||
! Attack !! Startup !! On Hit !! On Standing Block !! On Crouching Block !! Notes | |||
|- | |||
| n5A || 5 || -3 || -7 || -2 || | |||
|- | |||
| n2A || 5 || +5 || +1 || +6 || | |||
|- | |||
| 5A || 7 || -8 || -11 || -6 || | |||
|- | |||
| 2A || 8 || -2 || -11 || -6 || | |||
|- | |||
| jA || 8 || N/A || N/A || N/A || | |||
|- | |||
| n5B || 11 || -5 || -17 || -12 || | |||
|- | |||
| n2B || 10 || -1 || -13 || -8 || | |||
|- | |||
| 5B || 13 || -1 || -17 || -12 || | |||
|- | |||
| 2B || 12 || -5 || N/A || -12 || | |||
|- | |||
| j8B || 14 || N/A || N/A || N/A || | |||
|- | |||
| j7B/j9B || 11 || N/A || N/A || N/A || | |||
|- | |||
| n5C || 14 || -6~-5 || -20 || -15 || | |||
|- | |||
| 5C || 16 || +9~+10 || -25 || -20 || | |||
|- | |||
| 2C || 13 || +4~+5 || -20 || -15 || | |||
|- | |||
| j8C || 12 || N/A || N/A || N/A || | |||
|- | |||
| j7C/j9C || 11 || N/A || N/A || N/A || | |||
|- | |||
| 6B || 22 || KD || -17 || N/A || Active for 6 frames | |||
|- | |||
| 5D || 9 || -6 || -18 || -13 || | |||
|- | |||
| 6D || 14 || +4 || N/A || -3 || | |||
|- | |||
| 2D || 8 || -1 || N/A || -8 || | |||
|- | |||
| 3D || 14 || KD || N/A || -3 || Active for 9 frames | |||
|- | |||
| jD || 10 || N/A || N/A || N/A || | |||
|- | |||
| Hyper Slash || 26 || KD || -43 || -33 || | |||
|- | |||
| Continuous Slash || 11 || N/A || -25 || -20 || | |||
|} | |||
==Colors== | ==Colors== | ||
[[File:kyoshiro-color.png]] | [[File:kyoshiro-color.png|x290px]] | ||
==External Links== | ==External Links== | ||
*[https://seesaawiki.jp/w/givingleaf/d/%c0%e9%ce%be%b6%b8%bb%e0%cf%ba Seesaa wiki] | *[https://seesaawiki.jp/w/givingleaf/d/%c0%e9%ce%be%b6%b8%bb%e0%cf%ba Seesaa wiki] | ||
*[https://twitter.com/tekitogate/status/1534696266604892160 Near-unblockable setup from Tekitogate] | |||
{{CharNavbox SSVI}} | |||
{{Navbox SS6}} | {{Navbox SS6}} | ||
[[Category:Samurai Shodown VI]] | [[Category:Samurai Shodown VI]] | ||
[[Category:Kyoshiro]] | [[Category:Kyoshiro]] | ||
Latest revision as of 03:31, 24 January 2024
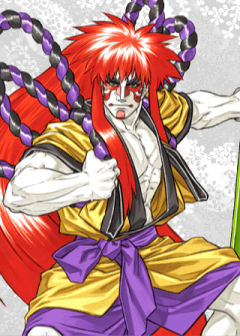
Introduction
We live in a society where Kyoshiro no longer has a good instant overhead while Mina gets to set up five TAS unblockables for free.
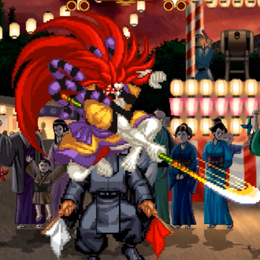
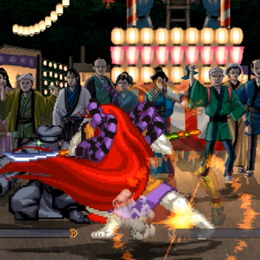
Kyoshiro is still great at poking and anti-airing as per usual, but in this iteration he's received a wealth of changes both good and bad. His toad is extremely fast now and is an excellent combo ender for high damage, while to spice up his recoil cancel game Kyoshiro now has access to a mixup-oriented stance. On the flipside, he can no longer run and his air spin has been nerfed considerably. This makes it quite difficult for Kyoshiro to come back from a life deficit without taking serious risks.
Data
- Dash type: Step
- Damage taken: 101%
- Rage retention: 195
- Rage duration: 10 seconds
- Miscellaneous: Kyoshiro can cancel the beginning of his weapon pickup animation.
Gameplan
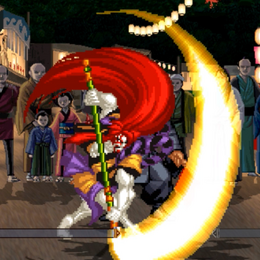
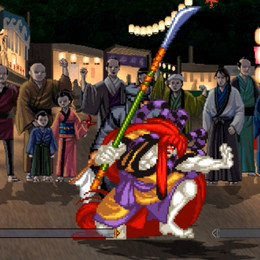
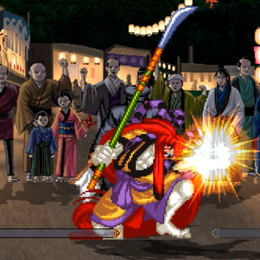
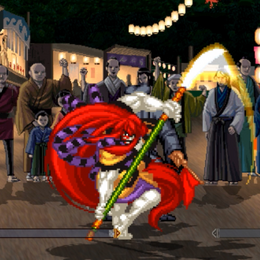
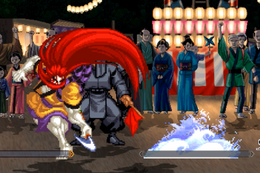
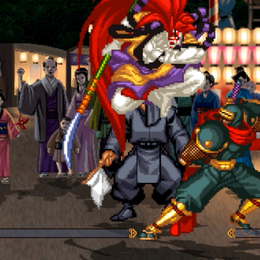
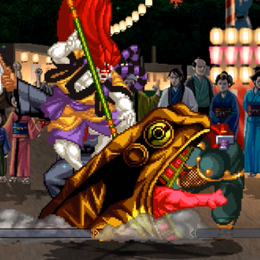
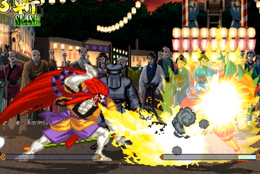
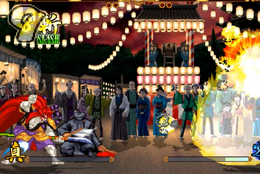
Poke, poke, poke. 2A, 5B and 2B have you covered, 5C too I guess. 2A is the fastest of these pokes and thus recoils faster as well. 2B isn't too safe, but the fact it hits low and is thus immune to deflects means you might be able to press 5B a lot more often, which is a better normal as far as vertical range and recovery goes. Another decent poke Kyoshiro has in his arsenal is 6B, a leaping overhead which reaches far and goes over a ton of stuff, but it doesn't recoil. The recoil cancel Kyoshiro is intended to use is Lion's Tail (214S), which is quite quick and rewarding but also unsafe. To complement this he has a fakeout version (214D) which also counts as a stance, with built in high/low/empty hop mixups. Alternatively Kyoshiro can just do 214D on its own then settle for another mixup option independent of this stance, which is sometimes preferable because if any of the followups get blocked he's in for a world of hurt. He can't use backdash air spin (j2S) anymore because it deals very little damage and doesn't even knock down, so you'll have to settle with 6B for your overhead. For a low mixup, you have a risky option in Toad Plague (236D) which actually has a lot going for it. It deals a great amount of damage, causes a hard knockdown, gives Kyoshiro an extreme high profile and will eat a single fireball hit for him while it's out. Furthermore this move is less risky than in other games at the cost of having a bit less range, as its recovery has been reduced, but it's still a risk. Use it in mixups or as another recoil cancel option. At fullscreen Kyoshiro can safely send out his tsunamis (236S) which are quick enough and travel fullscreen but are unsafe up close.
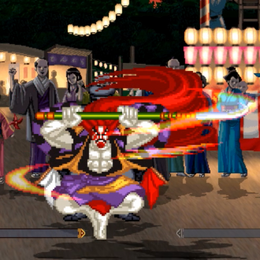
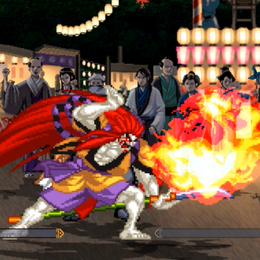
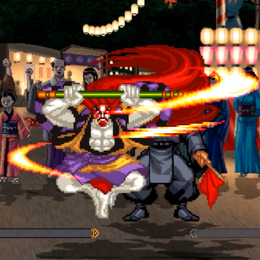
To balance out the ground game, Kyoshiro has more anti-airs than you can poke a stick at: 2C which hits above him, leaping spin (623S) to cover an even greater area, Yoga Flame (421S) for a dependable far anti-air and WFT if you are in Rage. You can attempt to use 214S as an anti-air with some success but it is usually outclassed by the options listed above. For air-to-airs he has jB and jC, but be mindful that Kyoshiro's jump is not only floaty but also travels high.
Kyoshiro cannot play hit-and-run well at all, particularly because he has a step dash now instead of a run which was already quite slow. As such, when his opponent has the life lead he is either going to have to rely on defensive pokes and stance mixups stemming from these pokes or take big risks. Toad, leaping spin, 214D~A and WFT are some tools which permit reckless play from Kyoshiro, as they travel extremely far for what they are, deal high damage and lead to important knockdowns and other advantages. Of course, these are all extremely unsafe. Ideally one should aim to never be in situations where landing either of these becomes your only way to clutch out the game, but if the clock is ticking then you certainly have the tools to YOLO it.
As for Spirit choices, Kyoshiro can take advantage of I Spirit to make his poking game stronger with the highest damage boost in the game and Hyper Slashes at his disposal. Kyoshiro doesn't particularly need his WFT for his gameplan, so he can afford to ditch it to make his poking game stronger. If you want access to his WFT then II Spirit is viable for its high attack power and its ability to destroy weapons potentially turning entire games around in your favour. V Spirit is another choice, as he has plenty of space to meditate and his instant overhead no longer knocking down means he can convert from it into Issen.
Normal Moves
Far Slashes
Near Slashes
Kicks
Air Normals
Unarmed Normals
| Attack | Description |
|---|---|
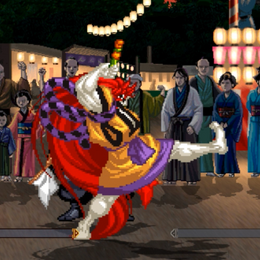
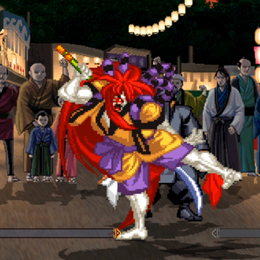
u5S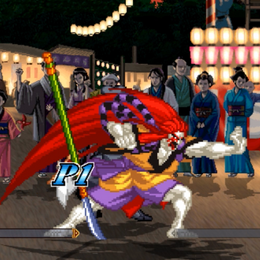 |
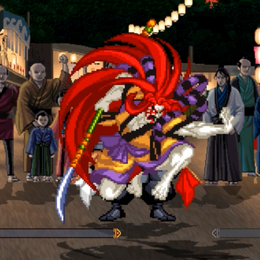
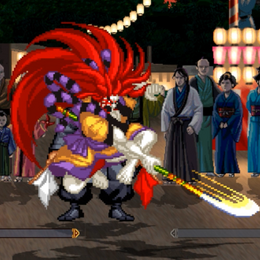
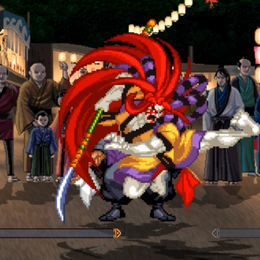
Standing palm thrust. Kyoshiro's longest-reaching poke when unarmed. |
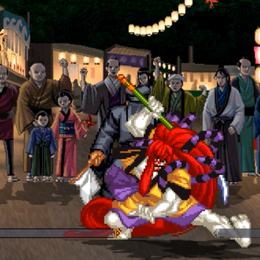
u2S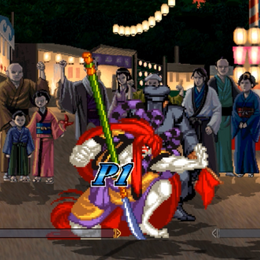 |
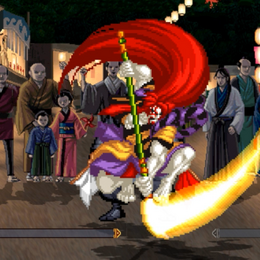
Crouching palm thrust which doesn't reach as far. |
ujS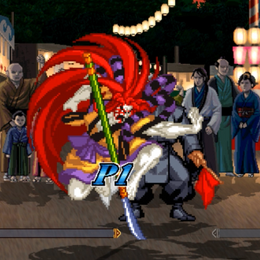 |
Same as jA. |
Hyper Slash (I)
| Attack | Description |
|---|---|
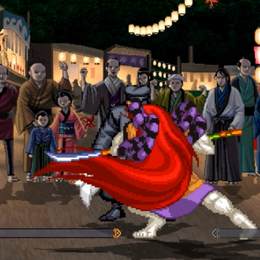
A+B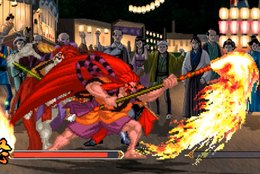 |
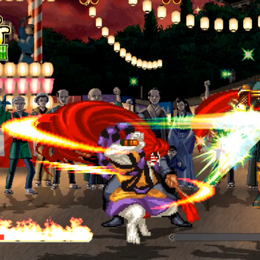
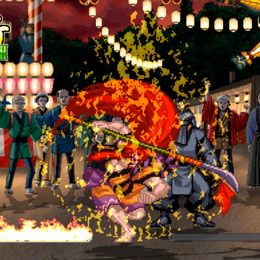
His 5C, but with a fire effect. The Guy Fieri of Hyper Slashes. |
Command Moves
Special Moves
Supers
Combos
Standard Combos
- 5A/n5A/n2A 623A - Light combo for good reward. Won't combo from max range 5A but does work over most of its range.
- n5B/2D 623A/214A/236D/236AB - Close medium combos. Use toad as it's the GOAT.
Continuous Slash (IV)
- A+B BBC 623B/214S/236D/236AB - 623B is better than 623C because it leaves you safer and in poking distance, while 623A won't work in general. You should be combo'ing into toad or WFT anyway.
State Of Nothingness (V)
- j2S, ... ABC - Only real use for Kyoshiro's instant overhead is during slowed time where he can convert into Issen after he recovers. Kyoshiro has a wide selection of lows to mix this in with.
Frame Data - Provided by Tekitogate
| Attack | Startup | On Hit | On Standing Block | On Crouching Block | Notes |
|---|---|---|---|---|---|
| n5A | 5 | -3 | -7 | -2 | |
| n2A | 5 | +5 | +1 | +6 | |
| 5A | 7 | -8 | -11 | -6 | |
| 2A | 8 | -2 | -11 | -6 | |
| jA | 8 | N/A | N/A | N/A | |
| n5B | 11 | -5 | -17 | -12 | |
| n2B | 10 | -1 | -13 | -8 | |
| 5B | 13 | -1 | -17 | -12 | |
| 2B | 12 | -5 | N/A | -12 | |
| j8B | 14 | N/A | N/A | N/A | |
| j7B/j9B | 11 | N/A | N/A | N/A | |
| n5C | 14 | -6~-5 | -20 | -15 | |
| 5C | 16 | +9~+10 | -25 | -20 | |
| 2C | 13 | +4~+5 | -20 | -15 | |
| j8C | 12 | N/A | N/A | N/A | |
| j7C/j9C | 11 | N/A | N/A | N/A | |
| 6B | 22 | KD | -17 | N/A | Active for 6 frames |
| 5D | 9 | -6 | -18 | -13 | |
| 6D | 14 | +4 | N/A | -3 | |
| 2D | 8 | -1 | N/A | -8 | |
| 3D | 14 | KD | N/A | -3 | Active for 9 frames |
| jD | 10 | N/A | N/A | N/A | |
| Hyper Slash | 26 | KD | -43 | -33 | |
| Continuous Slash | 11 | N/A | -25 | -20 |
