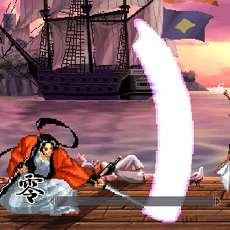
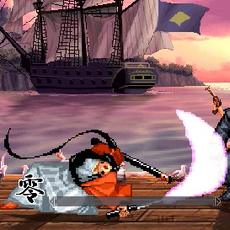
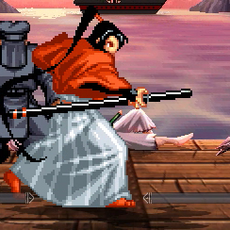
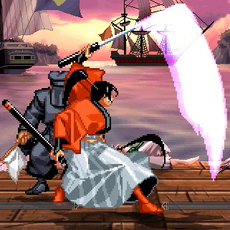
Our Fatal Fury: City of the Wolves wiki page is ready for editing: https://dreamcancel.com/wiki/Fatal_Fury:_City_of_the_Wolves
Samurai Shodown VI/Yumeji: Difference between revisions
| (8 intermediate revisions by the same user not shown) | |||
| Line 4: | Line 4: | ||
==Introduction== | ==Introduction== | ||
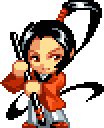
Yumeji is a headswap of [[Samurai Shodown VI/Ukyo|Ukyo]] who draws from Ukyo's Samurai Shodown III/IV Bust moveset. Yumeji | Yumeji is a headswap of [[Samurai Shodown VI/Ukyo|Ukyo]] who draws from Ukyo's Samurai Shodown III/IV Bust moveset. Yumeji trades out Ukyo's specials and floaty jump for better air mobility and varied specials that suit a very well rounded hit and run game. The two share many normals, but Yumeji's frame data is tweaked to better suit a midrange poking game. Yumeji has excellent tech chases off most soft knockdowns, reliable meaty setups off hard knockdowns, solid pressure, and a potent neutral game with good pokes and recoil cancels, a long reaching overhead, and an air fireball series. | ||
==Data== | ==Data== | ||
| Line 29: | Line 29: | ||
* III lets Yumeji charge Rage manually and grants infinite Rage at very low HP. Poor Rage retention means the charging process is slow. Dodge offers a standard grounded defensive option. Air parry is niche given Yumeji's other air options, but may have occasional utility. | * III lets Yumeji charge Rage manually and grants infinite Rage at very low HP. Poor Rage retention means the charging process is slow. Dodge offers a standard grounded defensive option. Air parry is niche given Yumeji's other air options, but may have occasional utility. | ||
* IV's signature Continuous Slash offers Yumeji an alternative combo starter for increased damage or a modest Rage boost. IV shares dodge as a defensive option with III Spirit, and offers Rage Explosion + Issen as a last ditch defensive threat | * IV's signature Continuous Slash offers Yumeji an alternative combo starter for increased damage or a modest Rage boost. IV shares dodge as a defensive option with III Spirit, and offers Rage Explosion + Issen as a last ditch defensive threat. | ||
* V downplays Yumeji's supers, but ample opportunity to meditate, good high/low options that don't knock down, and an unburstable launcher make Yumeji's State of Nothingness game very threatening. V also builds on II's dodges and rolls with an excellent forward hop. Rage Explosion is available as a defensive option, but without access to Issen. Reduced Rage time emphasizes meditation, but Yumeji does have good base Rage duration when Rage is preferable to further meditation. | * V downplays Yumeji's supers, but ample opportunity to meditate, good high/low options that don't knock down, and an unburstable launcher make Yumeji's State of Nothingness game very threatening. V also builds on II's dodges and rolls with an excellent forward hop. Rage Explosion is available as a defensive option, but without access to Issen. Reduced Rage time emphasizes meditation, but Yumeji does have good base Rage duration when Rage is preferable to further meditation. | ||
| Line 48: | Line 48: | ||
| display = 230x230px | | display = 230x230px | ||
| description = | | description = | ||
Similar reach to 5A, deals more damage, but longer recovery and | Similar reach to 5A, deals more damage, but longer recovery and recoils on block. Still whiffs on some crouching opponents. | ||
}} | }} | ||
| Line 69: | Line 69: | ||
| display = 230x230px | | display = 230x230px | ||
| description = | | description = | ||
Broad arcing slash that hits directly above Yumeji, then in front. Good anti-air if spaced to avoid possible n2B, but risks taking a jump-in hit in crouching state. | Broad arcing slash that hits directly above Yumeji, then in front. Good anti-air if spaced to avoid possible n2B, but risks taking a jump-in hit in crouching state. Recoils on block and will hit opponents that can duck under 5B. | ||
}} | }} | ||
| Line 76: | Line 76: | ||
| display = 230x230px | | display = 230x230px | ||
| description = | | description = | ||
This is Yumeji's only far normal which | This is Yumeji's only far normal which can neither recoil nor special cancel, though it is also the most damaging. Preferred over 5C for punishes due to better damage and frame advantage. Moves forward and can go under some high attacks. | ||
}} | }} | ||
| Line 98: | Line 98: | ||
| display = 230x230px | | display = 230x230px | ||
| description = | | description = | ||
Close range two hit slash. Second hit may catch ducks and dodges. Also works as an easy close range punish option, though slower than n5B or 5D. | |||
}} | }} | ||
| Line 119: | Line 119: | ||
| display = 230x230px | | display = 230x230px | ||
| description = | | description = | ||
Crouching two hit slash with slightly slower startup than n5C and no recoil cancel, but better frame advantage on hit and starts lower. | |||
}} | }} | ||
| Line 303: | Line 303: | ||
**Midscreen, forward jump or roll into 236A. Allow the roll to fully recover rather than roll canceling. This also sets up a good spacing for 6B mixups. | **Midscreen, forward jump or roll into 236A. Allow the roll to fully recover rather than roll canceling. This also sets up a good spacing for 6B mixups. | ||
**In corner, neutral/back jump or backroll into whichever 236S is appropriate for the spacing. Again, if rolling allow it to fully recover. | **In corner, neutral/back jump or backroll into whichever 236S is appropriate for the spacing. Again, if rolling allow it to fully recover. | ||
* | *Alternatively, any version leads to a guaranteed pursuit. Requires a microdash if midscreen. | ||
}} | }} | ||
| Line 311: | Line 311: | ||
| display = 230x230px | | display = 230x230px | ||
| description3 = | | description3 = | ||
*Concealed with the morphing effect from V, Yumeji dashes forward then swipes at the opponent. All three versions have significant startup, but gain strike invulnerability when Yumeji disappears on frame 18. Situationally useful as a recoil cancel to beat opponents mashing | *Concealed with the morphing effect from V, Yumeji dashes forward then swipes at the opponent. All three versions have significant startup, but gain strike invulnerability when Yumeji disappears on frame 18. Situationally useful as a recoil cancel to beat opponents mashing. | ||
*623A is +9 on hit, linking into many of Yumeji's faster normals as well as Continuous Slash. Somewhat safe on block when spaced, especially if the opponent crouch blocks. However, all 623S variants hit mid. Loses invulnerability shortly before it hits. | *623A is +9 on hit, linking into many of Yumeji's faster normals as well as Continuous Slash. Somewhat safe on block when spaced, especially if the opponent crouch blocks. However, all 623S variants hit mid. Loses invulnerability shortly before it hits. | ||
*623B acts like a single hit version of 66B and launches the opponent. Reaches slightly further than 623A. Yumeji can also combo off this, and once again loses invulnerability shortly before it hits. | *623B acts like a single hit version of 66B and launches the opponent. Reaches slightly further than 623A. Yumeji can also combo off this, and once again loses invulnerability shortly before it hits. | ||
| Line 323: | Line 323: | ||
| description6 = | | description6 = | ||
*Long-ranged attacks with followups that lead to knockdowns. As this is your fastest grounded special, it is also your main combo ender. The initial attacks both have relatively low recovery, though the followups are much more committal. | *Long-ranged attacks with followups that lead to knockdowns. As this is your fastest grounded special, it is also your main combo ender. The initial attacks both have relatively low recovery, though the followups are much more committal. | ||
*421A is an upwards hitting launcher. This can antiair and will juggle into the followups on air hit. Whiffs against crouching opponents. As a launcher, opponents cannot Rage Explosion after 421A hits. | *421A is an upwards hitting launcher. This can antiair and will juggle into the followups on air hit. Whiffs against crouching opponents and small standing hurtboxes, especially if not point blank. As a launcher, opponents cannot Rage Explosion after 421A hits. Can clash and is vulnerable to deflect. | ||
*421B is a low downwards strike. This is relatively safe on block as a recoil cancel and can check opponents stand blocking. Yumeji's primary special for combos and an important recoil cancel option as well. | *421B is a low downwards strike. This is relatively safe on block as a recoil cancel and can check opponents stand blocking. Yumeji's primary special for combos and an important recoil cancel option as well. | ||
*The optional second hit reaches not only farther but either higher (A) or lower (B). On hit, A will knock the opponent further away, while B will keep them closer. Both versions have much higher recovery than the first hit and are very unsafe. It can be delayed a little to frame trap. The B followup will hit low if cancelled into from 421B, but from 421A it will hit overhead. Limited coverage and high recovery makes the followups generally ill-suited for zoning, but they can be used for a ranged mixup on knockdown or after an air hit. | *The optional second hit reaches not only farther but either higher (A) or lower (B). On hit, A will knock the opponent further away, while B will keep them closer. Both versions have much higher recovery than the first hit and are very unsafe. It can be delayed a little to frame trap. The B followup will hit low if cancelled into from 421B, but from 421A it will hit overhead. Limited coverage and high recovery makes the followups generally ill-suited for zoning, but they can be used for a ranged mixup on knockdown or after an air hit. | ||
| Line 345: | Line 345: | ||
| display = 230x230px | | display = 230x230px | ||
| description = | | description = | ||
*Bust-[[Samurai Shodown VI/Ukyo|Ukyo]]'s WFT. Fast startup and travels fullscreen quickly. While it can be used as a standalone punish because of this, this WFT is best used as a combo ender where it is guaranteed to hit. Will sideswitch and leave the opponent close to Yumeji in a hard knockdown. | *Bust-[[Samurai Shodown VI/Ukyo|Ukyo]]'s WFT. Fast startup and travels fullscreen quickly. While it can be used as a standalone punish because of this, this WFT is best used as a combo ender where it is guaranteed to hit. Will sideswitch and leave the opponent close to Yumeji in a hard knockdown. Yumeji's lower body is invulnerable until just before this move becomes active. | ||
}} | }} | ||
Latest revision as of 03:41, 12 February 2025
Introduction
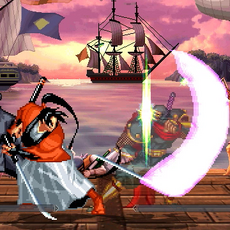
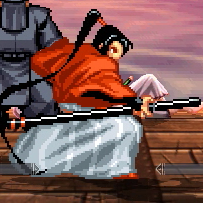
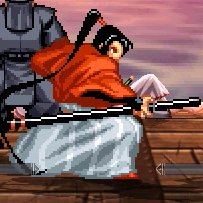
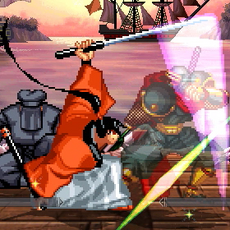
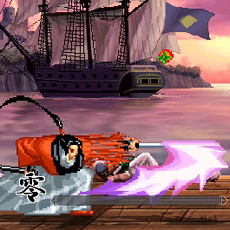
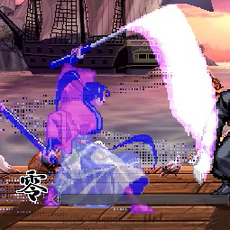
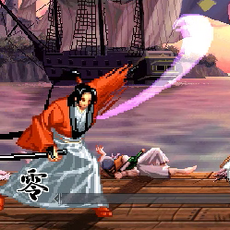
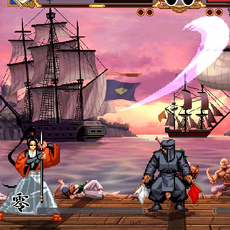
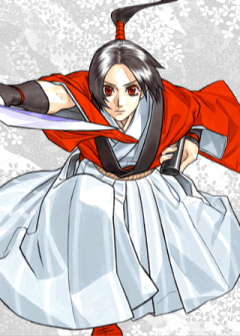
Yumeji is a headswap of Ukyo who draws from Ukyo's Samurai Shodown III/IV Bust moveset. Yumeji trades out Ukyo's specials and floaty jump for better air mobility and varied specials that suit a very well rounded hit and run game. The two share many normals, but Yumeji's frame data is tweaked to better suit a midrange poking game. Yumeji has excellent tech chases off most soft knockdowns, reliable meaty setups off hard knockdowns, solid pressure, and a potent neutral game with good pokes and recoil cancels, a long reaching overhead, and an air fireball series.
Data
- Dash type: Run
- Damage taken: 115% (4th Frailest)
- Rage retention: 90
- Rage duration: 15 seconds (4th Longest)
Gameplan
Yumeji is a keepaway character with an assortment of ranged pokes, recoil cancel options and fireballs to cover different ranges and angles. This variation of Ukyo retains his fast run speed and backdash but has a faster jump which makes air poking much more viable. However, much like Ukyo, Yumeji's defense is below average to compensate for the strong zoning tools you're working with.
Learn the spacings for 5B and 5C, as they are your best pokes. Both are fast, reach incredibly far and recoil on block. If you are expecting the opponent to block your 5B, 5A may be used instead to recoil cancel faster. Yumeji's fastest recoil cancel options are 214S and 421A/B ~A/B. If you've conditioned the opponent to respect you, there's also 236S to press an advantage or 623S as a mixup option if spaced properly. Up close, Yumeji's lights can be used as strong, safe pressure tools, given they are fast and have good recovery. As for anti-airing, Yumeji has 2B, jC and, most importantly, Concealed Sabre Firefly (j1236S). Firefly is an air fireball which comes out extremely fast and covers different trajectories for each strength, which couples nicely with Yumeji's relatively fast jumps to take full control of the skies. By backdash cancelling into it, Firefly also provides Yumeji even more ground control and anti-air potential.
Firefly's sheer speed means that, much like Ukyo's Tsubame Gaeshi, it can be used to punish close medium slashes up close. It doesn't hit overhead, though - close range vortexes are his thing. As for other punish options, Yumeji retains Ukyo's excellent run speed and fast, far-reaching 66C, but also adds 66B to the mix, which can be special cancelled on the first hit. 66C is an ideal punish option at all times, as Yumeji is designed to play hit-and run at the tip of its range, and the knockdown it provides leads nicely into setplay with Concealed Sabre Solar Flame (236S), a ground fireball. While Firefly is a fast, arced fireball with limited range, Solar Flame travels quickly in a straight line, but the startup is dreadful. Yumeji needs space to set this up, but the reward is well worth it. While Firefly only provides a knockdown, which is still useful, Solar Flame grants incredible frame advantage if it connects. On hit, Yumeji can very easily pick up with 66B or 66C for a knockdown. On block, the choice is yours to either run away or zone in for a mixup, which should depend on how close you are to the corner given Yumeji's propensity for running away. Tick throws and shimmies are very useful here, especially given Yumeji's fast ground speeds across the board. Given the potential ground to be lost during the startup and how not even the heavy version reaches fullscreen, Solar Flame is a lot more useful for setplay than it is for straight zoning. Oral Tradition Snow Wind (421A/B ~A/B) can potentially be used for zoning as well, but given the wait before your followups come out, its bad recovery and tricky angles, it is advised to save that move for combos, where its range and angles make it excel.
Up close, Yumeji has some mixup potential, although not as devastating at Ukyo's from all ranges. Concealed Sabre Ephemeral Shadow (623S) is a series of shadow slashes consisting of a frame trap which can link into heavies, a forward-hitting knockdown and a crossup-hitting knockdown. These are effective recoil options up close, although they can be thrown. In lieu of Tsubame Gaeshi, there's also 6B, a modest overhead which has to be spaced lest it be thrown or punished on hit, and a decent assortment of low-hitting kicks to back it up. When not running away, Yumeji can lead into this safely when running behind a Solar Flame, which is even scarier in the corner. At that range, Yumeji can time Solar Flame so it hits the opponent if they don't tech, but in such a way that if they do tech, Yumeji can tech chase with 66C or Firefly for short rolls and a throw for long rolls. On a side note, Yumeji should never pursuit an opponent unless it is guaranteed to kill, as it wastes time which could be spent timing a meaty Solar Flame or otherwise buying space.
Spirits
- I greatly increases Yumeji's damage output during Rage, which plays favorably to such a long Rage duration. Yumeji's Hyper Slash also has good range. However, it offers no defensive or mobility options, bars access to Yumeji's good supers, and Yumeji's Hyper Slash damage is 5th weakest in the game.
- II enhances Yumeji's Weapon Flip by breaking the opponent's weapon, offering an extended window to press momentum. It also grants access to your Secret Move once per game. Rolls, ducks, and hops give Yumeji a variety of defensive options, and rolls also enhance Yumeji's mobility.
- III lets Yumeji charge Rage manually and grants infinite Rage at very low HP. Poor Rage retention means the charging process is slow. Dodge offers a standard grounded defensive option. Air parry is niche given Yumeji's other air options, but may have occasional utility.
- IV's signature Continuous Slash offers Yumeji an alternative combo starter for increased damage or a modest Rage boost. IV shares dodge as a defensive option with III Spirit, and offers Rage Explosion + Issen as a last ditch defensive threat.
- V downplays Yumeji's supers, but ample opportunity to meditate, good high/low options that don't knock down, and an unburstable launcher make Yumeji's State of Nothingness game very threatening. V also builds on II's dodges and rolls with an excellent forward hop. Rage Explosion is available as a defensive option, but without access to Issen. Reduced Rage time emphasizes meditation, but Yumeji does have good base Rage duration when Rage is preferable to further meditation.
- VI ensures reliable access to WFT thanks to its unique Rage system. Repeated access to Yumeji's Secret Move at low HP offers an additional high damage confirm, and even combos from Yumeji's 5A. Mikiri dodges are very strong defensive options that also give earlier access to Secret Move, and Hyper Guard can push the opponent away to restart Yumeji's gameplan.
Normal Moves
Far Slashes
| 5A |
|---|
| 5B |
|---|
| 5C |
|---|
| 2A |
|---|
| 2B |
|---|
| 2C |
|---|
Near Slashes
| n5A |
|---|
| n5B |
|---|
| n5C |
|---|
| n2A |
|---|
| n2B |
|---|
| n2C |
|---|
Kicks
| 5D |
|---|
| 6D |
|---|
| 2D |
|---|
| 3D |
|---|
Dash Normals
| 66A |
|---|
| 66B |
|---|
| 66C |
|---|
| 66D |
|---|
Air Normals
| jA |
|---|
| jB |
|---|
| jC |
|---|
| jC |
|---|
| jD |
|---|
Unarmed Normals
| u5S |
|---|
| u2S |
|---|
| u66S |
|---|
| juS |
|---|
Command Moves
| 6B |
|---|
Hyper Slash (I)
| Hyper Slash
A+B
A+B |
|---|
Continuous Slash (IV)
| Continuous Slash
A+B
A+B |
|---|
Special Moves
Concealed Sabre Solar Flame
| Concealed Sabre Solar Flame
236S
236S |
|---|
Concealed Sabre Firefly
| Concealed Sabre Firefly
j1236S
j1236S |
|---|
Concealed Sabre Snowdust Flash
| Concealed Sabre Snowdust Flash
214S
214S |
|---|
Concealed Sabre Ephemeral Shadow
| Concealed Sabre Ephemeral Shadow
623S
623S |
|---|
Oral Tradition Snow Wind
| Oral Tradition Snow Wind
421S
421S |
|---|
Toy Transformation
| Toy Transformation
3214623E (II)
3214623E (II) |
|---|
Supers
Heavenly Wave of Soichi Jinmu
| Heavenly Wave of Soichi Jinmu
236AB
236AB |
|---|
Secret Move Ground God
| Secret Move Ground God
641236BC (II), 236BC (VI)
641236BC (II), 236BC (VI) |
|---|
Combos
Standard Combos
- n5B/n2B/66B/5D 421S~S/236AB - Combos starting from medium slashes.
- 2D, n5A/n2A/3D/6D - 2D followups with varying levels of risk/reward. n5A can combo into WFT.
- 2D, j1236A - High risk 1f link for low reward. Not recommended.
- 623A/B, 66C - Confirm from 623S hits. Remember that 623C does not allow followups.
- 623A, 2B 421S~S - Close range followup to 623A.
- 236S, 66X - Ground fireball's hitstun is long enough to follow up with a dashing normal, or anything else that will reach.
- 421A, 66C - Also a 1f link, but minimal risk and good reward. Deals comparable damage to 421A~A but as a confirm.
- 421A, 2A - Point blank 421A can also set up an air reset with 2A. This can cancel into 421S~S for a mixup on landing, 236C for pressure (does not hit meaty), or Yumeji can simply run in to start pressure. Replacing 2A with n5A in the corner sets up meaty 6B/6D mix, but bear in mind this leaves Yumeji punishable after 6B if point blank.
- ch 2C, 66C/6D/n2B 421S~S - Counterhit 2C confirms for different spacings and commitment. Somewhat tight link, especially 66C.
Hyper Slash (I)
- 236S A+B - Will only combo around the tip of 236A's range. If you're actually fishing for this in a match for some reason, don't try it anywhere else or it will get you killed. It will probably get you killed, anyway.
IV Spirit
- A+B BBC/AABBC 421A/B ~A/B - Continuous Slash punishes. For the CS2 juggle, 421A ~A/B is most consistent.
- A+B BBC/AABBC 236AB - Continuous Slash into WFT.
- A+B BBC 214A - Corner only.
- 623A, A+B - Continuous Slash will link at any spacing unless 623A catches an extended hurtbox, but the followups aren't as reliable at max range. CS4 is the best option when spaced; the first A followup will likely whiff and must quickly cancel into the second A followup. On CS2 the third (C) followup may whiff at max range.
- 66B 421A/A+B BBC/A+B AABBC 421A, ABC Juggles into Fatal Flash. 66B 421A juggles earliest and is thus the least vulnerable to Rage Explosion, but is character specific when used midscreen. The CS4 route is also Yumeji's most damaging Issen confirm in IV Spirit; omitting 421A is a marginal reduction in damage if pressed for time.
State Of Nothingness (V)
- 6B, ... ABC - Conversion from overhead into Fatal Flash. Be careful not to link grounded heavies together in the filler. jB may be used as an instant overhead instead if the opponent's crouching hurtbox is large enough.
- 421A ABC - Launcher into Issen. Immune to Rage Explosion if the opponent is using IV/V Spirit, but has short range. 421A will not hit most crouching opponents after 6B.
Frame Data
| Attack | Startup | Total | On Hit | On Standing Block | On Crouching Block | Notes |
|---|---|---|---|---|---|---|
| n5A | 4 | 18 | -2 | -6 | -1 | |
| n2A | 4 | 18 | -2 | -6 | -1 | |
| 5A | 10 | 26 | -4 | -2 | +3 | |
| 2A | 6 | 21 | -3 | -2 | +3 | |
| 66A | 7 | 35 | -8 | -20 | -15 | |
| jA | 8 | N/A | N/A | N/A | N/A | |
| n5B | 8 | 41 | -13 | -8 | -3 | |
| n2B | 6 | 25 | +1 | -8 | -3 | |
| 5B | 9 | 35 | -6 | -8 | -3 | |
| 2B | 13 | 39 | -6 | -8 | -3 | |
| 66B | 10 | 44 | -10 | -23 | -18 | |
| jB | 9 | N/A | N/A | N/A | N/A | |
| n5C | 11 | 64 | -5 | -20 | -15 | |
| n2C | 13 | 63 | -1~0 | -20 | -15 | |
| 5C | 15 | 65 | -11~-10 | -20 | -15 | |
| 2C | 16 | 55 | 0~+1 | -31 | -26 | |
| 66C | 6 | 55 | KD | -41 | -36 | |
| j8C | 11 | N/A | N/A | N/A | N/A | |
| j7C/9C | 12 | N/A | N/A | N/A | N/A | |
| 6B | 23 | 48 | -15 | -17 | N/A | -5 on crouching hit |
| 5D | 8 | 37 | -9 | -21 | -16 | |
| 6D | 5 | 36 | KD | N/A | -18 | |
| 2D | 6 | 13 | +5 | N/A | +6 | |
| 3D | 5 | 30 | KD | -17 | -12 | |
| 66D | 6 | 34 | KD | N/A | -15 | |
| jD | 7 | N/A | N/A | N/A | N/A | |
| Hyper Slash | 24 | 85 | KD | -63 | -53 | |
| Continuous Slash | 8 | 41 | KD | -20 | -15 | |
| 236A | 51 | 63 | +19 | 0 | +5 | Frame advantage given for point blank |
| 236B | 51 | 63 | +19 | 0 | +5 | |
| 236C | 51 | 63 | +19 | 0 | +5 | |
| 623A | 35 | 54 | +9 | -10 | -5 | |
| 623B | 41 | 64 | KD | -11 | -6 | Launches |
| 623C | 49 | 81 | KD | -20 | -15 | |
| 214A | 24 | 105 | KD | -24 | -19 | Hitgrab, untechable KD |
| 214B | 30 | 148 | KD | -29 | -24 | Hitgrab, untechable KD |
| 214C | 36 | 191 | KD | -34 | -29 | Hitgrab, untechable KD |
| 421A | 16 | 38 | KD | -14 | -9 | Launches |
| 421A~A | 34 | 86 | KD | N/A | N/A | Hits too high to reach grounded opponents |
| 421A~B | 34 | 86 | KD | -44 | N/A | |
| 421B | 16 | 38 | -2 | N/A | -9 | |
| 421B~A | 34 | 85 | KD | -44 | -39 | |
| 421B~B | 34 | 85 | KD | N/A | -39 | |
| WFT | 2+10 | 74 | KD | -40 | -35 | |
| SM | 2+10 | 76 | KD | -34 | -29 | Second hit total 30f startup |
