-Happy New Year 2025!
Art of Fighting 2/Yuri Sakazaki: Difference between revisions
Stressedin (talk | contribs) mNo edit summary |
|||
| (13 intermediate revisions by the same user not shown) | |||
| Line 1: | Line 1: | ||
{{CharNavbox AOF2}} | |||
== | {{TOClimit|3}} | ||
[[File:AOF2 Yuri Illustration.png|200x600px|thumb|right]] | |||
==Story== | |||
After her father dissappeared when she was young, Yuri became heavily dependent on Ryo. This dependency helped motivate Ryo to become a better fighter, but was to her detriment when she was kidnapped by Mr. Big. After being saved by Ryo and Robert, she was able to convince her father Takuma to train her, which he reluctantantly agreed to as he began to teach her the basics before she was invited to the King of Fighters tournament. | After her father dissappeared when she was young, Yuri became heavily dependent on Ryo. This dependency helped motivate Ryo to become a better fighter, but was to her detriment when she was kidnapped by Mr. Big. After being saved by Ryo and Robert, she was able to convince her father Takuma to train her, which he reluctantantly agreed to as he began to teach her the basics before she was invited to the King of Fighters tournament. | ||
==Introduction== | |||
Yuri is by no means the strongest character in the game, but she does have some tools that help her win some matchups. A lot of times, though, the odds are not in her favor. | |||
{{ ProConTable | |||
| pros= | |||
* Good range on her normals | |||
* Good fireball | |||
* Multiple advancing yolo options to control ground in neutral | |||
| cons= | |||
* Normals are sluggish and leave her vulnerable | |||
* Anti-airs do really bad damage unless she's willing to spend meter on Saiha | |||
* Struggles to play neutral unless she's spending a lot of meter on Hyakuretsu Binta | |||
* Hard time securing knockdowns that lead to meaningful oki | |||
* Can't combo off lights at most ranges, or do two-hit confirms into anything | |||
* Reactable throw that can be punished on tech by almost half the cast | |||
* No reversal | |||
}} | |||
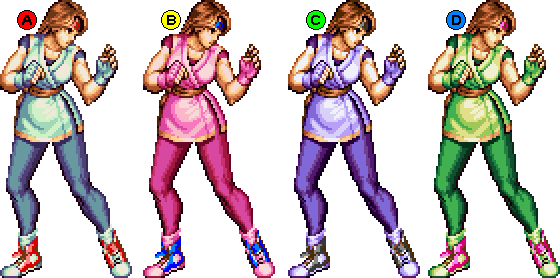
===Colors=== | |||
[[image:AOF2_Yuri_Colors.png]] | |||
==Movelist== | |||
'''Special Moves''' | |||
Ko-Oh Ken - [[image:qcf.gif]] + [[image:a.gif]] - 20% Spirit | |||
Saiha - [[image:qcb.gif]] + [[image:a.gif]] - 20% Spirit | |||
Enbu Kyaku - [[image:qcb.gif]] + [[image:b.gif]] - 20% Spirit | |||
Raioh Ken - [[image:qcf.gif]] + [[image:b.gif]] - 25% Spirit | |||
Hyakuretsu Binta - [[image:fd.gif]][[image:bk.gif]][[image:fd.gif]] + [[image:a.gif]] - 40% Spirit | |||
'''Super Move''' | |||
Haoh Shoukou Ken - [[image:fd.gif]][[image:hcf.gif]] + [[image:a.gif]] - 75% Spirit | |||
'''Desperation Move''' | |||
Hien Houou Kyaku - [[image:fd.gif]][[image:bk.gif]][[image:hcb.gif]] + [[image:b.gif]] + [[image:c.gif]] - 75% Spirit | |||
==Normals== | |||
===Standing Normals=== | |||
====cl.LP==== | |||
{{FrameDataCargo-AOF2 | |||
| moveId = yuri_cllp | |||
| description = Slow, minus, and not any more rewarding on hit than her other lights. Not useful at the ranges where it'll activate. The prox range is also way larger than the range of the move, which means this move doubles as a nerf to f.LP. | |||
}} | |||
====f.LP==== | |||
{{FrameDataCargo-AOF2 | |||
| moveId = yuri_flp | |||
| description = A great, fast, plus, disjointed normal, just like Ryo's. Unlike Ryo, however, Yuri has a bad cl.LP holding hers back, making this deceptively hard to apply. | |||
}} | |||
====5LK==== | |||
{{FrameDataCargo-AOF2 | |||
| moveId = yuri_5lk | |||
| description = All the whiff recovery of a heavy and all the damage of a light? Talk about a win-win! | |||
In all seriousness, this move is a fine anti-air, if unrewarding. | |||
}} | |||
====cl.HP==== | |||
{{FrameDataCargo-AOF2 | |||
| moveId = yuri_clhp | |||
| description = Bog-standard close heavy for punishes and the like. | |||
}} | |||
====f.HP==== | |||
{{FrameDataCargo-AOF2 | |||
| moveId = yuri_fhp | |||
| description = Slow and less damaging than most heavies. Regrettably, this is one of your best pokes. | |||
}} | |||
====cl.HK==== | |||
{{FrameDataCargo-AOF2 | |||
| moveId = yuri_clhk | |||
| description = Another humdrum close heavy. cl.HP is faster and more damaging, so this doesn't have much to do. | |||
}} | |||
====f.HK==== | |||
{{FrameDataCargo-AOF2 | |||
| moveId = yuri_fhk | |||
| description = Unique far-reaching neutral option, but unfortunately sucks. Punishable on block and hit, even with absolutely perfect spacing, and also pretty reactable on startup, making this a very bad neutral option unless your opponent is at 16 health or less, you think they'll be caught dashing, *and* you don't have the Spirit to use the much better Hyakuretsu Binta. | |||
}} | |||
===Crouching Normals=== | |||
====2LP==== | |||
{{FrameDataCargo-AOF2 | |||
| moveId = yuri_2lp | |||
| description = Great crouching jab. Since Yuri's stand jab situation is so wonky, this is a great normal to press a bunch instead. | |||
}} | |||
====2LK==== | |||
{{FrameDataCargo-AOF2 | |||
| moveId = yuri_2lk | |||
| description = Less range and less frame advantage than 2LP, which is also a low. Not much point. | |||
}} | |||
====2HP==== | |||
{{FrameDataCargo-AOF2 | |||
| moveId = yuri_2hp | |||
| description = Very fast anti-air that reaches pretty high up. | |||
}} | |||
====2HK==== | |||
{{FrameDataCargo-AOF2 | |||
| moveId = yuri_2HK | |||
| description = Very fast sweep that's deceptively hard to punish. One of Yuri's only ways of securing knockdowns from farther away than literally right on top of them. | |||
}} | |||
===Jumping Normals=== | |||
====j.LP==== | |||
{{FrameDataCargo-AOF2 | |||
| moveId = yuri_jlp | |||
| description = Strictly worse than j.LK in every way. | |||
}} | |||
====j.LK==== | |||
{{FrameDataCargo-AOF2 | |||
| moveId = yuri_jlk | |||
| description = Big and very fast flying kick. Good air-to-air and jump-in. | |||
}} | |||
====j.HP==== | |||
{{FrameDataCargo-AOF2 | |||
| moveId = yuri_jhp | |||
| description = Also strictly worse than j.LK in every way. | |||
}} | |||
====j.HK==== | |||
{{FrameDataCargo-AOF2 | |||
| moveId = yuri_jhk | |||
| description = Pretty slow, but the 6 extra damage helps a lot on a character who struggles so much to deal damage. Covers basically the same screen space as j.LK. Useful if you think you have the time. | |||
}} | |||
==System Mechanics== | |||
===Uppercut=== | |||
{{FrameDataCargo-AOF2 | |||
| moveId = yuri_uppercut | |||
| description = No real advantage as an anti-air over 2HP aside from the knockdown. | |||
}} | |||
===Low Attack=== | |||
{{FrameDataCargo-AOF2 | |||
| moveId = yuri_lowattack | |||
| description = This move is tiny horizontally, but has a unique property that makes it stand out. While Yuri is lifting her leg, she actually can't be tagged with lows unless the opponent hits her back leg, making this move usable as a low crush. This is a nifty way to beat options like sweeps, other low attacks, and King's slide. | |||
}} | |||
===Throw=== | |||
{{FrameDataCargo-AOF2 | |||
| moveId = yuri_throw | |||
| description = Comically bad frame advantage on hit, a long animation that makes this move pretty easy to tech, and the fullscreen launch means this practically sets the situation back to roundstart. Not ideal, but you'll have to rely on it to open people up, since Yuri has no other mixup tools. | |||
Unfortunately, the frame advantage is so bad that some characters can actually punish this move on tech. King, Mickey, Mr. Big, Lee, and Yuri herself can do so anywhere, while Eiji and John can only punish if they were thrown into the corner. The punishes these characters get all do more damage than the teched throw, and since Yuri's throw animation is long and not super difficult to react to with tech, this means Yuri really struggles to do much of anything vs some characters when they get a life lead. | |||
}} | |||
===Air Throw=== | |||
{{FrameDataCargo-AOF2 | |||
| moveId = yuri_airthrow | |||
| description = The hit detection on airthrow is as comically tiny and as finnicky as ground throws are in this game, making this unfeasible as a reaction anti-air, as you will be swatted by buttons. Potentially very hard-hitting as a read or as a panic air-to-air, though you get sent back to neutral on hit. Can also be easily option-selected with lights by just doing j.C and praying. | |||
}} | |||
===Taunt=== | |||
{{FrameDataCargo-AOF2 | |||
| moveId = yuri_taunt | |||
| description = Same frame data and spirit drain as Ryo and Robert. Taunting is useful in neutral due to the Spirit drain it inflicts on your opponent. | |||
}} | |||
==Special Moves== | ==Special Moves== | ||
===Ko-oh Ken=== | |||
{{FrameDataCargo-AOF2 | |||
| moveId = yuri_236a | |||
| description = Costs 20% Spirit. | |||
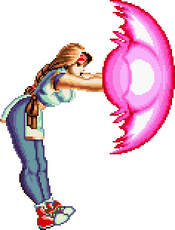
''' | OK fireball with slightly better frame data than Ryo's version. Not useful as a close- or mid-range tool due to the frame data. Not ideal as a far-range option either; Yuri's unrewarding normal anti-airs means you don't get much from forcing them into the air unless you cash out with Saiha, and doing that too often means giving up future Saiha anti-airs and the ability to threaten with Hyakuretsu Binta in neutral as often. Weigh the cost of using accordingly. | ||
At low Spirit, the fireball will dissipate instantly without travelling anywhere, and will do 6 damage. This is, of course, terrible, and you should not attempt this special at low Spirit. | |||
}} | |||
===Saiha=== | |||
{{FrameDataCargo-AOF2 | |||
| moveId = yuri_214a | |||
| description = Costs 20% Spirit. | |||
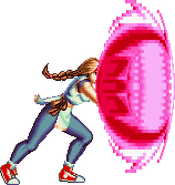
''' | Actually a really good anti-air. Starts up faster than you'd think and is more annoying to whiff punish than you'd think, since it's active from the moment the particle effects appear onscreen and is active well into the animation of the fireball dissipating. By far her most rewarding anti-air, making this a useful part of her kit. | ||
== | At low Spirit, the fireball will become much smaller, and will do 6 damage. It's actually still got a very good anti-air hitbox in this state, but the low reward means options like 5LK and 2HP are preferred. | ||
''' | }} | ||
===Enbu Kyaku=== | |||
{{FrameDataCargo-AOF2 | |||
| moveId = yuri_214b | |||
| description = Consumes 20% Spirit on use if available, but is unchanged at low Spirit. | |||
Pretty wimpy. The second and third hit don't combo, the third and fourth hit don't combo, and at range, the first and second hit don't combo. It's safe on block, which is nice for tacking on an extra 8 damage to your combos and then immediately resetting to neutral. | |||
}} | |||
===Raioh Ken=== | |||
{{FrameDataCargo-AOF2 | |||
| moveId = yuri_236b | |||
| description = Costs 25% Spirit. | |||
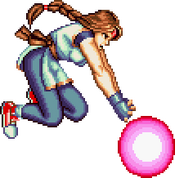
Not an air fireball in this game. Instead, you input it on the ground, Yuri neutral jumps while loudly announcing what attack she's about to use, then throws the fireball. Not really all that good as a neutral tool, due to being very telegraphed and covering a pretty whatever angle that leaves you vulnerable to having the ball forward jumped over and getting punished on your landing. | |||
At low Spirit, the fireball will dissipate instantly without travelling anywhere, and will do 8 damage. This is, of course, terrible, and you should not attempt this special at low Spirit. | |||
}} | |||
===Hyakuretsu Binta=== | |||
{{FrameDataCargo-AOF2 | |||
| moveId = yuri_646a | |||
| description = Costs 40% Spirit. | |||
Yuri's best feature by far. Very fast, safe on block, and highly-damaging yolo move that wins trades. Adds some layers to Yuri's neutral, since your opponent has to respect the threat of it from midrange. Good to threaten with from time to time, but the Spirit cost means you ought to be conservative. | |||
At low Spirit, this move is replaced with Yuri's f.HP. Humorously, even though you can cancel this f.HP into itself, it has too much pushback to combo, preventing Yuri from getting a stun setup. | |||
' | }} | ||
== | ==Super Move== | ||
===Haoh Shoukou Ken=== | |||
{{FrameDataCargo-AOF2 | |||
| moveId = yuri_641236a | |||
| description = Costs 75% Spirit. Can only be executed with sufficient Spirit. | |||
Too much startup and Spirit cost to be useful in virtually any situation. As an added bonus, it has much more recovery than other characters' versions of the move, making it even more useless than before. Does a sizable 18 damage on block and travels fast, so it can be useful for chip kills vs a low-health opponent you just knocked down. | |||
}} | |||
==Desperation Move== | |||
===Hien Houou Kyaku=== | |||
{{FrameDataCargo-AOF2 | |||
| moveId = yuri_6463214bc | |||
| description = Costs 75% Spirit. Can only be executed with sufficient Spirit and at 25% health or below. | |||
Big, damaging unblockable. Yuri being starved for good knockdowns means you can't really set this up often, unless you're landing a lot of raw sweeps or cancel an anti-air normal into it. Still useful as a checkmate option off those hits. | |||
}} | |||
{{Navbox AOF2}} | {{Navbox AOF2}} | ||
Latest revision as of 01:15, 30 June 2024
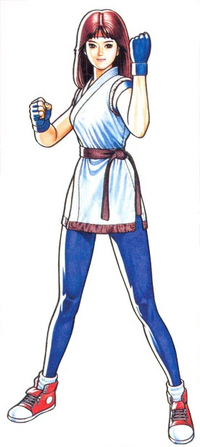
Story
After her father dissappeared when she was young, Yuri became heavily dependent on Ryo. This dependency helped motivate Ryo to become a better fighter, but was to her detriment when she was kidnapped by Mr. Big. After being saved by Ryo and Robert, she was able to convince her father Takuma to train her, which he reluctantantly agreed to as he began to teach her the basics before she was invited to the King of Fighters tournament.
Introduction
Yuri is by no means the strongest character in the game, but she does have some tools that help her win some matchups. A lot of times, though, the odds are not in her favor.
| Strengths | Weaknesses |
|---|---|
|
|
Colors
Movelist
Special Moves
Hyakuretsu Binta - ![]()
![]()
![]() +
+ ![]() - 40% Spirit
- 40% Spirit
Super Move
Haoh Shoukou Ken - ![]()
![]() +
+ ![]() - 75% Spirit
- 75% Spirit
Desperation Move
Hien Houou Kyaku - ![]()
![]()
![]() +
+ ![]() +
+ ![]() - 75% Spirit
- 75% Spirit
Normals
Standing Normals
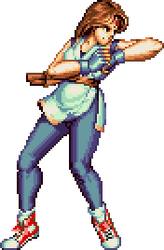
cl.LP
| Close LP
5A
5A |
|---|
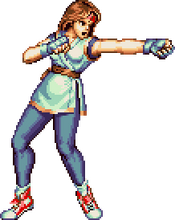
f.LP
| Far LP
5A
5A |
|---|
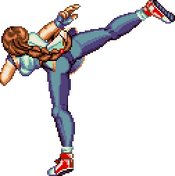
5LK
| Stand LK
5B
5B |
|---|
cl.HP
| Close HP
5[A]
5[A] |
|---|
f.HP
| Far HP
5[A]
5[A] |
|---|
cl.HK
| Close HK
5[B]
5[B] |
|---|
f.HK
| Far HK
5[B]
5[B] |
|---|
Crouching Normals
2LP
| Crouch LP
2A
2A |
|---|
2LK
| Crouch LK
2B
2B |
|---|
2HP
| Crouch HP
2[A]
2[A] |
|---|
2HK
| Crouch HK
2[B]
2[B] |
|---|
Jumping Normals
j.LP
| J.LP
j.A
j.A |
|---|
j.LK
| j.LK
j.B
j.B |
|---|
j.HP
| j.HP
j.[A]
j.[A] |
|---|
j.HK
| j.HK
j.[B]
j.[B] |
|---|
System Mechanics
Uppercut
| Uppercut
AC
AC |
|---|
Low Attack
| Low Attack
BC
BC |
|---|
Throw
| Throw
6/4 C
6/4 C |
|---|
Air Throw
| Air Throw
j.C
j.C |
|---|
Taunt
| Taunt
D
D |
|---|
Special Moves
Ko-oh Ken
| Ko-Oh Ken
236A
236A |
|---|
Saiha
| Saiha
214A
214A |
|---|
Enbu Kyaku
| Enbu Kyaku
214B
214B |
|---|
Raioh Ken
| Raioh Ken
236B
236B |
|---|
Hyakuretsu Binta
| Hyakuretsu Binta
646A
646A |
|---|
Super Move
Haoh Shoukou Ken
| Haoh Shoukou Ken
641236A
641236A |
|---|
Desperation Move
Hien Houou Kyaku
| No results
No results
No results |
No results |
|---|
