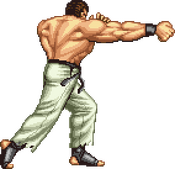
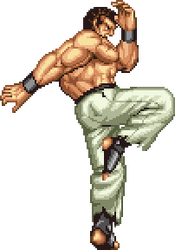
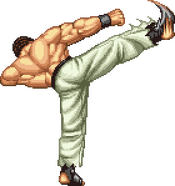
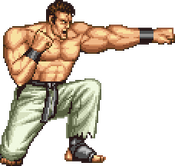
-Happy New Year 2025!
Art of Fighting 2/Takuma Sakazaki: Difference between revisions
No edit summary |
skeleton |
||
| Line 46: | Line 46: | ||
Ryuko Ranbu - [[image:qcf.gif]][[image:fd.gif]][[image:bk.gif]] + [[image:a.gif]] + [[image:c.gif]] - 75% Spirit | Ryuko Ranbu - [[image:qcf.gif]][[image:fd.gif]][[image:bk.gif]] + [[image:a.gif]] + [[image:c.gif]] - 75% Spirit | ||
==Normals== | |||
===Standing Normals=== | |||
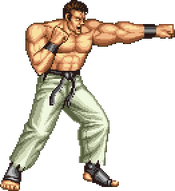
====5LP==== | |||
{{FrameDataCargo-AOF2 | |||
| moveId = takuma_5lp | |||
| description = Fast, plus on block, comically disjointed, and decently big jab. Links into itself anywhere but max range and Zan Retsu Ken at anywhere at all. Good thing to just kinda do. | |||
}} | |||
====5LK==== | |||
{{FrameDataCargo-AOF2 | |||
| moveId = takuma_5lk | |||
| description = Hits pretty high up above Takuma, and can be used as an anti-air in a pinch. Takuma has better anti-air options, though. | |||
}} | |||
====clHP==== | |||
{{FrameDataCargo-AOF2 | |||
| moveId = takuma_clhp | |||
| description = Fast, damaging punish starter. Not much other utility. | |||
}} | |||
====fHP==== | |||
{{FrameDataCargo-AOF2 | |||
| moveId = Takuma_fhp | |||
| description = Big disjointed mid poke that hits pretty hard. | |||
}} | |||
====clHK==== | |||
{{FrameDataCargo-AOF2 | |||
| moveId = takuma_clhk | |||
| description = Bizarrely bad normal. Does the same damage as a lot of lights, has too much pushback to combo into specials even at point-blank, and is awful on hit/block. At the angles where it'd hit as an anti-air, Takuma has more rewarding options. Avoid. | |||
}} | |||
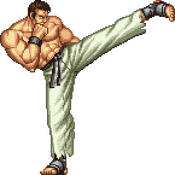
====fHK==== | |||
{{FrameDataCargo-AOF2 | |||
| moveId = takuma_fhk | |||
| description = Hits at a respectable angle for anti-airing, and is very rewarding on hit. The input makes it deceptively hard to do this on reaction, due to the extra time spent holding buttons before the move starts up. | |||
}} | |||
===Crouching Normals=== | |||
====2LP==== | |||
{{FrameDataCargo-AOF2 | |||
| moveId = takuma_2lp | |||
| description = Identical frame data to 5LP, and retains the great hitbox and links into Zan Retsu Ken, but this one's a low. Another great button. | |||
}} | |||
====2LK==== | |||
{{FrameDataCargo-AOF2 | |||
| moveId = takuma_2lk | |||
| description = Despite the animation, actually has less range than 2LP. 2LP is also another low and has better frame advantage on hit for easier links, leaving this normal without much point. | |||
}} | |||
====2HP==== | |||
{{FrameDataCargo-AOF2 | |||
| moveId = takuma_2hp | |||
| description = Good clutch anti-air at angles where fHK or Zan Retsu Ken won't work. Pretty whatever damage, though. | |||
}} | |||
====2HK==== | |||
{{FrameDataCargo-AOF2 | |||
| moveId = takuma_2hk | |||
| description = Placeholder text | |||
}} | |||
===Jumping Normals=== | |||
====j.LP==== | |||
{{FrameDataCargo-AOF2 | |||
| moveId = takuma_jlp | |||
| description = Placeholder text | |||
}} | |||
====j.LK==== | |||
{{FrameDataCargo-AOF2 | |||
| moveId = takuma_jlk | |||
| description = Big fast flying kick. Good air-to-air and jump-in. | |||
It's possible to set up an unblockable crossup with this move by hitting it at just the right angle. In addition, since lows in this game are a hitbox check rather than a hard-coded property, if Takuma meaties you with jLK as low to the ground as possible, jLK becomes a low. Takuma can set both of these situations up off throw, giving Robert a four-way mixup *and* an unblockable off his throw. | |||
}} | |||
====j.HP==== | |||
{{FrameDataCargo-AOF2 | |||
| moveId = takuma_jhp | |||
| description = Placeholder text | |||
}} | |||
====j.HK==== | |||
{{FrameDataCargo-AOF2 | |||
| moveId = takuma_jhk | |||
| description = Placeholder text | |||
}} | |||
==System Mechanics== | |||
===Uppercut=== | |||
{{FrameDataCargo-AOF2 | |||
| moveId = takuma_uppercut | |||
| description = Very similar anti-air to 2HP, except it knocks down instead of causing an air reset. | |||
}} | |||
===Low Attack=== | |||
{{FrameDataCargo-AOF2 | |||
| moveId = takuma_lowattack | |||
| description = Same range as sweep, but a bit slower and a fair amount safer on block. Similarly useful. | |||
}} | |||
===Throw=== | |||
{{FrameDataCargo-AOF2 | |||
| moveId = takuma_throw | |||
| description = Takuma gets a potentially-unblockable four-way mixup with jLK into Kishin Geki, which is a guaranteed touch of stun after throw, even if you block the last two hits of Kishin Geki. For some reason, it'll just stun you through your guard somehow. If he's at low Spirit, he converts that into a stun loop into your death, and if he isn't, the combo he's about to hit you with will do enough damage to kill you at most health thresholds. | |||
}} | |||
===Taunt=== | |||
{{FrameDataCargo-AOF2 | |||
| moveId = takuma_taunt | |||
| description = Placeholder text | |||
}} | |||
==Special Moves== | ==Special Moves== | ||
===Ko-Oh Ken=== | |||
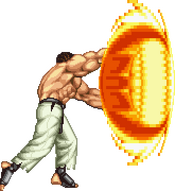
{{FrameDataCargo-AOF2 | |||
| moveId = Takuma_236a | |||
| description = Costs 20% Spirit. | |||
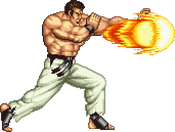
At low Spirit, the fireball will dissipate instantly without travelling anywhere, and will do 8 damage. This is, of course, terrible, and you should not attempt this special at low Spirit. | |||
}} | |||
===Kyokugenryu Renbu Ken=== | |||
{{FrameDataCargo-AOF2 | |||
| moveId = takuma_214a | |||
| description = Consumes 20% Spirit on use if available, but is unchanged at low Spirit. | |||
}} | |||
===Hien Shippu Kyaku=== | |||
{{FrameDataCargo-AOF2 | |||
| moveId = takuma_16b | |||
| description = Costs 25% Spirit. Cannot be special cancelled into. | |||
Very bad move. High startup, awful on block, and unusable in combos due to the bizarre fact that you can't cancel into it. Due to how much ground Takuma's dash covers at infinitely less risk, and the very strong jumpscare option he already has with Shoran Kyaku, there's not much use to this as a neutral tool. | |||
At low Spirit, the travel speed during the active frames is cut in half, leading to the move only travelling 3/4 of the screen. In addition, the first hit does 16 damage, and the second hit won't come out at all. This is completely useless. | |||
}} | |||
===Zan Retsu Ken=== | |||
{{FrameDataCargo-AOF2 | |||
| moveId = takuma_646a | |||
| description = Costs 40% Spirit. | |||
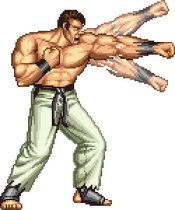
' | An amazing move for every aspect of Takuma's gameplan. Due to its instant startup, hitgrab property that lets it win trades, and big, disjointed hitbox, this move makes for a powerful and rewarding abare tool. These same properties also make it very useful in combos, with it linking out of lights and comboing naturally out of clHP. Its massive disjoint and high active frames make it a powerful anti-air at a lot of ranges as well, and it'll beat buttons on the ground at some spacings. | ||
''' | What makes this move really stand out is that it's very frustrating to whiff punish. You can't punish with fireballs, since it destroys non-super projectiles. You can't punish with sweep, since it hits crouchers and outranges sweeps. You often can't punish with a jump-in, since this move's generous hitbox means it'll often beat air attacks clean. You can't wait for it to recover, since it has no recovery. As long as they don't block it, you've got an excellent low-risk neutral option. Mind the Spirit cost, however. | ||
At low Spirit, this move is replaced with Takuma's 5LP. This doesn't really do anything for him. | |||
}} | |||
==Super Move== | |||
===Haoh Shoukou Ken=== | |||
{{FrameDataCargo-AOF2 | |||
| moveId = takuma_641236a | |||
| description = Costs 75% Spirit. Can only be executed with sufficient Spirit. | |||
Too much startup and Spirit cost to be useful in virtually any situation. Not nearly as tall as it looks, either; every character can jump over it just fine. Does a sizable 18 damage on block and travels fast, so it can be useful for chip kills vs a low-health opponent you just knocked down. | |||
}} | |||
== | ==Desperation Move== | ||
===Ryuko Ranbu=== | |||
{{FrameDataCargo-AOF2 | |||
| moveId = takuma_2363214c | |||
| description = Costs 75% Spirit. Can only be executed with sufficient Spirit and at 25% health or below. | |||
Big, damaging unblockable. Not very difficult to set up as a meaty; you can get it off 2HK, Uppercut, Low Attack, Kohou, throw, and air resets with anti-air normals cancelled into it. Against opponents without good reversal options, this can provide a devastating checkmate option. | |||
}} | |||
{{Navbox AOF2}} | {{Navbox AOF2}} | ||
Revision as of 07:25, 10 June 2024
Story
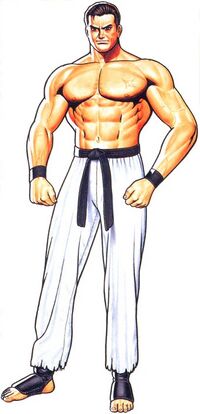
Takuma in his younger days grew many different rivalries with other martial arts practitioners, such as Ryuhaku Todoh and Lee Gakusuo, Lee Pai Long's father. Through these battles, he gains the nickname "The Ultimate Tiger", a name similar to one Ryo will inherit one day. He married an American woman named Ronnet and has two kids, Ryo and Yuri. He moved to America to raise his kids and spread the prestige of his dojo. He trained Ryo fiercly, and recruited Robert Garcia as a student as well. When Ryo turned 10, Ronnet died in mysterious circumstances, and he disappears fearing his family is being targeted, leaving Ryo to take care of Yuri. Years later, as Ryo refuses to work for Mr. Big as an adult, Big kidnaps Yuri and threatens Takuma to work for him. Reluctantly, Takuma agrees in order to protect Yuri, but first dons the iconic tengu mask and the persona "Mr. Karate" in order to hide his identity and protect his family's honor. Ryo eventually fights Mr. Karate to save Yuri, and threatens to kill him, but Yuri stops him and reveals Karate as Takuma, their father. Takuma repents for leaving them, and Ryo and Yuri forgive him. He returns back to his Dojo, and continues to train Ryo, as well as Yuri. One year after his unmasking, he receives an invitation to the King of Fighters tournament.
Introduction
Takuma is a strong character with a lot of simple, no-nonsense tools that are extremely effective at what they do. He still has some nonsense, though.
| Strengths | Weaknesses |
|---|---|
|
|
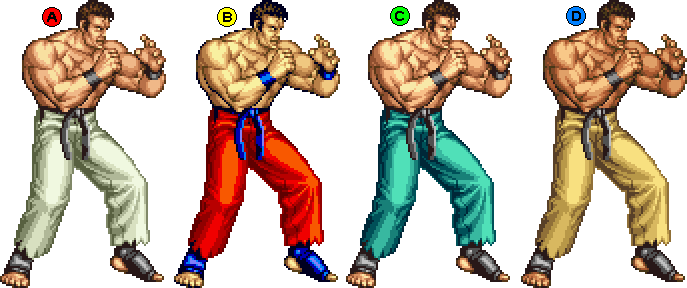
Colors
Movelist
Special Moves
Hien Shippu Kyaku - ![]()
![]() +
+ ![]() - 25% Spirit
- 25% Spirit
Zan Retsu Ken - ![]()
![]()
![]() +
+ ![]() - 40% Spirit
- 40% Spirit
Super Move
Haoh Shikou Ken - ![]()
![]() +
+ ![]() - 75% Spirit
- 75% Spirit
Desperation Move
Ryuko Ranbu - ![]()
![]()
![]() +
+ ![]() +
+ ![]() - 75% Spirit
- 75% Spirit
Normals
Standing Normals
5LP
| Stand LP
5A
5A |
|---|
5LK
| Stand LK
5B
5B |
|---|
clHP
| Close HP
5[A]
5[A] |
|---|
fHP
| Far HP
5[A]
5[A] |
|---|
clHK
| Close HK
5[B]
5[B] |
|---|
fHK
| Far HK
5[B]
5[B] |
|---|
Crouching Normals
2LP
| 2LP
2A
2A |
|---|
2LK
| 2LK
2B
2B |
|---|
2HP
| 2HP
2[A]
2[A] |
|---|
2HK
| 2HK
2[B]
2[B] |
|---|
Jumping Normals
j.LP
| j.LP
j.A
j.A |
|---|
j.LK
| j.LK
j.B
j.B |
|---|
j.HP
| j.HP
j.[A]
j.[A] |
|---|
j.HK
| j.HP
j.[B]
j.[B] |
|---|
System Mechanics
Uppercut
| Uppercut
AC
AC |
|---|
Low Attack
| Low Attack
BC
BC |
|---|
Throw
| Throw
6/4 C
6/4 C |
|---|
Taunt
| Taunt
D
D |
|---|
Special Moves
Ko-Oh Ken
| Ko-Oh Ken
236A
236A |
|---|
Kyokugenryu Renbu Ken
| Kishin Geki
214A
214A |
|---|
Hien Shippu Kyaku
| Hien Shippu Kyaku
16B
16B |
|---|
Zan Retsu Ken
| Zan Retsu Ken
646A
646A |
|---|
Super Move
Haoh Shoukou Ken
| Haoh Shikou Ken
641236A
641236A |
|---|
Desperation Move
Ryuko Ranbu
| No results
No results
No results |
No results |
|---|
