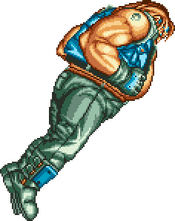
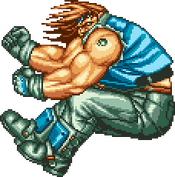
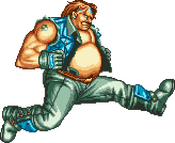
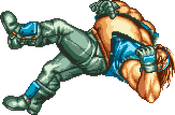
-Happy New Year 2025!
Art of Fighting 2/Jack Turner: Difference between revisions
Descriptions |
|||
| Line 16: | Line 16: | ||
| pros= | | pros= | ||
* Takes less damage than the rest of the cast | * Takes less damage than the rest of the cast | ||
* Very large, very damaging buttons and | * Very large, very damaging buttons and great dash give him a surprising ranged presence | ||
* | * Can grab people out of blockstun with his command grabs, leading to inescapable throw setups | ||
* Shockingly good movement; slightly less air time on jump, same walkspeed as Ryo, only forward dash with no startup | * Shockingly good movement; slightly less air time on jump, same walkspeed as Ryo, only forward dash with no startup | ||
* 1f command grab with pretty good range makes him tricky to defend against | * 1f command grab with pretty good range makes him tricky to defend against | ||
| Line 24: | Line 24: | ||
* Takes nearly twice as long to get up if knocked down | * Takes nearly twice as long to get up if knocked down | ||
* Needs meter both for damage and for throw loops, making him very meter-reliant | * Needs meter both for damage and for throw loops, making him very meter-reliant | ||
* Command grabs have bad frame advantage, meaning he needs the corner for consistent oki off them | |||
}} | }} | ||
| Line 57: | Line 58: | ||
{{FrameDataCargo-AOF2 | {{FrameDataCargo-AOF2 | ||
| moveId = jack_5lp | | moveId = jack_5lp | ||
| description = | | description = Slower than a usual jab, but large and disjointed. Good poke. | ||
}} | }} | ||
| Line 63: | Line 64: | ||
{{FrameDataCargo-AOF2 | {{FrameDataCargo-AOF2 | ||
| moveId = jack_5lk | | moveId = jack_5lk | ||
| description = | | description = Kinda slow and not much range, but hits decently hard. Not as good as 5LP but nice. | ||
}} | }} | ||
| Line 69: | Line 70: | ||
{{FrameDataCargo-AOF2 | {{FrameDataCargo-AOF2 | ||
| moveId = jack_clhp | | moveId = jack_clhp | ||
| description = | | description = Very hard-hitting close normal, and safe on block. Useful up-close tool. | ||
}} | }} | ||
| Line 75: | Line 76: | ||
{{FrameDataCargo-AOF2 | {{FrameDataCargo-AOF2 | ||
| moveId = jack_fhp | | moveId = jack_fhp | ||
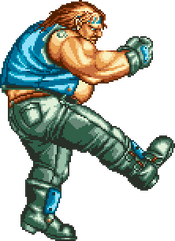
| description = | | description = Big silly swing with a lot of recovery. Not a great button, since it doesn't cover that much space and leaves you vulnerable. | ||
}} | }} | ||
| Line 81: | Line 82: | ||
{{FrameDataCargo-AOF2 | {{FrameDataCargo-AOF2 | ||
| moveId = jack_5hk | | moveId = jack_5hk | ||
| description = | | description = Ok anti-air, especially with the amount of damage it deals. | ||
}} | }} | ||
| Line 88: | Line 89: | ||
{{FrameDataCargo-AOF2 | {{FrameDataCargo-AOF2 | ||
| moveId = jack_2lp | | moveId = jack_2lp | ||
| description = | | description = Slightly better frame data than 5LP and also a low. Another good poke. | ||
}} | }} | ||
| Line 94: | Line 95: | ||
{{FrameDataCargo-AOF2 | {{FrameDataCargo-AOF2 | ||
| moveId = jack_2lk | | moveId = jack_2lk | ||
| description = | | description = Same range as 2LP, slightly worse frame data, and much better damage. Probably a better poke overall than 2LP. | ||
}} | }} | ||
| Line 100: | Line 101: | ||
{{FrameDataCargo-AOF2 | {{FrameDataCargo-AOF2 | ||
| moveId = jack_2hp | | moveId = jack_2hp | ||
| description = | | description = Really funny looking anti-air, and hits pretty hard. | ||
}} | }} | ||
| Line 106: | Line 107: | ||
{{FrameDataCargo-AOF2 | {{FrameDataCargo-AOF2 | ||
| moveId = jack_2hk | | moveId = jack_2hk | ||
| description = | | description = Safe on block sweep that gets you your win condition on hit. Same range as 2LP/2LK, making it another pretty good low poke. | ||
}} | }} | ||
| Line 113: | Line 114: | ||
{{FrameDataCargo-AOF2 | {{FrameDataCargo-AOF2 | ||
| moveId = jack_jlp | | moveId = jack_jlp | ||
| description = | | description = Funny laggy air button #1. Not as bad as the other two; it hits pretty hard and isn't awful on hit or block for how active it is. Less useful than jLK for virtually any situations, though. | ||
}} | }} | ||
| Line 119: | Line 120: | ||
{{FrameDataCargo-AOF2 | {{FrameDataCargo-AOF2 | ||
| moveId = jack_jlk | | moveId = jack_jlk | ||
| description = | | description = Fast, hard-hitting, very active air button that randomly has less landing recovery than every other aerial in the game. Land on someone with this and you can command grab them for massive damage. | ||
}} | }} | ||
| Line 125: | Line 126: | ||
{{FrameDataCargo-AOF2 | {{FrameDataCargo-AOF2 | ||
| moveId = jack_jhp | | moveId = jack_jhp | ||
| description = | | description = Funny laggy air button #2. Knocks down and hits pretty hard, but is death on block or whiff. jLK is more rewarding due to the command grabs you get off connecting with it and many times safer. Avoid. | ||
}} | }} | ||
| Line 131: | Line 132: | ||
{{FrameDataCargo-AOF2 | {{FrameDataCargo-AOF2 | ||
| moveId = jack_jhk | | moveId = jack_jhk | ||
| description = | | description = Funny laggy air button #3. jHP but slower, less damaging, and even worse on whiff/block. Avoid. | ||
}} | }} | ||
| Line 138: | Line 139: | ||
{{FrameDataCargo-AOF2 | {{FrameDataCargo-AOF2 | ||
| moveId = jack_uppercut | | moveId = jack_uppercut | ||
| description = | | description = A fast anti-air, and tied for Jack's fastest normal. Good at what it does. | ||
}} | }} | ||
| Line 144: | Line 145: | ||
{{FrameDataCargo-AOF2 | {{FrameDataCargo-AOF2 | ||
| moveId = jack_closelowattack | | moveId = jack_closelowattack | ||
| description = | | description = Fast low and Jack's other fastest normal. Knocks down on hit and cancels into command grab on block for the tick throw. Okay to press at close-range. | ||
}} | }} | ||
| Line 150: | Line 151: | ||
{{FrameDataCargo-AOF2 | {{FrameDataCargo-AOF2 | ||
| moveId = jack_lowattack | | moveId = jack_lowattack | ||
| description = | | description = Not actually a low. Also not that useful. Can be made plus on block or hit, but you could also just dash forward to cover the space much faster and at less risk. | ||
}} | }} | ||
| Line 156: | Line 157: | ||
{{FrameDataCargo-AOF2 | {{FrameDataCargo-AOF2 | ||
| moveId = jack_throw | | moveId = jack_throw | ||
| description = | | description = Does less damage than other throws for some reason. Not super helpful given the ridiculous command grabs you have in your arsenal. | ||
}} | }} | ||
| Line 162: | Line 163: | ||
{{FrameDataCargo-AOF2 | {{FrameDataCargo-AOF2 | ||
| moveId = jack_airthrow | | moveId = jack_airthrow | ||
| description = | | description = Tiny air-to-air. You should probably just press jLK instead. | ||
}} | }} | ||
| Line 168: | Line 169: | ||
{{FrameDataCargo-AOF2 | {{FrameDataCargo-AOF2 | ||
| moveId = jack_taunt | | moveId = jack_taunt | ||
| description = | | description = Same frame data and Spirit drain as every taunt. Taunting gives Jack a thing he can do at long-range to apply pressure, which is always nice. | ||
}} | }} | ||
| Line 176: | Line 177: | ||
| moveId = jack_236a | | moveId = jack_236a | ||
| description = Costs 20% Spirit. | | description = Costs 20% Spirit. | ||
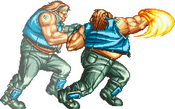
Deals massive damage on hit and block, and is safe at far ranges. Reaches fullscreen, too, making it a useful chip-kill tool. As a neutral tool, it's not as helpful as just running or jumping due to how fast Jack is, though. | |||
At low Spirit, this move deals 24 damage and only has 6 active frames. Given the one advantage of the regular version was damage, this isn't very helpful. | |||
}} | }} | ||
| Line 182: | Line 187: | ||
| moveId = jack_214a | | moveId = jack_214a | ||
| description = Consumes 20% Spirit on use if available, but is unchanged at low Spirit. | | description = Consumes 20% Spirit on use if available, but is unchanged at low Spirit. | ||
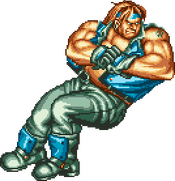
The second and third hit have punishable gaps immediately after them (5f and 17f respectively), making this a hard move to justify using, especially since its effective range is also command grab range. No real utility. | |||
}} | }} | ||
| Line 188: | Line 195: | ||
| moveId = jack_646a | | moveId = jack_646a | ||
| description = Costs 20% Spirit. | | description = Costs 20% Spirit. | ||
Big and funny, but way too slow to justify using, since it does the same damage as Knuckle Pad with less range, and Knuckle Pad was already not a great move. | |||
At low Spirit, this move travels a very short distance forward before attacking. Useless. | |||
}} | }} | ||
| Line 194: | Line 205: | ||
| moveId = jack_16b | | moveId = jack_16b | ||
| description = Costs 25% Spirit. | | description = Costs 25% Spirit. | ||
A 12f overhead might sound crazy, but don't get too excited; it whiffs on crouchers for most of its active frames, so you're actually looking at something closer to a 35-40f overhead. It's death on block, too, making this another move that's just way too risky in spite of its massive upfront reward. | |||
At low Spirit, the forward momentum of this special is cut in half. Still terrible. | |||
}} | }} | ||
| Line 199: | Line 214: | ||
{{FrameDataCargo-AOF2 | {{FrameDataCargo-AOF2 | ||
| moveId = jack_646b | | moveId = jack_646b | ||
| description = Costs 25% Spirit. | | description = Costs 25% Spirit. Heavy normals cannot special cancel into it. | ||
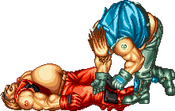
Bonkers command grab. You can grab people out of both hitstun and blockstun with this move, and if the opponent's out of range, rather than whiffing, Jack will just use his 5LK/5HK instead depending on button hold. You can buffer this behind just about anything to guarantee a huge chunk of health off any hit or blocked light. The only downside is its bad frame advantage, meaning the oki midscreen is pretty bad, but the damage and corner carry are pretty worth it. Also, it's a 1f grab, making it a powerful defensive tool. | |||
At low Spirit, this move does 8 damage. There aren't any other changes, so this is actually still pretty scary. You really wish you had the meter to deal some more damage, but if you've gotten them in the corner, killing them via inescapable throw loop in increments of 8 damage is just as good as increments of 30. | |||
}} | }} | ||
| Line 207: | Line 226: | ||
| moveId = jack_463214b | | moveId = jack_463214b | ||
| description = Costs 75% Spirit. Can only be executed with sufficient Spirit. | | description = Costs 75% Spirit. Can only be executed with sufficient Spirit. | ||
None of the 3 hits combo into each other, so even if you somehow hit the pretty slow first hit, you'll get the next two blocked and eat whatever punish the opponent can muster. Does pretty solid chip damage on block, so it might be useful for chip kills due to the range. | |||
}} | }} | ||
| Line 214: | Line 235: | ||
| moveId = jack_63214a | | moveId = jack_63214a | ||
| description = Costs 75% Spirit. Can only be executed with sufficient Spirit and at 25% health or below. | | description = Costs 75% Spirit. Can only be executed with sufficient Spirit and at 25% health or below. | ||
Just like Brain Shock, this can grab people out of hitstun or blockstun and will whiff with punch buttons instead of a whiff animation, making this a devastating up-close option and useful in every situation Brain Shock is. Minus on hit, but you probably should've killed them with this if you're late enough in the round to use it so it's fine. | |||
}} | }} | ||
{{Navbox AOF2}} | {{Navbox AOF2}} | ||
Revision as of 01:56, 14 June 2024
Story
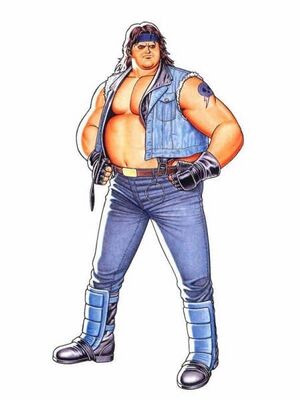
Jack is one of Mr. Big's highest ranked men. He runs his own gang called the Neo Black Cats, and hangs frequently at bars around South Town. He has formed rivalries with many of the underground thugs crawling in South Town, and even has beef with King. After his defeat from Ryo and Robert in AOF1, Jack continued to lead his gang, until he was invited to the King of Fighters tournament.
Introduction
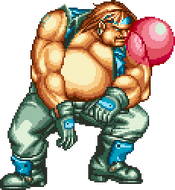
Jack only wants one thing: to get in, force you into the corner, and trap you in a throw loop. Jack is built like a tank, with the damage output of one too, but quicker and with better effective range than you'd think.
In addition, Jack will only take 85% of the damage dealt to him once he dips below 75% health, will only take 70% damage once he dips below 50% health, and will only take 60% damage once he's below 25% health, all non-inclusive. This makes him a uniquely tanky character in a game with mostly-universal health.
| Strengths | Weaknesses |
|---|---|
|
|
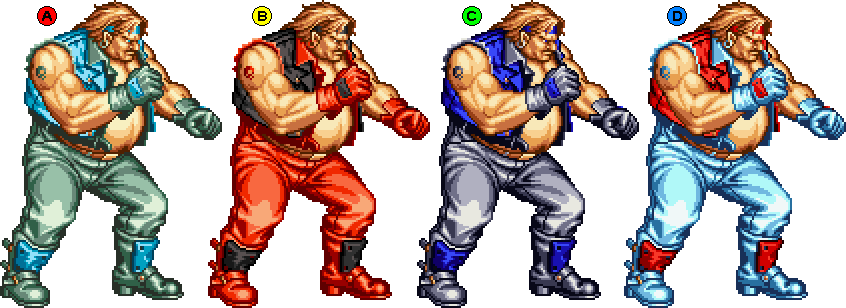
Colors
Movelist
Special Moves
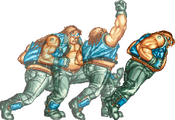
Dynamite Lariat - ![]()
![]()
![]() +
+ ![]() - 20% Spirit
- 20% Spirit
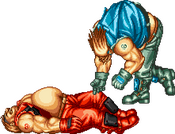
Super Dropkick - ![]()
![]() +
+ ![]() - 25% Spirit
- 25% Spirit
Super Move
Super Hip Attack - ![]()
![]() +
+ ![]() - 75% Spirit
- 75% Spirit
Desperation Move
Normals
Standing Normals
5LP
| 5LP
5A
5A |
|---|
5LK
| 5LK
5B
5B |
|---|
cl.HP
| Close HP
5[A]
5[A] |
|---|
f.HP
| Far HP
5[A]
5[A] |
|---|
5HK
| 5HK
5[B]
5[B] |
|---|
Crouching Normals
2LP
| 2LP
2A
2A |
|---|
2LK
| 2LK
2B
2B |
|---|
2HP
| 2HP
2[A]
2[A] |
|---|
2HK
| 2HK
2[B]
2[B] |
|---|
Jumping Normals
j.LP
| j.LP
j.A
j.A |
|---|
j.LK
| j.LK
j.B
j.B |
|---|
j.HP
| j.HP
j.[A]
j.[A] |
|---|
j.HK
| j.HK
j.[B]
j.[B] |
|---|
System Mechanics
Uppercut
| Uppercut
AC
AC |
|---|
Close Low Attack
| Close Low Attack
BC
BC |
|---|
Far Low Attack
| Far Low Attack
BC
BC |
|---|
Throw
| Throw
6/4 C
6/4 C |
|---|
Air Throw
| Air Throw
j.C
j.C |
|---|
Taunt
| Taunt
D
D |
|---|
Special Moves
Knuckle Pad
| Knuckle Pad
236A
236A |
|---|
Bomber Dance
| Bomber Rush
214A
214A |
|---|
Dynamite Lariat
| Dynamite Lariat
646A
646A |
|---|
Super Dropkick
| Super Dropkick
16B
16B |
|---|
Brain Shock
| Brain Shock
646B
646B |
|---|
Super Move
Super Hip Attack
| Super Hip Attack
463214B
463214B |
|---|
Desperation Move
Hell Dive
| Hell Dive
63214A
63214A |
|---|
