Difference between revisions of "Samurai Shodown VI/Sankuro"
m (→Far Slashes) |
m (→Far Slashes) |
||
| Line 24: | Line 24: | ||
===Far Slashes=== | ===Far Slashes=== | ||
*'''5A''' - Quick hammer flick. | *'''5A''' - Quick hammer flick. | ||
*'''5B''' - Hammer swipe with decent range. Hits farther than [[Samurai Shodown VI/Genjuro | *'''5B''' - Hammer swipe with decent range. Hits farther than [[Samurai Shodown VI/Genjuro|Genjuro]]'s 5B. | ||
*'''5C''' - Long ranged punish which can catch backdashes. Does not have a kara cancel window, unlike [[Samurai Shodown VI/Genjuro | *'''5C''' - Long ranged punish which can catch backdashes. Does not have a kara cancel window, unlike [[Samurai Shodown VI/Genjuro|Genjuro]]'s 5C. | ||
*'''2A''' - n5A but lower. | *'''2A''' - n5A but lower. | ||
*'''2B''' - Low-hitting poke with less range than 5B, but considerably quicker. Immune to deflects. | *'''2B''' - Low-hitting poke with less range than 5B, but considerably quicker. Immune to deflects. | ||
Revision as of 09:25, 29 June 2021
Introduction
No, not Zankuro.
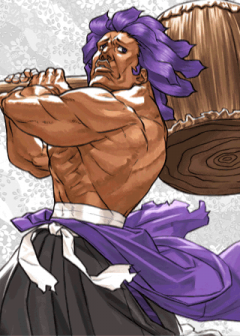
Sankuro makes his return to Samurai Shodown in this iteration, somewhat reformed from his days as a midboss. Gone is his unblockable gun super and ability to replenish health on demand, but instead he has the tools to play a relatively fundamental game. His assists retain their usefulness at pestering the opponent, but can additionally lead to frame traps involving themselves and the rest of your ranged tools. Additionally, a bomb toss and a command grab (which also happens to be how Sankuro goes about restoring health mid-round in this game) give him some mixup potential.
Data
- Dash type: Run
- Damage taken: 101%
- Rage retention: 195
- Rage duration: 8 seconds
Gameplan
Sankuro may be considered a zoning variant of Genjuro, given his 5B has decent range and he retains Genjuro's lengthy 5C for good pokes, but from those pokes his recoil options are not mixup-oriented but instead zoning-oriented. His gun (236S) fires an invisible shot which travels a set distance determined by its strength, effectively creating a dead zone in that range for a split second. 236C is the slowest shot but also travels the farthest, therefore being effective as a far harassment tool, while 236A/B are more effective as recoil cancel options. 236A is the fastest shot but its range is shorter than that of your medium slashes, however it will still catch an extended hurtbox from an opponent attempting to punish, for instance, a blocked heavy slash. 236B's reach extends beyond your maximum poke range but its speed may prove to be an issue against characters who can outpoke Sankuro. For this reason it is important to switch between these two strengths depending on the matchup.
Assists are another way of controlling space. Ofuyo (214A) will slide hitting low, covering your side of the floor. Goshichi (214B) will fall down hitting high, though his hitbox isn't active until he's just about to hit the ground. Ippachi (214C) will slide from behind the opponent, occupying their corner for when 236C won't reach. These assists will appear after Sankuro finishes calling them, and furthermore Sankuro can call a different assist immediately after. This allows not only for frame traps between an assist and a poke/different assist but also a chance for you to buy yourself more space if needs be.
Besides your low/high assists, Sankuro also has 6D for an overhead, far 2B and 2D for lows and 623D for a command grab as far as a mixup game goes. If he gets a knockdown and his opponent doesn't tech roll, he can throw a bomb (236D) to set these up relatively safely. Sankuro has a small gap for movement between throwing the bomb and its explosion, in which he can actually grab the opponent before it explodes. The bomb also allows you to link into other attacks if it hits, and you can Rage Explode before it hits for a low damage unblockable.
Sankuro has a particularly damaging confirm into WFT in IV Spirit, but the ability to space gun shots (particularly 236A) with roll cancels is useful for his neutral game, with them additionally giving his command grab extra reach. Sankuro doesn't take full advantage of State Of Nothingness (his overheads all knock down and he doesn't have a launcher), nor does he have any particular use for forward hops. If you want roll cancels then II is the way to go, given your WFT is easy to confirm into and Sankuro is more than capable of keeping an unarmed opponent away from their weapon.
Normal Moves
Far Slashes
- 5A - Quick hammer flick.
- 5B - Hammer swipe with decent range. Hits farther than Genjuro's 5B.
- 5C - Long ranged punish which can catch backdashes. Does not have a kara cancel window, unlike Genjuro's 5C.
- 2A - n5A but lower.
- 2B - Low-hitting poke with less range than 5B, but considerably quicker. Immune to deflects.
- 2C - 5C but lower and with slightly faster startup.
Near Slashes
- n5A - Short hammer butt. Useful for tick throws.
- n5B - Standard combo tool.
- n5C - Upward swing for punishes. Not an effective anti-air.
- n2A - Same as far version.
- n2B - Crouching n5B but more active.
- n2C - Crouching n5C but it ends quicker, allowing you to link something afterwards.
Kicks
- 5D - The last hit of Genjuro's old three-hitter. Fast with long reach. Special cancellable.
- 6D - The second hit of Genjuro's old three-hitter, an overhead which knocks down. Despite appearances this does not anti-air,
- 2D - Short low kick. Special cancellable but nothing Sankuro has is fast enough.
- 3D - Just as active as Genjuro's sweep but it can be blocked high.
Dash Normals
- 66A - Stubby elbow with bad frame data. Punishable on hit.
- 66B - Straight hammer swing with good range.
- 66C - Running 5C, with aided reach thanks to some of the momentum carrying over. Best used as a punish tool.
- 66D - Running 3D. Safe on block.
Air Normals
- jA - Light air-to-air with barely any active frames.
- jB - jA but better. Decent range.
- jC - Genjuro's njC, a downward hammer swing. Covers a decent amount of range in front of you.
- jD - Air-to-air. Looks similar to 3D.
Unarmed Normals
- u5S - Short punch.
- u2S - Low hook.
- u66S - Running u2S which knocks down.
- juS - Downward punch.
Hyper Slash (I)
- A+B - Essentially his 5C.
Special Moves
Ofuyo!/Goshichi!/Ippachi! - 214X respectively, can be done unarmed
- Sankuro's helpers. You may have more than one different helper on the screen at any time, which allows for some basic frame traps involving them alone, but you can throw other moves into the mix as well. None of these deal chip damage but they are safe on block.
- Ofuyo! - 214A (Samurai Drive)
- Ofuyo slides along the ground from behind you, hitting low. After some delay she will traverse half a stage distance from behind you. On hit there is a small window to juggle the opponent with something like a heavy slash or Goshichi. This recovers earlier than the other versions, allowing for some setplay if you've got the opponent cornered. You can trap the opponent with your 6D (even though the gap between the low and the overhead is quite large), but it's probably more rewarding to go for a strike/throw mixup instead.
- Goshichi! - 214B
- Goshichi falls from the sky and slams you, hitting high. He will spawn directly in front of the opponent. An easy trap would be to call Ofuyo then immediately call Goshichi afterwards, in which there's plenty of time for the opponent to switch their guard from low to high but they're pretty much just stuck there. Not that great as an anti-air despite appearances as Goshichi's hitbox only becomes active when he's about to land. You do not recover in time to perform a near-unblockable with one of your lows.
- Ippachi! - 214C
- Ippachi slides along the ground from behind the opponent, hitting mid. He will only travel a short distance, most likely to hit a cornered opponent. Rather than causing a knockdown, he will hold the opponent in place for a free hit. Ippachi is also the only way for Sankuro to hit most characters from fullscreen, so he is useful for catching opponents at ranges where Ofuyo and gunshots can't reach.
Look My Admirable Life!! - 6SSS
- The animation is similar to Genjuro's 646S but is functionally similar to Gaoh's 63214S. Strength determines the speed between swings, but the gaps between hits mean you won't get a full combo with this move alone. Best used as a chipping tool.
Edo Is Sushi!! - 623D, can be done unarmed
- A command grab. Deals more damage than your regular throw. Sankuro trips you then eats some sushi to restore health. The second part is no longer a special move on its own, so this is your only opportunity for a health boost unless you're playing with items on.
My Tanegashima - 236S, can be done unarmed (Samurai Drive)
- His gun. You can block it this time around. This is an effective recoil cancel option and a basic means of fullscreen harassment. Strength determines the startup and range.
- 236B will reach far enough to hit from the range of all of Sankuro's pokes. 236A reaches shorter than even 2B, but is considerably faster than 236B and may catch an extended hurtbox from the opponent.
- 236C reaches just short of fullscreen but is nontheless an effective way to harass your opponent. For that little bit of range that lies outside 236's reach there's always... Ippachi.
One Thing Of Boast - 236D, can be done unarmed (Samurai Drive)
- Sankuro throws a bomb which explodes shortly after leaving the palm of his hand. You are free to move a little before the bomb explodes for setplay, but aside from helpers your mixup options are limited to 6D (overhead), 2B (far low) and 2D (close low). If you're close enough you can also grab them with 623D before the bomb explodes, or Rage Explode for an unblockable if your Spirit has it. The blast may also be used for a getaway, although the opponent isn't stuck in blockstun for long. On hit the bomb will cause a juggle state.
Toy Transformation - 6321464E (II)
Supers
Violence Is Good - 236AB
- Sankuro charges from a midscreen distance and swings his hammer. Upon a successful hit his helpers will beat the opponent up while old mate smokes a durry. This WFT is particularly useful for its fast startup, meaning you can combo this from just about any starter.
Sushi Is Edo Style!! - 396BC (II), 236BC (VI)
- An enhanced version of 623D, dealing a little more damage and restoring more health. II Spirit's motion containing an up input means you'll have to buffer this in some way, but fortunately you can roll cancel into it.
Combos
Standard Combos
- n5B/n2B/5D 236A/236AB - Special cancels.
- n2C, 5D 236A/236AB - Link from n2C. Corner only.
- 214A 5C/214B/236AB - Small juggles with Ofuyo.
- 214C 214A/214B/236C - Fullscreen combos with Ippachi.
- 236D 5C/236A - Relevant juggles from bomb blast.
Continuous Slash (IV)
- n2C, A+B - Link into A+B. You'll only be able to follow it up with AA... or CCE in the corner, but BBC will connect from anywhere.
- A+B BBC 236A - Meterless juggle.
- A+B AABBCC 236AB - Hit confirm into WFT if you have the time for it.
Rage Explosion (IV, V)
- 236D, ABC - Low damage unblockable.


