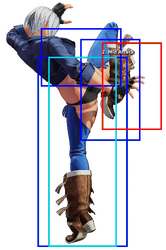
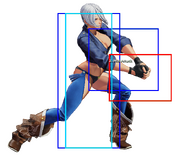
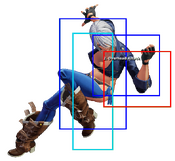
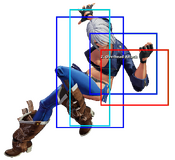
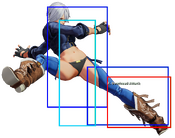
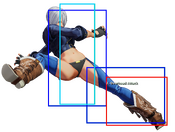
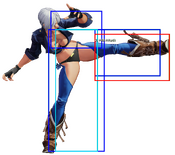
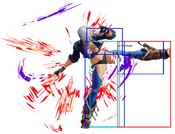
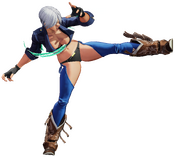
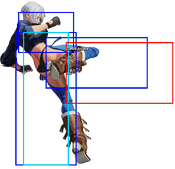
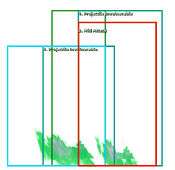
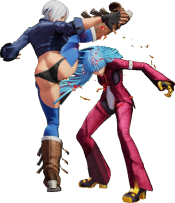
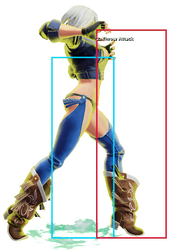
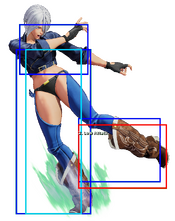
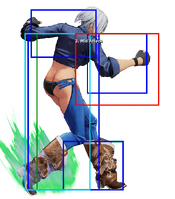
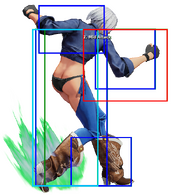
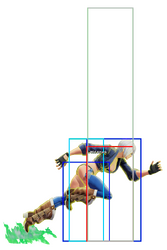
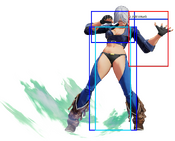
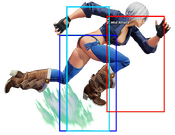
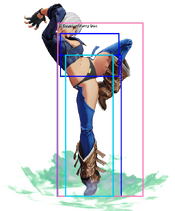
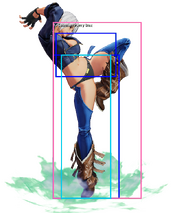
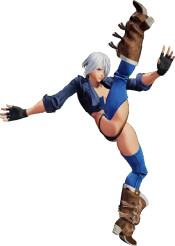
-The Dream Cancel Wiki has successfully upgraded it's wiki software and editing has returned. Tables for data have returned.
The King of Fighters XV/Ángel: Difference between revisions
SalsaInABowl (talk | contribs) →Jump A: Updated description |
SalsaInABowl (talk | contribs) m →Mad Murder: Minor terminology fix |
||
| (48 intermediate revisions by 2 users not shown) | |||
| Line 9: | Line 9: | ||
{{TOClimit|3}} | {{TOClimit|3}} | ||
==Gameplay Summary== | ==Gameplay Summary== | ||
Ángel is a very, ''very'' strange and complex character in comparison to the rest of the cast, in part due to some unorthodox normals and mostly due to her Unchain system. Ángel's Unchain system allows her to cancel a set of special moves into another set of special moves into another set of special moves to confuse and mix up the opponent. She has multiple different lows, overheads, and command grabs and ways to set them up | Ángel is a very, ''very'' strange and complex character in comparison to the rest of the cast, in part due to some unorthodox normals and mostly due to her Unchain system. Ángel's Unchain system allows her to cancel a set of special moves into another set of special moves into another set of special moves to confuse and mix up the opponent. She has multiple different lows, overheads, and command grabs and ways to set them up. She is a different beast compared to everyone else in the game, but can be very rewarding for those who put in the time and effort to master her. Outside of her complexity, Angel is a powerful mixup fighter who excels at close range. Her Unchain System allows her lots of variety in her approach, oki and pressure games, and getting put in the corner against her is a death sentence. Angel's biggest weakness is her awkward neutral — Ángel will have use good movement to force her way in against her opponents. Her pokes are quietly serviceable at best and her approach is difficult without access to truly dangerous normals like the rest of the cast, making it easy to push her back. If an opponent can successfully keep her out, it will be hard for Ángel to get started. Ángel functions best on point, where her high meterless damage and good meter build allow her to vortex the opponent to death while minimizing the chance that her opponent uses a guard cancel to stop her offense. | ||
{{StrengthsAndWeaknesses | {{StrengthsAndWeaknesses | ||
| intro = '''''{{SUBPAGENAME}} is a rushdown character that excels in pressuring her opponent with the Unchained (UC) System.''''' | | intro = '''''{{SUBPAGENAME}} is a rushdown character that excels in pressuring her opponent with the Unchained (UC) System.''''' | ||
| pros= | | pros= | ||
* ''' | * '''Extremely Anti-Projectile''': There are at least 5 moves in Ángel’s arsenal that have some form of projectile invulnerability, and many of these are forward-advancing attacks. In addition to this, she has access to EX Red Sky for only half a bar, a lightning-fast slide that does good damage, is projectile invulnerable, grants a safejump on hit and can hit from about half-screen distance. This move alone makes projectile zoning a complete non-issue (and even an opportunity) to Ángel, let alone the fact she has several other options to choose from on top of standard KOF anti-zoning. | ||
* '''Flexibility''': | * '''Brutal Oki''': Ángel’s combos almost always grant the opportunity to safejump after the combo ender. If it’s not a safejump, it’s a setup that allows her to hit an unblockable punch on the opponent as soon as they wakeup. If it’s not that, it’s guard breaking with 214AC. Or it’s a left/right mix. Sometimes the left/right mix is also a safejump regardless of the direction she chooses. Ángel’s offense is very difficult to stop once it gets started. | ||
* '''Massive Damage''': Outstanding meterless damage. Achieving upwards of 40% damage without burning meter is not out of the question. | * '''Flexibility''': Ángel has a huge number of tools to help her out in battle. Several Unchain Starts help her contest neutral or defend against her opponents approach, which lets her adapt to her opponents gameplan easily. An Ángel player with solid reflexes and sharp reads can readily react to any situation with the right move. | ||
* '''Massive Damage At A Low Cost''': Outstanding meterless damage. Achieving upwards of 40% damage without burning meter is not out of the question. | |||
* '''Terrifying Mixups''': Angel's left/right game is absurd with her j.C, which crosses up incredibly well. Her high damage allows her to two-touch most characters and vortex them back into the mixup all over again. She has everything a pressure character could want, including command grabs, frame traps, and even an honest-to-god unblockable for catching the hardest of turtles. | * '''Terrifying Mixups''': Angel's left/right game is absurd with her j.C, which crosses up incredibly well. Her high damage allows her to two-touch most characters and vortex them back into the mixup all over again. She has everything a pressure character could want, including command grabs, frame traps, and even an honest-to-god unblockable for catching the hardest of turtles. | ||
| cons= | | cons= | ||
* '''Awkward Neutral''': Angel's neutral can be very awkward, with normals that range anywhere from unspectacularly bad or situational to decent at best. Whiff punishing can be difficult, and even trying to punish on block can be difficult due to her close heavies having very short range and the subpar nature of her far normals. It’s not all bad, but if Ángel is not given the sufficient space and time to utilize her Unchain in neutral, her normals will make for an uncomfortable time on defense. | * '''Awkward Neutral''': Angel's neutral can be very awkward, with normals that range anywhere from unspectacularly bad or situational to decent at best. Whiff punishing can be difficult, and even trying to punish on block can be difficult due to her close heavies having very short range and the subpar nature of her far normals. It’s not all bad, but if Ángel is not given the sufficient space and time to utilize her Unchain in neutral, her normals will make for an uncomfortable time on defense. | ||
* '''Terrible Meter Dumps''': In extreme contrast to her meterless damage, Ángel’s returns on meter spent in a combo will fall off a cliff once you spend any more than 1 bar. The price to pay for meterless 400 damage combos is being forced to spend 3-3.5 bars just to break 620 damage. Her super deals 160 base damage, and her climax only does 430. Her lengthy combos result in harsh scaling by the end of combo, which makes Quick MAX, an action which accelerates this scaling and expects you to cash out with super attacks, very unrewarding. Her normals make a guard cancel roll unrewarding as a punish tool. With all of this in mind, meter is best spent on EX moves, shatter strikes, her counter super and guard cancel CD; most of these are strictly defensive options. Big damage must be achieved by leaning into Ángel’s strong resets because dumping meter into big damage to secure kills is not an option. | |||
* '''Issues with consistency''': Ángel has an uncanny ability to make rounds go really, really bad for your opponent, but there will be times where you may find it difficult to truly get Ángel’s offense started and you are forced to spend the next round trying to make a comeback. Even her defense is serviceable (don’t forget, she has a 1F counter super that beats safejumps) for the most part, but that runs into issues with consistency too. You may press B to stop a hop with far B, only to find that close B (absolutely not an anti-hop) comes out instead and you eat a combo. You may get out of the corner by command dashing through your opponent, or you just get counterhit out of the dash and eat a full combo. At least her meter gain is consistently high for your troubles. | * '''Issues with consistency''': Ángel has an uncanny ability to make rounds go really, really bad for your opponent, but there will be times where you may find it difficult to truly get Ángel’s offense started and you are forced to spend the next round trying to make a comeback. Even her defense is serviceable (don’t forget, she has a 1F counter super that beats safejumps) for the most part, but that runs into issues with consistency too. You may press B to stop a hop with far B, only to find that close B (absolutely not an anti-hop) comes out instead and you eat a combo. You may get out of the corner by command dashing through your opponent, or you just get counterhit out of the dash and eat a full combo. At least her meter gain is consistently high for your troubles. | ||
}} | }} | ||
| Line 112: | Line 113: | ||
| '''0 Meter''' | | '''0 Meter''' | ||
| | | | ||
2B > 2A > 46B | 2B > 2A > 46B > 2P > 6K > 236C<br/> | ||
j.D | |||
2B > Close B > 46D > 6P > 66A > 46D > 2K > 66k<br/> | |||
j.D > Close D > 6B > 214C > 2K > 426K > 8K > 66K<br/> | |||
CD > 624B (whiff) > 2C > 426K > 8K > 426K > 8P > 6AB > 66A > 46D > 2K > 66K<br/> | |||
| | | | ||
185 dmg<br/> | 185 dmg<br/> | ||
233 dmg + safejump<br/> | |||
347 dmg + safejump<br/> | |||
268 dmg + safejump<br/> | |||
|- | |- | ||
| ''' | | '''0.5 Meter''' | ||
| | | | ||
2B > | 2B > 2A > 46BD > 6P > 66A > 46D > 2K > 66K<br/> | ||
j.D | |||
j.D > Close D > 6B > 214C > 2K > 8P > 6AB > 66A > 46D > 6K > 426BD > 8K > 66C > 624B<br/> | |||
| | | | ||
228 dmg + safejump<br/> | |||
448 dmg<br/> | |||
|- | |- | ||
| ''' | | '''1 Meter''' | ||
| | | | ||
j.D > Close D > 6B > 214C > 2K > 8P > 6AB > 66A > 46D > 6K > 426BD > 8K > 66C > 624BD<br/> | |||
2B > Close B > 46D > 6P > 66A > 46D > 6K > 426BD > 8K > 66C > 624BD<br/> | |||
| | | | ||
464 dmg + safejump<br/> | |||
309 dmg + safejump<br/> | |||
|- | |- | ||
|} | |} | ||
==Basic Combo Starters== | ==Basic Combo Starters== | ||
'''2B 2A 46B'''<br> | '''2B > 2A > 46B'''<br> | ||
* | *Anything involving 2A will result in a fairly low damage combo unless you spend half a bar on 46BD. Try and use Close B instead of 2A whenever possible. | ||
*Followups are limited without meter or corner.<br> | *Followups are limited without meter or corner.<br> | ||
'''2B c.B 46D'''<br> | '''2B > c.B > 46D'''<br> | ||
*46D keeps the opponent closer | *46D keeps the opponent closer on hit, allowing 6P > 66A to combo after.<br> | ||
*46D does not combo from 2A. | *46D does not combo from 2A. | ||
'''2B > c.B > 214A'''<br> | |||
'''2B c.B 214A'''<br> | *If Close B is blocked, this same string becomes a frametrap. | ||
* | *Starting an Unchain sequence with 214P will generally always result in the best possible damage and widest array of combo routes.<br> | ||
'''c.D 6B | '''c.D > 6B > 214C'''<br> | ||
* | *Highest damage combo starter.<br> | ||
* | *214C combos from 6B and is otherwise identical to 214A in its usage during combos starting with a Close D, but it generates more meter. Use it over 214A whenever possible. <br> | ||
''' | '''CD > 624B (whiff) > 2C'''<br> | ||
* | *Best damage off a CD hit. If the 2C > 426K > 8K > 426K > 8P string is too difficult, you can just do 214C or even 2C > 214C (kara) > 2K after the slide and do the rest of the standard BNB after. The first string will give a completely meterless safejump, so it is recommended to learn it as soon as possible. | ||
===Unchain Overview=== | ===Unchain Overview=== | ||
'''Overview''' | '''Overview''' | ||
Unchain can be thought of as a complex rekka series.<br> | Unchain can be thought of as a complex rekka series with 4 stages.<br> | ||
# Use a '''Starter''' move. | # Use a '''Starter''' move to begin the first stage of the sequence. Even if the move misses or gets blocked, it can be followed up with an Unchain Circle attack. The sequence always immediately advances to the Circle phase after an Unchain Starter. | ||
# | # In stage 2, Ángel can perform any 1 of 6 '''Unchain Circle''' attacks (henceforth shortened to “Circle”). Because there is no light and heavy version of the Circle moves, they are simply abbreviated as P and K (for example, 8K or 2P). Unlike the other stages, this one does not necessarily end after 1 move. | ||
# Optionally, you may cancel | # Optionally, you may cancel Circle moves into other Circle moves, <div class="mw-collapsible mw-collapsed" data-expandtext="following these rules." data-collapsetext="TL;DR"> | ||
## You must alternate between punches and kicks. | ## You must alternate between punches and kicks. As an example, if you use a punch attack in the Circle phase, the next attack must be a kick. | ||
## You cannot repeat directional inputs between consecutive moves. | ## You cannot repeat directional inputs between consecutive moves. If you use a Circle attack with a forward input, the next Circle attack must contain a down or up input. | ||
## You cannot use the same move twice within one unchain sequence. | ## You cannot use the same move twice within one unchain sequence. Any time an Unchain Starter is used, the sequence is considered reset. | ||
## If the Starter was a | ## If the Starter was a command dash (426K) that was canceled into from a Circle move (see the next phase of the Unchain sequence), you may only perform one Circle attack per sequence. If you wish to observe this restriction to better understand it, perform the following combo at midscreen: 214P > 6K > 426BD > 8P > 426K > 8K. Notice that you are locked out of any Circle attacks after 8K, leaving 66C, 66A or 66K as your only follow-up options.<div> | ||
# | # While still in the Circle phase, you may reset the sequence by canceling a Circle attack into Unchain Starter - Dash (426K). This applies the previously mentioned restriction on Circle cancels until the sequence is dropped or finished. | ||
# | # After any Unchain Circle attack, you may optionally perform a Special Spin. This is the only move available in stage 3 of the Unchain sequence, and can be skipped entirely in favor of going straight to stage 4 if so desired. The Special Spin is a dodge with complicated invulnerability properties, used as both a movement tool and a way to safely disengage the Unchain sequence. [https://dreamcancel.com/wiki/The_King_of_Fighters_XV/%C3%81ngel#Special_Circle Read more about the Special Spin here.] If a Special Spin is performed, your only options are to drop the sequence or perform a move from the final stage. | ||
# After stage 2 or 3, you may end the sequence with an Unchain Finisher. These moves will end the sequence, but they are not necessarily combo enders — a successful 66A or 66C will extend combos and even allow you to begin a new Unchain sequence, and 66K is super cancelable (even if this is rarely ever recommended). | |||
''' | To recap: | ||
* | |||
'''Unchain Starter''' | |||
*Begins the Unchain sequence with 1 of 5 moves, and plenty of mix already baked into this phase. A low, an overhead, potential frametraps and a side-switching command dash are located here. | |||
'''Unchain Circle''' | '''Unchain Circle''' | ||
*6 moves that can be rapidly chained together, or even canceled back into another command dash to reset the sequence. Both of the up input Circle attacks are mids that are great at covering high angles and extending combos. Both of the forward input Circle attacks are overheads, one slow and one fast. Both of the down input Circle attacks are lows, one slow and one fast. | |||
''' | '''Special Spin ''' | ||
* | *Pick from 1 or 3 dodges that grant strike and projectile invulnerability on frame 1. Back spin travels the furthest, neutral spin recovers the fastest, while the forward spin moves you forward, which can be considered a reward in of itself. | ||
'''Unchain Finisher''' | |||
*End the sequence. This stage is home to plenty of mix: A launcher, an unblockable wallbounce, a fast command grab, a slow command grab and a safe-on-block hard knockdown with good range are at your disposal. | |||
* | |||
===Strategy=== | ===Strategy=== | ||
====Anti-airing==== | ====Anti-airing==== | ||
*Best anti-airs: | *Best anti-airs: Far D, Far B, 66A | ||
*Angel's anti-airs are | *Angel's grounded anti-airs are weak, or hard to access in the case of 66A. Your best option for stopping an aerial approach is to meet them in air with a j.A. This may require a good read/reaction, and hitting them before their jump attack becomes active. | ||
*Far B is great anti-hop, but does not cover full jump angles very well. Far D covers it a little better. Far D can work as anti-hop too, but it is a bit more risky in exchange for the higher damage. | |||
*If you do find yourself in the position to anti-air with 66A for whatever reason, it is a very rewarding option and it comes with upper body invulnerability through most of its startup. | |||
*2C is similarly rewarding, but not a very good anti-air in itself. You may consider it as a high-risk option. | |||
====Movement==== | ====Movement==== | ||
*Angel's backdash can be canceled into j.2D. To do this, simply | *Angel's backdash can be canceled into j.2D. To do this, simply input 2D while backdashing. This makes her backdash go from 22 total frames to 19, and the j.2D can still hit an advancing opponent (or extended hurtbox), especially if you're cornered. | ||
*Unchain can be used for movement. '''Tricky to use and not required for starting the character.'''<div class="mw-collapsible mw-collapsed" data-expandtext="Tell me more" data-collapsetext="TL;DR"> | *Unchain can be used for movement. '''Tricky to use and not required for starting the character, but you will eventually need to learn this as you get better at the game and fight stronger opponents.'''<div class="mw-collapsible mw-collapsed" data-expandtext="Tell me more" data-collapsetext="TL;DR"> | ||
** | **426K not only allows you to move forward at the same speed as a regular run, it allows you to access your Unchain Circle options right out of the run. This gives you instant access to powerful movement options, such as 8K > Special Spin and 6K. | ||
**Look for opportunities to use Unchain moves as movement tools, such as 2K’s long forward movement or 6K’s ability to jump over most fireballs while advancing forward and giving you access to the Special Spin. | |||
** | **8K is Ángel’s fastest Unchain Circle attack at 8 frames of startup, and is therefore the primary method of quickly accessing the Special Spin. | ||
** | **Dash > 8K can be looped. This allows her to rapidly cover hop angles with a hitbox while advancing forward for as long as this input is looped. This can also be achieved by inputting 412369K during the command dash, which will perform the 8K and immediately cancel it into another dash. While not as fast as 8K, 2P and 8P can also be used for the dash loop. | ||
** | **426K can be used to get out of the corner, as it is quite difficult to react to and switches sides. | ||
** | **66K has good range, moves forward, has lower body invulnerability and is safe on block, making it a decent option for forcing your way in. | ||
<div> | <div> | ||
| Line 229: | Line 221: | ||
|moveId=angel_sta | |moveId=angel_sta | ||
|description= | |description= | ||
*Standard jab. Does what a jab does, does not do what a jab do not do, no more or less. | |||
* Can | *Can combo into 46B / 46BD. On counterhit against an airborne opponent, EX Dash (426BD) will convert this into a combo. | ||
}} | }} | ||
| Line 240: | Line 229: | ||
|moveId=angel_stb | |moveId=angel_stb | ||
|description= | |description= | ||
*Great anti-hop. Also does a decent job of stuffing most ground attacks. | |||
*When attempting to use this against hops, be sure that the opponent is not close enough to make Close B activate instead of this move. | |||
}} | }} | ||
| Line 248: | Line 238: | ||
|moveId=angel_stc | |moveId=angel_stc | ||
|description= | |description= | ||
*Decent way to keep your opponent’s forward movement in check | |||
*MAX Mode is very unrewarding for Ángel and is therefore not advised, but this is her best button to fish for Quick MAX with if you really feel like spending 2 bars for ~360 damage. | |||
}} | }} | ||
| Line 255: | Line 246: | ||
|moveId=angel_std | |moveId=angel_std | ||
|description= | |description= | ||
* | *ass | ||
}} | }} | ||
| Line 275: | Line 264: | ||
|description= | |description= | ||
* This move does not hit low, despite its animation. | * This move does not hit low, despite its animation. | ||
* You will usually combo into 214A or | * You will usually combo into 214A or 46D after hitting this move. | ||
* One of, if not the only one, the few lights in the game that can combo into shatter strike. | * One of, if not the only one, the few lights in the game that can combo into shatter strike. | ||
* Usually can be chained into itself one time if you’re close enough. | * Usually can be chained into itself one time if you’re close enough. | ||
| Line 310: | Line 299: | ||
|moveId=angel_crb | |moveId=angel_crb | ||
|description= | |description= | ||
* Fast poke that hits low | * Fast, short range poke that hits low | ||
* | * 2B combo starters are generally not very rewarding for Ángel, especially compared to other characters. | ||
* Follow up with | * Follow up with Close B > 46D or 2A > 46B to hit confirm into Unchain. If you use 2A instead of Close B, you must spend half a bar on 46BD to get access to the superior Unchain routes that Close B > 46D grants. | ||
}} | }} | ||
| Line 319: | Line 308: | ||
|moveId=angel_crc | |moveId=angel_crc | ||
|description= | |description= | ||
*Not as good of an anti-air as it looks, but it can work | *Not as good of an anti-air as it looks, but it can work and the reward is solid | ||
*Compensates for being the second-slowest 2C in the game by being the only launcher 2C in the game. | *Compensates for being the second-slowest 2C in the game by being the only launcher 2C in the game. | ||
*Special cancelable, even on whiff. | *Special cancelable, even on whiff. | ||
* | *Commonly followed up with 214P (kara) > 2K; this is also the optimal combo starter after a 214AC guard break in the corner. | ||
*Don't whiff this without canceling into something like | *Don't whiff this without canceling into something like 214P or 426K. | ||
}} | }} | ||
| Line 341: | Line 330: | ||
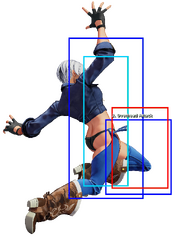
|name=jump A | |name=jump A | ||
|input=j.A | |input=j.A | ||
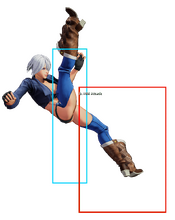
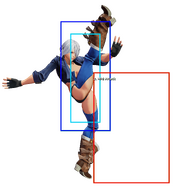
|captions= Hop Version (Hitbox), Jump Version | |||
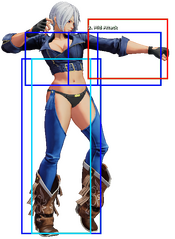
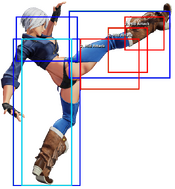
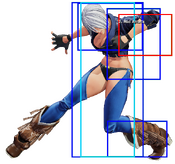
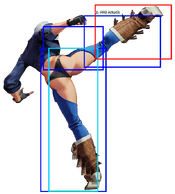
|description2=*Great all-around aerial attack option | |description2=*Great all-around aerial attack option | ||
*Can cancel into j.2D unless performed during a hop. There is no risk attached to this, so you may as well buffer it every time. | *Can cancel into j.2D unless performed during a hop. There is no risk attached to this, so you may as well buffer it every time. | ||
*If j.A counterhits an aerial opponent, it will successfully combo into j.2D for a total of 97 damage on the air-to-air exchange | *If j.A counterhits an aerial opponent, it will successfully combo into j.2D for a total of 97 damage and just a little bit more time for oki on the air-to-air exchange | ||
}} | }} | ||
| Line 351: | Line 341: | ||
|name=jump B | |name=jump B | ||
|input=j.B | |input=j.B | ||
|captions= Hop Version (Hitbox), Jump Version | |||
|description2=*Decent for stopping an opponent's hop if used preemptively in close range | |description2=*Decent for stopping an opponent's hop if used preemptively in close range | ||
}} | }} | ||
| Line 359: | Line 350: | ||
|name=jump C | |name=jump C | ||
|input=j.C | |input=j.C | ||
|captions= Hop Version (Hitbox), Jump Version | |||
|description2=*Dedicated cross-up attack. Has no hitbox in front of Ángel, but a fantastic hitbox behind her. | |description2=*Dedicated cross-up attack. Has no hitbox in front of Ángel, but a fantastic hitbox behind her. | ||
*Will always allow you to Close D after a hit since the “pushback” technically forces your opponent closer to you rather than pushing them away. | *Will always allow you to Close D after a hit since the “pushback” technically forces your opponent closer to you rather than pushing them away. | ||
| Line 369: | Line 361: | ||
|name=jump D | |name=jump D | ||
|input=j.D | |input=j.D | ||
|captions= Hop Version (Hitbox), Jump Version | |||
|description2=*Solid jump-in combo starter | |description2=*Solid jump-in combo starter | ||
*The usual choice of aerial attack on a hop (where j.A > j.2D is inaccessible) or a safejump. | *The usual choice of aerial attack on a hop (where j.A > j.2D is inaccessible) or a safejump. | ||
| Line 392: | Line 385: | ||
*On air hit: Follow this up by immediately command dashing and pressing 8P at the right time. | *On air hit: Follow this up by immediately command dashing and pressing 8P at the right time. | ||
}} | }} | ||
====AdvanceStrike==== | |||
{{FrameDataCargo-KOFXV | |||
|moveId=angel_214cd | |||
|description= | |||
*Same animation and range as her CD. | |||
}} | |||
====jump CD==== | ====jump CD==== | ||
| Line 398: | Line 400: | ||
|name=jump CD | |name=jump CD | ||
|input=j.CD | |input=j.CD | ||
|captions= Hop Version (Hitbox), Jump Version | |||
|description2=*Fairly standard horizontal j.CD. Decent air-to-air. | |description2=*Fairly standard horizontal j.CD. Decent air-to-air. | ||
*On counterhit, use 426BD after landing to convert this into a combo. | *On counterhit, use 426BD after landing to convert this into a combo. | ||
| Line 417: | Line 420: | ||
|name=Tekitou Rush | |name=Tekitou Rush | ||
|input=(close) 4/6C | |input=(close) 4/6C | ||
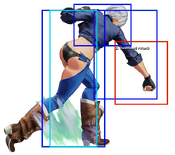
|description=* | |description=* Fairly standard forward throw. Gives enough time to go for a manually timed safejump. | ||
*Auto-timed safejump: After throwing an opponent into the corner, immediately backdash > j.2D and then hyper hop forward. | |||
}} | }} | ||
| Line 426: | Line 430: | ||
|input=(close) 4/6D | |input=(close) 4/6D | ||
|description=* Normal throw that switches sides | |description=* Normal throw that switches sides | ||
* You will be quite far from the opponent after doing this, unless you were backed up into a corner. You still have time for oki if you're fast enough. | * You will be quite far from the opponent after doing this, unless you were backed up into a corner. You still have time for oki or even a safejump if you're fast enough. | ||
* Safejump: If you throw your opponent into the corner, immediately press Far B and hyper hop forward. | |||
}} | }} | ||
| Line 446: | Line 451: | ||
|description=* Cancel into this after j.A (unless it's a hop) for extra damage on your jump-in | |description=* Cancel into this after j.A (unless it's a hop) for extra damage on your jump-in | ||
*Opponent may switch their block to low after blocking the j.A, leading to a hit if the j.2D comes out after | *Opponent may switch their block to low after blocking the j.A, leading to a hit if the j.2D comes out after | ||
*See notes in the [[The_King_of_Fighters_XV/Ángel#Movement|movement]] section about using this during a backdash | *With good timing and a decent hop angle on the opponent, Ángel can land on the other side of the opponent after hitting this. | ||
*If you are backed into a corner, you can backdash and | *See notes in the [[The_King_of_Fighters_XV/Ángel#Movement|movement]] section about using this during a backdash to make the backdash faster. | ||
*If you are backed into a corner, you can backdash and immediately press 2D to use this move as a sneaky, fast overhead. There are combo resets that make use of this; in the corner, try the following: 66C > 426BD > Close D > 426K > Backdash j.2D > [Any combo] | |||
}} | }} | ||
| Line 458: | Line 464: | ||
|name=Red Sky | |name=Red Sky | ||
|input=63214BD | |input=63214BD | ||
|captions= Normal Version (Hitbox), EX Version (Hitbox) | |||
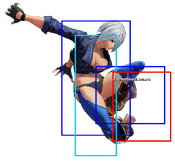
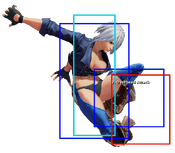
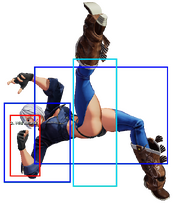
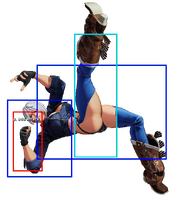
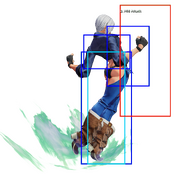
|description3=*Ángel slides forward about half-screen distance. B version is faster, D version has longer range and is +2 on block. | |description3=*Ángel slides forward about half-screen distance. B version is faster, D version has longer range and is +2 on block. | ||
*This is a hitgrab, not a true command grab. It can be blocked. | *This is a hitgrab, not a true command grab. It can be blocked. | ||
*Works as both a combo ender and a way to advance forward in neutral due to its safety on block. | *Works as both a combo ender and a way to advance forward in neutral due to its safety on block. | ||
*On a CD hit, use any version of this to quickly get back in range of the opponent and confirm into a combo, usually with 2C > 214P (kara) > 2K | *On a CD hit, use any version of this to quickly get back in range of the opponent and confirm into a combo, usually with 2C > 214P (kara) > 2K | ||
*EX version slides faster and can go through projectiles. Grants hard knockdown and an easy safejump, a property that makes it one of the best combo enders Ángel has access to. | *EX version slides faster and can go through projectiles. Grants hard knockdown and an easy safejump, a property that makes it one of the best combo enders Ángel has access to. It is also her best anti-projectile tool. | ||
*Safejump: Immediately hyper hop forward after the 624BD animation ends. | *Safejump: Immediately hyper hop forward after the 624BD animation ends. | ||
}} | }} | ||
| Line 471: | Line 478: | ||
|name=Mad Murder | |name=Mad Murder | ||
|input=41236AC | |input=41236AC | ||
|captions= Normal Version (Hitbox), EX Version (Hitbox) | |||
|description3=*Command grab that launches the opponent | |description3=*Command grab that launches the opponent | ||
*Normal version can also be accessed during Unchain — Step (426K), even after the side switch. | |||
*EX Version has less startup frames and launches higher. It also has strike invulnerability starting on frame 3. | *EX Version has less startup frames and launches higher. It also has strike invulnerability starting on frame 3. | ||
*Tick throw setup: Make the enemy block a Close A, then use 426AC as soon as its recovery ends (do not special cancel directly out of Close A or the grab will whiff) | *Tick throw setup: Make the enemy block a Close A, then use 426AC as soon as its recovery ends (do not special cancel directly out of Close A or the grab will whiff) | ||
| Line 503: | Line 512: | ||
|name=Unchain – Tornado | |name=Unchain – Tornado | ||
|input=46B/D/BD | |input=46B/D/BD | ||
|captions= Normal Version (Hitbox), Normal Version - Hit State Only (Hitbox), , EX Version | |||
|description3=* Unchain starter with good range | |description3=* Unchain starter with good range | ||
*Often used to continue combos on a launched opponent | *Often used to continue combos on a launched opponent | ||
| Line 515: | Line 525: | ||
|name=Unchain – Blow | |name=Unchain – Blow | ||
|input=214AC | |input=214AC | ||
|captions= Normal Version (Hitbox), EX Version | |||
|description3=* Unchain starter that can lead to big damage and works especially well after 6B | |description3=* Unchain starter that can lead to big damage and works especially well after 6B | ||
*You can kara-cancel this into any Unchain Circle move, get creative with it and do stuff like poke low from midscreen by canceling into 2K | *You can kara-cancel this into any Unchain Circle move, get creative with it and do stuff like poke low from midscreen by canceling into 2K | ||
| Line 527: | Line 538: | ||
|name=Unchain - Step | |name=Unchain - Step | ||
|input=41236BD | |input=41236BD | ||
|description3=* Ángel dashes forward | |captions= Normal Version (Hitbox),, EX Version | ||
*Can be canceled into any Unchain Circle after running for a minimum of 10 frames or after switching sides with the opponent | |description3=* Ángel dashes forward at the same speed as a normal run despite the slightly sped-up animation. | ||
*Heavy version (426D) will cause Ángel to vanish and switch sides with the opponent if Ángel runs into them. The light version (426B) will not do this and Ángel will instead continue running at the opponent. Ángel is strike invulnerable during the vanish animation. | |||
*If Ángel runs into an opponent that is already in the corner using the | *Can be canceled into the normal version of Mad Murder (426P) or any Unchain Circle after running for a minimum of 10 frames or after switching sides with the opponent | ||
*EX version deals damage and is mostly used to extend combos due to it being extremely punishable on block. If it hits on an enemy already in the corner, | *If Ángel runs into an opponent that is already in the corner using the heavy version, her strike invulnerability only lasts 5 frames (instead of 20) and she cannot cancel into an Unchain Circle after. | ||
*Despite not having throw invulnerability, a normal throw will almost never catch it; this is not as reliable against command grabs | |||
*EX version deals damage and is mostly used to extend combos due to it being extremely punishable on block. If it hits on an enemy that is already in the corner, it will not switch sides but can still be canceled into a Circle attack. | |||
}} | }} | ||
| Line 567: | Line 580: | ||
|input=2A/C | |input=2A/C | ||
|description=*Ángel slides a short distance forward and extends her arm out against the ground | |description=*Ángel slides a short distance forward and extends her arm out against the ground | ||
* This and Unchain Step (41236B/D) will cancel into each other repeatedly, | *A fast low with short range | ||
*This and Unchain Step (41236B/D) will cancel into each other repeatedly; this is not only a high/low mixup that can go into 6K at any given moment, it is also a frame trap. | |||
*Unchain follow-ups: 8K, 6K | *Unchain follow-ups: 8K, 6K | ||
}} | }} | ||
====Circle – High==== | ====Circle – High==== | ||
{{FrameDataCargo-KOFXV | {{FrameDataCargo-KOFXV | ||
| Line 586: | Line 601: | ||
|name=Circle – Hammer Blow | |name=Circle – Hammer Blow | ||
|input=6A/C | |input=6A/C | ||
|description=* | |captions= , Hit State Only | ||
|description=*A slow overhead punch with fairly short range and great frametrap potential | |||
*On a grounded opponent, the first hit can be canceled into 66A for a launch; this is usually followed by 46D > 2K > 66K | *On a grounded opponent, the first hit can be canceled into 66A for a launch; this is usually followed by 46D > 2K > 66K | ||
*On an airborne opponent, hold | *This move is great for baiting out reversals using the following blockstring: Close D > 6B > 214C > 6P > 4AB. This string leaves enough of a gap for reversals to come out, but the Special Spin will ensure you are not hit by the reversal and you can take your free punish. | ||
*On an airborne opponent, hold jump after the hit to perform a safejump | |||
*Unchain follow-ups: 8K, 2K | *Unchain follow-ups: 8K, 2K | ||
}} | }} | ||
| Line 609: | Line 625: | ||
|moveId=angel_ab,angel_6ab,angel_4ab | |moveId=angel_ab,angel_6ab,angel_4ab | ||
|name=Special Circle – Feint | |name=Special Circle – Feint | ||
|input=4AB | |input=AB, 6AB, 4AB | ||
|captions= AB Version (Hitbox),, 6AB Version (Hitbox),, 4AB Version | |||
|description3=*Ángel spins after performing an Unchain Circle move. If 4 or 6 is inputted along with AB, she will move in that direction. The back spin travels further, the neutral spin recovers faster, and the forward spin generally appears to have better throw invulnerability. | |description3=*Ángel spins after performing an Unchain Circle move. If 4 or 6 is inputted along with AB, she will move in that direction. The back spin travels further, the neutral spin recovers faster, and the forward spin generally appears to have better throw invulnerability. | ||
*Outstanding for baiting reversals during Unchain, especially by using 6P > 4AB | *Outstanding for baiting reversals during Unchain, especially by using 6P > 4AB | ||
| Line 639: | Line 656: | ||
*If you are close enough to the corner, the opponent will bounce behind you | *If you are close enough to the corner, the opponent will bounce behind you | ||
*Very useful for attempting resets after the wallbounce | *Very useful for attempting resets after the wallbounce | ||
*Safejump: On an airborne hit in the corner, immediately jump toward the corner, then super jump away from the corner and press j.C on the way down. You may also normal jump and press j.D, it will still be a safejump. | |||
*If you are not in the corner but still want a safejump after hitting this, spend half a bar on 624BD. | |||
}} | }} | ||
====Finish – Rolling==== | ====Finish – Rolling==== | ||
{{FrameDataCargo-KOFXV | {{FrameDataCargo-KOFXV | ||
| Line 682: | Line 702: | ||
|name=Real Rave | |name=Real Rave | ||
|input=4623AC | |input=4623AC | ||
|captions= Normal Version (Hitbox), Max Version (Hitbox) | |||
|description3=*Ángel runs forward and hits the opponent with a series of punches and kicks, launching them after (does not actually combo into anything except for Advanced/Climax cancels) | |description3=*Ángel runs forward and hits the opponent with a series of punches and kicks, launching them after (does not actually combo into anything except for Advanced/Climax cancels) | ||
*EX version switches sides if the opponent is not backed up against the corner. It also does not launch, but a Climax will still hit after. | *EX version switches sides if the opponent is not backed up against the corner. It also does not launch, but a Climax will still hit after. | ||
| Line 692: | Line 713: | ||
|name=Blue Monday Counter | |name=Blue Monday Counter | ||
|input=4623BD | |input=4623BD | ||
|captions= Normal Version (Hitbox), Max Version | |||
|description3=*Ángel lifts her knee up. If an opponent hits her during the fairly tight active frame window, she will Rock Bottom them (switching sides) and then perform The People's Elbow. | |description3=*Ángel lifts her knee up. If an opponent hits her during the fairly tight active frame window, she will Rock Bottom them (switching sides) and then perform The People's Elbow. | ||
*2-bar version does more damage, and nothing else. | *2-bar version does more damage, and nothing else. | ||
Latest revision as of 10:40, 12 December 2024

All this means she has unparalleled strength when up close. She loves to joke around, and her personality isn’t something one can pin down. Leaving her life in Mexico behind, she joins Krohnen and enters KOF.
Hop: 32f
Backdash: 22f
Run Speed Ranking: 5
Gameplay Summary
Ángel is a very, very strange and complex character in comparison to the rest of the cast, in part due to some unorthodox normals and mostly due to her Unchain system. Ángel's Unchain system allows her to cancel a set of special moves into another set of special moves into another set of special moves to confuse and mix up the opponent. She has multiple different lows, overheads, and command grabs and ways to set them up. She is a different beast compared to everyone else in the game, but can be very rewarding for those who put in the time and effort to master her. Outside of her complexity, Angel is a powerful mixup fighter who excels at close range. Her Unchain System allows her lots of variety in her approach, oki and pressure games, and getting put in the corner against her is a death sentence. Angel's biggest weakness is her awkward neutral — Ángel will have use good movement to force her way in against her opponents. Her pokes are quietly serviceable at best and her approach is difficult without access to truly dangerous normals like the rest of the cast, making it easy to push her back. If an opponent can successfully keep her out, it will be hard for Ángel to get started. Ángel functions best on point, where her high meterless damage and good meter build allow her to vortex the opponent to death while minimizing the chance that her opponent uses a guard cancel to stop her offense.
| Ángel is a rushdown character that excels in pressuring her opponent with the Unchained (UC) System. | |
| Pros | Cons |
|
|
Movelist
(*) = EX OK
(!) = MAX OK
Throws
Command Normals
Heavy Knee Attack - ![]() +
+ ![]() (Midair Only)
(Midair Only)
Special Moves
Unchain Start
- Unchain Circle
- Special Unchain Circle
- Unchain Finish
Super Special Moves
Blue Monday Counter - ![]()
![]() +
+ ![]() /
/![]() (In time with opponent's attack) (!)
(In time with opponent's attack) (!)
Climax Super Special Moves
Quick Combo Reference
| 0 Meter |
2B > 2A > 46B > 2P > 6K > 236C 2B > Close B > 46D > 6P > 66A > 46D > 2K > 66k j.D > Close D > 6B > 214C > 2K > 426K > 8K > 66K CD > 624B (whiff) > 2C > 426K > 8K > 426K > 8P > 6AB > 66A > 46D > 2K > 66K |
185 dmg 233 dmg + safejump 347 dmg + safejump 268 dmg + safejump |
| 0.5 Meter |
2B > 2A > 46BD > 6P > 66A > 46D > 2K > 66K j.D > Close D > 6B > 214C > 2K > 8P > 6AB > 66A > 46D > 6K > 426BD > 8K > 66C > 624B |
228 dmg + safejump 448 dmg |
| 1 Meter |
j.D > Close D > 6B > 214C > 2K > 8P > 6AB > 66A > 46D > 6K > 426BD > 8K > 66C > 624BD 2B > Close B > 46D > 6P > 66A > 46D > 6K > 426BD > 8K > 66C > 624BD |
464 dmg + safejump 309 dmg + safejump |
Basic Combo Starters
2B > 2A > 46B
- Anything involving 2A will result in a fairly low damage combo unless you spend half a bar on 46BD. Try and use Close B instead of 2A whenever possible.
- Followups are limited without meter or corner.
2B > c.B > 46D
- 46D keeps the opponent closer on hit, allowing 6P > 66A to combo after.
- 46D does not combo from 2A.
2B > c.B > 214A
- If Close B is blocked, this same string becomes a frametrap.
- Starting an Unchain sequence with 214P will generally always result in the best possible damage and widest array of combo routes.
c.D > 6B > 214C
- Highest damage combo starter.
- 214C combos from 6B and is otherwise identical to 214A in its usage during combos starting with a Close D, but it generates more meter. Use it over 214A whenever possible.
CD > 624B (whiff) > 2C
- Best damage off a CD hit. If the 2C > 426K > 8K > 426K > 8P string is too difficult, you can just do 214C or even 2C > 214C (kara) > 2K after the slide and do the rest of the standard BNB after. The first string will give a completely meterless safejump, so it is recommended to learn it as soon as possible.
Unchain Overview
Overview
Unchain can be thought of as a complex rekka series with 4 stages.
- Use a Starter move to begin the first stage of the sequence. Even if the move misses or gets blocked, it can be followed up with an Unchain Circle attack. The sequence always immediately advances to the Circle phase after an Unchain Starter.
- In stage 2, Ángel can perform any 1 of 6 Unchain Circle attacks (henceforth shortened to “Circle”). Because there is no light and heavy version of the Circle moves, they are simply abbreviated as P and K (for example, 8K or 2P). Unlike the other stages, this one does not necessarily end after 1 move.
- Optionally, you may cancel Circle moves into other Circle moves,
- You must alternate between punches and kicks. As an example, if you use a punch attack in the Circle phase, the next attack must be a kick.
- You cannot repeat directional inputs between consecutive moves. If you use a Circle attack with a forward input, the next Circle attack must contain a down or up input.
- You cannot use the same move twice within one unchain sequence. Any time an Unchain Starter is used, the sequence is considered reset.
- If the Starter was a command dash (426K) that was canceled into from a Circle move (see the next phase of the Unchain sequence), you may only perform one Circle attack per sequence. If you wish to observe this restriction to better understand it, perform the following combo at midscreen: 214P > 6K > 426BD > 8P > 426K > 8K. Notice that you are locked out of any Circle attacks after 8K, leaving 66C, 66A or 66K as your only follow-up options.
- While still in the Circle phase, you may reset the sequence by canceling a Circle attack into Unchain Starter - Dash (426K). This applies the previously mentioned restriction on Circle cancels until the sequence is dropped or finished.
- After any Unchain Circle attack, you may optionally perform a Special Spin. This is the only move available in stage 3 of the Unchain sequence, and can be skipped entirely in favor of going straight to stage 4 if so desired. The Special Spin is a dodge with complicated invulnerability properties, used as both a movement tool and a way to safely disengage the Unchain sequence. Read more about the Special Spin here. If a Special Spin is performed, your only options are to drop the sequence or perform a move from the final stage.
- After stage 2 or 3, you may end the sequence with an Unchain Finisher. These moves will end the sequence, but they are not necessarily combo enders — a successful 66A or 66C will extend combos and even allow you to begin a new Unchain sequence, and 66K is super cancelable (even if this is rarely ever recommended).
To recap:
Unchain Starter
- Begins the Unchain sequence with 1 of 5 moves, and plenty of mix already baked into this phase. A low, an overhead, potential frametraps and a side-switching command dash are located here.
Unchain Circle
- 6 moves that can be rapidly chained together, or even canceled back into another command dash to reset the sequence. Both of the up input Circle attacks are mids that are great at covering high angles and extending combos. Both of the forward input Circle attacks are overheads, one slow and one fast. Both of the down input Circle attacks are lows, one slow and one fast.
Special Spin
- Pick from 1 or 3 dodges that grant strike and projectile invulnerability on frame 1. Back spin travels the furthest, neutral spin recovers the fastest, while the forward spin moves you forward, which can be considered a reward in of itself.
Unchain Finisher
- End the sequence. This stage is home to plenty of mix: A launcher, an unblockable wallbounce, a fast command grab, a slow command grab and a safe-on-block hard knockdown with good range are at your disposal.
Strategy
Anti-airing
- Best anti-airs: Far D, Far B, 66A
- Angel's grounded anti-airs are weak, or hard to access in the case of 66A. Your best option for stopping an aerial approach is to meet them in air with a j.A. This may require a good read/reaction, and hitting them before their jump attack becomes active.
- Far B is great anti-hop, but does not cover full jump angles very well. Far D covers it a little better. Far D can work as anti-hop too, but it is a bit more risky in exchange for the higher damage.
- If you do find yourself in the position to anti-air with 66A for whatever reason, it is a very rewarding option and it comes with upper body invulnerability through most of its startup.
- 2C is similarly rewarding, but not a very good anti-air in itself. You may consider it as a high-risk option.
Movement
- Angel's backdash can be canceled into j.2D. To do this, simply input 2D while backdashing. This makes her backdash go from 22 total frames to 19, and the j.2D can still hit an advancing opponent (or extended hurtbox), especially if you're cornered.
- Unchain can be used for movement. Tricky to use and not required for starting the character, but you will eventually need to learn this as you get better at the game and fight stronger opponents.
- 426K not only allows you to move forward at the same speed as a regular run, it allows you to access your Unchain Circle options right out of the run. This gives you instant access to powerful movement options, such as 8K > Special Spin and 6K.
- Look for opportunities to use Unchain moves as movement tools, such as 2K’s long forward movement or 6K’s ability to jump over most fireballs while advancing forward and giving you access to the Special Spin.
- 8K is Ángel’s fastest Unchain Circle attack at 8 frames of startup, and is therefore the primary method of quickly accessing the Special Spin.
- Dash > 8K can be looped. This allows her to rapidly cover hop angles with a hitbox while advancing forward for as long as this input is looped. This can also be achieved by inputting 412369K during the command dash, which will perform the 8K and immediately cancel it into another dash. While not as fast as 8K, 2P and 8P can also be used for the dash loop.
- 426K can be used to get out of the corner, as it is quite difficult to react to and switches sides.
- 66K has good range, moves forward, has lower body invulnerability and is safe on block, making it a decent option for forcing your way in.
Normals
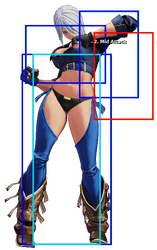
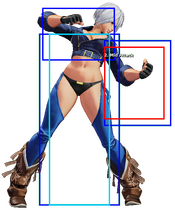
Far Standing Normals
Far A
| stand A
A
A |
|---|
Far B
| stand B
B
B |
|---|
Far C
| stand C
C
C |
|---|
Far D
| stand D
D
D |
|---|
Close Standing Normals
Close A
| close A
cl.A
cl.A |
|---|
Close B
| close B
cl.B
cl.B |
|---|
Close C
| close C
cl.C
cl.C |
|---|
Close D
| close D
cl.D
cl.D |
|---|
Crouch Normals
Crouch A
| crouch A
cr.A
cr.A |
|---|
Crouch B
| crouch B
cr.B
cr.B |
|---|
Crouch C
| crouch C
cr.C
cr.C |
|---|
Crouch D
| crouch D
cr.D
cr.D |
|---|
Jump Normals
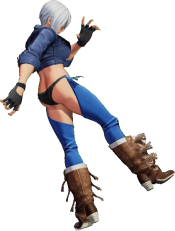
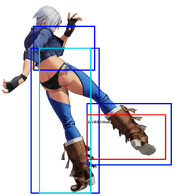
Jump A
| jump A
j.A
j.A |
|---|
Jump B
| jump B
j.B
j.B |
|---|
Jump C
| jump C
j.C
j.C |
|---|
Jump D
| jump D
j.D
j.D |
|---|
Blowback
Blowback
| Blowback
CD
CD |
|---|
ShatterStrike
| ShatterStrike
qcf+CD
qcf+CD |
|---|
AdvanceStrike
| AdvanceStrike
214CD
214CD |
|---|
jump CD
| jump CD
j.CD
j.CD |
|---|
Rush Moves
| rush
cl.AA/cl.AAX
cl.AA/cl.AAX |
|---|
Throws
Tekitou Rush
| Tekitou Rush
(close) 4/6C
(close) 4/6C |
|---|
Shadow Behead
| Shadow Behead
(close) 4/6D
(close) 4/6D |
|---|
Command Moves
Middle Spin
| Middle Spin
6B
6B |
|---|
Heavy Knee Attack
| Heavy Knee Attack
j.2D
j.2D |
|---|
Special Moves
Unchain
Red Sky
| Red Sky
63214BD
63214BD |
|---|
Mad Murder
| Mad Murder
41236AC
41236AC |
|---|
Unchain – Low
| Unchain – Low
3B
3B |
|---|
Unchain – Heel
| Unchain – Heel
3D
3D |
|---|
Unchain – Tornado
| Unchain – Tornado
46B/D/BD
46B/D/BD |
|---|
Unchain – Blow
| Unchain – Blow
214AC
214AC |
|---|
Unchain – Step
| Unchain - Step
41236BD
41236BD |
|---|
Circle
Circle – Upper
| Circle – Upper
8A/C
8A/C |
|---|
Circle – Sobat
| Circle – Sobat
6B/D
6B/D |
|---|
Circle – Under Blow
| Circle – Under Blow
2A/C
2A/C |
|---|
Circle – High
| Circle – High
8B/D
8B/D |
|---|
Circle – Hammer Blow
| Circle – Hammer Blow
6A/C
6A/C |
|---|
Circle – Assault
| Circle – Assault
2B/D
2B/D |
|---|
Special Circle
Special Circle – Feint
| Special Circle – Feint
AB, 6AB, 4AB
AB, 6AB, 4AB |
|---|
Finish
Finish – Lariat
| Finish – Lariat
66A
66A |
|---|
Finish – Straight
| Finish – Straight
66C
66C |
|---|
Finish – Rolling
| Finish – Rolling
66D
66D |
|---|
Finish – Neck Cutter
| Finish – Neck Cutter
236A
236A |
|---|
Finish – Grapple Kick
| Finish – Grapple Kick
236C
236C |
|---|
Super Special Moves
Real Rave
| Real Rave
4623AC
4623AC |
|---|
Blue Monday Counter
| Blue Monday Counter
4623BD
4623BD |
|---|
Climax Super Special Moves
| Ascension Time
2141236CD
2141236CD |
|---|
Misc
Alternate Colors
 |
 |
 |
 |
 |
 |
 |
 |

