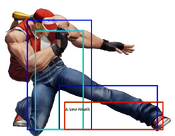
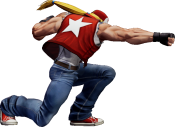
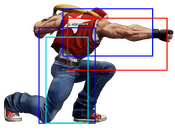
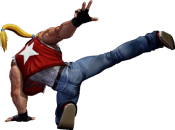
-Happy New Year 2025!
The King of Fighters XV/Terry Bogard: Difference between revisions
| (34 intermediate revisions by 2 users not shown) | |||
| Line 10: | Line 10: | ||
{{TOClimit|3}} | {{TOClimit|3}} | ||
==Gameplay Summary== | ==Gameplay Summary== | ||
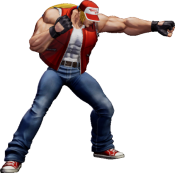
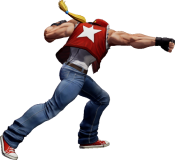
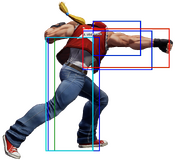
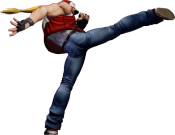
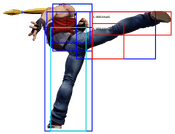
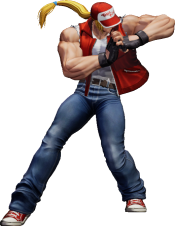
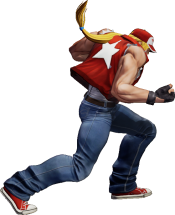
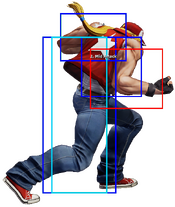
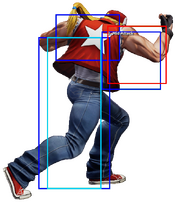
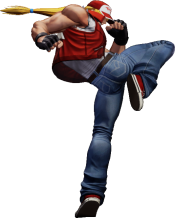
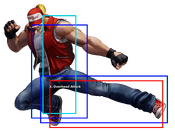
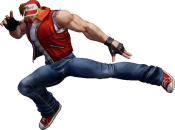
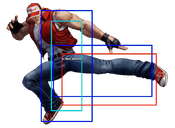
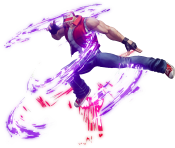
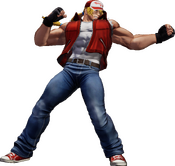
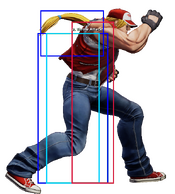
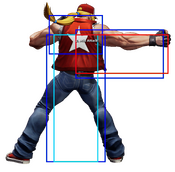
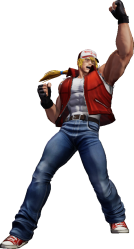
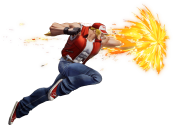
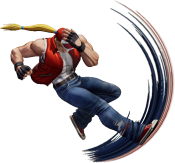
''Fatal Fury'''s | One of the most recognizable characters in fighting games, ''Fatal Fury'''s own Legendary Wolf, Terry Bogard, is a well-rounded brawler with an emphasis on pressure and midrange presence. Terry excels at closing the gap between him and his opponent with his far-reaching specials and pokes, with very high damage and guard-crushing potential once he gets in. | ||
Terry | Terry plays a relatively simple gameplan, which is to get in and try not to get pushed out. He has numerous solid buttons in his standing normals, all of which have great reach; his Back Knuckle (6A) command normal is also decent as a neutral poke. Both his grounded and aerial blowback have excellent range and dodge low attacks, which makes them great for approaches. He even has a projectile in Power Wave (236P[P]), which he can use for pressure as well as a niche zoning tool. And as always, he has a reliable anti-air in Rising Tackle which, after several years, is once again a DP motion which allows Terry to consistently punish jump-in attempts. Rising Upper (3C), an extender for his light attacks, also works well in this regard. | ||
Terry | Terry's pressure can be stifling if properly spaced. Burning Knuckle (214P[P]) is hugely unsafe on paper, but if throw out from further rages it becomes a powerful tool for frame trapping and space trapping. His heavy Power Charge (426D) is +2 on block at max range with high pushback, making it great for baiting out whiff punishes. '''EX''' Power Wave is +5 on block at point blank and does massive guard damage, which makes it great for extending pressure strings or breaking guard. Lastly, his Crack Shoot (214K[K]) is a decent approach tool, with the '''EX''' version being a fast overhead at 20 frames. All of these options make Terry a nuisance at any range for opponents looking for openings or gaps in Terry's pressure. | ||
But the real threat is Terry's damage. With command normal extensions for both his light and heavy attacks as well as the ability to cancel his light Power Charge into Rising Tackle or Power Dunk (623K[K]), Terry can easily take a solid chunk out of the opponent's lifebar without any resources. But once Terry has a bar or more, he becomes hugely threatening. Terry is already a very meter-efficient character thanks to the solid reward he gets off his Shatter Strike as well as his Power Charge cancels, but this in itself makes his meter-dumping capabilities incredibly powerful. In a similar vein to Kyo Kusanagi, Terry can perform Power Geyser loops in the corner with the right execution, which overall makes him a devastating offensive character with great meter efficiency. | |||
It should be noted, however, that beyond his damage and guard-crushing potential, Terry has no real gimmicks. Terry lacks crossups and an overhead he can combo off of, which makes it difficult for Terry to open up defensive opponents. At long range, it's hard for Terry to contest the opponent, especially since his only zoning option is a grounded fireball, which makes it easy to dodge. Terry is also significantly weaker without resources. Without meter, Terry can't threaten opponents with safe guard breaks or surprise overheads and his most important attribute, his incredibly high damage. | |||
Overall, Terry is a simple but solid character with unique but effective space control. He's welcoming for beginners, but still fleshed-out enough to work well in the hands of more seasoned players who are aware of their spacing. If you're willing to handle being weaker without meter and want to make big comebacks with resources, then give Terry a shot. | |||
{{StrengthsAndWeaknesses | {{StrengthsAndWeaknesses | ||
| intro = '''''{{SUBPAGENAME}} is a versatile and simple character who spends meter for big damage.''''' | | intro = '''''{{SUBPAGENAME}} is a versatile and simple character who spends meter for big damage.''''' | ||
| Line 25: | Line 29: | ||
* '''Great Metered Offense''': Due to his incredible guard damage with EX Power Wave coupled with his relative safety, Terry can establish a terrifying offense game that can quickly turn into unavoidable guardbreak setups against opponents lacking meter or the reactions for the situation. While he relies heavily on meter to keep his offense strong, there's few things as frightening or common as a well-stocked Anchor Terry. | * '''Great Metered Offense''': Due to his incredible guard damage with EX Power Wave coupled with his relative safety, Terry can establish a terrifying offense game that can quickly turn into unavoidable guardbreak setups against opponents lacking meter or the reactions for the situation. While he relies heavily on meter to keep his offense strong, there's few things as frightening or common as a well-stocked Anchor Terry. | ||
| cons= | | cons= | ||
* ''' | * '''Hungry for Meter''': Terry needs meter for his biggest damage potential and safest pressure. While Terry has many uses for his meterless tools, he really shines with easy access to EX and supers. He also tends not to build much meter back either, making it difficult to accrue his stock back once he's blown it. | ||
* '''Meterless Mixup''': Can struggle to effectively open up opponents without meter, lacking meterless overheads and only one low he can combo from, meaning smart use of shorthops is very important. | * '''Meterless Mixup''': Can struggle to effectively open up opponents without meter, lacking meterless overheads and only one low he can combo from, meaning smart use of shorthops is very important. | ||
* '''Awkward Light Confirms''': Canceling into Terry's specials from lights (besides Power Dunk and Rising Tackle) requires canceling into Rising Upper (3C), as his specials otherwise start up too slowly to cancel from lights. This means that Terry requires more spatial awareness than other characters. | * '''Awkward Light Confirms''': Canceling into Terry's specials from lights (besides Power Dunk and Rising Tackle) requires canceling into Rising Upper (3C), as his specials otherwise start up too slowly to cancel from lights. This means that Terry requires more spatial awareness than other characters. | ||
* ''' | * '''Committal Footsies:''' Some of Terry's farthest-reaching normals, such as his 5B and 5C, are only super-cancelable. This means that Terry has to spend a lot of meter to convert stray hits into any meaningful damage, which isn't worth the cost. | ||
}} | }} | ||
| Line 150: | Line 154: | ||
|moveId=terry_sta | |moveId=terry_sta | ||
|description= | |description= | ||
Quick hop-check and frame trap button. | |||
}} | }} | ||
====Far B==== | ====Far B==== | ||
{{FrameDataCargo-KOFXV | {{FrameDataCargo-KOFXV | ||
|moveId=terry_stb | |moveId=terry_stb | ||
|description= | |description= | ||
One of Terry's best pokes thanks to its speed and range. Very easy to pester the opponent with this. | |||
}} | }} | ||
| Line 166: | Line 170: | ||
|description= | |description= | ||
* Mainly used pre-emptively to anti-air hops | * Mainly used pre-emptively to anti-air hops | ||
Very fast and disjointed straight punch, used to control neutral. | |||
}} | }} | ||
| Line 173: | Line 178: | ||
|moveId=terry_std | |moveId=terry_std | ||
|description= | |description= | ||
* Whiffs on crouchers at range. | * Whiffs on crouchers at range. | ||
* Shifts Terry forward slightly if pressed again before recovery ends. | * Shifts Terry forward slightly if pressed again before recovery ends. | ||
* With available meter, Far D becomes a dangerous quick max option due to its huge range and low damage scaling from being a heavy attack. Learning to hit confirm this attack into quick max is valuable for Terry. | * With available meter, Far D becomes a dangerous quick max option due to its huge range and low damage scaling from being a heavy attack. Learning to hit confirm this attack into quick max is valuable for Terry. | ||
Very powerful high kick that excels at anti-airing and controlling neutral, just barely whiffing at round start. | |||
}} | }} | ||
| Line 186: | Line 190: | ||
|moveId=terry_cla | |moveId=terry_cla | ||
|description= | |description= | ||
Pretty standard close jab. Doesn't link into anything. | |||
}} | }} | ||
| Line 204: | Line 206: | ||
|moveId=terry_clc | |moveId=terry_clc | ||
|description= | |description= | ||
A gut punch that hits twice, making for very easy confirms. The first hit does 50 damage so you can still get decent damage even if you don't confirm off the second hit. | |||
}} | }} | ||
| Line 212: | Line 214: | ||
|moveId=terry_cld | |moveId=terry_cld | ||
|description= | |description= | ||
* Forces stand. | * Forces stand. | ||
Go-to starter for optimal damage. At 6 frames, it's a decently fast starter. The force stand property makes it useful for combos that would otherwise whiff on crouching characters. | |||
}} | }} | ||
| Line 240: | Line 243: | ||
|moveId=terry_crd | |moveId=terry_crd | ||
|description= | |description= | ||
A slow but beefy sweep that reaches high enough to catch hops at further ranges. | |||
}} | }} | ||
| Line 250: | Line 252: | ||
|name=jump A | |name=jump A | ||
|input=j.A | |input=j.A | ||
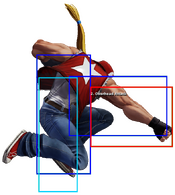
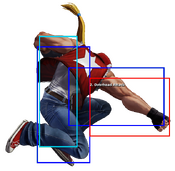
|captions= | |||
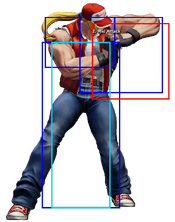
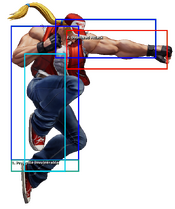
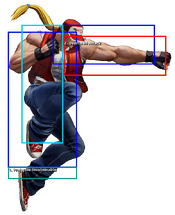
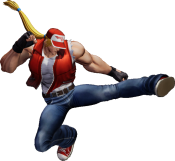
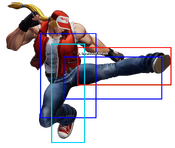
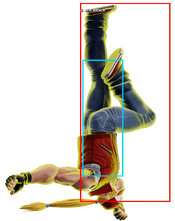
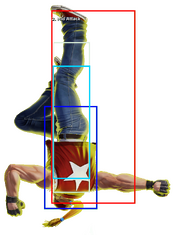
|hitboxCaptions= Hop Version (Hitbox), Jump Version | |||
|description2= | |description2= | ||
* Tied with j.B for being Terry's fastest jump attack | * Tied with j.B for being Terry's fastest jump attack | ||
| Line 260: | Line 264: | ||
|name=jump A | |name=jump A | ||
|input=j.8A | |input=j.8A | ||
|captions= | |||
|hitboxCaptions= Hop Version (Hitbox), Jump Version | |||
|description2=* Placeholder | |description2=* Placeholder | ||
}} | }} | ||
| Line 268: | Line 274: | ||
|name=jump B | |name=jump B | ||
|input=j.B | |input=j.B | ||
|captions= Hop Version (Hitbox), Jump Version | |||
|description2= | |description2= | ||
* Great air-to-air: fast, good horizontal range, and has a good amount of active frames. | * Great air-to-air: fast, good horizontal range, and has a good amount of active frames. | ||
| Line 279: | Line 286: | ||
|name=Neutral Jump B | |name=Neutral Jump B | ||
|input=j.8B | |input=j.8B | ||
|captions= Hop Version (Hitbox), Jump Version | |||
|description2=* Air-to-air. Can be used in a similar way as regular j.B. | |description2=* Air-to-air. Can be used in a similar way as regular j.B. | ||
}} | }} | ||
| Line 287: | Line 295: | ||
|name=jump C | |name=jump C | ||
|input=j.C | |input=j.C | ||
|captions= Hop Version (Hitbox), Jump Version | |||
|description2=* Easily gets low-profiled under. | |description2=* Easily gets low-profiled under. | ||
}} | }} | ||
| Line 294: | Line 303: | ||
|name=jump D | |name=jump D | ||
|input=j.D | |input=j.D | ||
|captions= Hop Version (Hitbox), Jump Version | |||
|description2=* Long and deep hitting. | |description2=* Long and deep hitting. | ||
* Great at crossing up opponents from a full jump or superjump. One of Terry's main mix-up options at midscreen | * Great at crossing up opponents from a full jump or superjump. One of Terry's main mix-up options at midscreen | ||
| Line 304: | Line 314: | ||
|moveId=terry_cd | |moveId=terry_cd | ||
|description= | |description= | ||
* Low invulnerable (5-30f) | |||
* Low invulnerable | |||
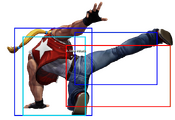
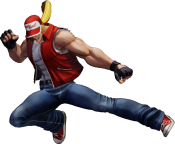
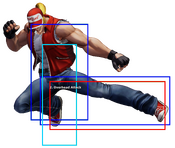
A jumping kick with massive forward movement and low invulnerability | A jumping kick with massive forward movement and low invulnerability. CD can be spaced out to be up to +2 on block—in fact, all of his grounded CD attacks (Shatter Strike, Advance Strike) can be spaced out to be unpunishable or highly advantageous. | ||
}} | }} | ||
| Line 317: | Line 326: | ||
Incredible st.CD that complements Terry's toolkit. On combo hit, Terry can easily build back the meter lost from his Shatter Strike with his Power Charge cancels. | Incredible st.CD that complements Terry's toolkit. On combo hit, Terry can easily build back the meter lost from his Shatter Strike with his Power Charge cancels. | ||
}} | |||
====AdvanceStrike==== | |||
{{FrameDataCargo-KOFXV | |||
|moveId=terry_214cd | |||
|description= | |||
*Same animation and range as his CD. | |||
* The throw counter is on the ground under Terry. | |||
Thanks to the generous forward movement and active frames, Terry's Advance Strike is a very powerful meaty attack, being up to +8 on block. From that range, Terry can safely link into 2D to continue a blockstring. | |||
}} | }} | ||
| Line 324: | Line 343: | ||
|name=jump CD | |name=jump CD | ||
|input=j.CD | |input=j.CD | ||
|captions= Hop Version (Hitbox), Jump Version | |||
|description2= | |description2= | ||
* Somewhat slow, but has a big hitbox with a lot of horizontal range and can be timed to not whiff against crouching opponents (use when Terry reaches the top of his hop height) | * Somewhat slow, but has a big hitbox with a lot of horizontal range and can be timed to not whiff against crouching opponents (use when Terry reaches the top of his hop height) | ||
| Line 380: | Line 400: | ||
|name=Power Wave | |name=Power Wave | ||
|input=236A/C/AC | |input=236A/C/AC | ||
|captions= Normal Version (Hitbox), EX Version | |||
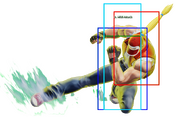
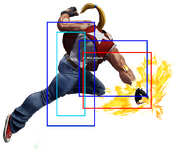
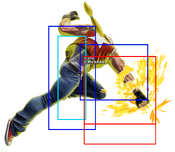
|description3= Terry punches the ground, generating a shockwave that travels across the screen. | |description3= Terry punches the ground, generating a shockwave that travels across the screen. | ||
* '''EX''' version connects into Buster Wolf whenever it hits. | * '''EX''' version connects into Buster Wolf whenever it hits. | ||
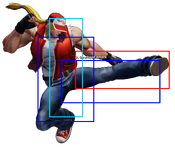
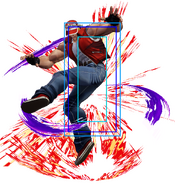
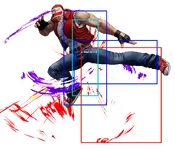
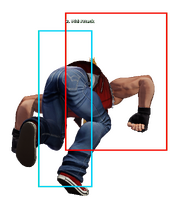
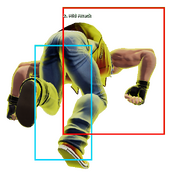
Power Wave is Terry's signature | Power Wave is Terry's signature projectile. Power Wave is quite mediocre as a zoning option due to its slow startup and recovery, and as a ground-based projectile, it's quite easy to jump over. For these reasons, Power Wave is most effective at midrange as a blockstring ender, where it would be hard for the opponent to punish. | ||
The '''EX''' version, meanwhile, is a very powerful pressure tool. It is +5 on block at point-blank range and depletes around 17% of the opponent's guard bar. In certain blockstrings, Terry can destroy around 50% of the opponent's guard bar until he's pushed out of range. On hit, it puts the opponent into decently long hitstun before launching, allowing Terry to combo into Buster Wolf almost wherever it connects. | |||
}} | }} | ||
| Line 391: | Line 414: | ||
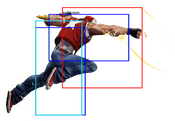
|name=Burning Knuckle | |name=Burning Knuckle | ||
|input=214A/C/AC | |input=214A/C/AC | ||
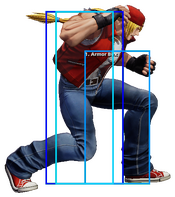
|captions= A Version (Hitbox), C Version (Hitbox), EX Version | |||
|description3= | |description3= | ||
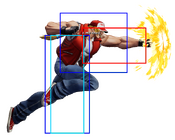
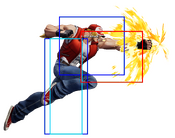
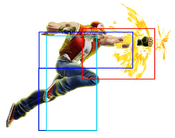
Terry briefly pauses before launching forwards with a straight punch. | Terry briefly pauses before launching forwards with a straight punch. | ||
| Line 398: | Line 422: | ||
Burning Knuckle is Terry's most straightforward combo ender. It has decent damage and oki on hit and is great for basic combos, including super cancels. While relatively unsafe at point blank, Burning Knuckle's frame advantage increases at further ranges and is plus on block at max range. At its furthest range, 214C is one of the most plus-on-block non-projectile moves in the game and cannot be punished except by command grabs. | Burning Knuckle is Terry's most straightforward combo ender. It has decent damage and oki on hit and is great for basic combos, including super cancels. While relatively unsafe at point blank, Burning Knuckle's frame advantage increases at further ranges and is plus on block at max range. At its furthest range, 214C is one of the most plus-on-block non-projectile moves in the game and cannot be punished except by command grabs. | ||
---- | ---- | ||
''' | '''214A:''' Soft knockdown. Combos from heavies and 3C. | ||
---- | ---- | ||
''' | '''214C:''' Exactly one frame too slow to combo from heavies. Only combos from crumples, such as 41236BD. Sliding hard knockdown. | ||
---- | ---- | ||
''' | '''214AC:''' Sliding hard knockdown. Combos from heavies and 3C. | ||
}} | }} | ||
| Line 410: | Line 434: | ||
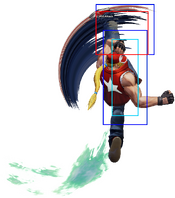
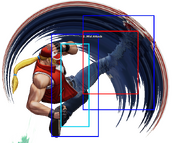
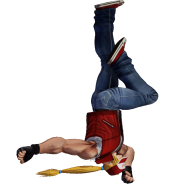
|name=Crack Shoot | |name=Crack Shoot | ||
|input=214B/D/BD | |input=214B/D/BD | ||
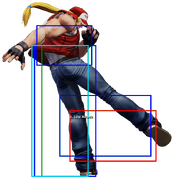
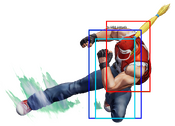
|captions= B Version (Hitbox),,, D Version,,, EX Version | |||
|description3= | |description3= | ||
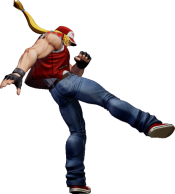
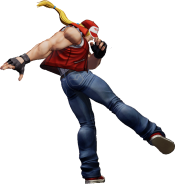
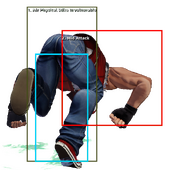
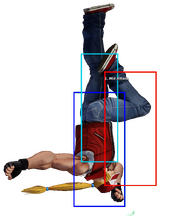
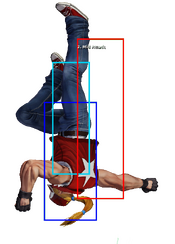
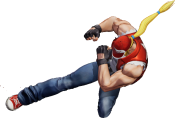
Terry flips forward with an outstretched leg, striking opponents repeatedly as he flies forwards. | Terry flips forward with an outstretched leg, striking opponents repeatedly as he flies forwards. | ||
* Slightly minus on block. | * Slightly minus on block. | ||
* Only the '''EX''' version is a true overhead. | * Only the '''EX''' version is a true overhead. | ||
* 214D hits only twice on grounded opponents. The third hit only lands if the opponent is airborne. | |||
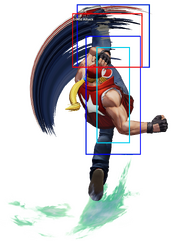
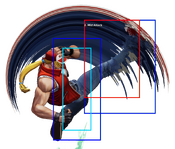
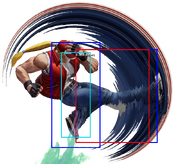
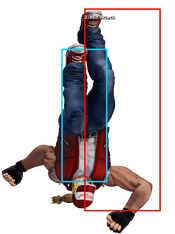
Crack Shoot isn't plus, but is one of the safest moves Terry can throw out without having to spend meter. On hit its attributes are mediocre; it doesn't knock down or super cancel, leaves the opponent standing with little to no advantage, and scales with its own hits, making it a very poor combo tool in general. Its best use is as a general approach and pressure tool. | Crack Shoot isn't plus, but is one of the safest moves Terry can throw out without having to spend meter. On hit its attributes are mediocre; it doesn't knock down or super cancel, leaves the opponent standing with little to no advantage, and scales with its own hits, making it a very poor combo tool in general. Its best use is as a general approach and pressure tool. | ||
| Line 425: | Line 451: | ||
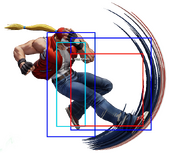
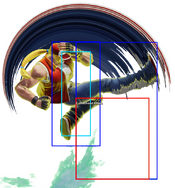
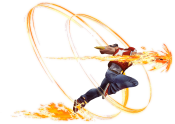
|name=Rising Tackle | |name=Rising Tackle | ||
|input=623A/C/AC | |input=623A/C/AC | ||
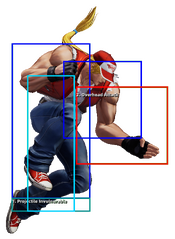
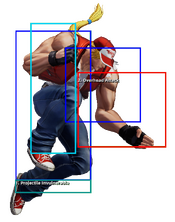
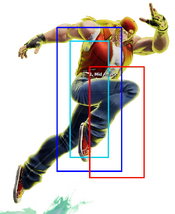
|captions= A Version (Hitbox),,, C Version,,, EX Version | |||
|description3=* Reversal/anti-air. | |description3=* Reversal/anti-air. | ||
* A version is invulnerable to air-attacks. | * A version is invulnerable to air-attacks. | ||
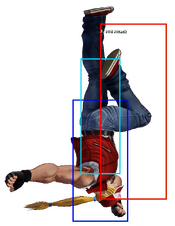
| Line 439: | Line 466: | ||
|name=Power Charge | |name=Power Charge | ||
|input=41236B/D/BD | |input=41236B/D/BD | ||
|captions= Normal Version (Hitbox), EX Version | |||
|description3= | |description3= | ||
* | *426BD crumples, although 236CD is typically a better option if Terry has at least one bar. | ||
*The second hit of 623K followups will whiff if Terry previously used 623BD in the combo. | *The second hit of 623K followups will whiff if Terry previously used 623BD in the combo. | ||
Terry performs a low-angled shoulder charge. | Terry performs a low-angled shoulder charge. Power Charge has a decent amount of utility; the light version can cancel into 623P or 623K, while the heavy version can be used to create frame traps or spacing traps, depending on Terry's distance from the opponent. | ||
Below are the followups for 426B. The followups allow Terry to build just under 0.5 bars, which is great for combos involving meter. | |||
---- | ---- | ||
'''623A:''' Possibly worst option. Lowest damage. | '''623A:''' Possibly worst option. Lowest damage. | ||
| Line 461: | Line 489: | ||
|name=Power Dunk | |name=Power Dunk | ||
|input=623B/D/BD | |input=623B/D/BD | ||
|captions= B Version (Hitbox),, D Version,,, EX Version | |||
|description3= | |description3= | ||
* This move hits before leaving the ground and again on the way down. NOT on the way up. | * This move hits before leaving the ground and again on the way down. NOT on the way up. | ||
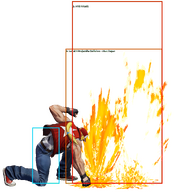
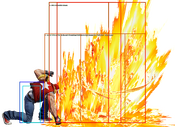
| Line 474: | Line 503: | ||
|name=Power Geyser | |name=Power Geyser | ||
|input=2141236A/C/AC | |input=2141236A/C/AC | ||
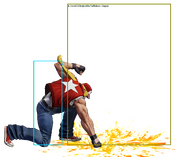
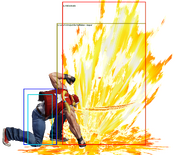
|captions= Normal Version (Hitbox),, Max Version | |||
|description3=* Fully invincible projectile super that doesn't go very far. | |description3=* Fully invincible projectile super that doesn't go very far. | ||
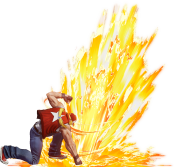
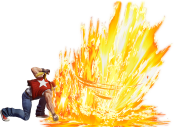
* Too slow to reliably work as a reversal, but can be tricky to punish. | * Too slow to reliably work as a reversal, but can be tricky to punish. | ||
| Line 486: | Line 516: | ||
|name=Buster Wolf | |name=Buster Wolf | ||
|input=236236B/D/BD | |input=236236B/D/BD | ||
|captions= Normal Version (Hitbox), Max Version | |||
|description3=* Super that goes near full screen in the blink of an eye. | |description3=* Super that goes near full screen in the blink of an eye. | ||
* MAX version has projectile invulnerability and goes full screen, beats pretty much any projectile, including a Maxima laser. | * MAX version has projectile invulnerability and goes full screen, beats pretty much any projectile, including a Maxima laser. | ||
Latest revision as of 01:08, 21 December 2024
Forward/Back Hop: 33f
Neutral Hop: 32f
Backdash: 21f
Run Speed Ranking: 5
Gameplay Summary
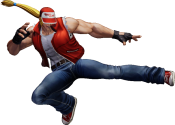
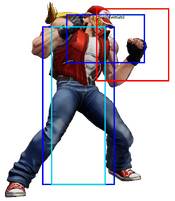
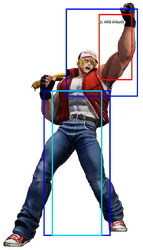
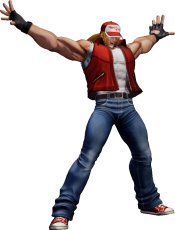
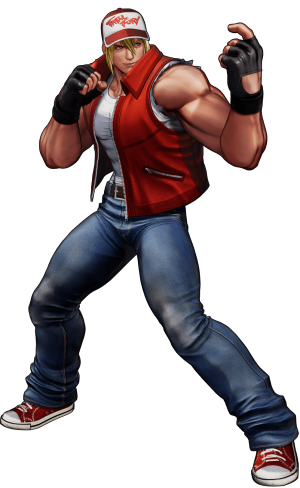
One of the most recognizable characters in fighting games, Fatal Fury's own Legendary Wolf, Terry Bogard, is a well-rounded brawler with an emphasis on pressure and midrange presence. Terry excels at closing the gap between him and his opponent with his far-reaching specials and pokes, with very high damage and guard-crushing potential once he gets in.
Terry plays a relatively simple gameplan, which is to get in and try not to get pushed out. He has numerous solid buttons in his standing normals, all of which have great reach; his Back Knuckle (6A) command normal is also decent as a neutral poke. Both his grounded and aerial blowback have excellent range and dodge low attacks, which makes them great for approaches. He even has a projectile in Power Wave (236P[P]), which he can use for pressure as well as a niche zoning tool. And as always, he has a reliable anti-air in Rising Tackle which, after several years, is once again a DP motion which allows Terry to consistently punish jump-in attempts. Rising Upper (3C), an extender for his light attacks, also works well in this regard.
Terry's pressure can be stifling if properly spaced. Burning Knuckle (214P[P]) is hugely unsafe on paper, but if throw out from further rages it becomes a powerful tool for frame trapping and space trapping. His heavy Power Charge (426D) is +2 on block at max range with high pushback, making it great for baiting out whiff punishes. EX Power Wave is +5 on block at point blank and does massive guard damage, which makes it great for extending pressure strings or breaking guard. Lastly, his Crack Shoot (214K[K]) is a decent approach tool, with the EX version being a fast overhead at 20 frames. All of these options make Terry a nuisance at any range for opponents looking for openings or gaps in Terry's pressure.
But the real threat is Terry's damage. With command normal extensions for both his light and heavy attacks as well as the ability to cancel his light Power Charge into Rising Tackle or Power Dunk (623K[K]), Terry can easily take a solid chunk out of the opponent's lifebar without any resources. But once Terry has a bar or more, he becomes hugely threatening. Terry is already a very meter-efficient character thanks to the solid reward he gets off his Shatter Strike as well as his Power Charge cancels, but this in itself makes his meter-dumping capabilities incredibly powerful. In a similar vein to Kyo Kusanagi, Terry can perform Power Geyser loops in the corner with the right execution, which overall makes him a devastating offensive character with great meter efficiency.
It should be noted, however, that beyond his damage and guard-crushing potential, Terry has no real gimmicks. Terry lacks crossups and an overhead he can combo off of, which makes it difficult for Terry to open up defensive opponents. At long range, it's hard for Terry to contest the opponent, especially since his only zoning option is a grounded fireball, which makes it easy to dodge. Terry is also significantly weaker without resources. Without meter, Terry can't threaten opponents with safe guard breaks or surprise overheads and his most important attribute, his incredibly high damage.
Overall, Terry is a simple but solid character with unique but effective space control. He's welcoming for beginners, but still fleshed-out enough to work well in the hands of more seasoned players who are aware of their spacing. If you're willing to handle being weaker without meter and want to make big comebacks with resources, then give Terry a shot.
| Terry Bogard is a versatile and simple character who spends meter for big damage. | |
| Pros | Cons |
|
|
Movelist
(*) = EX OK
(!) = MAX OK
Throws
Command Normals
Special Moves
Super Special Moves
Climax Super Special Moves
Quick Combo Reference
| 0 Meter |
Light |
2B > 2A > 3C > 214A = 183 dmg |
| 0.5 Meter |
Light |
2B > 2A > 3C > 426BD, 41236B > 623C = 311 dmg |
| 1 Meter |
Light confirm |
2B > 2B > 5B > 236236B = 246 dmg (easier input: 2B > 2B > 236B > 236B) |
| 2 Meters |
Light confirm quick max (1st/2nd character) |
2B > 2B > 5B > BC, c.D > 6A > 426BD, 426B > 623C > 2141236C = 426 dmg |
| 3 Meters |
Light confirm quick max (1st character) |
2B > 2B > 5B > BC, c.D > 6A > 426BD, 214A > 2141236CD = 547 dmg |
| 4 Meters |
Light confirm quick max |
2B > 2B > 5B > BC, c.D > 6A > 214A, 236236BD > 2141236CD = 710 dmg |
Normals
Far Standing Normals
Far A
| stand A
A
A |
|---|
Far B
| stand B
B
B |
|---|
Far C
| stand C
C
C |
|---|
Far D
| stand D
D
D |
|---|
Close Standing Normals
Close A
| close A
cl.A
cl.A |
|---|
Close B
| close B
cl.B
cl.B |
|---|
Close C
| close C
cl.C
cl.C |
|---|
Close D
| close D
cl.D
cl.D |
|---|
Crouch Normals
Crouch A
| crouch A
cr.A
cr.A |
|---|
Crouch B
| crouch B
cr.B
cr.B |
|---|
Crouch C
| crouch C
cr.C
cr.C |
|---|
Crouch D
| crouch D
cr.D
cr.D |
|---|
Jump Normals
Jump A
| jump A
j.A
j.A |
|---|
Neutral Jump A
| jump A
j.8A
j.8A |
|---|
Jump B
| jump B
j.B
j.B |
|---|
Neutral Jump B
| Neutral Jump B
j.8B
j.8B |
|---|
Jump C
| jump C
j.C
j.C |
|---|
Jump D
| jump D
j.D
j.D |
|---|
Blowback
Blowback
| Blowback
CD
CD |
|---|
ShatterStrike
| Shatterstrike
236CD
236CD |
|---|
AdvanceStrike
| AdvanceStrike
214CD
214CD |
|---|
jump CD
| jump CD
j.CD
j.CD |
|---|
Rush Moves
| rush
cl.AA/c.AAX
cl.AA/c.AAX |
|---|
Throws
Buster Throw (Forward)
| Buster Throw (Forward)
(close) 4/6C
(close) 4/6C |
|---|
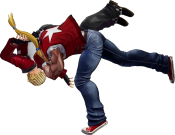
Buster Throw (Backward)
| Buster Throw (Backward)
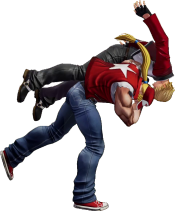
(close) 4/6D
(close) 4/6D |
|---|
Command Moves
Back Knuckle
| Back Knuckle
6A
6A |
|---|
Rising Upper
| Rising Upper
3C
3C |
|---|
Special Moves
Power Wave
| Power Wave
236A/C/AC
236A/C/AC |
|---|
Burning Knuckle
| Burning Knuckle
214A/C/AC
214A/C/AC |
|---|
Crack Shoot
| Crack Shoot
214B/D/BD
214B/D/BD |
|---|
Rising Tackle
| Rising Tackle
623A/C/AC
623A/C/AC |
|---|
Power Charge
| Power Charge
41236B/D/BD
41236B/D/BD |
|---|
Power Dunk
| Power Dunk
623B/D/BD
623B/D/BD |
|---|
Super Special Moves
Power Geyser
| Power Geyser
2141236A/C/AC
2141236A/C/AC |
|---|
Buster Wolf
| Buster Wolf
236236B/D/BD
236236B/D/BD |
|---|
Climax Super Special Moves
Stardust Ignition
| Stardust Ignition
2141236CD
2141236CD |
|---|
Misc
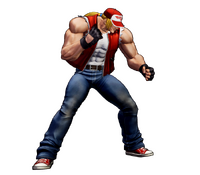
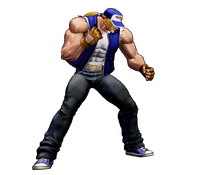
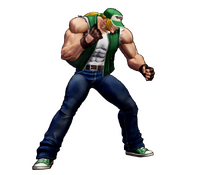
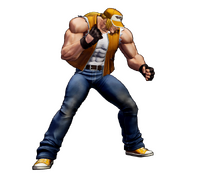
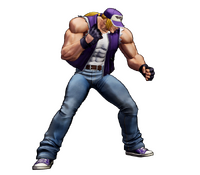
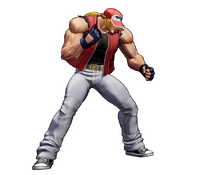
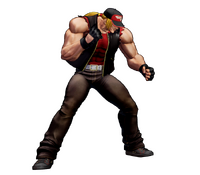
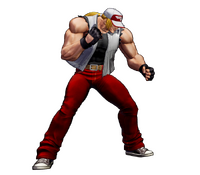
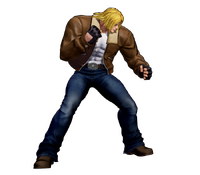
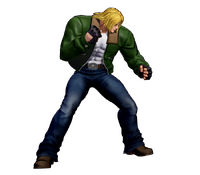
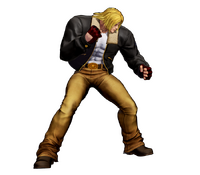
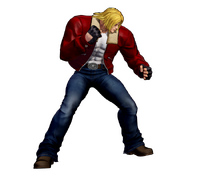
Alternate Colors
 |
 |
 |
 |
 |
 |
 |
 |
 |
 |
 |
 |
 |
 |
 |
 |
