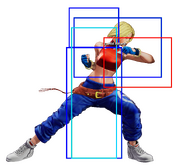
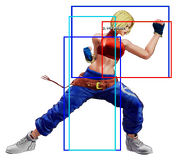
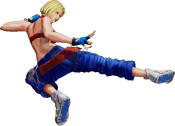
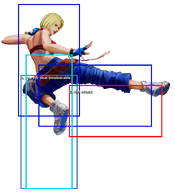
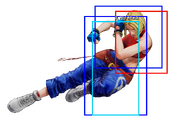
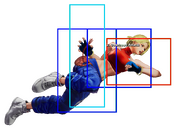
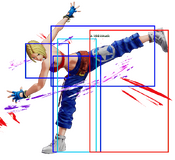
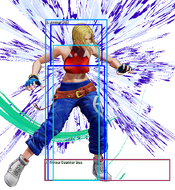
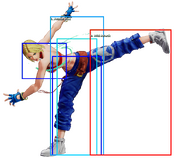
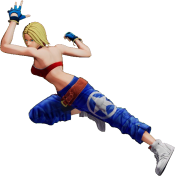
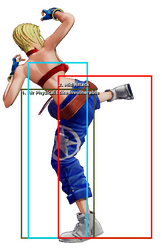
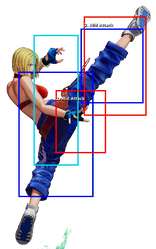
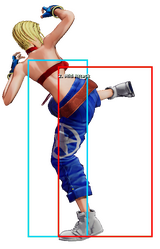
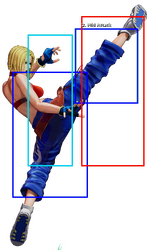
-The Dream Cancel Wiki has successfully upgraded it's wiki software and editing has returned. Tables for data have returned.
The King of Fighters XV/Blue Mary: Difference between revisions
Awesomeguy42 (talk | contribs) |
|||
| (24 intermediate revisions by 4 users not shown) | |||
| Line 63: | Line 63: | ||
| '''0 Meter''' | | '''0 Meter''' | ||
| | | | ||
2B 2A 4B [4]6B<br/> | |||
Placeholder<br/> | Placeholder<br/> | ||
| | | | ||
( = | ( = 151 dmg<br/> | ||
( = dmg<br/> | ( = dmg<br/> | ||
|- | |- | ||
| Line 88: | Line 88: | ||
==Gameplay Overview== | ==Gameplay Overview== | ||
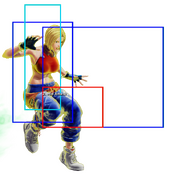
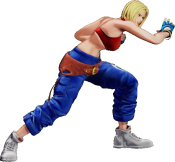
Mary is a vortex character with quick but risky ways to win neutral, with her low, far-travelling set of jumps in the air and her runs and Straight Slicer on the ground. Additionally, she has EX M. Breaker (623AC) to go through fireballs of any height. Once she's in, Mary has a myriad of mixup options to pick from - in addition to strong hop normals such as j.D and j.CD and her reliable low hit confirms (2B 2A 4B), Mary has access to a dodge and command grab in one move (214P~236P), a leaping command grab for use in strings (623P) and an overhead (6A) which can be super cancelled. All of these can lead to hard knockdowns. However, Mary has to take serious risks in neutral, with Straight Slicer in particular being punishable. If she finds herself defending, she has access to two different reversals: a dragon punch (623K) and her dodge. These lead to hard knockdowns as well - not only is she tricky to pin down because of this, but her vortex is easy to resume as well. However, not only can both options be covered with a well-spaced safejump, but, like the rest of Mary's kit, they are both very unsafe. Mary is a strong character who can be used in any team slot, given her ability to meter dump and her constant hard knockdowns either way, but it is precisely this element of risk which keeps her in check. | |||
{{StrengthsAndWeaknesses | {{StrengthsAndWeaknesses | ||
| intro = {{SUBPAGENAME}} is a rushdown character who can preserve momentum well using mixups and reversals which all result in hard knockdowns, but who requires very good reads before she can start. | | intro = '''''{{SUBPAGENAME}} is a rushdown character who can preserve momentum well using mixups and reversals which all result in hard knockdowns, but who requires very good reads before she can start.''''' | ||
| pros= | | pros= | ||
* '''Fast and Agile:''' Mary has a fairly quick run speed, great shorthops, and the screen-crossing Straight Slicer to keep her opponents on their toes. | * '''Fast and Agile:''' Mary has a fairly quick run speed, great shorthops, and the screen-crossing Straight Slicer to keep her opponents on their toes. | ||
| Line 101: | Line 103: | ||
* '''Risky:''' For all of her strengths and everything she can do, Mary always has to take serious risks. She's very punishable on all of her tools, and all of her options for callouts are extremely committal or have universal counters. For example, Real Counter is strike invulnerable, but Mary can be easily grabbed out of it on reaction. | * '''Risky:''' For all of her strengths and everything she can do, Mary always has to take serious risks. She's very punishable on all of her tools, and all of her options for callouts are extremely committal or have universal counters. For example, Real Counter is strike invulnerable, but Mary can be easily grabbed out of it on reaction. | ||
}} | }} | ||
==Normals== | ==Normals== | ||
| Line 129: | Line 129: | ||
|moveId=bluemary_fd | |moveId=bluemary_fd | ||
|description= | |description= | ||
* A sobat which goes over lows. | * A sobat which goes over lows. This doesn't typically hit hops. If it hits you can confirm into super. | ||
}} | }} | ||
===Close Standing Normals=== | ===Close Standing Normals=== | ||
| Line 157: | Line 156: | ||
|moveId=bluemary_cld | |moveId=bluemary_cld | ||
|description= | |description= | ||
* Deals more damage than cl.C and it's concentrated in one hit as opposed to two, but there's more pushback and less time to hit confirm. | * Deals more damage than cl.C and it's concentrated in one hit as opposed to two, but there's more pushback and less time to hit confirm. An advantage over close C is it recovers faster so you won't get punished if someone neutral jumps your throw attempt. | ||
}} | }} | ||
| Line 178: | Line 177: | ||
|moveId=bluemary_2c | |moveId=bluemary_2c | ||
|description= | |description= | ||
* Rushes Mary forward a fair bit. Optimal combo glue after you pop Quickmode. Has decent priority and is surprisingly fast but it's not very safe. | * Rushes Mary forward a fair bit. Optimal combo glue after you pop Quickmode. Has decent priority and is surprisingly fast but it's not very safe. This is useful for some punishes. | ||
}} | }} | ||
====Crouch D==== | ====Crouch D==== | ||
{{FrameDataCargo-KOFXV | {{FrameDataCargo-KOFXV | ||
| Line 193: | Line 193: | ||
|name=jump A | |name=jump A | ||
|input=j.A | |input=j.A | ||
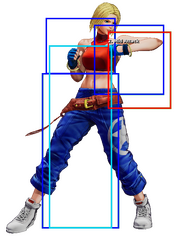
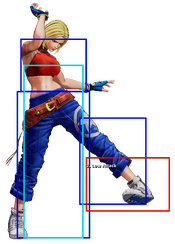
|hitboxCaptions= Hop Version, Jump Version | |||
|description2=* Angled downward for jump-ins but not used much. | |description2=* Angled downward for jump-ins but not used much. | ||
}} | }} | ||
| Line 200: | Line 201: | ||
|name=jump B | |name=jump B | ||
|input=j.B | |input=j.B | ||
|hitboxCaptions= Hop Version, Jump Version | |||
|description2=* Fast, hits deep and leads to ambiguous crossups. Important hop normal for when Mary is up close. | |description2=* Fast, hits deep and leads to ambiguous crossups. Important hop normal for when Mary is up close. | ||
}} | }} | ||
| Line 207: | Line 209: | ||
|name=jump C | |name=jump C | ||
|input=j.C | |input=j.C | ||
|hitboxCaptions= Hop Version, Jump Version | |||
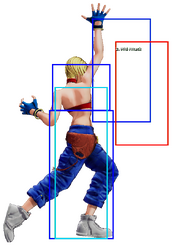
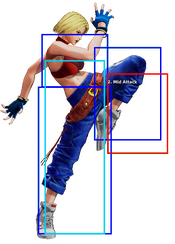
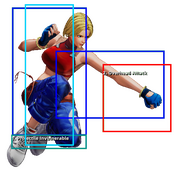
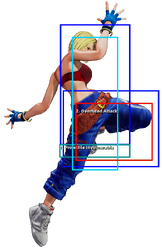
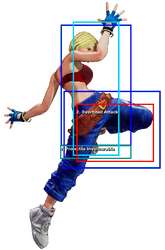
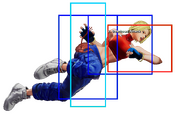
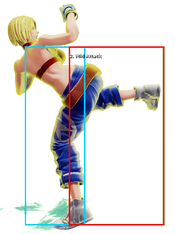
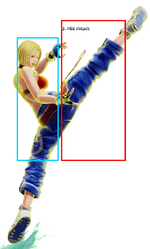
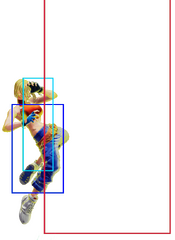
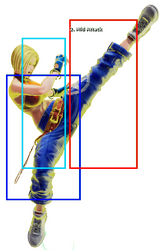
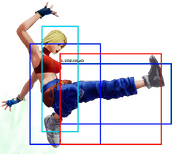
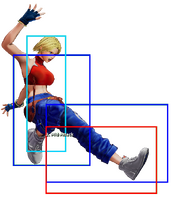
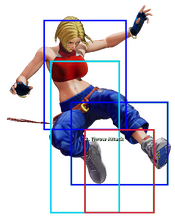
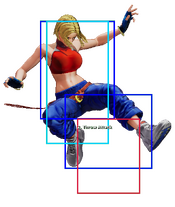
|description2=* This is Mary's best air-to-air, angled a bit above her head. This has similar range to j.D but the two normals cover the space above and below her respectively, perfectly complementing each other but forcing you to make a split-second decision as to where the opponent is going to be. | |description2=* This is Mary's best air-to-air, angled a bit above her head. This has similar range to j.D but the two normals cover the space above and below her respectively, perfectly complementing each other but forcing you to make a split-second decision as to where the opponent is going to be. | ||
}} | }} | ||
| Line 214: | Line 217: | ||
|name=jump D | |name=jump D | ||
|input=j.D | |input=j.D | ||
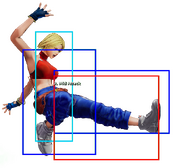
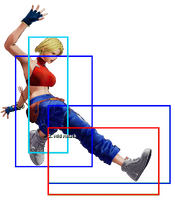
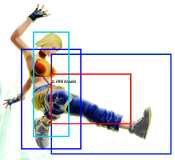
|hitboxCaptions= Hop Version, Jump Version | |||
|description2=* This move's decent range and downward angle combines with Mary's low, far-travelling jumps to be an effective chase tool. This is a very effective jump-in but it has very limited crossup potential. | |description2=* This move's decent range and downward angle combines with Mary's low, far-travelling jumps to be an effective chase tool. This is a very effective jump-in but it has very limited crossup potential. | ||
}} | }} | ||
| Line 222: | Line 226: | ||
|moveId=bluemary_cd | |moveId=bluemary_cd | ||
|description= | |description= | ||
* Has very decent range but doesn't move Mary forward at all, limiting its use in pressure. Can be cancelled into command normals. | * Has very decent range but doesn't move Mary forward at all, limiting its use in pressure. This does hit hops. Can be cancelled into command normals. | ||
}} | }} | ||
| Line 230: | Line 234: | ||
|description= | |description= | ||
*Go for pickups with Straight Slicer. You get EX Straight Slicer for free if you want to use that. | *Go for pickups with Straight Slicer. You get EX Straight Slicer for free if you want to use that. | ||
}} | |||
====AdvanceStrike==== | |||
{{FrameDataCargo-KOFXV | |||
|moveId=bluemary_214cd | |||
|description= | |||
*Same animation and range as her CD. | |||
}} | }} | ||
| Line 237: | Line 249: | ||
|name=jump CD | |name=jump CD | ||
|input=j.CD | |input=j.CD | ||
|hitboxCaptions= Hop Version, Jump Version | |||
|description2=* Extremely important tool. Its long, downward angle and its great priority make it function as an effective pressure tool, and for poking your way in as well. Do it early for best results, as the startup is quite slow. You can't really use this for early air-to-airs, so you'll either have to use jC instead or stick with moves like Vertical Arrow or Real Counter. | |description2=* Extremely important tool. Its long, downward angle and its great priority make it function as an effective pressure tool, and for poking your way in as well. Do it early for best results, as the startup is quite slow. You can't really use this for early air-to-airs, so you'll either have to use jC instead or stick with moves like Vertical Arrow or Real Counter. | ||
}} | }} | ||
| Line 245: | Line 258: | ||
|name=rush | |name=rush | ||
|input=c.AA/c.AAX | |input=c.AA/c.AAX | ||
|description2=* | |description2=* c.AAABB ends in her heavy Straight Slicer to Crab Clutch. | ||
}} | }} | ||
| Line 271: | Line 284: | ||
|name=Hammer Arch | |name=Hammer Arch | ||
|input=6A | |input=6A | ||
|hitboxCaptions= Raw Version, Cancel Version | |||
|description=* Long-ranged overhead. High profiles a bit during the startup, but it can be stuffed with 2Bs just before the hit. Super cancellable raw. When used in a cancel, such as after a close heavy normal, this is special cancelable. | |description=* Long-ranged overhead. High profiles a bit during the startup, but it can be stuffed with 2Bs just before the hit. Super cancellable raw. When used in a cancel, such as after a close heavy normal, this is special cancelable. | ||
* When canceling from a normal it can be performed with a 4A input making it easy to cancel into [4]6B/D | * When canceling from a normal it can be performed with a 4A input making it easy to cancel into [4]6B/D. | ||
}} | }} | ||
| Line 280: | Line 294: | ||
|name=Double Rolling | |name=Double Rolling | ||
|input=4B | |input=4B | ||
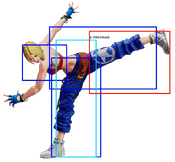
|hitboxCaptions= Raw Version, , Cancel Version | |||
|description=* Two hits: a sobat which goes over lows, then a low-hitting kick. Only the second hit is cancellable. This has fast enough startup to combo from lights and it gives you enough time to charge for any Straight Slicer, but on block there is 2-frame gap between the two hits which can be rolled through or stuffed by reversals. Its range isn't the best so if you cancel from 2A too far from the opponent then you will drop the combo. | |description=* Two hits: a sobat which goes over lows, then a low-hitting kick. Only the second hit is cancellable. This has fast enough startup to combo from lights and it gives you enough time to charge for any Straight Slicer, but on block there is 2-frame gap between the two hits which can be rolled through or stuffed by reversals. Its range isn't the best so if you cancel from 2A too far from the opponent then you will drop the combo. | ||
| Line 299: | Line 314: | ||
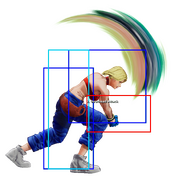
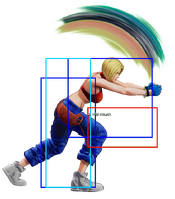
|name=Straight Slicer | |name=Straight Slicer | ||
|input=[4]6B/D | |input=[4]6B/D | ||
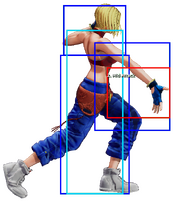
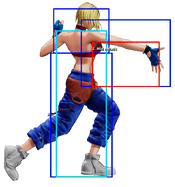
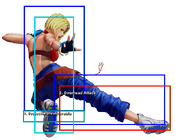
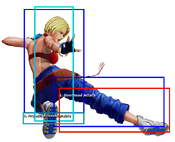
|hitboxCaptions= Normal Version, EX Version | |||
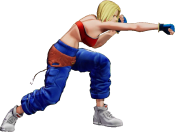
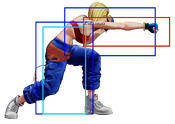
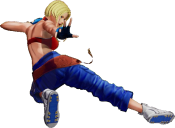
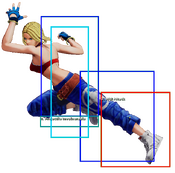
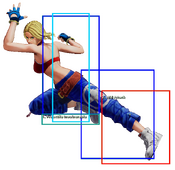
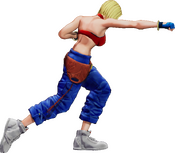
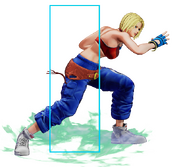
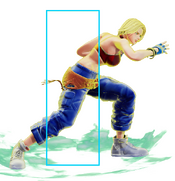
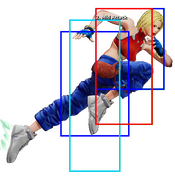
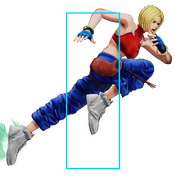
|description=* A slide which only travels about half the screen, but its startup means it can be combo'd from 2A at max range (NB: you can't always do this with 4B). You can use this to go under high fireballs, but it requires timing because Mary hops a little before sliding. Unsafe but can be spaced to be made safe. Super cancellable. Soft knockdown. | |description=* A slide which only travels about half the screen, but its startup means it can be combo'd from 2A at max range (NB: you can't always do this with 4B). You can use this to go under high fireballs, but it requires timing because Mary hops a little before sliding. Unsafe but can be spaced to be made safe. Super cancellable. Soft knockdown. | ||
*What isn't shown in the movelist is that this move can be followed up with by light Vertical Arrow, done with any 623K input. This cannot be EX enhanced, and either way you get a soft knockdown. Whether or not Vertical Arrow will actually connect instead of whiffing badly depends on the spacing. Either way, you're going to miss out on okizeme. | *What isn't shown in the movelist is that this move can be followed up with by light Vertical Arrow, done with any 623K input. This cannot be EX enhanced, and either way you get a soft knockdown. Whether or not Vertical Arrow will actually connect instead of whiffing badly depends on the spacing. Either way, you're going to miss out on okizeme. | ||
|description2=* A near-fullscreen slide, with the keyword being near-fullscreen. In addition to being easily baited at fullscreen, it can also be sniped by deep-hitting jump-ins if the opponent is hopping in place (this can still trip some moves, however). This is an important tool against high fireballs, but it requires a very good read considering how good the recovery on those tools tend to be, and how bad this move is on block. | |description2=* A near-fullscreen slide, with the keyword being near-fullscreen. In addition to being easily baited at fullscreen, it can also be sniped by deep-hitting jump-ins if the opponent is hopping in place (this can still trip some moves, however). This is an important tool against high fireballs, but it requires a very good read considering how good the recovery on those tools tend to be, and how bad this move is on block. | ||
|description3=* Pretty much [4]6D but it travels way faster, making it a much better anti-fireball tool and even more effective for surprise attacks. Its | *Super cancellable. This is Mary's only special move you can actually cancel into M.Typhoon, as it keeps the opponent on their feet if not followed up with Crab Clutch. | ||
|description3=* Pretty much [4]6D but it travels way faster, making it a much better anti-fireball tool and even more effective for surprise attacks. Its follow-up is also much more rewarding on hit. This is also bad on block, even with its follow-up. | |||
}} | }} | ||
| Line 310: | Line 327: | ||
|name=Crab Clutch | |name=Crab Clutch | ||
|input=[4]6D~236B/D | |input=[4]6D~236B/D | ||
|description=* A hard knockdown from your anti-fireball tool | |description=* A hard knockdown from your anti-fireball tool. | ||
}} | }} | ||
===Stun Fang=== | ===Stun Fang=== | ||
{{FrameDataCargo-KOFXV | {{FrameDataCargo-KOFXV | ||
| Line 325: | Line 343: | ||
|name=Vertical Arrow | |name=Vertical Arrow | ||
|input=623B/D | |input=623B/D | ||
|description2=*An anti-air special. The light version | |hitboxCaptions= B Version, , D Version, , EX Version, , Anywhere Juggle Grab Box during EX Version | ||
|description2=*An anti-air special. The light version is invincible to air attacks. The heavy and EX versions are fully invincible. The heavy version is your main reversal but it's kinda slow. Despite appearances this will often catch opponents jumping over you in the corner. Super cancellable. | |||
|description3=*The EX version deals more damage overall than 623D~623B/D. As 623D is a common combo ender from many of Mary's juggles, this can be used instead if the combo is going to kill. This move is also faster than 623D, making it less easy to safejump. | |description3=*The EX version deals more damage overall than 623D~623B/D. As 623D is a common combo ender from many of Mary's juggles, this can be used instead if the combo is going to kill. This move is also faster than 623D, making it less easy to safejump. | ||
}} | }} | ||
| Line 334: | Line 353: | ||
|name=M.Snatcher | |name=M.Snatcher | ||
|input=623D~B/D or 623BD~B/D | |input=623D~B/D or 623BD~B/D | ||
|description2=* Can only be used after heavy and | |description2=* Can only be used after heavy and EX Vertical Arrow. This follow-up grants you a hard knockdown and some time to chase up to the opponent and go for something. | ||
* | * EX version is anywhere juggle. | ||
}} | }} | ||
| Line 343: | Line 362: | ||
|name=Spin Fall | |name=Spin Fall | ||
|input=236A/C | |input=236A/C | ||
|hitboxCaptions= A Version, , C Version, , EX Version | |||
|description2=* This move is mainly used to extend pressure if your combo string was blocked. 236A is better for this because 236C is unsafe and has slower startup. This will easily catch opponents trying to jump out, but it's nowhere near as active as [[The King of Fighters XV/Terry Bogard|Terry]]'s Crack Shoot. This move can go over some ground-skimming fireballs, but it has slow startup and the recovery isn't good. Not an overhead despite appearances. | |description2=* This move is mainly used to extend pressure if your combo string was blocked. 236A is better for this because 236C is unsafe and has slower startup. This will easily catch opponents trying to jump out, but it's nowhere near as active as [[The King of Fighters XV/Terry Bogard|Terry]]'s Crack Shoot. This move can go over some ground-skimming fireballs, but it has slow startup and the recovery isn't good. Not an overhead despite appearances. | ||
* However, 236C and its followup can be used to end a juggle with a hard knockdown. | |||
|description3=* Combo glue. This and Stun Fang are your best combo extenders, although this is better to start off with because it deals way less hits, so damage scaling won't affect the rest of the combo as much. However, the juggle into Climbing Arrow afterwards is tighter than it is after Stun Fang, so juggling after this move optimally takes a little more skill. Still not an overhead. | |description3=* Combo glue. This and Stun Fang are your best combo extenders, although this is better to start off with because it deals way less hits, so damage scaling won't affect the rest of the combo as much. However, the juggle into Climbing Arrow afterwards is tighter than it is after Stun Fang, so juggling after this move optimally takes a little more skill. Still not an overhead. | ||
}} | }} | ||
===M.Spider=== | ===M.Spider=== | ||
{{FrameDataCargo-KOFXV | {{FrameDataCargo-KOFXV | ||
| Line 351: | Line 373: | ||
|name=M.Spider | |name=M.Spider | ||
|input=236C~236A/C | |input=236C~236A/C | ||
|description=* A hard knockdown | |description=* A hard knockdown followup to 236C that can be used on both grounded and airborne opponents. Handy for oki after an EX juggle. | ||
}} | }} | ||
| Line 359: | Line 381: | ||
|name=Real Counter | |name=Real Counter | ||
|input=214A/C | |input=214A/C | ||
|hitboxCaptions= Normal Version, EX Version | |||
|description2=* Mary's spot dodge. Any strike will whiff through this move completely, but Mary can be grabbed out of this at any point. This version of the move has enough i-frames that you can realistically dodge moves with plenty of active frames such as [[The King of Fighters XV/Terry Bogard|Terry]]'s Burn Knuckle and then punish them with Backdrop Real. However, the invuln window quickly wears off after this and a well-spaced meaty will be able to punish it. This can work as an anti-air against direct jump-ins but will lose to empty jump throw, as there is no landing recovery for you to punish. | |description2=* Mary's spot dodge. Any strike will whiff through this move completely, but Mary can be grabbed out of this at any point. This version of the move has enough i-frames that you can realistically dodge moves with plenty of active frames such as [[The King of Fighters XV/Terry Bogard|Terry]]'s Burn Knuckle and then punish them with Backdrop Real. However, the invuln window quickly wears off after this and a well-spaced meaty will be able to punish it. This can work as an anti-air against direct jump-ins but will lose to empty jump throw, as there is no landing recovery for you to punish. | ||
|description3=* Much more dependable as a reversal. Not only is the strike invuln lengthened but the attack also starts with a couple frames of throw invuln as well. This also makes it more dependable as a mixup option, as it cannot be checked with wakeup throw. | |description3=* Much more dependable as a reversal. Not only is the strike invuln lengthened but the attack also starts with a couple frames of throw invuln as well. This also makes it more dependable as a mixup option, as it cannot be checked with wakeup throw. | ||
| Line 368: | Line 391: | ||
|name=Backdrop Real | |name=Backdrop Real | ||
|input=214A/C/AC~236A/C | |input=214A/C/AC~236A/C | ||
| | |hitboxCaptions= Normal Version, EX Version | ||
| | |description=* An instant command grab which can only be performed within Real Counter. The caveat is that you must wait twelve frames before you can cancel Real Counter into Backdrop Real, meaning no instant command grabs from this. This can work as a mixup option, as the dodge will beat wakeup mashing and the minimum waiting time of twelve frames is not enough to react to reliably. However, this will lose to jumping or wakeup throws, and the range of the command grab itself, though decent, is something to keep in mind. | ||
|description2=* The cancel window starts instantly, so you can get it out as fast as possible. There are no input tricks to get this followup out instantly, however. This will leave the opponent behind you, which is great if you are cornered as that is where 214AC is most effective as a reversal (less chance of being crossed up out of it), but not so great if you're the one who is bullying in the corner. | |||
* Can be comboed into from pretty much any of your cancelable normals for a saucy side switch. | |||
}} | }} | ||
| Line 377: | Line 402: | ||
|name=M.Breaker | |name=M.Breaker | ||
|input=623A/C | |input=623A/C | ||
|description2=* A leaping command grab which looks identical to a hop | |hitboxCaptions= A Version, C Version, EX Version | ||
|description2=* A leaping command grab which looks identical to a hop. Strength determines the startup and how far it goes. Each strength can be ticked into from lights and heavies respectively; for instance, you can cancel cl.C 6A into 623C and it will catch them blocking or mashing a low button, whereas 623A starts up too quickly for the grab to work. This move beats advance strike. | |||
|description3=* The EX version travels further than 623C, is faster and goes through fireballs. This is particularly helpful against characters with ground-skimming fireballs, where Straight Slicer is of no help. | |description3=* The EX version travels further than 623C, is faster and goes through fireballs. This is particularly helpful against characters with ground-skimming fireballs, where Straight Slicer is of no help. | ||
}} | }} | ||
| Line 387: | Line 413: | ||
|name=M.Typhoon | |name=M.Typhoon | ||
|input=6321463214B/D | |input=6321463214B/D | ||
|hitboxCaptions= Normal Version, Max Version | |||
|description2=* A fast command grab super. Deals more damage than M.Splash Rose but there's no Advanced or Climax cancel window anywhere. | |description2=* A fast command grab super. Deals more damage than M.Splash Rose but there's no Advanced or Climax cancel window anywhere. | ||
|description3=* Instant. Still no Climax | |description3=* Instant. Still no Climax Cancel window. | ||
}} | }} | ||
| Line 396: | Line 423: | ||
|name=M.Splash Rose | |name=M.Splash Rose | ||
|input=2363214A/C | |input=2363214A/C | ||
|description2=* Rush super. There are two cancel windows: as she leaves the ground for the final hit and as she is falling. | |hitboxCaptions= A Version, C Version, , Max Version | ||
|description3=* Much better invincibility and travels further. The ideal Climax | |description2=* Rush super. There are two cancel windows: as she leaves the ground for the final hit and as she is falling. A recent buff to her Advance Cancel into M.Typhoon means you'll want to cancel pretty much exclusively during the landing impact. | ||
|description3=* Much better invincibility and travels further. The ideal Climax Cancel window is on the very final hit as she lands, though be wary you'll be switching sides if you do so. | |||
*Even though the final hit switches sides, you don't need to mirror your input for your Climax Cancel — perform it as if you were still on the side you started on. | |||
}} | }} | ||
Latest revision as of 21:53, 1 January 2025
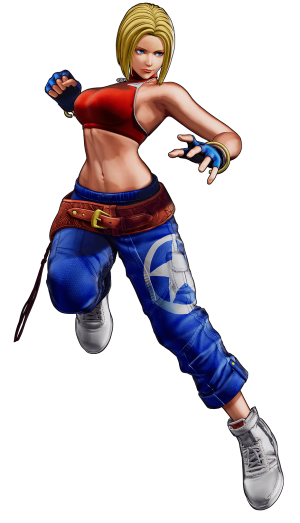
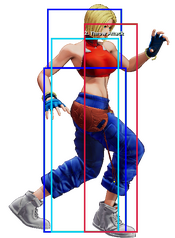
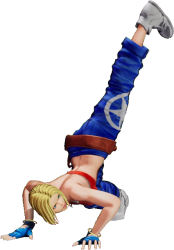
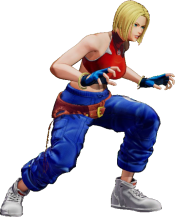
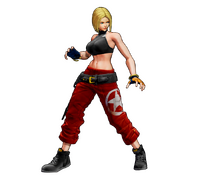
Blue Mary has a strong bond with Terry Bogard.
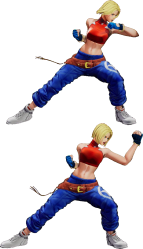
Hop: 33f
Backdash: 23f
Run Speed Ranking: 5
Movelist
(*) = EX OK
(!) = MAX OK
Throws
Command Normals
Special Moves
Super Special Moves
Climax Super Special Moves
Quick Combo Reference
| 0 Meter |
2B 2A 4B [4]6B |
( = 151 dmg |
| 1 Meter |
Placeholder |
( = dmg |
| 2 Meters |
Placeholder |
( = dmg |
Gameplay Overview
Mary is a vortex character with quick but risky ways to win neutral, with her low, far-travelling set of jumps in the air and her runs and Straight Slicer on the ground. Additionally, she has EX M. Breaker (623AC) to go through fireballs of any height. Once she's in, Mary has a myriad of mixup options to pick from - in addition to strong hop normals such as j.D and j.CD and her reliable low hit confirms (2B 2A 4B), Mary has access to a dodge and command grab in one move (214P~236P), a leaping command grab for use in strings (623P) and an overhead (6A) which can be super cancelled. All of these can lead to hard knockdowns. However, Mary has to take serious risks in neutral, with Straight Slicer in particular being punishable. If she finds herself defending, she has access to two different reversals: a dragon punch (623K) and her dodge. These lead to hard knockdowns as well - not only is she tricky to pin down because of this, but her vortex is easy to resume as well. However, not only can both options be covered with a well-spaced safejump, but, like the rest of Mary's kit, they are both very unsafe. Mary is a strong character who can be used in any team slot, given her ability to meter dump and her constant hard knockdowns either way, but it is precisely this element of risk which keeps her in check.
| Blue Mary is a rushdown character who can preserve momentum well using mixups and reversals which all result in hard knockdowns, but who requires very good reads before she can start. | |
| Pros | Cons |
|
|
Normals
Far Standing Normals
Far A
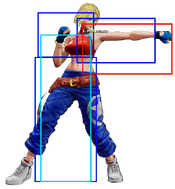
| far A
A
A |
|---|
Far B
| far B
B
B |
|---|
Far C
| far C
C
C |
|---|
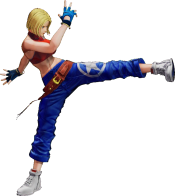
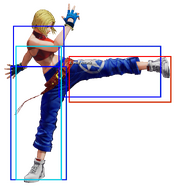
Far D
| far D
D
D |
|---|
Close Standing Normals
Close A
| close A
cl.A
cl.A |
|---|
Close B
| close B
cl.B
cl.B |
|---|
Close C
| close C
cl.C
cl.C |
|---|
Close D
| close D
cl.D
cl.D |
|---|
Crouch Normals
Crouch A
| crouch A
2A
2A |
|---|
Crouch B
| crouch B
2B
2B |
|---|
Crouch C
| crouch C
2C
2C |
|---|
Crouch D
| crouch D
2D
2D |
|---|
Jump Normals
Jump A
| jump A
j.A
j.A |
|---|
Jump B
| jump B
j.B
j.B |
|---|
Jump C
| jump C
j.C
j.C |
|---|
Jump D
| jump D
j.D
j.D |
|---|
Blowback
Blowback
| Blowback
CD
CD |
|---|
Shatter Strike
| Shatterstrike
236CD
236CD |
|---|
AdvanceStrike
| AdvanceStrike
214CD
214CD |
|---|
jump CD
| jump CD
j.CD
j.CD |
|---|
Rush Moves
| rush
c.AA/c.AAX
c.AA/c.AAX |
|---|
Throws
Lock Kick
| Lock Kick
(close) 4/6C
(close) 4/6C |
|---|
Viktor Throw
| Viktor Throw
(close) 4/6D
(close) 4/6D |
|---|
Command Moves
Hammer Arch
| Hammer Arch
6A
6A |
|---|
Double Rolling
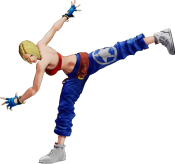
| Double Rolling
4B
4B |
|---|
Climbing Arrow
| Climbing Arrow
3D
3D |
|---|
Special Moves
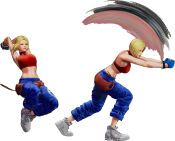
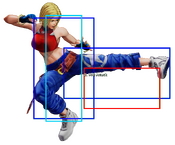
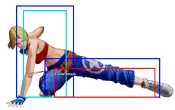
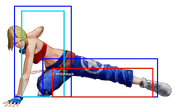
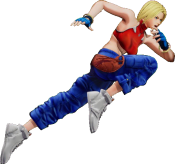
Straight Slicer
| Straight Slicer
[4]6B/D
[4]6B/D |
|---|
Crab Clutch
| Crab Clutch
[4]6D~236B/D
[4]6D~236B/D |
|---|
Stun Fang
| Stun Fang
[4]6BD~236A/C
[4]6BD~236A/C |
|---|
Vertical Arrow
| Vertical Arrow
623B/D
623B/D |
|---|
M.Snatcher
| M.Snatcher
623D~B/D or 623BD~B/D
623D~B/D or 623BD~B/D |
|---|
Spin Fall
| Spin Fall
236A/C
236A/C |
|---|
M.Spider
| M.Spider
236C~236A/C
236C~236A/C |
|---|
Real Counter
| Real Counter
214A/C
214A/C |
|---|
Backdrop Real
| Backdrop Real
214A/C/AC~236A/C
214A/C/AC~236A/C |
|---|
M.Breaker
| M.Breaker
623A/C
623A/C |
|---|
Super Special Moves
M.Typhoon
| M.Typhoon
6321463214B/D
6321463214B/D |
|---|
M.Splash Rose
| M.Splash Rose
2363214A/C
2363214A/C |
|---|
Climax Super Special Moves
M.Dynamite Swing
| M.Dynamite Swing
2141236CD
2141236CD |
|---|
Misc
Alternate Colors
 |
 |
 |
 |
 |
 |
 |
 |

