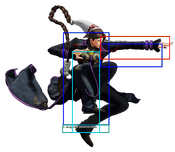
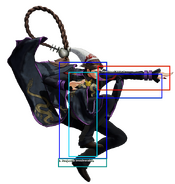
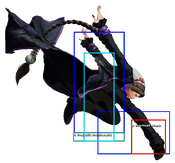
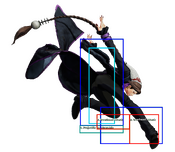
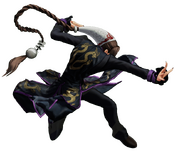
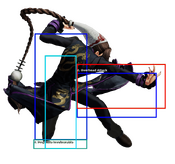
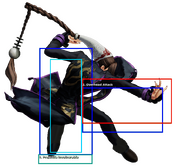
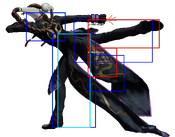
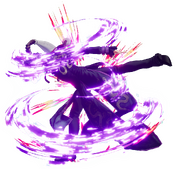
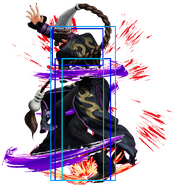
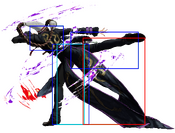
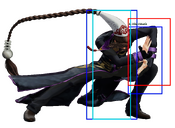
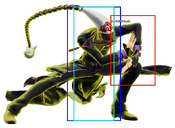
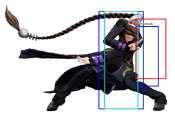
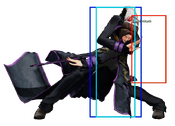
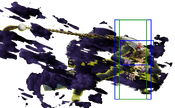
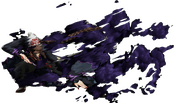
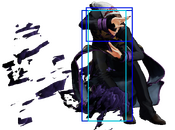
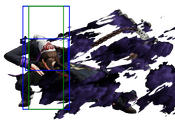
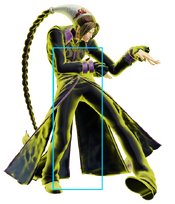
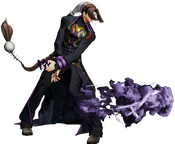
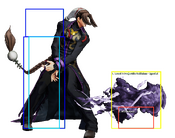
-The Dream Cancel Wiki has successfully upgraded it's wiki software and editing has returned. Tables for data have returned.
The King of Fighters XV/Duo Lon: Difference between revisions
m set the template better |
→Command Moves: quick tweak reflecting final patch |
||
| (34 intermediate revisions by 7 users not shown) | |||
| Line 1: | Line 1: | ||
{{CharNavbox_XV}} | {{CharNavbox_XV}} | ||
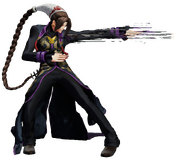
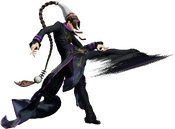
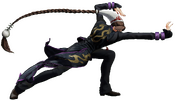
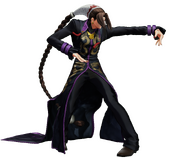
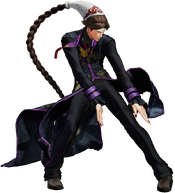
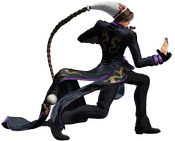
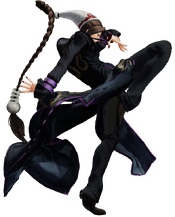
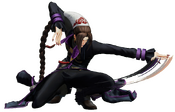
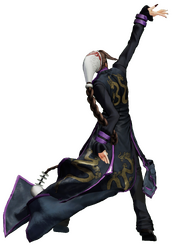
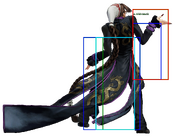
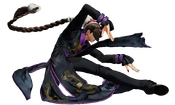
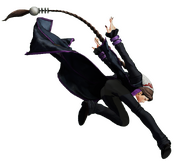
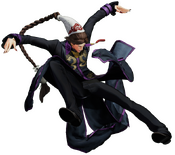
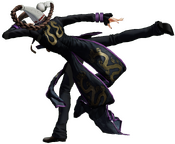
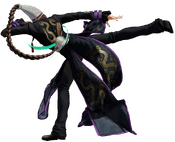
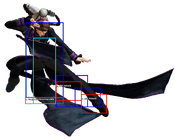
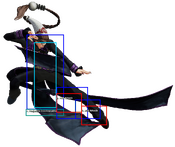
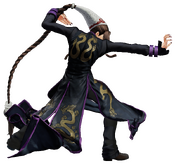
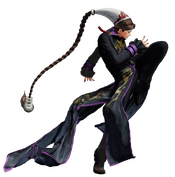
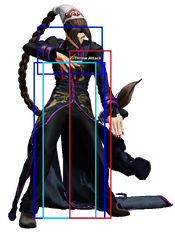
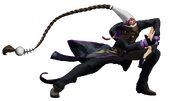
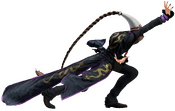
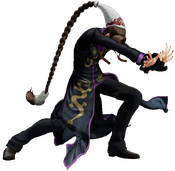
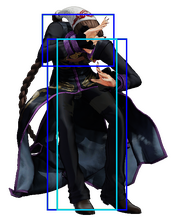
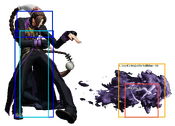
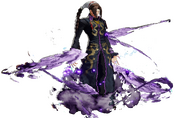
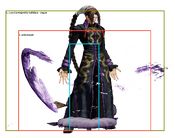
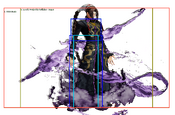
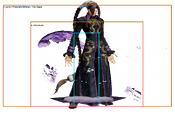
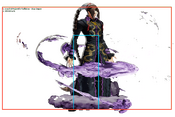
<section begin="image"/>[[File:KOFXV | <section begin="image"/>[[File:KOFXV duolon Profile.png|thumb|Duo Lon is a handsome young man with long, flowing hair (worn in a queue-style braid) and a somewhat somber air about him.<br/>He seeks out his father, Ron, leader of—and eventual traitor to—the Hizoku clan of assassins. During his quest he meets Ash, Elisabeth, and other fighters. | ||
<div class="center" style="width: auto; margin-left: auto; margin-right: auto;"> | <div class="center" style="width: auto; margin-left: auto; margin-right: auto;"> | ||
<big>'''Jump:''' 40f | <big>'''Jump:''' 40f | ||
| Line 16: | Line 16: | ||
'''Throws''' | '''Throws''' | ||
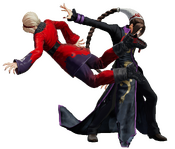
Suishu Shoukou - [[image:bk.gif]] / [[image:fd.gif]] + [[image:c.gif]] | |||
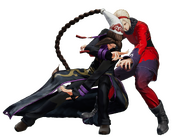
Suishu Houki - [[image:bk.gif]] / [[image:fd.gif]] + [[image:d.gif]] | |||
'''Command Normals''' | '''Command Normals''' | ||
Genmuken - [[image:fd.gif]] + [[image:a.gif]] (*) | |||
Air Genmuken - [[image:fd.gif]] + [[image:a.gif]] (*) (Midair Only) | |||
Air Genmukyaku - [[image:fd.gif]] + [[image:b.gif]] (*) (Midair Only) | |||
Hiei Kyaku - [[image:fd.gif]] + [[image:b.gif]] | |||
Target Combo 1 - [[image:b.gif]] > [[image:d.gif]] (Midair Only) | |||
'''Special Moves''' | '''Special Moves''' | ||
Genmukyaku - [[image:dp.gif]] + [[image:b.gif]] / [[image:d.gif]] (*) | |||
Shaki Juuryuu 1 - [[image:qcf.gif]] + [[image:a.gif]] / [[image:c.gif]] (*) | |||
:┗Shaki Juuryuu 2 - [[image:fd.gif]] + [[image:a.gif]] / [[image:c.gif]] | |||
::┗Shaki Juuryuu 3 - [[image:fd.gif]] + [[image:a.gif]] / [[image:c.gif]] | |||
:::┗Himou Kyaku Forward - [[image:fd.gif]] + [[image:b.gif]] / [[image:d.gif]] (*) | |||
:::┗Himou Kyaku Backward - [[image:bk.gif]] + [[image:b.gif]] / [[image:d.gif]] (*) (from EX Shaki Juuryuu Only) | |||
Juon Shikon - [[image:qcb.gif]] + [[image:a.gif]] / [[image:c.gif]] (*) | |||
Himou Kyaku Forward - [[image:qcf.gif]] + [[image:b.gif]] / [[image:d.gif]] (*) | |||
:┗Shaki Juuryuu 1 - [[image:qcf.gif]] + [[image:a.gif]] / [[image:c.gif]] (*) (from EX Himou Kyaku Forward Only) | |||
Himou Kyaku Forward - [[image:qcf.gif]] + [[image:b.gif]] / [[image:d.gif]] (*) | |||
: | :┗Juon Shikon - [[image:qcb.gif]] + [[image:a.gif]] / [[image:c.gif]] | ||
'''Super Special Moves''' | '''Super Special Moves''' | ||
Hiden Genmu Bakuto Shikon - [[image:qcb.gif]][[image:db.gif]][[image:qcf.gif]] + [[image:a.gif]] / [[image:c.gif]] (!) | |||
Hiden Genmu Onryou Heki - [[image:qcb.gif]][[image:qcb.gif]] + [[image:a.gif]] / [[image:c.gif]] (!) | |||
'''Climax Super Special Moves''' | '''Climax Super Special Moves''' | ||
Mugen Juon Toubu - [[image:qcb.gif]][[image:db.gif]][[image:qcf.gif]]+[[image:c.gif]]+[[image:d.gif]] | |||
==Quick Combo Reference== | ==Quick Combo Reference== | ||
| Line 61: | Line 69: | ||
| '''0 Meter''' | | '''0 Meter''' | ||
| | | | ||
Low confirm<br/> | |||
Anywhere<br/> | Anywhere<br/> | ||
| | | | ||
2B > 2A > 236A ~ 6P ~ 6P ~ 6B, cl.D = 153 dmg<br/> | |||
cl.D > 6A > 236C ~ 6P ~ 6P ~ 6B, cl.D = 258 dmg<br/> | |||
|- | |- | ||
| '''½ Meter''' | | '''½ Meter''' | ||
| | | | ||
Low confirm<br/> | |||
Anywhere<br/> | Anywhere<br/> | ||
| | | | ||
2B > 2A > 6AC > 236C ~ 6P ~ 6P ~ 6B, cl.D = 223 dmg<br/> | |||
cl.D > 6A > 236AC ~ 6P ~ 6P, 236C ~ 6P ~ 6P ~ 6B, cl.D = 311 dmg<br/> | |||
|- | |- | ||
| '''1 Meter''' | | '''1 Meter''' | ||
| Line 95: | Line 103: | ||
==Gameplay Overview== | ==Gameplay Overview== | ||
{{StrengthsAndWeaknesses | {{StrengthsAndWeaknesses | ||
| intro = {{SUBPAGENAME}} is a | | intro = '''''{{SUBPAGENAME}} is a tricky hybrid character with smothering mixup rushdown and a bevy of powerful zoning normals.''''' | ||
| pros= | | pros= | ||
* ''' | * '''Quick Mix''': Duo Lon's post-rekka options can be blisteringly fast. Canceling a reset into a command dash gives Duo scary left-right mixup, and if the opponent gets wise, he can simply make space for himself, bait a reversal, and punish accordingly. | ||
* ''' | * '''Long, Strong Buttons''': Duo Lon's normals, command or otherwise, control space impressively well. His j.6A and j.6B have incredible range for pestering opponents air-to-air and on the ground, respectively, and his grounded 6A can be canceled into several of his other tools to create or maintain space, start combos, or confirm stray hits into super cancels. | ||
* ''' | * '''Pick Your Poison''': Duo Lon can play at range, pestering his opponent with big normals, command dashing to and fro, and keeping up a "wall" of sorts with his unique low-and-slow projectile, or he can flick a switch and turn into a mixup monster with his assortment of rekkas, resets, and side-switch guessing games. The choice is yours! | ||
| cons= | | cons= | ||
* ''' | * '''Low Damage''': Even with meter, Duo Lon's damage is ''just'' a tad lower than a good chunk of the roster's. This is ostensibly to keep his mixups in check, but if your opponent gets wise to said mixup, you're forced to do pretty paltry damage. | ||
* ''' | * '''Punishingly Unsafe''': In the worst case scenario that his rekkas are blocked, Duo Lon is dead in the water. Metered or not, his command dashes can still be hit or thrown out of, meaning there's no escape from a prepared opponent. | ||
* ''' | * '''Slow, Weird Buttons''': While his buttons are strong, they're also awkward—learning their use cases can be a bit much at first, and some of them leave you wide open for punishment if done carelessly. Also, see below. | ||
* '''No Meterless Reversal''': Surprising nobody, the mixup-oriented character has to rely on supers for an invincible reversal. Thankfully, Duo Lon only has to spring for the level 1 version of his "get off of me" super, but it's still pretty inconvenient. | |||
}} | }} | ||
{{#ev:youtube|8P3OsZt5tDE|||'''Character breakdown'''|frame}} | |||
==Normals== | ==Normals== | ||
| Line 111: | Line 122: | ||
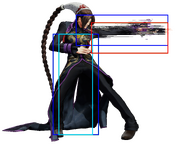
====Far A==== | ====Far A==== | ||
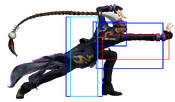
{{FrameDataCargo-KOFXV | {{FrameDataCargo-KOFXV | ||
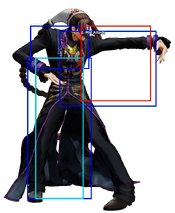
|moveId= | |moveId=duolon_fa | ||
|description= | |description= | ||
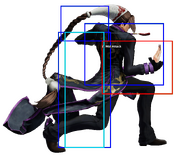
* | * Doesn't hit crouchers, except for large characters (Maxima, Antonov, Dinosaur) | ||
* Placeholder | * Placeholder | ||
* Placeholder | * Placeholder | ||
| Line 121: | Line 132: | ||
====Far B==== | ====Far B==== | ||
{{FrameDataCargo-KOFXV | {{FrameDataCargo-KOFXV | ||
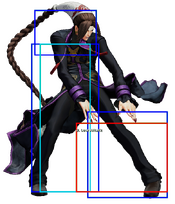
|moveId= | |moveId=duolon_fb | ||
|description= | |description= | ||
* Placeholder | * Placeholder | ||
| Line 131: | Line 142: | ||
====Far C==== | ====Far C==== | ||
{{FrameDataCargo-KOFXV | {{FrameDataCargo-KOFXV | ||
|moveId= | |moveId=duolon_fc | ||
|description= | |description= | ||
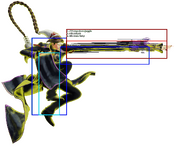
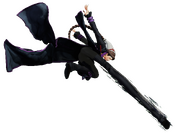
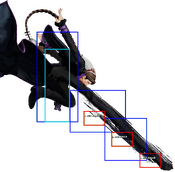
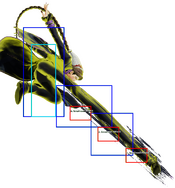
* | * Exceptional range, one of the few standing normals that will hit an opponent at round start distance. | ||
* | * Painfully slow at 12 frame startup. | ||
}} | }} | ||
====Far D==== | ====Far D==== | ||
{{FrameDataCargo-KOFXV | {{FrameDataCargo-KOFXV | ||
|moveId= | |moveId=duolon_fd | ||
|description= | |description= | ||
* | * Like f.A, f.D also doesn't hit crouchers, except for large characters (Maxima, Antonov, Dinosaur) | ||
* Placeholder | * Placeholder | ||
* Placeholder | * Placeholder | ||
| Line 152: | Line 161: | ||
====Close A==== | ====Close A==== | ||
{{FrameDataCargo-KOFXV | {{FrameDataCargo-KOFXV | ||
|moveId= | |moveId=duolon_cla | ||
|description= | |description= | ||
* Placeholder | * Placeholder | ||
| Line 162: | Line 171: | ||
====Close B==== | ====Close B==== | ||
{{FrameDataCargo-KOFXV | {{FrameDataCargo-KOFXV | ||
|moveId= | |moveId=duolon_clb | ||
|description= | |description= | ||
* Placeholder | * Placeholder | ||
| Line 172: | Line 181: | ||
====Close C==== | ====Close C==== | ||
{{FrameDataCargo-KOFXV | {{FrameDataCargo-KOFXV | ||
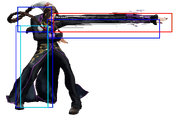
|moveId= | |moveId=duolon_clc | ||
|description= | |description= | ||
Your fastest heavy at 5 frames, but not forcing standing on hit and deceptively short activation range(meaning you get the sluggish 12 frame far C instead) make this button somewhat risky to use. | |||
}} | }} | ||
====Close D==== | ====Close D==== | ||
{{FrameDataCargo-KOFXV | {{FrameDataCargo-KOFXV | ||
|moveId= | |moveId=duolon_cld | ||
|description= | |description= | ||
* | * Forces stand on hit, guaranteeing a combo into 6A. | ||
Only one frame slower than close C, but better activation proximity and aforementioned force standing make it a better choice generally. | |||
}} | }} | ||
| Line 193: | Line 197: | ||
====Crouch A==== | ====Crouch A==== | ||
{{FrameDataCargo-KOFXV | {{FrameDataCargo-KOFXV | ||
|moveId= | |moveId=duolon_2a | ||
|description= | |description= | ||
* Placeholder | * Placeholder | ||
| Line 203: | Line 207: | ||
====Crouch B==== | ====Crouch B==== | ||
{{FrameDataCargo-KOFXV | {{FrameDataCargo-KOFXV | ||
|moveId= | |moveId=duolon_2b | ||
|description= | |description= | ||
* Placeholder | * Placeholder | ||
| Line 213: | Line 217: | ||
====Crouch C==== | ====Crouch C==== | ||
{{FrameDataCargo-KOFXV | {{FrameDataCargo-KOFXV | ||
|moveId= | |moveId=duolon_2c | ||
|description= | |description= | ||
* | * Forces stand on hit, guaranteeing a combo into 6A. | ||
Decent anti-air, if slightly slow on recovery. | |||
}} | }} | ||
====Crouch D==== | ====Crouch D==== | ||
{{FrameDataCargo-KOFXV | {{FrameDataCargo-KOFXV | ||
|moveId= | |moveId=duolon_2d | ||
|description= | |description= | ||
* Placeholder | * Placeholder | ||
| Line 234: | Line 236: | ||
====Jump A==== | ====Jump A==== | ||
{{FrameDataCargo-KOFXV | {{FrameDataCargo-KOFXV | ||
|moveId= | |moveId=duolon_ha,duolon_ja | ||
|name=jump A | |name=jump A | ||
|input=j.A | |input=j.A | ||
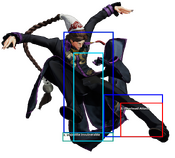
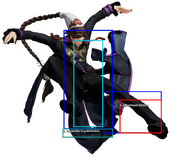
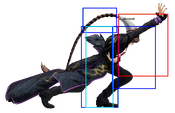
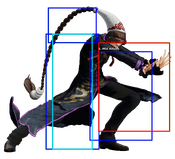
|hitboxCaptions= Hop Version, Jump Version | |||
|description2= | |description2= | ||
* Placeholder | * Placeholder | ||
| Line 246: | Line 249: | ||
====Jump B==== | ====Jump B==== | ||
{{FrameDataCargo-KOFXV | {{FrameDataCargo-KOFXV | ||
|moveId= | |moveId=duolon_hb,duolon_jb | ||
|name=jump B | |name=jump B | ||
|input=j.B | |input=j.B | ||
|hitboxCaptions= Hop Version, Jump Version | |||
|description2= | |description2= | ||
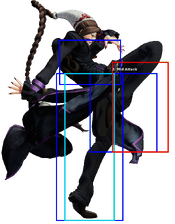
* | * Can hit crossup(full jump only) | ||
Useful as an instant overhead. | |||
}} | }} | ||
====Jump C==== | ====Jump C==== | ||
{{FrameDataCargo-KOFXV | {{FrameDataCargo-KOFXV | ||
|moveId= | |moveId=duolon_hc,duolon_jc | ||
|name=jump C | |name=jump C | ||
|input=j.C | |input=j.C | ||
|hitboxCaptions= Hop Version, Jump Version | |||
|description2= | |description2= | ||
* Placeholder | * Placeholder | ||
| Line 270: | Line 273: | ||
====Jump D==== | ====Jump D==== | ||
{{FrameDataCargo-KOFXV | {{FrameDataCargo-KOFXV | ||
|moveId= | |moveId=duolon_hd,duolon_jd | ||
|name=jump D | |name=jump D | ||
|input=j.D | |input=j.D | ||
|hitboxCaptions= Hop Version, Jump Version | |||
|description2= | |description2= | ||
* Placeholder | * Placeholder | ||
| Line 283: | Line 287: | ||
====Blowback==== | ====Blowback==== | ||
{{FrameDataCargo-KOFXV | {{FrameDataCargo-KOFXV | ||
|moveId= | |moveId=duolon_cd | ||
|description= | |description= | ||
* | * Has similar hitbox issues as with f.A and f.D, generally whiffing against most crouchers. | ||
* | * Has a lower hitbox closer to Duo Lon, allowing him to hit crouchers at closer distances. | ||
* Placeholder | * Placeholder | ||
Placeholder | Placeholder | ||
| Line 293: | Line 297: | ||
====Shatter Strike==== | ====Shatter Strike==== | ||
{{FrameDataCargo-KOFXV | {{FrameDataCargo-KOFXV | ||
|moveId= | |moveId=duolon_236cd | ||
|description= | |description= | ||
* | * Doesn't suffer from the hitbox issues that plague regular stand CD. | ||
* Placeholder | * Placeholder | ||
* Placeholder | * Placeholder | ||
Placeholder | Placeholder | ||
}} | |||
====AdvanceStrike==== | |||
{{FrameDataCargo-KOFXV | |||
|moveId=duolon_214cd | |||
|description= | |||
*Same animation and range as his CD. | |||
* The throw counter is at the feet. | |||
}} | }} | ||
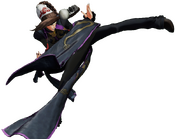
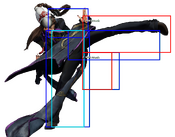
====Jump CD==== | ====Jump CD==== | ||
{{FrameDataCargo-KOFXV | {{FrameDataCargo-KOFXV | ||
|moveId= | |moveId=duolon_hcd,duolon_jcd | ||
|name=jump CD | |name=jump CD | ||
|input=j.CD | |input=j.CD | ||
|hitboxCaptions= Hop Version, Jump Version | |||
|description2= | |description2= | ||
* Placeholder | * Placeholder | ||
| Line 312: | Line 327: | ||
Placeholder | Placeholder | ||
}} | }} | ||
==Rush Moves== | ==Rush Moves== | ||
{{FrameDataCargo-KOFXV | {{FrameDataCargo-KOFXV | ||
|moveId= | |moveId=duolon_rush1,duolon_rush2 | ||
|name=rush | |name=rush | ||
|input=cl.AA/c.AAX | |input=cl.AA/c.AAX | ||
| Line 323: | Line 337: | ||
* Placeholder | * Placeholder | ||
* Placeholder | * Placeholder | ||
Goes into A rekkas, (MAX) Hiden Genmu Bakuto Shikon (Dash Super) or Climax. | |||
}} | }} | ||
| Line 329: | Line 343: | ||
==Throws== | ==Throws== | ||
{{FrameDataCargo-KOFXV | {{FrameDataCargo-KOFXV | ||
|moveId = | |moveId = duolon_cthrow | ||
|name= | |name=Suishu Shoukou | ||
|description= | |description= | ||
* Placeholder | * Placeholder | ||
| Line 339: | Line 353: | ||
{{FrameDataCargo-KOFXV | {{FrameDataCargo-KOFXV | ||
|moveId = | |moveId = duolon_dthrow | ||
|name= | |name=Suishu Houki | ||
|description= | |description= | ||
* Placeholder | * Placeholder | ||
| Line 350: | Line 364: | ||
==Command Moves== | ==Command Moves== | ||
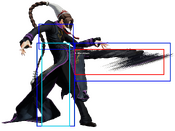
=== | ===Genmuken=== | ||
{{FrameDataCargo-KOFXV | {{FrameDataCargo-KOFXV | ||
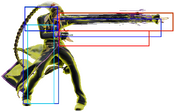
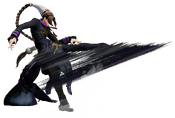
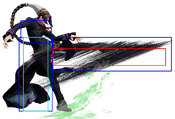
|moveId= | |moveId=duolon_6a,duolon_6ac | ||
|hitboxCaptions= Normal Version, EX Version | |||
|description2= | |||
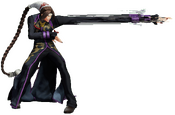
* EX Genmuken functions like a special move for cancelling purposes. This makes it possible to cancel into from 2D or stand CD where you could not for regular 6A. | |||
* 6A whiffs against crouching opponents when done on its own, but connects while the opponent is in hitstun. | |||
* 6AC sucks in the opponent on hit. | |||
Placeholder | |||
}} | |||
===Air Genmuken=== | |||
{{FrameDataCargo-KOFXV | |||
|moveId=duolon_j6a,duolon_j6ac | |||
|hitboxCaptions= Normal Version, EX Version | |||
|description2= | |||
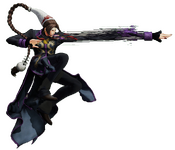
* EX version has anywhere juggle properties. No scaling penalty is applied even in this situation. | |||
* Placeholder | |||
* Placeholder | |||
Placeholder | |||
}} | |||
===Air Genmukyaku=== | |||
{{FrameDataCargo-KOFXV | |||
|moveId=duolon_j6b,duolon_j6bd | |||
|hitboxCaptions= Normal Version, EX Version | |||
|description2= | |||
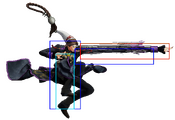
* Placeholder | |||
* Placeholder | |||
* Placeholder | |||
Placeholder | |||
}} | |||
===Hiei Kyaku === | |||
{{FrameDataCargo-KOFXV | |||
|moveId=duolon_6b | |||
|description= | |description= | ||
* Placeholder | * Placeholder | ||
| Line 360: | Line 407: | ||
}} | }} | ||
=== | ===Target Combo 1=== | ||
{{FrameDataCargo-KOFXV | {{FrameDataCargo-KOFXV | ||
|moveId= | |moveId=duolon_jb_d | ||
|description= | |description= | ||
* Placeholder | * Placeholder | ||
| Line 369: | Line 416: | ||
Placeholder | Placeholder | ||
}} | }} | ||
==Special Moves== | ==Special Moves== | ||
=== | ===Genmukyaku=== | ||
{{FrameDataCargo-KOFXV | {{FrameDataCargo-KOFXV | ||
|moveId= | |moveId=duolon_623b,duolon_623d,duolon_623bd | ||
|name= | |name=Genmukyaku | ||
|input= | |input=623B/D/BD | ||
|hitboxCaptions= B Version, D Version, EX Version | |||
|description3= | |description3= | ||
* Placeholder | * Placeholder | ||
| Line 384: | Line 431: | ||
}} | }} | ||
=== | ===Shaki Juuryuu 1=== | ||
{{FrameDataCargo-KOFXV | {{FrameDataCargo-KOFXV | ||
|moveId= | |moveId=duolon_236a,duolon_236c,duolon_236ac | ||
|name= | |name=Shaki Juuryuu 1 | ||
|input= | |input=236A/C/AC | ||
|hitboxCaptions= Normal Version, EX Version | |||
|description3= | |description3= | ||
* Placeholder | * Placeholder | ||
| Line 395: | Line 443: | ||
Placeholder | Placeholder | ||
}} | }} | ||
{{FrameDataCargo-KOFXV | {{FrameDataCargo-KOFXV | ||
|moveId= | |moveId=duolon_236a6p,duolon_236c6p,duolon_236ac6p | ||
|name= | |name=Shaki Juuryuu 2 | ||
|input= | |input=236A/C/AC~6P | ||
|hitboxCaptions= Normal Version, EX Version | |||
|description3= | |description3= | ||
* Placeholder | * Placeholder | ||
| Line 407: | Line 454: | ||
Placeholder | Placeholder | ||
}} | }} | ||
{{FrameDataCargo-KOFXV | {{FrameDataCargo-KOFXV | ||
|moveId= | |moveId=duolon_236a6p6p,duolon_236c6p6p,duolon_236ac6p6p | ||
|name= | |name=Shaki Juuryuu 3 | ||
|input= | |input=236A/C/AC~6P~6P | ||
|hitboxCaptions= Normal Version, EX Version | |||
|description3= | |description3= | ||
* Placeholder | * Placeholder | ||
| Line 419: | Line 465: | ||
Placeholder | Placeholder | ||
}} | }} | ||
{{FrameDataCargo-KOFXV | {{FrameDataCargo-KOFXV | ||
|moveId= | |moveId=duolon_236a6p6p6b,duolon_236c6p6p6b,duolon_236ac6p6p6b | ||
|name= | |name=B Himou Kyaku Forward Follow Up | ||
|input= | |input=236A/C/AC~6P~6P~6B | ||
|description3= | |description3= | ||
* Placeholder | * Placeholder | ||
| Line 431: | Line 475: | ||
Placeholder | Placeholder | ||
}} | }} | ||
{{FrameDataCargo-KOFXV | {{FrameDataCargo-KOFXV | ||
|moveId= | |moveId=duolon_236a6p6p6d,duolon_236c6p6p6d,duolon_236ac6p6p6d | ||
|name= | |name=D Himou Kyaku Forward Follow Up | ||
|input= | |input=236A/C/AC~6P~6P~6D | ||
|description3= | |description3= | ||
* Placeholder | * Placeholder | ||
| Line 445: | Line 486: | ||
}} | }} | ||
{{FrameDataCargo-KOFXV | {{FrameDataCargo-KOFXV | ||
|moveId= | |moveId=duolon_236a6p6p6bd,duolon_236c6p6p6bd,duolon_236ac6p6p6bd | ||
|name= | |name=EX Himou Kyaku Forward Follow Up | ||
|input= | |input=236A/C/AC~6P~6P~6BD | ||
|description3= | |description3= | ||
* Placeholder | * Placeholder | ||
| Line 455: | Line 496: | ||
}} | }} | ||
{{FrameDataCargo-KOFXV | {{FrameDataCargo-KOFXV | ||
|moveId= | |moveId=duolon_236ac6p6p4b,duolon_236ac6p6p4d,duolon_236ac6p6p4bd | ||
|name= | |name=Himou Kyaku Backward Follow Up to EX Rekka Ender | ||
|input= | |input=236AC~6P~6P~4K | ||
|hitboxCaptions= B Version, , D Version, , EX Version | |||
|description3= | |description3= | ||
* Placeholder | * Placeholder | ||
| Line 465: | Line 507: | ||
}} | }} | ||
== | ===Juon Shikon=== | ||
=== | {{FrameDataCargo-KOFXV | ||
|moveId=duolon_214a,duolon_214c,duolon_214ac | |||
|name=Juon Shikon | |||
|input=214A/C/AC | |||
|hitboxCaptions= Normal Version, EX Version | |||
|description3= | |||
* Placeholder | |||
* Placeholder | |||
* Placeholder | |||
The AC version is cancelable into teleports. It hits three times and stays on the screen even if Duo Lon gets hit. | |||
}} | |||
===Himou Kyaku Forward=== | |||
{{FrameDataCargo-KOFXV | {{FrameDataCargo-KOFXV | ||
|moveId= | |moveId=duolon_236b,duolon_236d,duolon_236bd | ||
|name= | |name=Himou Kyaku Forward | ||
|input= | |input=236B/D/BD | ||
|hitboxCaptions= B Version, , D Version, , EX Version | |||
|description3= | |description3= | ||
* Placeholder | * Placeholder | ||
| Line 478: | Line 533: | ||
}} | }} | ||
=== | ===Himou Kyaku Backward=== | ||
{{FrameDataCargo-KOFXV | {{FrameDataCargo-KOFXV | ||
|moveId= | |moveId=duolon_214b,duolon_214d,duolon_214bd | ||
|name= | |name=Himou Kyaku Backward | ||
|input= | |input=214B/D/BD | ||
|hitboxCaptions= B Version, , D Version, , EX Version | |||
|description3= | |description3= | ||
* Placeholder | * Placeholder | ||
| Line 488: | Line 544: | ||
* Placeholder | * Placeholder | ||
Placeholder | Placeholder | ||
}} | |||
==Super Special Moves== | |||
===Hiden Genmu Bakuto Shikon=== | |||
{{FrameDataCargo-KOFXV | |||
|moveId=duolon_214236p,duolon_214236ac | |||
|name=Hiden Genmu Bakuto Shikon | |||
|input=214236A/C/AC | |||
|hitboxCaptions= Normal Version, Max Version | |||
|description2= | |||
* Placeholder | |||
* Placeholder | |||
* Placeholder | |||
Placeholder | |||
}} | |||
===Hiden Genmu Onryou Heki=== | |||
{{FrameDataCargo-KOFXV | |||
|moveId=duolon_214214p,duolon_214214ac | |||
|name=Hiden Genmu Onryou Heki | |||
|input=214214A/C/AC | |||
|hitboxCaptions= Normal Version, , Max Version | |||
|description2= | |||
* All versions are fully invulnerable frame 1. | |||
Stubby horizontal range, but covers behind Duo Lon. A pretty good reversal for one bar. | |||
}} | }} | ||
==Climax Super Special Moves== | ==Climax Super Special Moves== | ||
=== | ===Mugen Juon Toubu=== | ||
{{FrameDataCargo-KOFXV | {{FrameDataCargo-KOFXV | ||
|moveId= | |moveId=duolon_2141236cd | ||
|name= | |name=Mugen Juon Toubu | ||
|input=2141236CD | |input=2141236CD | ||
|description= | |description= | ||
| Line 506: | Line 587: | ||
==Videos== | ==Videos== | ||
{{#ev:youtube| | {{#ev:youtube|2e0A6PN3pVE|||'''Duo Lon Trailer'''|frame}} | ||
{{CharNavbox_XV}} | {{CharNavbox_XV}} | ||
| Line 512: | Line 593: | ||
[[Category:The King of Fighters XV]] | [[Category:The King of Fighters XV]] | ||
[[Category: | [[Category:Duo Lon]] | ||
Latest revision as of 00:49, 3 January 2025

He seeks out his father, Ron, leader of—and eventual traitor to—the Hizoku clan of assassins. During his quest he meets Ash, Elisabeth, and other fighters.
Hop: 32f
Backdash: 23f
Run Speed Ranking: 3
Movelist
(*) = EX OK
(!) = MAX OK
Throws
Command Normals
Air Genmuken - ![]() +
+ ![]() (*) (Midair Only)
(*) (Midair Only)
Air Genmukyaku - ![]() +
+ ![]() (*) (Midair Only)
(*) (Midair Only)
Target Combo 1 - ![]() >
> ![]() (Midair Only)
(Midair Only)
Special Moves
Super Special Moves
Hiden Genmu Bakuto Shikon - ![]()
![]()
![]() +
+ ![]() /
/ ![]() (!)
(!)
Hiden Genmu Onryou Heki - ![]()
![]() +
+ ![]() /
/ ![]() (!)
(!)
Climax Super Special Moves
Quick Combo Reference
| 0 Meter |
Low confirm |
2B > 2A > 236A ~ 6P ~ 6P ~ 6B, cl.D = 153 dmg |
| ½ Meter |
Low confirm |
2B > 2A > 6AC > 236C ~ 6P ~ 6P ~ 6B, cl.D = 223 dmg |
| 1 Meter |
Anywhere |
move > move > move = 0 dmg |
| 2 Meter |
Anywhere |
move > move > move = 0 dmg |
Gameplay Overview
| Duo Lon is a tricky hybrid character with smothering mixup rushdown and a bevy of powerful zoning normals. | |
| Pros | Cons |
|
|
Normals
Far Standing Normals
Far A
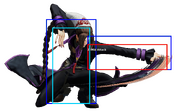
| stand A
5A
5A |
|---|
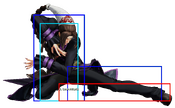
Far B
| stand B
5B
5B |
|---|
Far C
| stand C
5C
5C |
|---|
Far D
| stand D
5D
5D |
|---|
Close Standing Normals
Close A
| close A
cl.A
cl.A |
|---|
Close B
| close B
cl.B
cl.B |
|---|
Close C
| close C
cl.C
cl.C |
|---|
Close D
| close D
cl.D
cl.D |
|---|
Crouch Normals
Crouch A
| crouch A
2A
2A |
|---|
Crouch B
| crouch B
2B
2B |
|---|
Crouch C
| crouch C
2C
2C |
|---|
Crouch D
| crouch D
2D
2D |
|---|
Jump Normals
Jump A
| jump A
j.A
j.A |
|---|
Jump B
| jump B
j.B
j.B |
|---|
Jump C
| jump C
j.C
j.C |
|---|
Jump D
| jump D
j.D
j.D |
|---|
Blowback
Blowback
| Blowback
CD
CD |
|---|
Shatter Strike
| ShatterStrike
236CD
236CD |
|---|
AdvanceStrike
| AdvanceStrike
214CD
214CD |
|---|
Jump CD
| jump CD
j.CD
j.CD |
|---|
Rush Moves
| rush
cl.AA/c.AAX
cl.AA/c.AAX |
|---|
Throws
| Suishu Shoukou
(close) 4/6+C
(close) 4/6+C |
|---|
| Suishu Houki
(close) 4/6+D
(close) 4/6+D |
|---|
Command Moves
Genmuken
| Genmuken
6A
6A |
|---|
Air Genmuken
| Air Genmuken
6A
6A |
|---|
Air Genmukyaku
| Air Genmukyaku
j.6B
j.6B |
|---|
Hiei Kyaku
| Hiei Kyaku
6B
6B |
|---|
Target Combo 1
| Target Combo 1
j.B,D
j.B,D |
|---|
Special Moves
Genmukyaku
| Genmukyaku
623B/D/BD
623B/D/BD |
|---|
Shaki Juuryuu 1
| Shaki Juuryuu 1
236A/C/AC
236A/C/AC |
|---|
| Shaki Juuryuu 2
236A/C/AC~6P
236A/C/AC~6P |
|---|
| Shaki Juuryuu 3
236A/C/AC~6P~6P
236A/C/AC~6P~6P |
|---|
| B Himou Kyaku Forward Follow Up
236A/C/AC~6P~6P~6B
236A/C/AC~6P~6P~6B |
|---|
| D Himou Kyaku Forward Follow Up
236A/C/AC~6P~6P~6D
236A/C/AC~6P~6P~6D |
|---|
| EX Himou Kyaku Forward Follow Up
236A/C/AC~6P~6P~6BD
236A/C/AC~6P~6P~6BD |
|---|
| Himou Kyaku Backward Follow Up to EX Rekka Ender
236AC~6P~6P~4K
236AC~6P~6P~4K |
|---|
Juon Shikon
| Juon Shikon
214A/C/AC
214A/C/AC |
|---|
Himou Kyaku Forward
| Himou Kyaku Forward
236B/D/BD
236B/D/BD |
|---|
Himou Kyaku Backward
| Himou Kyaku Backward
214B/D/BD
214B/D/BD |
|---|
Super Special Moves
Hiden Genmu Bakuto Shikon
| Hiden Genmu Bakuto Shikon
214236A/C/AC
214236A/C/AC |
|---|
Hiden Genmu Onryou Heki
| Hiden Genmu Onryou Heki
214214A/C/AC
214214A/C/AC |
|---|
Climax Super Special Moves
Mugen Juon Toubu
| Mugen Juon Toubu
2141236CD
2141236CD |
|---|
