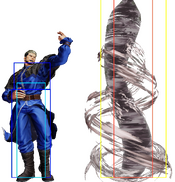
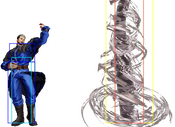
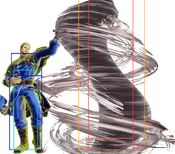
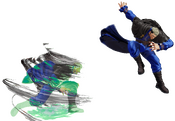
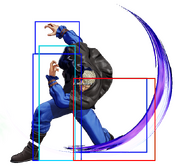
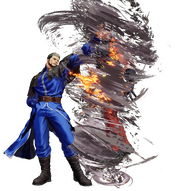
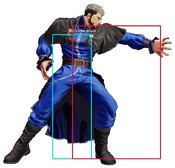
-Happy New Year 2025!
The King of Fighters XV/Goenitz: Difference between revisions
Awesomeguy42 (talk | contribs) |
|||
| (21 intermediate revisions by 4 users not shown) | |||
| Line 97: | Line 97: | ||
==Gameplay Overview== | ==Gameplay Overview== | ||
A former final boss of The King of Fighters '96, Goenitz is a character known for his frustratingly oppressive zoning, backed up by an additional set of tools to surprise opponents who clam up. | A former final boss of The King of Fighters '96, Goenitz is a character known for his frustratingly oppressive zoning, backed up by an additional set of tools to surprise opponents who clam up. However - in '''XV''' - Goenitz zoning is a far cry from what it used to be. Rather, his offense and damage are where he truly shines. | ||
Goenitz's gameplan is simple: control the space with tornadoes, | Goenitz's gameplan is simple: control the space with tornadoes and air normals, and use his speed and EX Yonokaze to call out an opponent's rolls or approaches; these tools, when paired together, allow Goenitz to bait opponents into making mistakes, or simply back themselves into the corner. Though, things are complicated when looking at his middling set of ground normals, which can make Goenitz a tad difficult to pick up and play. | ||
Then, if he's caught with no meter in the midrange, Goenitz has to play an uphill battle of constant pre-emptive reads to build up enough meter to become a threat once more. | |||
'''''However''''', when Goenitz scores a knockdown, nearly ANY knockdown, he can finally do his work. His teleport, overhead, rekkas, high-damaging supers, and on-block framedata give Goenitz surprisingly potent rushdown, complete with meaty setups, frame traps, tick throws, an actually good pressure reset, and even more that the opponent has to account for. Any opponent defending against Goenitz must always be on the lookout for these tricks, on top of the constant threat of EX Yonokaze. | |||
Goenitz is, overall, a high-risk, high-return | Goenitz is, overall, a high-risk, high-return character with little margin for error, both for himself and for his opponent. It can make for especially tense fights, but the thrill of these situations, combined with his unique playstyle, make Goenitz an all-around fun and challenging character to play. | ||
{{StrengthsAndWeaknesses | {{StrengthsAndWeaknesses | ||
| intro = '''''{{SUBPAGENAME}} is | | intro = '''''{{SUBPAGENAME}} is a heavily unique character who uses his specials and EX moves to bait opponents into making small mistakes that end up destroying their health bar.''''' | ||
| pros= | | pros= | ||
* ''' | * '''Synergistic Specials''': Goenitz has a lot of ways to force his opponent to either make a risky approach, or to capitalize on their defensive play. While Yonokaze is nowhere near as strong as it used to be, it's now coupled with a [[The_King_of_Fighters_XV/Goenitz#Hyouga|command dash]] with movement mixups, and a very active [[The_King_of_Fighters_XV/Goenitz#Wanhyo:_Tokobuse/Mametsu|poke]], so Goenitz must rely on his specials with as much thought as his normals to get his opponents in the situations he wants them. | ||
* ''' | * '''Strong Air Buttons''': Goenitz air buttons are all around great. With a jCD that has a great hitbox for offense and walling-out alike, and multiple air normals for every situation, including crossups. These air normals are the ones Goenitz uses for most of his time in neutral, as they lead to better advantage and are more consistent than his ground normals. | ||
* '''Meter Flexibility''': On top of having supers | * '''Combo Utility''': Largely due to the opportunities his cl.D juggle grants him, Goenitz's optimal combos do incredible damage, able to shave off 50% off an opponent's lifebar with a single bar of meter. Additionally, [[The_King_of_Fighters_XV/Goenitz#Shin_Ya_Otome:_Yomotsu|Shin Ya Otome: Yamotsu]] has 2 versions to convert from crazy ranges and heights, making his damage with meter consistent as well. | ||
* ''' | * '''Meter Flexibility''': On top of having supers with great utility, Goenitz has multiple EX moves with various useful functions, including an anywhere juggle, an OTG, and a high damage, plus on block, highly active psuedo-projectile that covers immense space. Finally, his corner juggles are incredibly meter efficient, almost always building back 25-50% of a bar. | ||
* '''Suffocating Pressure''': With his teleport and his run speed, Goenitz can follow up most any solid hit in neutral with his strong offense. To start, Goenitz's frametraps are amazingly safe, with the pushback on his command normal putting him at optimal ranges for CD and Yonokaze counterpokes, and his EX Yonokaze frametraps leaving him ''PLUS''. He also can safely frametrap from heavy normals - a rare sight in XV - leading to reward ranging from good to '''extreme'''. Finally, when Goenitz gets an enemy in the corner, he has a great collection of tools to send them back to the Earth. Not only is everything previously mentioned strong on its own, but Hyouga gives him a fantastic pressure reset, as the D version will sneak past abare (as well as allow him to land a jump in), and the feint version can surprise people looking out for the D version. All of this not only makes it hard to both defend and get out of the corner against him, but it also makes him shockingly difficult to reversal for most of the cast. | |||
| cons= | | cons= | ||
* ''' | * '''Horrendous Defense''': If Goenitz lets an opponent get in on him, he has no consistent tools to get them off without meter. First off, he has to spend at LEAST 2 bars for a reversal, and his abare is among the worst in the game due to its lack of range, coverage, and its extreme whiff recovery. While EX Wanhyo: Tokobuse is great for high jumps, it's extremely limited for hops. In fact, among all of his normals and specials, Goenitz has horrible answers to offensive hops. All of this is compounded by his shoddy backdash, meaning Goenitz doesn't have much to consistently defend with other than guard cancels. This not only makes being in the corner as Goenitz a nightmare, but also creates a dichotomy where even though he can easily start an offensive game from mostly any knockdown, he will also have an incredibly difficult time the moment he gets knocked down even at midscreen. | ||
* ''' | * '''Blindspots''': Goenitz lacks quick presence at complete fullscreen and up close. While EX Yonokaze does a lot of heavy lifting when enemies are near him, it is not good enough to duke with it as your only option - and it requires meter. This means Goenitz will eventually have to make highly risky predictions against fast characters and offensive play, and often times will have to give up space to avoid being put into bad ranges. | ||
* '''Lackluster Ground Normals''': Goenitz's normals on the ground are not truly terrible(for the most part), but are all either very specific in their application or have noticeable shortcomings. Playing Goenitz well requires quick decisionmaking on what normals to use and when. | * '''Lackluster Ground Normals''': Goenitz's normals on the ground are not truly terrible(for the most part), but are all either very specific in their application, have limited conversions, or have other noticeable shortcomings. Playing Goenitz well requires quick decisionmaking on what normals to use and when. Additionally, his standing normals all have extreme whiff recovery, making his normals riskier than the average character. | ||
* '''Big Body''': Though not necessarily an exclusive downside, Goenitz's large frame means he | * '''Big Body''': Though not necessarily an exclusive downside, Goenitz's large frame means he can get hit easier than other characters. This specifically affects Goenitz quite badly due to his lack of answers for air approach, and his shoddy backdash is further weakened by his frame. | ||
}} | * '''''Awful Reaction Anti Airs''''': Goenitz has near absolute nothing for a good reaction anti air, sporting one of the worst 2Cs in the game, he has to rely on specials to anti air. Sadly, his quickest anti air here is an 8f EX move. While this can be used on high jump ins to great effect, it is very difficult to use it on hops without buffering. The result? Goenitz must play very pre-emptively to stop hops - which wouldn't be ''too'' bad if his fast hop checks were any good. And without meter? Goenitz gets practically no pressure or offensive lead at all for most of his hop checks. }} | ||
{{#ev:youtube|iN45aqLxZDE|||'''Character breakdown'''|frame}} | |||
==Normals== | ==Normals== | ||
| Line 196: | Line 199: | ||
* Hits twice. First hit has juggle properties, making it very useful for corner extensions. | * Hits twice. First hit has juggle properties, making it very useful for corner extensions. | ||
* Only the first hit cancels to specials. | * Only the first hit cancels to specials. | ||
A truly bizarre normal that is unusual in its usage as it is in its animation. | A truly bizarre normal that is unusual in its usage as it is in its animation. | ||
Where it will be used most often is in the corner to extend combos after 214AC. However, it | Where it will be used most often is in the corner to extend combos after 214AC. However, it can situationally catch opponents jumping at or over Goenitz, making it occasionally useful against greedy cross-up attempts or desperation jumps from opponents trying to escape the corner. You have to predict the opponent doing so in the latter, but its juggle properties greatly amplify the reward for landing it. | ||
}} | }} | ||
| Line 229: | Line 231: | ||
|moveId=goenitz_2c | |moveId=goenitz_2c | ||
|description= | |description= | ||
* | * Mediocre vertical range, does not actually reach as far as his hand, but decent active frames. | ||
* Abysmal horizontal range, to the point of never being worth going for on a grounded opponent. | * Abysmal horizontal range, to the point of never being worth going for on a grounded opponent. | ||
* Combos to 623AC on hit, regardless of if it hits grounded or airborne. | * Combos to 623AC on hit, regardless of if it hits grounded or airborne. | ||
The only anti-air Goenitz has that doesn't require meter. | The only anti-air Goenitz has that doesn't require meter. Difficult to use and unreliable due to short range, however, which leaves it vulnerable to divekicks and other air specials (such as Najd j.214P). | ||
At six frame startup, | At six frame startup, it's decent for reactive AAing, but timing is required or it may whiff. It can always combo into 623AC, making it more rewarding for mid or anchor Goenitz. | ||
}} | }} | ||
| Line 338: | Line 340: | ||
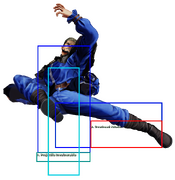
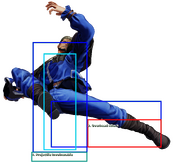
|hitboxCaptions= Hop Version, Jump Version | |hitboxCaptions= Hop Version, Jump Version | ||
|description2= | |description2= | ||
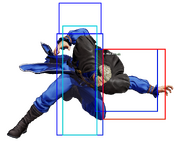
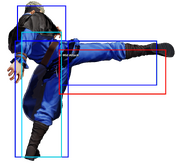
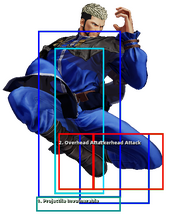
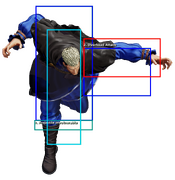
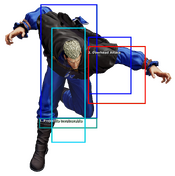
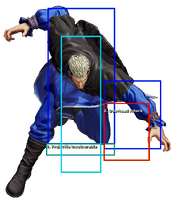
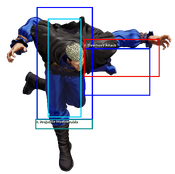
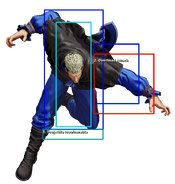
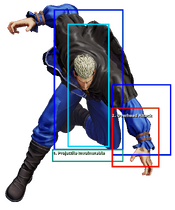
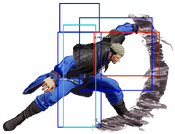
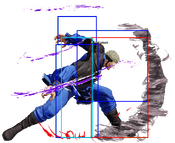
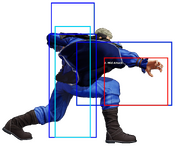
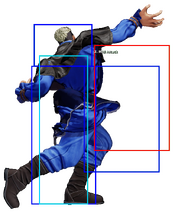
* Has decent reach and the ability to hit below Goenitz | * Has decent reach and the ability to hit below Goenitz | ||
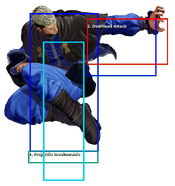
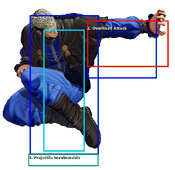
* The vertical and horizontal ranges make it a great tool for retreating when combined with backward hops. However, it's | * The vertical and horizontal ranges make it a great tool for retreating when combined with backward hops. However, it's a little slower than some of his other air-to-air options. | ||
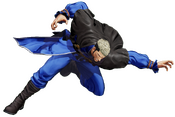
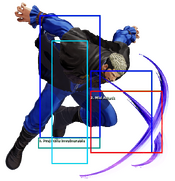
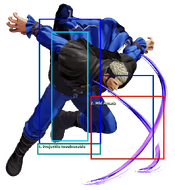
* Goenitz has time for this move after his teleports that leave him airborne (214D and 214BD). | * Goenitz has time for this move after his teleports that leave him airborne (214D and 214BD). | ||
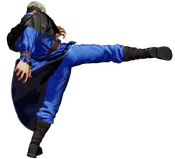
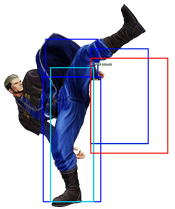
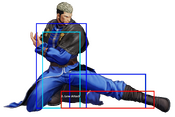
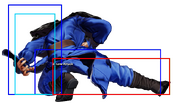
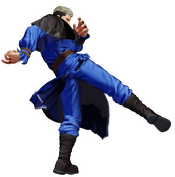
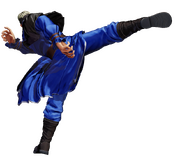
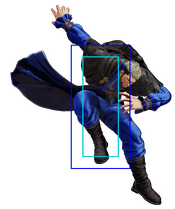
To contrast Goenitz's bad standing CD, he has an excellent jumping CD. This is one of Goenitz's best buttons in neutral as it gives Goenitz a big knockdown button to press while he establishes more space between him and his opponent. | |||
In the corner, or if you hit it close enough, it's possible to combo a 623AC afterward, regardless of whether it counter hits. | In the corner, or if you hit it close enough, it's possible to combo a 623AC afterward, regardless of whether it counter hits. | ||
| Line 352: | Line 354: | ||
|input=cl.AA/c.AAX | |input=cl.AA/c.AAX | ||
|description2= | |description2= | ||
* | *Ends with 623A, 2363214 A/AC or Climax depending on meters and last button pressed. 623A can be stopped to make the rush safe on block. | ||
Ends with 623A, 2363214 A/AC or Climax depending on meters and last button pressed. 623A can be stopped to make the rush safe on block. | |||
}} | }} | ||
==Throws== | ==Throws== | ||
| Line 371: | Line 369: | ||
|name=Yomi e no Michi | |name=Yomi e no Michi | ||
|description= | |description= | ||
* Tosses the opponent full screen | * Tosses the opponent full screen. | ||
}} | }} | ||
| Line 421: | Line 419: | ||
|hitboxCaptions= B Version, , , D Version, , , EX Version | |hitboxCaptions= B Version, , , D Version, , , EX Version | ||
|description3= | |description3= | ||
* All air normals after D and | * All air normals after D and EX versions have one frame of recovery on the ground. This allows Geonitz to combo easily into all of his ground normals and have positive guard advantage. | ||
}} | }} | ||
| Line 464: | Line 462: | ||
|hitboxCaptions= Hitbox is the same for all versions. | |hitboxCaptions= Hitbox is the same for all versions. | ||
|description3= | |description3= | ||
* Place holder | |||
}} | }} | ||
{{FrameDataCargo-KOFXV | {{FrameDataCargo-KOFXV | ||
| Line 469: | Line 468: | ||
|name=Shin Aoihana: Seiran 3 | |name=Shin Aoihana: Seiran 3 | ||
|input=214A/C/AC~4A/C~4A/C | |input=214A/C/AC~4A/C~4A/C | ||
|hitboxCaptions= | |hitboxCaptions= A Version, C and AC Versions | ||
|description3= | |description3= | ||
Keep in mind that the C version ender cannot combo into 236214C due to the latter's slower start up compared to 236214A. | Keep in mind that the C version ender cannot combo into 236214C due to the latter's slower start up compared to 236214A. | ||
| Line 484: | Line 483: | ||
* 623B can only cancel into 214A/C. | * 623B can only cancel into 214A/C. | ||
* 623D/BD can cancel into any special, except for 623K/BD. | * 623D/BD can cancel into any special, except for 623K/BD. | ||
* 623BD can be used to combo after 623C brake. | |||
Combo filler, B and D are used for juggles, BD can be used for juggles or from heavies. | |||
}} | }} | ||
| Line 518: | Line 518: | ||
|input=2141236CD | |input=2141236CD | ||
|description= | |description= | ||
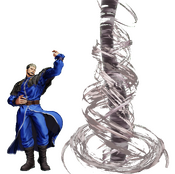
* Spawns an un-reflectable tornado projectile directly in front of | * Spawns an un-reflectable tornado projectile directly in front of Goenitz. | ||
* Initial projectile is identical in size and animation to 426AC | * Initial projectile is identical in size and animation to 426AC. | ||
* When cancelled into from a super, the projectile spawns directly on top of the opponent. | * When cancelled into from a super, the projectile spawns directly on top of the opponent. | ||
Standard cinematic Climax. Above average minimum scaled damage. | |||
}} | }} | ||
Latest revision as of 05:29, 11 January 2025
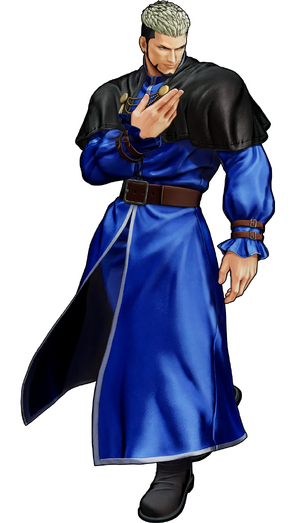
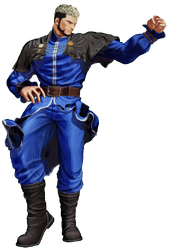
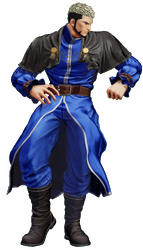
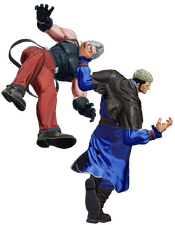
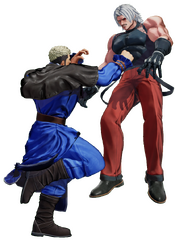
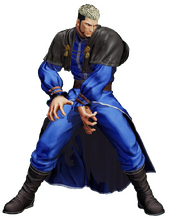
His dignified wardrobe (that of a pastor) and polite mannerisms give off a gentle air, but mask another side of him—that of a ruthless monster quite happy to inflict pain and suffering on those who dare stand in his way.
Hop: 32f
Backdash: 23f
Run Speed Ranking: 3
Movelist
(*) = EX OK
(!) = MAX OK
Throws
Command Normals
Special Moves
Shin Aoihana: Seiran 1 - ![]() +
+ ![]() /
/ ![]() (*)
(*)
Shin Tsumakushi: Yoarashi - ![]() +
+ ![]() /
/ ![]() (*)
(*)
Super Special Moves
Shin Ya Otome: Yomotsu - ![]()
![]()
![]() +
+ ![]() /
/ ![]() (!)
(!)
Climax Super Special Moves
Quick Combo Reference
| 0 Meter |
Anywhere, light starter |
2B > 2A > 214A > 4P > 4P = 139 dmg |
| ½ Meter |
Anywhere, light starter |
2B > 2A > 214AC > 4P > 4P, 623C = 236 dmg |
| 1 Meter |
Anywhere |
2B > 2A > 214A > 4P > 4P > 2363214P = 292 dmg |
| 2 Meter |
Anywhere |
cl.C > 6A > 623BD > 426AC, 623D > 623C > 2363214P = 589 dmg |
Gameplay Overview
A former final boss of The King of Fighters '96, Goenitz is a character known for his frustratingly oppressive zoning, backed up by an additional set of tools to surprise opponents who clam up. However - in XV - Goenitz zoning is a far cry from what it used to be. Rather, his offense and damage are where he truly shines.
Goenitz's gameplan is simple: control the space with tornadoes and air normals, and use his speed and EX Yonokaze to call out an opponent's rolls or approaches; these tools, when paired together, allow Goenitz to bait opponents into making mistakes, or simply back themselves into the corner. Though, things are complicated when looking at his middling set of ground normals, which can make Goenitz a tad difficult to pick up and play. Then, if he's caught with no meter in the midrange, Goenitz has to play an uphill battle of constant pre-emptive reads to build up enough meter to become a threat once more.
However, when Goenitz scores a knockdown, nearly ANY knockdown, he can finally do his work. His teleport, overhead, rekkas, high-damaging supers, and on-block framedata give Goenitz surprisingly potent rushdown, complete with meaty setups, frame traps, tick throws, an actually good pressure reset, and even more that the opponent has to account for. Any opponent defending against Goenitz must always be on the lookout for these tricks, on top of the constant threat of EX Yonokaze.
Goenitz is, overall, a high-risk, high-return character with little margin for error, both for himself and for his opponent. It can make for especially tense fights, but the thrill of these situations, combined with his unique playstyle, make Goenitz an all-around fun and challenging character to play.
| Goenitz is a heavily unique character who uses his specials and EX moves to bait opponents into making small mistakes that end up destroying their health bar. | |
| Pros | Cons |
|
|
Normals
Far Standing Normals
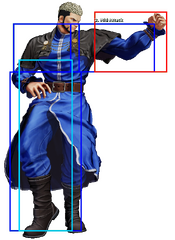
Far A
| stand A
5A
5A |
|---|
Far B
| stand B
5B
5B |
|---|
Far C
| stand C
5C
5C |
|---|
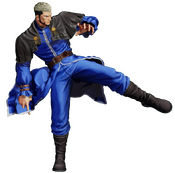
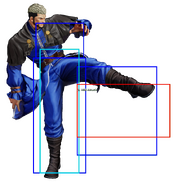
Far D
| stand D
5D
5D |
|---|
Close Standing Normals
Close A
| close A
cl.A
cl.A |
|---|
Close B
| close B
cl.B
cl.B |
|---|
Close C
| close C
cl.C
cl.C |
|---|
Close D
| close D
cl.D
cl.D |
|---|
Crouch Normals
Crouch A
| crouch A
2A
2A |
|---|
Crouch B
| crouch B
2B
2B |
|---|
Crouch C
| crouch C
2C
2C |
|---|
Crouch D
| crouch D
2D
2D |
|---|
Jump Normals
Jump A
| jump A
j.A
j.A |
|---|
Jump B
| jump B
j.B
j.B |
|---|
Jump C
| jump C
j.C
j.C |
|---|
Jump D
| jump D
j.D
j.D |
|---|
Blowback
Blowback
| Blowback
CD
CD |
|---|
Shatter Strike
| ShatterStrike
236CD
236CD |
|---|
AdvanceStrike
| AdvanceStrike
214CD
214CD |
|---|
Jump CD
| jump CD
j.CD
j.CD |
|---|
Rush Moves
| rush
cl.AA/c.AAX
cl.AA/c.AAX |
|---|
Throws
| Meifu no Mon
(close) 4/6+C
(close) 4/6+C |
|---|
| Yomi e no Michi
(close) 4/6+D
(close) 4/6+D |
|---|
Command Moves
Uranagi
| Uranagi
6A
6A |
|---|
Target Combo 1
| Oroshi
5CC
5CC |
|---|
Special Moves
Yonokaze
| Yonokaze
41236A/B/C/D/AC/BD
41236A/B/C/D/AC/BD |
|---|
Hyouga
| Hyouga
214B/D/BD
214B/D/BD |
|---|
Hyouga (Stop)
| Hyouga
214B/D/BD~AB
214B/D/BD~AB |
|---|
Wanhyo: Tokobuse/Mametsu
| Wanhyo: Tokobuse/Mametsu
623A/C/AC
623A/C/AC |
|---|
Shin Aoihana: Seiran
| Shin Aoihana: Seiran 1
214A/C/AC
214A/C/AC |
|---|
| Shin Aoihana: Seiran 2
214A/C/AC~4A/C
214A/C/AC~4A/C |
|---|
| Shin Aoihana: Seiran 3
214A/C/AC~4A/C~4A/C
214A/C/AC~4A/C~4A/C |
|---|
Shin Tsumakushi: Yoarashi
| Shin Tsumakushi: Yoarashi
623B/D/BD
623B/D/BD |
|---|
Super Special Moves
Yami Doukoku
| Yami Doukoku
6321463214A/C/AC
6321463214A/C/AC |
|---|
Shin Ya Otome: Yomotsu
| Shin Ya Otome: Yomotsu
236214A/C/AC
236214A/C/AC |
|---|
Climax Super Special Moves
Tokoshie no Kaze
| Tokoshie no Kaze
2141236CD
2141236CD |
|---|
Misc
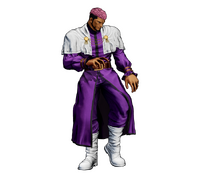
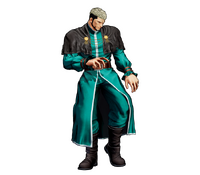
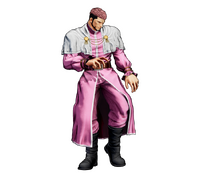
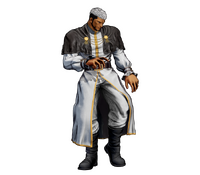
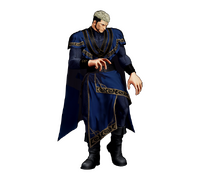
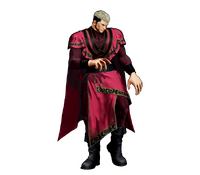
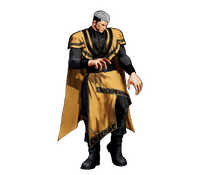
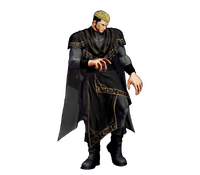
Alternate Colors
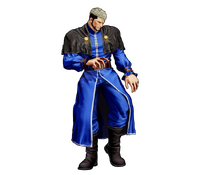 |
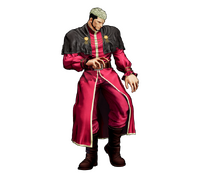 |
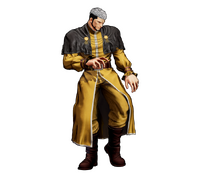 |
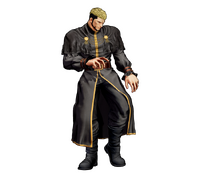 |
 |
 |
 |
 |
 |
 |
 |
 |
 |
 |
 |
 |
