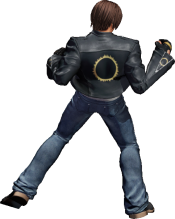
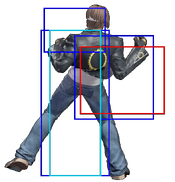
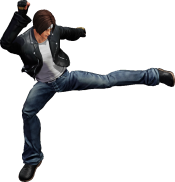
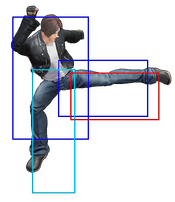
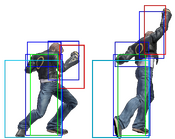
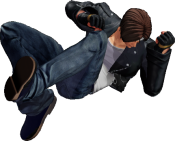
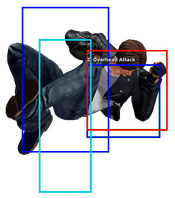
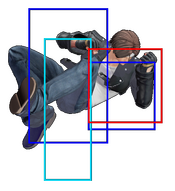
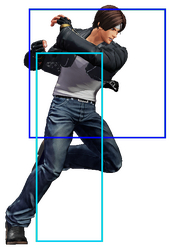
-Happy New Year 2025!
The King of Fighters XV/Kyo Kusanagi: Difference between revisions
Awesomeguy42 (talk | contribs) |
|||
| (44 intermediate revisions by 5 users not shown) | |||
| Line 1: | Line 1: | ||
{{CharNavbox_XV}} | {{CharNavbox_XV}} | ||
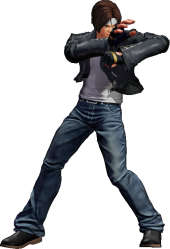
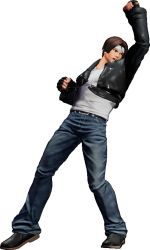
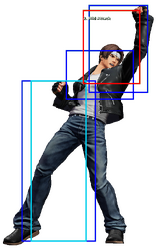
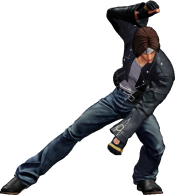
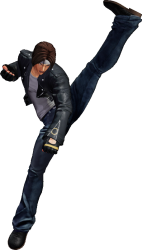
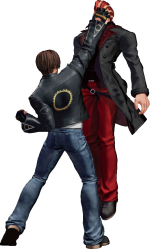
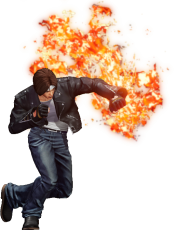
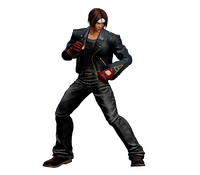
<section begin="image"/>[[File:KOFXV Kyo Profile.png|thumb|Kyo Kusanagi is the heir to the Kusanagi clan and successor of the Kusanagi Style of Ancient Martial Arts. The Kusanagi clan is one of three entrusted with a Sacred Treasure, and thus a cleansing flame resides within Kyo's very own blood.<br/>Though his biggest rival is Iori Yagami, they are both left with little option but to put aside their differences and team up once again for this latest KOF to hopefully prevent Orochi from resurrecting once again.]]<section end="image"/> | <section begin="image"/>[[File:KOFXV Kyo Profile.png|thumb|Kyo Kusanagi is the heir to the Kusanagi clan and successor of the Kusanagi Style of Ancient Martial Arts. The Kusanagi clan is one of three entrusted with a Sacred Treasure, and thus a cleansing flame resides within Kyo's very own blood.<br/>Though his biggest rival is Iori Yagami, they are both left with little option but to put aside their differences and team up once again for this latest KOF to hopefully prevent Orochi from resurrecting once again. | ||
<div class="center" style="width: auto; margin-left: auto; margin-right: auto;"> | |||
<big>'''Jump:''' 40f | |||
<br>'''Hop:''' 32f | |||
<br>'''Backdash:''' 21f | |||
<br>'''Run Speed Ranking:''' 5 | |||
</big></div>]]<section end="image"/> | |||
{{TOClimit|3}} | {{TOClimit|3}} | ||
| Line 69: | Line 75: | ||
| pros= | | pros= | ||
* '''All-Rounder''': Kyo is good at pretty much everything in the midrange and closerange game. He has great normals, great close-range specials, solid confirms, and easy damage thanks to his rekkas. | * '''All-Rounder''': Kyo is good at pretty much everything in the midrange and closerange game. He has great normals, great close-range specials, solid confirms, and easy damage thanks to his rekkas. | ||
* '''Great Close Range Pressure''': Once Kyo is next to his opponent, he becomes a real threat. Moves like his rekka mixups and his EX command grab let him perform high damage conversions with knockdown consistently. Once his opponent is in the corner his game becomes even better, since he gains access to his devastating Orochinagi Loops. | |||
* '''Great Close Range Pressure''': Once Kyo is next to his opponent, he becomes a real threat. Moves like | |||
* '''Shiki Rekkas''': Kyo's rekka's are his most valuable tool. They help him confirm, contest neutral, and muscle through his opponents offense. Good use of them is key to running his gameplan, and they always pay out well when used properly. | * '''Shiki Rekkas''': Kyo's rekka's are his most valuable tool. They help him confirm, contest neutral, and muscle through his opponents offense. Good use of them is key to running his gameplan, and they always pay out well when used properly. | ||
* '''Great Punish Game''': At the cost of 0.5 bars, Kyo can punish moves that might be safe thanks to distance with his 623AC since it travels forward and starts up at 4F. His 236AC also lets him push forward across neutral at high speed, which can be difficult for most characters to react to. | * '''Great Punish Game''': At the cost of 0.5 bars, Kyo can punish moves that might be safe thanks to distance with his 623AC since it travels forward and starts up at 4F. His 236AC also lets him push forward across neutral at high speed, which can be difficult for most characters to react to. | ||
| Line 100: | Line 105: | ||
Corner<br/> | Corner<br/> | ||
| | | | ||
2B > 2A > 3D > 236D, | 2B > 2A > 3D > 236D ~ D, 624K = 191 dmg<br/> | ||
cl.C > 3D > 236D ~ D, 236C, 623C = 284 dmg <br/> | |||
|- | |- | ||
| '''½ Meter''' | | '''½ Meter''' | ||
| Line 108: | Line 113: | ||
Corner<br/> | Corner<br/> | ||
| | | | ||
2B > 2A > 3D > 4214BD | 2B > 2A > 3D > 4214BD, 236B ~ B, 236C ~ 63214C ~ 6C ~ 623C = 294 dmg<br/> | ||
2B > 2A > 3D > 4214BD | 2B > 2A > 3D > 4214BD, 236B ~ B, 236A, 623C = 303 dmg<br/> | ||
|- | |- | ||
| '''1 Meter''' | | '''1 Meter''' | ||
| Line 116: | Line 121: | ||
Corner<br/> | Corner<br/> | ||
| | | | ||
2B > 2A > 3D > 236D, | 2B > 2A > 3D > 236D ~ D, 624K > SC 2141236P = 290 dmg<br/> | ||
2B > 2A > 3D > 236D, | 2B > 2A > 3D > 236D ~ dl.D, 236C, 623A > SC 2141236P, 623A = 327 dmg<br/> | ||
|- | |- | ||
| '''2 Meters''' | | '''2 Meters''' | ||
| Line 124: | Line 129: | ||
Corner<br/> | Corner<br/> | ||
| | | | ||
2B > 2A > 3D > 4214BD | 2B > 2A > 3D > 4214BD, 236B ~ B, 236BD, 236C ~ 63214C > SC 2141236P = 377 dmg <br/> | ||
2B > 2A > 3D > 4214BD | 2B > 2A > 3D > 4214BD, 236B ~ dl.B, 236A, 236BD, 236C, 623A > SC 2141236P, 623C = 453 dmg<br/> | ||
|- | |- | ||
|} | |} | ||
| Line 135: | Line 140: | ||
|moveId=kyo_sta | |moveId=kyo_sta | ||
|description= | |description= | ||
* Whiffs on crouching opponents. | * Whiffs on crouching opponents outside of hitstun. | ||
Hits high enough to effectively jab hops out of the air. Pretty safe to throw out and can combo into his | Hits high enough to effectively jab hops out of the air. Pretty safe to throw out and can combo into his 236A series or 236BD, but vulnerable to crouching moves as it whiffs on crouching opponents that aren't already in hitstun. | ||
}} | }} | ||
| Line 144: | Line 149: | ||
|description= | |description= | ||
* Can be chained into from light normals. | * Can be chained into from light normals. | ||
A quick poke button that is very useful for checking an opponent looking to run in from mid-range. Also somewhat useful in pressure for stuffing some of an opponent's options after some pressure strings, or topping off damage if you are too far away to land a full combo. Damage is not as great as | A quick poke button that is very useful for checking an opponent looking to run in from mid-range. Also somewhat useful in pressure for stuffing some of an opponent's options after some pressure strings, or topping off damage if you are too far away to land a full combo. Damage is not as great as 5D, but is better on whiff than far D. | ||
}} | }} | ||
====Far C==== | ====Far C==== | ||
| Line 153: | Line 158: | ||
* Can be cancelled into specials | * Can be cancelled into specials | ||
Kyo steps forward during the startup of st.C, giving it excellent range. Despite being slower than average, it is a | Kyo steps forward during the startup of st.C, giving it excellent range. Despite being slower than average, it is a fairly strong poke. | ||
}} | }} | ||
| Line 160: | Line 165: | ||
|moveId=kyo_std | |moveId=kyo_std | ||
|description= | |description= | ||
One of Kyo's standout pokes, st.D is fast and has | One of Kyo's standout pokes, st.D is fast and has good range, making it a decent neutral tool. | ||
}} | }} | ||
| Line 177: | Line 182: | ||
|description= | |description= | ||
* Standing low. | * Standing low. | ||
* | * Chains into itself and other light attacks, but has greater pushback. | ||
Chainable standing low that excels at starting blockstrings, but mind the pushback. | |||
}} | }} | ||
| Line 211: | Line 216: | ||
|description= | |description= | ||
* Slower than 2A, can't be staggered. | * Slower than 2A, can't be staggered. | ||
}} | }} | ||
| Line 234: | Line 239: | ||
|name=jump A | |name=jump A | ||
|input=j.A | |input=j.A | ||
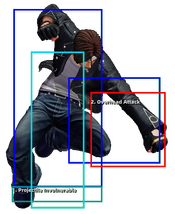
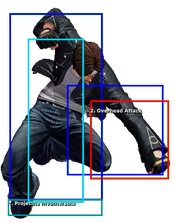
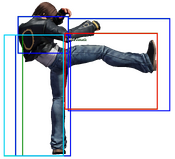
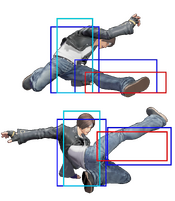
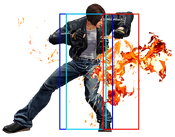
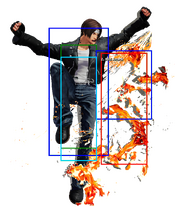
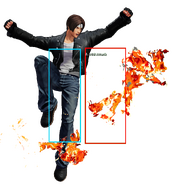
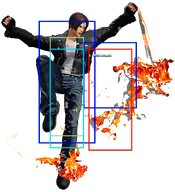
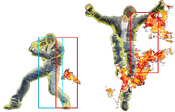
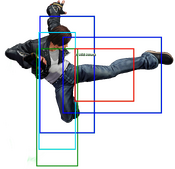
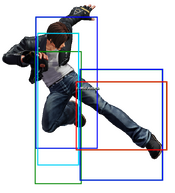
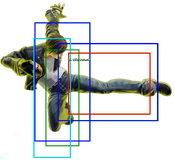
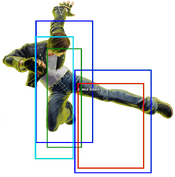
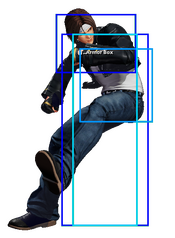
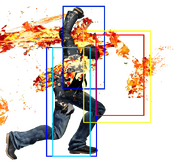
|hitboxCaptions= Hop Version, Jump Version | |||
|description2=* Lifts his legs up, helping him hop over projectiles. | |description2=* Lifts his legs up, helping him hop over projectiles. | ||
}} | }} | ||
====Jump B==== | ====Jump B==== | ||
{{FrameDataCargo-KOFXV | {{FrameDataCargo-KOFXV | ||
|moveId=kyo_hb,kyo_jb | |moveId=kyo_hb, kyo_jb | ||
|name=jump B | |name=jump B | ||
|input=j.B | |input=j.B | ||
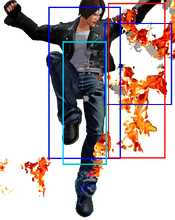
|hitboxCaptions= Hop Version, Jump Version | |||
|description2=* Kyo's go to Crossup button. | |description2=* Kyo's go to Crossup button. | ||
* Great way to deal with low-profiling attempts. | * Great way to deal with low-profiling attempts. | ||
| Line 251: | Line 258: | ||
|name=jump C | |name=jump C | ||
|input=j.C | |input=j.C | ||
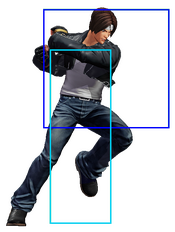
|description2= | |hitboxCaptions= Hop Version, Jump Version | ||
|description2= | |||
Strong jump-in, hits fairly deep, very active. Kyo's best air button for starting a combo from. | |||
}} | }} | ||
====Jump D==== | ====Jump D==== | ||
{{FrameDataCargo-KOFXV | {{FrameDataCargo-KOFXV | ||
| Line 258: | Line 268: | ||
|name=jump D | |name=jump D | ||
|input=j.D | |input=j.D | ||
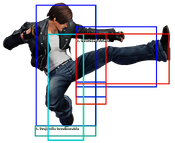
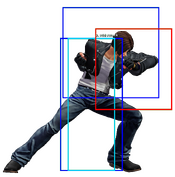
|hitboxCaptions= Hop Version, Jump Version | |||
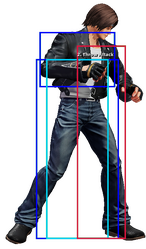
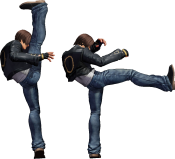
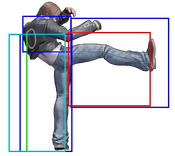
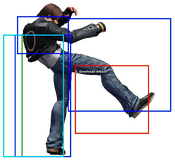
|description2=* Kyo's longest air normal. | |description2=* Kyo's longest air normal. | ||
A great air to air button with good range. Its hitbox make it great to stop air approaches but limits its use as an offensive jump-in since it has to be done very late for it to hit on crouching opponents. | A great air to air button with good range. Its hitbox make it great to stop air approaches but limits its use as an offensive jump-in since it has to be done very late for it to hit on crouching opponents. | ||
| Line 271: | Line 282: | ||
Kyo slides slightly backwards before dealing a massive blow with his shoulders. Since it shrinks his hurtbox it can be used to create whiff punish situations with the correct spacing and make it less minus on block or even plus. ''ex.:2B>2B>2B>CD'' | Kyo slides slightly backwards before dealing a massive blow with his shoulders. Since it shrinks his hurtbox it can be used to create whiff punish situations with the correct spacing and make it less minus on block or even plus. ''ex.:2B>2B>2B>CD'' | ||
Extremely good CD for ground offense, but has a nasty habit of whiffing against hops. A staple for Kyo's pressure due to its movement, disjoint, relative safety and whiff cancel options. | |||
}} | }} | ||
| Line 280: | Line 291: | ||
*Same animation and range as his CD | *Same animation and range as his CD | ||
Having the same forward movement makes his Shatter Strike good on offensive reads from considerable range. Can be followed up by 236BB for great reward on hit | Having the same forward movement makes his Shatter Strike good on offensive reads from considerable range. Can be followed up by 236BB for great reward on hit | ||
}} | |||
====AdvanceStrike==== | |||
{{FrameDataCargo-KOFXV | |||
|moveId=kyo_qcb+cd | |||
|description= | |||
*Same animation and range as his CD. | |||
* The throw counter is at the feet. | |||
}} | }} | ||
| Line 287: | Line 307: | ||
|name=jump CD | |name=jump CD | ||
|input=j.CD | |input=j.CD | ||
|hitboxCaptions= Hop Version, Jump Version | |||
|description2=* Very aggressive and deep hitting. | |description2=* Very aggressive and deep hitting. | ||
A great tool for offensive approach. Once the hitbox is active, and with forward momentum, it will most likely win or trade against most air buttons and ground normals giving you a soft knockdown letting you attempt another offensive approach. | A great tool for offensive approach. Once the hitbox is active, and with forward momentum, it will most likely win or trade against most air buttons and ground normals giving you a soft knockdown letting you attempt another offensive approach. | ||
| Line 323: | Line 344: | ||
|moveId=kyo_6B | |moveId=kyo_6B | ||
|input=6B | |input=6B | ||
| | |imageCaptions="Outer Style: Roaring Axe of Heaven" | ||
|hitboxCaptions= Raw Version, , Cancel Version | |||
|description= | |description= | ||
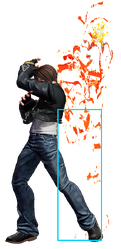
* Standing overhead | * Standing overhead | ||
| Line 335: | Line 357: | ||
|moveId=kyo_3D | |moveId=kyo_3D | ||
|input=3D | |input=3D | ||
| | |imageCaptions="Style 88" | ||
|hitboxCaptions= Raw Version, , Cancel Version | |||
|description= | |description= | ||
* Two hits, both low | * Two hits, both low | ||
| Line 349: | Line 372: | ||
|captions="Outer Style: Hell Drop" | |captions="Outer Style: Hell Drop" | ||
|description= | |description= | ||
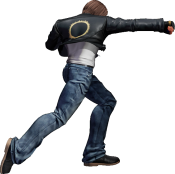
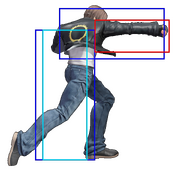
* Hard knockdown on airborne opponents. | * Hard knockdown on airborne opponents. | ||
Kyo combines his fists and slams down on the opponent. Heavily nerfed from his 2D era, it has potential to crossup opponents but j.B does a better job at it and, while his dowward hitbox is | Kyo combines his fists and slams down on the opponent. Heavily nerfed from his 2D era, it has potential to crossup opponents but j.B does a better job at it and, while his dowward hitbox is decent, the forward hitbox is smaller than his j.B or j.A making it a bad air to air option even if it slams aerial opponents back down to the ground in a hard knockdown. This move can be done during a backdash to slightly extend travel distance, reduce landing recovery, and shorten your hitbox. When your back is to the corner, doing it out of a backdash has some niche use as a quick overhead. | ||
}} | }} | ||
| Line 360: | Line 382: | ||
|moveId=kyo_dp+A,kyo_dp+C,kyo_dp+AC | |moveId=kyo_dp+A,kyo_dp+C,kyo_dp+AC | ||
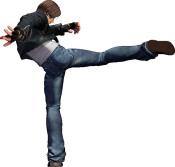
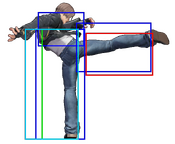
|input=623A/C/AC | |input=623A/C/AC | ||
| | |imageCaptions="Method 100: Demon Burner" | ||
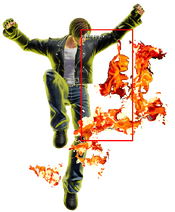
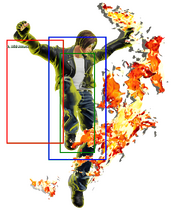
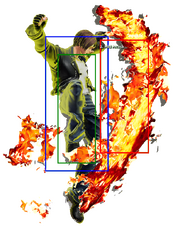
|hitboxCaptions= A Version, , , C Version, , , EX Version | |||
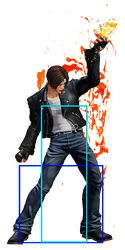
|description3= | |description3= | ||
* A version hits twice | * A version hits twice and has some invincibility to physical air attacks. | ||
* C version hits thrice, fully invincible meterless reversal. | * C version hits thrice, fully invincible meterless reversal. | ||
Kyo's Dragon Punch-styled special. All versions result in a techable knockdown and have relatively long recovery time, and as a result are unsafe on whiff or block. Grounded hits of this move (except for EX version) can be cancelled into ground supers. | Kyo's Dragon Punch-styled special. All versions result in a techable knockdown and have relatively long recovery time, and as a result are unsafe on whiff or block. Grounded hits of this move (except for EX version) can be cancelled into ground supers. | ||
| Line 378: | Line 401: | ||
|moveId=kyo_4214B,kyo_4214D,kyo_4214BD | |moveId=kyo_4214B,kyo_4214D,kyo_4214BD | ||
|input=4214B/D/BD | |input=4214B/D/BD | ||
| | |imageCaptions="Rainbow Energy Dynamite Kick" | ||
|hitboxCaptions= B Version, , ,D Version, , ,EX Version | |||
|description3= | |description3= | ||
* Hard knockdown on B/D versions | * Hard knockdown on B/D versions | ||
| Line 395: | Line 419: | ||
|moveId=kyo_236b,kyo_236d,kyo_236bd | |moveId=kyo_236b,kyo_236d,kyo_236bd | ||
|input=236B/D/BD | |input=236B/D/BD | ||
| | |imageCaptions="Method 75: Revision" | ||
|hitboxCaptions= Normal Verison, EX Version | |||
|description3= | |description3= | ||
* This two-part launcher is a staple of Kyo's combo game. | * This two-part launcher is a staple of Kyo's combo game. | ||
* Should you fail to hitconfirm into it, you can still save yourself from punishment by delaying the 2nd hit. | * Should you fail to hitconfirm into it, you can still save yourself from punishment by delaying the 2nd hit. | ||
* B version keeps the opponent grounded, D version knocks down, and EX version automatically performs the follow-up. | * B version keeps the opponent grounded, D version knocks down, and EX version automatically performs the follow-up. | ||
* Covers a lot of airspace. | * Regular versions adds an extra 5% combo scaling. | ||
* Covers a lot of airspace. | |||
* '''EX''' version allows for a continued juggle if 236K,K has already been used. If 236BD is used first, you can still perform the meterless 236K,K | * '''EX''' version allows for a continued juggle if 236K,K has already been used. If 236BD is used first, you can still perform the meterless 236K,K | ||
}} | }} | ||
| Line 406: | Line 432: | ||
===75 • Shiki Kai (Follow Up)=== | ===75 • Shiki Kai (Follow Up)=== | ||
{{FrameDataCargo-KOFXV | {{FrameDataCargo-KOFXV | ||
|moveId=kyo_236bk,kyo_236dk | |moveId=kyo_236bk,kyo_236dk | ||
|input=B/D after Shiki Kai B/D | |input=B/D after Shiki Kai B/D | ||
| | |description2= | ||
* Delayable follow-up launcher. | * Delayable follow-up launcher. | ||
* As with the first kick, regular versions adds an extra 5% combo scaling, for a total of 20% after both hits land. | |||
* Both versions can be delayed to the point where the combo drops, where the D version at least still causes a knockdown. | * Both versions can be delayed to the point where the combo drops, where the D version at least still causes a knockdown. | ||
* '''EX''' version performs its follow-up automatically at fastest timing. Whiffs on crouch block. | * '''EX''' version performs its follow-up automatically at fastest timing. Whiffs on crouch block. | ||
| Line 456: | Line 483: | ||
|moveId=kyo_qcf+A | |moveId=kyo_qcf+A | ||
|input=236A | |input=236A | ||
| | |imageCaptions="Method 114: Wild Bite"<br> | ||
<small>"Your body... is weak!"</small> | <small>"Your body... is weak!"</small> | ||
|hitboxCaptions= , Hitbox in Neutral, Hit State Only Hitbox | |||
|description= | |description= | ||
* Rekka starter. | * Rekka starter. | ||
| Line 474: | Line 502: | ||
* Rekka chain bridge | * Rekka chain bridge | ||
Kyo uppercuts his opponent after Aragami. This is mostly just your filler follow-up, not much special other than adding combo damage and making Kyo's rekka enders consistent. Leads to a soft knockdown if done without the other two follow-ups. Immensely unsafe on block, though it can be used as a (very) risky frame-trap if the opponent tries to press a button after blocking Aragami. | Kyo uppercuts his opponent after Aragami. This is mostly just your filler follow-up, not much special other than adding combo damage and making Kyo's rekka enders consistent. Leads to a soft knockdown if done without the other two follow-ups. Immensely unsafe on block, though it can be used as a (very) risky frame-trap if the opponent tries to press a button after blocking Aragami. | ||
There is a built-in safeguard to prevent 236A>236P's input overlap from causing an unwanted super cancel into 236236P. As such, it impossible to super cancel this move by inputting a super before this move hits. Doing so will instead result in Yanosabi (A/C ender) launching. If going for a super cancel, make sure to press the button for the super ''after'' Konokizu hits. | |||
}} | }} | ||
| Line 541: | Line 571: | ||
* Rekka chain bridge | * Rekka chain bridge | ||
* Hits low | * Hits low | ||
* Adds an extra 25% to combo scaling. | |||
* Trades with 3f moves when done immediately from 236A on block | * Trades with 3f moves when done immediately from 236A on block | ||
Kyo swings for the opponent's feet with this brand new rekka chain route. Like other chains, this can be used to frametrap and as a low mix-up complement to his overhead chain. Can also catch opponents trying to back walk or backdash out of rekka pressure. The low profile and solid pushback on block make this very difficult to punish properly without specific reads, and the 3F frametrap will catch any attempts to mash out. | Kyo swings for the opponent's feet with this brand new rekka chain route. Like other chains, this can be used to frametrap and as a low mix-up complement to his overhead chain. Can also catch opponents trying to back walk or backdash out of rekka pressure. The low profile and solid pushback on block make this very difficult to punish properly without specific reads, and the 3F frametrap will catch any attempts to mash out. | ||
| Line 574: | Line 605: | ||
|moveId=kyo_236c,kyo_236ac | |moveId=kyo_236c,kyo_236ac | ||
|input=236C/AC | |input=236C/AC | ||
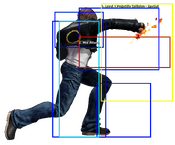
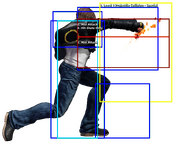
| | |imageCaptions="Method 115: Poison Bite" | ||
|hitboxCaptions= Normal Version, , EX Version | |||
|description2= | |description2= | ||
* Longer rekka with even more auto guard. | * Longer rekka with even more auto guard. | ||
| Line 585: | Line 617: | ||
|moveId=kyo_236C~63214P,kyo_236AC~63214P | |moveId=kyo_236C~63214P,kyo_236AC~63214P | ||
|input=236C/AC~63214A/AC | |input=236C/AC~63214A/AC | ||
| | |imageCaptions="Method 401: Crime Composition" | ||
|hitboxCaptions= Normal Version, EX Version | |||
|description2= | |description2= | ||
* Very short. Has a tendency to whiff, especially after the EX version. | * Very short. Has a tendency to whiff, especially after the EX version. | ||
| Line 612: | Line 645: | ||
|moveId=kyo_63214b,kyo_63214d,kyo_63214bd | |moveId=kyo_63214b,kyo_63214d,kyo_63214bd | ||
|input=63214B/D/BD | |input=63214B/D/BD | ||
| | |imageCaptions="Method 212: Harp Moon of Heaven", "Burn!" | ||
|hitboxCaptions= B Version, , , D Version, , , EX Version | |||
|description3= | |description3= | ||
* Kyo runs forward and triggers an attack when close. | * Kyo runs forward and triggers an attack when close. | ||
| Line 618: | Line 652: | ||
* Powerful combo ender, but when super canceled make sure to do it on the last hit. | * Powerful combo ender, but when super canceled make sure to do it on the last hit. | ||
* EX is a 3f grab with no running. | * EX is a 3f grab with no running. | ||
* | * Much better oki than most rekka enders, especially midscreen. | ||
A hitgrab where Kyo charges forward to grab the opponent, detonating them in his fist if he isn't blocked. This is Kyo's best meterless ender, granting great damage and corner carry as well as a hard knockdown. Can be easily cancelled into either of Kyo's supers for consistent damage. If you're learning Kyo, try to end most of your combos with this move if possible. | A hitgrab where Kyo charges forward to grab the opponent, detonating them in his fist if he isn't blocked. This is Kyo's best meterless ender, granting great damage and corner carry as well as a hard knockdown. Can be easily cancelled into either of Kyo's supers for consistent damage. If you're learning Kyo, try to end most of your combos with this move if possible. | ||
| Line 631: | Line 665: | ||
|name=Ura 108 Shiki • Orochinagi | |name=Ura 108 Shiki • Orochinagi | ||
|input=214236A/C/AC | |input=214236A/C/AC | ||
| | |imageCaptions="Reverse Method 108: Serpentine Mowdown"<br> | ||
<small>"Chew on this!"</small> | <small>"Chew on this!"</small> | ||
|hitboxCaptions= Normal Version Charge, Normal Version, , Max Version Charge, Max Version | |||
|description2= | |description2= | ||
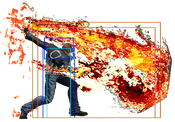
* If A or C version held for 60 frames since super freeze, it will launch significantly faster and deal 30 more damage. This faster version will combo from the same setups as if the button was not held. | * If A or C version held for 60 frames since super freeze, it will launch significantly faster and deal 30 more damage. This faster version will combo from the same setups as if the button was not held. | ||
| Line 649: | Line 684: | ||
|name=182 Shiki | |name=182 Shiki | ||
|input=236236A/C/AC | |input=236236A/C/AC | ||
| | |imageCaptions="Method 182" | ||
|hitboxCaptions= Both Versions Charge, Normal Version, , Max Version | |||
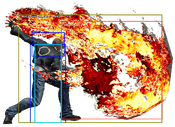
|description2=* Just as his Orochinagi, holding A or C after the super flash will make it deal more damage. | |description2=* Just as his Orochinagi, holding A or C after the super flash will make it deal more damage. | ||
* The A/C versions give better oki than his A/C Orochinagi since it leaves the opponent close to Kyo | * The A/C versions give better midscreen oki than his A/C Orochinagi since it leaves the opponent close to Kyo. | ||
Kyo rushes forward with a series of fire-empowered blows, ending with an explosion that gives a generous amount of frame advantage. | Kyo rushes forward with a series of fire-empowered blows, ending with an explosion that gives a generous amount of frame advantage. | ||
Ultimately, | Ultimately, you will be using Orochinagi more than this move. This move's most common use cases are that it is easier to cancel into off a raw DP and it will combo off normals that are directly super cancelled(e.g. far D or 6B). Not a bad super, but outclassed by Orochinagi as a combo ender in most cases. | ||
}} | }} | ||
| Line 665: | Line 700: | ||
|input=2141236CD | |input=2141236CD | ||
|captions="Reverse Method 1212: Eight Clouds" | |captions="Reverse Method 1212: Eight Clouds" | ||
|description=* Launches a fast projectile that travels about 90% of the screen. Because of the slightly slow startup and mid-level hitbox, climax cancels from juggles using A/C versions of 182 Shiki will miss. While the total base damage is | |description=* Launches a fast projectile that travels about 90% of the screen. Because of the slightly slow startup and mid-level hitbox, climax cancels from juggles using A/C versions of 182 Shiki will miss. While the total base damage is 510, it never reaches this value as it scales itself with its own hits. This makes the climax scale better in longer rather than shorter combos. | ||
}} | }} | ||
{{Colors-KOFXV}} | {{Colors-KOFXV}} | ||
==Videos== | ==Videos== | ||
{{#ev:youtube|fEx2_jSqbRo|||'''Kyo Kusanagi Reveal Trailer'''|frame}} | {{#ev:youtube|fEx2_jSqbRo|||'''Kyo Kusanagi Reveal Trailer'''|frame}} | ||
Latest revision as of 08:14, 9 March 2025
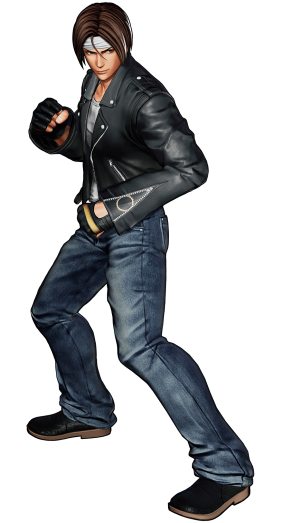
Though his biggest rival is Iori Yagami, they are both left with little option but to put aside their differences and team up once again for this latest KOF to hopefully prevent Orochi from resurrecting once again.
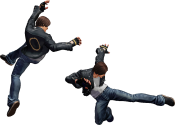
Hop: 32f
Backdash: 21f
Run Speed Ranking: 5
Movelist
(*) = EX OK
(!) = MAX OK
(Midair Only) = Can only be done in the air.
Throws
Command Normals
Geshiki Naraku Otoshi - ![]() /
/ ![]() /
/ ![]() +
+ ![]() (Midair Only)
(Midair Only)
Special Moves
212 Shiki * Kototsuki Yo - ![]() +
+ ![]() /
/ ![]() (*)
(*)
Super Special Moves
Ura 108 Shiki * Orochinagi: ![]()
![]()
![]() +
+ ![]() /
/ ![]() (!)
(!)
Climax Super Special Moves
Gameplay Summary
Kyo Kusanagi is a well-rounded character who works best at close range thanks to his many different ways to mix up the opponent. Kyo's Aragami special moves allow him to choose between a variety of different routes to hit the opponent high or low, though smart use of them is required since they are often punishable if blocked and can be reversal'ed through. In addition to high/low mixups, Kyo also has a strong cross-up game thanks to j.B and j.2C, as well as a command grab via EX Kototsuki Yo. For his neutral game, Kyo has a number of great normals to help him contest space. If all else fails, he can muscle through with his excellent DP and begin his close range game. Finally, Kyo also has great meterless/0.5 bar damage, especially in the corner. He works well in any team position, but is best played mid thanks to his great meter burn and weakness to zoning. Since many zoners become much stronger with meter, Kyo wants to get in and take care of as much of the enemy team as he can before allowing his other teammates to capitalize on his incredible meter build. Kyo is a good choice for both KOF beginners and veterans alike, as his strong fundamentals, great mixups and solid damage will take players far no matter their skill level.
| Kyo Kusanagi is a strong close-range combatant who utilizes his signature rekkas to finish his opponents or open them up. | |
| Pros | Cons |
|
|
Quick Combo Reference
In a nutshell:
Kyo's general combo structure can be summarized as
Any normal > 3D > 236D,D launcher > 624K > Super.
However, his most damaging routes may be more execution heavy; such as the use of charged Orochinagi, Orochinagi loops or his 212 Shiki OTG rekka follow up. This may require good use of KOF's buffering system and/or the use of shortcuts.
ex.: 623A > 2141236A = 632146A > 236A; 236C > 63214C > 2141236A = 236C > 63214C > 236A
| 0 Meter |
Low confirm |
2B > 2A > 3D > 236D ~ D, 624K = 191 dmg |
| ½ Meter |
Low confirm |
2B > 2A > 3D > 4214BD, 236B ~ B, 236C ~ 63214C ~ 6C ~ 623C = 294 dmg |
| 1 Meter |
Anywhere |
2B > 2A > 3D > 236D ~ D, 624K > SC 2141236P = 290 dmg |
| 2 Meters |
Anywhere |
2B > 2A > 3D > 4214BD, 236B ~ B, 236BD, 236C ~ 63214C > SC 2141236P = 377 dmg |
Normals
Far Standing Normals
Far A
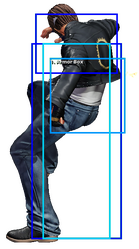
| far A
f.A
f.A |
|---|
Far B
| far B
f.B
f.B |
|---|
Far C
| far C
f.C
f.C |
|---|
Far D
| far D
f.D
f.D |
|---|
Close Standing Normals
Close A
| close A
c.A
c.A |
|---|
Close B
| close B
c.B
c.B |
|---|
Close C
| close C
c.C
c.C |
|---|
Close D
| close D
c.D
c.D |
|---|
Crouch Normals
Crouch A
| crouch A
2A
2A |
|---|
Crouch B
| crouch B
2B
2B |
|---|
Crouch C
| crouch C
2C
2C |
|---|
Crouch D
| crouch D
2D
2D |
|---|
Jump Normals
Jump A
| jump A
j.A
j.A |
|---|
Jump B
| jump B
j.B
j.B |
|---|
Jump C
| jump C
j.C
j.C |
|---|
Jump D
| jump D
j.D
j.D |
|---|
Blowback
Blowback
| Blowback
CD
CD |
|---|
ShatterStrike
| ShatterStrike
qcf+CD
qcf+CD |
|---|
AdvanceStrike
| AdvanceStrike
qcb+CD
qcb+CD |
|---|
jump CD
| jump CD
j.CD
j.CD |
|---|
Rush Moves
| rush
cl.AA/c.AAX
cl.AA/c.AAX |
|---|
Throws
| Hatsugane
4/6C
4/6C |
|---|
| Issetsu Seoi Nage
4/6D
4/6D |
|---|
Command Moves
| Ge Shiki • Gofu Yo
6B
6B |
|---|
| 88 Shiki
3D
3D |
|---|
| Geshiki Naraku Otoshi
j.2C
j.2C |
|---|
Special Moves
100 Shiki • Oniyaki
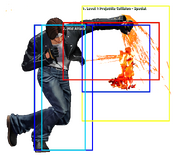
| 100 Shiki • Oniyaki
623A/C/AC
623A/C/AC |
|---|
R.E.D Kick
| R.E.D. Kick
4214B/D/BD
4214B/D/BD |
|---|
75 Shiki • Kai
| 75 Shiki • Kai
236B/D/BD
236B/D/BD |
|---|
75 • Shiki Kai (Follow Up)
| 75 Shiki • Kai (Follow Up)
B/D after Shiki Kai B/D
B/D after Shiki Kai B/D |
|---|
114 Shiki • Aragami
Kyo's 236A rekka can go into a couple different chains and a couple different enders, all with different uses. While they are listed seperately here as they all require detail, it may become confusing to follow along. To save you a bit of trouble, here is a table of the chains and a brief description of each, and you can scroll down and continue reading for more in-depth explanations of the specifics and usages for each rekka part.
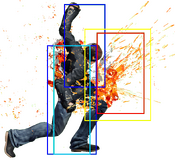
| 114 Shiki • Aragami
236A
236A |
|---|
128 Shiki • Konokizu (Aragami chain)
| 128 Shiki • Konokizu
236A/C after 114 Shiki • Aragami
236A/C after 114 Shiki • Aragami |
|---|
125 Shiki • Nanase (Aragami chain)
| 127 Shiki • Nanase
B/D after 128 Shiki • Konokizu
B/D after 128 Shiki • Konokizu |
|---|
127 Shiki • Yanosabi 1 (Aragami chain)
| 127 Shiki • Yanosabi
A/C after 128 Shiki • Konokizu
A/C after 128 Shiki • Konokizu |
|---|
127 Shiki • Yanosabi 2 (Aragami chain)
| 127 Shiki • Yanosabi (2)
63214A/C after 114 Shiki • Aragami
63214A/C after 114 Shiki • Aragami |
|---|
212 Shiki • Kototsuki Yo (Aragami chain)
| 212 Shiki • Kototsuki Yo
63214B/D after 127 Shiki • Yanosabi 2
63214B/D after 127 Shiki • Yanosabi 2 |
|---|
Ge-Shiki • Migari Ugachi (Aragami chain)
| Ge-Shiki • Migari Ugachi
A/C after Yanosabi (2)
A/C after Yanosabi (2) |
|---|
124 Shiki • Munotsuchi (Aragami chain)
| 124 Shiki • Munotsuchi
63214B/D after Yanosabi (2)
63214B/D after Yanosabi (2) |
|---|
427 Shiki • Hikigane (Aragami chain)
| 427 Shiki • Hikigane
B/D after Munotsuchi
B/D after Munotsuchi |
|---|
Ge-Shiki • Tsurubeotoshi (Aragami chain)
| Ge-Shiki • Tsurubeotoshi
A/C after Munotsuchi
A/C after Munotsuchi |
|---|
115 Shiki • Dokugami
| 115 Shiki: Dokugami
236C/AC
236C/AC |
|---|
401 Shiki • Tsumiyomi (Dokugami chain)
| 401 Shiki • Tsumiyomi
236C/AC~63214A/AC
236C/AC~63214A/AC |
|---|
402 Shiki • Batsuyomi (Dokugami chain)
| 401 Shiki • Batsuyomi
236C/AC~63214A/C~6A/C
236C/AC~63214A/C~6A/C |
|---|
100 Shiki • Oniyaki (Dokugami chain)
| 100 Shiki • Oniyaki (2)
236C/AC~63214A/C~6A/C~623A/C
236C/AC~63214A/C~6A/C~623A/C |
|---|
212 Shiki • Kototsuki Yo
| 212 Shiki • Kototsuki Yo
63214B/D/BD
63214B/D/BD |
|---|
Super Special Moves
Ura 108 Shiki • Orochinagi
| Ura 108 Shiki • Orochinagi
214236A/C/AC
214236A/C/AC |
|---|
182 Shiki
| 182 Shiki
236236A/C/AC
236236A/C/AC |
|---|
Climax Super Special Moves
Ura 1212 Shiki • Yakumo
| Ura 1212 Shiki • Yakumo
2141236CD
2141236CD |
|---|
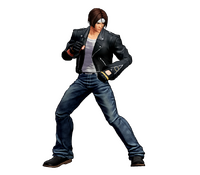
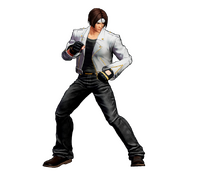
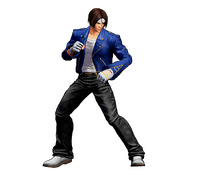
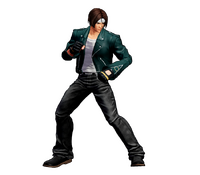
Alternate Colors
 |
 |
 |
 |
 |
 |
 |
 |
