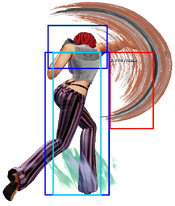
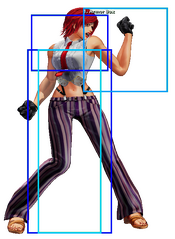
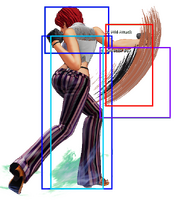
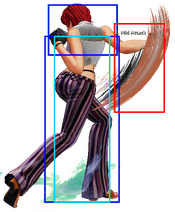
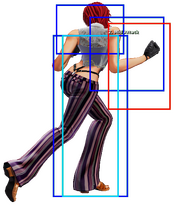
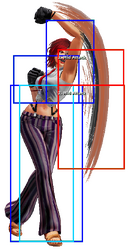
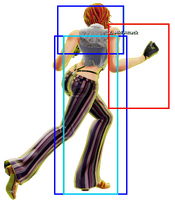
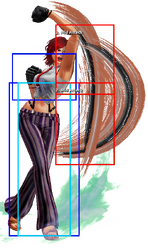
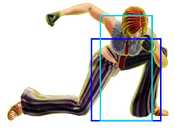
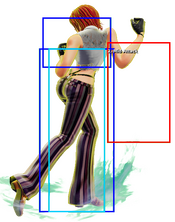
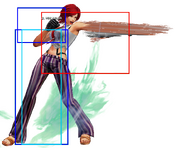
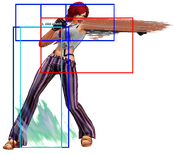
-Happy New Year 2025!
The King of Fighters XV/Vanessa: Difference between revisions
Callie Rose (talk | contribs) |
Ayoitsdave (talk | contribs) |
||
| (180 intermediate revisions by 15 users not shown) | |||
| Line 1: | Line 1: | ||
[[File:KOFXV Vanessa Profile.png|right | {{CharNavbox_XV}} | ||
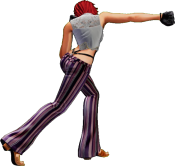
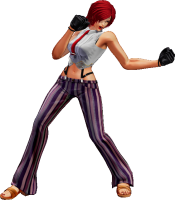
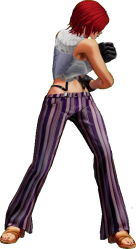
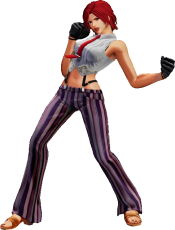
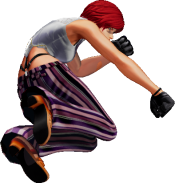
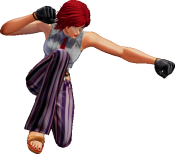
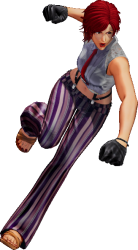
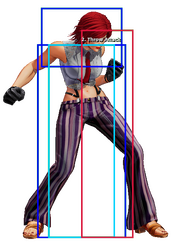
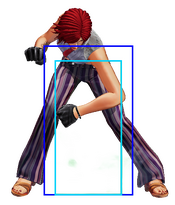
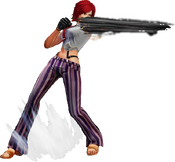
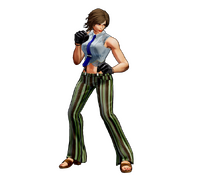
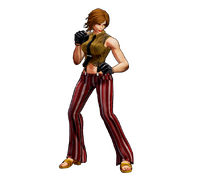
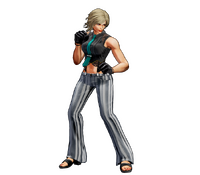
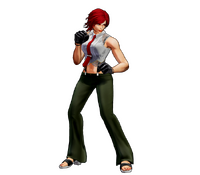
<section begin="image"/>[[File:KOFXV Vanessa Profile.png|thumb|Vanessa lives a double life between being a housewife and a mercenary agent. She is highly skilled in boxing and is able to KO her opponents with ease.<br/>Her husband and kid don't know anything about her secret activities. | |||
<div class="center" style="width: auto; margin-left: auto; margin-right: auto;"> | |||
<big>'''Jump:''' 40f | |||
<br>'''Hop:''' 32f | |||
<br>'''Backdash:''' 21f | |||
<br>'''Run Speed Ranking:''' 2 | |||
</big></div>]]<section end="image"/> | |||
{{TOClimit|3}} | {{TOClimit|3}} | ||
==Movelist== | |||
'''Throws''' | |||
Barrett Puncher (Forward) - [[image:bk.gif]] / [[image:fd.gif]] + [[image:c.gif]] | |||
Clinch Puncher (Backward) - [[image:bk.gif]] / [[image:fd.gif]] + [[image:c.gif]] | |||
'''Command Normals''' | '''Command Normals''' | ||
One Two Puncher - [[image:bk.gif]] / [[image:fd.gif]] + [[image:a.gif]] | |||
Sliding Puncher - [[image:df.gif]] + [[image:d.gif]] | |||
'''Special Moves''' | '''Special Moves''' | ||
Machine Gun Puncher - [[image:hcf.gif]] + [[image:a.gif]] / [[image:c.gif]] (*) | |||
Dash Puncher - [[image:bk.gif]] ~ [[image:fd.gif]] + [[image:a.gif]] / [[image:c.gif]] (*) | |||
Parrying Puncher - [[image:dp.gif]] + [[image:a.gif]] / [[image:c.gif]] (*) | |||
Puncher Vision (Forward) - [[image:qcf.gif]] + [[image:b.gif]] / [[image:d.gif]] (*) | |||
:'''┗''' Puncher Upper - [[image:fd.gif]] + [[image:a.gif]] | |||
:'''┗''' Puncher Straight - [[image:fd.gif]] + [[image:c.gif]] | |||
:'''┗''' Puncher Weaving - [[image:bk.gif]] + [[image:a.gif]] / [[image:c.gif]] | |||
Puncher Vision (Backward) - [[image:qcb.gif]] + [[image:b.gif]] / [[image:d.gif]] (*) | |||
:'''┗''' Puncher Upper - [[image:fd.gif]] + [[image:a.gif]] | |||
:'''┗''' Puncher Straight - [[image:fd.gif]] + [[image:c.gif]] | |||
:'''┗''' Puncher Weaving - [[image:bk.gif]] + [[image:a.gif]] / [[image:c.gif]] | |||
Puncher Weaving - [[image:qcb.gif]] + [[image:a.gif]] / [[image:c.gif]] (*) | |||
:'''┗''' Puncher Weaving (Keep) - Hold [[image:a.gif]] / [[image:c.gif]] | |||
::'''┗''' Dash Puncher - [[image:fd.gif]] + [[image:a.gif]] / [[image:c.gif]] | |||
::'''┗''' Parrying Puncher - [[image:bk.gif]] + [[image:a.gif]] / [[image:c.gif]] | |||
::'''┗''' Puncher Vision (Forward) - [[image:fd.gif]] + [[image:b.gif]] / [[image:d.gif]] | |||
::'''┗''' Puncher Vision (Backward) - [[image:bk.gif]] + [[image:b.gif]] / [[image:d.gif]] | |||
'''Super Special Moves''' | '''Super Special Moves''' | ||
Crazy Puncher - [[image:qcb.gif]][[image:db.gif]][[image:qcf.gif]] + [[image:a.gif]] / [[image:c.gif]] (!) | |||
Champion Puncher - [[image:qcf.gif]][[image:qcf.gif]] + [[image:a.gif]] / [[image:c.gif]] (!) | |||
'''Climax Super Special Moves''' | |||
Infinity Puncher - [[image:qcb.gif]][[image:db.gif]][[image:qcf.gif]] + [[image:c.gif]]+[[image:d.gif]] | |||
==Quick Combo Reference== | ==Quick Combo Reference== | ||
| Line 26: | Line 68: | ||
| '''0 Meter''' | | '''0 Meter''' | ||
| | | | ||
Low confirm<br/> | |||
Corner<br/> | |||
| | | | ||
( = | ( 2B > 2A > 4/6A > 41236C(mash A/C) = 190 dmg<br/> | ||
( = | ( 2B > 2A > 4/6A > [4]6A, 41236C(mash A/C) = 205 dmg<br/> | ||
|- | |- | ||
| '''1 Meter''' | | '''1 Meter''' | ||
| | | | ||
Low confirm<br/> | |||
Low confirm<br/> | |||
| | | | ||
( = dmg<br/> | ( 2B > 2A > 4/6A > 41236AC(mash A/C), [4]6A, [4]6AC, 236B~6C = 295 dmg<br/> | ||
( = dmg<br/> | ( 2B > 2A > 4/6A > 41236C(mash A/C) > 2141236A/C = 307 dmg<br/> | ||
|- | |- | ||
| '''2 Meters''' | | '''2 Meters''' | ||
| Line 51: | Line 93: | ||
==Gameplay Overview== | ==Gameplay Overview== | ||
{{StrengthsAndWeaknesses | |||
| intro = {{SUBPAGENAME}} is a highly mobile rushdown character with impressive combo damage, crazy neutral, and suffocating pressure. The nature of her pushback and framedata make it so that her pressure can rarely be punished. Her unique tools let her find a situation where anything can be useful, and she truly seems like she has no weakness. That is, until she's on defense. Vanessa's defense is terrible. Between having only one real reversal (that costs at least one bar and has a terrible hitbox) and terrible abare, Vanessa finds herself having even more disadvantages against KoF's already great systemic offense, meaning you either do a wild option to get out, or stay locked in and hope for the best. Vanessa's midrange also falters, with a lack of confirms and a lack of good ground buttons in general preventing her from doing much. Regardless, Vanessa's offense, combo game, and neutral are strong enough to make up for that. If you love to roll your opponents and don't care about having bad defense, this character is for you. | |||
'''Vanessa is a momentum-based offensive beast who makes up for her lack of mixups with her fantastic pressure and strong combo damage.''' | |||
| pros= | |||
* '''Powerful, Explosive Neutral''': Vanessa has immense mobility, some of the best jump and crouch buttons in the game, and can completely ignore the existence of projectiles. Though she is very stubby, her movement and jumping buttons make up for that in spades. | |||
* '''Safejumps''': Almost every combo Vanessa does ends in a safejump and she even gets a safejump off her sweep and her overhead. Be afraid, be very afraid. | |||
* '''Ridiculous Offense...''': Between stancels, her speed and framedata, vision gimmicks, great lights and frametraps from them, and her fantastic EX moves, Vanessa's pressure is incredible. While her mixups are quite limited, her pressure makes up for that by allowing her to make an opponent flinch with ease. With many frame traps, high guard damage, ambiguous punish windows and a supermassive toolkit, Vanessa's offense is nigh insurmountable without meter to defend with, and even still with. | |||
* '''Great Hitconfirms''': Vanessa's low pushback on lights and great command normal make her hitconfirms almost impossible to drop from up close, and give her great time to block confirm into 214A/C. At range, her 5B and the immense speed of her EX machine gun punch allow her to hitconfirm off 2 lights. | |||
*'''Strong Corner Carry''': Vanessa has a decent amount of combo options which all give her fullscreen corner carry without sacrificing oki. | |||
* '''Incredible Meter Gain''': Vanessa's overall low meter spend on combos and high generation means she can put her meter to use where it's needed - to make her pressure and mobility as potent as it is. | |||
| cons= | |||
* '''...And Horrible Defense''': Stubby abare, inconsistent hop check, and expensive reversals. Vanessa essentially has almost ''nothing'' other than pure system mechanics to help her defensively, which makes defending ''as'' her as hard as it is to defend ''against'' her. | |||
* '''Incredibly Punishing to Play''': Vanessa's recovery on many of her moves is so long that it's very often that dropping a combo, pressure, punish, or confirm will almost certainly be punished, oftentimes resulting in you getting hit by a full combo for something that seemed completely random (such as an air reset). Coupled with difficult execution and high APM, being 'asleep' when playing Vanessa is a surefire way to lose. | |||
* '''Meter Reliance''': Vanessa relies on meter not mainly for damage, but for continued pressure. Without meter, Vanessa finds herself without many ways to open up her opponents or keep them blocking and as such has to be more creative with her stubby moveset. | |||
* '''''Stubby''''': With the exception of her sweeps and jumping buttons, Vanessa's buttons are very small and very linear, forcing her to be cautious and pigeon-holed when it comes to neutral, abare, and even sometimes pressure. This can cause her to sometimes whiff 4/6A in the opponent's face, which can be ''reaction punished''. Additionally, her stand heavies are exquisitely terrible, and none of her buttons are good at pre-emptively stuffing hops. | |||
}} | |||
==Normals== | ==Normals== | ||
| Line 58: | Line 117: | ||
|moveId=vanessa_sta | |moveId=vanessa_sta | ||
|description= | |description= | ||
* | * Special and super cancellable. | ||
A decent fast poke that will stuff hops, but only on hop startup. It will often whiff on maximum hop arc and definitely whiff against full jumps. | |||
Whiffs on crouchers. | |||
}} | }} | ||
====Far B==== | ====Far B==== | ||
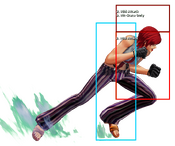
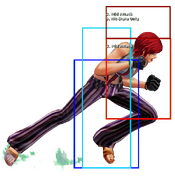
{{FrameDataCargo-KOFXV | {{FrameDataCargo-KOFXV | ||
|moveId=vanessa_stb | |moveId=vanessa_stb | ||
|description= | |description= | ||
* | * Command, whiff, special and super cancellable. | ||
Has more cancellable properties than stand A and also better at stuffing hops due to slightly further reach. | |||
Still can get hopped over. But it actually hits crouchers unlike stand A. | |||
}} | }} | ||
====Far C==== | ====Far C==== | ||
{{FrameDataCargo-KOFXV | {{FrameDataCargo-KOFXV | ||
|moveId=vanessa_stc | |moveId=vanessa_stc | ||
|description= | |description= | ||
* | * Command, whiff, special and super cancellable. | ||
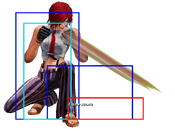
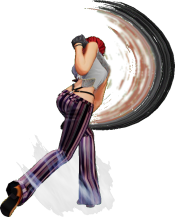
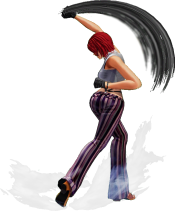
A 7 frame normal that is cancellable sounds like a great poke, however since it whiffs on crouchers, it should be used sparingly. It can work in a pinch, and for punishing certain moves, but as a poke you should probably use either far D or 2C instead, and remember to whiff cancel this if you do use it for some reason. | |||
}} | }} | ||
====Far D==== | ====Far D==== | ||
{{FrameDataCargo-KOFXV | {{FrameDataCargo-KOFXV | ||
|moveId=vanessa_std | |moveId=vanessa_std | ||
|description= | |description= | ||
* | * Super cancellable. | ||
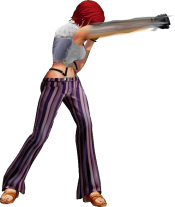
Another two hit button. Just like stand C, the second punch reaches further only because Vanessa herself moves forward as well. Despite that, it's still a very short ranged button with little space control. | |||
At 6 frames of startup, -3 on block, and the ability to hit crouchers and tag certain heights of a hop, this normal can be a fantastic mashout tool at certain ranges, and also gives a decent frametrap off of 2A (trades with 4f moves, so be sure to bait shatter strikes properly). While not cancellable, her target combo is very easy to hitconfirm out of this since it is two hits, and the target combo is quick max cancellable or super cancellable depending on if you want more damage. | |||
}} | }} | ||
===Close Standing Normals=== | ===Close Standing Normals=== | ||
| Line 85: | Line 158: | ||
|moveId=vanessa_cla | |moveId=vanessa_cla | ||
|description= | |description= | ||
* | * Command, special and super cancellable. | ||
A good close proximity button. Being 4f, safe on block and able to hit crouchers makes it a good button to press sometimes in a scramble. | |||
Loses against hops most of the time. | |||
}} | }} | ||
====Close B==== | ====Close B==== | ||
{{FrameDataCargo-KOFXV | {{FrameDataCargo-KOFXV | ||
|moveId=vanessa_clb | |moveId=vanessa_clb | ||
|description= | |description= | ||
* | * Command, special and super cancellable. | ||
Despite having the same startup as cl.A, it's slightly inferor due to being less plus on block. | |||
Loses against all hops. | |||
}} | }} | ||
| Line 98: | Line 178: | ||
|moveId=vanessa_clc | |moveId=vanessa_clc | ||
|description= | |description= | ||
* | |||
* Command, special and super cancellable. | |||
Other than being safe on block by itself there's little reason to use this over cl.D as it has more pushback and deals less damage. Mostly useful for wakeup throw OS'ing. | |||
Weird proximity range makes this button a lot more risky to use as an anti hop tool than it would seem. Very inconsistent, stick to 2C for that. | |||
}} | }} | ||
| Line 105: | Line 189: | ||
|moveId=vanessa_cld | |moveId=vanessa_cld | ||
|description= | |description= | ||
* | * Command, special and super cancellable. | ||
Does more damage than cl.C and is just as fast. This will be your primary button to start combos and blockstrings when running up. | |||
}} | }} | ||
| Line 113: | Line 198: | ||
|moveId=vanessa_cra | |moveId=vanessa_cra | ||
|description= | |description= | ||
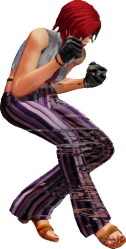
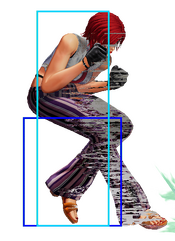
* | * Command, special and super cancellable. | ||
* Stubby. | |||
Your fastest normal tied with cl5B. It's used to hitconfirm from crouch B into 4/6A into any combo. | |||
Does not hit low, but is plus on block and frametraps 5f into 2D. | |||
}} | }} | ||
====Crouch B==== | ====Crouch B==== | ||
{{FrameDataCargo-KOFXV | {{FrameDataCargo-KOFXV | ||
|moveId=vanessa_crb | |moveId=vanessa_crb | ||
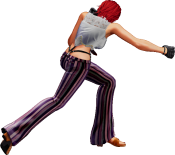
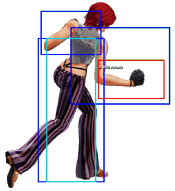
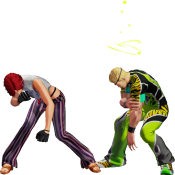
|captions=An old warcrime. | |||
|description= | |description= | ||
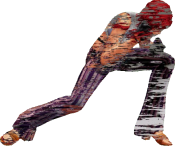
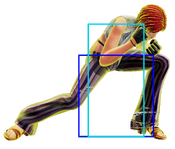
* | * Command, special and super cancellable. | ||
Hits low, but is a little slower and has lower range than crouch A. It's minus on block, so don't end your pressure with this button. | |||
This button has abysmal range. Do not use it in neutral outside of running up with a low (and even then, that might not work well) or catching a landing. | |||
}} | }} | ||
====Crouch C==== | ====Crouch C==== | ||
{{FrameDataCargo-KOFXV | {{FrameDataCargo-KOFXV | ||
|moveId=vanessa_crc | |moveId=vanessa_crc | ||
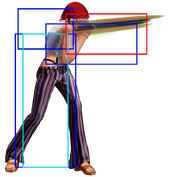
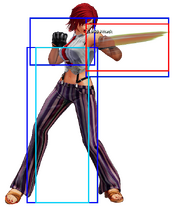
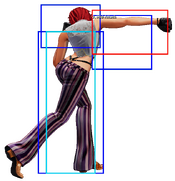
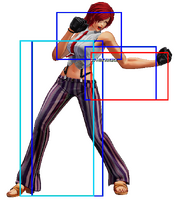
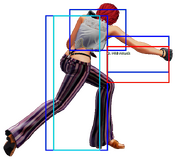
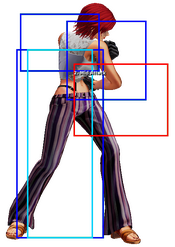
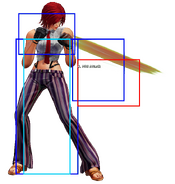
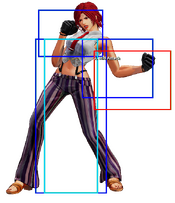
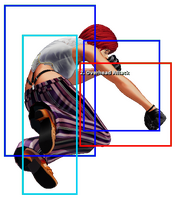
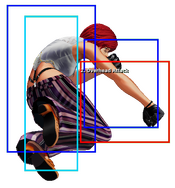
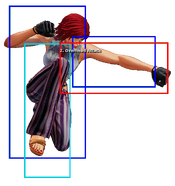
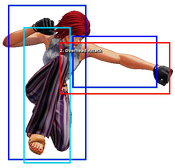
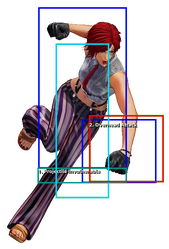
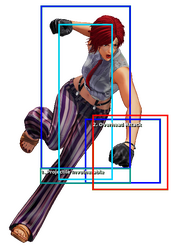
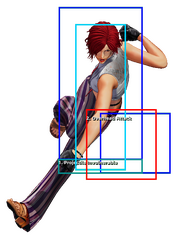
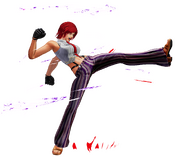
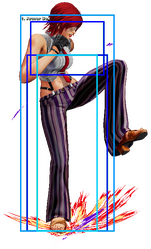
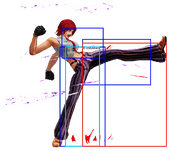
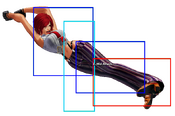
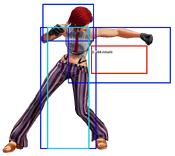
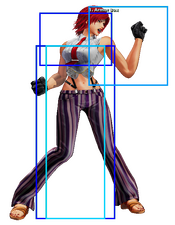
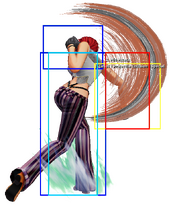
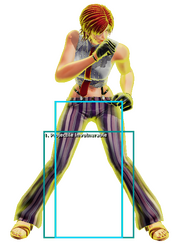
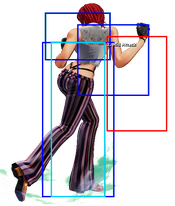
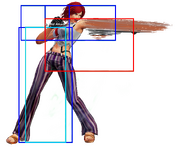
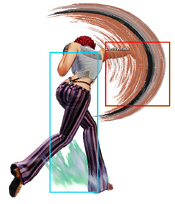
|hitboxCaptions= Frame: 7 to 8 (2 Frames), Frame: 9 to 11 (3 Frames), Frame: 12 to 15 (4 Frames) | |||
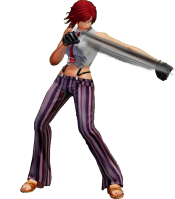
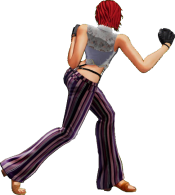
|description= | |description= | ||
* | * Command, special and super cancellable. | ||
Your primary anti-air tool. If timed well, it will beat most jump-ins. Even crossups. | |||
On counterhit against hops it will combo into Parrying Puncher (623A/C) or Champion Puncher (236236P). | |||
The anti air portion of the hitbox takes a bit to come out and this normal is overall small. However, it is also incredibly active, so 2C into late canceled puncher vision is incredibly valuable for neutral. | |||
}} | }} | ||
====Crouch D==== | ====Crouch D==== | ||
{{FrameDataCargo-KOFXV | {{FrameDataCargo-KOFXV | ||
|moveId=vanessa_crd | |moveId=vanessa_crd | ||
|description= | |description= | ||
* | * Command, special and super cancellable. | ||
By far one of your best buttons in neutral. It has the furthest range of any of her normals while also moving her forward. | |||
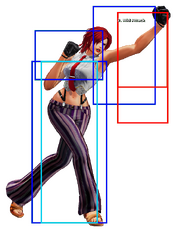
While it's very punishable on block, immediately cancelling it into either Puncher Weaving (214P) or Puncher Vision Backwards (214K) on block makes it safe. You also get a safejump on hit with a stancel (simply hh forward as soon as possible, delay is needed for EX). | |||
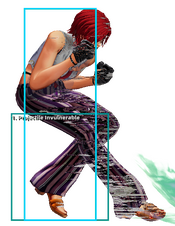
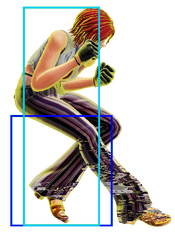
As of 2.41 this button is whiff cancelable, making it one of the best sweeps in the game due to its range, activity, and cancel options. | |||
}} | }} | ||
| Line 140: | Line 249: | ||
|name=jump A | |name=jump A | ||
|input=j.A | |input=j.A | ||
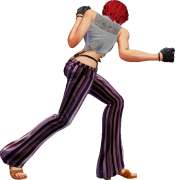
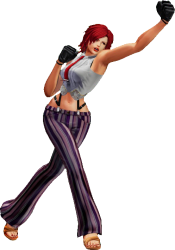
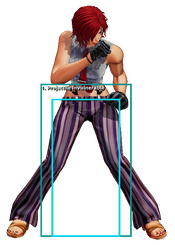
|description2= | |hitboxCaptions= Hop Version, Jump Version | ||
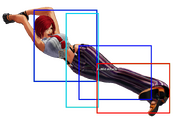
|description2=An okay air button. Her fastest air normal which is good for jump-ins but nothing else. Is severely outclassed by pretty much every other j.A in the game. | |||
USE THIS FOR SAFEJUMPS IF THROW OS'ING. Otherwise, your command normal followup will whiff on block. | |||
}} | }} | ||
====Jump B==== | ====Jump B==== | ||
{{FrameDataCargo-KOFXV | {{FrameDataCargo-KOFXV | ||
| Line 147: | Line 260: | ||
|name=jump B | |name=jump B | ||
|input=j.B | |input=j.B | ||
|description2= | |hitboxCaptions= Hop Version, Jump Version | ||
|description2=Your best air-to-air button, and possibly Vanessa's best anti-air in general. Hits horizontally and comes out fast at 5f. | |||
}} | }} | ||
====Jump C==== | ====Jump C==== | ||
| Line 154: | Line 268: | ||
|name=jump C | |name=jump C | ||
|input=j.C | |input=j.C | ||
|description2= | |hitboxCaptions= Hop Version, Jump Version | ||
|description2=Horrible range and meh active frames on hop makes this quite mediocre when done from one, though still required in pressure situations due to j.D's pushback issues. However, it's a nice close range full jump normal as its activity and hitstun are favorable. Use this only for safejumps and pressure. | |||
}} | }} | ||
====Jump D==== | ====Jump D==== | ||
{{FrameDataCargo-KOFXV | {{FrameDataCargo-KOFXV | ||
| Line 161: | Line 277: | ||
|name=jump D | |name=jump D | ||
|input=j.D | |input=j.D | ||
|hitboxCaptions= Hop Version, Jump Version | |||
|description2=Definitely Vanessa's best jump-in. Good horizontal range, good vertical range. Your primary starter for far jump-ins, but be warned as the pushback on this move will cause many normals to whiff on block. | |||
}} | |||
===Rush Moves=== | |||
{{FrameDataCargo-KOFXV | |||
|moveId=vanessa_rush1,vanessa_rush2 | |||
|name=rush | |||
|input=cl.AA/cl.AAX | |||
|description2=* Placeholder | |description2=* Placeholder | ||
}} | }} | ||
| Line 168: | Line 293: | ||
{{FrameDataCargo-KOFXV | {{FrameDataCargo-KOFXV | ||
|moveId=vanessa_cd | |moveId=vanessa_cd | ||
|description= | |description= Awful stand CD | ||
Has a great hitbox in a vacuum but the horrid framedata and lack of a lunge makes it next to useless outside of pressure. | |||
}} | }} | ||
| Line 176: | Line 301: | ||
|moveId=vanessa_236cd | |moveId=vanessa_236cd | ||
|description= | |description= | ||
* | * Has guard points, but not frame 1. | ||
* Raw hit on grounded opponent results in a crumple which can't be extended by normals. | |||
* Air hit results in wall bounce. | |||
* If used during combos it will cause a crumple that can be extended by normals. | |||
The universal mechanic shared by every character using their own CD animations. Costs 1 bar to use, but refunds half a bar on a successful hit. Does great guard damage as well. | |||
}} | }} | ||
| Line 184: | Line 314: | ||
|name=jump CD | |name=jump CD | ||
|input=j.CD | |input=j.CD | ||
|description2= | |hitboxCaptions= Hop Version, Jump Version | ||
|description2=Your other best button in neutral aside from crouch D. Compared to most of her buttons and especially her air buttons, j.CD has an amazing range and is vital for her pressure game since the dropkick is angled downwards. | |||
On counterhit you can follow up with Dash Puncher ([4]6A) where the ender varies depending on if you're midscreen on in the corner. | |||
}} | }} | ||
==Throws== | ==Throws== | ||
{{ | ===Barrett Puncher=== | ||
| | {{FrameDataCargo-KOFXV | ||
| | |moveId=vanessa_cthrow | ||
| | |name=Barrett Puncher | ||
| | |input=(close) 4/6C | ||
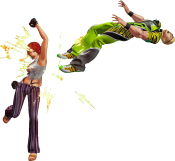
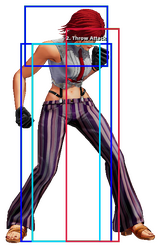
|description=* Placeholder | |||
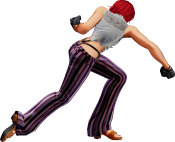
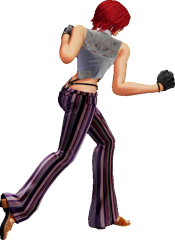
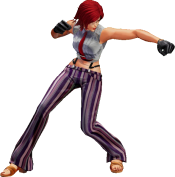
}} | |||
===Clinch Puncher=== | |||
{{FrameDataCargo-KOFXV | |||
|moveId=vanessa_dthrow | |||
|name=Clinch Puncher | |||
|input=(close) 4/6D | |||
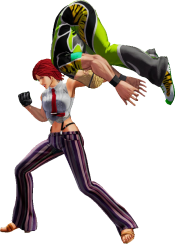
|description=* Placeholder | |||
}} | }} | ||
==Command Moves== | |||
{{FrameDataCargo-KOFXV | |||
|moveId=vanessa_4/6a_raw,vanessa_4/6a_chained | |||
|captions= ,'''Raw''',,'''Chained''' | |||
|input=4/6A | |||
|hitboxCaptions= Raw Version, , Cancel Version,, | |||
|description= | |||
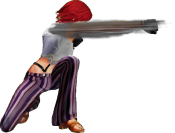
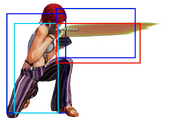
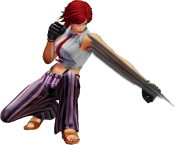
Just like every other command normal, there's 2 versions of this one. The raw version is a quick overhead which results in a knockdown. Primarily used to open up the opponent with some chip damage as it results in a manually timed safejump opportunity. | |||
|description2= | |||
If used during strings it instead becomes the sole reason why Vanessa's hitconfirm game is great. The duration of this move is long enough for you to tell if they blocked it or not. If it is, disengage with 214K or make yourself safe with 214P. If it hits, you get a full combo. | |||
'''This normal can get you killed at times due to whiffing.''': | |||
If you want to frametrap meterlessly FROM this, you will have to do 214A4C after the first hit, as the second hit has too much pushback for any frametrap to exist. To frametrap into this normal simply delay cancel from lights. | |||
Be careful when cancelling cl.C or cl.D into this from a jump-in. The pushback on heavy normals is far too great and you will end up whiffing this quite often, leaving you very, very, very punishable. | |||
Tends to whiff a lot at midrange connection with 2A as well. Try not to take too many risks whiff punishing with this. | |||
Delaying this will allow you to frametrap, but also increase the range and situations at which this normal will whiff. Do not jump in and do two lights if planning on frametrapping with this. Simply settle for one light. If not, you can lose the game. | |||
}} | }} | ||
{{ | {{FrameDataCargo-KOFXV | ||
|moveId=vanessa_3d | |||
|input=3D | |||
|description= | |||
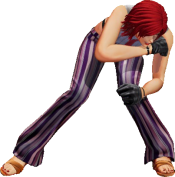
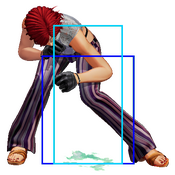
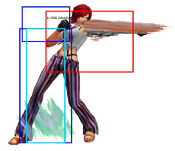
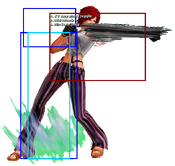
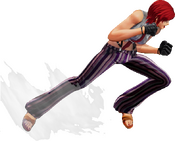
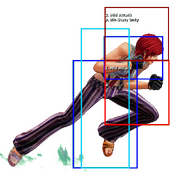
A great low profile sweep. Can be used to slide under high pokes or fireballs. But unlike crouch D it's not special cancellable, so make sure to space it properly so it becomes safe. | |||
Ground fireballs like Iori's 236A/C or Terry's 236A/C will beat it. | |||
}} | }} | ||
===Target Combo 1=== | |||
{{FrameDataCargo-KOFXV | |||
|moveId=vanessa_dc | |||
|description= Target combo that sees its effectiveness with far D. Easy to hit confirm into from a 6F far normal, meterlessly gives a soft knockdown with great corner carry (chase down with 236D), but also cancellable into super. | |||
Do not do this on block, it is extremely punishable. It should be easy to hit confirm into from two hits of far D. | |||
}} | }} | ||
==Special Moves== | ==Special Moves== | ||
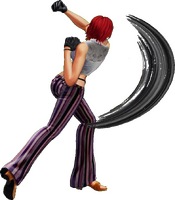
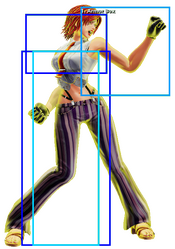
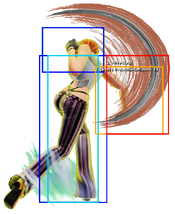
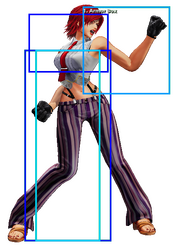
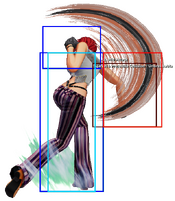
===Machine Gun Puncher=== | |||
{{FrameDataCargo-KOFXV | |||
|moveId=vanessa_41236a,vanessa_41236c,vanessa_41236ac | |||
|input=41236A/C/AC | |||
|hitboxCaptions= Normal Version, , , EX Version | |||
|description3= | |||
Main combo tool. Mashing punches during the duration of the move adds hits and damage, which should be done always. Unsafe but the pushback can make it an awkward punish. | |||
---- | |||
The '''A version''' and '''C version''' are functionally identical, while the '''EX version''' has more hits and ends in a launcher instead of a knockdown. | |||
}} | |||
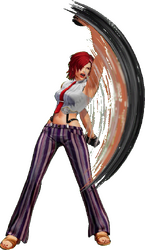
[[ | ===Dash Puncher=== | ||
{{FrameDataCargo-KOFXV | |||
|moveId=vanessa_46a,vanessa_46c,vanessa_46ac | |||
|size=22% | |||
|input=[4]6A/C or 6A/C during C/A Puncher Weaving<br> | |||
[4]6AC or 6A/C during EX Puncher Weaving | |||
|hitboxCaptions= A Version, , , C Version, , , EX Version, , During EX Puncher Weaving | |||
|description3= | |||
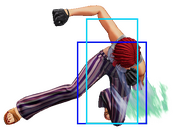
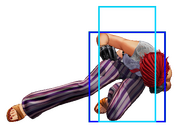
Anti-zoning and combo tool. Vanessa lowers her body to the ground and travels forward before rising with an uppercut. Low profiles only projectiles while travelling. This is your main combo starter and zoner killer. | |||
---- | |||
The '''A version''' travels almost half of the screen. Sees a lot of use in combos. Generally unsafe on block, but can be hard to punish at some spacings. | |||
---- | |||
The '''C version''' travels almost the entire length of the screen. Moves much faster, but the slower startup makes it easier to interrupt with strikes or throws. | |||
---- | |||
The '''EX version''' travels around half of the screen and hits the opponent twice before ending in an uppercut. Used for extending combos after [4]6A. If blocked, Vanessa does not perform the follow up punches and is left more unsafe. | |||
}} | |||
===Parrying Puncher=== | |||
{{FrameDataCargo-KOFXV | |||
|moveId=vanessa_623a,vanessa_623c,vanessa_623ac | |||
|size=22% | |||
|input=623A/C or 4A/C during C/A Puncher Weaving<br> | |||
623AC or 4A/C during EX Puncher Weaving | |||
|hitboxCaptions= A Version, , A Version during C Puncher Weaving, C Version, , C Version during A Puncher Weaving, EX Version, , During EX Puncher Weaving | |||
|description3= | |||
A hook with guard point property. '''A version''' can negate projectiles, '''C version''' can reflect projectiles. | |||
C version is a decent anti-air. Key point on decent, as its active frames and recovery leave a lot to be desired. | |||
''' | EX version is an all you can eat buffet. The crazy range makes it great for combo extensions and even better for frametraps, as it will frametrap from all heavies from quite the distance. Though it's -9 on block, the ridiculous pushback makes this safe. This means the move is a safe frametrap that grants a juggle on hit, while also dealing ''as much guard damage as a shatter strike''. An invaluable tool in her arsenal when played on mid. | ||
If you use these during Punching Weaving (214P), they no longer have guard point or anti-projectile properties. However, they will also recover quicker (reflected in [] in the frame data). You can use this to make guard crush setups easier to convert off. | |||
}} | |||
===Puncher Vision (Forward)=== | |||
{{FrameDataCargo-KOFXV | |||
|moveId=vanessa_236k,vanessa_214P_236k, vanessa_236bd | |||
|size=20% | |||
|input=236B/D or 6B/D during Puncher Weaving | |||
236BD | |||
|hitboxCaptions= Normal Version, Normal Version during Puncher Weaving, EX Version | |||
|description3=* Forward command dash | |||
* Some low profile properties similar to [4]6A/C | |||
* Completely fireball invulnerable when done from Puncher Vision. | |||
Core to her movement as it cancels into a multitude of followups, allowing her to move around the screen quickly while threatening other options. Can also be used for some blockstring gimmicks, but will always leave you very unsafe. EX version is fantastic for pressure as it recovers so fast you are no longer unsafe. The followups from the EX versions will also frametrap and/or blockstring from many of your moves, so it's of utmost importance to learn how to use this. | |||
' | A zoner's nightmare. | ||
The end of the move can also be Super Cancelled. | |||
}} | |||
===Puncher Vision (Backward)=== | |||
{{FrameDataCargo-KOFXV | |||
|moveId=vanessa_214k, vanessa_214P_214k, vanessa_214bd | |||
|size=20% | |||
|input=214B/D or 4B/D during Puncher Weaving | |||
214BD | |||
|hitboxCaptions= Normal Version, Normal Version during Puncher Weaving, EX Version | |||
|description3= * Backward command dash | |||
Used for retreating, and for dash movement in conjunction with the forward dash. The 6A and 6C followups off of backward command dash move very far forward, allowing her to do some shenanigans similar to that of Slayer's backstep. EX sees less use compared to the forward version, but is still a very fast and safe runaway option if needed. | |||
}} | |||
( | ===Puncher Weaving=== | ||
: | {{FrameDataCargo-KOFXV | ||
|moveId=vanessa_214p,vanessa_214ac | |||
|size=20% | |||
|input=214A/C or 4A/C during Puncher Vision<br> | |||
214AC or 4AC during EX Puncher Vision<br> | |||
Hold to maintain<br><br><be> | |||
|hitboxCaptions= Normal Version, , EX Version | |||
|description2= * Vanessa ducks down slightly and starts swaying. | |||
* useful to cancel certain things and be much safer on block. | |||
* EX version maintains a low profile, is fully projectile invulnerable and much faster to recover. It usually leaves you plus on block on cancel and can low profile many buttons but there are other options with this same ability and higher reward. It is the fastest of all these however. | |||
* By holding down the button, you can maintain the stance. | |||
* Holding A gives access to C versions and holding C to A. Holding either on 214AC gives you access to Ex versions of : | |||
:: '''6A/C''' Gives [[#Dash_Puncher|Dash puncher]] ([4]6A or [4]6C) correlating to button pressed. | |||
:: '''4A/C''' Gives [[#Parrying_Puncher|Parrying Puncher]] (623A or 623C) correlating to button pressed. | |||
* The Puncher Vision follow-ups are irrelevant of what button you're holding and you don't have access to EX Puncher Vision. | |||
:: '''4B/D''' Gives [[#Puncher_Vision_(Backward)|Puncher Vision (Backward)]] (214B or 214D) correlating to button pressed. | |||
:: '''6B/D''' Gives [[#Puncher_Vision_(Forward)|Puncher Vision (Forward)]] (236B or 236D) correlating to button pressed. | |||
}} | |||
===Puncher Upper=== | |||
{{FrameDataCargo-KOFXV | |||
|moveId=vanessa_236k_6a,vanessa_236bd_6a,vanessa_214k_6a,vanessa_214bd_6a | |||
|input=6A after Puncher Vision | |||
|hitboxCaptions= Normal Version, , , EX Version | |||
|description4= | |||
High reward but low range dash followup. Staple in corner BNBs, and frametraps from stand CD 236B. EX version is fantastic for pressure as you can create many high guard damage blockstring setups due to its blistering speed. Can cancel into 214B/D if blocked to retreat, or 214A/C for safety. EX version can only cancel into normal stancels on hit, another half bar will need to be spent on block. | |||
}} | |||
=== | ===Puncher Straight=== | ||
{{FrameDataCargo-KOFXV | |||
|moveId=vanessa_236k_6c,vanessa_236bd_6c,vanessa_214k_6c,vanessa_214bd_6c | |||
|input=6C after Puncher Vision | |||
|hitboxCaptions= Normal Version during 236B/D, , , EX Version during 236BD, , , Normal Version during 214B/D, EX Version during 214BD | |||
|description4= | |||
Low reward but high range followup. Doesn't see much use oustide of combos cause of its incredibly slow speed. EX version is useful midscreen but much more useful in pressure due to its blockstun, chip damage, guard damage, and frame trapping ability. Can cancel into 214B/D and 214A/C as well, but cancelling into another 236B/D on hit gets her very close quickly for great okizeme. As per usual, EX version is not cancelable into normal stancels on block. Canceling the backward vision version into weaving 4A/C is your main corner combo ender. | |||
EX version has an anywhere juggle, but it's quite hard to get this from an air to air. Instead, utilize this (done as late as possible) to get a 200 damage anti air that HKDs off 2C. | |||
}} | |||
==Super Special Moves== | |||
===Crazy Puncher=== | |||
{{FrameDataCargo-KOFXV | |||
|moveId=vanessa_2141236p,vanessa_2141236ac | |||
|name=Crazy Puncher | |||
|input=2141236A/C/AC | |||
|hitboxCaptions= Normal Version, Max Version | |||
|description2=* Highest damage combo ender. If you're gonna spend meter for a super, be sure to pick this one. | |||
}} | |||
=== | ===Champion Puncher=== | ||
{{FrameDataCargo-KOFXV | |||
|moveId=vanessa_236236p,vanessa_236236ac | |||
|name=Champion Puncher | |||
|input=236236A/C/AC | |||
|hitboxCaptions= Normal Version, Max Version | |||
|description2=* Much easier combo ender with lower damage, and the is one of your two only true reversals. Normal version grants a safejump with 5CD 236D > full jump. | |||
}} | |||
==Climax Super Special Moves== | |||
===Infinity Puncher=== | |||
{{FrameDataCargo-KOFXV | |||
|moveId=vanessa_2141236cd | |||
|input=2141236CD | |||
|description=* It's a Climax, and also Vanessa's second true reversal. Not much to say about this one aside of it being a decent meter dump finisher. | |||
}} | |||
==Misc== | ==Misc== | ||
{{Colors-KOFXV}} | |||
==Videos== | ==Videos== | ||
{{#ev:youtube|fb3ldoiHIIg|||'''Vanessa Reveal Trailer'''|frame}} | {{#ev:youtube|fb3ldoiHIIg|||'''Vanessa Reveal Trailer'''|frame}} | ||
{{CharNavbox_XV}} | {{CharNavbox_XV}} | ||
{{Navbox XV}} | {{Navbox XV}} | ||
Latest revision as of 17:28, 1 January 2025
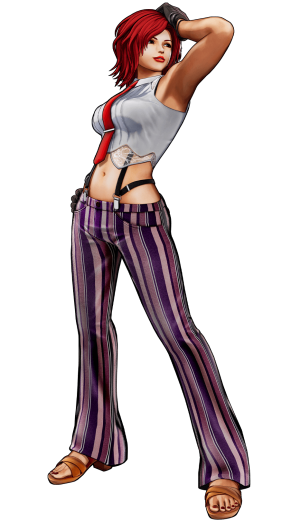
Her husband and kid don't know anything about her secret activities.
Hop: 32f
Backdash: 21f
Run Speed Ranking: 2
Movelist
Throws
Barrett Puncher (Forward) - ![]() /
/ ![]() +
+ ![]()
Clinch Puncher (Backward) - ![]() /
/ ![]() +
+ ![]()
Command Normals
Special Moves
Puncher Vision (Forward) - ![]() +
+ ![]() /
/ ![]() (*)
(*)
Puncher Vision (Backward) - ![]() +
+ ![]() /
/ ![]() (*)
(*)
Super Special Moves
Climax Super Special Moves
Quick Combo Reference
| 0 Meter |
Low confirm |
( 2B > 2A > 4/6A > 41236C(mash A/C) = 190 dmg |
| 1 Meter |
Low confirm |
( 2B > 2A > 4/6A > 41236AC(mash A/C), [4]6A, [4]6AC, 236B~6C = 295 dmg |
| 2 Meters |
Placeholder |
( = dmg |
Gameplay Overview
|
Vanessa is a highly mobile rushdown character with impressive combo damage, crazy neutral, and suffocating pressure. The nature of her pushback and framedata make it so that her pressure can rarely be punished. Her unique tools let her find a situation where anything can be useful, and she truly seems like she has no weakness. That is, until she's on defense. Vanessa's defense is terrible. Between having only one real reversal (that costs at least one bar and has a terrible hitbox) and terrible abare, Vanessa finds herself having even more disadvantages against KoF's already great systemic offense, meaning you either do a wild option to get out, or stay locked in and hope for the best. Vanessa's midrange also falters, with a lack of confirms and a lack of good ground buttons in general preventing her from doing much. Regardless, Vanessa's offense, combo game, and neutral are strong enough to make up for that. If you love to roll your opponents and don't care about having bad defense, this character is for you. Vanessa is a momentum-based offensive beast who makes up for her lack of mixups with her fantastic pressure and strong combo damage. |
|
| Pros | Cons |
|
|
Normals
Far Standing Normals
Far A
| stand A
st.A
st.A |
|---|
Far B
| stand B
st.B
st.B |
|---|
Far C
| stand C
st.C
st.C |
|---|
Far D
| stand D
st.D
st.D |
|---|
Close Standing Normals
Close A
| close A
cl.A
cl.A |
|---|
Close B
| close B
cl.B
cl.B |
|---|
Close C
| close C
cl.C
cl.C |
|---|
Close D
| close D
cl.D
cl.D |
|---|
Crouch Normals
Crouch A
| crouch A
2A
2A |
|---|
Crouch B
| crouch B
2B
2B |
|---|
Crouch C
| crouch C
2C
2C |
|---|
Crouch D
| crouch D
2D
2D |
|---|
Jump Normals
Jump A
| jump A
j.A
j.A |
|---|
Jump B
| jump B
j.B
j.B |
|---|
Jump C
| jump C
j.C
j.C |
|---|
Jump D
| jump D
j.D
j.D |
|---|
Rush Moves
| rush
cl.AA/cl.AAX
cl.AA/cl.AAX |
|---|
Blowback
Blowback
| Blowback
CD
CD |
|---|
ShatterStrike
| ShatterStrike
236CD
236CD |
|---|
jump CD
| jump CD
j.CD
j.CD |
|---|
Throws
Barrett Puncher
| Barrett Puncher
(close) 4/6C
(close) 4/6C |
|---|
Clinch Puncher
| Clinch Puncher
(close) 4/6D
(close) 4/6D |
|---|
Command Moves
| One-Two Puncher
4/6A
4/6A |
|---|
| Sliding Puncher
3D
3D |
|---|
Target Combo 1
| Target Combo 1
D~C
D~C |
|---|
Special Moves
Machine Gun Puncher
| Machine Gun Puncher
41236A/C/AC
41236A/C/AC |
|---|
Dash Puncher
| Dash Puncher [4]6A/C or 6A/C during C/A Puncher Weaving [4]6A/C or 6A/C during C/A Puncher Weaving |
|---|
Parrying Puncher
| Parrying Puncher 623A/C or 4A/C during C/A Puncher Weaving 623A/C or 4A/C during C/A Puncher Weaving |
|---|
Puncher Vision (Forward)
| Puncher Vision (Forward) 236B/D or 6B/D during Puncher Weaving 236BD236B/D or 6B/D during Puncher Weaving 236BD |
|---|
Puncher Vision (Backward)
| Puncher Vision (Backward) 214B/D or 4B/D during Puncher Weaving 214BD214B/D or 4B/D during Puncher Weaving 214BD |
|---|
Puncher Weaving
| Puncher Weaving 214A/C or 4A/C during Puncher Vision <be> 214A/C or 4A/C during Puncher Vision <be> |
|---|
Puncher Upper
| Puncher Upper
6A after Puncher Vision
6A after Puncher Vision |
|---|
Puncher Straight
| Puncher Straight
6C after Puncher Vision
6C after Puncher Vision |
|---|
Super Special Moves
Crazy Puncher
| Crazy Puncher
2141236A/C/AC
2141236A/C/AC |
|---|
Champion Puncher
| Champion Puncher
236236A/C/AC
236236A/C/AC |
|---|
Climax Super Special Moves
Infinity Puncher
| Infinity Puncher
2141236CD
2141236CD |
|---|
Misc
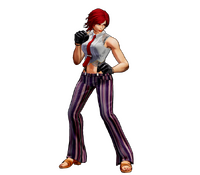
Alternate Colors
 |
 |
 |
 |
 |
 |
 |
 |
