-The Dream Cancel Wiki has successfully upgraded it's wiki software and editing has returned. Tables for data have returned.
The King of Fighters XV/Ryo Sakazaki: Difference between revisions
m Quick Combo Reference: Updated damage numbers on some 0 meter and 1/2 meter + added some more combos. |
|||
| (56 intermediate revisions by 3 users not shown) | |||
| Line 1: | Line 1: | ||
{{CharNavbox_XV}} | {{CharNavbox_XV}} | ||
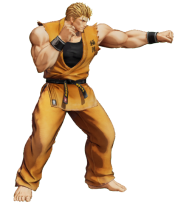
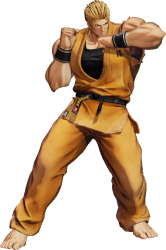
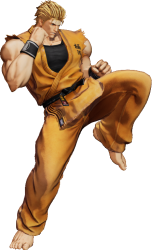
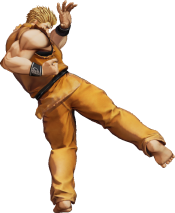
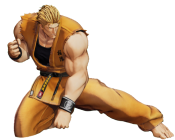
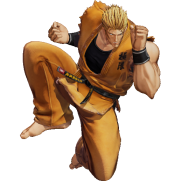
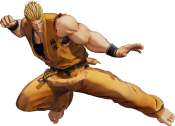
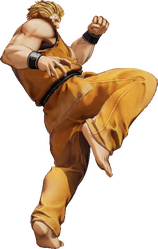
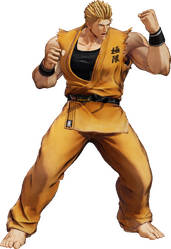
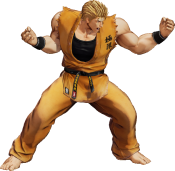
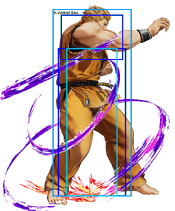
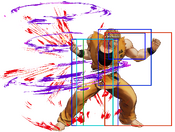
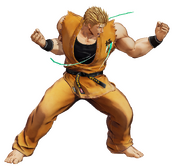
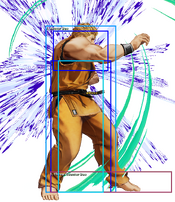
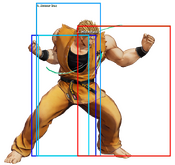
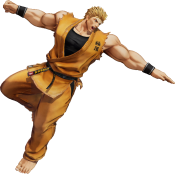
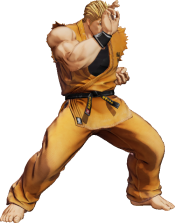
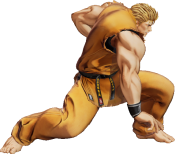
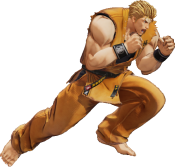
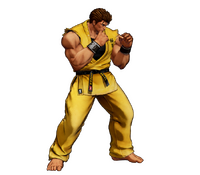
<section begin="image"/>[[File:KOFXV Ryo Profile.png|thumb|Ryo is the son and entrusted owner of Takuma Sakazaki's dojos for the Kyokugenryu school of Karate. As a child, Ryo spent his time training his body and eventually became so powerful that he was nicknamed The Invincible Dragon.<br/>Naturally, he is extremely strong-willed and will spare no effort getting things done. Even to this day, he continues to train himself to his maximum potential.]]<section end="image"/> | <section begin="image"/>[[File:KOFXV Ryo Profile.png|thumb|Ryo is the son and entrusted owner of Takuma Sakazaki's dojos for the Kyokugenryu school of Karate. As a child, Ryo spent his time training his body and eventually became so powerful that he was nicknamed The Invincible Dragon.<br/>Naturally, he is extremely strong-willed and will spare no effort getting things done. Even to this day, he continues to train himself to his maximum potential. | ||
<div class="center" style="width: auto; margin-left: auto; margin-right: auto;"> | |||
<big>'''Jump:''' 39f | |||
<br>'''Hop:''' 32f | |||
<br>'''Backdash:''' 22f | |||
<br>'''Run Speed Ranking:''' 7 | |||
</big></div>]]<section end="image"/> | |||
{{TOClimit|3}} | {{TOClimit|3}} | ||
==Movelist== | ==Movelist== | ||
| Line 54: | Line 60: | ||
Ryo also has some of the best defense in the game. Besides having a very fast DP, he is also the only character in the entire roster to have access to parries (6B, 3D) which have very fast startup, are extremely active, and push Ryo forward slightly. These parries can make Ryo hard to zone out as well, as he'll only build more meter from zoning attempts. | Ryo also has some of the best defense in the game. Besides having a very fast DP, he is also the only character in the entire roster to have access to parries (6B, 3D) which have very fast startup, are extremely active, and push Ryo forward slightly. These parries can make Ryo hard to zone out as well, as he'll only build more meter from zoning attempts. | ||
One would think that Ryo's excellent defensive options would mean he has poor damage output, but in all actuality, Ryo hits very, ''very'' hard. One '''EX''' | One would think that Ryo's excellent defensive options would mean he has poor damage output, but in all actuality, Ryo hits very, ''very'' hard. One '''EX Hien Shipuu Kyaku''' (214BD) opens the door to multiple combo options, such as '''Zanretsuken''' (646P[P]), a highly damaging multi-hit attack that can end in a hard knockdown (646A) or be used to juggle the opponent even more (646C/AC). To put it simply: Ryo has some of the best damage output in the game. | ||
In the end, besides being a rather simple character with a slight weakness to zoning and reliance on meter, Ryo doesn't have any real fatal flaws. Ryo works well in any team | In the end, besides being a rather simple character with a slight weakness to zoning and reliance on meter, Ryo doesn't have any real fatal flaws. Ryo works well in any team position, but is especially powerful on anchor. | ||
{{StrengthsAndWeaknesses | {{StrengthsAndWeaknesses | ||
| intro= '''''{{SUBPAGENAME}} is a rushdown-oriented shoto who trades zoning tools for an intimidatingly augmented offensive and defensive game.''''' | | intro= '''''{{SUBPAGENAME}} is a rushdown-oriented shoto who trades zoning tools for an intimidatingly augmented offensive and defensive game.''''' | ||
| Line 62: | Line 68: | ||
* '''Insane Damage Output:''' Given his multiple juggle and launch options (including a meterless launcher), Ryo is capable of racking up tons of damage without having to spend a lot of meter at all. In fact, Ryo can deal up to ''583 damage'' with just one bar from anywhere on the screen. Most of the cast can only get 470 damage or less with one bar. Which means if Ryo gets a hit on the opponent when he has a lot of meter... chances are they're probably going to die. | * '''Insane Damage Output:''' Given his multiple juggle and launch options (including a meterless launcher), Ryo is capable of racking up tons of damage without having to spend a lot of meter at all. In fact, Ryo can deal up to ''583 damage'' with just one bar from anywhere on the screen. Most of the cast can only get 470 damage or less with one bar. Which means if Ryo gets a hit on the opponent when he has a lot of meter... chances are they're probably going to die. | ||
* '''Fantastic Meter Build:''' DP-style moves build plenty of meter on their own, but only Ryo is capable of using his DP ''twice'' in a combo, allowing him to build an absurd amount of meter and gain nearly half a bar back from using both 623A and 623C in a combo. | * '''Fantastic Meter Build:''' DP-style moves build plenty of meter on their own, but only Ryo is capable of using his DP ''twice'' in a combo, allowing him to build an absurd amount of meter and gain nearly half a bar back from using both 623A and 623C in a combo. | ||
* '''Great Pressure''': Ryo excels at being up close, with several plus-on-block normals and parries that can create 50/50 mixup scenarios. Frame traps come easily to Ryo, who can cancel his 6A into Kizami | * '''Great Pressure''': Ryo excels at being up close, with several plus-on-block normals and parries that can create 50/50 mixup scenarios. Frame traps come easily to Ryo, who can cancel his 6A into Kizami Duki (AC), a slow but plus advancing mid. Ryo's 6A also serves as a raw overhead that can be Quick Max'd for massive damage. | ||
* '''Frame Data''': Being a rushdown character, Ryo's kit is designed to let him get in and stay in. Ryo has significantly more advantage on his normals than a great majority of the cast. All of his light normals range from being +3 to -1 on block, while his st.C and cr.D have noticeably more frame advantage than most other characters have for their respective moves of the type. | * '''Frame Data''': Being a rushdown character, Ryo's kit is designed to let him get in and stay in. Ryo has significantly more advantage on his normals than a great majority of the cast. All of his light normals range from being +3 to -1 on block, while his st.C and cr.D have noticeably more frame advantage than most other characters have for their respective moves of the type. | ||
* '''Top Tier Defense:''' Ryo has unique defensive capabilities in the form of parries (6B, 3D) which are extremely fast countermoves that can nullify any attack as long as the proper parry is used. Besides preventing Ryo from accumulating chip damage, the fast recovery of the parries means that should a parry connect with an opponent's attack, Ryo has plenty of time to counterattack with a highly damaging combo route. Ryo can cancel into these parries from any command-cancellable move, even if that move whiffs. Overall, Ryo's parries contribute to his excellent punish game. | * '''Top Tier Defense:''' Ryo has unique defensive capabilities in the form of parries (6B, 3D) which are extremely fast countermoves that can nullify any attack as long as the proper parry is used. Besides preventing Ryo from accumulating chip damage, the fast recovery of the parries means that should a parry connect with an opponent's attack, Ryo has plenty of time to counterattack with a highly damaging combo route. Ryo can cancel into these parries from any command-cancellable move, even if that move whiffs. Overall, Ryo's parries contribute to his excellent punish game. | ||
| cons= | | cons= | ||
* '''Heavily Fundamental''': Ryo does not really have anything that might catch the opponent off guard besides his parries and his overhead. He doesn't need a ton of meter to be a real threat, but having access to at least half a bar significantly improves Ryo's capabilities. Mostly, Ryo players will have to utilize strong fundamentals in order to win. | * '''Heavily Fundamental''': Ryo does not really have anything that might catch the opponent off guard besides his parries and his overhead. He doesn't need a ton of meter to be a real threat, but having access to at least half a bar significantly improves Ryo's capabilities. Mostly, Ryo players will have to utilize strong fundamentals in order to win. | ||
* '''Mediocre Mobility''': Ryo isn't exactly slow by any means, but he's not fast, either. Ryo shines up close, but he can still get overwhelmed by pressure. | * '''Mediocre Mobility''': Ryo isn't exactly slow by any means, but he's not fast, either. Ryo shines up close, but he can still get overwhelmed by pressure. With Ryo, you must take care in how you approach and use your tools at your spacing. | ||
}} | }} | ||
| Line 141: | Line 146: | ||
* Chains into itself and cr.A starting frame 12. Whiff cancellable. | * Chains into itself and cr.A starting frame 12. Whiff cancellable. | ||
Command cancelable and has slightly longer range than cr.A. | Command cancelable and has slightly longer range than cr.A. While it is not Ryo's most plus button, it is his furthest reaching plus button, which makes it preferable as a frametrap starter. | ||
}} | }} | ||
| Line 158: | Line 163: | ||
|moveId=ryo_stc | |moveId=ryo_stc | ||
|description= | |description= | ||
Solid poke with high reward thanks to its special-cancelability. | |||
}} | }} | ||
| Line 169: | Line 172: | ||
|moveId=ryo_std | |moveId=ryo_std | ||
|description= | |description= | ||
* | * Whiffs on crouching around Ryo's foot. | ||
Decently large anti-airing option with middling reward. As a poke it is relatively mediocre, and cr.D is usually a better option. | |||
}} | }} | ||
===Close Standing Normals=== | ===Close Standing Normals=== | ||
| Line 185: | Line 188: | ||
|moveId=ryo_clb | |moveId=ryo_clb | ||
|description= | |description= | ||
Ryo's most plus button, only preferable as a frame trap starter if Ryo is really close. | |||
}} | }} | ||
| Line 202: | Line 204: | ||
|moveId=ryo_cld | |moveId=ryo_cld | ||
|description= | |description= | ||
* | * Extends Ryo's head hurtbox. | ||
* Longer activation range than cl.C (activates around the furthest range st.A will hit) | |||
* Moves Ryo forward, which is great for strings & combos, but also means you cannot stuff out wakeup throws with it. | * Moves Ryo forward, which is great for strings & combos, but also means you cannot stuff out wakeup throws with it. | ||
A very good normal and quite possibly one of the best heavy starters in the game. cl.D has a significantly large activation range (noticeably larger than other proximity normals) which makes it very easy to start combos with. | |||
}} | }} | ||
| Line 216: | Line 219: | ||
* Links into cr.C and cl.C up close. | * Links into cr.C and cl.C up close. | ||
Great abare button and one of your best frametrap tools. At +2 on block, 2A is great for maintaining your turn and starting frametraps. | |||
}} | }} | ||
| Line 224: | Line 227: | ||
|description= | |description= | ||
Basic crouching light kick. | Basic crouching light kick. Even on block, which makes it decent for pressure. | ||
}} | }} | ||
| Line 231: | Line 234: | ||
|moveId=ryo_crc | |moveId=ryo_crc | ||
|description= | |description= | ||
* Ryo's fastest heavy normal. Only the first two active frames hit grounded opponents | * Ryo's fastest heavy normal. Only the first two active frames hit grounded opponents and are cancellable. | ||
* Forces stand. | |||
* Forces stand | |||
* Very unsafe on block or whiff. | * Very unsafe on block or whiff. | ||
Ryo | |||
Very fast cr.C that is a powerful anti-air thanks to Ryo's ability to cancel it into his 646AC anywhere juggle, leading to huge damage. Do be careful with using this because cr.C has a lot of recovery and massive disadvantage on hit and block. | |||
}} | }} | ||
| Line 243: | Line 245: | ||
{{FrameDataCargo-KOFXV | {{FrameDataCargo-KOFXV | ||
|moveId=ryo_crd | |moveId=ryo_crd | ||
|description= | |description= | ||
* | * Whiff-cancelable. | ||
* | * Has an ''enormous'' hurtbox stretching from Ryo's foot to the opponent's round start distance during recovery frames. | ||
* | * 3D cancel advantage: SKD (+26: Tech / +53: Non-tech)oH / -4oB | ||
Ryo | Ryo's farthest reaching normal that works decently for space control at only -5 on block, but necessitates canceling (especially whiff-canceling) due to its enormous hurtbox during recovery. | ||
}} | }} | ||
| Line 257: | Line 259: | ||
|name=jump A | |name=jump A | ||
|input=j.A | |input=j.A | ||
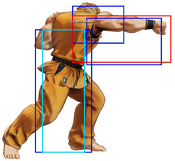
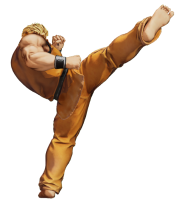
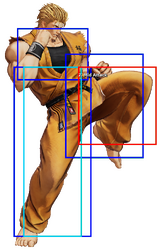
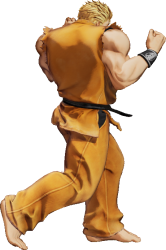
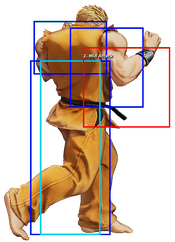
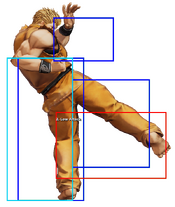
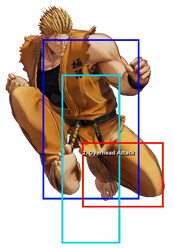
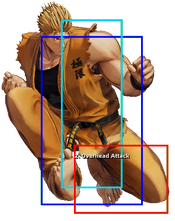
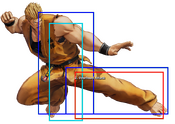
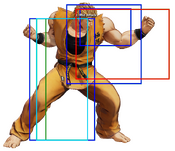
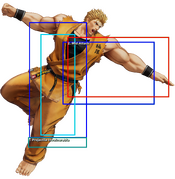
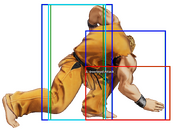
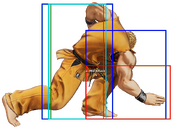
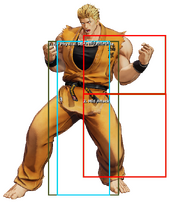
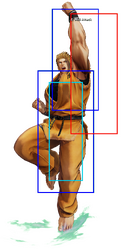
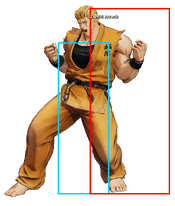
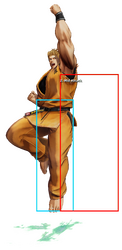
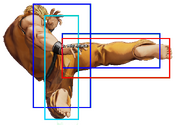
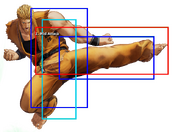
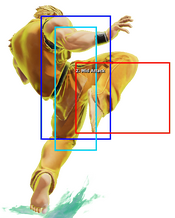
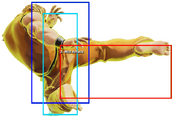
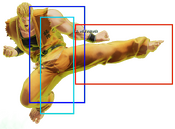
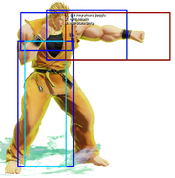
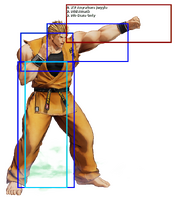
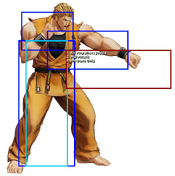
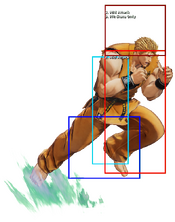
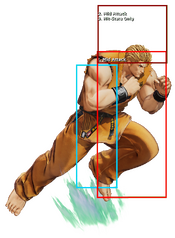
|captions= Hop Version (Hitbox), Jump Version | |||
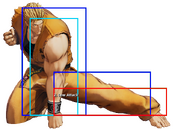
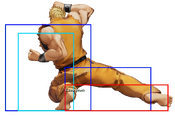
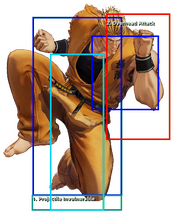
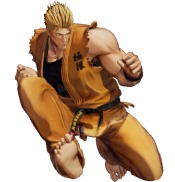
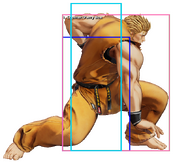
|description2=* Lots of active frames, but susceptible to getting low profiled under. | |description2=* Lots of active frames, but susceptible to getting low profiled under. | ||
}} | }} | ||
| Line 265: | Line 268: | ||
|name=jump B | |name=jump B | ||
|input=j.B | |input=j.B | ||
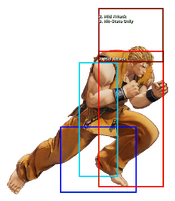
|captions= Hop Version (Hitbox), Jump Version | |||
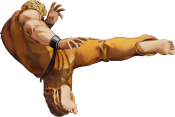
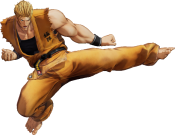
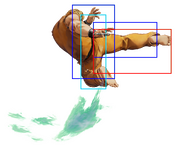
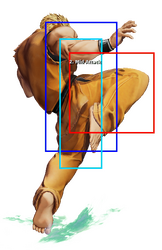
|description2=* Crossup. | |description2=* Crossup. | ||
* Leaves you very close to the opponent. | * Leaves you very close to the opponent. | ||
}} | }} | ||
====Jump C==== | ====Jump C==== | ||
{{FrameDataCargo-KOFXV | {{FrameDataCargo-KOFXV | ||
| Line 273: | Line 278: | ||
|name=jump C | |name=jump C | ||
|input=j.C | |input=j.C | ||
|captions= Hop Version (Hitbox), Jump Version | |||
|description2=* Susceptible to getting low profiled under, but more an issue of running out of active frames than a hitbox one. | |description2=* Susceptible to getting low profiled under, but more an issue of running out of active frames than a hitbox one. | ||
}} | }} | ||
| Line 281: | Line 287: | ||
|name=jump D | |name=jump D | ||
|input=j.D | |input=j.D | ||
|description2= | |captions= Hop Version (Hitbox), Jump Version | ||
|description2= Great air poke. Go-to for jump-ins. | |||
}} | }} | ||
| Line 301: | Line 308: | ||
* CD > 3D is even on block. | * CD > 3D is even on block. | ||
Above-average startup but is rather stubby. When canceled into 3D, it becomes | Above-average startup but is rather stubby. When canceled into 3D, it becomes safer and is one of Ryo's best cancel options. For example, if CD hits a grounded opponent and you cancel into 3D, you will have time to run up and perform 214BD from anywhere on the screen. | ||
}} | }} | ||
| Line 309: | Line 316: | ||
|description= | |description= | ||
Doesn't have very far range, and will not hit after 6A. | Doesn't have very far range, and will not hit after 6A. | ||
}} | |||
====AdvanceStrike==== | |||
{{FrameDataCargo-KOFXV | |||
|moveId=ryo_214cd | |||
|description= | |||
*Same animation and range as his CD. | |||
* The throw counter is at the feet. | |||
}} | }} | ||
| Line 342: | Line 358: | ||
|moveId=ryo_6a | |moveId=ryo_6a | ||
|name=Hyouchuu Wari | |name=Hyouchuu Wari | ||
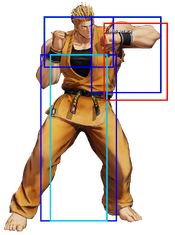
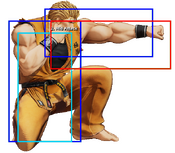
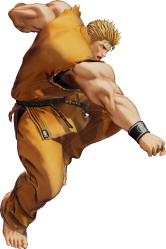
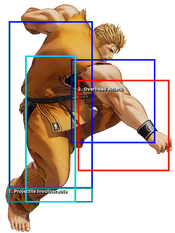
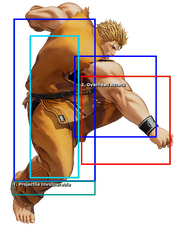
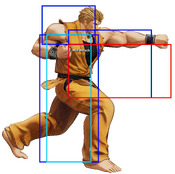
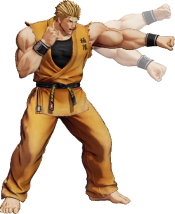
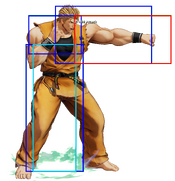
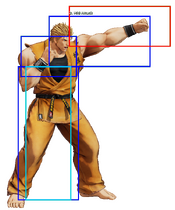
|captions="Ice Pillar Splitter" | |captions="Ice Pillar Splitter" / Raw Version (Hitbox), Cancel Version | ||
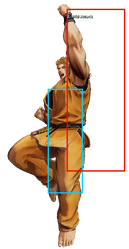
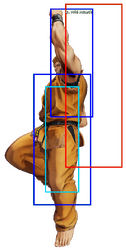
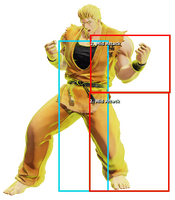
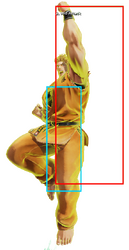
|input=6A | |input=6A | ||
|description=* Standard raw overhead / heavy normal extender. Key frametrap tool. | |description= | ||
* Causes a spiked soft knockdown on airborne opponents if performed raw. | |||
* Standard raw overhead / heavy normal extender. Key frametrap tool. | |||
A knifehand strike that hits overhead when done raw that also serves as a key frametrap/extender tool when canceled into | A knifehand strike that hits overhead when done raw that also serves as a key frametrap/extender tool when canceled into. | ||
}} | }} | ||
| Line 356: | Line 374: | ||
|input=6B | |input=6B | ||
|captions="Upper Level Block" | |captions="Upper Level Block" | ||
|description=* Increases Power Gauge by 80 points on successful parry. | |description= | ||
Parries all high and mid attacks, such as jump-ins and overheads. | |||
---- | |||
* Increases Power Gauge by 80 points on successful parry. | |||
* Can be instantly followed up with any kind of special (including supers) or another parry. | * Can be instantly followed up with any kind of special (including supers) or another parry. | ||
* Can be whiff canceled if canceled into. | * Can be whiff canceled if canceled into. | ||
Ryo's parry for high and mid attacks. On a successful parry, a distortion effect will appear | Ryo's parry for high and mid attacks. On a successful parry, a distortion effect will appear in front of Ryo, and he will be able to follow up with a special move, a Super Special move, or another parry. Starts up and recovers very fast, and has a noticeably large parry window (nearly 1/4 of a second). | ||
}} | }} | ||
| Line 369: | Line 390: | ||
|input=3D | |input=3D | ||
|captions="Low Level Block" | |captions="Low Level Block" | ||
|description=* Increases Power Gauge by 80 points on successful parry. | |description= | ||
Parries all low attacks and low-angled projectiles (such as Joe's Hurricane Upper) | |||
---- | |||
* Increases Power Gauge by 80 points on successful parry. | |||
* Can be instantly followed up with any kind of special (including supers) or another parry. | * Can be instantly followed up with any kind of special (including supers) or another parry. | ||
* Moves Ryo forward, regardless if the parry connects or not. | * Moves Ryo forward slightly, regardless if the parry connects or not. | ||
* Can parry ground-based projectiles. | |||
Ryo's parry for low attacks. | Ryo's parry for low attacks. Pushes Ryo forwards, which can allow him to stay in range during pressure strings. Has 3 less overall frames than his 6B parry, which can make 3D a better option for making his moves safer (for example, st.CD becomes even on block). Has a noticeably smaller parry window than 6B, but is still able to beat most lows on reaction. | ||
}} | }} | ||
| Line 394: | Line 419: | ||
|name=Kohou | |name=Kohou | ||
|input=623A/C/AC | |input=623A/C/AC | ||
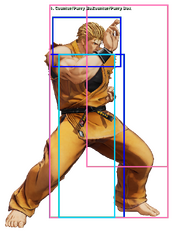
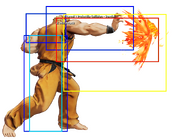
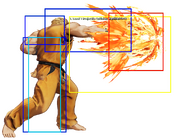
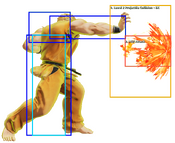
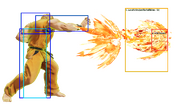
|captions= "Tiger Roar" | |captions= "Tiger Roar" / A Version (Hitbox), , C Version,,,, EX Version | ||
|description3= | |description3= | ||
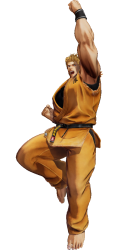
A very fast DP that is arguably one of the best anti-airs in the game since it can become a highly damaging combo starter if it hits a jumping opponent. Also an excellent combo ender with high damage potential. | |||
---- | ---- | ||
''' | '''623A:''' Allows for combos on opponents that are in the air. Options include 623C, cl.C, 2C, or 214B. Very low recovery compared to other 623As, unless it gets blocked. | ||
---- | ---- | ||
''' | '''623C:''' Hits twice. First hit does more damage than 623A, making it good for super canceling. | ||
---- | ---- | ||
''' | '''623AC:''' Hits once, but does more damage than both of 623C's hits combined. Can be used to end combos when there's no other metered options available. | ||
}} | }} | ||
| Line 411: | Line 436: | ||
|name=Ko-Ou Ken | |name=Ko-Ou Ken | ||
|input=236A/C/AC | |input=236A/C/AC | ||
|captions="Tiger Fist" | |captions="Tiger Fist" / A Version (Hitbox), , C Version,, EX Version | ||
|description3= | |description3= | ||
* Generates a very small amount of meter during startup. | * Generates a very small amount of meter during startup. | ||
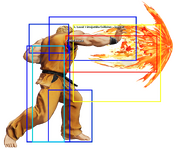
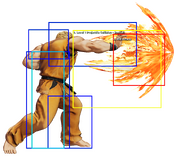
Ryo's "pseudo-fireball"— a mid-ranged attack that functions similarly to a fireball, but lacks the fullscreen range. Compared to true projectiles, Ko-Ou Ken has slower startup and range, but more than makes up for it with higher damage, faster recovery, and a larger vertical hitbox. | * As only the '''EX''' version is a true fireball, the meterless versions are considered physical strikes and therefore use the standard hitbox, meaning they can't be reflected, but they can still be countered. | ||
Ryo's "pseudo-fireball"— a mid-ranged attack that functions similarly to a fireball, but lacks the fullscreen range. Compared to true projectiles, Ko-Ou Ken has slower startup and range, but more than makes up for it with higher damage, faster recovery, and a larger vertical hitbox. It also knocks down if it hits, which is great for Ryo's pressure. | |||
The '''EX''' version is similar to your standard fireball, especially with its slower recovery than meterless, but it is still a very fast fireball with high damage. | The '''EX''' version is similar to your standard fireball, especially with its slower recovery than meterless, but it is still a very fast fireball with high damage. | ||
| Line 420: | Line 446: | ||
All versions allow for corner juggling, making this move an important part of corner combos. | All versions allow for corner juggling, making this move an important part of corner combos. | ||
---- | ---- | ||
''' | '''236A:''' Used for safe blockstrings and frametraps. While it doesn't hit until frame 17, the projectile can't be prevented from coming out from frame 12 and onwards, even if Ryo gets hit - which is great for corner pressure, since you can combo even after trades. Ryo has an extended lower hurtbox during active frames, which makes it easier to punish him with a sweep. | ||
---- | ---- | ||
''' | '''236C:''' Immense forward movement, pushing Ryo about half-screen. Unsafe point blank, but can be made safer with proper spacing. Decent as a midscreen approach tool due to its absurd disjoint. | ||
---- | ---- | ||
''' | '''236AC:''' Full screen projectile that hits twice and can power through non-EX fireballs. Great for winning fireball wars. Plus on block even at point blank, allowing for some extended pressure, especially in the corner. | ||
}} | }} | ||
| Line 433: | Line 459: | ||
|name=Hien Shipuu Kyaku | |name=Hien Shipuu Kyaku | ||
|input=214B/D/BD | |input=214B/D/BD | ||
|captions="Flying Gale Leg" | |captions="Flying Gale Leg" / B Version (Hitbox), D Version,,, EX Version | ||
|description3= | |description3= | ||
| Line 439: | Line 465: | ||
---- | ---- | ||
''' | '''214B:''' Situational punisher and combo ender after 623A. Very high block disadvantage and recovery. | ||
---- | ---- | ||
''' | '''214D:''' Combos from lights from a very close distance. Does the most damage and has the least amount of block disadvantage/recovery, but is still a guaranteed death sentence on block. Can be used for starting corner combos. Combos into 214B. | ||
---- | ---- | ||
''' | '''214BD:''' Your go-to move in confirms. Launches the opponent. | ||
}} | }} | ||
| Line 451: | Line 477: | ||
|name=Zanretsuken | |name=Zanretsuken | ||
|input=646A/C/AC | |input=646A/C/AC | ||
|captions="Relentless Fist" | |captions="Relentless Fist" / Normal Version (Hitbox),,, EX Version | ||
|description3= | |description3= | ||
* Functional hitgrab; the full animation will not play out unless the move properly connects. | |||
Ryo enters a stance and performs several high speed punches with his inner fist. If any of the hits snag the opponent, | * Does no chip damage whatsoever. | ||
Ryo enters a stance and performs several high speed punches with his inner fist. If any of the hits snag the opponent, it will trigger the main attack that either knocks the opponent away (646A) or launches them upwards (646C/AC). Even with meter, this move has poor range and long startup, meaning it is very hard to use as a combo starter or after 6A. Secondly, Zanretsuken pushes Ryo back on block, so if he is unable to land it, not only will Ryo be left wide open, but he will be sent out of close range, where he works best. For these reasons, Zanretsuken works best as a midcombo extender, such as 646A after 214BD or 646AC after 214BD, cl.C/cl.D. | |||
646AC is the cornerstone of Ryo's metered combos. Faster, more damaging, and more active than 646C and even having anywhere juggle properties, it is part of what makes getting hit by Ryo's metered combos so threatening. Ryo can only connect this move once per combo, so be sure on which version you want to use. | 646AC is the cornerstone of Ryo's metered combos. Faster, more damaging, and more active than 646C and even having anywhere juggle properties, it is part of what makes getting hit by Ryo's metered combos so threatening. Ryo can only connect this move once per combo, so be sure on which version you want to use. | ||
---- | ---- | ||
''' | '''646A:''' Combos from lights and causes a sliding hard knockdown, and is Ryo's only hard knockdown option outside of supers. Does more damage than the heavy version. | ||
---- | ---- | ||
''' | '''646C:''' Combos from heavies but the poor range and speed means the move will not connect after 6A. Launches the opponent. An excellent combo extender after a close heavy, and allows for more immensely damaging combos. | ||
---- | ---- | ||
''' | '''646AC:''' Does the second most damage and has anywhere juggle properties. Launches the opponent. Applies heavy scaling (counts as 10hits - so +50% DR), so be careful with where you use it in a combo (damage representation has been modified accordingly to help understand Damage Scaling) | ||
}} | }} | ||
| Line 471: | Line 498: | ||
|name=Haoh Shoukou Ken | |name=Haoh Shoukou Ken | ||
|input=641236A/C/AC | |input=641236A/C/AC | ||
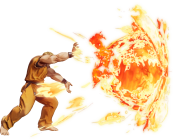
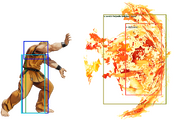
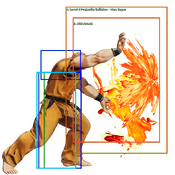
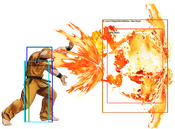
|captions= "Supreme Ruler's Roaring Fist" | |captions= "Supreme Ruler's Roaring Fist" / Normal Version (Hitbox), , Max Version | ||
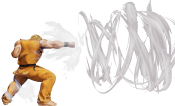
|description2=* Massive fireball. | |description2=* Massive fireball. | ||
* A version is slow enough to catch people rolling/jumping expecting the C version. | * A version is slow enough to catch people rolling/jumping expecting the C version. | ||
| Line 486: | Line 513: | ||
|name=Ryuuko Ranbu | |name=Ryuuko Ranbu | ||
|input=2363214A/C/AC | |input=2363214A/C/AC | ||
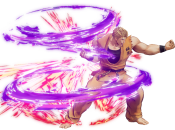
|captions= "Dragon & Tiger Wild Dance" | |captions= "Dragon & Tiger Wild Dance"/ Normal Version (Hitbox) <br> | ||
<small>"Kyokugen-ryu secret technique!"</small> | <small>"Kyokugen-ryu secret technique!"</small> , Max Version | ||
|description3=* Full screen dash into a flurry of strikes. | |description3=* Full screen dash into a flurry of strikes. | ||
* A version stops slightly short of full screen. | * A version stops slightly short of full screen. | ||
Latest revision as of 00:22, 14 September 2024
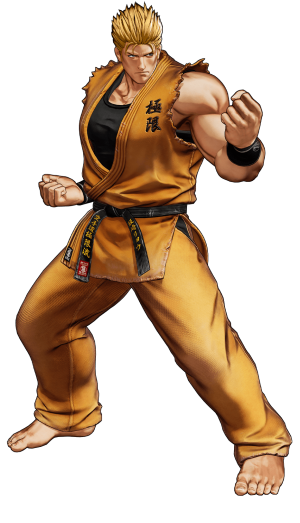
Naturally, he is extremely strong-willed and will spare no effort getting things done. Even to this day, he continues to train himself to his maximum potential.
Hop: 32f
Backdash: 22f
Run Speed Ranking: 7
Movelist
(*) = EX OK
(!) = MAX OK
Throws
Command Normals
Special Moves
Super Special Moves
Climax Super Special Moves
Gameplay Summary
Ryo Sakazaki treads a fine line between being a standard shoto and a rushdown character. He has all the characteristics and hallmarks of a shoto, but lacks the proper zoning tools—and instead is built around pushing himself in with his surprisingly advantageous pressure.
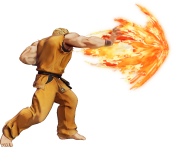
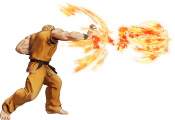
Ryo's tools are designed to push him into close quarters, and make it hard for the opponent to send him out of that range. Instead of having a meterless projectile, he uses Ko-Ou Ken (236P[P]), a rather large pseudo-fireball that either keeps him in place (236A) or pushes him forward significantly (236C). Both of these versions can leave Ryo plus on block from a relatively close distance.
Ryo's fireballs aren't the only things that can leave him at an advantage. Ryo's frame data is extraordinary, having lengthy normals that leave him at a better block advantage than a majority of the cast. He also has a command normal, Kizami Duki (A+C) than he can cancel into from a canceled 6A, which leaves Ryo +2 on block while still leaving him within effective distance of the opponent. These options give Ryo a powerful pressure game that is hard to contest.
Ryo also has some of the best defense in the game. Besides having a very fast DP, he is also the only character in the entire roster to have access to parries (6B, 3D) which have very fast startup, are extremely active, and push Ryo forward slightly. These parries can make Ryo hard to zone out as well, as he'll only build more meter from zoning attempts.
One would think that Ryo's excellent defensive options would mean he has poor damage output, but in all actuality, Ryo hits very, very hard. One EX Hien Shipuu Kyaku (214BD) opens the door to multiple combo options, such as Zanretsuken (646P[P]), a highly damaging multi-hit attack that can end in a hard knockdown (646A) or be used to juggle the opponent even more (646C/AC). To put it simply: Ryo has some of the best damage output in the game.
In the end, besides being a rather simple character with a slight weakness to zoning and reliance on meter, Ryo doesn't have any real fatal flaws. Ryo works well in any team position, but is especially powerful on anchor.
| Ryo Sakazaki is a rushdown-oriented shoto who trades zoning tools for an intimidatingly augmented offensive and defensive game. | |
| Pros | Cons |
|
|
Quick Combo Reference
In a nutshell
- Confirm into 214BD > 623C > Super.
- You can squeeze an extra EX in with 214BD > Close D > 646AC > 623C > Super.
- In the corner you can do 214D instead of the EX to save meter, but only against standing opponents (and 2C forces stand).
- Comboing into 236A doesn't need to be confirmed, and allows for follow-ups in the corner.
| 0 Meter |
Low confirm |
2B > 2A > 214B = 131 dmg |
| ½ Meter |
Low confirm |
2B > 2A > 214BD > 623A > 623C = 262 dmg |
| 1 Meter |
Low confirm |
2B > 2A > 214BD > Close D > 646AC > 623C = 327 dmg |
| 2 Meters |
Quick Punish |
5B > MAX > 5D > 6A > 214BD > 623C > Ranbu = 372 dmg |
Normals
Far Standing Normals
Far A
| stand A
st.A
st.A |
|---|
Far B
| stand B
st.B
st.B |
|---|
Far C
| stand C
st.C
st.C |
|---|
Far D
| stand D
st.D
st.D |
|---|
Close Standing Normals
Close A
| close A
cl.A
cl.A |
|---|
Close B
| close B
cl.B
cl.B |
|---|
Close C
| close C
cl.C
cl.C |
|---|
Close D
| close D
cl.D
cl.D |
|---|
Crouch Normals
Crouch A
| crouch A
cr.A
cr.A |
|---|
Crouch B
| crouch B
cr.B
cr.B |
|---|
Crouch C
| crouch C
cr.C
cr.C |
|---|
Crouch D
| crouch D
cr.D
cr.D |
|---|
Jump Normals
Jump A
| jump A
j.A
j.A |
|---|
Jump B
| jump B
j.B
j.B |
|---|
Jump C
| jump C
j.C
j.C |
|---|
Jump D
| jump D
j.D
j.D |
|---|
Rush Moves
| rush
cl.AA/cl.AAX
cl.AA/cl.AAX |
|---|
Blowback
Blowback
| Blowback
CD
CD |
|---|
ShatterStrike
| ShatterStrike
236CD
236CD |
|---|
AdvanceStrike
| AdvanceStrike
214CD
214CD |
|---|
jump CD
| jump CD
j.CD
j.CD |
|---|
Throws
C throw
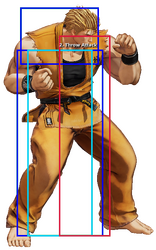
| Kyokugenryu Sanren Geki
(close) 4/6C
(close) 4/6C |
|---|
D throw
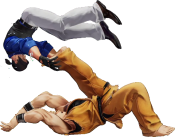
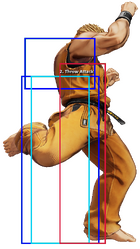
| Tomoe Nage
(close) 4/6D
(close) 4/6D |
|---|
Command Moves
Hyouchuu Wari
| Hyouchuu Wari
6A
6A |
|---|
Jyoudan Uke
| Jyoudan Uke
6B
6B |
|---|
Gedan Uke
| Gedan Uke
3D
3D |
|---|
Kizami Duki
| Kizami Duki
AC
AC |
|---|
Special Moves
Kohou
| Kohou
623A/C/AC
623A/C/AC |
|---|
Ko-Ou Ken
| Ko-Ou Ken
236A/C/AC
236A/C/AC |
|---|
Hien Shipuu Kyaku
| Hien Shipuu Kyaku
214B/D/BD
214B/D/BD |
|---|
Zanretsuken
| Zanretsuken
646A/C/AC
646A/C/AC |
|---|
Super Special Moves
Haoh Shoukou Ken
| Haoh Shoukou Ken
641236A/C/AC
641236A/C/AC |
|---|
Ryuuko Ranbu
| Ryuuko Ranbu
2363214A/C/AC
2363214A/C/AC |
|---|
Climax Super Special Moves
Shin • Tenchi Haoh Ken
| Shin • Tenchi Haoh Ken
2141236CD
2141236CD |
|---|
Misc
Alternate Colors
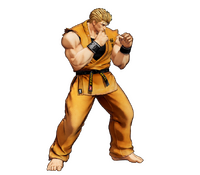 |
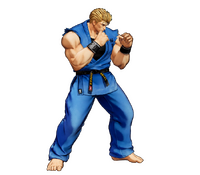 |
 |
 |
 |
 |
 |
 |
