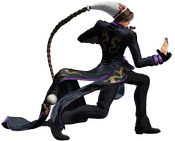
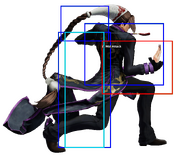
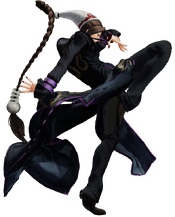
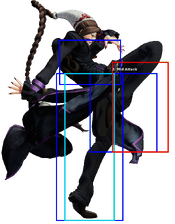
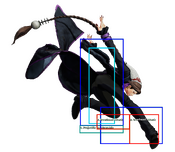
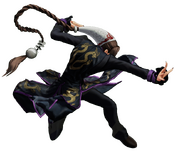
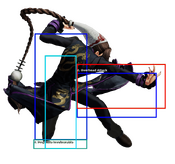
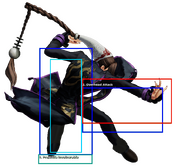
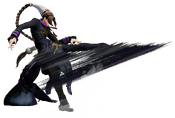
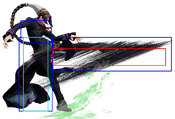
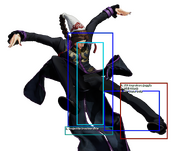
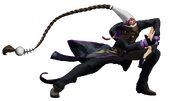
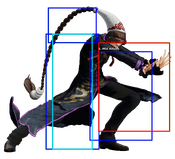
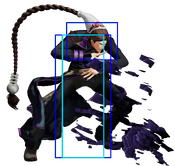
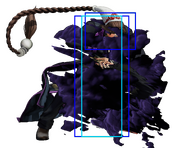
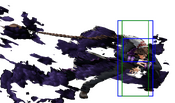
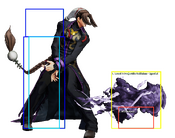
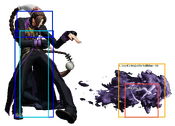
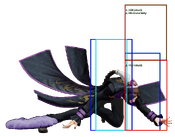
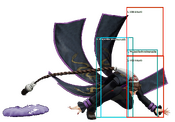
Our Fatal Fury: City of the Wolves wiki page is ready for editing: https://dreamcancel.com/wiki/Fatal_Fury:_City_of_the_Wolves
The King of Fighters XV/Duo Lon: Difference between revisions
filling out page, revert if you' |
|||
| (20 intermediate revisions by 3 users not shown) | |||
| Line 113: | Line 113: | ||
* '''Punishingly Unsafe''': In the worst case scenario that his rekkas are blocked, Duo Lon is dead in the water. Metered or not, his command dashes can still be hit or thrown out of, meaning there's no escape from a prepared opponent. | * '''Punishingly Unsafe''': In the worst case scenario that his rekkas are blocked, Duo Lon is dead in the water. Metered or not, his command dashes can still be hit or thrown out of, meaning there's no escape from a prepared opponent. | ||
* '''Slow, Weird Buttons''': While his buttons are strong, they're also awkward—learning their use cases can be a bit much at first, and some of them leave you wide open for punishment if done carelessly. Also, see below. | * '''Slow, Weird Buttons''': While his buttons are strong, they're also awkward—learning their use cases can be a bit much at first, and some of them leave you wide open for punishment if done carelessly. Also, see below. | ||
* '''No Meterless Reversal''': Surprising nobody, the mixup-oriented character has to rely on supers for an invincible reversal. Thankfully, Duo Lon only has to spring for the level 1 version of his "get off of me" super, but it's still pretty inconvenient. | * '''No Meterless Reversal''': Surprising nobody, the mixup-oriented character has to rely on supers for an invincible reversal. Thankfully, Duo Lon only has to spring for the level 1 version of his "get off of me" super, but it's still pretty inconvenient. | ||
}} | }} | ||
{{#ev:youtube|8P3OsZt5tDE|||'''Character breakdown'''|frame}} | |||
==Normals== | ==Normals== | ||
| Line 123: | Line 124: | ||
|moveId=duolon_fa | |moveId=duolon_fa | ||
|description= | |description= | ||
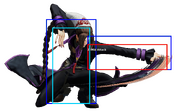
* Doesn't hit crouchers | * Doesn't hit crouchers in neutral except for large characters (Maxima, Antonov, Dinosaur)... | ||
* | * ...but works fine if part of a low confirm that hits, and combos into 6A for higher damage combos. | ||
}} | }} | ||
| Line 133: | Line 132: | ||
|moveId=duolon_fb | |moveId=duolon_fb | ||
|description= | |description= | ||
A little slower, a little more punishable, and a lot less rewarding than far A. It's one of your more damaging lights, though, and it actually hits crouching opponents in neutral. | |||
}} | }} | ||
| Line 143: | Line 139: | ||
|moveId=duolon_fc | |moveId=duolon_fc | ||
|description= | |description= | ||
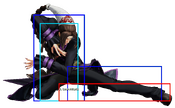
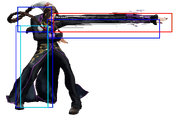
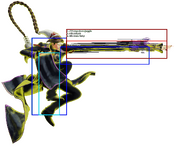
* Exceptional range, one of | * Exceptional range, and one of his few standing normals that will hit an opponent at round start distance. | ||
* Painfully slow at 12 frame startup. | * Painfully slow at 12 frame startup. | ||
}} | }} | ||
| Line 151: | Line 147: | ||
|moveId=duolon_fd | |moveId=duolon_fd | ||
|description= | |description= | ||
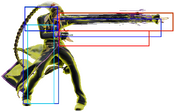
* Like f.A, f.D also doesn't hit crouchers, except for large characters (Maxima, Antonov, Dinosaur) | * Like f.A, f.D also doesn't hit crouchers, except for large characters (Maxima, Antonov, Dinosaur). | ||
}} | }} | ||
| Line 162: | Line 155: | ||
|moveId=duolon_cla | |moveId=duolon_cla | ||
|description= | |description= | ||
A quick smack with the wrist. This is your fastest normal at 4 frames, and combos into 6A. | |||
}} | }} | ||
| Line 171: | Line 161: | ||
{{FrameDataCargo-KOFXV | {{FrameDataCargo-KOFXV | ||
|moveId=duolon_clb | |moveId=duolon_clb | ||
|description= | |description= | ||
You can get the ''tiniest'' bit more damage if you start your low light confirms with this rather than 2B, but its activation range is quite picky. | |||
}} | }} | ||
| Line 182: | Line 169: | ||
|moveId=duolon_clc | |moveId=duolon_clc | ||
|description= | |description= | ||
Your fastest heavy at 5 frames, but not forcing standing on hit and deceptively short activation range (meaning you get the sluggish 12 frame far C instead) make this button somewhat risky to use. | |||
}} | }} | ||
| Line 193: | Line 177: | ||
|description= | |description= | ||
* Forces stand on hit, guaranteeing a combo into 6A. | * Forces stand on hit, guaranteeing a combo into 6A. | ||
Only one frame slower than close C, but better activation proximity and aforementioned force standing make it a better choice generally. | |||
}} | }} | ||
| Line 203: | Line 185: | ||
|moveId=duolon_2a | |moveId=duolon_2a | ||
|description= | |description= | ||
Duo Lon gives you a good old chop to the shins. Chains into other lights, including those that combo further into 6A, and so on and so forth. | |||
}} | }} | ||
| Line 213: | Line 192: | ||
|moveId=duolon_2b | |moveId=duolon_2b | ||
|description= | |description= | ||
Bog-standard low light kick. Doesn't cancel into anything but supers, but chains into your other lights. | |||
}} | }} | ||
| Line 224: | Line 200: | ||
|description= | |description= | ||
* Forces stand on hit, guaranteeing a combo into 6A. | * Forces stand on hit, guaranteeing a combo into 6A. | ||
Decent anti-air, if slightly slow on recovery. | |||
}} | }} | ||
| Line 233: | Line 207: | ||
|moveId=duolon_2d | |moveId=duolon_2d | ||
|description= | |description= | ||
* | * Cancelable on hit and whiff. | ||
An average sweep of average range. | |||
}} | }} | ||
| Line 247: | Line 219: | ||
|hitboxCaptions= Hop Version, Jump Version | |hitboxCaptions= Hop Version, Jump Version | ||
|description2= | |description2= | ||
* | * Can combo into j.6AC for a potential mid-air side switch. | ||
}} | }} | ||
| Line 260: | Line 229: | ||
|hitboxCaptions= Hop Version, Jump Version | |hitboxCaptions= Hop Version, Jump Version | ||
|description2= | |description2= | ||
* | * Can hit crossup (full jump only) | ||
Useful as an instant overhead. | |||
Useful as an instant overhead | |||
}} | }} | ||
| Line 273: | Line 240: | ||
|hitboxCaptions= Hop Version, Jump Version | |hitboxCaptions= Hop Version, Jump Version | ||
|description2= | |description2= | ||
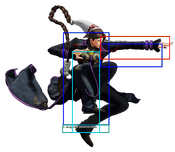
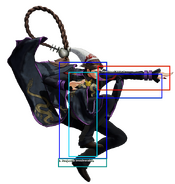
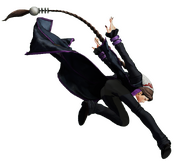
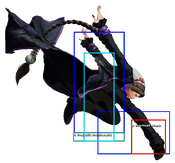
Just your average everyday jumping C. Hits at a slightly shallower angle than j.D. | |||
}} | }} | ||
| Line 286: | Line 250: | ||
|hitboxCaptions= Hop Version, Jump Version | |hitboxCaptions= Hop Version, Jump Version | ||
|description2= | |description2= | ||
Hits at a good angle for jump-ins. | |||
}} | }} | ||
| Line 299: | Line 260: | ||
* Has similar hitbox issues as with f.A and f.D, generally whiffing against most crouchers. | * Has similar hitbox issues as with f.A and f.D, generally whiffing against most crouchers. | ||
* Has a lower hitbox closer to Duo Lon, allowing him to hit crouchers at closer distances. | * Has a lower hitbox closer to Duo Lon, allowing him to hit crouchers at closer distances. | ||
}} | }} | ||
| Line 308: | Line 267: | ||
|description= | |description= | ||
* Doesn't suffer from the hitbox issues that plague regular stand CD. | * Doesn't suffer from the hitbox issues that plague regular stand CD. | ||
}} | }} | ||
| Line 318: | Line 274: | ||
|description= | |description= | ||
*Same animation and range as his CD. | *Same animation and range as his CD. | ||
* The throw counter is at the feet. | * The throw counter is at the feet. | ||
| Line 328: | Line 283: | ||
|name=jump CD | |name=jump CD | ||
|input=j.CD | |input=j.CD | ||
|hitboxCaptions= Hop Version, Jump Version | |||
|description2= | |description2= | ||
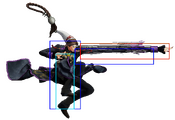
* | *Hits at roughly the same angle as his j.D. | ||
An average-to-good sized button, though its range can be deceptive under Duo's big fluttery jacket. | |||
}} | }} | ||
==Rush Moves== | ==Rush Moves== | ||
| Line 342: | Line 295: | ||
|input=cl.AA/c.AAX | |input=cl.AA/c.AAX | ||
|description2= | |description2= | ||
Goes into A rekkas, (MAX) Hiden Genmu Bakuto Shikon (Dash Super) or Climax. | Goes into A rekkas, (MAX) Hiden Genmu Bakuto Shikon (Dash Super) or Climax. | ||
}} | }} | ||
| Line 354: | Line 304: | ||
|name=Suishu Shoukou | |name=Suishu Shoukou | ||
|description= | |description= | ||
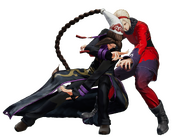
Duo Lon shoulder checks you to about half-screen. Duo has enough advantage after the throw to safely command dash into the opponent's face and keep himself safe from reversals. | |||
}} | }} | ||
| Line 364: | Line 311: | ||
|name=Suishu Houki | |name=Suishu Houki | ||
|description= | |description= | ||
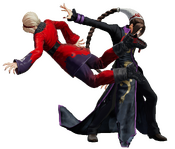
Duo Lon tosses you nearly fullscreen. Similarly to forward throw, Duo can teleport into his opponent's face and have just enough advantage to stay safe. | |||
}} | }} | ||
| Line 375: | Line 319: | ||
{{FrameDataCargo-KOFXV | {{FrameDataCargo-KOFXV | ||
|moveId=duolon_6a,duolon_6ac | |moveId=duolon_6a,duolon_6ac | ||
|hitboxCaptions= Normal Version, EX Version | |||
|description2= | |description2= | ||
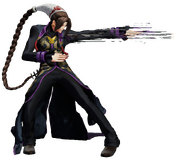
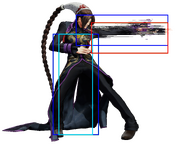
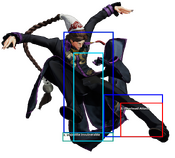
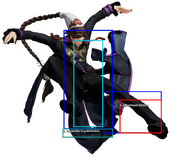
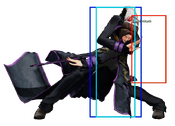
* EX | * EX Genmuken functions like a special move for cancelling purposes. This makes it possible to cancel into from 2D or stand CD where you could not for regular 6A. | ||
* 6A whiffs against | * 6A whiffs against crouching opponents when done on its own, but connects while the opponent is in hitstun. | ||
* 6AC sucks in the opponent on hit. | * 6AC sucks in the opponent on hit. | ||
}} | }} | ||
| Line 385: | Line 329: | ||
{{FrameDataCargo-KOFXV | {{FrameDataCargo-KOFXV | ||
|moveId=duolon_j6a,duolon_j6ac | |moveId=duolon_j6a,duolon_j6ac | ||
|hitboxCaptions= Normal Version, EX Version | |||
|description2= | |description2= | ||
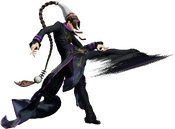
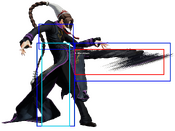
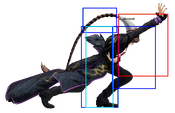
* EX version has anywhere juggle properties. No scaling penalty is applied even in this situation. | * EX version has anywhere juggle properties. No scaling penalty is applied even in this situation. | ||
}} | }} | ||
| Line 395: | Line 337: | ||
{{FrameDataCargo-KOFXV | {{FrameDataCargo-KOFXV | ||
|moveId=duolon_j6b,duolon_j6bd | |moveId=duolon_j6b,duolon_j6bd | ||
|hitboxCaptions= Normal Version, EX Version | |||
|description2= | |description2= | ||
* | * j.6B can be guarded either standing or crouching, meaning it's not the instant overhead you might think it is. | ||
* | * j.6BD, on the other hand, must be blocked overhead, giving you a very scary potential combo starter after an EX fireball four-way mixup. | ||
}} | }} | ||
| Line 406: | Line 347: | ||
|moveId=duolon_6b | |moveId=duolon_6b | ||
|description= | |description= | ||
It's fast, and it tags people from a good distance away, but your only real damaging options after that are either 236A or 623B, depending on your range. | |||
}} | }} | ||
| Line 416: | Line 354: | ||
|moveId=duolon_jb_d | |moveId=duolon_jb_d | ||
|description= | |description= | ||
* | * Only usable during jumps or super jumps, and only reliably so in air-to-air or mid-juggle situations. | ||
}} | }} | ||
| Line 428: | Line 363: | ||
|name=Genmukyaku | |name=Genmukyaku | ||
|input=623B/D/BD | |input=623B/D/BD | ||
|hitboxCaptions= B Version, D Version, EX Version | |||
|description3= | |description3= | ||
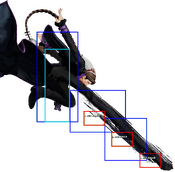
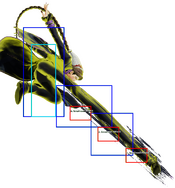
* | *B version hits roughly two character widths in front of Duo Lon (about round start position). | ||
* | *D version hits just a little bit under fullscreen (or about three-quarters of the way). | ||
* | *BD version hits slightly further than B version and launches opponents towards Duo Lon. | ||
Not quite the heat-seeking missile it was in KOFXIII, but still works as a way to catch opponents trying to zone or just not watching their feet. | |||
}} | }} | ||
| Line 440: | Line 376: | ||
|name=Shaki Juuryuu 1 | |name=Shaki Juuryuu 1 | ||
|input=236A/C/AC | |input=236A/C/AC | ||
| | |hitboxCaptions= Normal Version, EX Version | ||
|description3= | |description3= | ||
The start of Duo Lon's signature rekka series. All three rekkas in sequence can be performed on whiff, though he can only perform his command dashes if the final hit connects. | |||
}} | }} | ||
{{FrameDataCargo-KOFXV | {{FrameDataCargo-KOFXV | ||
| Line 451: | Line 384: | ||
|name=Shaki Juuryuu 2 | |name=Shaki Juuryuu 2 | ||
|input=236A/C/AC~6P | |input=236A/C/AC~6P | ||
|hitboxCaptions= Normal Version, EX Version | |||
|description3= | |description3= | ||
Marginally more punishable than the first hit and marginally less punishable than the last. Not much else to it. | |||
}} | }} | ||
{{FrameDataCargo-KOFXV | {{FrameDataCargo-KOFXV | ||
| Line 461: | Line 392: | ||
|name=Shaki Juuryuu 3 | |name=Shaki Juuryuu 3 | ||
|input=236A/C/AC~6P~6P | |input=236A/C/AC~6P~6P | ||
|hitboxCaptions= Normal Version, EX Version | |||
|description3= | |description3= | ||
* | * Both A and C versions launch the opponent on hit, with C's launch allowing for more damaging juggles after the fact. | ||
* | * AC version is a big meaty crumple. | ||
Duo Lon's rekka ender, being either a nasty palm strike to the face with his meterless variants or a two-palm body blow in its EX variant. From these enders, either on hit or block, Duo Lon can go into his forward command dash. If he spends the meter for the EX version, he can cancel the third hit crumple into his command backdash, from which he can cancel into his fireball if he so chooses. | |||
}} | }} | ||
{{FrameDataCargo-KOFXV | {{FrameDataCargo-KOFXV | ||
|moveId=duolon_236a6p6p6b,duolon_236c6p6p6b,duolon_236ac6p6p6b | |moveId=duolon_236a6p6p6b,duolon_236c6p6p6b,duolon_236ac6p6p6b | ||
|name=Himou Kyaku Forward | |name=B Himou Kyaku Forward Follow Up | ||
|input=236A/C/AC~6P~6P~6B | |input=236A/C/AC~6P~6P~6B | ||
|description3= | |description3= | ||
* | * Stays on your side of the opponent. | ||
}} | }} | ||
{{FrameDataCargo-KOFXV | {{FrameDataCargo-KOFXV | ||
|moveId=duolon_236a6p6p6d,duolon_236c6p6p6d,duolon_236ac6p6p6d | |moveId=duolon_236a6p6p6d,duolon_236c6p6p6d,duolon_236ac6p6p6d | ||
|name=Himou Kyaku Forward | |name=D Himou Kyaku Forward Follow Up | ||
|input=236A/C/AC~6P~6P~6D | |input=236A/C/AC~6P~6P~6D | ||
|description3= | |description3= | ||
* | * Switches sides with the opponent. | ||
}} | }} | ||
{{FrameDataCargo-KOFXV | {{FrameDataCargo-KOFXV | ||
|moveId=duolon_236a6p6p6bd,duolon_236c6p6p6bd,duolon_236ac6p6p6bd | |moveId=duolon_236a6p6p6bd,duolon_236c6p6p6bd,duolon_236ac6p6p6bd | ||
|name=Himou Kyaku Forward | |name=EX Himou Kyaku Forward Follow Up | ||
|input=236A/C/AC~6P~6P~6BD | |input=236A/C/AC~6P~6P~6BD | ||
|description3= | |description3= | ||
* | * Switches sides with the opponent and can steal corner. | ||
}} | }} | ||
{{FrameDataCargo-KOFXV | {{FrameDataCargo-KOFXV | ||
|moveId=duolon_236ac6p6p4b,duolon_236ac6p6p4d,duolon_236ac6p6p4bd | |moveId=duolon_236ac6p6p4b,duolon_236ac6p6p4d,duolon_236ac6p6p4bd | ||
|name=Himou Kyaku Backward | |name=Himou Kyaku Backward Follow Up to EX Rekka Ender | ||
|input=236AC~6P~6P~4K | |input=236AC~6P~6P~4K | ||
|hitboxCaptions= B Version, , D Version, , EX Version | |||
|description3= | |description3= | ||
* | * 4B and 4D an be canceled into fireball. | ||
}} | }} | ||
| Line 513: | Line 433: | ||
|name=Juon Shikon | |name=Juon Shikon | ||
|input=214A/C/AC | |input=214A/C/AC | ||
|hitboxCaptions= Normal Version, EX Version | |||
|description3= | |description3= | ||
* | * Neither A nor C version go totally fullscreen, though C fireball travels significantly further before dissipating. | ||
* The AC version is cancelable into command dash in either direction. It hits three times and stays on the screen even if Duo Lon gets hit. | |||
* | Duo Lon's signature fireball—really more of a smokeball—and a move that enables a lot of his scarier mixups. While the meterless versions work as more of a defensive tool than an offensive one, EX fireball can pin unwary opponents down in blockstun and can be canceled into Duo's command dash in either direction, giving way to some spooky left-right mix or even just a clean getaway if you need some breathing room. | ||
The AC version is cancelable into | |||
}} | }} | ||
| Line 525: | Line 445: | ||
|name=Himou Kyaku Forward | |name=Himou Kyaku Forward | ||
|input=236B/D/BD | |input=236B/D/BD | ||
|hitboxCaptions= B Version, , D Version, , EX Version | |||
|description3= | |description3= | ||
* | * B version keeps your side of the screen, while D version switches sides and goes a couple character widths away if done point blank with the opponent. | ||
* | * EX version switches sides and stays fairly close to the opponent. Note that you can switch sides even when in the corner. | ||
}} | }} | ||
| Line 537: | Line 456: | ||
|name=Himou Kyaku Backward | |name=Himou Kyaku Backward | ||
|input=214B/D/BD | |input=214B/D/BD | ||
|hitboxCaptions= B Version, , D Version, , EX Version | |||
|description3= | |description3= | ||
* | * B version travels about three character widths away from Duo Lon, and D version travels about four widths. | ||
* | * B and D versions can be canceled into fireball very early and very late into its animation. Conversely, EX version cannot be canceled into fireball at all. | ||
}} | }} | ||
==Super Special Moves== | ==Super Special Moves== | ||
| Line 551: | Line 468: | ||
|name=Hiden Genmu Bakuto Shikon | |name=Hiden Genmu Bakuto Shikon | ||
|input=214236A/C/AC | |input=214236A/C/AC | ||
|hitboxCaptions= Normal Version, Max Version | |||
|description2= | |description2= | ||
The "Dash Super". The MAX version can be used to punish bad fireball zoning if you're on the ball. | |||
}} | }} | ||
| Line 563: | Line 478: | ||
|name=Hiden Genmu Onryou Heki | |name=Hiden Genmu Onryou Heki | ||
|input=214214A/C/AC | |input=214214A/C/AC | ||
|hitboxCaptions= Normal Version, , Max Version | |||
|description2= | |description2= | ||
* | * All versions are fully invulnerable frame 1. | ||
Stubby horizontal range, but covers behind Duo Lon. A pretty good reversal for one bar. | |||
}} | }} | ||
| Line 577: | Line 491: | ||
|input=2141236CD | |input=2141236CD | ||
|description= | |description= | ||
Your fairly standard "giant hitbox Climax Super". Hits on both sides, though, so it's a fairly solid giant hitbox. | |||
}} | }} | ||
Latest revision as of 03:44, 9 January 2025

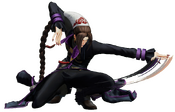
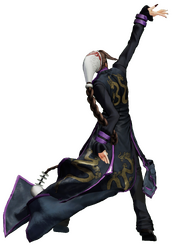
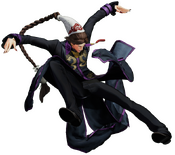
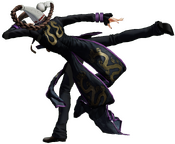
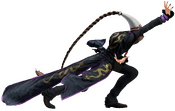
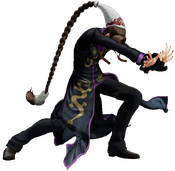
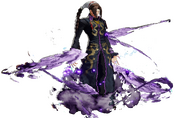
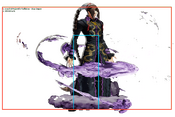
He seeks out his father, Ron, leader of—and eventual traitor to—the Hizoku clan of assassins. During his quest he meets Ash, Elisabeth, and other fighters.
Hop: 32f
Backdash: 23f
Run Speed Ranking: 3
Movelist
(*) = EX OK
(!) = MAX OK
Throws
Command Normals
Air Genmuken - ![]() +
+ ![]() (*) (Midair Only)
(*) (Midair Only)
Air Genmukyaku - ![]() +
+ ![]() (*) (Midair Only)
(*) (Midair Only)
Target Combo 1 - ![]() >
> ![]() (Midair Only)
(Midair Only)
Special Moves
Super Special Moves
Hiden Genmu Bakuto Shikon - ![]()
![]()
![]() +
+ ![]() /
/ ![]() (!)
(!)
Hiden Genmu Onryou Heki - ![]()
![]() +
+ ![]() /
/ ![]() (!)
(!)
Climax Super Special Moves
Quick Combo Reference
| 0 Meter |
Low confirm |
2B > 2A > 236A ~ 6P ~ 6P ~ 6B, cl.D = 153 dmg |
| ½ Meter |
Low confirm |
2B > 2A > 6AC > 236C ~ 6P ~ 6P ~ 6B, cl.D = 223 dmg |
| 1 Meter |
Anywhere |
move > move > move = 0 dmg |
| 2 Meter |
Anywhere |
move > move > move = 0 dmg |
Gameplay Overview
| Duo Lon is a tricky hybrid character with smothering mixup rushdown and a bevy of powerful zoning normals. | |
| Pros | Cons |
|
|
Normals
Far Standing Normals
Far A
| stand A
5A
5A |
|---|
Far B
| stand B
5B
5B |
|---|
Far C
| stand C
5C
5C |
|---|
Far D
| stand D
5D
5D |
|---|
Close Standing Normals
Close A
| close A
cl.A
cl.A |
|---|
Close B
| close B
cl.B
cl.B |
|---|
Close C
| close C
cl.C
cl.C |
|---|
Close D
| close D
cl.D
cl.D |
|---|
Crouch Normals
Crouch A
| crouch A
2A
2A |
|---|
Crouch B
| crouch B
2B
2B |
|---|
Crouch C
| crouch C
2C
2C |
|---|
Crouch D
| crouch D
2D
2D |
|---|
Jump Normals
Jump A
| jump A
j.A
j.A |
|---|
Jump B
| jump B
j.B
j.B |
|---|
Jump C
| jump C
j.C
j.C |
|---|
Jump D
| jump D
j.D
j.D |
|---|
Blowback
Blowback
| Blowback
CD
CD |
|---|
Shatter Strike
| ShatterStrike
236CD
236CD |
|---|
AdvanceStrike
| AdvanceStrike
214CD
214CD |
|---|
Jump CD
| jump CD
j.CD
j.CD |
|---|
Rush Moves
| rush
cl.AA/c.AAX
cl.AA/c.AAX |
|---|
Throws
| Suishu Shoukou
(close) 4/6+C
(close) 4/6+C |
|---|
| Suishu Houki
(close) 4/6+D
(close) 4/6+D |
|---|
Command Moves
Genmuken
| Genmuken
6A
6A |
|---|
Air Genmuken
| Air Genmuken
6A
6A |
|---|
Air Genmukyaku
| Air Genmukyaku
j.6B
j.6B |
|---|
Hiei Kyaku
| Hiei Kyaku
6B
6B |
|---|
Target Combo 1
| Target Combo 1
j.B,D
j.B,D |
|---|
Special Moves
Genmukyaku
| Genmukyaku
623B/D/BD
623B/D/BD |
|---|
Shaki Juuryuu 1
| Shaki Juuryuu 1
236A/C/AC
236A/C/AC |
|---|
| Shaki Juuryuu 2
236A/C/AC~6P
236A/C/AC~6P |
|---|
| Shaki Juuryuu 3
236A/C/AC~6P~6P
236A/C/AC~6P~6P |
|---|
| B Himou Kyaku Forward Follow Up
236A/C/AC~6P~6P~6B
236A/C/AC~6P~6P~6B |
|---|
| D Himou Kyaku Forward Follow Up
236A/C/AC~6P~6P~6D
236A/C/AC~6P~6P~6D |
|---|
| EX Himou Kyaku Forward Follow Up
236A/C/AC~6P~6P~6BD
236A/C/AC~6P~6P~6BD |
|---|
| Himou Kyaku Backward Follow Up to EX Rekka Ender
236AC~6P~6P~4K
236AC~6P~6P~4K |
|---|
Juon Shikon
| Juon Shikon
214A/C/AC
214A/C/AC |
|---|
Himou Kyaku Forward
| Himou Kyaku Forward
236B/D/BD
236B/D/BD |
|---|
Himou Kyaku Backward
| Himou Kyaku Backward
214B/D/BD
214B/D/BD |
|---|
Super Special Moves
Hiden Genmu Bakuto Shikon
| Hiden Genmu Bakuto Shikon
214236A/C/AC
214236A/C/AC |
|---|
Hiden Genmu Onryou Heki
| Hiden Genmu Onryou Heki
214214A/C/AC
214214A/C/AC |
|---|
Climax Super Special Moves
Mugen Juon Toubu
| Mugen Juon Toubu
2141236CD
2141236CD |
|---|
