-Happy New Year 2025!
XV Broken/Orochi Yashiro: Difference between revisions
Jump to navigation
Jump to search
| Line 86: | Line 86: | ||
| pros= | | pros= | ||
* '''Great Combo Damage''': Be it point, mid, or anchor, Orochi Yashiro tops the damage charts when it comes to grapplers. Fantastic scaling on D Odoru Daichi and C Musebu Daichi grant him terrific super cancel options, and the damage of his combos, in general, are above any other grappler's. | * '''Great Combo Damage''': Be it point, mid, or anchor, Orochi Yashiro tops the damage charts when it comes to grapplers. Fantastic scaling on D Odoru Daichi and C Musebu Daichi grant him terrific super cancel options, and the damage of his combos, in general, are above any other grappler's. | ||
* '''Actually Good Pressure''': Yashiro's stagger pressure gets a sidegrade with closer staggers being a lot more reactable with (cancel)6A CD. | * '''Actually Good Pressure''': Yashiro's stagger pressure gets a sidegrade with closer staggers being a lot more reactable with (cancel)6A CD. Because of this and other aspects of his kit, Orochi Yashiro can get constant tick throws, frametraps, and pressure resets from almost anything. Having all of this puts Yashiro's pressure above any other grappler's, giving him a veritable edge amongst the cast. | ||
* '''Big Fat Buttons''': Having every normal Yashiro does grants Orochi Yashiro great midrange and aerial capabilities, allowing him to play neutral in most matchups with great efficiency. | * '''Big Fat Buttons''': Having every normal Yashiro does grants Orochi Yashiro great midrange and aerial capabilities, allowing him to play neutral in most matchups with great efficiency. | ||
* '''Fantastic Light Confirms''': Orochi Yashiro's target combos give him very lengthy, very powerful hitconfirms that have ridiculous range. A keen player will be able to use this to their advantage to take any opportunity to start their pressure game. | * '''Fantastic Light Confirms''': Orochi Yashiro's target combos give him very lengthy, very powerful hitconfirms that have ridiculous range. A keen player will be able to use this to their advantage to take any opportunity to start their pressure game. | ||
| Line 92: | Line 92: | ||
* '''Mixup Potential''': Sporting one of the best crossups in the game with j.C, a great standing overhead, and the ridiculous setups of Niragu Daichi, Orochi Yashiro has any nearly any mixup option a grappler would want. | * '''Mixup Potential''': Sporting one of the best crossups in the game with j.C, a great standing overhead, and the ridiculous setups of Niragu Daichi, Orochi Yashiro has any nearly any mixup option a grappler would want. | ||
| cons= | | cons= | ||
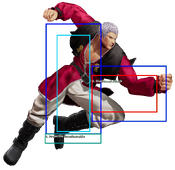
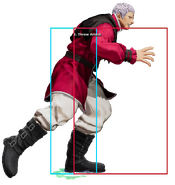
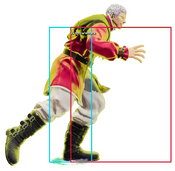
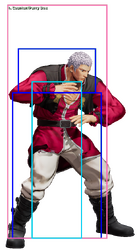
* '''Zoning Woes''': OYash is big and not the most mobile. As such, he has less ways to get around fireballs than your average KoF character thanks to his large hurtbox. This can make many zoner matchups quite troublesome. Unless you have the meter to bypass a projectile with an EX command grab, you're out of luck. | * '''Zoning Woes''': OYash is big and not the most mobile. As such, he has less ways to get around fast recovering fireballs than your average KoF character thanks to his large hurtbox. This can make many zoner matchups quite troublesome. Unless you have the meter and reactions to bypass a projectile with an EX command grab, you're out of luck. | ||
* '''Committal''': Much of Orochi Yashiro's gameplan is committal, and a messed up confirm, whiffed command grab, or simply accidentally confirming off a stuffed shorthop with a ground throw can mean his demise. | * '''Committal''': Much of Orochi Yashiro's gameplan is committal, and a messed up confirm, whiffed command grab, or simply accidentally confirming off a stuffed shorthop with a ground throw can mean his demise. This means Orochi Yashiro can't simply do normal > cancel like his less grapply counterpart, which will end up with him overall getting less openings from neutral. | ||
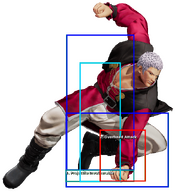
* '''Bad Oki on Highest Damage Grab''': OYash's oki on his highest damage grab in the corner is so bad that he requires a microwalk back in order to not get hit with a reversal throw, leaving his damage off raw meterless command grabs lower than other grapplers if he wants to maintain okizeme. | * '''Bad Oki on Highest Damage Grab''': OYash's oki on his highest damage grab in the corner is so bad that he requires a microwalk back in order to not get hit with a reversal throw, leaving his damage off raw meterless command grabs lower than other grapplers if he wants to maintain okizeme. | ||
* '''Bad Meter Generation''': Orochi Yashiro's meter generation is among the lowest in the cast, gaining peanuts for light confirms and even still less than half a bar off a heavy combo into C Museibu Daichi. Considering how much power OYash gets off his metered CGs and his super confirms. To put it shortly, this significantly harms his comeback potential on point, complicates his gameplan, and can mean that a won point fight may still leave you at a | * '''Bad Meter Generation''': Orochi Yashiro's meter generation is among the lowest in the cast, gaining peanuts for light confirms and even still less than half a bar off a heavy combo into C Museibu Daichi. Considering how much power OYash gets off his metered CGs and his super confirms, this is a bit of an issue. To put it shortly, this significantly harms his comeback potential on point, complicates his gameplan, and can mean that a won point fight may still leave you at a significant disadvantage unless you absolutely destroy the oncoming mid. | ||
* '''Spacing-Dependent Conversions''': Orochi Yashiro's conversions require a lot of spacial awareness to make the most of them. A messed up conversion means you miss out on his combo damage, oki, and pressure all at once. Further still, far conversions off air | * '''Spacing-Dependent Conversions''': Orochi Yashiro's conversions require a lot of spacial awareness to make the most of them. A messed up conversion means you miss out on his combo damage, oki, and pressure all at once. Further still, far conversions off air counterhits and TC CD require Orochi Yashiro to spend a half bar on EX Odoru Daichi, which further complicates his meter generation issues. As such, there are many ranges where Orochi Yashiro's threat level drops considerably, and knowing when and how to play around these ranges is pinnacle for success with this character. | ||
Revision as of 11:20, 30 August 2022
Movelist
(*) = EX OK
(!) = MAX OK
Throws
Command Normals
Special Moves
Super Special Moves
Ankoku Jigoku Gokuraku Otoshi - ![]()
![]() +
+ ![]() /
/ ![]() (!)
(!)
Climax Super Special Moves
Quick Combo Reference
| 0 Meter |
Anywhere |
move > move > move > move = 0 dmg |
| 1 Meter |
Anywhere |
move > move > move > move = 0 dmg |
| 2 Meters |
Anywhere |
move > move > move > move = 0 dmg |
Gameplay Overview
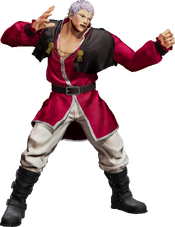
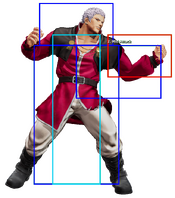
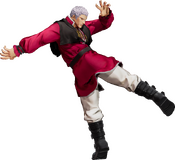
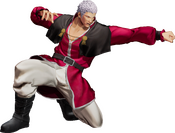
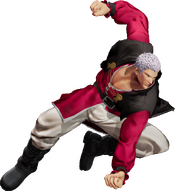
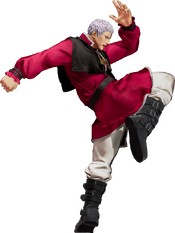
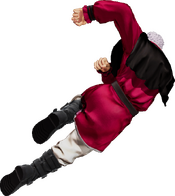
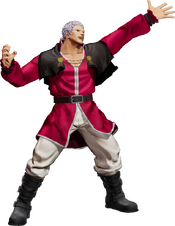
| Yashiro is a pressure-based grappler who seeks to duke it out in midrange and capitalize off any opening to get his game started. With a simple gameplan, many options, and congratulatory versatility, Orochi Yashiro can only be described as a menace that significantly rewards players who have fast thinking and the ability for high APM aggressive gameplay. | |
| Pros | Cons |
|
|
Normals
Far Standing Normals
Far A
| far A
f.A
f.A |
|---|
Far B
| far B
f.B
f.B |
|---|
Far C
| far C
f.C
f.C |
|---|
Far D
| far D
f.D
f.D |
|---|
Close Standing Normals
Close A
| close A
cl.A
cl.A |
|---|
Close B
| close B
cl.B
cl.B |
|---|
Close C
| close C
cl.C
cl.C |
|---|
Close D
| close D
cl.D
cl.D |
|---|
Crouch Normals
Crouch A
| crouch A
2A
2A |
|---|
Crouch B
| crouch B
2B
2B |
|---|
Crouch C
| crouch C
2C
2C |
|---|
Crouch D
| crouch D
2D
2D |
|---|
Jump Normals
Jump A
| jump A
j.A
j.A |
|---|
Jump B
| jump B
j.B
j.B |
|---|
Jump C
| jump C
j.C
j.C |
|---|
Jump D
| jump D
j.D
j.D |
|---|
Rush Moves
| rush
cl.AA/cl.AAX
cl.AA/cl.AAX |
|---|
Blowback
Blowback
| Blowback
CD
CD |
|---|
ShatterStrike
| ShatterStrike
236CD
236CD |
|---|
jump CD
| jump CD
j.CD
j.CD |
|---|
Throws
Baku
| Baku
(close) 4/6C
(close) 4/6C |
|---|
Beki
| Beki
(close) 4/6D
(close) 4/6D |
|---|
Command Moves
Saku
| Saku
6A
6A |
|---|
Bu
| Bu
6B
6B |
|---|
Gou
| Gou
6B/6B~CD
6B/6B~CD |
|---|
Ki
| Ki
5A~C
5A~C |
|---|
Special Moves
Niragu Daichi
| Niragu Daichi
41236A/C/AC
41236A/C/AC |
|---|
Musebu Daichi
| Musebu Daichi
632146A/C/AC
632146A/C/AC |
|---|
Odoru Daichi
| Odoru Daichi
41236B/D/BD
41236B/D/BD |
|---|
Kujiku Daichi
| Kujiku Daichi
214A/C/AC
214A/C/AC |
|---|
| Tsubusu Daichi
214A/C~P
214A/C~P |
|---|
Super Special Moves
Ankoku Jigoku Gokuraku Otoshi
| Ankoku Jigoku Gokuraku Otoshi
6321463214A/C/AC
6321463214A/C/AC |
|---|
Araburu Daichi
| Araburu Daichi
214214B/D/BD
214214B/D/BD |
|---|
Climax
Shuuen no Daichi
| Shuuen no Daichi
2141236CD
2141236CD |
|---|
