Difference between revisions of "XV Broken/Chris"
Jump to navigation
Jump to search
| (29 intermediate revisions by 7 users not shown) | |||
| Line 1: | Line 1: | ||
{{CharNavbox_XV}} | {{CharNavbox_XV}} | ||
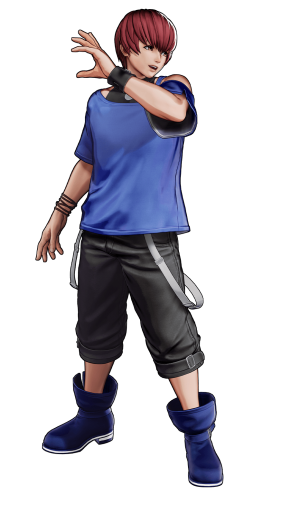
[[File:KOFXV Chris Profile.png|thumb|Chris is the vocalist of the rock group C.Y.S. Like his bandmates Shermie and Yashiro, Chris is also a member of the Four Heavenly Kings of Orochi. Though he has no experience in martial arts, his attacks utilize his small frame and speed to overwhelm his opponents.<br/>At first glance, Chris seems like a well-mannered young boy, however his angelic smile hides his devilish demeanor.]] | <section begin="image"/>[[File:KOFXV Chris Profile.png|thumb|Chris is the vocalist of the rock group C.Y.S. Like his bandmates Shermie and Yashiro, Chris is also a member of the Four Heavenly Kings of Orochi. Though he has no experience in martial arts, his attacks utilize his small frame and speed to overwhelm his opponents.<br/>At first glance, Chris seems like a well-mannered young boy, however his angelic smile hides his devilish demeanor.]]<section end="image"/> | ||
{{TOClimit|3}} | {{TOClimit|3}} | ||
==Movelist== | ==Movelist== | ||
| Line 81: | Line 81: | ||
==Gameplay Overview== | ==Gameplay Overview== | ||
{{StrengthsAndWeaknesses | {{StrengthsAndWeaknesses | ||
| intro = {{SUBPAGENAME}} is an | | intro = {{SUBPAGENAME}} is an rushdown character who bursts his opponents down at incredibly high speed. | ||
| pros= | | pros= | ||
* Rushdown beast. | * Rushdown beast. | ||
* Pro # | * Fast Movement. | ||
* Godlike Jump CD. | |||
* Pro #4 | |||
| cons= | | cons= | ||
* Stubby normals. | * Stubby normals. | ||
| Line 112: | Line 114: | ||
|description= | |description= | ||
* Hits twice, if you're in range for it. | * Hits twice, if you're in range for it. | ||
* 1st hit is cancel-able, which can be a saving grace is you were attempting a Close C but got this instead. | * 1st hit is cancel-able by command normals, which can be a saving grace is you were attempting a Close C but got this instead. | ||
* 2nd hit is cancel-able by special moves. It has enough hitstun to combo into 214C. | |||
}} | }} | ||
| Line 127: | Line 130: | ||
|moveId=chris_cla | |moveId=chris_cla | ||
|description= | |description= | ||
* A special cancel-able close jab, very plus on block. | * A special cancel-able close jab, very plus on block. You can link into cl.C, cl.D, and 2C on hit. | ||
}} | }} | ||
| Line 158: | Line 161: | ||
|moveId=chris_2a | |moveId=chris_2a | ||
|description= | |description= | ||
* This crouching jab can be chained from light normals. | * This crouching jab can be chained from light normals. Fast at 4f and plus on block. Has longer range than far A and combos into 6A. | ||
* Frame traps when cancelled into either of Chris' command normals, but Chris can be thrown during this. | |||
}} | }} | ||
| Line 165: | Line 169: | ||
|moveId=chris_2b | |moveId=chris_2b | ||
|description= | |description= | ||
* Hits low, comes out quick, useful for starting combos, great horizontal range, special cancel-able & chains into other light normals. | * Hits low, comes out quick, useful for starting combos, great horizontal range, special cancel-able & chains into other light normals. Chain into 2A > 6A for stronger combos if you're in range. | ||
* This can't be whiff cancelled, meaning if you buffer 214A behind it and the 2B whiffs, you'll get a far A instead, which can stop hop attempts on the 2B. This is a useful buffer in fishing for stray 2B hits. | |||
}} | }} | ||
| Line 173: | Line 178: | ||
|description= | |description= | ||
* 2 hits, both special cancel-able, though the 2nd whiffs vs crouch block. | * 2 hits, both special cancel-able, though the 2nd whiffs vs crouch block. | ||
** Usually not punishable if this happens. | |||
* Possible use as an anti-air, but the weird forward lean can make him pass under the opponent. | * Possible use as an anti-air, but the weird forward lean can make him pass under the opponent. | ||
* | ** Better against further distance hops. | ||
* Frame traps from 2A. | |||
}} | }} | ||
| Line 191: | Line 198: | ||
|name=jump A | |name=jump A | ||
|input=j.A | |input=j.A | ||
|description2=* | |description2=* Air to air normal for trying to hit someone that is above your head level. | ||
}} | }} | ||
====Jump B==== | ====Jump B==== | ||
{{FrameDataCargo-KOFXV | {{FrameDataCargo-KOFXV | ||
| Line 198: | Line 206: | ||
|name=jump B | |name=jump B | ||
|input=j.B | |input=j.B | ||
|description2=* | |description2=* Great air to air that can still catch grounded opponents if needed. Supplement alongisde his fantastic downward angled j.D and j.CD. | ||
}} | }} | ||
====Netural jump B==== | ====Netural jump B==== | ||
| Line 205: | Line 213: | ||
|name=jump 8B | |name=jump 8B | ||
|input=8j.B | |input=8j.B | ||
|description2=* | |description2=* Air to air. Use similarly to forward jump B. | ||
}} | }} | ||
====Jump C==== | ====Jump C==== | ||
| Line 212: | Line 220: | ||
|name=jump C | |name=jump C | ||
|input=j.C | |input=j.C | ||
|description2=* | |description2=* Worse overall than j.D. Doesn't reach as far out or low. | ||
}} | }} | ||
====Jump D==== | ====Jump D==== | ||
| Line 219: | Line 227: | ||
|name=jump D | |name=jump D | ||
|input=j.D | |input=j.D | ||
|description2=* | |description2=* Has a small cross-up hitbox, but hard to take advantage of on standing opponents. Overall your best jump-in for combos. | ||
}} | }} | ||
| Line 230: | Line 238: | ||
* Low invulnerable. | * Low invulnerable. | ||
* Has tons of pushback when not canceled out of. | * Has tons of pushback when not canceled out of. | ||
* Hard to punish but still fairly negative. Cancelling into 214A is a good option and makes comboing from it easier midscreen. | |||
}} | }} | ||
| Line 246: | Line 255: | ||
|description2=* The money maker. | |description2=* The money maker. | ||
* Really aggressive, downward angled jump CD. | * Really aggressive, downward angled jump CD. | ||
Despite the aggressive angle, it's very hard to jump over this. | |||
}} | |||
==Rush Moves== | |||
{{FrameDataCargo-KOFXV | |||
|moveId=chris_rush1,chris_rush2 | |||
|name=rush | |||
|input=cl.AA/c.AAX | |||
|description2=* Auto combo filler, you won't be using this much. | |||
}} | }} | ||
| Line 271: | Line 289: | ||
|input=6A | |input=6A | ||
|description=* Cancellable long poke. | |description=* Cancellable long poke. | ||
* Combos from light attacks. | * Combos from light attacks on hit and frame traps on block. | ||
* Causes a juggle on air hit. | |||
}} | }} | ||
===Reverse Anchor Kick=== | ===Reverse Anchor Kick=== | ||
{{FrameDataCargo-KOFXV | {{FrameDataCargo-KOFXV | ||
| Line 280: | Line 300: | ||
|description2=* Overhead. | |description2=* Overhead. | ||
* Hits twice when cancelled into. | * Hits twice when cancelled into. | ||
* In cancels does the same damage and scaling as 6A. | |||
}} | }} | ||
===Carry Off Kick=== | ===Carry Off Kick=== | ||
{{FrameDataCargo-KOFXV | {{FrameDataCargo-KOFXV | ||
| Line 300: | Line 322: | ||
|description3=* Reversal/anti-air. | |description3=* Reversal/anti-air. | ||
* All versions have full invincibility. | * All versions have full invincibility. | ||
* Damage and start-up aren't great. | * Damage and start-up aren't great compared to other reversals. | ||
* EX version causes a hard knockdown. You can do a safejump just by holding up. | |||
}} | }} | ||
===Glider Stomp=== | ===Glider Stomp=== | ||
{{FrameDataCargo-KOFXV | {{FrameDataCargo-KOFXV | ||
| Line 320: | Line 344: | ||
* Elbow strike into kick follow-up (A & EX hits low). Combo ender. | * Elbow strike into kick follow-up (A & EX hits low). Combo ender. | ||
* A version combos from lights, and leaves the opponent standing for immediate pressure. | * A version combos from lights, and leaves the opponent standing for immediate pressure. | ||
** Safe on block. You can threaten with 623K after to blow up attempts from your opponent to take back your turn, but the risk/reward is not skewed in your favor. | |||
** If you establish this threat however, you can take your turn even on block if your opponent is scared of the 623K. | |||
** Cancels into any of his supers easily, preferably 236236P. | |||
** Keep in mind characters with 1f command grabs can typically punish this move. | |||
* C version knocks down but only combos from heavy attacks. | * C version knocks down but only combos from heavy attacks. | ||
* EX | ** Cancels into his 214214K super easily. | ||
* EX combos from lights and causes a hard knockdown. | |||
}} | }} | ||
===Shooting Dancer Step=== | ===Shooting Dancer Step=== | ||
{{FrameDataCargo-KOFXV | {{FrameDataCargo-KOFXV | ||
| Line 330: | Line 360: | ||
|description3= | |description3= | ||
* Elbow strike into overhead follow-up. | * Elbow strike into overhead follow-up. | ||
* The bounce off at the end differs depending on version used, and can be canceled into | * The bounce off at the end differs depending on version used, with the B version bouncing forward behind the opponent, and the D version bouncing backwards. The bounce can be canceled into j.236K. | ||
* The overhead is interruptable by stand jabs. | ** The D version is usually better as Chris can mix-up the timing of the j.236K to potentially hit the opponent trying to punish a blocked 214D. | ||
* EX version | * The overhead is interruptable by stand jabs, putting Chris in a counterhit state allowing for full combos from your opponent. | ||
** The animation is similar to 214P, but since 214P is a true blockstring, the opponent can just mash a reversal when they see the first hit, though they are prone to getting hit by the last part of 214A due to them standing. | |||
* Letting the first hit whiff turns the second part of the attack into a long reaching overhead. However the whiff recovery is very long. | |||
* EX version is not an overhead, but instead combos into j.236K/BD for combo extentions. If you don't follow up with j.236K, you get a hard knockdown. | |||
}} | }} | ||
===Direction Change=== | ===Direction Change=== | ||
{{FrameDataCargo-KOFXV | {{FrameDataCargo-KOFXV | ||
| Line 340: | Line 374: | ||
|input=623A/C/AC | |input=623A/C/AC | ||
|description3=* Chris's command grab. | |description3=* Chris's command grab. | ||
* | * Switches sides | ||
* Its slow speed makes it useful for grabbing people while their throw immunity is wearing off, such as after a blocked light normal or a jump-in. | |||
}} | }} | ||
| Line 349: | Line 384: | ||
|input=236B/D/BD | |input=236B/D/BD | ||
|description3=* A dash that crosses through the opponent. | |description3=* A dash that crosses through the opponent. | ||
* | * The B version goes forward, and the D version goes upward. | ||
* Used to get back in at the end of blockstrings, and to confuse the opponent. | ** The D version can be cancelled into j.236K. | ||
** Heavy normals > 236D > j.236B is even on block and causes a frame trap, though the gap is large enough to be beaten by most light normals. | |||
* No versions have any kind of invulnerability. | |||
* Used to get back in at the end of blockstrings, and to confuse the opponent. | |||
* The EX version goes forwards until it goes behind the opponent, where it then does an attack with an animation similar to 214A. | |||
** On hit, it leaves you plus but far away. On block, it leaves you minus but not punishable except by fast command grabs. | |||
** If the move never goes behind the opponent, Chris suffers a notable recovery period. | |||
}} | }} | ||
| Line 361: | Line 402: | ||
|description3=* Combo super. | |description3=* Combo super. | ||
* Regular version does 5 hits, MAX version 10. | * Regular version does 5 hits, MAX version 10. | ||
* Full jump > short hop is a safe jump against 4f reversals. | |||
}} | }} | ||
===Twister Drive=== | ===Twister Drive=== | ||
{{FrameDataCargo-KOFXV | {{FrameDataCargo-KOFXV | ||
| Line 368: | Line 411: | ||
|input=214214BD | |input=214214BD | ||
|description3=* Reversal/anti-air super. | |description3=* Reversal/anti-air super. | ||
* Your best super for any juggle combos. | |||
* Has weird timing for comboing into Climax. | * Has weird timing for comboing into Climax. | ||
}} | }} | ||
Revision as of 23:31, 17 January 2023

Chris is the vocalist of the rock group C.Y.S. Like his bandmates Shermie and Yashiro, Chris is also a member of the Four Heavenly Kings of Orochi. Though he has no experience in martial arts, his attacks utilize his small frame and speed to overwhelm his opponents.
At first glance, Chris seems like a well-mannered young boy, however his angelic smile hides his devilish demeanor.
At first glance, Chris seems like a well-mannered young boy, however his angelic smile hides his devilish demeanor.
Movelist
(*) - EX OK
(!) - MAX OK
Throws
Step Turn - (close) ![]() /
/ ![]() +
+ ![]()
Aerial Drop - (close) ![]() /
/ ![]() +
+ ![]()
Command Normals
Spinning Array - ![]() +
+ ![]()
Reverse Anchor Kick - ![]() +
+ ![]()
Carry Off Kick - ![]() +
+ ![]()
Special Moves
Hunting Air - ![]() +
+ ![]() /
/ ![]() (*)
(*)
Glider Stomp - ![]() +
+ ![]() /
/ ![]() (Midair Only) (*)
(Midair Only) (*)
Shooting Dancer Thrust - ![]() +
+ ![]() /
/ ![]() (*)
(*)
Shooting Dancer Step - ![]() +
+ ![]() /
/ ![]() (*)
(*)
Direction Change - ![]() +
+ ![]() /
/ ![]() (*)
(*)
Scramble Dash - ![]() +
+ ![]() /
/ ![]() (*)
(*)
Super Special Moves
Chain Slide Touch - ![]()
![]() +
+ ![]() /
/ ![]() (!)
(!)
Twister Drive - ![]()
![]() +
+ ![]() /
/ ![]() (!)
(!)
Climax Super Special Move
Onslaught Mirage - ![]()
![]()
![]() +
+![]() +
+![]()
Quick Combo Reference
| 0 Meter |
Placeholder |
( = dmg |
| 1 Meter |
Placeholder |
( = dmg |
| 2 Meters |
Placeholder |
( = dmg |
Gameplay Overview
| Chris is an rushdown character who bursts his opponents down at incredibly high speed. | |
| Pros | Cons |
|
|
Normals
Far Standing Normals
Far A
| far A
A
A  |
|---|
Far B
| far B
B
B  |
|---|
Far C
| far C
C
C  |
|---|
Far D
| far D
D
D  |
|---|
Close Standing Normals
Close A
| close A
cl.A
cl.A  |
|---|
Close B
| close B
cl.B
cl.B  |
|---|
Close C
| close C
cl.C
cl.C  |
|---|
Close D
| close D
cl.D
cl.D  |
|---|
Crouch Normals
Crouch A
| crouch A
2A
2A  |
|---|
Crouch B
| crouch B
2B
2B  |
|---|
Crouch C
| crouch C
2C
2C  |
|---|
Crouch D
| crouch D
2D
2D  |
|---|
Jump Normals
Jump A
| jump A
j.A
j.A  |
|---|
Jump B
| jump B
j.B
j.B  |
|---|
Netural jump B
| jump 8B
8j.B
8j.B  |
|---|
Jump C
| jump C
j.C
j.C  |
|---|
Jump D
| jump D
j.D
j.D  |
|---|
Blowback
Blowback
| Blowback
CD
CD  |
|---|
ShatterStrike
| Shatterstrike
236CD
236CD  |
|---|
jump CD
| jump CD
j.CD
j.CD  |
|---|
Rush Moves
| rush
cl.AA/c.AAX
cl.AA/c.AAX   |
|---|
Throws
Step Turn
| Step Turn
(close) 4/6C
(close) 4/6C  |
|---|
Aerial Drop
| Aerial Drop
(close) 4/6D
(close) 4/6D  |
|---|
Command Moves
Spinning Array
| Spinning Array
6A
6A  |
|---|
Reverse Anchor Kick
| Reverse Anchor Kick
6B
6B  |
|---|
Carry Off Kick
| Carry Off Kick
3D
3D  |
|---|
Special Moves
Hunting Air
| Hunting Air
623B/D/BD
623B/D/BD   |
|---|
Glider Stomp
| Glider Stomp
j.236B/D/BD
j.236B/D/BD  |
|---|
Shooting Dancer Thrust
| Shooting Dancer Thrust
214A/C/AC
214A/C/AC     |
|---|
Shooting Dancer Step
| Shooting Dancer Step
214B/D/BD
214B/D/BD  |
|---|
Direction Change
| Direction Change
623A/C/AC
623A/C/AC  |
|---|
Scramble Dash
| Scramble Dash
236B/D/BD
236B/D/BD   |
|---|
Super Special Moves
Chain Slide Touch
| Chain Slide Touch
236236AC
236236AC   |
|---|
Twister Drive
| Twister Drive
214214BD
214214BD  |
|---|
Onslaught Mirage
| Onslaught Mirage
2141236CD
2141236CD  |
|---|


