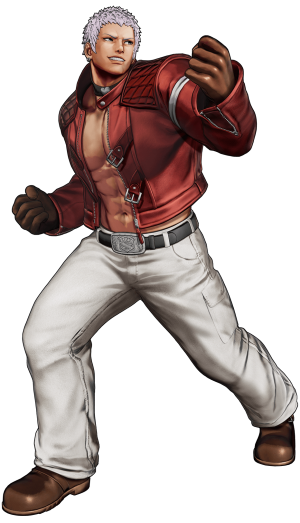
The King of Fighters XV/Yashiro Nanakase
Introduction
A fighter with power over the earth, Yashiro is the lead guitarist of the rock group C.Y.S. However, this is all a front as, for the past 660 years, he has underwent multiple reincarnations as a member of the Four Heavenly Kings of Orochi, which are the true enemies of the Three Sacred Treasures. He and fellow teammate Shermie sacrificed themselves to undo the seal of Orochi and grant his power to Chris during the '97 tournament, but Orochi was defeated by the Three Sacred Treasures soon after.
Yashiro, along with many other formerly dead fighters, was one of the lost souls trapped within the being known as Verse. He develops an interest in the mysterious powers wielded by Verse, and sets out with Shermie and Chris to join KOF once again.
Movelist
(*) = EX OK
(!) = MAX OK
Throws
Command Normals
Special Moves
Super Special Moves
Variable Bash Stream - ![]()
![]() +
+ ![]() /
/ ![]() (!)
(!)
Climax Super Special Moves
Quick Combo Reference
| 0 Meter |
Placeholder |
( = dmg |
| 1 Meter |
Placeholder |
( = dmg |
| 2 Meters |
Placeholder |
( = dmg |
Gameplay Overview
Normals
Far Standing Normals
| Far A |
|---|
| Far B |
|---|
| Far C |
|---|
| Far D |
|---|
Close Standing Normals
| Close A |
|---|
| Close B |
|---|
| Close C |
|---|
| Close D |
|---|
Crouch Normals
| Crouch A |
|---|
| Crouch B |
|---|
| Crouch C |
|---|
| Crouch D |
|---|
Jump Normals
| Jump A |
|---|
| Jump B |
|---|
| Jump C |
|---|
| Jump D |
|---|
Hop Normals
| Hop A |
|---|
| Hop B |
|---|
| Hop C |
|---|
| Hop D |
|---|
Blowback
| Stand CD |
|---|
| Jump CD |
|---|
| Hop CD |
|---|
Throws
| Liver Blow |
|---|
| Hatchet Throw |
|---|
Command Moves
| Regret Bash 6A |
|---|
| Step Side Kick 6B |
|---|
Special Moves
| Missile Might Bash 214A/C |
|---|
| Upper Duel 623A/C |
|---|
| Jet Counter 41236A/C |
|---|
| Jet Counter Still 236A/C after Jet Counter |
|---|
| Sledgehammer 214B/D |
|---|
Super Special Moves
| Final Impact 236236A/C |
|---|
| Variable Bash Stream 236236B/D |
|---|
| Ultimate Billion Bash 2141236CD |
|---|
Combos
Notation Guide (placeholder XIV page for now, replace w/ XV page when available)
General Notes
- ...
Rush Auto Combo
Meterless: Backhand, turn punch, knee in the stomach. Ends with qcb+A. (146 DMG)
1 Meter: Ends with qcfx2+K. (240 DMG)
2 Meter: Ends with qcfx2+BD. (367 DMG)
3 Meter: Ends with qcb,hcf+CD. (439 DMG)
0 Meter
Anywhere
- cr.B > cr.A > cr.A > qcb+A (151 DMG)
Quick and easy meterless BNB off a low starter. Ends in soft knockdown.
- cr.B > Rush Autocombo (168 DMG)
Might actually be better to go into Rush Autocombo if you don't even have enough meter for an EX special. It does more damage and builds a bit more meter than the above. Absolutely do not use this combo if you have 1 bar or more, as it will go to waste.
- (j.X) cl.C > f+B > qcb+C (234 DMG)
Corner Only
- (j.X) cl.C > f+B > qcb+C, dp+A (293 DMG)
0.5 Meters
Anywhere
- cr.B > cr.A > cr.A > qcb+AC, hcf+A ~ qcf+A (253 DMG)
Can also end this combo with hcf+A ~ qcf+C if you want slightly more damage in exchange for less corner carry.
- (j.X) cl.C > f+B > qcb+AC, hcf+A ~ qcf+A (308 DMG)
Corner Only
- cr.B > cr.A > cr.A > qcb+AC, dp+C (235 DMG)
- cr.B > cr.A > cr.A > qcb+AC, hcf+A ~ qcf+C (266 DMG)
Corner carry doesn't matter if you're in the corner, so feel free to go into the C ender instead of the A one for the higher damage.
- cr.B > cr.A > cr.A > qcb+AC, delay qcb+A, dp+A (287 DMG)
Wait a tiny bit before inputting the qcb+A, otherwise you'll only get the first hit and the combo will drop. You don't want to delay too long though, as in that case the dp+A will whiff.
- (j.X) cl.C > f+B > qcb+AC, delay qcb+A, dp+A (344 DMG)
- (j.X) cl.C > f+B > qcb+C, dp+AC, qcb+A, dp+A (431 DMG)
Excellent damage for just half a bar.
1 Meter
Anywhere
- cr.B > cr.A > cr.A > qcb+A > SC qcfx2+K (311 DMG)
- cr.B > cr.A > cr.A > qcb+AC, hcf+AC ~ qcf+C, hcf+A ~ hcf+A (330 DMG)
Good corner carry, will take you from corner to midscreen.
- (j.X) cl.C > f+B > qcb+C > SC qcfx2+K (404 DMG)
- (j.X) cl.C > f+B > qcb+AC, hcf+AC ~ qcf+C, hcf+A ~ qcf+A (378 DMG)
Corner Only
- cr.A > cr.A > cr.A > qcb+AC, delay qcb+A, dp+AC, delay qcb+A, dp+A (387 DMG)
- (j.X) cl.C > f+B > qcb+AC, delay qcb+A, dp+AC, delay qcb+A, dp+A (453 DMG)
1.5 Meters
Anywhere
- cr.B > cr.A > cr.A > qcb+AC, hcf+A ~ qcf+C > SC qcfx2+P (374 DMG)
Corner Only
- cr.B > cr.A > cr.A > qcb+AC, hcf+AC ~ qcf+C, qcb+A, dp+AC, delay qcb+A, dp+A (440 DMG)
The second qcb+A can be tough to land, practice the timing.
- (j.X) cl.C > f+B > qcb+AC, hcf+AC ~ qcf+C, qcb+A, dp+AC, delay qcb+A, dp+A (513 DMG)
2 Meters
Anywhere
- ...
Corner Only
3 Meters
Anywhere
- ...
Corner Only
- ...
4 Meters
Anywhere
- ...
Corner Only
- ...
5 Meters
Anywhere
- ...
Corner Only
- ...


